FZ5010R - Smoke detector ELRO - Free user manual and instructions
Find the device manual for free FZ5010R ELRO in PDF.
User questions about FZ5010R ELRO
0 question about this device. Answer the ones you know or ask your own.
Ask a new question about this device
Download the instructions for your Smoke detector in PDF format for free! Find your manual FZ5010R - ELRO and take your electronic device back in hand. On this page are published all the documents necessary for the use of your device. FZ5010R by ELRO.
USER MANUAL FZ5010R ELRO
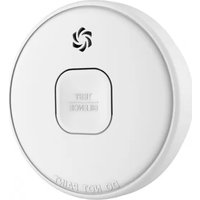
text_image
DO NOT PAINTSMOKE DETECTOR
WIRELESS CONNECTED
FZ5010R
Home is not a place, it's a feeling

flowchart
graph TD
    A["Connect your smoke alarms"] --> B["Verbinden Sie Ihre Rauchwarnmelder"]
    B --> C["Meerdere rookmelders onderling koppelen"]
    C --> D["Connectez vos détecteurs de fumée"]
    D --> E["Page - 17"]
    F["NET Indication"] --> G["Blue-Blau-Blauw-Bleu Green-Grün-Groen-Vert"]
    H["Activation switch"] --> I["Aktivierung Schalter Activeringsschakelaar Interrupteur d'activation"]
    I --> J["B = ON"]
    K["LED"] --> L["Red-Rot Rood-Rouge"]
    M["Testbutton Testknopf Testknop Bouton test"] --> N["Siren output Sirenenausgang Sirene uitgang Sortie sirène"]
    O["Other-Anderes Andere-Autre"] --> P["OK"]
    Q["Computer"] --> R["√"]
    S["Bedroom"] --> T["√"]
    U["Car"] --> V["X"]
    W["Refrigerator"] --> X["X"]
    Y["Water Heater"] --> Z["X"]
    AA["Light Bulbide Wall"] --> AB["√"]
    AC["Indoor Room"] --> AD["√"]
Thank you for purchasing our smoke alarm!
Please read these instructions carefully and store them in a safe place where you can access them easily.
Product description and intended use
This is a smoke alarm with radio link function with an optical sensor for installation in residential buildings, apartments and rooms with residential-like use. Smoke alarms are designed to provide an early warning of fire smoke and fires to persons present, so that these persons can react appropriately to the hazardous event. Always consult local regulations for smoke alarms.
Product specifications
Detection method : Optical
Power supply : Sealed battery 3V DC
Battery lifetime : 10 years
Alarm volume : ≥ 85 dB (A) at 3 meters
Monitored area : 40 m²
Operating temperature : 0 °C - 45 °C
Operating humidity : < 93 %
Date of replacement : See product label
Individual alarm indicator : Yes
Alarm silence facility : Yes | Hush time: 5-15 minutes
Low battery warning : Yes
Low battery silence facility : Yes | Hush time: 10 hours
Installation in leisure accommodation vehicles : Yes
Mounting location : Ceiling or wall
Interconnectable : Yes | max. 40 devices
Wireless frequency : 868.3 MHz
Wireless distance : 35 meters (100 meters open space)
Warnings
- To prevent injury, this apparatus must be securely attached to the ceiling/wall in accordance with the installation instructions.
- Batteries should not be exposed to excessive heat such as sunshine, fire or the like.
- Do not paint or cover the smoke alarm.
Where to install a smoke alarm
- Smoke alarms must be installed in such a way that they can be reached unhindered by the fire smoke so that fires can be reliably detected during the development phase.
• Install at least in sleeping areas (especially children's rooms).
• Install at least in escape rooms.
• In the middle of the ceiling of a room.
- At least 50 cm away from the wall and other objects.
• Maximum installation height of 6 meter.
- If ceiling installation is not possible, the smoke alarm can be installed on the wall. The distance to the ceiling should be between 30 and 50 centimeters.
Where to install a smoke alarm in rooms with special geometries
- Corridors with a maximum width of 3m: Max. 15m between 2 smoke alarms. Max. 7,5m to the front side of the gallery and smoke alarms at edges/crossings of corridors.
• Rooms with sloping ceilings: - If the ceiling inclination is >20^ to the horizontal: Smoke alarms must be installed at least 0.5 m and at most 1 m from ceiling top.
- Partial roof slopes: If the flat ceiling is ≤ 1m wide, consider as ceiling inclination is of >20^ . If the flat ceiling is >1m wide, consider as flat ceiling.
• Rooms with subdivided ceilings: - Height of the subdivisions is ≤ 0.2 m: Beams without consideration; smoke alarm may be installed on the beams as well as on ceiling.
- Height of subdivisions is >0.2 m and area of ceiling panels >36 m ^4 : Smoke alarm should be installed in each ceiling panel.
- Height of subdivisions > 0.2 m and area of ceiling panels ≤ 36 m²: Individual ceiling without consideration.
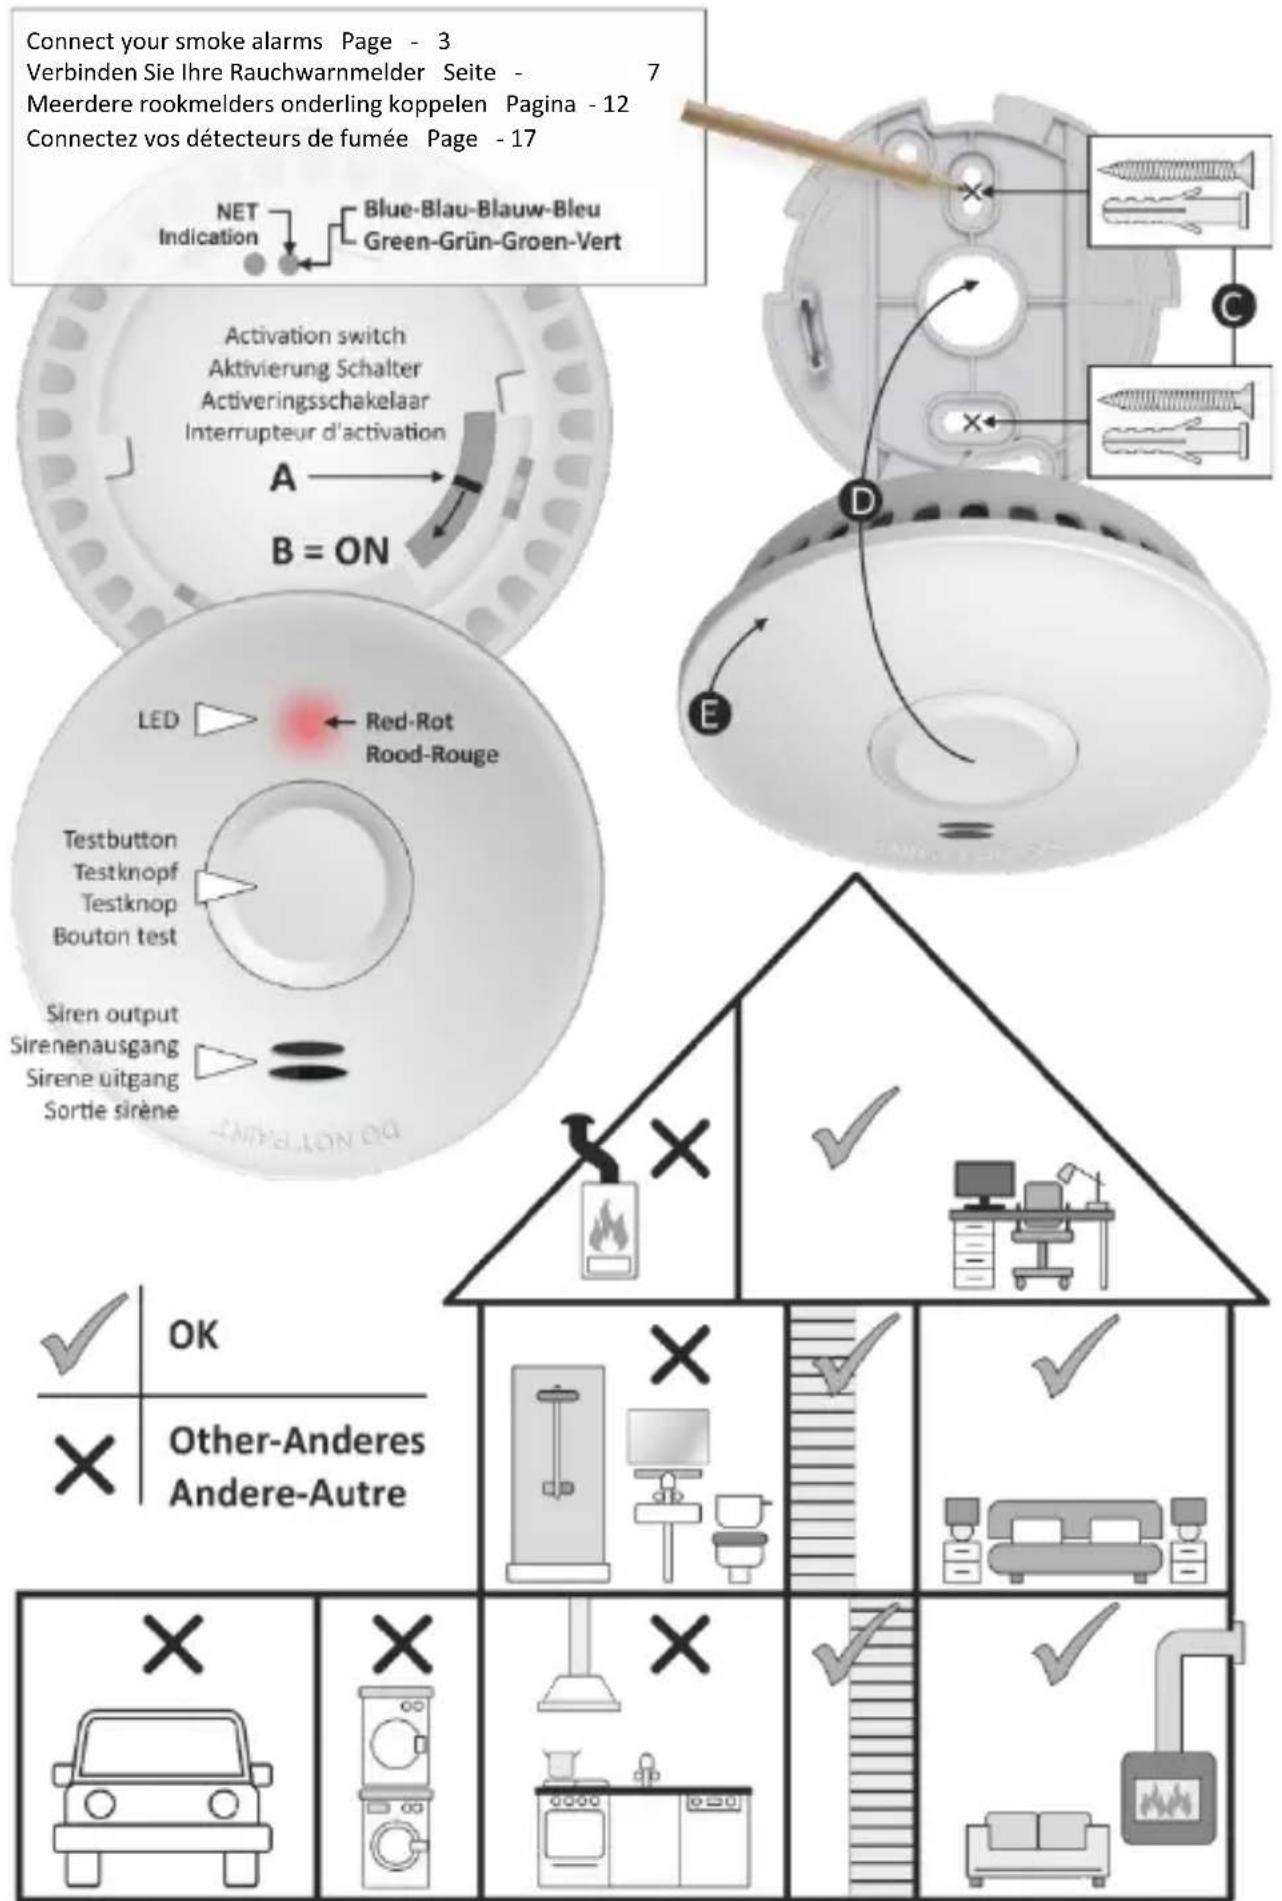
Where not to install a smoke alarm
- In an environment with a high risk of draught (e.g., close to air conditioning, fans and ventilation outlets). The movement of air can impair the penetration of fire smoke into the smoke alarm.
- Areas where combustions regularly occur, such as kitchens.
- Areas with high humidity such as bathrooms, or close to devices such as dish washers or washing machines.
Activation (view page 1\_A-B)
- Before using the smoke detector, it is important to activate and test it.
- Use a screwdriver to push the activation switch to "B = ON", on the front side a red LED will light up very briefly.
- Test the correct activation of your smoke detector by pressing the test button for a few seconds, you will hear the test signal, the smoke detector is functioning as it should.
- Then return the switch to the "A" position.
- The smoke detector is automatically reactivated by placing it on the mounting plate and turning it to the left, 2 plastic hooks on the mounting plate set the switch to the "B = ON" position.
Warning
- Replace 10 years after activation: ____
- If the test signal is not heard, the smoke detector must not be used!
Connect your smoke alarms (view page 1)
- Choose one smoke alarm as the master smoke alarm.
- Turn your master smoke alarm into the connect mode by quickly pressing the test button 3 times.
- The red LED (frontside) will light up, followed by the blue LED (backside). This indicates that the smoke alarm turned into the connect mode in which it remains for 30 seconds.
- Turn the next smoke alarm into the learn mode by quickly pressing the test button 3 times.
- The red LED (frontside) will light up, followed by the green LED (backside). This indicates that the smoke alarms are connected to each other.
-
Repeat step 1 to 5 for connecting more smoke alarms. Make sure that you always use the same master smoke alarm!
-
Test if your smoke alarm were connected successfully by pressing the test button of a random device until it beeps. The red LED of all connected devices will flash twice per second for five minutes. Please note! The paired detectors will not sound alarm during the test.
Reset connection
- Disconnect the smoke alarm you want to reset by removing it from the mounting plate, or by pushing the activation switch to the "A" position with a screwdriver.
- Press and hold the test button and activate the smoke alarm again by pushing the activation switch to the "B = ON" position.
- Hold the test button while the LED lights up red and release it when the LED turns of.
- When the LED lights up again, press the test button.
- The LED will start flashing to indicate that it the network is being cleared.
- When the LED turns off, the connection is successfully cleared.
- Repeat step 1 to 6 for disconnecting more smoke alarms.
Mounting (view page 1\_C-D-E)
- Place the mounting plate on the desired installation location and mark where the holes should be drilled.
- Drill two holes with a diameter of 5 millimeters.
- Push the plastic plugs into the holes.
- Insert the screws into the mounting plate and tighten them firmly into the plugs.
- Place the smoke alarm on the mounting bracket and secure it by turning it clockwise.
- Test the correct operation of your smoke alarm by pressing the test button. If no sound is generated, the smoke alarm is not functioning properly and should not be used!
Alarm silence facility
When the smoke alarm has detected smoke and turns into the alarm mode, you can mute the alarm for a minimum of 5 minutes and a maximum 15 minutes by pressing the test button. After that, the smoke alarm automatically resets and returns into the normal operation mode. If there are still particles of combustion in the air, the smoke alarm will turn into the alarm mode again. WARNING: Before using the alarm silence facility, always identify the cause of the alarm and make sure that the circumstances are safe.
Low battery mode
When the battery is running low, the smoke alarm will indicate this with a repetitive beep and flash for approximately 30 days. WARNING: This smoke alarm is equipped with a non-replaceable battery. When this warning occurs, replace the device as soon as possible! The acoustic low battery warning signal can be muted for ten hours by pressing the test button. The smoke alarm is still functioning and able to detect smoke when it's in this mode.
Fault warning mode
When the smoke alarm is not functioning properly, it will turn into the fault warning mode. Try cleaning the smoke alarm (see paragraph maintenance) or replace the smoke alarm!
Maintenance
- Test this smoke alarm weekly for correct operation using the test facility. If the smoke alarm functions correctly, it will generate a loud beep. Due to the loudness of the alarm, make sure that you always stand at arm's length distance from the unit when you are testing. If the smoke alarm does not generate an acoustic signal, the smoke alarm must be replaced immediately!
- Clean the smoke alarm at least once per month to remove dirt, dust or debris. Use a vacuum cleaner with a soft brush and vacuum all sides and covers of the smoke alarm. Do not remove the top cover of the smoke alarm to clean it inside.
- Do not attempt to repair this smoke alarm. If the smoke alarm shows a damage related to its functionality, it must be replaced!
- Trouble shooting: False alarm is often caused by dust or steam.
| Operating mode | Visual (red flash) | Acoustic (beep) | Description mode |
| Normal | 1 x per 40 seconds | None | Device is functioning properly |
| Test | 1 x per second (3 x) / pause of 1,5 seconds | 1 x per second (3 x) / pause of 1,5 seconds | Device is being tested |
| Alarm | 1 x per second (3 x) / pause of 1,5 seconds | 1 x per second (3 x) / pause of 1,5 seconds | Device has detected smoke |
| Wireless alarm | None | 2 x per seconds | Connected device detected smoke |
| Alarm silence | 1 x per 8 seconds | None | Smoke alarm is muted |
| Low battery warning | 1 x per 40 seconds | 1 x per 40 seconds | Battery is running low |
| Connected low battery warning | 1 x per 3 hours | 1 x per 3 hours | Battery of connected device is running low |
| Low battery warning silence | None | None | Low battery warning is muted |
| Fault warning | None | 1 x per 40 seconds | Device is not functioning properly |
Recycling and disposal
The WEEE symbol means that this product and batteries must be disposed separately from other household waste. When they reach their end of life, take them to a designated waste collection point in your area to guarantee a safe disposal or recycling. Protect the environment, human health and natural resources!

1116
DoP: FZ5010R-01
22 FZ5010R
Fire Safety EN 14604:2005 + AC:2008
By affixing the CE marking on a product, the manufacturer declares that the product complies with all legal requirements for CE marking and can be sold throughout the EEA.
Service and contact
To ensure that we can provide our customers with the best possible service as quickly as possible, we ask you to consider the following:
Go to www.elro.eu to receive a quick answer to your question. Here you will find answers to frequently asked questions, detailed installation videos and the most recent version of a product manual. Can't resolve your question using the website? Leave a question via the product page or send an email to info@elro.eu we will help you as soon as possible. For the warranty conditions applicable to this product, please visit www.elro.eu