825010 - Paint spray Westfalia - Free user manual and instructions
Find the device manual for free 825010 Westfalia in PDF.
User questions about 825010 Westfalia
0 question about this device. Answer the ones you know or ask your own.
Ask a new question about this device
Download the instructions for your Paint spray in PDF format for free! Find your manual 825010 - Westfalia and take your electronic device back in hand. On this page are published all the documents necessary for the use of your device. 825010 by Westfalia.
USER MANUAL 825010 Westfalia
GB Original Instructions
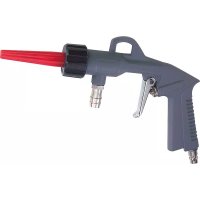
natural_image
White spray gun with red handle and metal fittings, isolated on white background (no text or symbols visible)Instruction manuals provide valuable hints for using your new device. They enable you to use all functions, and they help you avoid misunderstandings and prevent damage. Please take the time to read this manual carefully and keep it for future reference.
If you pass the device on to third parties, enclose these instructions.
Chers clients,
text_image
Labeled diagram of a spray gun with numbered parts for identification and assembly reference.| Deutsch | English | |
| 1 | Schlauchschelle | Hose Clip |
| 2 | Düsenscheibe | Nozzle Plate |
| 3 | Sicherungsring | Safety Ring |
| 4 | Abzug | Trigger |
| 5 | Abzugfeststeller | Trigger Lock |
| 6 | Absperrventil | Cut-Off Valve |
| 7 | Druckluft-Schnellkupplungsadapter | Quick Air Coupler |
| 8 | Drucklufteingang | Air Inlet |
| 9 | Handgriff | Handle |
| 10 | Materialmengenregulierer | Fluid Control Turnknob |
| 11 | Aufhängeöse | Suspension Eye |
| 12 | Trichtergriff | Hopper Handle |
| 13 | Trichter | Hopper |
| 14 | Düse ∅: 4 mm | Nozzle ∅: 4 mm |
| 15 | Düse ∅: 6 mm | Nozzle ∅: 6 mm |
| 16 | Düse ∅: 8 mm | Nozzle ∅: 8 mm |
text_image
Yellow triangular warning sign with black exclamation mark symboltext_image
Yellow triangular warning sign with black exclamation mark symbolPlease note the following safety notes to avoid malfunctions, damage or physical injury:
- Please read this manual carefully and use the device only according to this manual.

■ Dispose of used packaging material carefully or store it out of the reach of children. There is a danger of suffocation!
- Persons with limited physical, sensorial or mental abilities are not allowed to use the device, unless they are supervised and briefed for their safety by a qualified person.
- Keep the air hopper spray gun out of reach of children. It is not a toy.
- The air hopper spray gun may only be operated by competent persons. Unintended use or modifications of any kind can lead to injuries or to damage to property.
- Observe all local and national process specifications and requirements of the authorities and professional associations with regard to ventilation, fire fighting, operations and general practices in the workplace.
■ Always use the hopper spray gun with the necessary care and caution and protect yourself and others form accidents by taking suitable precautions.
- Never aim the hopper spray gun at yourself, other persons or animals. Coating material can damage skin, lung and eyes.
- For your own safety always use the quick coupling adaptor to connect the hopper spray gun to the air supply and always regulate the working pressure by using a pressure regulator. Do not exceed the max. permitted operating air pressure. Refer to the technical data.
■ Never use oxygen or flammable gases as source of energy.
- Check if all connections and hoses are mechanically secured and if they are functioning properly. Loose hoses may cause severe injuries. Only use quick coupling adaptors.
- Disconnect the spray gun from the compressed air source before doing any maintenance work or when not in use. Make sure there is no remaining pressure inside the spray gun before maintaining or cleaning the unit.
- Do not modify the hopper spray gun in any way and do not use it for any unintended use. Only use original accessory. Not recommended accessory can bear a risk of danger.
- Only use the hopper spray gun in sufficiently ventilated rooms.
- Always wear personal safety equipment when using the hopper spray gun. Toxic fumes and certain coating materials can be poisonous. Those materials may create irritation or be otherwise harmful to health. Follow the recommendations on the data sheets. Always wear respiratory protection. The safety class of the system has to be in accordance with the processed coating material. Always wear safety gloves. We suggest wearing ear and eye protection when operating the hopper spray gun.

- Keep your working area tidy. Only take as much coating material to your working area as required for the job. Do not keep coating material in open containers; store it in a safe place which is not easily accessible to others.
- During applying coating material make sure no ignition source (e.g. open flames, lid cigarettes, lamps not protected against explosion etc.) may be present. During painting explosive gases may be formed.
- Do not continue using a damaged hopper spray gun. Do not try to repair it yourself. In case of questions or problems turn to our customer service.
OPERATION
Intended Use
- The air hopper spray gun is intended for applying different types of wall and ceiling finishes such as natural wall coatings, silicate plaster, sand finish textures, Latex textures, reinforcement adhesives, snow flake textures, etc. It is not designed to apply regular wall paint or thin coatings of any kind.
- The intended use also included an operation following the operating instructions.
- Any use beyond these parameters (different media, applying force) or any changes (reconstruction, no original accessory) can lead to serious risks and is regarded as use that contrary to the intended purpose.
Before first Use
Unpack the air hopper spray gun and check it for any damage in transit. Do not use the tool if it is damaged.
Dispose of packaging materials or store it out of reach of children.
Air Pressure and Air Volume
- The air hopper spray gun requires clean and oil-free air. Therefore do not use an oil-fog lubricator within the air supply system.
- If possible, only use compressed air hoses for the air supply that previously have not been used with other air tools which required an oil-fog lubrication system.
- Operate the air hopper spray gun with a pressure of 1.7 – 6.2 bar. When using a higher pressure than the max. permitted pressure of 6.2 bar for operating the air tool, its self life will be reduced drastically. Operate the air hopper spray gun using a compressor with an air suction capacity of at least 200 l/min. The ideal capacity is provided by compressors with a suction capacity of 200 – 300 l/min.
The higher the airflow is adjusted, the finer the spray pattern will be. When working with too much air, the grains of sand (in plaster) become dissolved from the coating material and rebound from the wall. This will lead to loss of coating material and dirt.
Only use air hoses with an inner diameter of at least 9 mm. When setting up the air pressure, always keep in mind that the pressure will decrease by approx. 0.6 bar when using a 10 m long hose with an inner diameter of 9 mm.
Inserting/Changing the Nozzles
For achieving a good material structure, preferably use twice the diameter of the largest grain size.
- Press the trigger (4) and lock the trigger while it is pressed using the trigger lock (5).
- Unscrew the safety ring (3) counter clockwise from the thread at the front of the spray gun. Remove the installed nozzle and replace it with the required nozzle (14), (15) or (16).
- Screw the safety ring with the inserted nozzle back on the thread of the spray gun.
- Release the trigger stop.
Consistency of the Coating Material
For proper spraying results it is essential to agitate the coating material to a smooth and lump-free consistency. Make sure the coating material is viscous but not too thick so it can lightly slide down in the hopper gun.
When using textile plaster (e.g. cotton finishing), make sure the mass is viscous (pasty). For checking the consistency, incline a plastic smoothing trowel to approx. 45^ and apply some coating material on the trowel. The mass should slowly slide down.
Do not mix the coating material to thinner consistency if a fine surface structure is desired. In this case preferably use a smaller nozzle or adjust higher air volume.
Note: Do not prepare the coating material inside the hopper (13) of the gun. Have it prepared in a separate container instead. Always observe the provided notes from the manufacturer of the coating material.
Operation
- Clean the surface to be coated (ceiling, walls). The surface has to be clean, dry and free of grease and dust.
- Install the plastic hopper (13) on the gun body and properly secure it with the hose clip (1).
- Before starting to work, check the trigger (4) and make sure it moves freely.
- With the cut-off valve (6) you can cut and engage the air supply.
- The hopper spray gun is equipped with an R ^1/4 air inlet (8). For your own safety, do not permanently connect the spray gun with the air hose, but use a quick air coupler (7) instead. Seal the end of the quick coupler with one or two layers of Teflon tape. The air should be regulated and filtered. Setup the
air pressure according to the parameters supplied with the material to be processed and according to the technical data.
-
Have an assistant pour the material to be processed into the top of the hopper. The hopper has a max. capacity of 5.7 litres. Do not fill more than 34 of its capacity.
-
Firmly hold the handle (9) of the gun with one hand and the hopper handle (12) with the other hand. Press the trigger (4) to start spraying. Release the trigger to stop spraying.
-
Use the fluid control knob (10) to preset the operating range of the trigger (4). Turning in the fluid control knob clockwise will decrease the operating range of the trigger. This way it can be pressed in less far.
Caution: Avoid screwing the material fluid control knob completely out of the spray gun, otherwise the seal may be damaged. The material quantity limiter may only be unscrewed until the thread becomes visible.
- After work, disconnect the air hopper spray gun from the air supply and clean it as described in chapter "Cleaning and Maintenance".
Notes:
- Perform test runs on some test pieces. This way you can determine the optimum spraying strength and the spraying distance.
- The movement speed of the spray gun depends on the size of the nozzle, the distance to the surface (wall or ceiling), the consistency of the coating material and the used air pressure.
- Do not spray in an arc on the surface and do not interrupt spraying as this will lead to uneven or too little coating material distribution onto the surface. Most of the coating products are fast-dry materials.
- Always keep the spray gun in a constant distance to the surface. Hold the spray gun vertically to the surface to be sprayed and move the spray gun evenly and in parallel lanes from one side to the other.
- Before cleaning the hopper spray gun, check the work first. After work empty remaining coating material into an appropriate bin. Properly dispose of coating material that is no longer needed.
- Fresh treated surfaces must not be exposed to direct sunlight, to very high or low temperatures, wind, dust, water or rain.
- Pay attention to the air hose while operating the hopper spray gun. Hold the hose with one hand while you are operating the spray gun with the other hand. If necessary, ask an assistant to take care of the air hose. The hose must not be bent and do not step on it.
Cleaning and Maintenance
- Before cleaning or maintaining, first disconnect the air hopper spray gun from the air supply.
- After use thoroughly rinse the spray gun and the hopper. When using water-soluble coating material, simply clean all parts of the hopper spray gun thoroughly with water.
- Should it be necessary to disassemble the hopper spray for thoroughly cleaning, observe the correct order of the components when assembling the spray gun. Always be careful when disassembling and assembling the spray gun.
- Lubricate all moving parts of the hopper spray with suitable non-silicone grease. All parts such as nozzles, seals, adjusters, etc. are wear parts and must be exchanged with original spare parts in frequent use.
Caution: Avoid screwing the material fluid control knob (10) completely out of the spray gun, otherwise the seal may be damaged. The material quantity limiter may only be unscrewed until the thread becomes visible.
- Use a moist cloth to clean the housing of the spray gun.
- Do not allow liquids to enter the tool and never immerse it into liquids. Water in the compressed air inlet can damage the machine. Therefore it is recommended to drain the air line and the compressor in regular intervals! Also clean the air filters in regular intervals.
Storing
- Store the air hopper spray gun indoors in a dry place that is protected from dust, dirt and extreme temperatures.
- Store the spray gun out of reach of children.
Technical Data
Air Consumption: 140 – 220 l/min
Operating Pressure Range: 3 – 5 bar
Maximum Air Pressure: 6.2 bar
Air Inlet: G¼"
Hopper Capacity: Approx. 5 l
Weight incl. Hopper: Approx. 788 g
Nozzle Sizes: ∅ 4, 6, 8 mm
CONSIGNES DE SÉCURITÉ

Specifications techniques
Please help avoid waste materials.
If you at some point intend to dispose of this article, then please keep in mind that many of its components consist of valuable materials, which can be recycled. Please do not discharge it in the rubbish bin, but check with your local council for recycling facilities in your area.