SBS30P - Speaker Fenton - Free user manual and instructions
Find the device manual for free SBS30P Fenton in PDF.

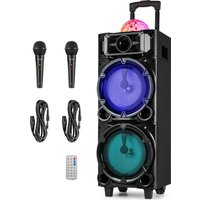
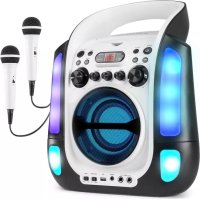
| Product type | Karaoke speaker with CD/CD+G/USB player, Bluetooth and microphones |
| Brand | Fenton |
| Model | SBS30P |
| Dimensions (L x D x H) | 300 x 365 x 225 mm |
| Weight | 2.50 kg |
| Power supply | AC adapter 12 V, input 100-240 V ~ 50 Hz |
| Main functions | CD, CD+G, MP3 playback; USB port (FAT32, up to 32 GB); AUX input (3.5 mm jack); Bluetooth; TV output (composite RCA); microphones (2 x 6.35 mm jack inputs); volume, balance, echo, talk over controls; LED show; track programming |
| Built-in speaker | Yes, 1 speaker |
| Input connectors | DC power socket, USB port, AUX IN (3.5 mm jack), MIC 1/MIC 2 (6.35 mm jack) |
| Output connectors | VIDEO OUT (yellow RCA), AUDIO OUT L/R (white/red RCA) |
| Care and cleaning | Clean with a soft, dry cloth. Do not use solvents or chemicals. |
| Safety | Do not open the device. Repairs only by a qualified technician. Use indoors, ambient temperature 5°C to 35°C. Keep out of reach of children. |
| Spare parts and repairability | Contact a Fenton authorized service center for any repairs. Use recommended accessories. |
| General information | CE certified. Do not dispose of in household waste. Specifications subject to change without notice. |
Frequently Asked Questions - SBS30P Fenton
User questions about SBS30P Fenton
0 question about this device. Answer the ones you know or ask your own.
Ask a new question about this device
Download the instructions for your Speaker in PDF format for free! Find your manual SBS30P - Fenton and take your electronic device back in hand. On this page are published all the documents necessary for the use of your device. SBS30P by Fenton.
USER MANUAL SBS30P Fenton
natural_image
Two PentioK portable radio devices, one black and one pink, displayed against a white background with no visible text or symbols.INSTRUCTION MANUAL GEBRUIKSAANWIJZING BEDIENUNGSANLEITUNG MANUAL DE INSTRUCCIONES MANUEL D'INSTRUCTIONS
Congratulations to the purchase of this Fenton product. Please read this manual thoroughly prior to using the unit in order to benefit fully from all features.
Read the manual prior to using the unit. Follow the instructions in order not to invalidate the warranty. Take all precautions to avoid fire and/or electrical shock. Repairs must only be carried out by a qualified technician in order to avoid electrical shock. Keep the manual for future reference.
- To protect against a fire, electric shock or personal injury, do not immerse cord, electric plugs or device in water or other liquids.
- Do not expose the appliance to extreme temperatures. The appliance shall be used in moderate climates.
- The use of attachments that are not recommended by the appliance manufacturer may result in fire, electric shock or personal injury.
- Do not open the unit by removing any cover parts. Do not attempt to repair the unit. Any repairs or servicing should be done by qualified personnel only.
• The appliance is not a toy. Do not let children play with it. Never let children insert foreign objects into the appliance. - Never clean the surface of the device with solvents, paint thinners, cleansers or other chemical products. Instead, use a soft, dry cloth or soft brush.
- Keep small objects (i.e. screws, mounting material, memory cards etc.) and packaging out of the range of children. Do not let Children play with foil. Choking hazard!
- Please keep the original packaging. To gain sufficient protection of the device while shipment or transportation, make sure to put it back in its original packaging.
- Do not use any volatile liquids, detergents or the like. Use a clean dry cloth.

This mark attracts the attention of the user to high voltages that are present inside the housing and that are of sufficient magnitude to cause a shock hazard.

This mark attracts the attention of the user to important instructions that are contained in the manual and that he should read and adhere to.
The unit has been certified CE. It is prohibited to make any changes to the unit. They would invalidate the CE certificate and their guarantee!
NOTE: To make sure that the unit will function normally, it must be used in rooms with a temperature between 5°C/41°F and 35°C/95°F.

Electric products must not be put into household waste. Please bring them to a recycling centre. Ask your local authorities or your dealer about the way to proceed. The specifications are typical. The actual values can slightly change from one unit to the other. Specifications can be changed without prior notice.
Do not attempt to make any repairs yourself. This would invalid your warranty. Do not make any changes to the unit. This would also invalid your warranty. The warranty is not applicable in case of accidents or damages caused by inappropriate use or disrespect of the warnings contained in this manual. Fenton cannot be held responsible for personal injuries caused by a disrespect of the safety recommendations and warnings. This is also applicable to all damages in whatever form.
UNPACKING INSTRUCTION
CAUTION! Immediately upon receiving the product, carefully unpack the carton, check the contents to ensure that all parts are present, and have been received in good condition. Notify the shipper immediately and retain packing material for inspection if any parts appear damage from shipping or the package itself shows signs of mishandling. Save the package and all packing materials. In the event that the product must be returned to the factory, it is important that the product be returned in the original factory box and packing.
If the device has been exposed to drastic temperature fluctuation (e.g. after transportation), do not switch it on immediately. The arising condensation water might damage your device. Leave the device switched off until it has reached room temperature.
POWERSUPPLY
On the label on the backside of the product is indicated on this type of power supply must be connected. Check that the mains voltage corresponds to this, all other voltages than specified, the light effect can be irreparably damaged. The product must also be directly connected to the mains and may be used. No dimmer or adjustable power supply.

Always connect the device to a protected circuit (circuit breaker or fuse). Make sure the device has an appropriate electrical ground to avoid the risk of electrocution or fire.
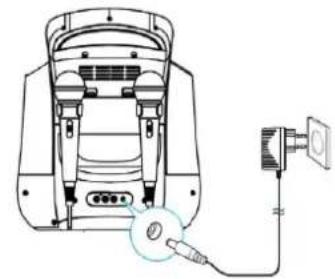
Connecting Power
Plug the supplied AC adapter into the DC jack on the rear side of the unit and connect to a standard AC wall socket with 230V\~50Hz continuous power supply.
Note: When the unit is not operated for long periods of time, unplug the AC adapter from the unit and wall outlet.
Connecting to your TV
Use the supplied color coded RCA patch cable (white/red/yellow) to connect the corresponding terminals on the device's rear with the respective ones on your TV and/or hifi.
To make song lyrics contained on a CD+G appear on your TV screen, select the corresponding input channel (Video-In, A/V or the like) in your TV settings or by remote control.
If your TV does not have such a feature, you can use an RF modulator (available in specialist shops) that is to be interposed between the SBS30 video out and the cable antenna of your TV.
natural_image
Technical line drawing of a device with a connected cable and sensor (no text or symbols)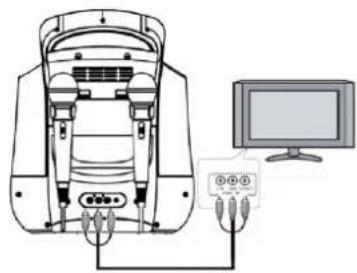
natural_image
Diagram of a device with connectors and a monitor connected to it (no text or symbols visible)Please read the user manual of your TV for more information on connecting external video devices.
Connecting a Microphone
- Plug a microphone (one microphone is included) into the MIC 1 or MIC 2 JACK on the lower left side of your unit. The mic output will be mixed with an audio source from CD/CD+G/USB flash drive.
- Slide ON/OFF switch on microphone to "ON" before singing and always slide to "OFF" after use.
CAUTION: Tapping or dropping the microphone while it is on can cause permanent damage to it. Never grip and swing the microphone around by the connecting cord.
BUTTONS AND FUNCTIONS
Function Selector CD/USB
- Slide the CD/USB FUNCTION switch to CD position to playback a CD, MP3, CD+G, CD-R/CD-RW disc.
- Slide the CD/USB FUNCTION switch to USB position to playback MP3 files on a USB flash drive.
- Once the AUX IN jack is plugged into, the unit will automatically enter the AUX mode. You can attach other music sources (iPod, MP3 or other digital audio players) through the AUX IN jack to your external player's audio out jack or headphone jack.
LED show ON/OFF
- Set it to "ON" to turn ON the LED show.
- Set it to "OFF" to turn LED show OFF.
Power On/Off Button
- Press this button to turn unit ON.
- Press and hold this button to turn unit OFF.
Play/Pause Button ▶II
- Tap once to play a selected song when playing a CD/CD+G/CD-R/CD-RW disc or MP3 files on a USB flash drive. The PLAY/PAUSE indicator will light.
- While playing, tap again to pause. The PLAY/PAUSE indicator will flash.
Stop Button ■
- While a selected song is playing, tap this to stop.
Next Button
- Tap once to skip forward to the following song during playback or stop mode.
Prev Button
- Tap once to skip back to the start of the current song during playback or skip back to the previous song during stop mode.
Repeat Function
- During CD/CD+G/MP3 playback on CD/CD-R/CD-RW/USB Flash Drive tap once for Repeat 1 (REPEAT indicator in LED display will flash) to playback current song only;
- Tap again for Repeat All (REPEAT indicator will light steadily) to repeat all available tracks on the disc;
- Tap again to cancel Repeat mode (REPEAT indicator will be OFF).
Program Function
This function allows music tracks to be played in a programmed sequence.
Note: Program function can only be set in STOP mode.
- Press the PROGRAM button once. Program Number 01 will display and PROGRAM indicator will flash.
- Press the SKIP FORWARD or SKIP BACKWARD button to select the track to be programmed.
- Press the PROGRAM button again to store the selection. The Program number. will advance to 02 to prompt for the next input.
- You may repeat steps #2 to #3 to program up to 20 CD / 99 MP3 tracks. As soon as you have entered the 20th CD / 99th MP3 track, the LED display will show "FU", indicating that program is full.
- Press the PLAY button to complete and start program play. Press STOP button to stop program play.
- You may use the REPEAT function to repeatedly play a certain track (Repeat 1) or all tracks (Repeat All) in the Program Play Mode.
- The CD player will stop when all the programmed tracks have been played through once. To repeat program play, press the PLAY/PAUSE button.
- To cancel program play, press the STOP button twice while program play is running or open the CD door in stop mode.
Up to 20 CD / 99 MP3 tracks can be programmed. If you attempt to program more than 20 CD / 99 MP3 tracks, "FU" will appear in the LED display and "PROG FULL" will appear on the TV screen as shown on right side (if connected).

text_image
CD TRK 20/20 PROG FULL MP3 T: 118/118 PROG FULL 7 Days - Craig David 002 K-pop MP 003 Beatles 004 Kelly Cl 005 Daughtry 006 Madonna 007 Michael 008 Lady Cag 009 Cline D 002 Abide Wi 003 Amazing 004 Angel DeWhen finished programming, tap PLAY button to confirm and start program play. The "PROG" indicator in the LED display will light. While playing, you may tap the NEXT or PREV button to skip to a desired song in the program list.
text_image
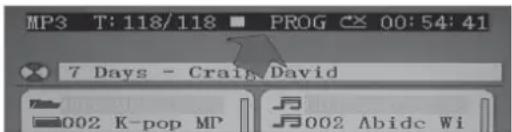
MP3 T:118/118 PROG 00:54:41 7 Days - Craig David 002 K-pop MP 002 Abide WiTo stop program play temporarily, tap the STOP button once. The "PROG" indicator in the LED display and TV screen (as shown below) will remain ON. Tap PLAY button to resume program play.
Note: if you tap the STOP button twice consecutively, you will cancel program play and erase the program list permanently. The "PROG" indicator in the LED display and TV screen will go off. In stop mode, you can review the program list by pressing the NEXT or PREV button.
Input Functions
• DC JACK: Connect the DC plug of the DC12V output AC Adapter (included) to this jack.
- USB JACK: Connect a USB flash drive (FAT32 formatted) up to 32GB (not included) to this jack for playback of MP3 files.
- AUX IN JACK: Connect the 3.5mm stereo plug of a stereo audio cable (not included) to this jack and the other end to an external audio player for playback.
- MIC 1 / MIC 2 JACKS: Connect the microphone to either one of the jacks to sing.
Output Functions
- VIDEO OUT JACK: Connect the yellow coded RCA plug of the A/V cable (included) to this jack and the other end to the video/av input of your TV.
- AUDIO OUT JACKS (L/R): Connect the white coded RCA plug (L) and red coded plug (R) of the A/V cable (included) to these jacks and the other end to the audio inputs of your TV.
- SPEAKER: There is one built-in speaker for this unit.
Karaoke Control Functions
• MASTER VOLUME: Adjust this to obtain the desired volume level from the built-in speaker.
- BALANCE CONTROL: Adjust this to obtain the optimum music and vocal levels while playing a CD+G or file or as left (L) and right (R) channel balance while playing ordinary stereo sound tracks of CD or MP3.
- TALK OVER: When you will talk or sing over the music, you would certainly want to attenuate the music. The SBS karaoke speaker does this for you automatically. The sensitivity can be control by the Talk Over control.
- MIC VOLUME: Adjust this control to obtain the desired mic volume output during singing. Volume level of both Mic 1 and Mic 2 will be adjusted at the same time.
- ECHO CONTROL: Turn this control clockwise for a more significant echo effect to enrich your voice for a concert hall effect.
Getting Started
- Connect your unit to a compatible TV using the included A/V cable.
- Plug in the included microphone into either the MIC 1 or MIC 2 jack. Note: Always set the mic to OFF until you are ready to sing to avoid possible sharp feedback noises.
Singing along with CD+G, CD, CD-R/CD-RW or USB Flash Drive
- Set the FUNCTION selector to "CD".
- Load a CD/CD+G disc as follows: Grip the top front edge on the CD door where indicated and pull gently to open it. The LED display will display "OP". Load a disc vertically into the compartment with the printed side facing you. Gently close the CD door. The unit begins to read the disc.
- The LED display will display the total number of tracks. (If no disc is loaded or the disc cannot be recognized, "No" will be displayed in the LED display). When a CD+G disc is detected and being played, the CDG indicator in the LED display will light.
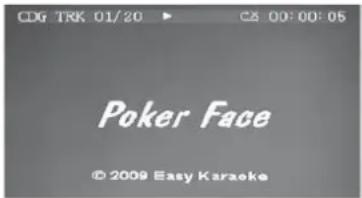
- Press PLAY/PAUSE button to play the disc. If a CD+G track is being played, the following TV screen will appear:
text_image
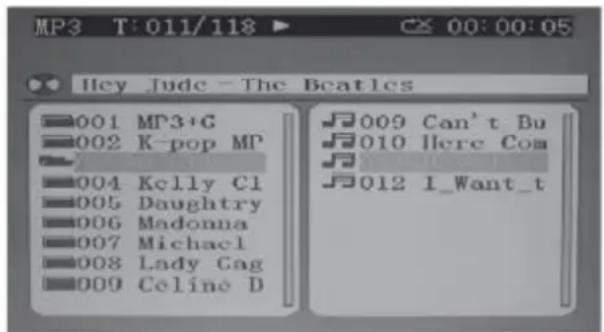
CDG TRK 01/20 ▶ C$ 00:00:05 Poker Face © 2009 Easy KaraokeNOTE: If you try to play a self-compiled CD-R/RW disc or USB flash drive with MP3 songs (both are not included), you will see the following menu instead:
text_image
MP3 T:011/118 00:00:05 Hey_Jude - The Beatles 001 MP3+G 002 K-pop MP 004 Kelly Cl 005 Daughtry 006 Madonna 007 Michael 008 Lady Cag 009 Celine D 009 Can't Bu 010 Here Com 012 I_Want_tOn the top line of the menu, "T: 011/118 means track #11 out of total 118 tracks is now playing. The elapsed time of current track is shown on the right.
BT OPERATION
Slide the FUNCTION SELECTOR to the right, selecting CD. Press and hold the STOP/BT button to enter BT mode. If successful, "bt" will flash on the display. Turn on the BT function of the device you want to pair to the SBS30 Karaoke System. If a password is required, enter "0000". After successfully pairing the SBS30 Karaoke System with your device, "bt" will stop flashing, but remains on the display.
If the number of songs on the disc/USB drive is more than 99, the 10th digit of LED display will show letter A to F (A=10, b=11, C=12, d=13, E=14 & F=15). For example, if it contains "118" songs, "b8" will show on the LED display. If the number of songs on the disc/USB flash drive is over 159, the LED display will show 99. However, if you have connected to a TV, full disc content information will be shown. All basic play/pause, stop and skip controls are identical to CD mode.
- Select your favorite song using the NEXT/PREV button.
- Tap PLAY/PAUSE button to start playing.
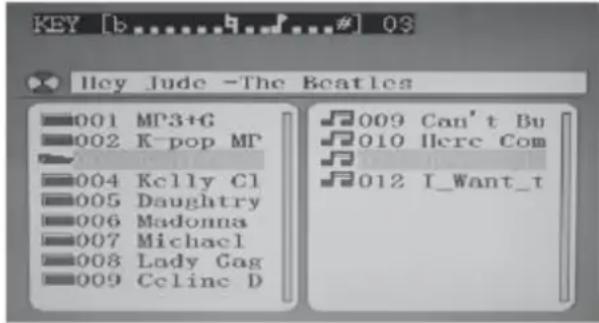
- Turn ON your microphone and starting singing. Adjust the MASTER VOLUME, MIC VOLUME and TV VOLUME if necessary.
text_image
KEY [b....#] 03 Hey Jude -The Beatles 001 MP3+G 002 K-pop MP 004 Kelly Cl 005 Daughtry 006 Madonna 007 Michael 008 Lady Gag 009 Celine D 009 Can't Bu 010 Here Com 012 I_Want_tImportant Hints on playing CDs
- CD mechanisms used in devices like this are designed to fully read all commercial CDs. They will also read self-compiled CD-R/CD-RW discs but it may take up to 10 seconds for playback to start. If playback does not start, it is likely due to the quality of the CD-R/CD-RW disc and/or the compatibility of the CD compilation software. Manufacturer is not responsible for the playback quality of CD-R/ CD-RW discs.
- Do not apply excessive force or press the CD door while it is playing.
- Never place anything except a compact disc in the disc compartment. Foreign objects can damage the unit.
- Only load one disc into the disc compartment at a time.
Singing along from Aux Input Sources
This karaoke unit features an aux-in jack for connecting your iPod, MP3 player or other digital music player.
- Connect the headphone jack of your external device to the AUX IN jack located on the lower side of this unit (The connection cable is not included).
- Turn on the unit player and it will enter the AUX function mode once an external device is plugged into the AUX IN jack.
- Connect the line out or headphone jack of your external audio device (e.g. a CD player, MP3 player, iPhone, iPod, etc...) to the unit with a suitable audio cable (not included).
- Select your favorite song on your external audio device to play. You may need to adjust the output volume of your external audio device if the headphone jack is used for making the connection.
- Turn on your microphone and start singing. Adjust the MASTER VOLUME and/or MIC VOLUME if necessary.
- You may also use the BALANCE and ECHO controls to enhance your singing experience. Turn off both devices after use.
NOTE: Once the AUX IN jack has been plugged into, the unit automatically enters the AUX mode no matter what position the Function Selector is in. Remember to disconnect the Aux In cable from the unit after use in order to listen to the CD or USB input again.
Using the Unit as a Public Address System
This unit can also be used as a PA (Public Address System).
NOTE: To prevent feedback or whistling from occurring, please be sure that the microphone is not held too close to unit's speaker.
- With unit stopped at CD or USB mode, unplug any 3.5mm audio cable (not included) connected to the AUX IN JACK previously.
- Turn on your microphone (one included) and start your performance. Adjust the MASTER VOLUME, MIC VOLUME and ECHO control if necessary.
LED Light Show
- The LED light shows inside the speaker and in the lower corners of the unit are created automatically based on the music source being played at the time
- Set Light Show control to "ON" to turn ON the LED show.
- Set Light Show control to "OFF" to turn LED show OFF.
natural_image
Technical line drawing of a device with a cable and sensor connected to a speaker (no text or symbols present)
natural_image
Diagram of a vehicle chassis connected to a computer monitor via cable (no text or symbols present)text_image
CDG TRK 01/20 Poker Face © 2009 Easy Karaokenatural_image
Technical line drawing of a device with a connected cable and sensor (no text or symbols)
natural_image
Diagram of a vehicle chassis connected to a monitor via cable (no text or symbols present)text_image
CDG TRK 01/20 Poker Face © 2009 Easy Karaokenatural_image
Diagram of a vehicle interior with a sensor connected to a mounted device (no text or symbols visible)
natural_image
Diagram of a device with cable and power cord connected to a monitor (no text or symbols present)text_image
CD8 TRK 01/20 50:00:00:05 Poker Face © 2009 Easy Karaokenatural_image
Diagram of a device with a cable and sensor connected to a wall-mounted connector (no text or symbols present)natural_image
Diagram of a device with connectors and a monitor, no text or symbols presentTouche Play/Pause ▶II
text_image
CDG TRK 01/20 Poker Face © 2009 Easy KaraokeThe specifications are typical. The actual values can slightly change from one unit to the other. Specifications can be changed without prior notice.
The products referred to in this manual is conforming European and UK legislation directives to which they are subject:
European Union
Tronios B.V.,
7602KR Almelo, The Netherlands
2014/35/EU
2014/30/EU
2011/65/EC

United Kingdom
Tronios Ltd.,
130 Harley Street,
London W1G 7JU, United Kingdom
S.I. 2016:1101
S.I. 2016:1091
S.I. 2012:3032

Specifications and design are subject to change without prior notice.
www.tronios.com
Copyright © 2022 by Tronios The Netherlands