F249 - Coffee machine BUFFALO - Free user manual and instructions
Find the device manual for free F249 BUFFALO in PDF.
| Product type | Electric coffee machine |
| Brand | Buffalo |
| Model | F249 |
| Capacity | 15 litres (approx. 100 cups) |
| Dimensions (H x W x D) | 530 x 360 x 280 mm |
| Weight (full) | Approx. 20 kg |
| Supply voltage | 230 V / 50 Hz |
| Power | 1500 W |
| Current | 6.5 A |
| Brewing time (full load) | Approx. 60 minutes |
| Coffee type | Ground coffee (filter basket) |
| Main functions | Percolation, automatic keep-warm, "Ready" end-of-brewing indicator |
| Body material | Stainless steel and plastic |
| Maintenance | Wipe exterior with damp cloth, descale every 3 months with suitable product |
| Safety | Do not immerse, do not touch hot surfaces, do not operate dry, automatic shut-off at end of cycle |
| Spare parts | Percolator tube, filter basket, lid, tray, tap |
| Repairability | Requires intervention by a qualified technician recommended |
| Warranty | Manufacturer's warranty (refer to general conditions) |
| Use | Indoor use only |
Frequently Asked Questions - F249 BUFFALO
User questions about F249 BUFFALO
0 question about this device. Answer the ones you know or ask your own.
Ask a new question about this device
Download the instructions for your Coffee machine in PDF format for free! Find your manual F249 - BUFFALO and take your electronic device back in hand. On this page are published all the documents necessary for the use of your device. F249 by BUFFALO.
USER MANUAL F249 BUFFALO
15 litre Coffee Percolator/Urn
Instruction manual

natural_image
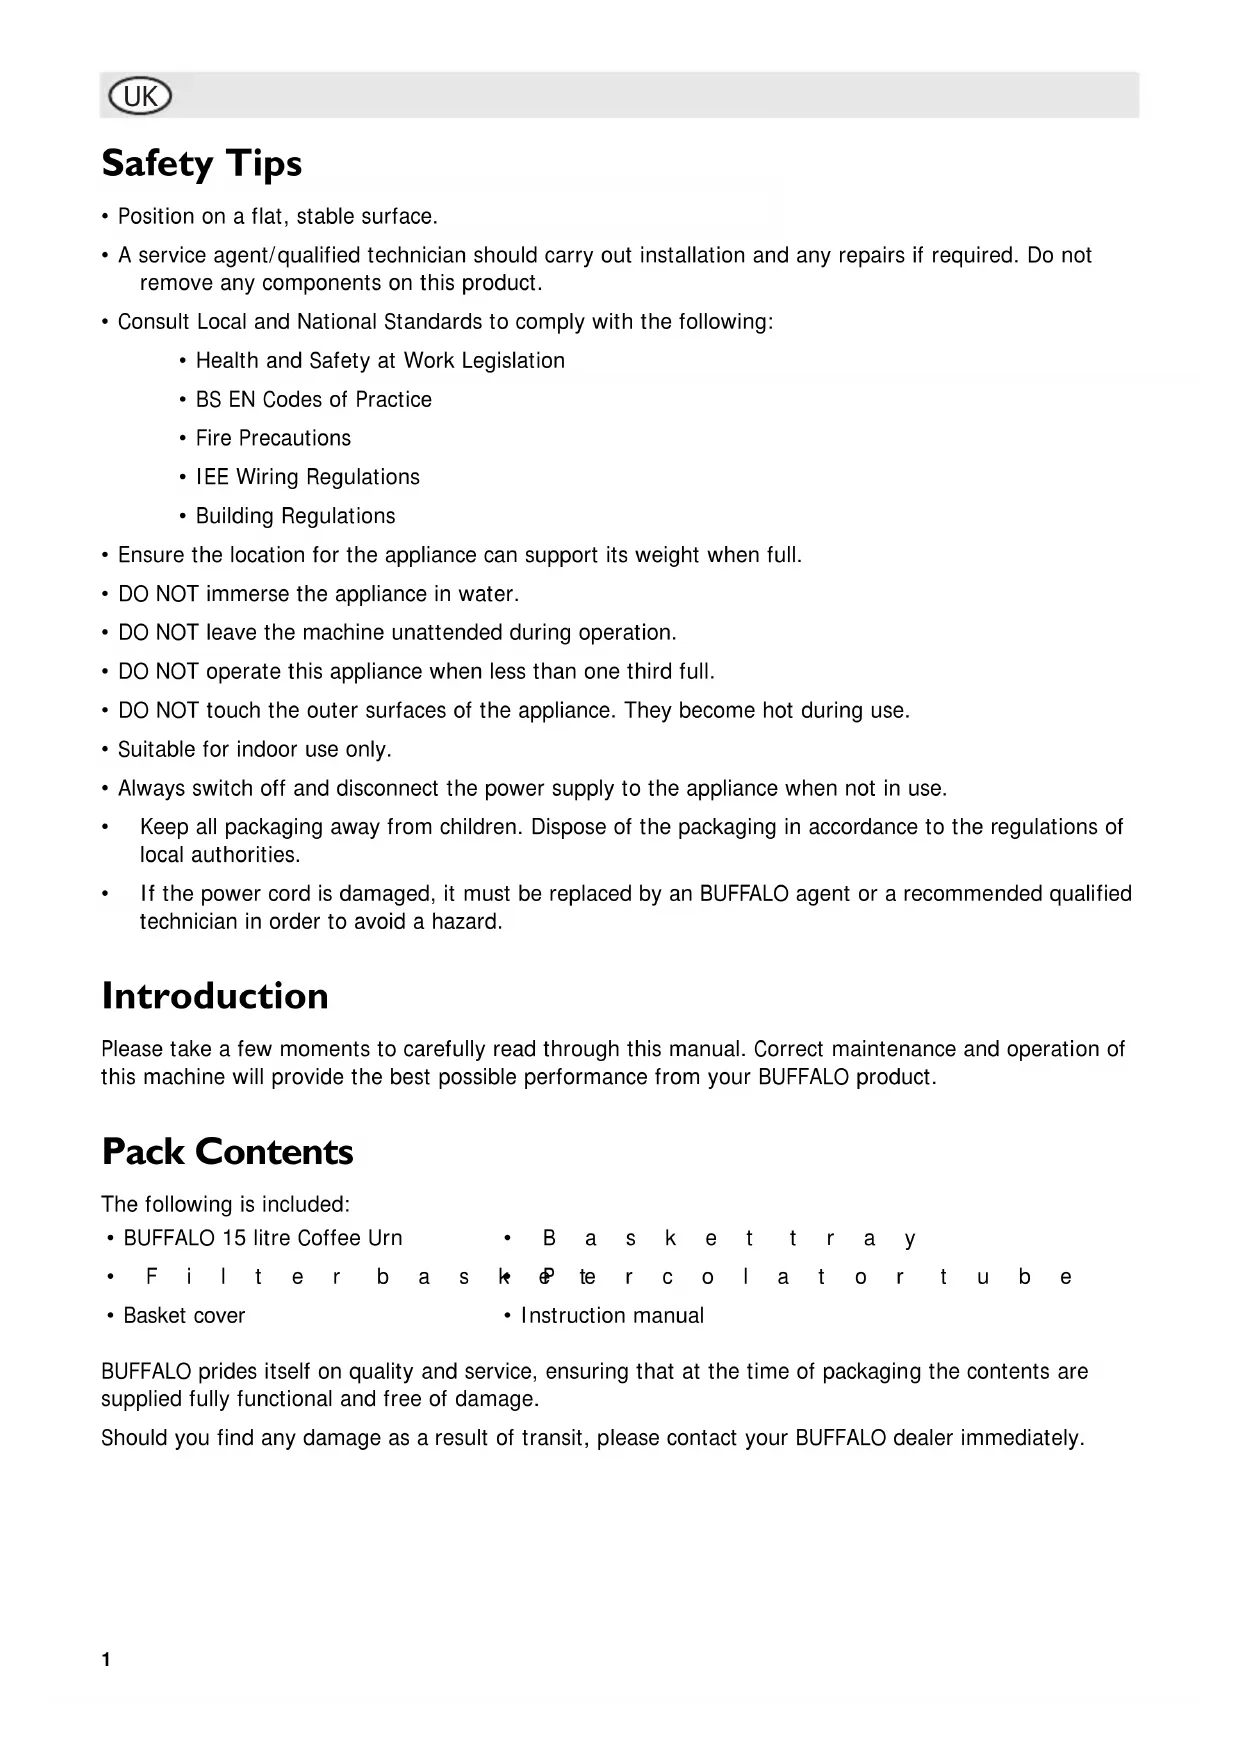
Exterior view of a stainless steel coffee maker with black handle and side arm (no visible text or symbols)
15 liter koffieketel
Handleiding

15 liters urnetrakter
Brukerhåndbok

Cleaning, Care & Maintenance 3
Descaling 3
Troubleshooting 3
Technical Specifications 4
Electrical Wiring 4
Compliance 4
NL
Inhoudsopgave
Veiligheidstips 5
Inleiding 5
Verpakkingsinhoud 5
Bediening 6
Koffie zetten 6
Serveren 7
- Position on a flat, stable surface.
- A service agent/qualified technician should carry out installation and any repairs if required. Do not remove any components on this product.
- Consult Local and National Standards to comply with the following:
• Health and Safety at Work Legislation
• BS EN Codes of Practice
- Fire Precautions
- IEE Wiring Regulations
• Building Regulations
- Ensure the location for the appliance can support its weight when full.
- DO NOT immerse the appliance in water.
- DO NOT leave the machine unattended during operation.
- DO NOT operate this appliance when less than one third full.
- DO NOT touch the outer surfaces of the appliance. They become hot during use.
- Suitable for indoor use only.
- Always switch off and disconnect the power supply to the appliance when not in use.
- Keep all packaging away from children. Dispose of the packaging in accordance to the regulations of local authorities.
- If the power cord is damaged, it must be replaced by an BUFFALO agent or a recommended qualified technician in order to avoid a hazard.
Introduction
Please take a few moments to carefully read through this manual. Correct maintenance and operation of this machine will provide the best possible performance from your BUFFALO product.
Pack Contents
The following is included:
• BUFFALO 15 litre Coffee Urn
- Basket tray
- Filter basis
k eP ter r c o l a t o r t u b e
- Basket cover
- Instruction manual
BUFFALO prides itself on quality and service, ensuring that at the time of packaging the contents are supplied fully functional and free of damage.
Should you find any damage as a result of transit, please contact your BUFFALO dealer immediately.
Operation
I. Remove the appliance from the packaging. Make sure that all protective plastic film and plastic coatings are thoroughly removed from all surfaces.

Note: Before using for the first time, clean the interior of the appliance and all parts in warm soapy water, then rinse thoroughly.
Brewing Coffee
I. Pour fresh cold water into the urn; filling it at least half way. Use the level indicator on the front of the appliance as a guide.
2. Fill the Filter basket with the desired amount of ground coffee and cover with the Basket cover.
3. Insert the Percolator tube into the urn.

Note: Ensure the base of the Percolator tube is securely located into the base of the percolator.
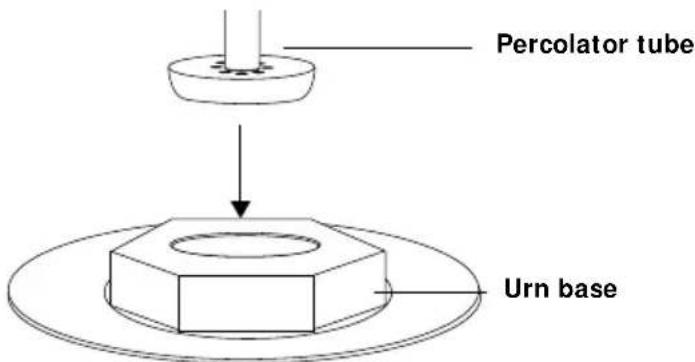
text_image
Percolator tube Urn base- Slot the Basket tray over the Percolator tube. Rest the tray securely on the lugs protruding from the Percolator tube.
- Place the Filter basket and cover over the Percolator tube and onto the Basket tray.
- Place the lid on the Coffee Percolator.
- Connect to the power supply and turn On to begin brewing the coffee.

WARNING: The outside of the appliance becomes very hot during use. DO NOT TOUCH!
- The 'Ready' light is illuminated when the coffee has been brewed. The coffee is kept at serving temperature by the percolator.
- Turn the power switch OFF when the level indicator is almost empty, or the equivalent of 3 cups of coffee is left in the urn, to prevent any damage to the heating element.

Note: DO NOT allow the appliance to boil dry. This invalidates the warranty.
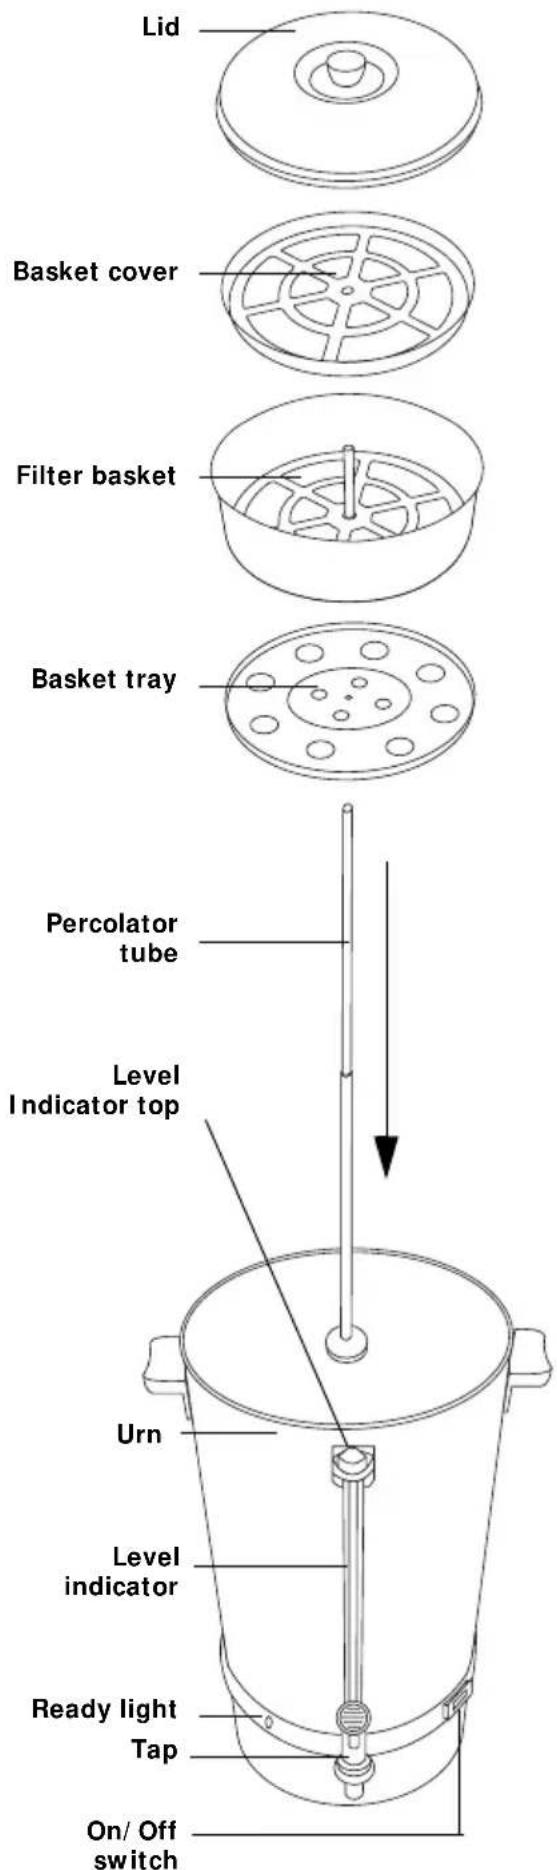
text_image
Lid Basket cover Filter basket Basket tray Percolator tube Level Indicator top Urn Level indicator Ready light Tap On/ Off switchServing
I. Place a suitable vessel beneath the tap.
2. Pull the tap towards you to begin pouring the coffee.
3. Raise the tap handle to close the tap.
Emptying the Appliance
Drain the appliance by using the tap to empty the urn.
Cleaning, Care & Maintenance
• Always turn off and disconnect the appliance from the power supply before cleaning.
• Use soapy water and a damp cloth to clean the exterior of the appliance.
- Dry t h o r o u g h l y after cleaning.
Descaling
In hard water areas lime scale can build up within the appliance after prolonged use. To descale the appliance:
I. Pour a solution of descaler and water into the reservoir.
2. Brush the interior gently with a soft bristled brush.
3. Discard the solution collected in the jug.
4. Fill the reservoir with clean water and turn the appliance back On to flush out the system. Flush out the system thoroughly to remove any descaler residue.
- The appliance is now ready for use.

Note: Use a suitable descaler and always follow the instructions on the container.
BUFFALO recommend that this appliance is descaled every 3 months or more frequently in hard water areas.
Troubleshooting
| Fault Probable Cause Action | ||
| The unit is not working | The unit is not switched on Check the unit is plugged in correctly and switched on | |
| Plug and lead are damaged Call BUFFALO agent or qualified technician | ||
| Fuse in the plug has blown Replace the plug fuse | ||
| Power supply Check power supply | ||
| Internal wiring fault Call BUFFALO agent or qualified technician | ||
| The appliance turns on but does not make coffee | Limescale build up in Percolator tube De scale appliance | |
| The tap is leaking | The tap has become loose | Tighten the tap handle |
| The level indicator has become loose | Tighten the knurled top of the level indicator | |
Technical Specifications
| Model | Voltage | Power | Current | Capacity | Weight (full) | Brewing Time (full) | Dimensions w x d x h mm |
| F249 2 | 30V 50Hz 150 | 0W 6.5A 15 | litres | (100 cups) | 20kg approx. | 60 minutes approx. | 530 x 360 x 280 |
Electrical Wiring
This appliance is supplied with a 3 pin, moulded, BS1363 plug and lead, with a 13 amp fuse as standard. The plug is to be connected to a suitable mains socket.
This appliance is wired as follows:
• Live wire (coloured brown) to terminal marked L
• Neutral wire (coloured blue) to terminal marked N
• Earth wire (coloured green/yellow) to terminal marked E
This appliance must be earthed, using a dedicated earthing circuit.
If in doubt consult a qualified electrician.
Electrical isolation points must be kept clear of any obstructions. In the event of any emergency disconnection being required they must be readily accessible.
Compliance
BUFFALO parts have undergone strict product testing in order to comply with regulatory standards and specifications set by international, independent, and federal authorities.
BUFFALO products have been approved to carry the following symbol:

All rights reserved. No part of these instructions may be produced or transmitted in any form or by any means, electronic, mechanical, photocopying, recording or otherwise, without the prior written permission of BUFFALO.
Every effort is made to ensure all details are correct at the time of going to press, however, BUFFALO reserve the right to change specifications without notice.
Veiligheidstips
DECLARATION OF CONFORMITY
- Conformiteitsverklaring • Déclaration de conformité • Konformitätserklärung • Dichiarazione di conformità •
- Declaración de conformidad • Declaração de conformidade • Överensstämmelseförsäkran •
• Overensstemmelseserklæring • Konformitetserklæring • Selvitys vaatimustenmukaisuudesta •
I, the undersigned, hereby declare that the equipment specified above conforms to the above Directive(s) and Standard(s).