Profi Plus III FZ022 - Bike trailer Fischer - Free user manual and instructions
Find the device manual for free Profi Plus III FZ022 Fischer in PDF.

User questions about Profi Plus III FZ022 Fischer
0 question about this device. Answer the ones you know or ask your own.
Ask a new question about this device
Download the instructions for your Bike trailer in PDF format for free! Find your manual Profi Plus III FZ022 - Fischer and take your electronic device back in hand. On this page are published all the documents necessary for the use of your device. Profi Plus III FZ022 by Fischer.
USER MANUAL Profi Plus III FZ022 Fischer
natural_image
Two wrenches shown side by side: a black screwdriver and a metallic wrench (no text or symbols visible)Wichtig:
natural_image
Close-up of a metallic circular object suspended by wires, possibly a gong or fan (no visible text or symbols)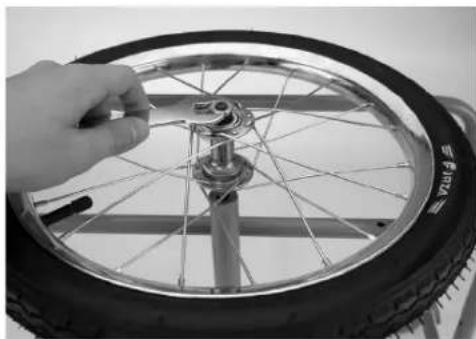
natural_image
Close-up of a hand adjusting a bicycle wheel rim with a wrench, showing mechanical components (no text or symbols visible)
natural_image
Close-up of a metal bracket with a black clip attached, no visible text or symbols
natural_image
Close-up of a bicycle steering wheel with a handle, showing tire and wheel rim (no text or symbols visible)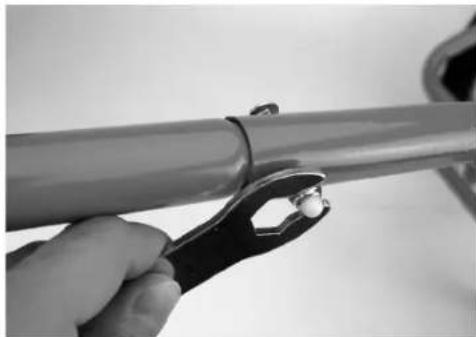
natural_image
Close-up of a hand holding a pipe fitting with a small metallic component (no text or symbols visible)FISCHER
natural_image
Close-up of a bicycle wheel handle with metal fasteners, no visible text or symbolsnatural_image
Close-up of a mechanical component with visible internal structure and white railings (no text or symbols)natural_image
Close-up of a black bicycle wheel with attached mechanical components (no text or symbols visible)
natural_image
Close-up of a hand using a tool to adjust or install a mechanical component (no visible text or symbols)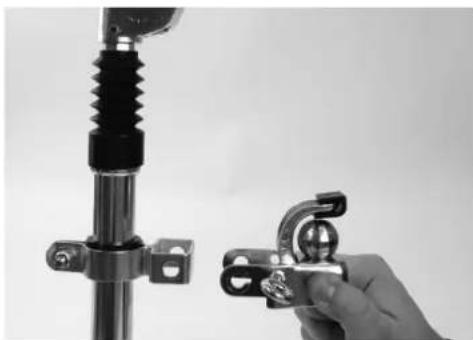
natural_image
Close-up of a hand holding a mechanical clamp and spring scale component (no text or symbols visible)natural_image
Close-up of a hand using a wrench to adjust a mechanical clamp against a vertical rod (no text or symbols visible)natural_image
Close-up of a hand adjusting a mechanical clamp or bracket component (no visible text or symbols)
natural_image
Close-up of a hand using a metallic tool to adjust a mechanical component (no visible text or symbols)natural_image
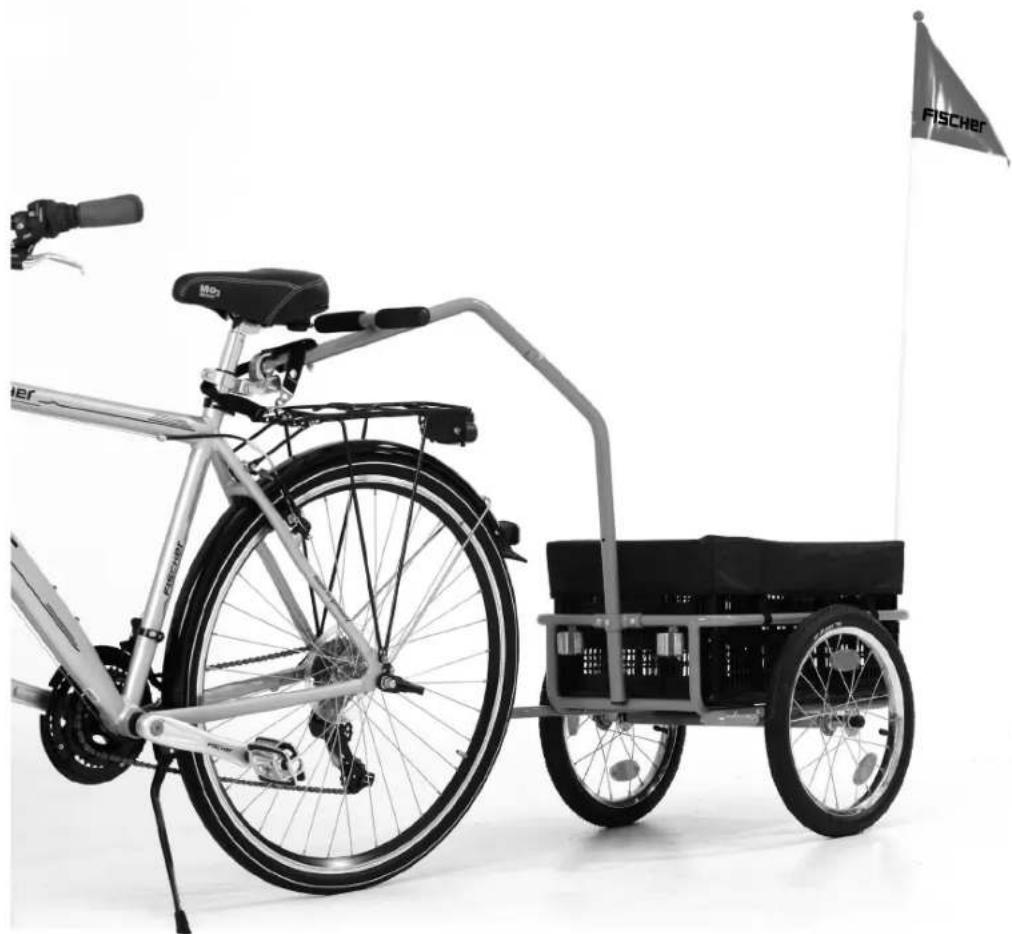
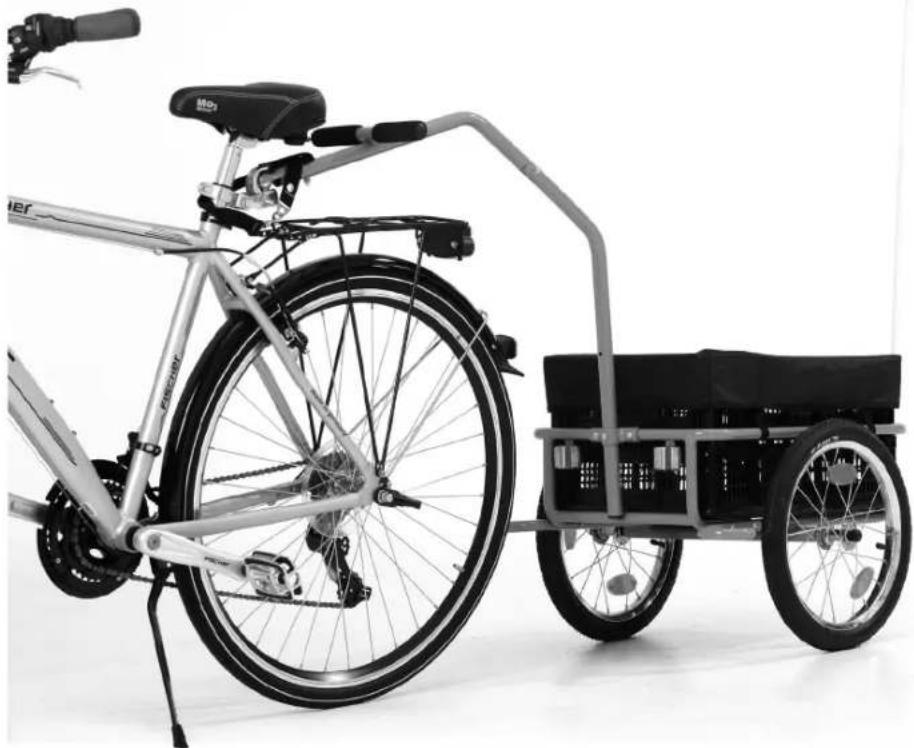
Black-and-white photo of a bicycle with a three-wheeled tricycle and a small Fischer flag on the right (no text or symbols on the vehicle itself)GB Operating and safety precautions
We congratulate you on purchasing your high-quality bicycle trailer.
The instructions for use form part of the product as supplied. Please pass on the instructions to the new owner if you sell or otherwise dispose of the product.
Safety precautions
Please read these instructions with attention before using the product, and then keep them in a safe place. Failure to follow the instructions can affect both your own safety and that of other road users.
- The trailer is intended for transporting items. The trailer must not be used to transport passengers.
- Do not exceed the trailer's permitted maximum weight of 39 kg.
- Do not carry out technical modifications of any kind on the trailer.
- Do not attempt to carry additional loads on the tow bar.
- Maximum road speed: 10 mph (16 km/h)
- Do not use the trailer on stony or uneven road surfaces, or in road conditions otherwise considered dangerous.
- Proceed with great care when on public roads in order to avoid hazards.
- The person riding the towing bicycle must be at least 16 years of age and in a fit state to be in charge of a vehicle.
- Always wear a helmet when cycling.
- Ensure that the towing bicycle is in a perfect state of repair.
- You are recommended to fit the towing bicycle with rear-view mirrors.
- Check all components for tightness before each trip, paying particular attention to the quick-action coupling and wheels.
- Always switch on the lamps in conditions of poor light (at twilight, etc.)
- Please note that we cannot accept liability for accessories obtained from other suppliers.
- Only bicycles must be used as towing vehicles. The cycle used must be specifically identified in its manufacturer's instructions as being suitable for towing purposes.
- Ask your specialist dealer to check that the brakes are capable of fulfilling the following performance specifications.
Deceleration rate (with brakes full on) for a total mass of 140 kg.
Front wheel brakes: a 3.4 m/s ^2 (dry) a 2.2 m/s ^2 (wet) Back wheel brake: a 2.2 m/s ^2 (dry) a 1.4 m/s ^2 (wet)
-
Never load the trailer to above the top edge of the side rails, as falling objects may endanger other traffic. When loading up the trailer, you must ensure that the load is evenly distributed.
-
Load the trailer to its maximum capacity and practice towing it on an enclosed piece of land before venturing out onto public roads. Take special care to practice riding around bends and up and down slopes, and try out your emergency-braking and setting-off techniques on different road surfaces. Take into account the extended braking distance of the vehicle and trailer resulting from the additional trailer load.
-
Attach the pennant supplied to make the cycle and trailer more visible.
-
Always check your tyre pressures before riding off, as insufficient tyre pressure can have a detrimental effect on the riding performance of the cycle and trailer.
-
Note that there is an increased risk of tipping over when stationary when the trailer is attached. Ensure at all times that the towing bicycle is in a fit state to tow the loaded trailer.
-
Push the load well inside the trailer or otherwise secure it to prevent loss.
-
Warning: Please follow the local traffic regulation during using on the public road!
-
Towbar load min.: 35 N / towbar load max.: 45 N
Technical specifications:
Weights:
Weight of trailer when empty: 9,0 kg
Permitted total weight: 39 kg
Maximum load capacity: 30 kg
Notes on warranty:
The warranty conditions are as stipulated in law.
Maintenance and repair:
If the trailer is subject to heavy use, all its components must be checked regularly and worn and damaged items replaced as required. Do not attempt to repair damaged components. Damaged items must always be substituted with an original replacement part. Retighten all screws, nuts, etc. after the first ten hours of use.
Check the bicycle and trailer before each trip to ensure that they are in a correct state of repair.
Made for:
Crosshead screwdriver + multifunctional tool supplied
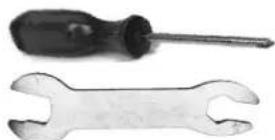
Important:
An approved battery-powered rear light must be fitted for use on public roads.
GB Operating and safety precautions
| Part. no. | Number | Designation Additional | informations Dimensions fig. Picture | ||
| 1 1 | Transport box | 52 x 36 x 26.5 cm | 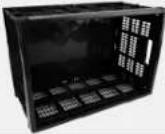 | ||
| 2 1 | Base frame | 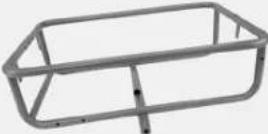 | |||
| 3 1 | Cover |  | |||
| 4 1 | Lower tow | par part Inc. attachment | kit (bracket + 2 screws M6x35 + 2 screws M6x50) | 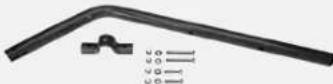 | |
| 5 1 | Upper tow | par part Inc. 1 fixing screw M6x35 | 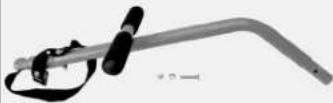 | ||
| 6 2 | Wheel Inc. | wheel nut cover 16 inch | 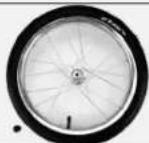 | ||
| 7 2 | Wheel deflection protection | Inc. 2 fixing screws M6x40 | 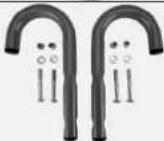 | ||
| 8 3 | Reflector 2x white and 1x red inc. | fixing screws M5x10 | 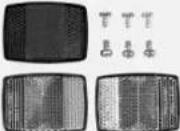 | ||
| 9 4 | Wheel-Reflector Orange |  | |||
| 10 1 | Safety pennant 2 parts inc. connector About 120 cm | 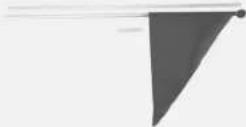 | |||
| 11 1 | Multifunctional tool | 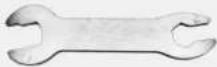 | |||
| 12 1 | Coupling | 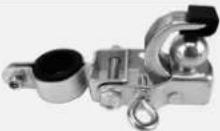 | |||
FISCHER
GB Operating and safety precautions
natural_image
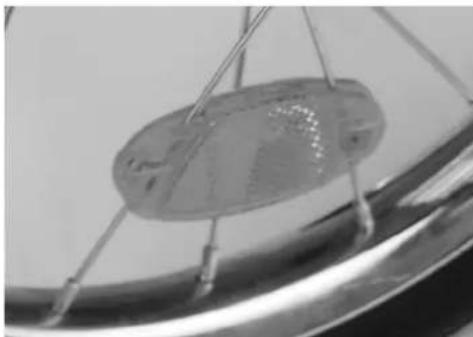
Close-up of a metallic object suspended by wires, possibly a lamp or oscillator (no visible text or symbols)Place 2 orange reflectors [part no. 9] on the outer spokes of both of the wheels. Make sure that these are firmly attached to the spokes.

natural_image
Close-up of a hand adjusting a bicycle tire with a wrench, showing mechanical components and wheel (no text or symbols visible)Screw both wheels [part no. 6] to the base frame [part no. 2] as shown in the photo.
Tighten the screw positioned on the outside and attach the screw covers by placing them on the screws.
Please make sure that the self-locking screw is properly tightened. Check regularly that the self-locking screw is correctly seated.
natural_image
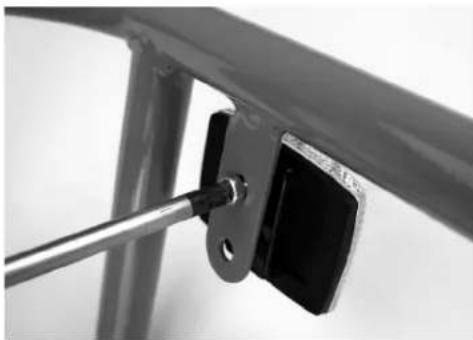
Close-up of a metal bracket with a black clip attached, no visible text or symbolsScrew both white reflectors [part no. 8] to the front of the base frame [part no. 2] and screw the red reflector to the rear of the base frame by the brackets provided for this purpose. Use 2 M5x10 fixing screws each for this.
natural_image
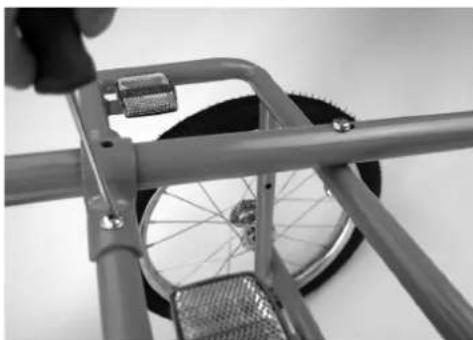
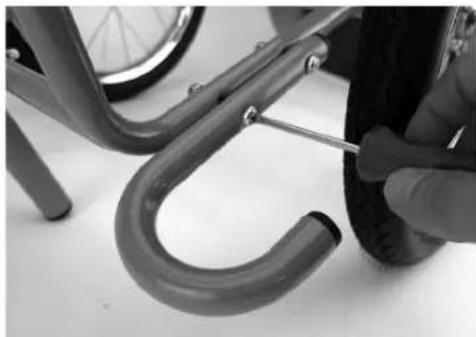
Close-up of a bicycle steering wheel assembly with a hand adjusting the gear (no text or symbols visible)Screw the lower tow bar part [part no. 4] to the front of the base frame [part no. 2] using the attachment bracket and by means of 2 M6x50 screws and 2 M6x35 screws (each with washers and nuts).
natural_image
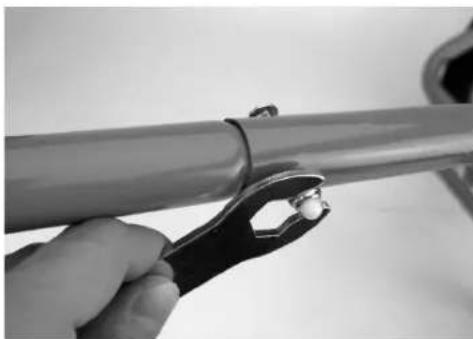
Close-up of a hand using a tool to adjust a pipe fitting with a small component (no text or symbols visible)Put the upper tow bar part [part no. 5] on to the lower part and connect the two parts by putting the self-locking screw M6x35 into the square opening and screw it tight with its washer and nut.
Step 1 Attaching the spoke reflectors
Step 2 Fitting the wheels
IMPORTANT:
Step 3 Attaching the reflectors
Step 4 Attaching the lower tow bar part
Step 5 Attaching the upper tow bar part
FISCHER

Operating and safety precautions
Step 6
Fitting the wheel deflection protection
Screw one of the two wheel deflection guards [part no. 7] to the base frame in front of each of the wheels. For this use screws M6x40 with washers and nuts.
natural_image
Close-up of a bicycle wheel handle and tire assembly with metal fasteners (no text or symbols visible)Step 7 Attaching the safety flag
Step 8
Putting in the transport box
Put the two halves of the flag [part no. 10] together using the connector and then put it in the hole provided in the rear of the trailer.
Fold out the transport box [part no. 1] and place it in the base frame [part no. 2].
natural_image
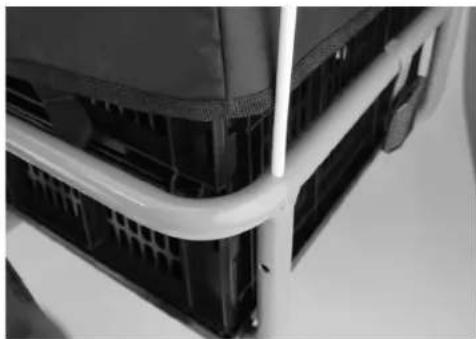
Close-up of a mechanical component with visible internal structure and white railings (no text or symbols)Step 9 Putting on the transport cover
Lay the fabric cover [part no. 3] on the transport box and attach the cover to the base frame [part no. 2] by means of the 4 Velcro strips.
Step 10
Attaching the trailer coupling to the bicycle
natural_image
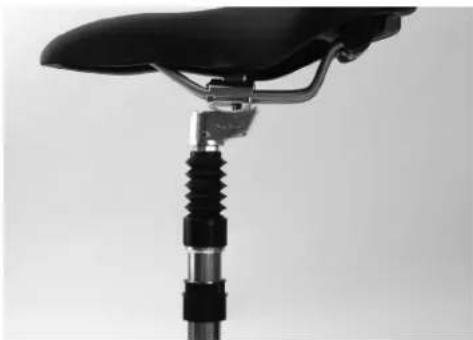
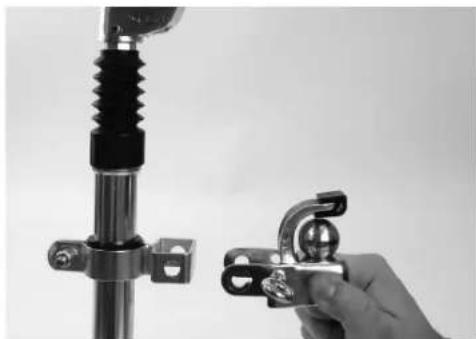
Close-up of a black bicycle seat with attached mechanical components (no visible text or symbols)Secure the saddle-support mounting, with the help of the plastic shims, to the saddle pillar of your bicycle. [Part-Nr. 12]

natural_image
Close-up of a hand using a tool to adjust or install a mechanical component (no visible text or symbols)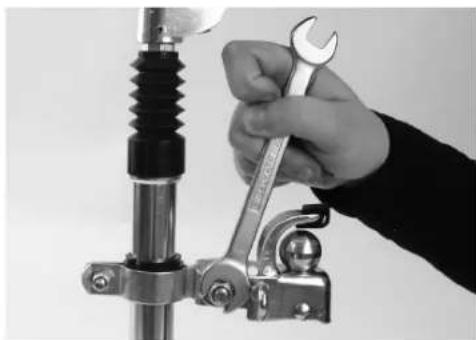
natural_image
Close-up of a hand using a wrench to adjust a mechanical clamp or bracket (no text or symbols visible)Now use the screw that is ready-fitted to the saddle support mounting to attach the ball-head coupling to the saddle support mounting.
natural_image
Close-up of a hand adjusting a mechanical clamp or bracket component next to a vertical metallic rod (no text or symbols visible)FISCHER
GB Operating and safety precautions
natural_image
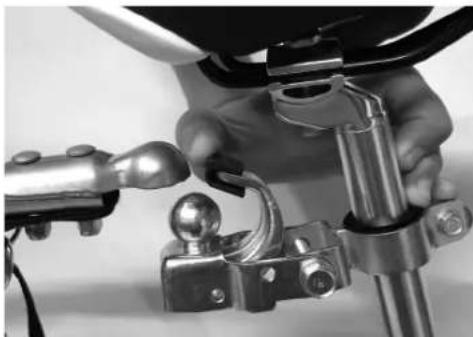
Close-up of a hand adjusting a mechanical component with a metallic bracket and lever (no visible text or symbols)Pull forwards the safety catch on the ball-head element and attach the ball coupling. Tighten the securing screw in order to hold the coupling in place. This will prevent the ball-head coupling and tow bar becoming separated during use. [Part-Nr. 12]
Place the safety strap around the bicycle's saddle post and hook it to the bracket on the tow bar.
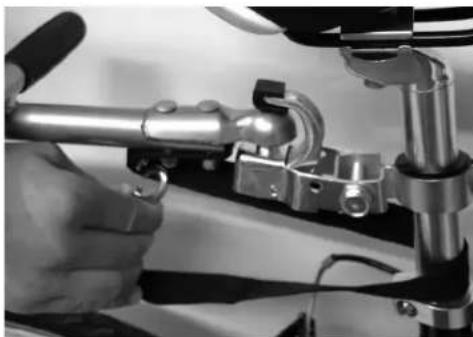
The connection between the bicycle and the trailer is an important part of the assembly process. Make sure that the trailer is securely connected to the bicycle.
natural_image
Close-up of a hand using a metal tool to adjust a bicycle wheel (no visible text or symbols)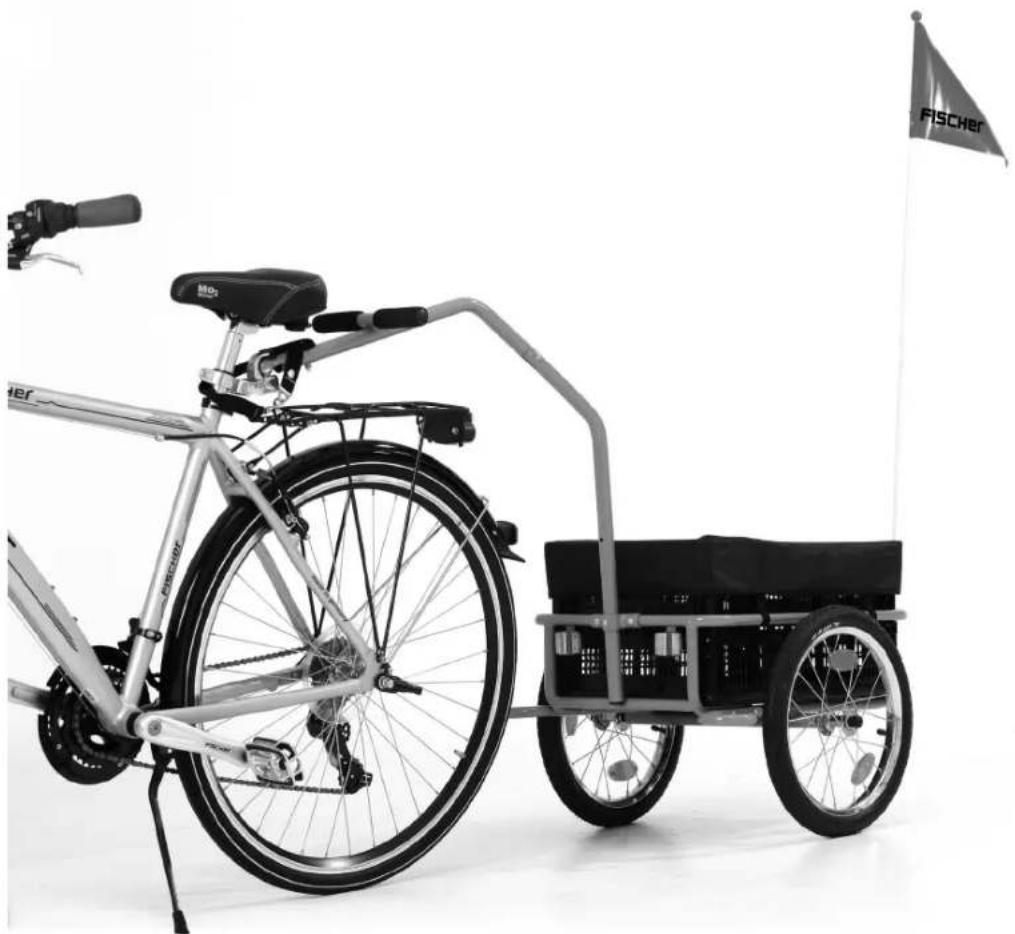
natural_image
Black-and-white photo of a bicycle with a three-wheeled tricycle and a small Fischer flag on the side (no text or symbols on the vehicle itself)Step 11: Connect the trailer to the bicycle
IMPORTANT!
Fully-assembled trailer
natural_image
Two types of wrenches: a black screwdriver and a metallic wrench (no text or symbols visible)Important:
natural_image
Close-up of a metallic circular object suspended by wires, possibly a gong or fan (no visible text or symbols)natural_image
Close-up of a hand adjusting a bicycle wheel rim with a wrench, showing mechanical components (no text or symbols visible)Etape 3
natural_image
Close-up of a metal bracket with a black clip attached, no visible text or symbolsEtape 4
Pose de la partie
inférieure du timon
natural_image
Close-up of a bicycle steering wheel with a handle, showing tire and gear mechanism (no text or symbols visible)Etape 5
Pose de la partie
inférieure du timon
natural_image
Close-up of a hand using a tool to adjust a pipe fitting (no text or symbols visible)FISCHER
natural_image
Close-up of a bicycle wheel handle with metal fasteners, no visible text or symbolsnatural_image
Close-up of a mechanical component with visible internal structure and white railings (no text or symbols)natural_image
Close-up of a black bicycle wheel with attached mechanical components (no text or symbols visible)
natural_image
Close-up of a hand using a tool to adjust or install a mechanical component (no visible text or symbols)
natural_image
Close-up of a hand holding a mechanical clamp and spring scale component (no text or symbols visible)natural_image
Close-up of a hand using a wrench to adjust a mechanical clamp against a vertical rod (no text or symbols visible)natural_image
Close-up of a hand adjusting a mechanical clamp or bracket component (no visible text or symbols)
natural_image
Close-up of a hand using a tool to adjust a mechanical component (no visible text or symbols)Remorque montée
natural_image
Black-and-white photo of a bicycle with a three-wheeled tricycle and two wheeled cargo cart (no visible text or symbols)
natural_image
Two types of wrenches: a black screwdriver and a white wrench (no text or symbols visible)Importante
natural_image
Close-up of a metallic object suspended by wires, possibly a lamp or sensor array (no visible text or symbols)natural_image
Close-up of a hand adjusting a bicycle tire with a wrench, showing mechanical components and wheel (no text or symbols visible)natural_image
Close-up of a metal bracket with a black clip attached, no visible text or symbolsnatural_image
Close-up of a bicycle steering wheel system with a hand adjusting the frame (no text or symbols visible)natural_image
Close-up of a hand using a tool to adjust a pipe fitting with a small component (no text or symbols visible)natural_image
Close-up of a bicycle seat with metal brackets and a wheel, no visible text or symbolsnatural_image
Close-up of a mechanical component with white railings and black plastic parts (no visible text or symbols)natural_image
Close-up of a black bicycle seat with attached mechanical components (no visible text or symbols)natural_image
Close-up of a hand using a tool to adjust or install a mechanical component (no visible text or symbols)
natural_image
Close-up of a hand using a wrench to adjust a mechanical clamp or bracket (no text or symbols visible)natural_image
Close-up of a hand adjusting a mechanical clamp or bracket component with a metallic rod (no text or symbols visible)FISCHER
natural_image
Close-up of a hand adjusting a mechanical clamp or bracket component (no visible text or symbols)natural_image
Close-up of a hand using a tool to adjust a mechanical component (no visible text or symbols)
natural_image
Black-and-white photo of a bicycle with a three-wheeled tricycle and a small Fischer flag on the right side (no text or symbols on the vehicle itself)natural_image
Two wrenches: a black screwdriver and a metallic wrench (no text or symbols visible)WAŻNE:
natural_image
Close-up of a metallic circular object suspended by wires, possibly a gong or fan (no visible text or symbols)
natural_image
Close-up of a hand adjusting a bicycle wheel rim with a wrench, showing mechanical components (no text or symbols visible)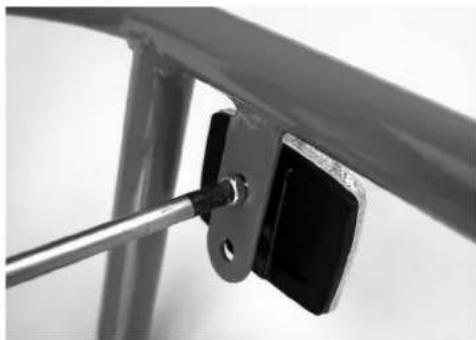
natural_image
Close-up of a metal bracket with a black clip attached, no visible text or symbols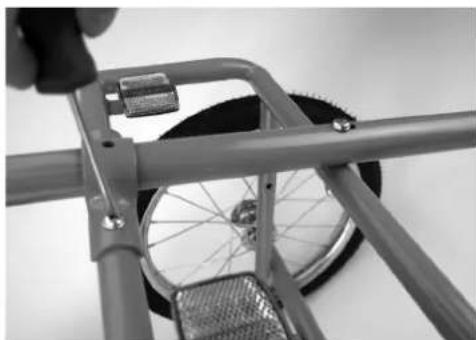
natural_image
Close-up of a bicycle steering wheel assembly with a hand adjusting the handle (no text or symbols visible)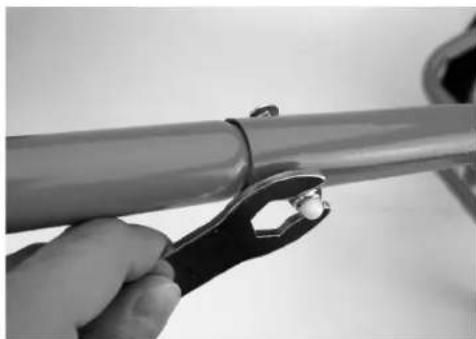
natural_image
Close-up of a hand holding a pipe fitting with a small white object attached (no text or symbols visible)FISCHER
natural_image
Close-up of a bicycle wheel handle with metal fasteners, no visible text or symbolsnatural_image
Close-up of a mechanical component with visible internal structure and white railings (no text or symbols)natural_image
Close-up of a black bicycle wheel with attached mechanical components (no text or symbols visible)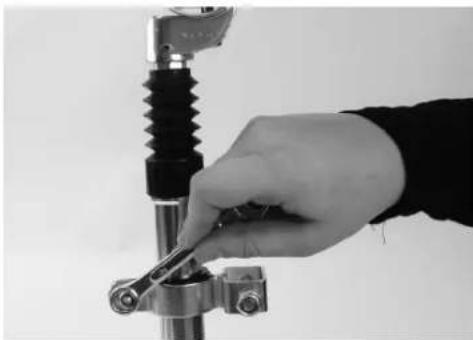
natural_image
Close-up of a hand using a tool to adjust or install a mechanical component (no visible text or symbols)
natural_image
Close-up of a hand holding a mechanical clamp and spring scale component (no text or symbols visible)natural_image
Close-up of a hand using a wrench to adjust a mechanical clamp against a vertical rod (no text or symbols visible)natural_image
Close-up of a hand adjusting a mechanical clamp or bracket component (no visible text or symbols)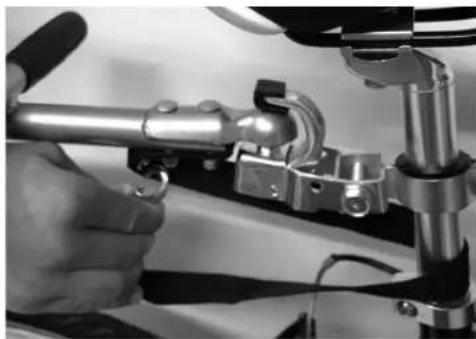
natural_image
Close-up of a hand using a metallic tool to adjust a mechanical component (no visible text or symbols)Złożona przyczepka