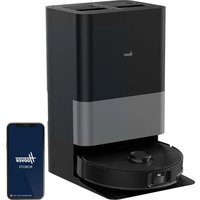
HVRPWR CH93619 - Vacuum Cleaner HOOVER - Free user manual and instructions
Find the device manual for free HVRPWR CH93619 HOOVER in PDF.

User questions about HVRPWR CH93619 HOOVER
0 question about this device. Answer the ones you know or ask your own.
Ask a new question about this device
Download the instructions for your Vacuum Cleaner in PDF format for free! Find your manual HVRPWR CH93619 - HOOVER and take your electronic device back in hand. On this page are published all the documents necessary for the use of your device. HVRPWR CH93619 by HOOVER.
USER MANUAL HVRPWR CH93619 HOOVER
natural_image
Black commercial vacuum cleaner with attached hose and brand logo (no visible text or symbols on device body)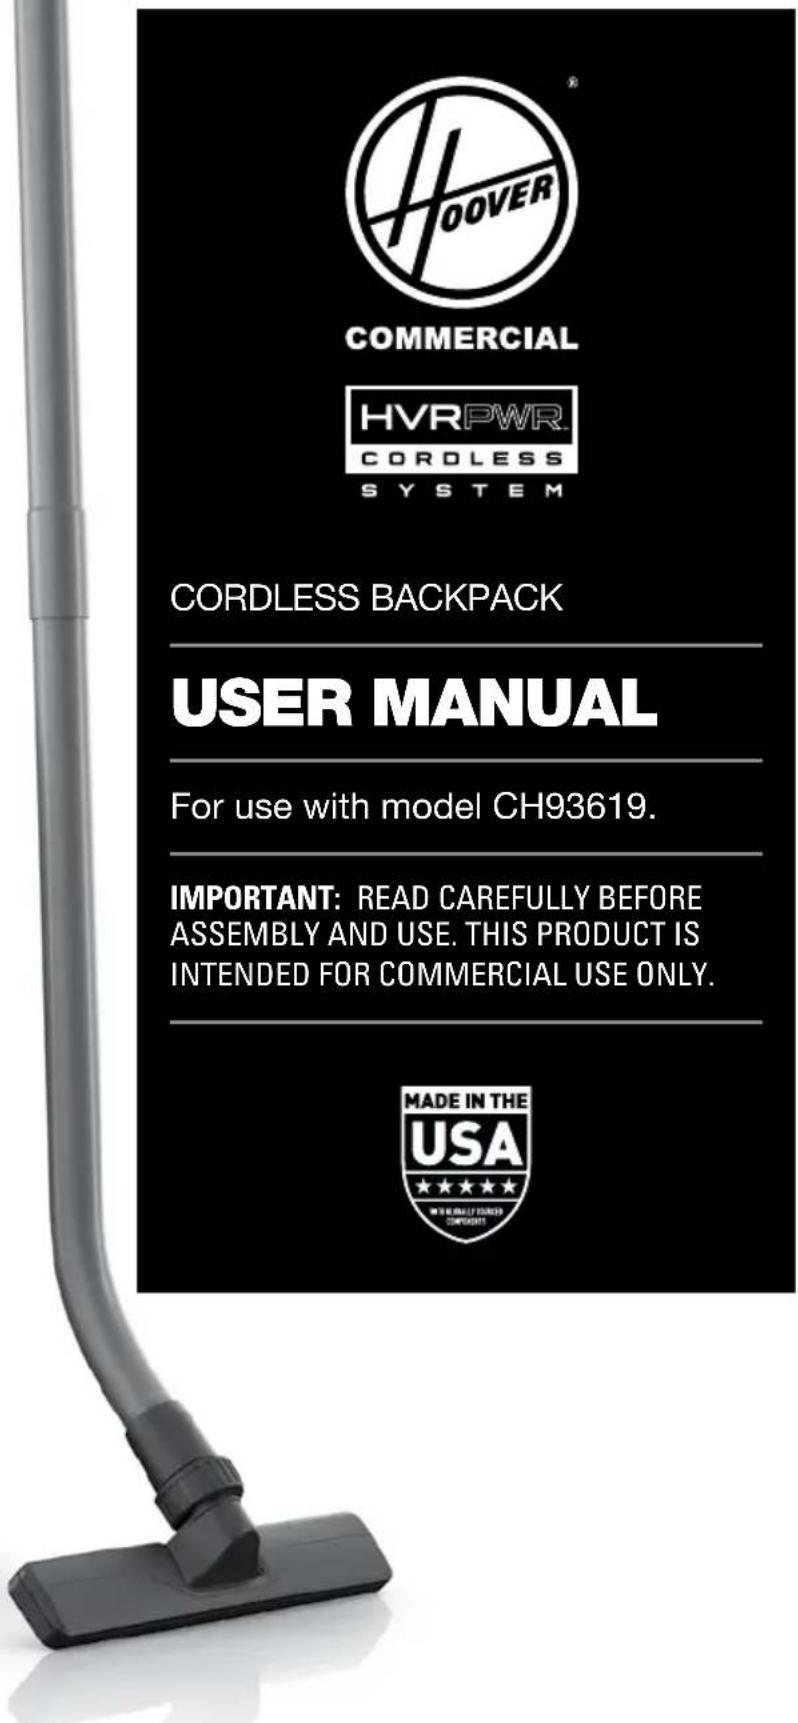
text_image
HOVER COMMERCIAL HVRPWR. CORDLESS SYSTEM CORDLESS BACKPACK USER MANUAL For use with model CH93619. IMPORTANT: READ CAREFULLY BEFORE ASSEMBLY AND USE. THIS PRODUCT IS INTENDED FOR COMMERCIAL USE ONLY. MADE IN THE USA ★★★★★ ★★★★★ ★★★★★ ★★★★★ ★★★★★
text_image
OOVERCOMMERCIAL

SYSTEM
CORDLESS BACKPACK
USER MANUAL
For use with model CH93619.
IMPORTANT: READ CAREFULLY BEFORE ASSEMBLY AND USE. THIS PRODUCT IS INTENDED FOR COMMERCIAL USE ONLY.

Welcome.
Thank you for choosing a Hoover® Commercial product.

IF YOU NEED ASSISTANCE
Please call 1-888-768-2014 (Mon-Fri 8am-5pm EST) to speak with a customer service representative; or visit our website at HooverCommercial.com.
Table of Contents
Safety Instructions 4-5
Product Features 6-7
Getting Started 8
Assembling Wand & Attaching The Tools 8
Harness Ergonomics & Height Adjustment 9
Using Your HVRPWR™ 40v Cordless Backpack 10
Wearing the HVRPWR™ 40v Backpack Vacuum 11
HVRPWR™40v Battery & Charger 12-13
Maintenance 14
How To Replace The Filter Bag 15
Filters 16-17
Troubleshooting 18
Warranty 19
Español 21
Français 39
IMPORTANT SAFETY INSTRUCTIONS SAVE THESE INSTRUCTIONS!
IMPORTANT: READ CAREFULLY BEFORE ASSEMBLY AND USE. WHEN USING AN ELECTRICAL APPLIANCE, BASIC PRECAUTIONS SHOULD ALWAYS BE FOLLOWED, INCLUDING THE FOLLOWING: READ ALL INSTRUCTIONS BEFORE USING THIS APPLIANCE.
WARNING: TO REDUCE THE RISK OF FIRE, ELECTRIC SHOCK, OR INJURY: NEVER EXPOSE YOUR BATTERY PACK, VACUUM CLEANER, OR CHARGER TO WATER, MOISTURE, OR FLUIDS, INCLUDING BUT NOT LIMITED TO CORROSIVE OR CONDUCTIVE FLUIDS, OR ALLOW FLUIDS TO FLOW INSIDE THESE ITEMS.
Corrosive or conductive fluids, such as salt water, chlorine, certain industrial chemicals, and bleach or bleach containing products, etc., can cause a short circuit in the battery pack. If your battery pack is exposed to a corrosive or conductive fluid, do not attempt to use or charge the battery pack and immediately perform the following steps:
Wear appropriate personal protective equipment, including eye protection and rubber gloves.
Place your exposed battery pack in a large bucket, such as a 5 gallon or similar bucket, and fill the bucket with regular tap water.
Do not place more than two packs in the bucket.
Locate the bucket outdoors in an area inaccessible to children and pets and away from all buildings, garages/sheds, structures, vehicles, and combustible/flammable materials.
Leave the battery pack(s) in the bucket filled with tap water and call Customer Service at 1-888-768-2014 for additional instructions on the proper disposal of the exposed battery pack(s).
- Fully assemble before operating.
- Do not use the unit, store or charge battery outdoors or on wet surfaces. Do not allow charger to get wet.
- The charger is for indoor use only. Be sure to always keep the battery and charger in a dry place.
- Do not allow to be used as a toy. Not intended for use by children age 12 and under. Close supervision is necessary when used near children. To avoid injury or damage, keep children away from product, and do not allow children to place fingers or other objects into any openings.
- Use only as described in this manual. Use only Hoover Commercial's recommended attachments and products.
- Do not use charger with damaged cord or plug. If appliance or charger is not working as it should, has been dropped, damaged, left outdoors, or dropped into water, call customer service at 1.888.768.2014 prior to continuing use.
- Do not pull or carry charger by cord, use cord as a handle, close a door on cord, or pull cord around sharp edges or corners. Do not place product on cord. Do not run appliance over cord. Keep cord away from heated surfaces.
- Do not unplug charger by pulling on cord. To unplug charger, grasp the plug, not the cord.
- Do not handle charger — including charger plug and charger terminals, or appliance — with wet hands.
- Do not incinerate the charger, battery, or appliance even if it is severely damaged. The batteries can explode in a fire.
- Do not put any object into ventilation openings. Do not use with any opening blocked; keep free of dust, lint, hair, and anything that may reduce air flow.
- Dress properly. Do not wear loose clothing or jewelry. Contain long hair. Keep hair, loose clothing, fingers, and all parts of body away from openings and moving parts. Loose clothing, jewelry, or long hair can be caught in internal moving parts.
- Use extra care when cleaning on stairs. To avoid personal injury or damage, and to prevent the cleaner from falling, always place cleaner at bottom of stairs or on floor. Do not place cleaner on stairs or furniture, as it may result in injury or damage.
- This product includes rechargeable lithium-ion batteries. Do not expose batteries to high temperatures, as they may catch fire and/or explode.
- Do not expose battery to crushing, incineration or similar actions.
- Do not dispose of battery in a fire or trash compactor. See battery disposal section for directions.
- Do not attempt to disassemble battery.
- Unplug the charger from the outlet before any routine cleaning or maintenance.
- Leaks from battery cells can occur under extreme conditions. If any liquid gets on the skin wash quickly with soap and water. If any liquid gets into the eyes, do not rub eyes, immediately flush them with clean water continuously for a minimum of 15 minutes. Seek medical attention immediately.
- Recharge only with the charger (Hoover Commercial Part #CH07150) supplied by Hoover Commercial to recharge. A charger that is suitable for one type of battery pack may create a risk of injury and fire when used with another battery pack.
- Use only the battery (Hoover Commercial Part # CH27260, CH17360) supplied by Hoover Commercial. Use of any other battery packs may create a risk of injury and fire.
- Do not touch or insert objects into battery pack or charger terminals.
-
Do not attempt to short circuit the battery or charger terminals.
-
Do not use to pick up flammable or combustible liquids, such as gasoline, or fine wood sandings, or use in areas where they may be present.
- NEVER vacuum materials that are burning or smoking, such as hot coals, cigarette butts, matches, or hot ashes etc.
- Do not use without Filters and/or Dust Bag in place.
- Prevent unintentional starting. Ensure the switch is in the off-position before connecting to battery pack, picking up or carrying the appliance. Carrying the appliance with your finger on the switch or energizing appliance that has the switch on invites accidents.
• Always remove the battery pack from the appliance before making any adjustments, changing accessories, storing product, cleaning or when not in use. Removing battery pack will prevent accidental starting that could cause serious personal injury. - When battery pack is in use, keep it away from other metal objects, like paper clips, coins, keys, nails, screws, or other small metal objects, that can make a connection from one terminal to another. Shorting the battery terminals together may cause burns or a fire.
- Under abusive conditions, liquid may be ejected from the battery; avoid contact. If contact accidentally occurs, flush with water. If liquid contacts eyes, additionally seek medical help. Liquid ejected from the battery may cause irritation or burns.
- Do not use a battery pack or appliance that is damaged or modified. Damaged or modified batteries may exhibit unpredictable behavior resulting in fire, explosion or risk of injury.
- Do not expose battery pack or appliance to fire or excessive temperature. Exposure to fire or temperature above 265^ (130°C) may cause explosion.
- Follow all charging instructions and do not charge the battery pack or appliance outside of the temperature range specified in the instructions. Charging improperly or at temperatures outside of the specified range may damage the battery and increase the risk of fire.
- Have servicing performed by a qualified repair person using only identical replacement parts. This will ensure that the safety of the product is maintained.
- Do not modify or attempt to repair the appliance or the battery pack except as indicated in the instructions for use and care.
CAUTION: TO REDUCE THE RISK OF DAMAGE:
- Avoid picking up hard, sharp objects with this product, as they may cause damage.
- Do not expose machine to freezing temperatures.
- Do not use sharp objects to clean out hose as they can cause damage.
WARNING: TO REDUCE THE RISK OF ELECTRIC SHOCK, THE CHARGER HAS A POLARIZED PLUG (ONE BLADE IS WIDER THAN THE OTHER). THIS PLUG WILL FIT IN A POLARIZED OUTLET ONLY ONE WAY. IF THE PLUG DOES NOT FIT FULLY IN THE OUTLET, REVERSE THE PLUG. IF IT STILL DOES NOT FIT, CONTACT A QUALIFIED ELECTRICIAN TO INSTALL THE PROPER OUTLET. DO NOT CHANGE THE PLUG IN ANY WAY.
BATTERY DISPOSAL WARNING: RISK OF EXPLOSION OR EXPOSURE TO TOXIC MATERIAL.
CAUTION:
CAUTION. The battery used in this device may present a risk of fire or chemical burn if mistreated. Do not disassemble, heat above manufacturer's maximum temperature limit (40°C/104°F), or incinerate. Replace battery with Hoover Commercial Battery Part #CH27260, CH17360 only. Use of another battery may present a risk of fire or explosion. Dispose of used battery promptly. Keep away from children. Do not disassemble and do not dispose of in fire. Do not attempt to disassemble the battery or remove any component projecting from the battery terminals. The battery and charger have no user serviceable parts. Fire or injury may result. Prior to disposal, protect exposed terminals with heavy insulating tape to prevent shorting.
LITHIUM-ION BATTERIES: The battery must be collected, recycled or disposed of in an environmentally sound manner. The EPA certified RBRC Battery Recycling Seal on the lithium-ion (Li-ion) battery indicated Techtronic Industries, a corporate affiliate of Hoover Commercial, is voluntarily participating in an industry program to collect and recycle these batteries at the end of their useful life, when taken out of service in the United States or Canada. The RBRC program provides a convenient alternative to placing used Li-ion batteries into the trash or the municipal
waste stream, which may be illegal in your area. Please visit www.rbrc.org/call2recycle/ for information on Li-ion battery recycling and disposal bans/restrictions in your area. Hoover Commercial involvement in this program is part of our commitment to preserving our environment and conserving our natural resources.

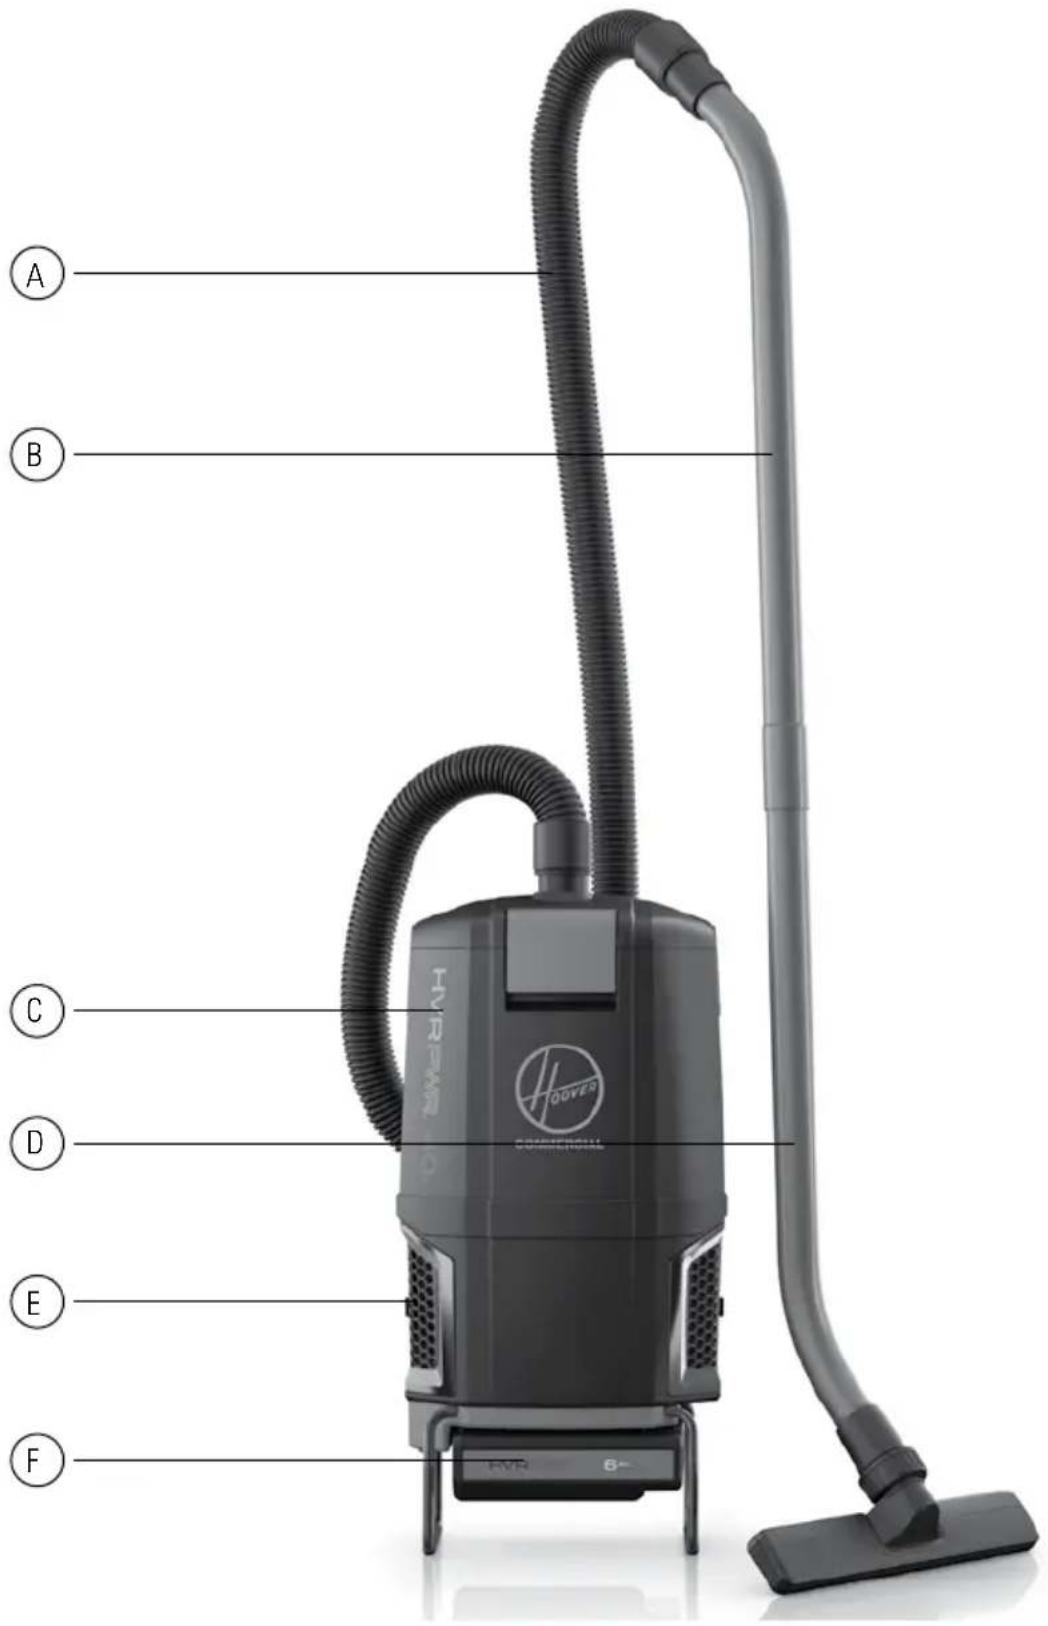
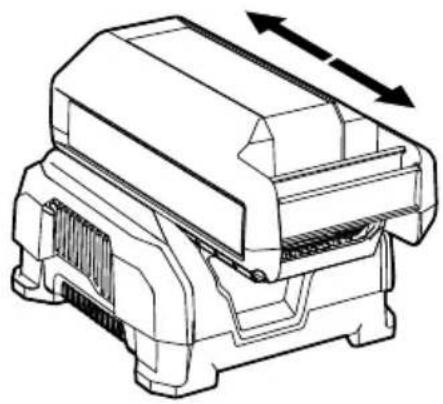
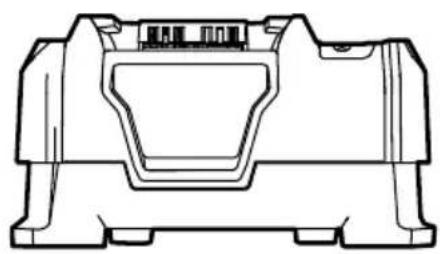
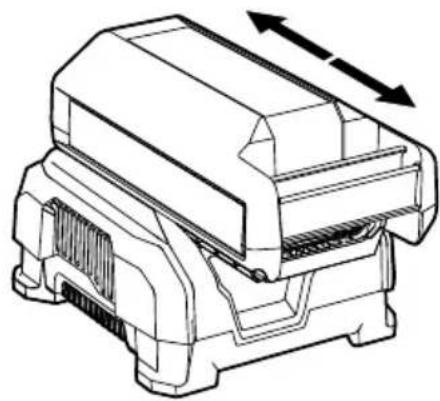
Product Features
A Hose
B Upper Wand
C Vacuum Assembly
• Allergen Filter Bag
• Cloth Filter Bag
• HEPA Media Filter
D Lower Wand
E Final Filters
• HEPA Media Filters
• Hexaguard™ Filters
F HVRPWR™ 40V Li-ion Battery*
G HVRPWR™ 40V Charger*
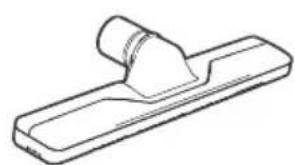
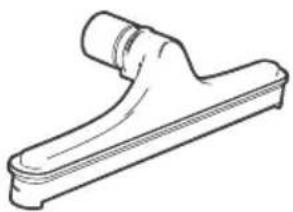
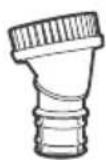
Tools
natural_image
Line drawing of a mechanical clamp or bracket (no text or symbols)Carpet Tool Hard Floor Tool
natural_image
Line drawing of a mechanical component with a curved handle and flange (no text or symbols)
Crevice Tool
Dusting Brush
text_image
A B C D E F HOOVER Commercial FVR 6+
text_image
HVR 6" F GAssembling Wand & Attaching The Tools
CAUTION:
NOT TO BE USED FOR GROOMING A PET. FULLY ASSEMBLE PRODUCT PRIOR TO USE.
natural_image
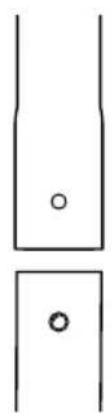
Simple line drawing of two vertical panels with circular holes, no text or symbols present1 Align the small silver button on the lower wand with the small opening on the upper wand.
natural_image
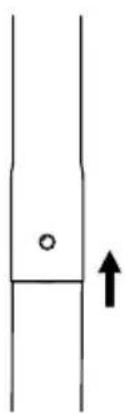
Simple line drawing of a vertical pipe or channel with a small circular mark and an upward arrow (no text or symbols)2 Insert lower wand into upper wand until small button clicks into the small opening.
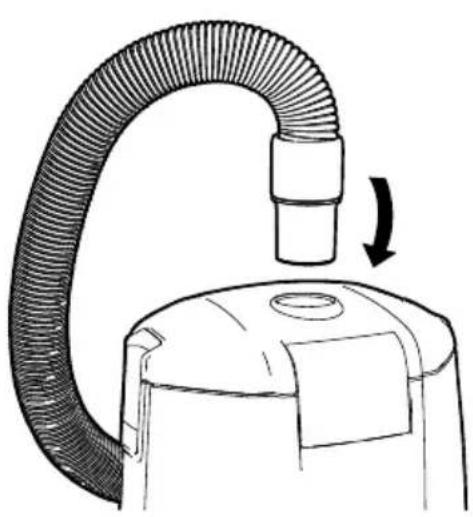
natural_image
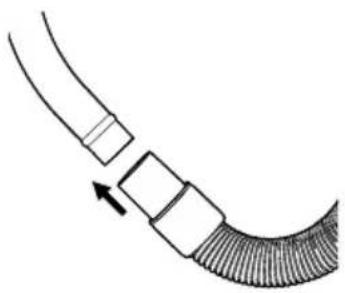
Diagram of a curved pipe with segmented sections and an arrow indicating direction (no text or symbols)3 Firmly push hose end over the open end of the upper wand past the raised ring.
natural_image
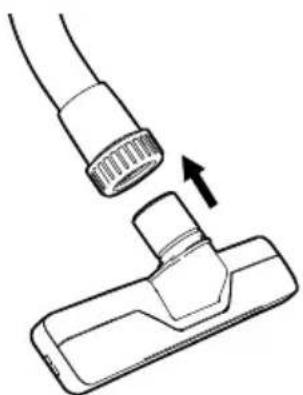
Diagram of a hairdryer tool interacting with a cable, showing a change in the tip (no text or symbols present)4 To use the floor tools, loosen the cuff on the lower wand by twisting counterclockwise without removing the cuff completely. Insert the floor tool into the cuff and align the metal ring with the groove in the tool. Tighten cuff by twisting clockwise.
Harness Ergonomics & Height Adjustment
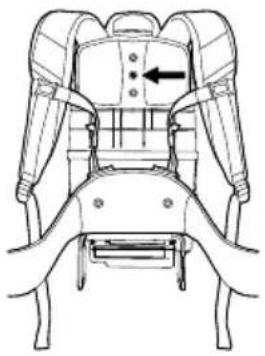
NOTE: The Harness has been designed and engineered to accommodate a wide range of users and can be adjusted to fit, according to height. The Upper Harness should sit between the shoulder blades for a comfortable fit. The backpack is shipped with the Upper Harness positioned with the center hole mounted to the middle Height Adjustment Boss.
natural_image
Technical line drawing of a mechanical seat assembly with no visible text or symbols1 To adjust the Upper Harness, use a Phillips screwdriver to remove the screw from the Height Adjustment Boss.
natural_image
Technical line drawing of a mechanical device with no visible text or symbols2 Move the Upper Harness and fully tighten screw into the correct Height Adjustment Boss.
natural_image
Technical line drawing of a mechanical seat assembly with no visible text or symbolsFor shorter users, move to the top Height Adjustment Boss downward.
natural_image
Technical line drawing of a mechanical seat assembly with no visible text or symbolsFor taller users move the lowest height adjustment boss upward.
| Setting User Height Adjustment | ||
| Setting 1 5'2"≤ | Slide top height adjustment boss all the way to bottom | |
| Setting 2 5'3"-5'6" | Slide top height adjustment boss to second lowest setting | |
| Setting 3 5'7"-5'10" | Middle adjustment boss should be directly in the center | |
| Setting 4 5'11"-6'2" | Slide bottom height adjustment boss to second highest setting | |
| Setting 5 6'3"> | Slide bottom height adjustment boss all the way to the top | |
Using Your HVRPWR™ 40v Backpack
NOTE: Do not use vacuum without both filter bag and HEPA filters in place.
AMBIENT TEMPERATURE RANGE: 0 °C - 40 °C (32 °F - 104 °F)
natural_image
Line drawing of a vacuum cleaner with a curved tube and arrow indicating motion (no text or symbols)1 Insert hose end firmly into hose inlet.
natural_image
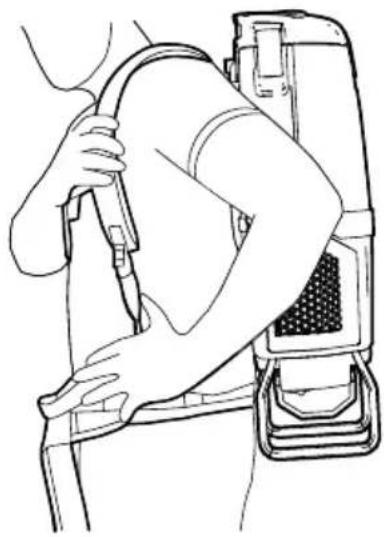
Line drawing of a person using a medical device to lift a patient's arm (no text or symbols present)2 Loosen shoulder straps then lift backpack, sliding both arms through shoulder straps.
natural_image
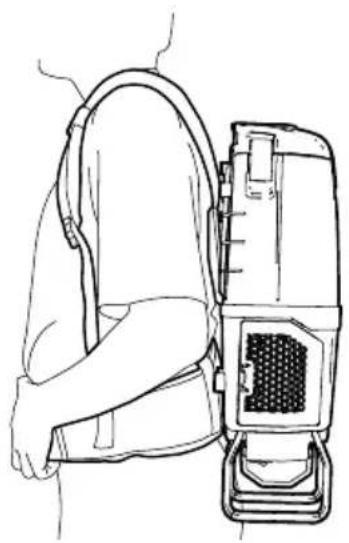
Line drawing of a person wearing a backpack and holding a portable device (no text or symbols)3 Position lower rear pad into the small of back so that weight of machine is resting on the hips, and not shoulders.
Wearing the HVRPWR™ 40v Backpack Vacuum
NOTE: The ergonomic harness is designed to easily identify the steps for wearing the backpack correctly.
natural_image
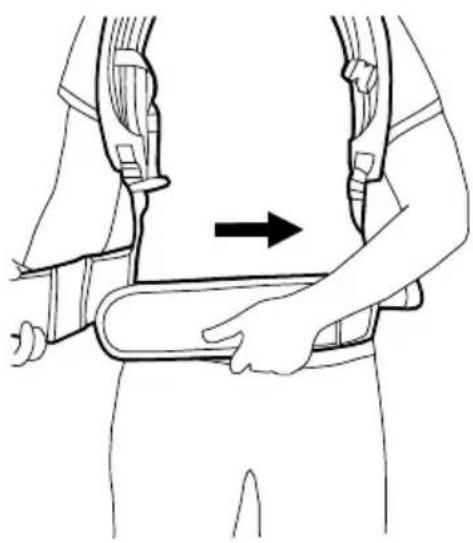
Line drawing of a person wearing a seatbelt with an arrow indicating direction (no text or symbols)1 Tighten waist strap until secure and comfortable. NOTE: Should you require additional length, the extension belt can be placed between belt ends and adjusted to desired length.
natural_image
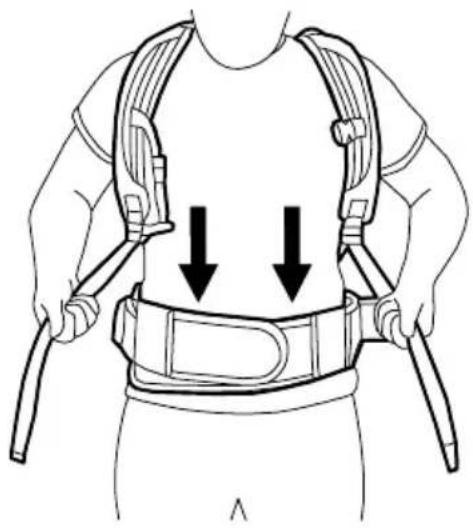
Line drawing of a person wearing a full-body medical harness with two downward arrows indicating compression or pressure points (no text or symbols present)2 Pull down on ends of shoulder straps until upper harness touches shoulder blades. Nearly all weight of machine should be on hips. You should be able to easily slide your finger between each strap and shoulder. Retighten waist band if necessary.

natural_image
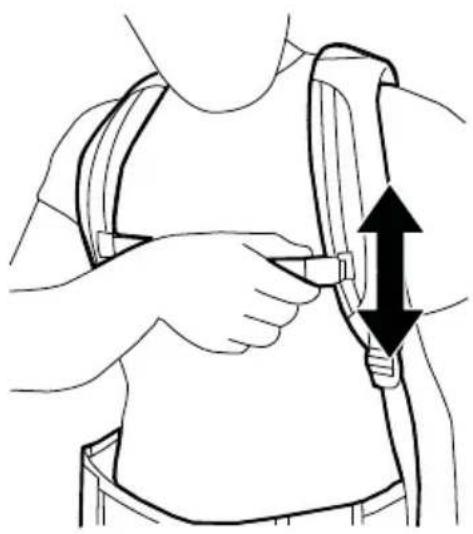
Illustration of a person adjusting a belt buckle, showing hands and a right-pointing arrow (no text or symbols)3 Connect the sternum strap buckle and tighten or loosen as needed.
natural_image
Illustration of a person adjusting a belt buckle, showing two hands and a double-headed arrow indicating upward motion (no text or symbols)4 Slide sternum straps up or down for adjustment.
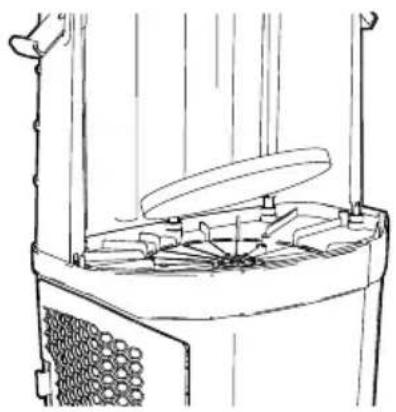
HVRPWR™ 40v Battery & Charger (Sold Separately)
NOTE: Batteries are shipped in a low charge condition to prevent possible problems. You should charge them before first use.
CHARGING AMBIENT TEMPERATURE RANGE: 5 °C – 40 °C (41 °F – 104 °F)
natural_image
Technical line drawing of a mechanical component with two directional arrows indicating movement (no text or symbols)1 To charge the battery, slide battery into charger. Push backward until battery clicks into place and LED Status Indicator is lit.
natural_image
Technical line drawing of a mechanical housing component (no text or symbols)2 Charger LED Status Indicator will turn green when battery is fully charged. If the charger flashes red and green, an error has occurred. Remove and replace battery.

text_image
HVRPWR.3 When charging, the fully lit LEDs on the battery will indicate charge level.
natural_image
Technical line drawing of a mechanical component with directional arrows indicating movement (no text or symbols)4 To remove battery, press the release button and slide battery forward while holding down on charger base.
HVRPWR™ 40v Battery & Charger (Sold Separately)
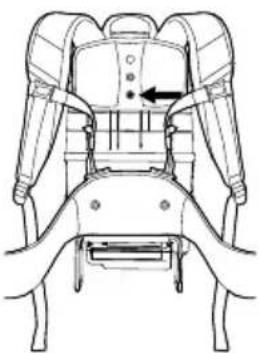
natural_image
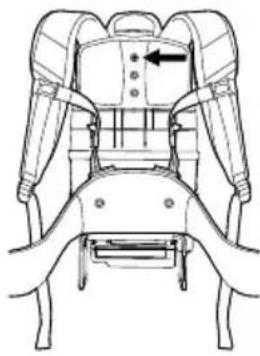
Line drawing of a mechanical device with a base and side legs, showing no text or symbols.1 Insert battery into housing by grasping the integrated handle and pushing firmly in until battery locks into place.
natural_image
Line drawing of a portable electronic device with two legs and a side-mounted connector, no text or symbols present3 To remove battery, grasp the integrated handle while pressing the handle release. Slide out from housing by pulling while holding down release button.
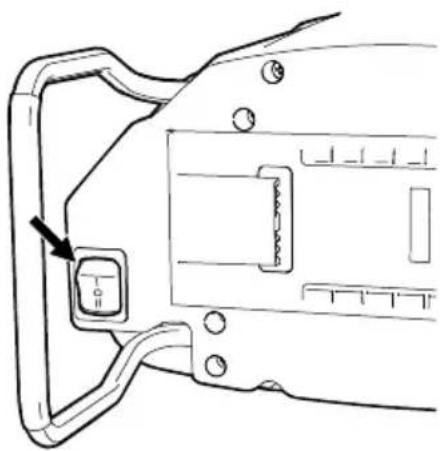
natural_image
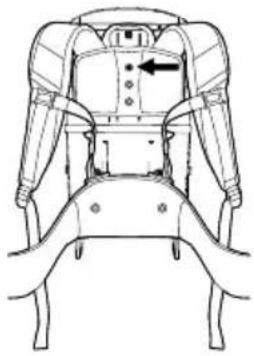
Technical line drawing of a mechanical component with a highlighted section and mounting holes (no text or symbols)2 Press orange switch to power up the unit.
I (HUSH): Hush™ mode quiet cleaning.
II (BOOST): High traffic area cleaning.
(0) OFF: Turn off by returning switch to center position.
Maintenance
Any other servicing should be done by an authorized service representative.
THERMAL PROTECTOR STATEMENT
A thermal protector has been designed into your cleaner to protect it from overheating.
When the thermal protector activates the cleaner it will stop running.
If this happens proceed as follows:
- Turn cleaner OFF and remove battery pack.
- Check fullness of bag, change if needed.
- Inspect the air path for any obstructions. Clear obstructions if present.
- When battery pack is removed and motor cools for 30 minutes, the thermal protector will deactivate and cleaning may continue.
If the thermal protector continues to activate after following the above steps, your cleaner needs servicing.
WARNING:
TO REDUCE THE RISK OF PERSONAL INJURY: REMOVE BATTERY BEFORE CLEANING
OR SERVICING. IF APPLIANCE OR CHARGER IS NOT WORKING AS IT SHOULD, HAS BEEN DROPPED, DAMAGED, LEFT OUTDOORS, OR
DROPPED INTO WATER, CALL CUSTOMER SERVICE AT 1.888.768.2014 PRIOR TO CONTINUING USE
NOTE: When using the vacuum to pick up very fine dust, such as sawdust or drywall dust, it will be necessary to replace the bag and clean the filters at more frequent intervals to maintain maximum suction. Fine dust will clog bag pores and reduce suction, prior to bag becoming full.
natural_image
Line drawing of a mechanical device with a top component and side legs (no text or symbols)1 Check filter bag. Change, if full.
natural_image
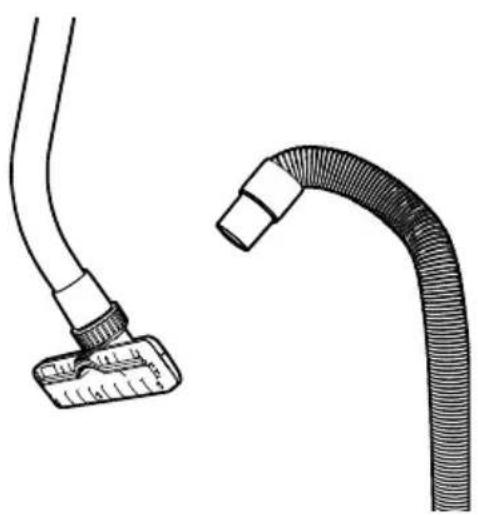
Illustration of two medical tubing components: a flexible tube with flange and a thick curved tube (no text or symbols)2 Check for clogs in nozzle, wand, hose, and bag inlet. Clear any obstructions.
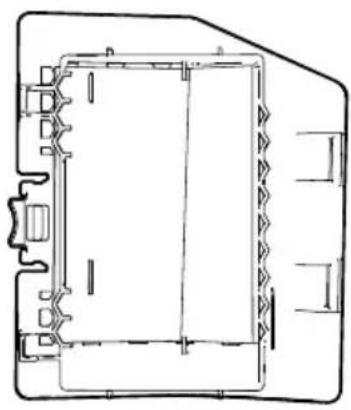
How To Replace The Filter Bag
WARNING:
TO REDUCE THE RISK OF PERSONAL INJURY: REMOVE BATTERY BEFORE CLEANING
OR SERVICING.
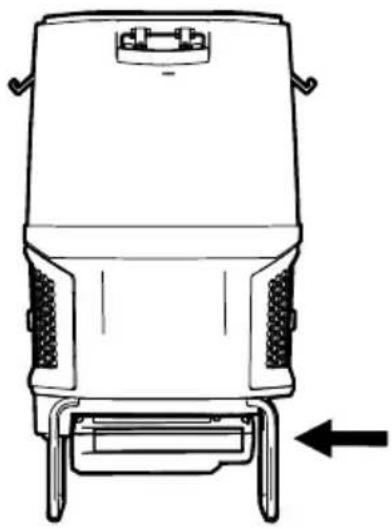
natural_image
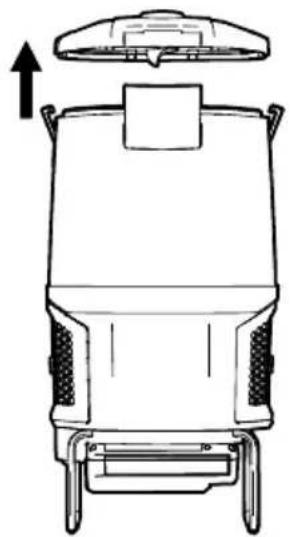
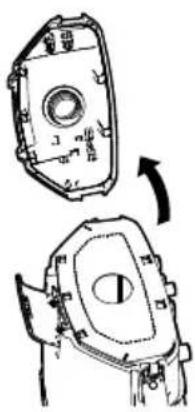
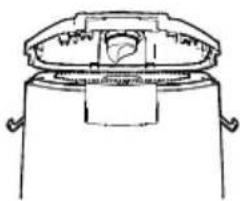
Technical line drawing of a mechanical component with two views (top and side), no visible text or symbols1 Open top cover by unlocking the 3 latches.
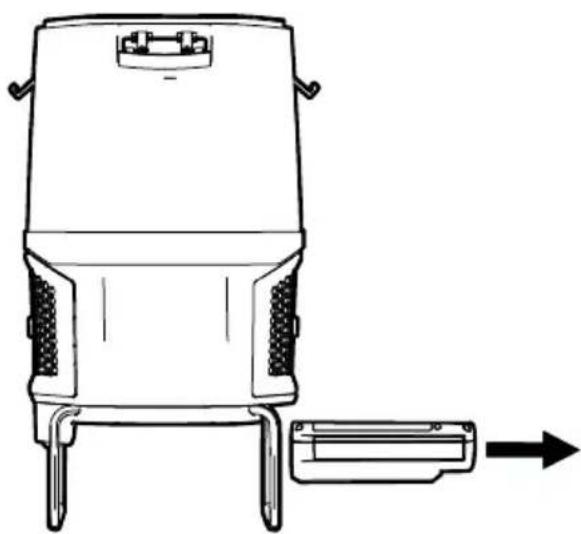
natural_image
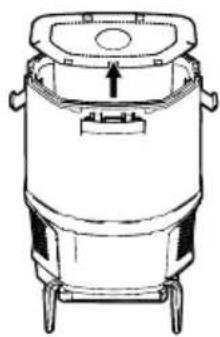
Line drawing of a cylindrical industrial vessel with mounting feet and a central lid (no text or symbols)2 Lift out Filter bag.
natural_image
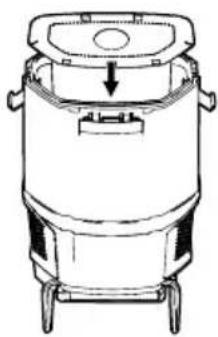
Line drawing of a cylindrical industrial vessel with a downward arrow indicating flow or movement (no text or symbols)3 Insert new bag by aligning the tabs into the opening in the cardboard collar.
natural_image
Line drawing of a mechanical component with a central housing and two side handles (no text or symbols)4 Replace top cover and secure latches.
Filters
WARNING:
TO REDUCE THE RISK OF PERSONAL INJURY — REMOVE BATTERY BEFORE CLEANING
OR SERVICING. DO NOT OPERATE VACUUM WITHOUT BOTH INLET FILTER AND FINAL FILTERS IN PLACE.
HEPA MEDIA FINAL FILTER
The final filters assist in the filtration process to return cleaner air to the room. There are 2 HEPA Filters, one on each side of the backpack.
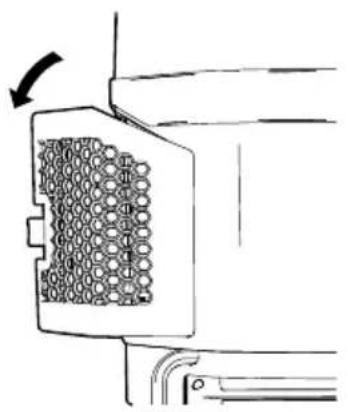
natural_image
Diagram of a mechanical component with a grid-like pattern and an arrow indicating rotation (no text or symbols)1 Remove filter door by pulling rear tab forward and rotating out.
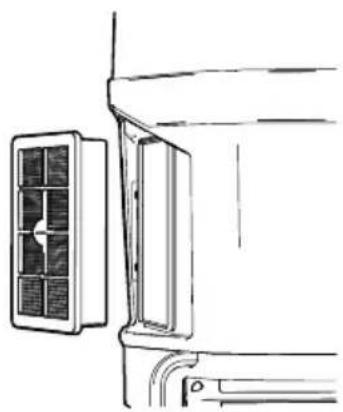
natural_image
Line drawing of a wall-mounted air conditioner unit with cooling panel and ventilation slots (no text or symbols)2 Pull filter out by the frame. Hand rinse in cold water under low pressure. Rinse only surface facing inside of machine. Let dry for 24 hours and reposition into the filter housing.
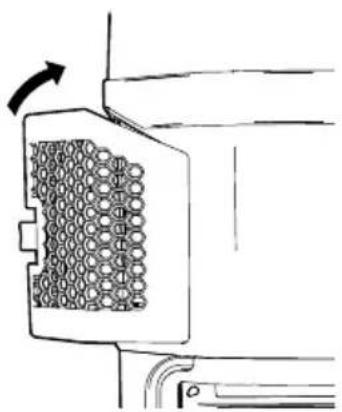
natural_image
Diagram of a mechanical component with a grid-patterned inner area and directional arrow (no text or symbols)3 To replace filter door, align the two forward facing tabs and rotate into place. Press rear tab until door snaps into place.
IMPORTANT:
ALLOW FILTER TO DRY COMPLETELY BEFORE REPLACING. DRY FILTER ON
EDGE SO AIR CIRCULATES ON BOTH SIDES OF FILTER. THIS MAY TAKE UP TO 24 HOURS.

REPLACEMENT FILTER
Inspect HEPA Media Final Filter every month, rinsing when necessary. Check for wear of media and replace if pleats are damaged. Change filter regularly to maintain maximum performance.
HEPA Media Final Filter 2 Pack Part No. AH40006
WARNING:
TO REDUCE THE RISK OF PERSONAL INJURY — REMOVE BATTERY BEFORE CLEANING
OR SERVICING. DO NOT OPERATE VACUUM WITHOUT BOTH INLET FILTER AND FINAL FILTERS IN PLACE.
HEXAGUARD™ ACTIVATED CARBON FILTER
natural_image
Technical line drawing of a mechanical component or housing (no text or symbols)1 The HexaGuard™ Filters are located on the inside of the filter door. Pull to remove.
INLET FILTER
The inlet filter is located on the inside, bottom of bag housing and protects the motor from damage.
natural_image
Line drawing of a mechanical device with a central rotating knob and surrounding components (no text or symbols)1 If the filter becomes dirty, pull off the grill and lift out the filter. Hand rinse in cold water under low pressure. Let filter dry for 24 hours. Reposition dry filter and snap grill into place.
IMPORTANT:
ALLOW FILTER TO DRY COMPLETELY BEFORE REPLACING. DRY FILTER ON
EDGE SO AIR CIRCULATES ON BOTH SIDES OF FILTER. THIS MAY TAKE UP TO 24 HOURS.

REPLACEMENT FILTER
Replace HexaGuard™
Filter yearly for optimum
performance.
Part No. 440009176

REPLACEMENT FILTER
Inspect Inlet Filter every
2 weeks to keep vacuum
running at peak performance.
Part No. 440009175
LUBRICATION
The motor is equipped with bearings which contain sufficient lubrication for its lifetime.
The addition of lubrication could cause damage. Do not add lubrication to motor.
Troubleshooting
WARNING TO REDUCE THE RISK OF PERSONAL INJURY: REMOVE BATTERY BEFORE CLEANING OR SERVICING. IF APPLIANCE IS NOT WORKING AS IT SHOULD, HAS BEEN DROPPED, DAMAGED, LEFT OUTDOORS, OR DROPPED INTO WATER, TAKE IT TO A SERVICE CENTER PRIOR TO CONTINUING USE.
Any other servicing should be done by an authorized service representative.
STORAGE: Always remove the battery pack before storing the charger or any time the charger is unplugged.
| CHARGER | RED LED | GREEN LED | ORANGE LED | ACTION | |
 | Power On | ||||
| Without battery pack | ON OFF | OFF | Ready to charge battery pack. | ||
 | Testing | ||||
| Hot battery pack | OFFOFF | ON | When battery pack reaches cooled temperature, charger begins charge mode. | ||
 | Battery pack | When battery pack reaches warmed temperature, charger begins charge mode. | |||
| Deeply discharged | Charger conditions battery until normal voltage is reached, then begins charge mode. | ||||
 | Error | ||||
 | Flashing | Flashing | OFF | Battery pack or charger is damaged or faulty. | |
| • Error, try to repeat the conditions a second time by removing and reinstalling the battery pack. If the LED status repeats a second time, try charging a different battery.• If a different battery charges normally, dispose of the pack (see BATTERY DISPOSAL section).• If a different battery also indicates "Error," the charger may be damaged or faulty. | |||||
 | Charging | ||||
 | Arging | OFF | Flashing | OFF | Battery is being charged. |
 | Ready | ||||
 | Full | OFF | ON | OFF | Charging is complete. |
- Error, try to repeat the conditions a second time by removing and reinstalling the battery pack. If the LED status repeats a second time, try charging a different battery.
- If a different battery charges normally, dispose of the pack (see BATTERY DISPOSAL section).
- If a different battery also indicates "Error," the charger may be damaged or faulty.
Problem Possible Cause Possible Solution
| Vacuum won't run 1. Your battery may not be inserted properly. | 1. Make sure the battery is fully seated in battery cavity. |
| 2. Your battery may not be charged. | 2. Check the Charge Level Indicator and charge the battery if it's low. |
| 3. Your battery may be too hot. 3. | Remove battery and let cool for 30 minutes, replace battery and retry or replace with second charged battery. |
| 4. There may be internal component damage. | 4. Call for service: 1-888-768-2014 |
| Bag Check Indicator has turned red OR vacuum won't pick up OR low suction | 1. Filter Bag full and/or clogged. |
| Dust escaping from vacuum | 1. Filter Bag full. 1. Empty Filter Bag - Pg. 15. |
| 2. Filter Bag not installed correctly. | |
| 3. Hose not installed correctly. 3. Review Hose installation - Pg. 10. | |
| Wand is difficult to push or won't move forward | 1. Incorrect Floor Tool. 1. Check that the Carpet Tool is being used for carpet and Hard Floor Tool is being used for hard floors. |
2 YEAR LIMITED WARRANTY
WHAT THIS WARRANTY COVERS
When used and maintained in normal Commercial use and in accordance with the Owner's Guide your Hoover Commercial backpack is warranted against original defects in material and workmanship for 2 year limited warranty from date of purchase (the "Warranty Period"). During the Warranty Period, Hoover Commercial will provide labor and parts, at no cost to you, to correct any such defect in your CH93619 that was purchased in the United States, at a U.S. Military Exchange, or in Canada. Hoover Commercial also reserves the right to provide you with a replacement product(s) or refund, in Hoover Commercial's discretion, in order to satisfy the terms of this warranty.
HOW TO MAKE A WARRANTY CLAIM
If this product is not as warranted, take or send the product to a Hoover ^® Commercial Authorized Warranty Service Dealer along with proof of purchase. For an automated referral to authorized service outlets, phone: 1-888-768-2014OR visit Hoover ^® Commercial online at www.hoovercommercial.com. For additional assistance or information concerning this Warranty or the availability of warranty service outlets, phone 1-888-768-2014 Mon-Fri 8am-5pm EST.
WHAT THIS WARRANTY DOES NOT COVER
Certain parts for your Hoover® Commercial product require replacement in the ordinary course of use due to normal wear. These items include belts, agitator roll sleeves, agitator bearings, brushes, bags, filters and bulbs. These parts are not covered by this Warranty. This Warranty also does not cover: improper maintenance of the product, damage due to misuse, acts of God, nature, vandalism or other acts beyond the control of Hoover® Commercial, owner's acts or omissions, use outside the country in which the product was initially purchased, resale of the product by the original owner, defects or damages caused by repair or alteration by anyone other than an Authorized Hoover® Commercial Warranty Service Dealer. Hoover® Commercial reserves the right to inspect any alleged defective product and make final decisions on any warranty claim. This warranty does not cover pick up, delivery, transportation or house calls. However, if you mail your product to a Hoover® Commercial Authorized Warranty Service Dealer for warranty service, cost of shipping will be paid one way.
OTHER IMPORTANT TERMS
This Warranty is not transferable and may not be assigned. This Warranty shall be governed and construed under the laws of the state of North Carolina. The Warranty Period will not be extended by any replacement or repair performed under this Warranty. THIS WARRANTY IS THE EXCLUSIVE WARRANTY AND REMEDY PROVIDED BY HOOVER® COMMERCIAL. ALL OTHER WARRANTIES, EXPRESSED OR IMPLIED, INCLUDING WARRANTIES OF MERCHANTABILITY OR FITNESS FOR PARTICULAR PURPOSE, ARE DISCLAIMED. IN NO EVENT WILL HOOVER® BE LIABLE FOR ANY SPECIAL, INDIRECT, INCIDENTAL OR CONSEQUENTIAL DAMAGES OF ANY KIND OR NATURE TO OWNER OR ANY PARTY CLAIMING THROUGH OWNER, WHETHER BASED IN CONTRACT, NEGLIGENCE, TORT OR STRICT PRODUCTS LIABILITY OR ARISING FROM ANY CAUSE WHATSOEVER. Some states do not allow the exclusion of consequential damages, so the above exclusion may not apply to you. This warranty gives you specific rights; you may also have others that vary from state to state.
MANUAL DEL USUARIO
natural_image
Two technical line drawings of a mechanical component, possibly a tool or bracket, shown in side and top views (no text or symbols present)text_image
A B C D E F HOOVER Commercial FVR 6+
text_image
HVR 6" F GCARACTERÍSTICAS DEL PRODUCTO
natural_image
Simple line drawing of two vertical panels with circular holes, no text or symbols presentnatural_image
Simple line drawing of a vertical pipe or channel with a small circular mark and an upward arrow (no text or symbols)natural_image
Diagram of a curved pipe with internal components and an arrow indicating direction (no text or symbols)natural_image
Diagram showing a pipe fitting with a valve, no text or symbols presentnatural_image
Line drawing of a mechanical device with no visible text or symbolsnatural_image
Technical line drawing of a mechanical device with no visible text or symbolsnatural_image
Technical line drawing of a mechanical seat assembly with no visible text or symbolsnatural_image
Technical line drawing of a mechanical seat assembly with no visible text or symbolsnatural_image
Line drawing of a vacuum cleaner with a coiled hose and valve, showing airflow direction (no text or symbols)natural_image
Line drawing of a person using a medical device to interact with another person (no text or symbols present)natural_image
Line drawing of a person wearing a backpack and holding a portable device (no text or symbols)natural_image
Line drawing of a person wearing a seatbelt with an arrow indicating direction (no text or symbols)natural_image
Line drawing of a person wearing a full-body medical harness with two downward arrows indicating compression or pressure points (no text or symbols)natural_image
Illustration of a person adjusting a belt buckle, showing hands and a right-pointing arrow (no text or symbols)natural_image
Illustration of a person adjusting a belt buckle, showing two hands and a double-headed arrow indicating compression (no text or symbols)natural_image
Technical line drawing of a mechanical component with two directional arrows indicating movement (no text or symbols)natural_image
Technical line drawing of a mechanical housing component (no text or symbols)natural_image
Technical line drawing of a mechanical component with directional arrows indicating movement (no text or symbols)natural_image
Line drawing of a mechanical device with a base and side legs, showing no text or symbols.natural_image
Line drawing of a portable electronic device with two legs and a side-mounted connector, no text or symbols presentnatural_image
Technical line drawing of a mechanical component with a highlighted square and arrow (no text or symbols)natural_image
Line drawing of a mechanical device with a top component and side legs (no text or symbols)natural_image
Illustration of two medical tubing components: a flexible tube with a flat base and a thick curved tube with a flanged end (no text or symbols)natural_image
Technical line drawing of a mechanical component with two views (top and side), no visible text or symbolsnatural_image
Line drawing of a cylindrical industrial vessel with mounting feet and a central lid (no text or symbols)natural_image
Line drawing of a cylindrical industrial vessel with a downward arrow indicating force or movement (no text or symbols)natural_image
Simple line drawing of a cylindrical container with a lid and side handles (no text or symbols)natural_image
Diagram of a mechanical component with a grid-like pattern and an arrow indicating rotation (no text or symbols)natural_image
Line drawing of a wall-mounted air conditioner unit with a side panel and mounting bracket (no text or symbols)natural_image
Diagram of a mechanical component with a grid-patterned inner area and directional arrow (no text or symbols)natural_image
Technical line drawing of a mechanical component or housing (no text or symbols)natural_image
Line drawing of a mechanical device with a central lid and surrounding components (no text or symbols)text_image
A B C D E F HOOVER Commercial FVR 6+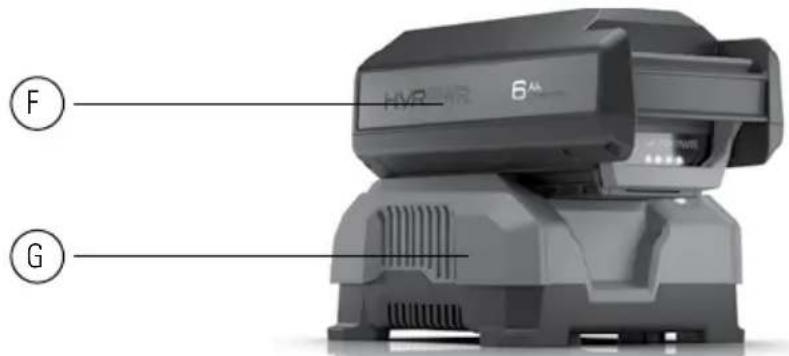
text_image
HVR 6" F GCARACTÉRISTIQUES DU PRODUIT
natural_image
Simple line drawing of two vertical panels with circular holes, no text or symbols presentnatural_image
Simple line drawing of a vertical pipe or channel with a small circular mark and an upward arrow (no text or symbols)natural_image
Diagram of a curved pipe with a shaded area and an arrow indicating direction (no text or symbols)natural_image
Diagram showing a cable being inserted into a T-shaped component with an arrow indicating the insertion direction (no text or symbols present)natural_image
Technical line drawing of a mechanical device with no visible text or symbolsnatural_image
Technical line drawing of a mechanical device with no visible text or symbolsnatural_image
Technical line drawing of a mechanical seat assembly with no visible text or symbolsnatural_image
Technical line drawing of a mechanical device with no visible text or symbolsnatural_image
Line drawing of a vacuum cleaner with a coiled hose and valve, showing airflow direction (no text or symbols)natural_image
Line drawing of a person using a medical device to interact with another person (no text or symbols present)natural_image
Line drawing of a person wearing a backpack and holding a portable device (no text or symbols)natural_image
Line drawing of a person wearing a seatbelt with an arrow indicating direction (no text or symbols)natural_image
Line drawing of a person wearing a full-body medical harness with two downward arrows indicating compression or pressure points (no text or symbols)natural_image
Illustration of a person adjusting a belt buckle, showing hands and a right-pointing arrow (no text or symbols)natural_image
Illustration of a person adjusting a belt buckle, showing two hands and a double-headed arrow indicating compression (no text or symbols)natural_image
Technical line drawing of a mechanical component with directional arrows indicating movement (no text or symbols)natural_image
Technical line drawing of a mechanical housing component (no text or symbols)natural_image
Technical line drawing of a mechanical component with directional arrows indicating movement (no text or symbols)natural_image
Line drawing of a mechanical device with a base and side legs, showing no text or symbols.natural_image
Line drawing of a portable electronic device with two legs and a side-mounted connector, no text or symbols presentnatural_image
Technical line drawing of a mechanical component with a highlighted square and arrow (no text or symbols)natural_image
Line drawing of a mechanical device with a top component and side legs (no text or symbols)natural_image
Technical line drawing of two hoses: a flexible hose with a flat base and a coiled tube with a bulb (no text or symbols)natural_image
Technical line drawing of a mechanical component with two views showing internal features (no text or symbols)natural_image
Line drawing of a cylindrical industrial vessel with mounting feet and a central lid (no text or symbols)natural_image
Line drawing of a cylindrical industrial vessel with a downward arrow indicating flow or movement (no text or symbols)natural_image
Line drawing of a mechanical component with a central housing and two side handles (no text or symbols)natural_image
Diagram of a mechanical component with a grid-like pattern and an arrow indicating rotation (no text or symbols)natural_image
Line drawing of a wall-mounted air conditioner unit with a side panel and ventilation slots (no text or symbols)natural_image
Diagram of a mechanical component with a grid-patterned inner area and an arrow indicating rotation (no text or symbols)natural_image
Technical line drawing of a mechanical component or housing (no text or symbols)natural_image
Line drawing of a mechanical device with a central lid and surrounding components (no text or symbols)REPLACEMENT DU FILTRE
Remplacez le filtre HexaGuard™