TWM 0960 - Fan Orbegozo - Free user manual and instructions
Find the device manual for free TWM 0960 Orbegozo in PDF.

User questions about TWM 0960 Orbegozo
0 question about this device. Answer the ones you know or ask your own.
Ask a new question about this device
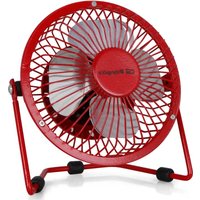
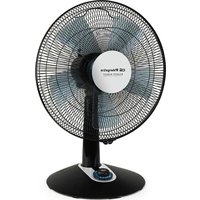
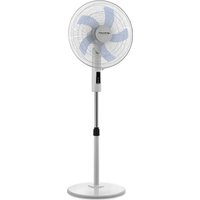
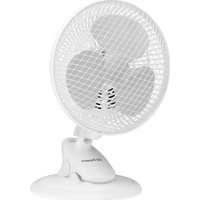
Download the instructions for your Fan in PDF format for free! Find your manual TWM 0960 - Orbegozo and take your electronic device back in hand. On this page are published all the documents necessary for the use of your device. TWM 0960 by Orbegozo.
USER MANUAL TWM 0960 Orbegozo
natural_image
White vertical electric air conditioner tower with grid grille and digital display (no text or symbols visible)TWM 0960
Sonifer,S.A.
Read this manual carefully before running this appliance and save it for reference in order to obtain the best results and ensure safe use.
text_image
A B C D E F G H Iflowchart
graph TD
    A[" fan with sun icon"] --> B[" Apagar pantalla "]
    C[" fan with power button icon"] --> D[" Velocidad del Ventilador "]
    E[" fan with smiley icon"] --> F[" ON/OF "]
    G[" fan with power button icon"] --> H[" Temporizador "]
    I[" fan with power button icon"] --> J[" Oscilación "]
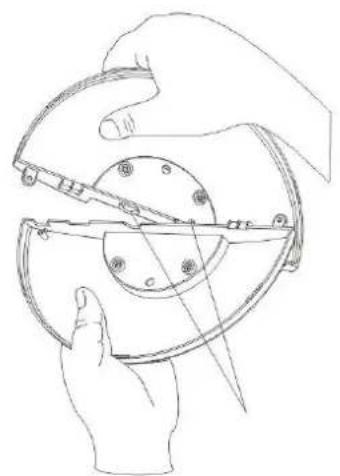
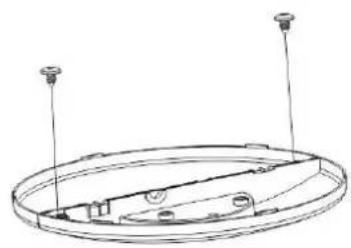
MONTAR LA BASE
natural_image
Line drawing of hands using a tool to cut or adjust a circular component, no text or symbols present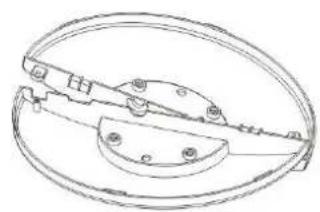
natural_image
Technical line drawing of a mechanical clamp or bracket assembly (no text or symbols)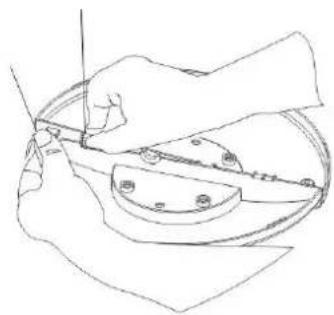
natural_image
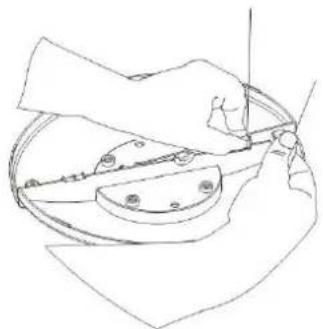
Line drawing of hands using a tool to cut or mark a circular component (no text or symbols)Paso 2
Paso 1
natural_image
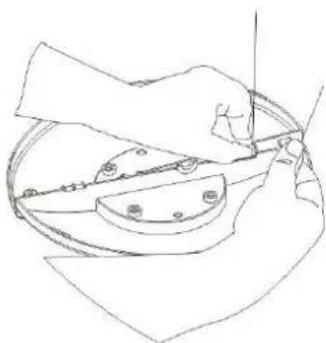
Line drawing of a hand using a tool to cut or adjust a circular component (no text or symbols)Paso 3
natural_image
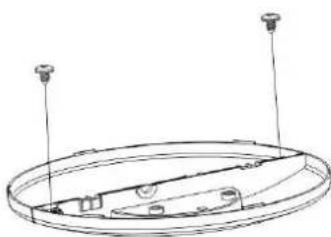
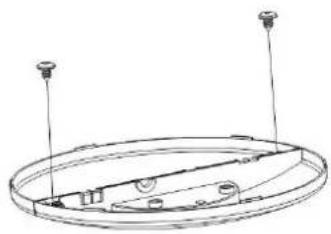
Technical line drawing of a circular mechanical component with two mounting holes and internal components (no text or symbols)Paso 4
natural_image
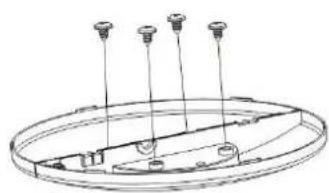
Technical line drawing of a circular mechanical component with four mounting holes (no text or symbols)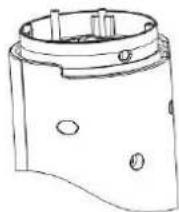
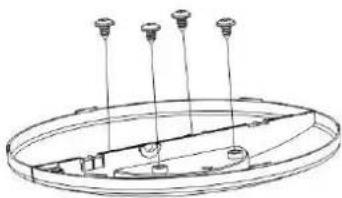
Paso 5
-
This appliance can be used by children aged from 8 years and above and persons with reduced physical, sensory or mental capabilities or lack of experience and knowledge if they have been given supervision or instruction concerning use of the appliance in a safe way and understand the hazards involved. Children must never play with the appliance. Cleaning and user maintenance must never be carried out by children without supervision.
-
Children should be supervised to ensure that they do not play with the appliance.
-
Keep the appliance and the cable cord out of the reach of children less than 8 years old.
-
WARNING: In order to ensure your children's safety, please keep all packaging (plastic bags, boxes, polystyrene etc.) out of their reach.
-
If the supply cord is damaged it must be repaired by the Authorized Service Agent.
-
Never pull on the cord when unplugging.
-
Do not use the unit with a damaged cord or plug, or if it is not working properly.
-
Do not handle the appliance with wet hands.
-
Never immerse the appliance in water or any other liquid.
-
Make sure the appliance has been unplugged before cleaning.
- This appliance must be installed following the national regulations for electrical installations.
- This appliance is for household use only.
- In case that you need a copy of the instruction manual, you can find it in www.orbegozo.com.
-
WARNING: In case of misuse, there is a risk of possible injury.
-
Never insert fingers, pencils or any other object through the grille when fan is running.
- Disconnect the plug when moving from one location to another.
- Be sure fan is on a stable, even surface when operating to avoid overturning.
- DO NOT use fan in window. Rain may create an electrical hazard. Do not leave the fan operating adjacent to an area where water has been collected to avoid the potential of electrical hazard.
- Do not hang or mount fan on a wall or ceiling.
- While cleaning, be sure to not splash water and do not use oil, alcohol or chemical articles as they may cause distortion of fan body and cause electrical hazards.
- Make sure to keep the fan far away from humidity, chemical articles and oil.
- Keep away from curtain, clothing or other something
may affect the fan's working.
- Turn off all switches and pull out power supply plug when you go out for long time.
- The fan should not be used without a base or on the side.
- Do not use this fan outside.
text_image
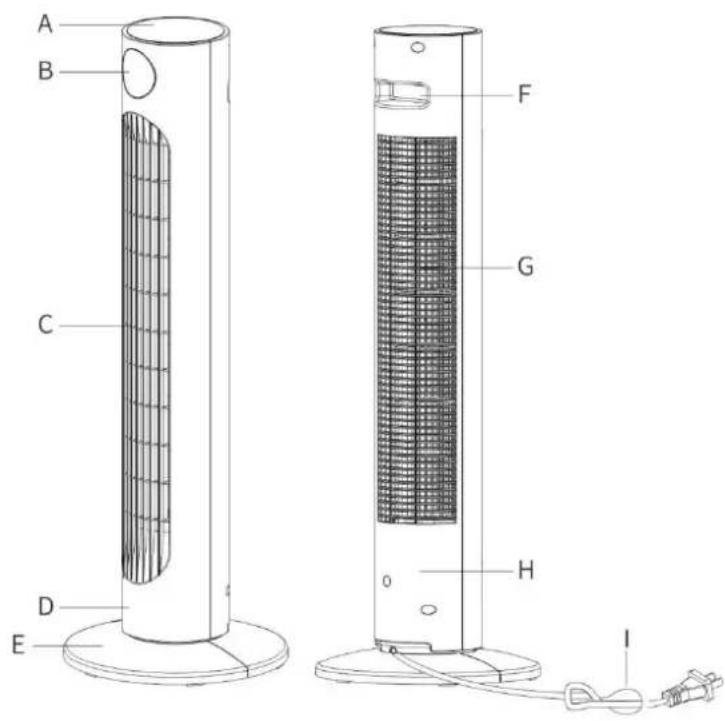
A B C D E F G H IA. Control panel
B.digital display
C. Air outlet grill
D. Front panel
E. Basis
F. Handle for transport
G. Rear air intake grill
H. Rear panel
I. Power cord
FEATURES
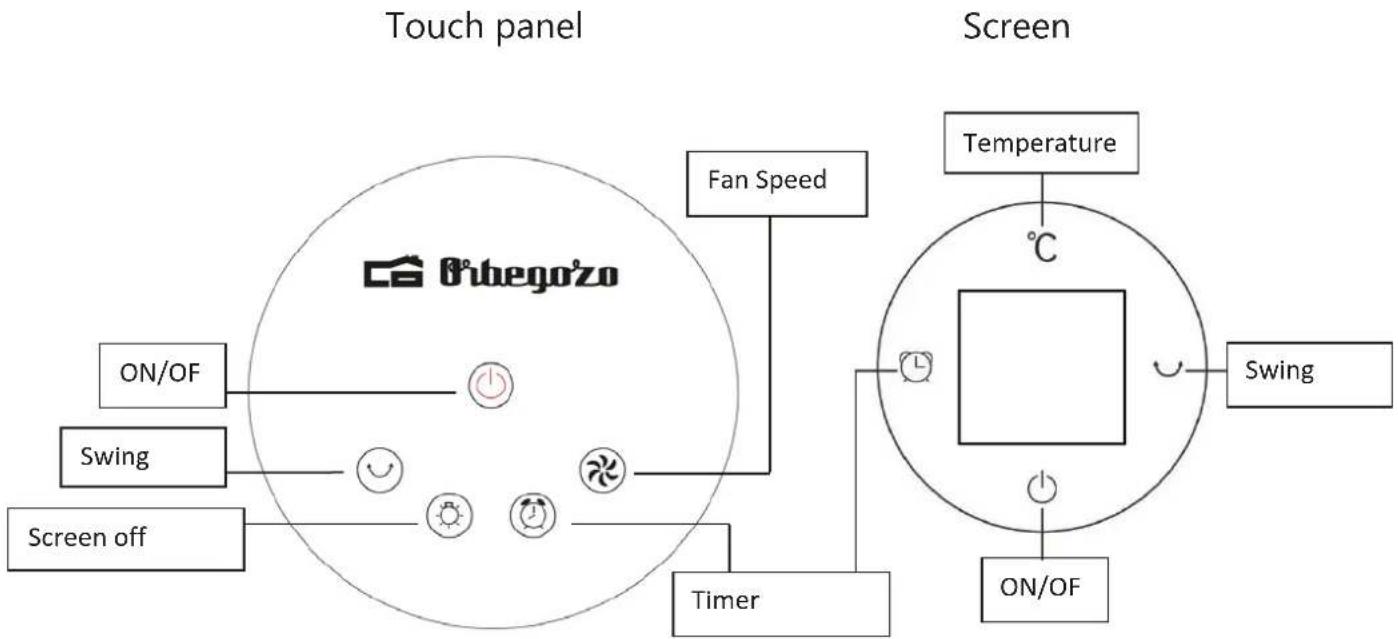
flowchart
graph TD
    subgraph Touch Panel
        A["ON/OF"] --> B["Switch"]
        B --> C["Screen off"]
        D["Fan Speed"] --> E["Timer"]
        F["Screen off"] --> G["Switch"]
        H["Switch"] --> I["On/OF"]
        J["ON/OF"] --> K["Switch"]
        L["Switch"] --> M["On/OF"]
        N["Switch"] --> O["ON/OF"]
        P["Switch"] --> Q["ON/OF"]
        R["Switch"] --> S["ON/OF"]
        T["Switch"] --> U["ON/OF"]
        V["Switch"] --> W["ON/OF"]
        X["Switch"] --> Y["ON/OF"]
        Z["Switch"] --> AA["ON/OF"]
        AB["Switch"] --> AC["ON/OF"]
        AD["Switch"] --> AE["ON/OF"]
        AF["Switch"] --> AG["ON/OF"]
        AH["Switch"] --> AI["ON/OF"]
        AJ["Switch"] --> AK["ON/OF"]
        AL["Switch"] --> AM["ON/OF"]
        AN["Switch"] --> AO["ON/OF"]
        AP["Switch"] --> AQ["ON/OF"]
        AR["Switch"] --> AS["ON/OF"]
        AT["Switch"] --> AU["ON/OF"]
        AV["Switch"] --> AW["ON/OF"]
        AX["Switch"] --> AY["ON/OF"]
        AZ["Switch"] --> BA["ON/OF"]
        BB["Switch"] --> BC["ON/OF"]
        BD["Switch"] --> BE["ON/OF"]
        BF["Switch"] --> BG["ON/OF"]
        BH["Switch"] --> BI["ON/OF"]
        BJ["Switch"] --> BK["ON/OF"]
        BL["Switch"] --> BM["ON/OF"]
        BN["Switch"] --> BO["ON/OF"]
        BP["Switch"] --> BQ["ON/OF"]
        BR["Switch"] --> BS["ON/OF"]
        BT["Switch"] --> BU["ON/OF"]
        BV["Switch"] --> BW["ON/OF"]
        BX["Switch"] --> BY["ON/OF"]
        BZ["Temperature"] --> CA["C"]
        DZ["Timer"] --> CB["L"]
        DZ["Timer"] --> CC["L"]
        DZ["Timer"] --> DD["L"]
        DZ["Timer"] --> DE["L"]
        DZ["Timer"] --> FD["L"]
        DZ["Timer"] --> DG["L"]
        DZ["Timer"] --> DH["L"]
        DZ["Timer"] --> DI["L"]
        DZ["Timer"] --> DJ["L"]
        DZ["Timer"] --> DK["L"]
        DZ["Timer"] --> DL["L"]
        DZ["Timer"] --> DV["L"]
        DZ["Timer"] --> DW["L"]
        DZ["Timer"] --> DX["L"]
        DZ["Timer"] --> DXT["L"]
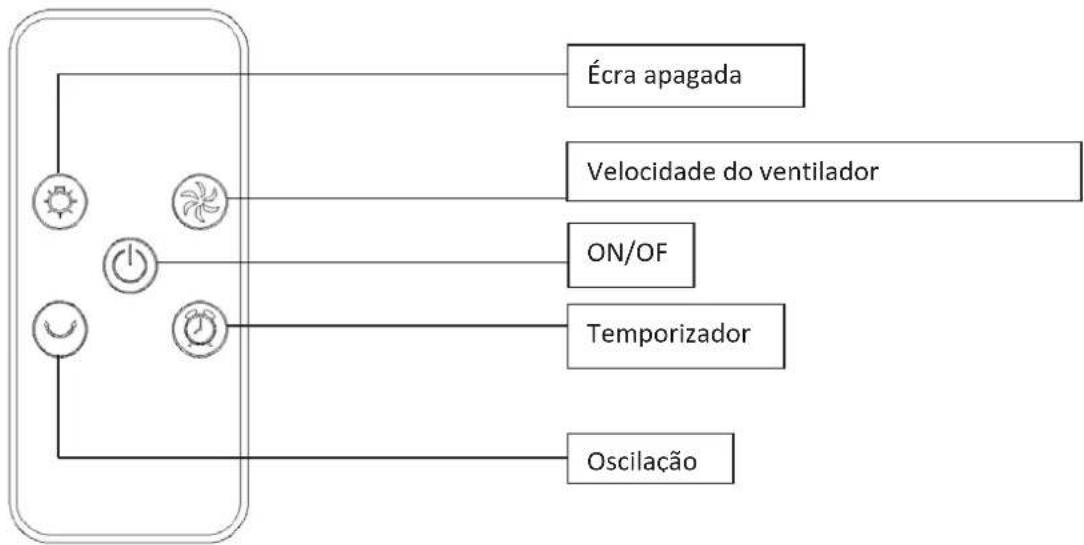
REMOTE CONTROL
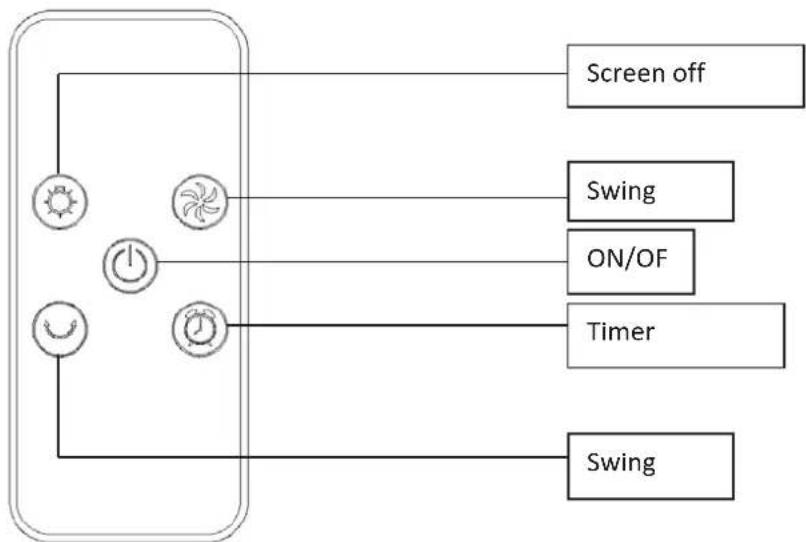
flowchart
graph TD
    A["Sun"] --> B["Power"]
    C["Wind Turbine"] --> D["Power"]
    E["Clock"] --> F["Power"]
    G["Sun"] --> H["Switch off"]
    I["ON/OF"] --> J["Switch"]
    K["Timer"] --> L["Switch"]
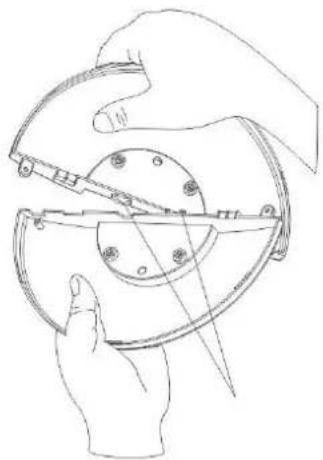
ASSEMBLE THE BASE
natural_image
Line drawing of hands using a tool to cut or adjust a mechanical component (no text or symbols present)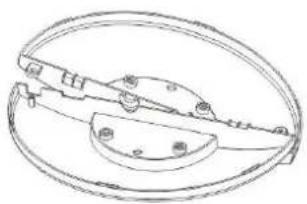
natural_image
Technical line drawing of a mechanical component with circular base and flanged ends (no text or symbols)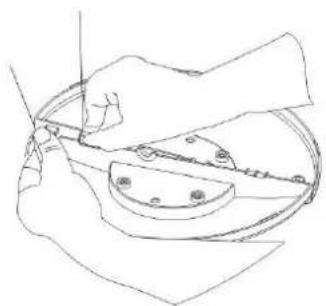
natural_image
Line drawing of a hand using a tool to cut or mark a circular component (no text or symbols)Step 1
natural_image
Line drawing of a hand using a tool to cut a circular object with holes, no text or symbols presentStep 3
natural_image
Technical line drawing of a circular mechanical component with two vertical posts and internal components (no text or symbols)Step 4
Step 2

natural_image
Pure technical line drawing of a circular mechanical component with four vertical rods and mounting holes (no text or symbols)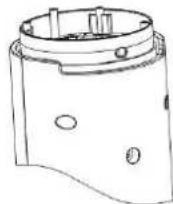
Step 5
Step 1: Line up the groove in the base against the round notch in another half base panel and rotate the parts as shown.
Step 2: Hold the two parts and press on one side
Step 3: Hold the other part and repeat the previous step.
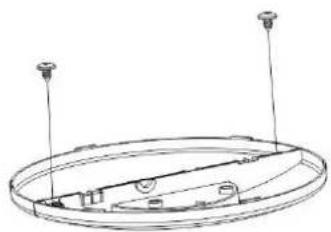
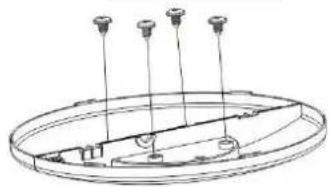
Step 4 and 5: Put screws in the holes
FUNCTIONS
-
Standby mode: Plug the power cord into the socket. The appliance will enter standby status.
-
Power on: In STANDBY MODE, press " 🔊". The appliance will start working at air level 2.
-
Air level: press " ☑ " to adjust the air level. This level will be displayed on the screen (1-2-3).
-
Timer: Press " ☑ " to set the timer. Adjustable up to 12h with 1h intervals.
-
Oscillation: Press " ⊙ " to make the appliance oscillate during use.
-
Screen off: press " Ⓞ", all lights will be off. Press again and all the lights will turn on.
-
Temperature: The room temperature will be displayed on the screen.
REMOVE THE PLASTIC SHEET FROM THE REMOTE CONTROL TO START USING IT.

text_image
PullCLEANING AND MAINTENANCE
Clean with neutral detergent and soft cloth.
Attention: Unplug the appliance before cleaning it. Do not leave water on the control panel.
DISPOSAL OF OLD ELECTRICAL APPLIANCES

The European directive 2012/19/EU on Waste Electrical and Electronic Equipment (WEEE), requires that old household electrical appliances must not be disposed of in the normal unsorted municipal waste stream. Old appliances must be collected separately in order to optimize the recovery and recycling of the materials they contain, and reduce the impact on human health and the environment. The crossed out "wheeled bin" symbol on the product reminds you of your obligation, that when you dispose of the appliance, it must be separately collected. Consumers should contact their local authority or retailer for information concerning the correct disposal of their old appliance.
DECLARATION OF CONFORMITY:
This device complies with the requirements of the Low Voltage Directive 2014/35/EU and the requirements of the EMC directive 2014/30/EU.
GUARANTEE
This appliance is covered and is entitled to the legal guarantee in accordance with the legislation in force from the date of purchase. Keep the purchase receipt to be able to claim your right to the guarantee. To find the closest service to your location, contact through the following web link: https://orbegozo.com/asistencia-tecnica/
For any type of query, doubt or incident, you can contact us through our email shown on the main page of this manual or through our technical assistance service at https://orbegozo.com/contacto/
Orbegozo is not responsible for components and accessories that are subject to wear and tear due to use, as well as perishable compounds or those that have deteriorated due to improper use. Nor will it be held responsible if the owner has technically modified the device. Check the legal conditions on our website.
FRANÇAIS
CONSIGNES DE SECURITE
natural_image
Line drawing of a hand using a tool to cut a circular object with a ruler, no text or symbols presentPas 3
natural_image
Technical line drawing of a circular mechanical component with two mounting holes and internal components (no text or symbols)Pas 4
natural_image
Technical line drawing of a circular mechanical component with four mounting holes (no text or symbols)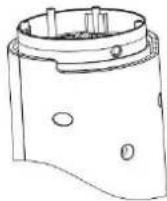
Pas 5
text_image
A B C D E F G H IA. Painel de controle
B. display digital
C. Grade de saída de ar
D. Painel frontal
E. Base
F. Alça para transporte
G. Grade de entrada de ar traseira
H. Painel traseiro
I. Cabo de alimentação
CARACTERISTICAS
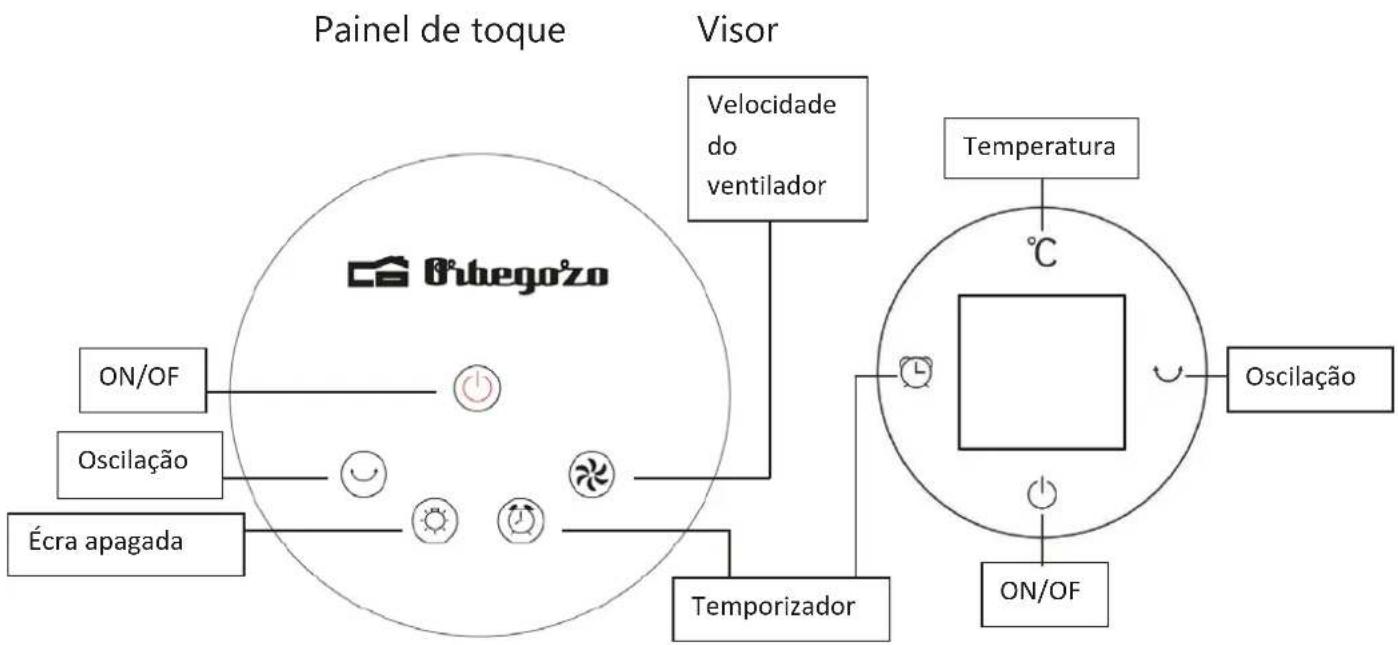
flowchart
graph TD
    A["Painel de toque"] --> B["ON/OF"]
    A --> C["Oscilação"]
    A --> D["Écra apagada"]
    E["Visor"] --> F["Velocidade do ventilador"]
    F --> G["Temporizador"]
    G --> H["ON/OF"]
    I["Temperatura"] --> J["°C"]
    K["Oscilação"] --> L["ON/OF"]
    M["Temporizador"] --> N["Temporizador"]
    style A fill:#f9f,stroke:#333
    style E fill:#ccf,stroke:#333
    style I fill:#cfc,stroke:#333
CONTROLE REMOTO
natural_image
Line drawing of a hand using a tool to cut or adjust a circular component (no text or symbols)Paso 3
natural_image
Technical line drawing of a circular mechanical component with two vertical posts and internal components (no text or symbols)Paso 4
Paso 2
natural_image
Technical line drawing of a circular mechanical component with four vertical pins (no text or symbols)
Paso 5