
57061 - Scarifier HYUNDAI - Free user manual and instructions
Find the device manual for free 57061 HYUNDAI in PDF.
| Product type | Scarifier |
| Brand | Hyundai |
| Model | 57061 |
| Weight | 39 kg |
| Cutting width | 400 mm |
| Cutting height | +15 to -15 mm (adjustable) |
| Engine | Hyundai H210 (4 kW, 3400 rpm) |
| Fuel | Unleaded gasoline Euro 95 (E10) |
| Fuel tank volume | 1 L |
| Engine oil type | SAE30 or 15W40 |
| Engine oil volume | 0.6 L |
| Collection bag volume | 45 L |
| Sound pressure level | 85.9 dB(A) |
| Sound power level | 101.2 dB(A) |
| Vibrations | 7.03 m/s² |
| Wheel dimensions | Front and rear: 200 mm |
| Handlebar adjustment | 2 height positions |
| Air filter maintenance | Every 25 hours of use |
| Spark plug replacement | Every 100 hours of use |
| Warranty | 24 months |
Frequently Asked Questions - 57061 HYUNDAI
User questions about 57061 HYUNDAI
0 question about this device. Answer the ones you know or ask your own.
Ask a new question about this device
Download the instructions for your Scarifier in PDF format for free! Find your manual 57061 - HYUNDAI and take your electronic device back in hand. On this page are published all the documents necessary for the use of your device. 57061 by HYUNDAI.
USER MANUAL 57061 HYUNDAI
VERTICUTEERMACHINE 57061
natural_image
Line drawing of a lawn mower with attached tool handle (no text or symbols)8 Nederlands
17 English
26 Français
36 Deutsch
47 Svenska
56 Dansk
65 Verklaring van overeenstemming • Declaration of conformity • Certificat de conformité • Konformitätserklärung • Försäkran om överensstämmelse • Overensstemmelseserklæring
A
text_image
A B C D E F G H IB


C
natural_image
Close-up of a hand adjusting a tire component on a vehicle (no visible text or symbols)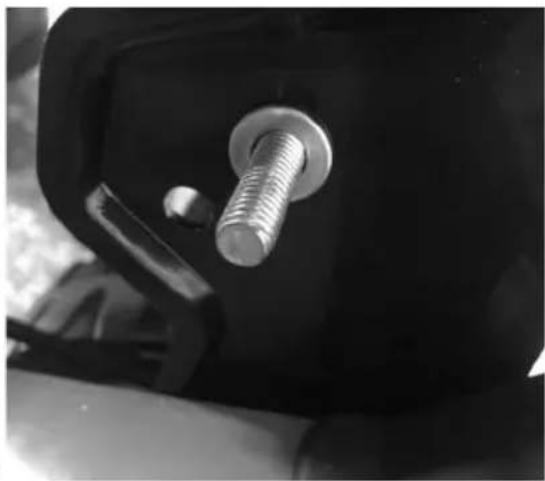
natural_image
Close-up of a mechanical component with a metallic bolt and screw, no visible text or symbols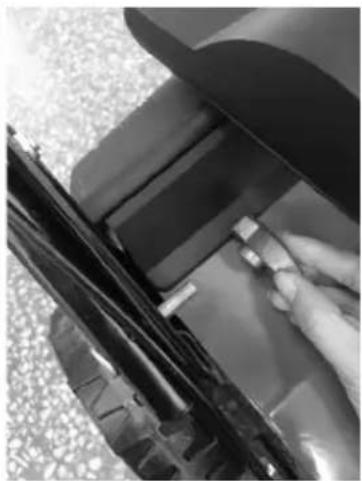
natural_image
Close-up of a hand adjusting a black mechanical component with a circular housing (no visible text or symbols)D
natural_image
Close-up of a hand holding a tool near a black metal pipe or cable, with another person visible in the background (no text or symbols)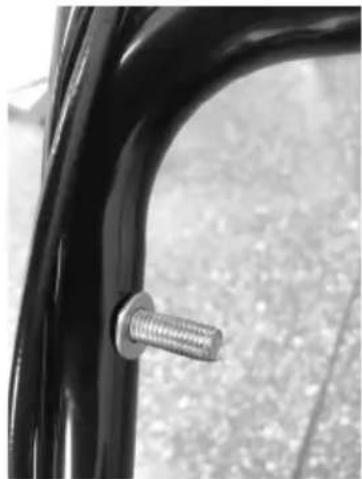
natural_image
Close-up of a black metal bracket with a threaded screw attached, against a blurred outdoor background (no text or symbols visible)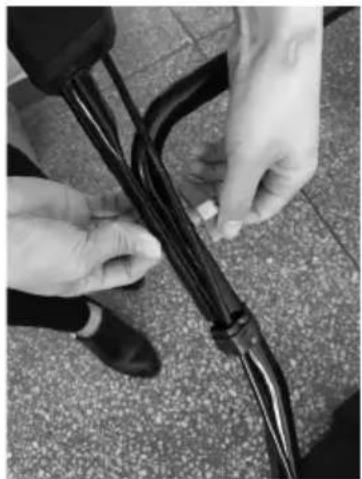
natural_image
Close-up of hands holding a black cable with a small object, placed on pavement (no text or symbols visible)E
natural_image
Close-up of a black metal frame with attached cable, placed on a textured gray surface (no text or symbols visible)F
natural_image
Close-up of a black metal bracket with two circular holes and a small 'H' symbol (no text or labels)G
natural_image
Close-up of hands holding a black electronic device with wires and a pen, no visible text or symbols
natural_image
Close-up of hands operating a small electronic device with wires, no visible text or symbols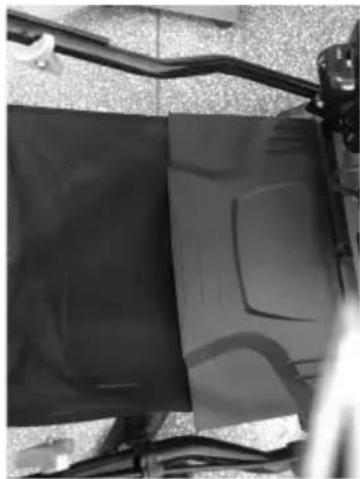
natural_image
Close-up of a black panel with visible internal markings and wiring, mounted on a metal frame (no text or symbols)H

natural_image
Person using a device to lift a black box, no visible text or symbols|
natural_image
Close-up of a hand operating a black circular knob on a metallic mechanical device (no visible text or symbols)J
natural_image
Close-up of a mechanical device with a rotary knob and labeled component (no readable text or symbols)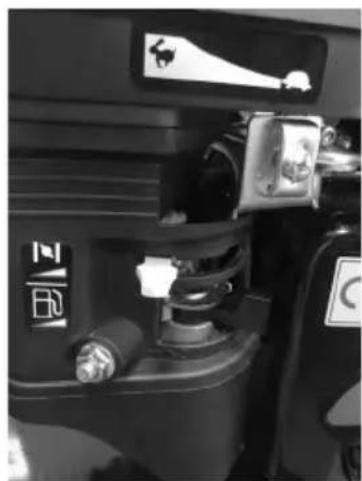
natural_image
Close-up of a mechanical device with no visible text or symbols
natural_image
Person using a leg lift machine on a carpet (no visible text or symbols)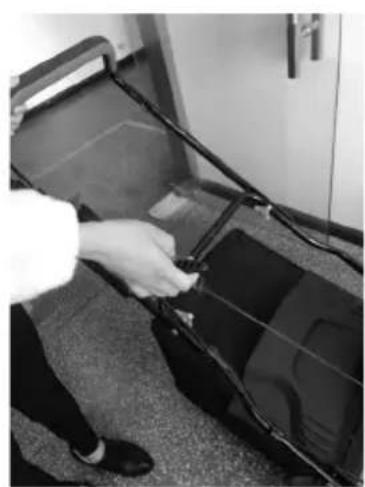
natural_image
Person inserting a cable into a device inside a vehicle (no visible text or symbols)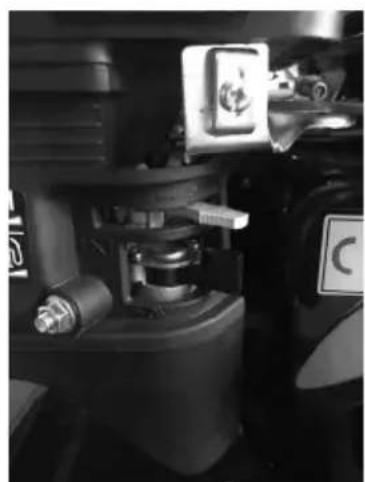
natural_image
Close-up of mechanical components with no visible text or symbolsK
natural_image
Person using a leg exercise machine on a tiled floor (no visible text or symbols)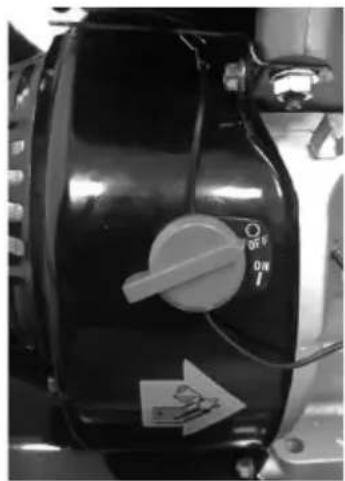
natural_image
Close-up of a mechanical control panel with a rotary knob and directional arrow (no readable text or symbols)L
natural_image
Close-up of a small wheeled vehicle with visible wheels and mechanical components, no text or symbols present.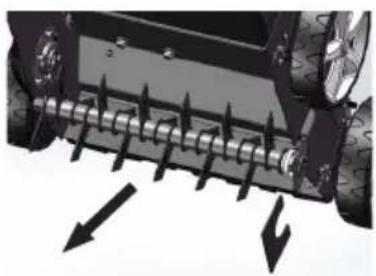
natural_image
Close-up of a vehicle's wheel rim with directional arrows indicating force or movement (no text or symbols)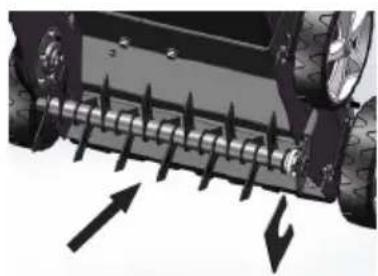
natural_image
Close-up of a vehicle's wheel rim with directional arrows indicating force or movement (no text or symbols)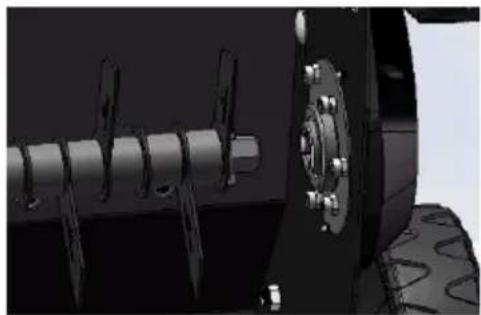
natural_image
Close-up of mechanical components including a cylindrical shaft and flanged wheel assembly (no visible text or symbols)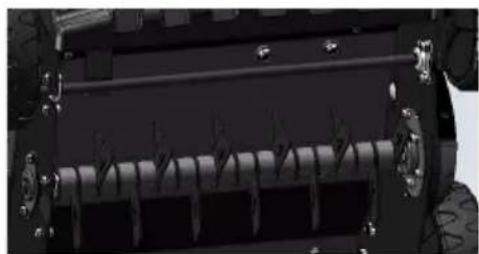
natural_image
Close-up of a vehicle's internal mechanical component with coiled springs and mounting brackets (no visible text or symbols)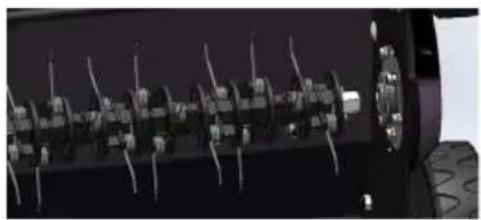
natural_image
Close-up of a mechanical component with multiple pins and a central shaft (no visible text or symbols)
natural_image
Close-up of a mechanical component with multiple curved features and mounting brackets (no visible text or symbols)Q
natural_image
Close-up of a black rectangular mechanical component with metallic fittings and a curved handle, placed on a textured floor (no visible text or symbols)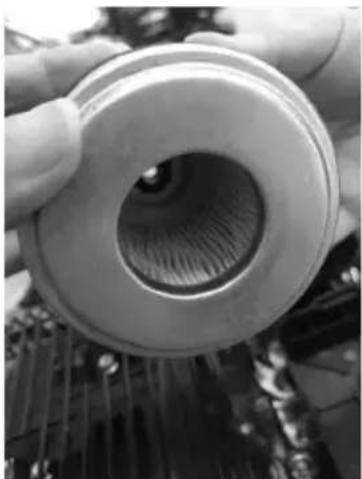
natural_image
Close-up of a mechanical component with a circular opening, showing internal structure (no text or symbols visible)VERTICUTEER-
MACHINE
57061
Subject to changes; specifications are subject to change without notice.
Introduction
The machine is solely intended for scarifying natural grass. This machine is designed for removing moss and weeds from the soil and for loosening the soil. As a result, the lawn absorbs nutrients better and it is cleaned.
It is recommended to use the machine in the spring and autumn.
This machine is not intended for professional use.
This machine is not intended for use by persons younger than 18 and persons who are unfamiliar with the manual.
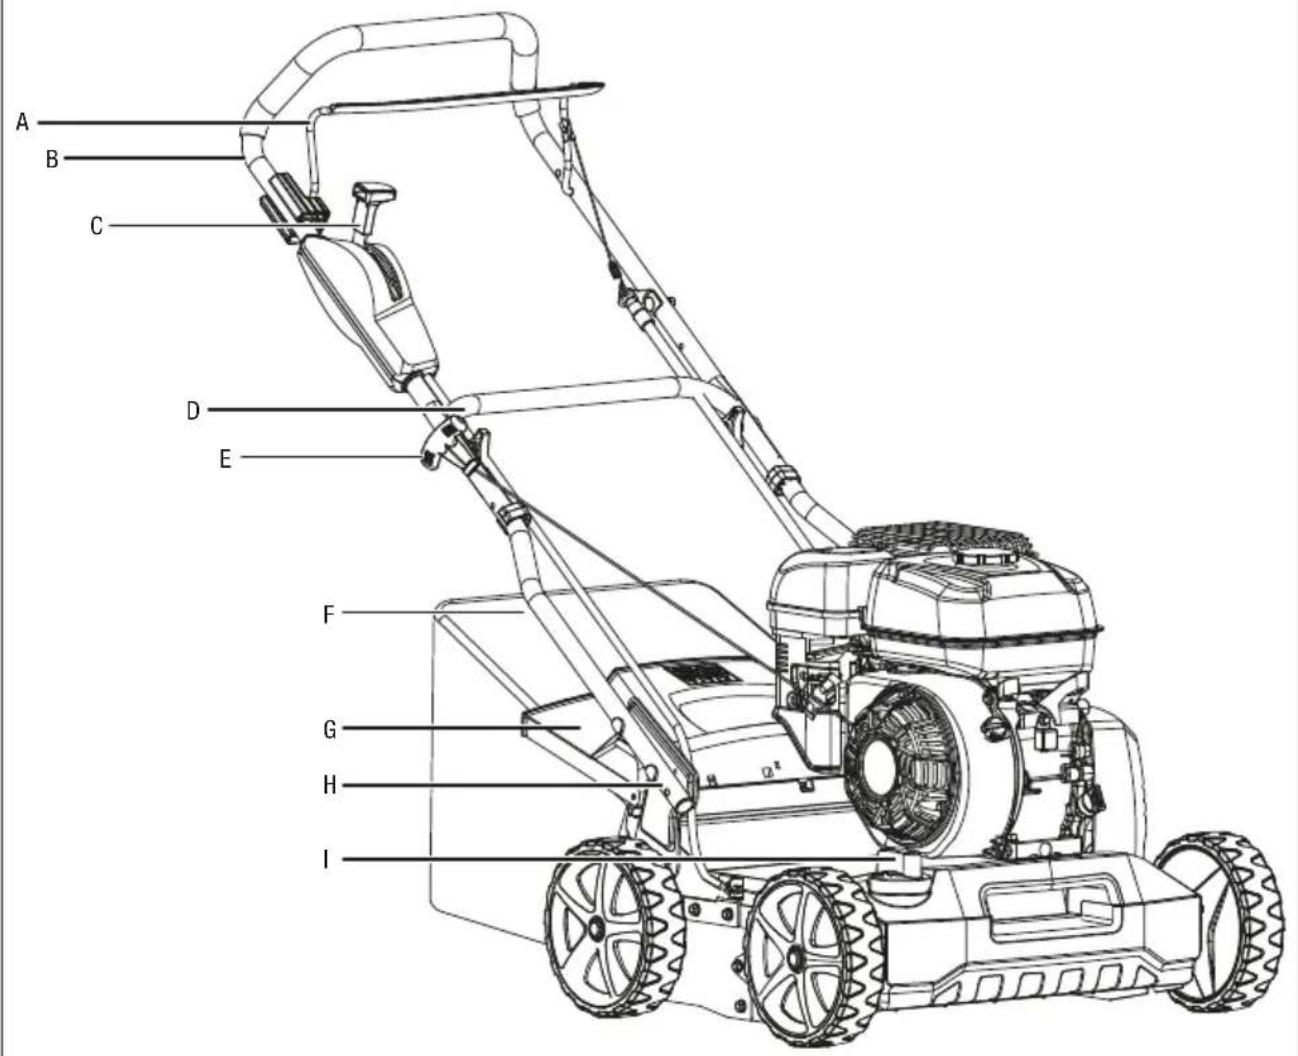
Product description
Machine parts A
The machine contains the following parts:
A. Brake lever
B. Upper handle
C. Throttle
D. Lower handle
E. Starter lever
F. Grass collection bag
G. Rear discharge cover
H. Lever for height adjustment
I. Lever for cutter height adjustment
Technical data
| Engine speed 3400 rpm | |
| Nominal output 4 kW | |
| Weight 39 kg | |
| Front wheel dimensions 200 mm | |
| Rear wheel dimensions 200 mm | |
| Engine type H210 | |
| Oil SAE30 | 15W40 |
| Oil tank volume 0.6 L | |
| Petrol Euro 95 (E10) | lead-free |
| Capacity fuel tank 1 L | |
| Capacity grass collection bag | 45 L |
| Cutting height +15 – -15 mm | |
| Cutting width 400 mm | |
| L_pA (sound pressure)* 85.9 dB(A) | |
| L_pA (uncertainty) 3 dB(A) | |
| L_WA (sound power)** | 101.2 dB(A) |
| L_WA (uncertainty) | 3.43 dB(A) |
| Vibration | 7.03 m/s2 |
| Vibration uncertainty | 1.5 m/s2 |
* Level of sound pressure in the work area. Measured on the basis of 2000/14/EC and 2005/88/EC.
** The measured value is less than the guaranteed value: L_WA dB(A). Measured on the basis of 2000/14/EC and 2005/88/EC.
Safety
Symbols used in this manual
The following symbols are used in this manual:
Danger of physical injury or material damage.
i Information that should be considered important, but not related to injury.
Symbols on the machine B
The following symbols apply to the machine:
- Please read the manual before using the machine.
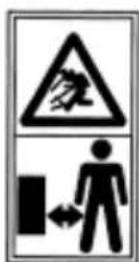
- Keep bystanders away from the machine.
- Danger of cuts. Cutter blades in motion. Do not put your hands or feet close to or under the cutting plate opening.
- Warning. Remove the spark plug cable from the spark plug and read the instructions before performing repairs or maintenance.
- Do not use the machine in a confined and/or insufficiently ventilated space. Carbon monoxide poses a health hazard.
- Do not use the machine when it is raining, in a thunderstorm or when the grass is wet.
- Wear eye and ear protection.
- CE marking. The machine complies with the European Commission requirements and rules.
- Sound level marking. The noise level of the machine does not exceed 98 dB.
General safety instructions
WARNING!
Read all safety warnings and all instructions. Failure to follow the warnings and instructions may result in electric shock, fire and/or serious injury.
Safety warnings
When using the machine, always carefully follow the enclosed safety instructions and the additional safety instructions below.
⚠️ Save all warnings and instructions for future reference.
Use and maintenance of the machine
This machine is not intended for persons (including children) with reduced physical, sensory or mental capacity, or with insufficient experience and knowledge, unless they have been given supervision or instruction from a person responsible for their safety.
The machine produces an electromagnetic field during use. Make sure that the user's active/passive medical implants do not cause any problems when using the machine.
Before use, remove any foreign objects from the lawn that could be thrown out by the machine.
⚠️ Check that all nuts, bolts and screws are properly tightened.
Check that the cutter blade and the cutter blade screw are securely fastened. When the cutting edges need to be sharpened, this should be done a little on both sides to avoid imbalance. If the cutter blade is damaged, it should be replaced.
Before use, check the grass collection bag for damage and reduced functionality.
Do not overreach. Make sure you are standing firmly and always retain your balance. This results in better control of the machine in unexpected situations.
A spanner left in the machine at a moving part can result in injury. Remove tools before turning on the machine.
⚠ Always wear long trousers and sturdy, non-slip footwear when using the machine.
Personal protective equipment, such as safety goggles, a dust mask, non-skid footwear, a hard hat and hearing protection reduce personal injury. Always wear safety goggles.
⚠ Loose clothing, jewellery or long hair may get caught in moving parts. Do not wear baggy clothing or jewellery. Keep hair, clothes and gloves away from moving parts.
Do not use the machine for too long and take frequent breaks. Extended use of the machine results in blood circulation problems in the hands, caused by vibrations. These effects become worse the lower the temperature and/or when holding the handles very firmly. The machine can be used for a longer period with proper gloves and regular breaks. Limit daily use.
Do not use the machine in a confined and/or insufficiently ventilated space. Carbon monoxide poses a health hazard.
⚠️ Only use the machine in sufficient light.
Do not use the machine when it is raining, in a thunderstorm or when the grass is wet.
Do not use the machine on a slope or descending stretch of lawn. Only use the machine crosswise on slopes.
Do not use the machine when safety systems have been changed/disabled.
Do not use the machine when you are tired, ill or under the influence of alcohol or other drugs.
Do not use the machine to shred branches or pruning waste.
Do not use the machine to level uneven surfaces such as molehills.
Do not use the machine for more than 10 hours per year.
During operation, stay alert for foreign objects that could be thrown out by the machine.
⚠️ Keep children and animals at a safe distance when the machine is in use.
Never lift the machine with the engine running.
Never put your hands or feet under the lawnmower or into the rear discharge opening when the engine is running.
⚠ Do not change the rated speed of the engine.
On self-propelled machines, disconnect the self-propelled system before starting the engine.
Do not force the machine. Use the right machine for your application. The right machine will do the job better and safer.
⚠️Do not change the governor settings.
⚠ Do not run the engine at high speed unnecessarily.
⚠️Do not leave the engine running unattended.
⚠ Keep hands or feet away from rotating parts.
Avoid contact with hot fuel, oil, exhaust fumes and hot surfaces. Do not touch the engine or exhaust silencer. These parts become extremely hot during use and remain hot for some time after the engine is turned off. Allow the engine to cool down completely before carrying out maintenance or adjustments.
⚠ Turn off the engine immediately if the machine produces abnormal noises or vibration. Disconnect the spark plug cable and find the cause. Abnormal noises or vibrations are generally a warning of problems.
⚠ Stop the engine and remove the spark plug cap in the following situations:
- Before carrying out activities under the lawnmower or the rear discharge opening.
- Before carrying out maintenance, repairs or inspections.
- Before carrying, lifting or removing the machine.
-
Before leaving the machine unattended.
-
Before adjusting the cutting height.
- Before removing and emptying the grass collection bag.
- After hitting an unknown object.
In the case of a cut, cover the wound with a clean cloth and press hard to allow the blood to clot.
Prevent the eyes from coming into contact with petrol and/or oil. If your eyes have been contact with petrol and/or oil, rinse your eyes immediately. If the eyes remain irritated, consult a doctor.
Only use attachments and accessories approved by the manufacturer. The use of incorrect attachments can cause personal injury.
Maintain the machine. Check the operation of moving parts, check parts for breakage and other conditions that may affect the operation of the machine.
⚠️ Be careful when moving the teeth of the roller. This will make the other teeth move as well. This can also happen if the machine is on.
Do not put your fingers between moving parts and stationary parts.
Have the machine repaired if it is damaged. Many accidents are caused by poorly maintained equipment.
⚠️To avoid the risk of fire, keep the engine and exhaust silencer free of grass, leaves, excessive grease or carbon.
Never dip or spray the machine with water or other liquids. Keep the handles dry, clean and free of dirt. Clean after each use.
To protect the environment, observe the rules and regulations for the disposal of gas, oil, etc.
⚠️ Store the inactive machine beyond the reach of children and do not allow its operation by persons unfamiliar with the machine or these instructions. The use of the machine by inexperienced users is
dangerous.
Fuel safety
⚠ Fuel is highly flammable and the fumes can cause explosions. Take precautions to avoid the risk of serious personal injury.
When refilling or draining the fuel tank, use an approved fuel storage container. Never fill the fuel tank indoors but in a clean, well-ventilated outdoor area.
Do not smoke or allow sparks, naked flames, or other sources of ignition near the area while adding fuel or operating the machine.
⚠️ Keep earthed conducting objects, such as tools, away from live electrical parts and connections to prevent sparks. Sparks can ignite fumes.
Always stop the engine and allow it to cool down before filling the fuel tank. Never remove the cap from the fuel tank or add fuel while the engine is running or when the engine is hot. Do not use the machine with leaks in the fuel system.
⚠ Slowly loosen the fuel cap to release the pressure in the tank.
Never fill the fuel tank above the limit mark.
⚠️Fill the fuel tank outdoors with a funnel.
⚠ Top up petrol and oil before starting the engine.
⚠️ Remove spilled fuel from the fuel tank and cap. Never use the machine without the tank cap firmly in place.
Prevent the creation of a source of ignition due to spilled fuel. If fuel is spilled, do not try to start the engine but move the machine away from the area. Wait before starting the engine until fuel fumes are gone. Store fuel in containers specially designed and approved for this purpose.
⚠ Store fuel in a cool, well-ventilated place, safely away from sparks, naked flames, or other source of ignition.
Never store fuel or a machine with fuel in the tank in a building where fumes with sparks can come into contact, such as naked flames or a boiler, oven or tumble dryer. Allow the engine to cool down before you put it in storage.
⚠️Petrol is extremely flammable. Petrol vapour can explode and cause serious injury or death. Be extremely careful when handling petrol. Keep out of reach of children.
Installation
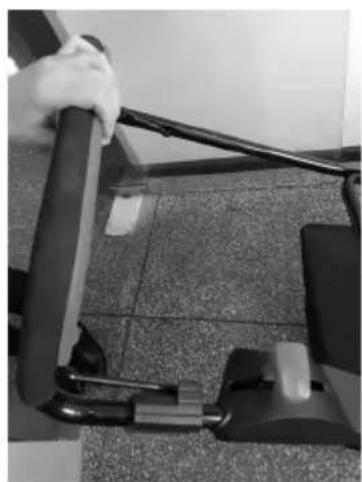
Installing the lower handle C D E
- Fasten the lower handle with the screws, washers and knobs.
- Fasten the lower and upper handles with the screws, washers and knobs.
- Fix the cable clamp in position.
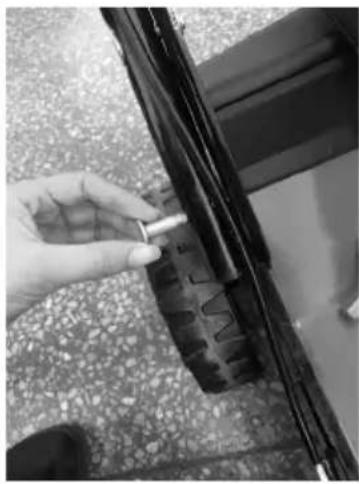
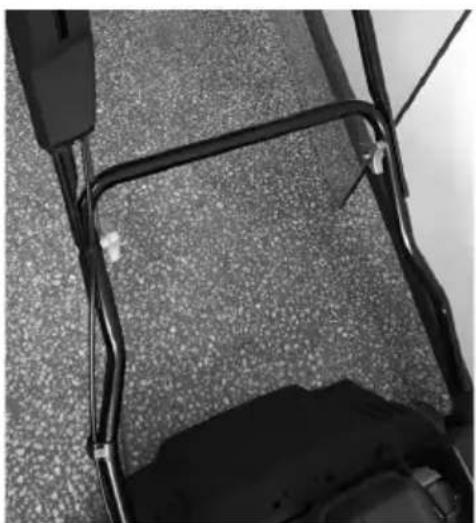
Changing the height of the handle F
- Fasten the handle with the screws and knobs in hole 2 for the highest position.
- Fasten the handle with the screws in hole 1 for the lowest position.
⚠️ Always adjust the height on both sides of the lower handle.
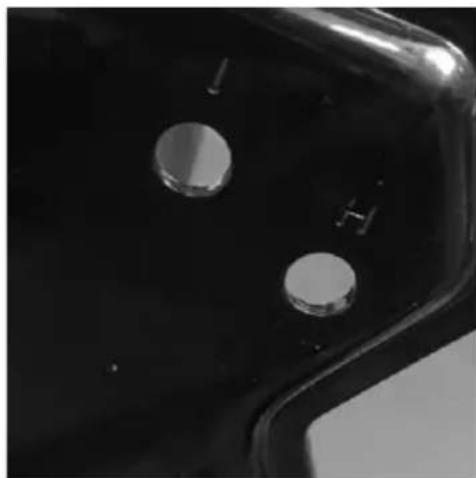
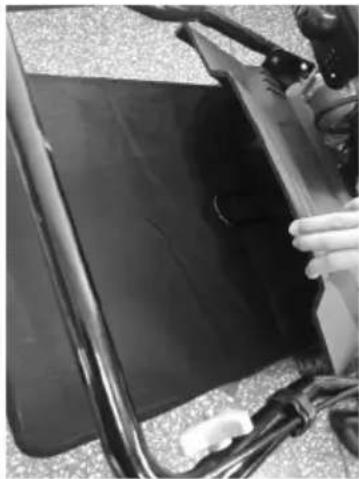
Installing the grass collection bag G
You can work with or without the grass collection bag. If you use the grass collection bag, the grass will go into the grass collection bag. Otherwise, the grass will go onto the ground.
- Open the rear discharge cover.
- Install the grass collection bag.
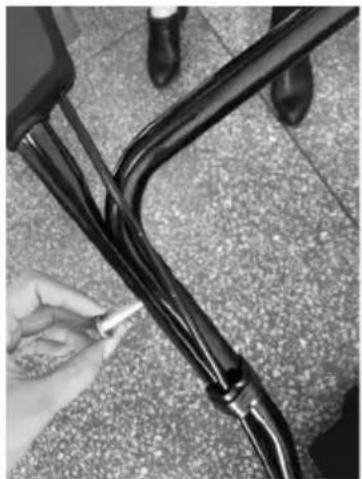
Installing the starter lever H
- Route the starter lever cable through the cable duct.
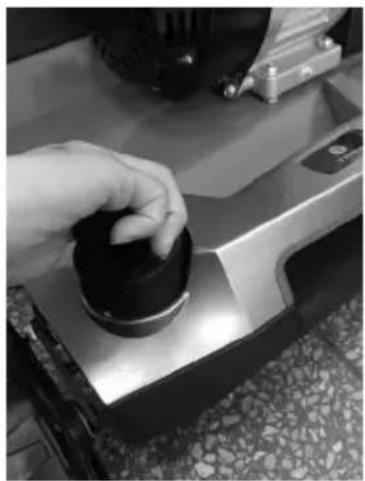
Adjusting the cutting height I
- Rotate the knob clockwise to move the blade up.
- Rotate the knob anticlockwise to move the blade down.
⚠ Stop the engine before adjusting the cutting height. The cutter blade can cause serious injuries.
⚠ Make sure the transport handle is in the transport position.
Topping up the oil
All engines are tested at the factory before they are packed. There may still be oil in the engine. The amount of oil left in the engine varies.
- Open the filler cap with dipstick.
- Clean the dipstick.
- Insert the dipstick into the engine.
- Do not screw in the dipstick when measuring the oil level.
- Check how much oil is on the dipstick.
i The oil must be between the upper and lower limit marks. - If there is no oil on the dipstick, top up the oil.
- Remove some of the oil if oil is above the upper limit mark.
- Close the filler cap with dipstick.
Topping up the petrol
The engine is supplied without petrol. Fill up with one litre before starting the engine.
- Open the filler cap.
- Fill the fuel up to the fuel limit in the neck of the fuel tank.
- Do not overfill the fuel tank.
- Remove spilled petrol before starting the engine.
- Close the filler cap.
Use
Starting the engine J
⚠ Allow the engine to cool down completely.
-
Move the engine lever to the 'On' position.
-
Move the carburettor lever to the 'On' position when the engine is cold.
Keep the throttle in the 'Off' position when moving the carburettor lever to the 'On' position.
-
Pull the brake lever towards the upper handle.
-
Grasp the starter handle with the right hand.
-
Slowly pull the starter handle until resistance is felt.
-
Pull hard on the starter handle when resistance is felt.
-
Move the throttle to the 'Run' position.
The cutter blade starts moving immediately after starting the engine.
i The machine can move when the cutter blade is in contact with the ground.
Scarifying
The cutter blade rotates and removes the layer formed by moss, lichen and weeds.
During cutting, the machine makes holes in the ground that loosen the lawn so it absorbs nutrients better.
i Scarify the lawn in spring (April/May) and autumn (October).
Aeration
The cutter blade rotates and combs the lawn. Light mossy spots are aerated.
Aeration damages the surface of the ground, which improves water drainage. Oxygen is also better absorbed.
iAerate the lawn when necessary during the entire growing period.
Turning off the engine K
-
Release the brake lever to stop.
-
Move the throttle to the 'Off' position.
The cutter blade will run for a few seconds after the engine is turned off. Remove the spark plug cap if the machine is left unattended.
Emptying the grass collection bag
-
Stop the machine.
-
Lift the cover and remove the grass collection bag.
-
Empty the grass collection bag.
-
Replace the grass collection bag.
Problem-solving
| Problem Possible cause Solution | ||
| The engine won't start. | Throttle not in the correct position. Move the throttle to the correct position. | |
| Out of fuel. Replenish the fuel. | ||
| Air filter element is dirty. Clean the air filter element. | ||
| Spark plug is loose. Tighten the spark plug. | ||
| Spark plug cable is loose. Attach the spark plug cable to the spark plug. | ||
| Spark plug defective, dirty or incorrectly positioned. | Replace the spark plug | |
| Spark plug wet with fuel (flooded engine). | Dry and reinstall the spark plug. | |
| Fuel filter clogged, carburettor defective, ignition defective, valves stuck, etc. | Take the engine to a qualified service centre. | |
| Engine has no power. | Cutting height is too low. Increase the cutting height. | |
| Grass is too long. Mow the grass before scarifying. | ||
| The discharge chute is blocked. Remove the spark plug connector and remove the blockage. | ||
| Air filter element is clogged. Clean the air filter element. | ||
| Poor scarifying results. | Cutting height is too high. Lower the cutting height. | |
| Damaged cutter blades. Have the cutter blades replaced. | ||
| Grass collection bag does not fill. | Grass collection bag is full/clogged. Stop scarifying. Empty and clean the grass collection bag. | |
| The discharge chute is blocked. Remove the spark plug connector and remove the blockage. | ||
| Abnormal noises. | There is play in nuts, bolts and other mounted parts. | Tighten the parts. |
| Vibrations. | Cutting assembly is loose. | Tighten the cutter blade. |
| Cutting assembly is unbalanced. | Balance the cutter blade. | |
Transport and storage
When transporting or storing the machine, adhere to the following instructions:
If the machine is decommissioned for a month or more, you should empty the fuel tank and change the oil. This prevents problems when restarting.
⚠ Make sure the transport handle is in the transport position.
⚠ Clean the machine thoroughly and store the machine covered in a dry place.
⚠️ Store the machine in a frost-free space.
Lightly grease the cutter blade to prevent rust.
Never store the machine with fuel in the engine in a building where there are naked flames or sparks.
⚠ Wear protective gloves during transport.
⚠️ Keep the engine, silencer, battery and fuel tank free of grass, leaves, or excess grease.
⚠️ Empty the fuel tank outside.
⚠ Allow the engine to cool down for at least 30 minutes.
Always keep the machine upright to avoid fuel leakage.
Maintenance
Cleaning and maintenance
⚠ Allow the engine to cool down completely.
Do not use a pressure cleaner or garden hose to clean the engine. Water can damage the engine and the fuel system.
i Clean the outside with a dry cloth.
i Clean the underside of the machine with a garden hose. Lift up the machine so that the spark plug is facing upwards.
Lubricate parts
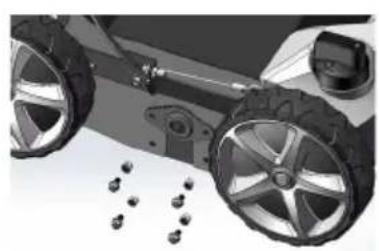
- Lubricate the ball bearings in each wheel with oil at least once per season.
Removing and installing the scarifier roller L
⚠ Wear protective gloves when removing and installing the blade.
- Remove the spark plug.
- Remove the grass collection bag.
- Lift up the machine so that the front is facing up a little.
- Remove the four screws from the cover.
- Lift the roller and pull the roller towards you.
- Place a new roller in the hexagonal hole and press the other end of the roller.
- Secure the roller with the two screws.
- Install the cover with the four screws.
Draining the oil
i Drain the used oil while the engine is warm. Warm oil drains faster and more fully.
- Wipe the area around the oil filler cap clean.
- Open the filler cap with dipstick.
- Place a suitable container next to the machine to collect the used oil.
- Tilt the machine to the right. The used oil will be discharged through the filler neck.
- Make sure the oil is drained completely.
Maintaining the air cleaner M
Do not allow dust or soil to enter the foam filter. Clean the air filter after every 25 hours of use. Clean the foam filter element regularly if the machine is used in dry, dusty areas.
- Remove the cover.
- Blow dust off of the foam filter element.
- Drip some SAE30 oil on the foam filter element and squeeze gently to remove any excess oil.
- Install the filter.
- Place the cover.
⚠️Replace the filter if it is worn, damaged, or cannot be cleaned.
Replacing the spark plug
Only use an original spark plug for replacement. Replace the spark plug after 100 hours for best results.
Replacing the brake discs
Only use original brake discs for replacement. Check the brake discs and have them replaced regularly.
Adjust the clutch and brake cables
- Turn the clutch cable adjuster to tighten the clutch lever.
- Turn the brake cable adjuster to tighten the brake lever.
Service
After the period of guarantee, should repairs be required we will pay the greatest possible attention to repair the tool. For service and/or repair outside the period of guarantee, you can directly contact the address below: Dvize bv, Witte Vlinderweg 51,1521 PS Wormerveer, The Netherlands info@dvize.eu, www.hyundaitools-nl.com
Environment
Processing
Your product, accessories and packaging must be sorted for environmentally friendly disposal. To protect the environment, observe the rules and regulations for the disposal of gas, oil, etc.
Guarantee
This tool has been thoroughly checked in the factory. After purchase date a full 2 year's guarantee applies to material and production defects. The receipt s also the guarantee card and must be submitted in case of claim to guarantee. In case of possible problems within the period of guarantee, you must contact your purchase address.
Guarantee conditions
If the tool shows defects as a result of material and production defects during the period of guarantee, we guarantee free repair on condition that:
- The tool has been used properly and for the purpose for which it has been intended.
- Repairs are professionally carried out by a person appointed by the supplier.
- The proof of purchase will be submitted. Rechargeable batteries, battery chargers and parts showing normal wear are not covered by this guarantee.
If, during the period of guarantee, a defect emerges that cannot be repaired, free replacement of the tools takes place.
SCARIFICATEUR
57061
Dvize b.v. declares under our sole responsibility that this product is in conformity with the following standards or standardization documents:
Imported/Distributed by Dvize bv, The Netherlands Licensed by Hyundai Corporation, Korea