H4053 - Surveillance Camera Emos - Free user manual and instructions
Find the device manual for free H4053 Emos in PDF.
| Product type | Wireless surveillance camera |
| Brand | Emos |
| Model | H4053 |
| Video resolution | 1920 x 1080 pixels (Full HD) |
| Sensor | 1/2.9" CMOS 2 megapixels |
| Battery | Lithium-ion rechargeable 9,600 mAh |
| Infrared detection range | 9 meters |
| Infrared detection angle | 120° |
| Lens | 3.2 mm, F2.0 |
| Storage | SD card up to 128 GB (not included) and cloud storage |
| Protection rating | IP65 (weather resistant) |
| Connectivity | Wi-Fi 2.4 GHz IEEE 802.11b/g/n |
| Mobile app | EMOS GoSmart (Android and iOS) |
| Power supply | 5 V DC power adapter (included) and internal battery |
| Two-way audio | Yes (built-in speaker and microphone) |
| Motion detection | PIR sensor |
| Mount | Magnetic and rotating (included) |
| Maximum number of users | 4 |
| Care and cleaning | Wipe with a soft, dry cloth. Do not use abrasive products. |
| Security | Reset via Reset button (5 seconds). Compliant with directive 2014/53/EU. |
| Spare parts and repairability | Contact Emos after-sales service for any repairs. No consumer spare parts. |
Frequently Asked Questions - H4053 Emos
User questions about H4053 Emos
0 question about this device. Answer the ones you know or ask your own.
Ask a new question about this device
Download the instructions for your Surveillance Camera in PDF format for free! Find your manual H4053 - Emos and take your electronic device back in hand. On this page are published all the documents necessary for the use of your device. H4053 by Emos.
USER MANUAL H4053 Emos
text_image
B C D F I
text_image
A G E H J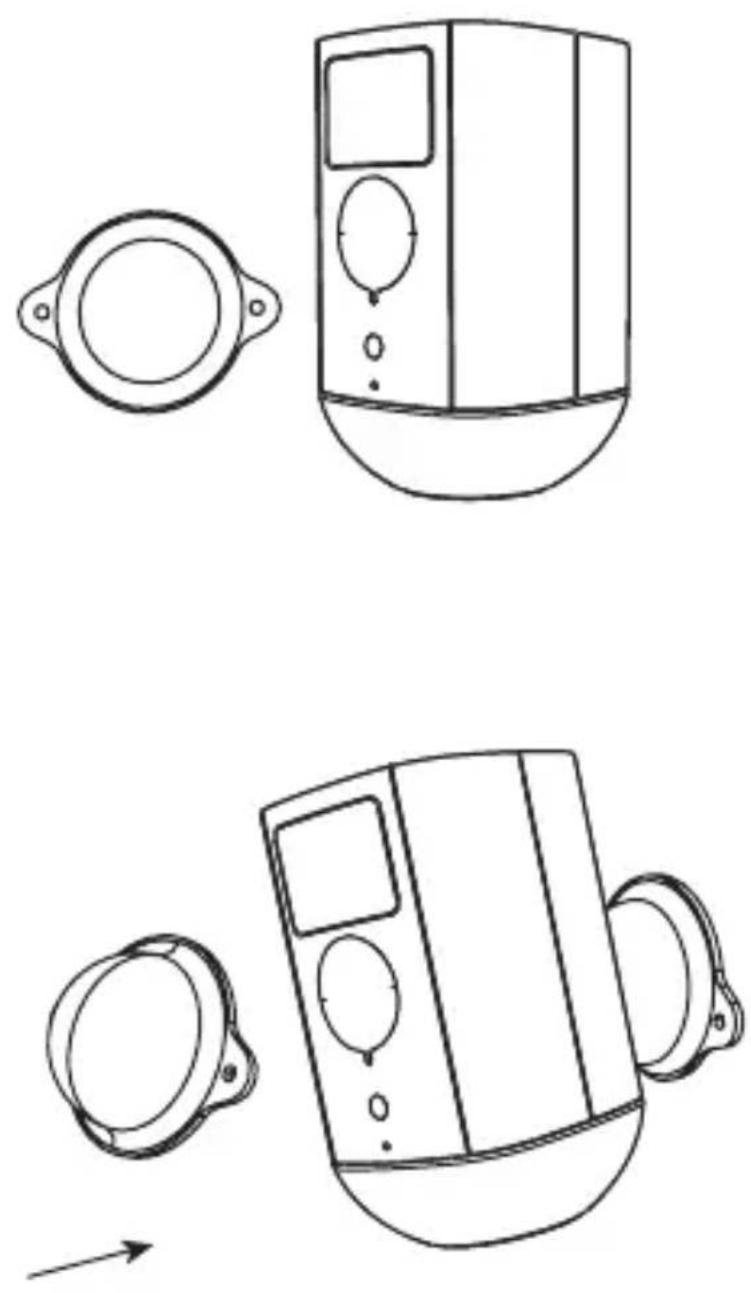

natural_image
Apple logo inside a circle with 'iOS Andr' text below (no other symbols or text)
natural_image
Android robot icon inside a circle with a horizontal bar below (no text or symbols)
text_image
iOS Android
text_image
QR code image containing encoded data, no visible human-readable text3
natural_image
Simple black-and-white icon of a smartphone (no text or symbols)
natural_image
Simple black rectangular object with two tall triangular extensions on top, resembling a stylized Wi-Fi icon (no text or symbols)
natural_image
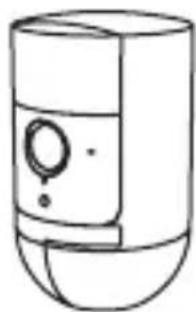
Simple line drawing of a cylindrical device with a handle and control panel (no text or symbols)
2.4 GHz 5 GHz

4
text_image
User Agreement and Privacy Policy Your privacy is of great importance, thus we have updated our Privacy Policy according to the latest laws and regulations to keep you fully informed. Before you consent to use our services, please kindly read through and comprehend what we present to you. More detailed information, please check Privacy Policy and User Agreement Agree Disagree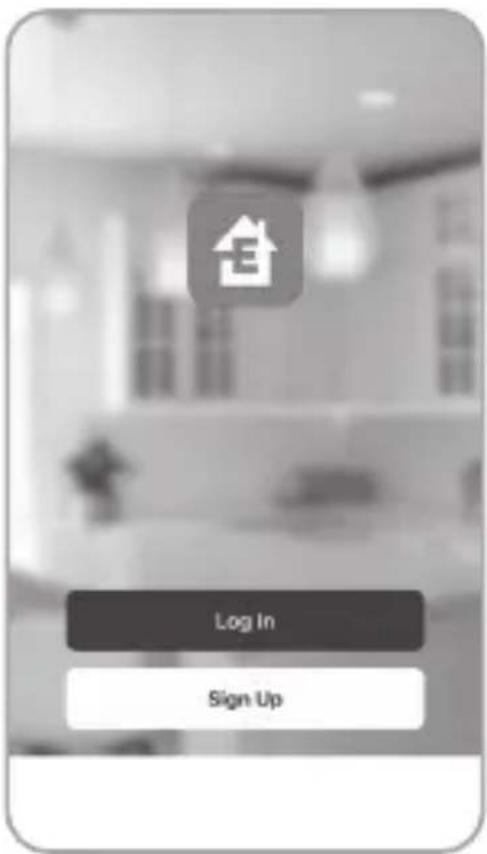
text_image
Log In Sign Up5a
text_image
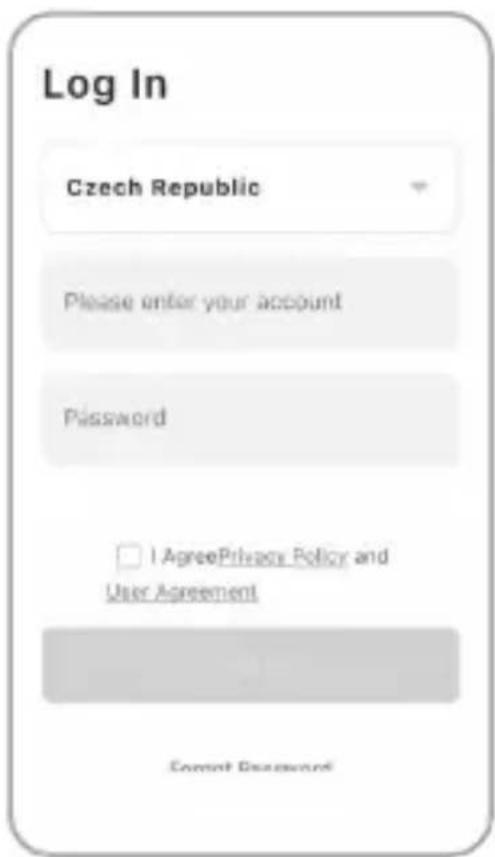
Log In Czech Republic Please enter your account Password I AgreePrivacy Policy and User Agreement Current Password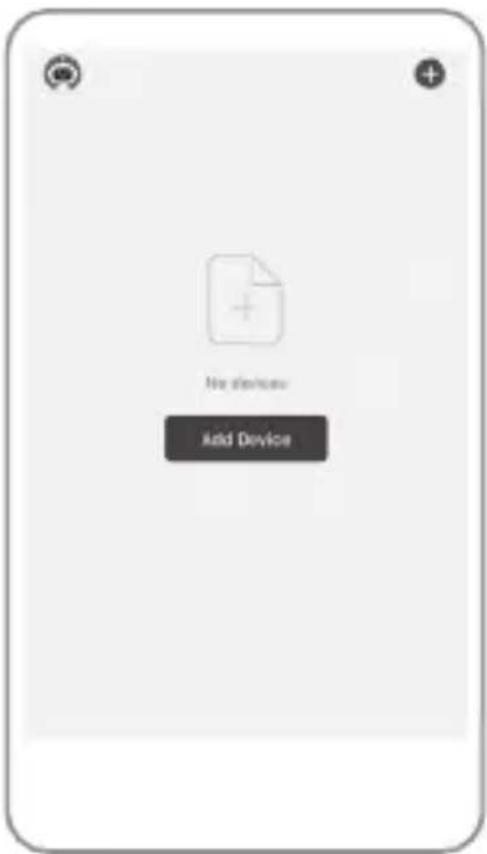
text_image
No devices Add Device5c
text_image
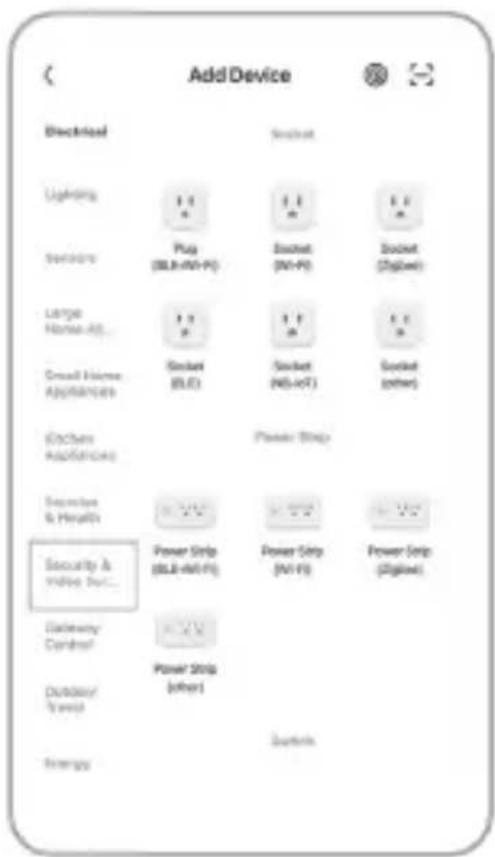
Add Device Electrical Lighting Sensors Large Home App Small Home Appliances Electrical Appliances Security & Health Security & Video Dev... Delivery Control Delivery/ Transit Energy Smartset Plug (BLB+40-F) Socket (M1-F) Socket (Digital) Socket (N5+47) Socket (other) Power Strip Power Strip (M1-F) Power Strip (Digital) Power Strip (other) Switch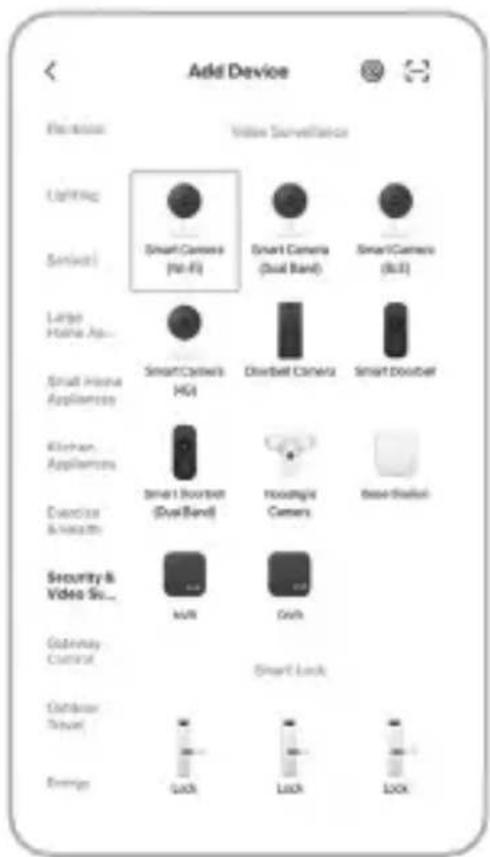
text_image
Add Device Electronics Video Surveillance Lighting Smart (No-Fi) Smart Camera Dual Band Smart/Camera BOLT Large Home Ap... Smart/Camera HUI Diverbell Camera Smart Doorbell Small Home Appliances Smart Doorbell Dye Band Houdgkin Camera Base Station Exercise & Health Security & Video Sci... BUR Cash Gateway Control Smart Lock Outdoor Street Lack Lock LDO6b
text_image
Reset the device Power on the device and make sure the indicator is flawling rapidly or a prompt tone is heard. Make sure the indicator is flashing quickly or a prompt tone is heard Next Reset Device Step by Step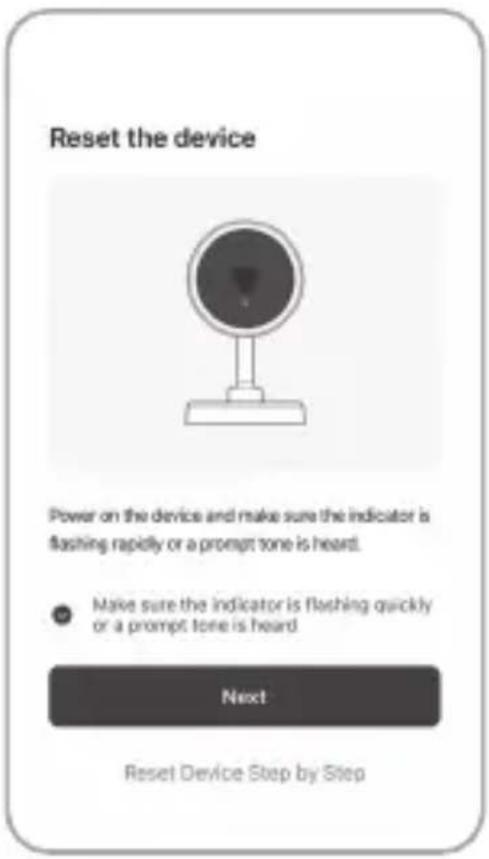
text_image
Reset the device Power on the device and make sure the indicator is flashing rapidly or a prompt tone is heard. Make sure the indicator is flashing quickly or a prompt tone is heard Next Reset Device Step by Step6d
text_image
Select 2.4 GHz Wi-Fi Network and enter password. If your Wi-Fi is 5GHz, please set it to be 2.4GHz. Common router setting method × Wi-Fi - 5GHz ✓ Wi-Fi - 2.4GHz Wi-Fi Name Enter your Wi-Fi name or gateway location access to End gateway Wi-Fi devices Open Password Next
text_image
Please scan the QR code from 16 to 20 cm away I Heard a Prompt No Prompts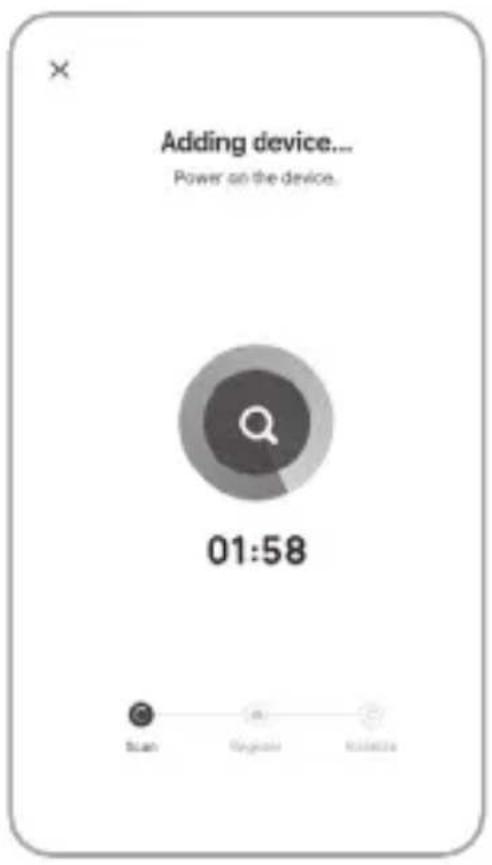
text_image
Adding device... Power on the device. 01:58 Scan Optogen Collectors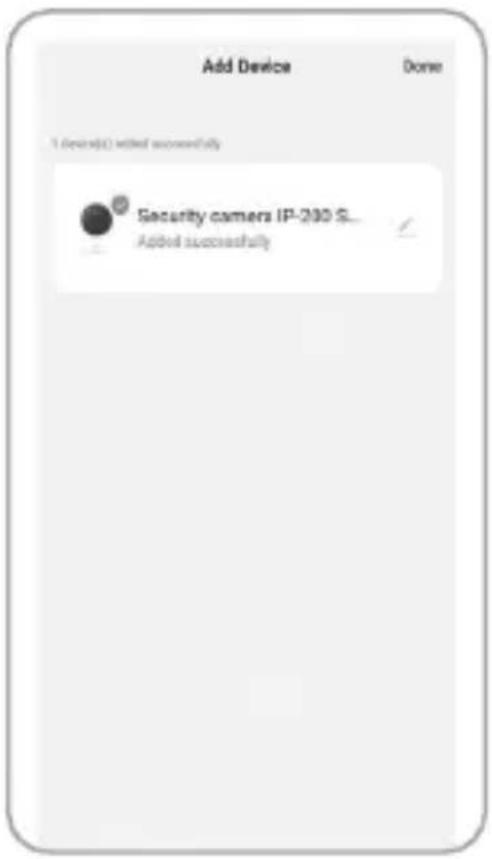
text_image
Add Device Done 1 (check) C added successfully Security camera IP-200 S... Added successfully6h
GB | IP Camera
Package contents:
Camera unit / Power adapter / USB cable / Magnetic mount / Rotary mount / Set of screws / Manual
Technical specifications:
Power supply: DC 5 V/1 A
Dimensions: 58 × 58 × 94 mm
Net weight: 225 g
Resolution: 1 920 × 1 080
Sensor: 1/2.9" 2 Megapixel CMOS
Battery capacity: 9 600 mAh
PIR detection range: 9 m
PIR angle: 120°
Lens: 3.2 mm, F2.0
Storage: SD card (max. 128 GB), Cloud storage
Enclosure rating: IP65
APP: EMOS GoSmart for Android and iOS
Connection: 2.4 GHz WIFI (IEEE802.11b/g/n)
Maximum number of users: 4
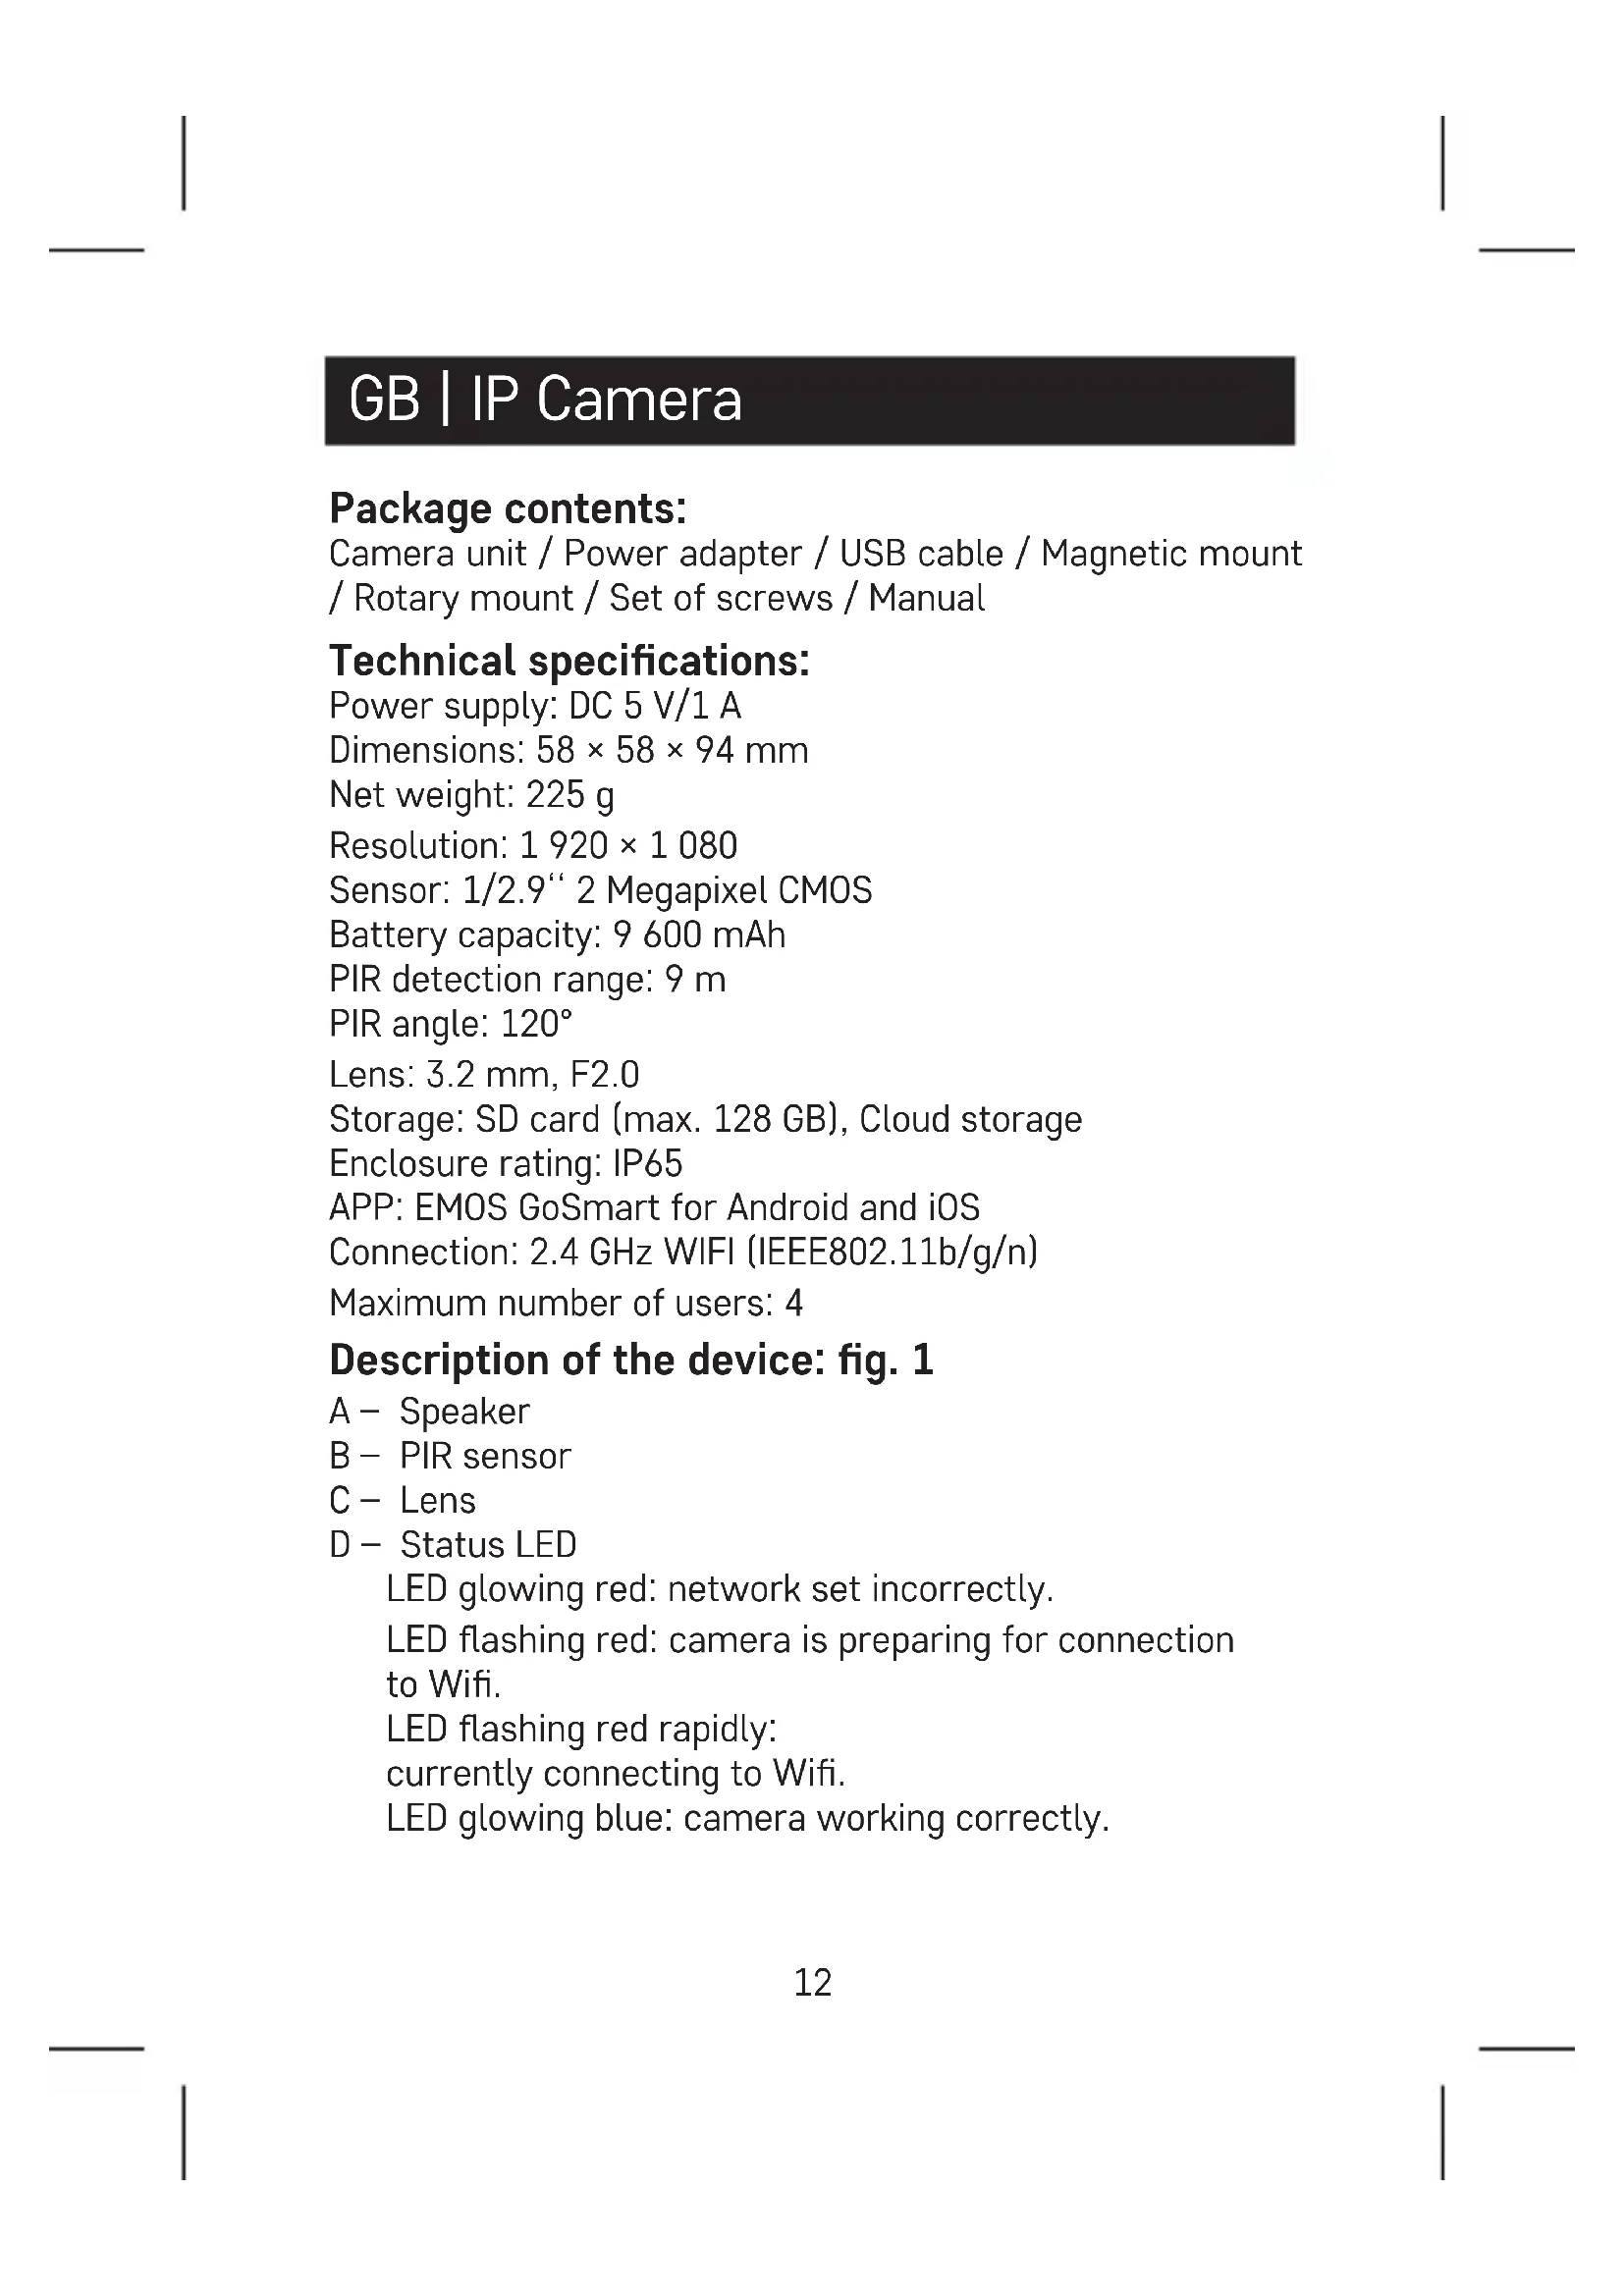
Description of the device: fig. 1
A - Speaker
B - PIR sensor
C - Lens
D - Status LED
LED glowing red: network set incorrectly.
LED flashing red: camera is preparing for connection to Wifi.
LED flashing red rapidly:
currently connecting to Wifi.
LED glowing blue: camera working correctly.
E - RESET button
Pressing and holding RESET for 5 s resets the device to factory settings.
F - Light sensor
G - Micro USB port
H - Charging indicator
LED glowing red: battery charging.
LED glowing blue: charging complete.
I - Microphone
J - SD card slot (max. 128 GB)
Installing the magnetic mount: fig. 2a
- Place the mount on the chosen spot and affix it using screws.
- Place the camera on the magnetic mount and adjust its direction as needed.
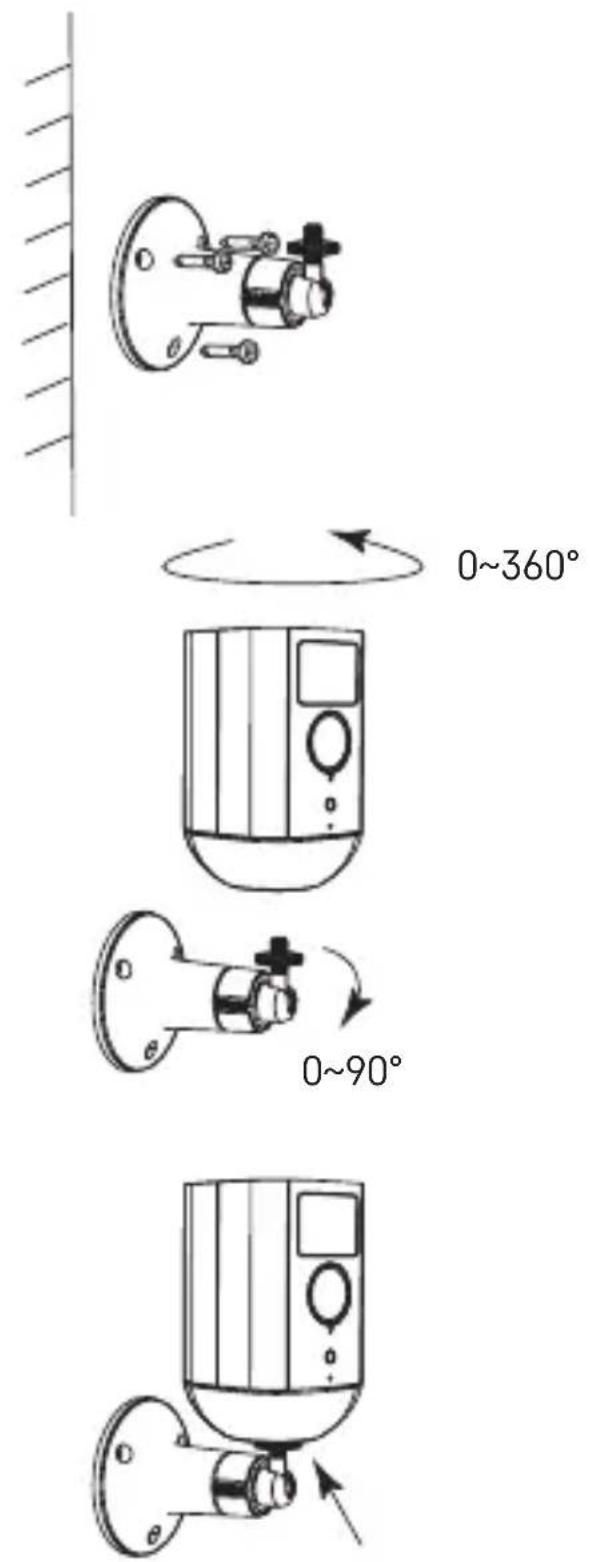
Installing the rotary mount: fig. 2b
- Place the mount on the chosen spot and affix it using screws.
- Place the camera on the rotary mount and adjust its direction as needed.
- Once the camera is positioned, affix it using screws.
Installing the EMOS GoSmart app: fig. 3
The app is available for Android and iOS on Google play and App Store.
Download the application by scanning the corresponding QR code.
Router setting: fig. 4
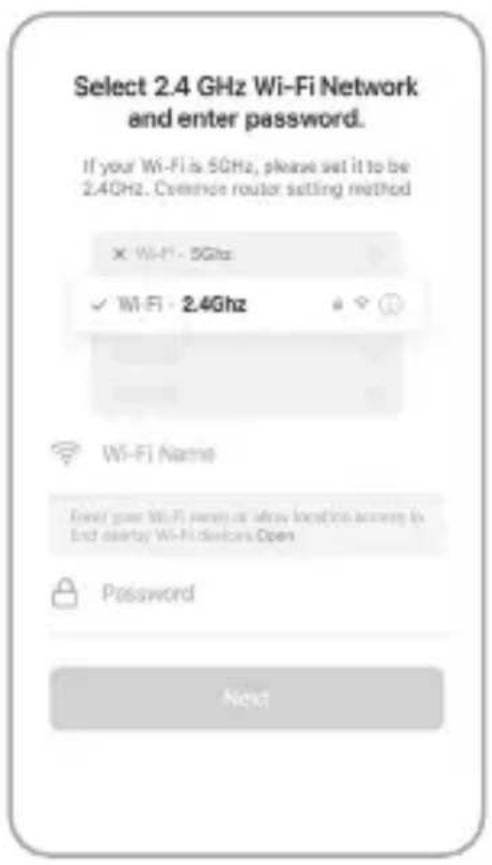
The camera only supports 2.4 GHz Wifi (not 5 GHz).
EMOS GoSmart mobile app:
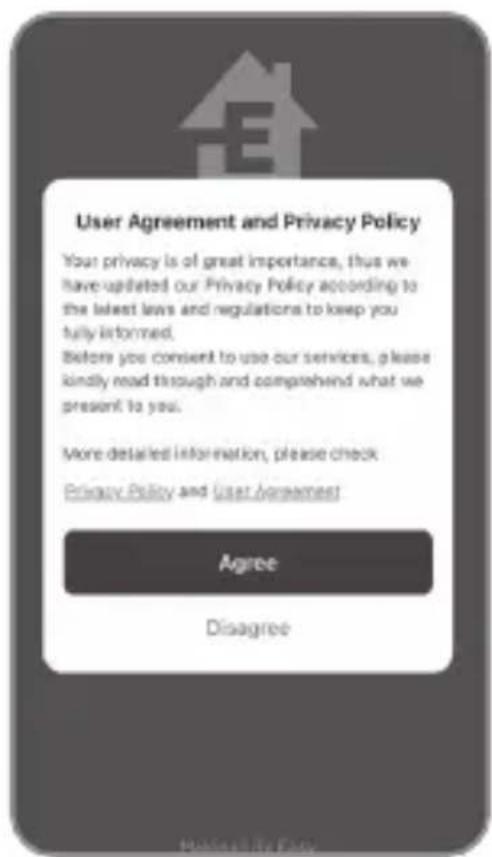
Fig. 5a
Open EMOS GoSmart and confirm the privacy policy by tapping agree.
Fig. 5b
Choose sign up.
Fig. 5c
Enter a valid e-mail address and choose a password.
Confirm the privacy policy by tapping agree.
Choose log in.
Fig. 6a
Choose add device.
Fig. 6b
Choose the corresponding product category.
Fig. 6c
Choose the correct type of product.
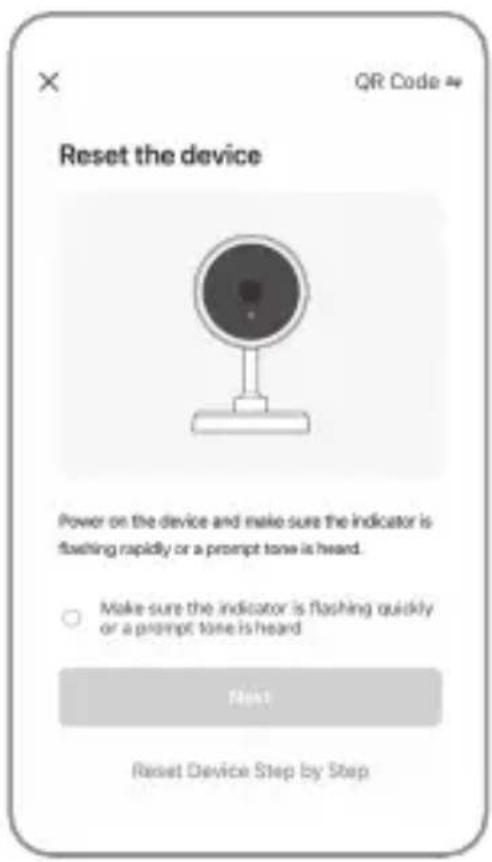
Fig. 6d
Connect the device to power.
Fig. 6e
Make sure the LED on the device is flashing.
Confirm by tapping next.
Fig. 6f
Enter the name of the Wifi network and password.
Confirm by tapping next.
Fig. 6g
A QR code will appear on the screen of your device.
Place the QR code in front of the lens of the camera unit.
Confirm that you have heard an audio signal for successful pairing.
Fig. 6h
The device will be detected automatically.
Fig. 6i
The device has been found.
Confirm by tapping done.
Connectivity: Wi-Fi 2.4 GHz IEEE 802.11b/g/n
Frequency band: 2.400–2.4835 GHz
Hereby, EMOS spol. s r.o. declares that the radio equipment type H4053 is in compliance with Directive 2014/53/EU. The full text of the EU declaration of conformity is available at the following internet address: http://www.emos.eu/download.
Do not dispose with domestic waste. Use special collection points for sorted waste. Contact local authorities for information about collection points. If the electronic devices would be disposed on landfill, dangerous substances may reach groundwater and subsequently food chain, where it could affect human health.
CZ | IP Kamera
Obsah balení:
APP: EMOS GoSmart for Android and iOS
D – Stavová LED dioda
APP: EMOS GoSmart for Android and iOS
Pripojenie: 2,4 GHz WIFI (IEEE802.11b/g/n)
APP: EMOS GoSmart for Android and iOS
APP: EMOS GoSmart for Android and iOS
Povezava: 2,4 GHz WIFI (IEEE802.11b/g/n)
D – Statusna LED dioda
APP: EMOS GoSmart for Android and iOS
Anschluss: 2,4 GHz WIFI (IEEE802.11b/g/n)
Stocare: SD card (max. 128 GB), Cloud storage
APP: EMOS GoSmart for Android and iOS
Conexiune: 2,4 GHz WIFI (IEEE802.11b/g/n)
Alimentation: DC 5 V/1 A
Dimensions: 58 × 58 × 94 mm
Poids net: 225 g
APP: EMOS GoSmart for Android and iOS
Connessione: 2,4 GHz WIFI (IEEE802.11b/g/n)
App EMOS GoSmart mobile:
Fig. 5a
APP: EMOS GoSmart for Android and iOS
APP: EMOS GoSmart for Android and iOS
Aansluiting: 2,4 GHz WIFI (IEEE802.11b/g/n)