
VE305WE1 - Washing machine BRANDT - Free user manual and instructions
Find the device manual for free VE305WE1 BRANDT in PDF.

| Product type | Dishwasher |
| Brand | BRANDT |
| Model | VE305WE1 |
| Power supply | 220-240 V, 10-16 A fuse |
| Water connection | 1.50 m hose, pressure 1-10 bar, min. flow 10 L/min |
| Waste water drainage | Drain hose 1.50 m (extendable up to 4 m) |
| Installation | Freestanding or built-in under worktop |
| Sound level | Sound insulation apron and seals provided |
| Door panel | Laminate panel 595 x 585 mm, max. thickness 4 mm |
| Capacity | Standard (not specified in manual) |
| Programs | Not specified (partial manual) |
| Safety | Anti-tip, mandatory grounding |
| Softener adjustment | According to water hardness |
Frequently Asked Questions - VE305WE1 BRANDT
User questions about VE305WE1 BRANDT
0 question about this device. Answer the ones you know or ask your own.
Ask a new question about this device
Download the instructions for your Washing machine in PDF format for free! Find your manual VE305WE1 - BRANDT and take your electronic device back in hand. On this page are published all the documents necessary for the use of your device. VE305WE1 by BRANDT.
USER MANUAL VE305WE1 BRANDT
Raccordement electrique 6-7
Installing your dishwasher 19-25
Levelling by adjusting the feet 19
Noise insulation flap. 19
Possibilities for building in or facing. 20
Water connections 21
Draining away the waste water 22
Electrical connection 22-23
Foam strip and soundproofing seal. 24
Installing the plastic corner brackets 24
Safety instructions 24
Building in under a hob 24
Dishwasher with built-in hob 25
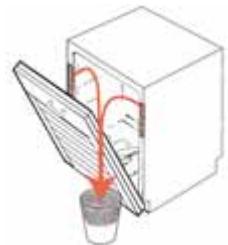
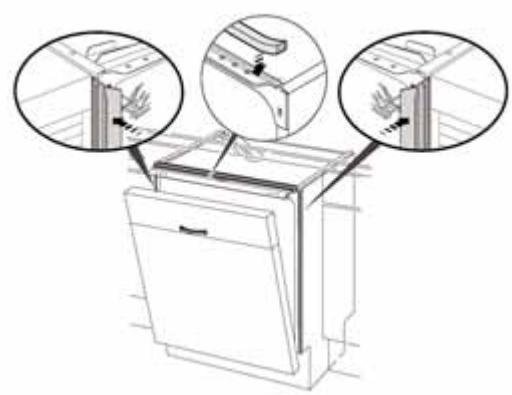
Installing your dishwasher
Remove the 2 red
protective wedges from the front of your appliance to avoid causing a leak.
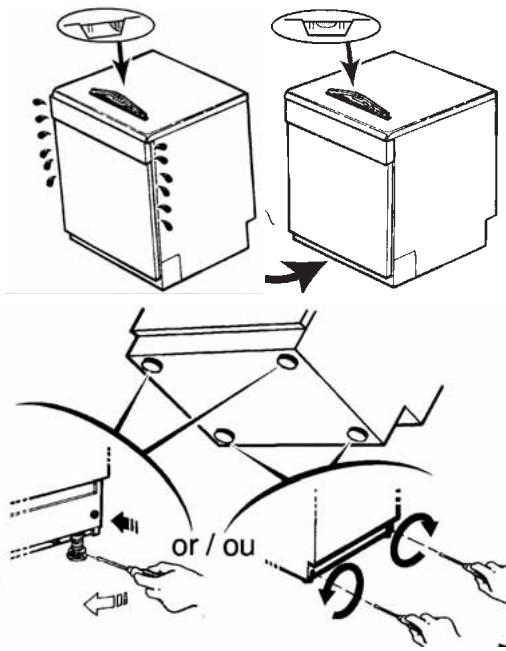
Levelling by adjusting the feet
Ensure that your dishwasher is well balanced and stable. The four feet can be adjusted, so adjust them if necessary using a screwdriver. If the feet are poorly adjusted, this decentres the door and makes your dishwasher wobble, causing leaks.
For dishwashers that can be built-in, fitted with rear feet adjustment via two knurled knobs on the base of the machine, at the front, use a screwdriver, without exerting force, to finish the adjustments to avoid damaging the worktop.
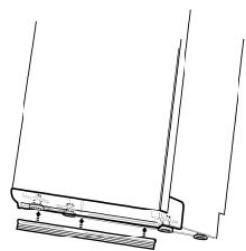
Noise insulation flap
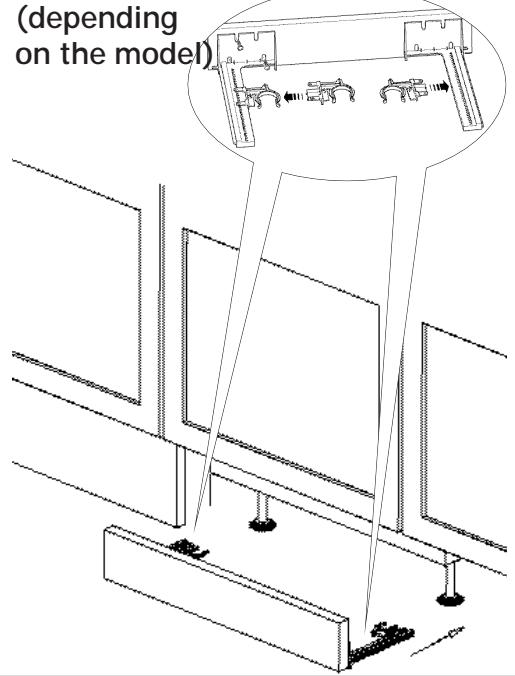
For better noise insulation, install the flap supplied with your dishwasher (depending on the model):
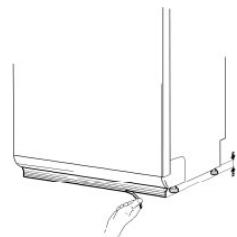
①. Slightly tilt the dishwasher backwards to clip the flap onto the base of the plinth. Ensure that it clips firmly at three points (each end and the centre)
②. Adjust the height of the flap by cutting off one or more strips after nicking the end with a pair of scissors.
The flap should be in contact with the floor.
①
(2)
Installing your dishwasher
Freestanding unit
You can use the top as a worktop. We recommend that you do not place your dishwasher too close to a heat source, otherwise you risk damaging the edging around the top.
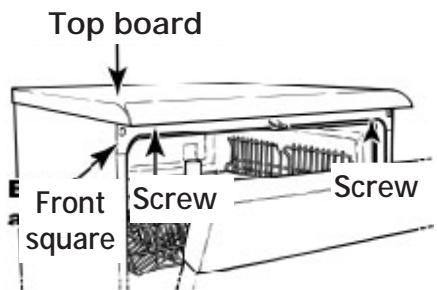
Built-in unit
If you are installing your dishwasher under an existing worktop:
- Remove the board from the top by unscrewing the two screws located underneath it (the corner brackets must remain on the machine).
- Adjust the height of the feet, if necessary.
- Fix your dishwasher to the worktop with two screws under the front corner bracket.
If your worktop is marble or a similar material, you can fasten your dishwasher in place at the sides using two brackets (available from the After-Sales department or from your dealer).
You can also build your machine into a column (raised above the floor).
GB
Faceable units
You can also match the colour of your machine to the units surrounding it by putting a facing on the door.
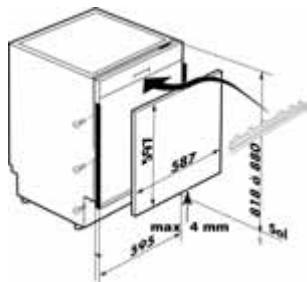
- Preparation
- Cut a laminated panel to the following dimensions (in mm): 595 × 585 with a maximum thickness of 4mm
-
Facing the door
-
Unscrew the 9 fixing screws from the facing bracket and remove it;
- Install the previously cut facing panel;
- Press the bracket hard onto the panel and retighten the fixing screws.
Balancing the door (depending on the model)
Adjust the tension on the springs, if required, to compensate for the weight of the facing panel. Adjustment is easier with the door closed.

(2)
Installing your dishwasher
Water connections
Important: check the water's hardness: all the information you require is provided in the Chapter "Adjusting the water softener" in your operating instructions manual.

When the tap is on the left-hand side of the machine, use the "anti-kinking" hook supplied with the machine to avoid any risk of the supply hose kinking while you are fitting your dishwasher. ( For large diameter safety hoses- depending on the model)
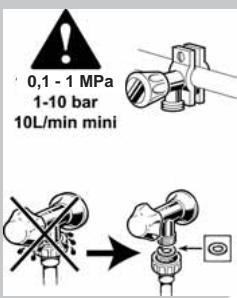
Tap: with threaded end, 20/27mm dia. (3/4" BSP)
Flow: 10l/min. minimum
Pressure: 1 bar to 10 bars (0.1 - 1 MPa)
In the event of high pressure, it is advisable to fit a pressure regulator. Your Water Company will give you the necessary information.
Length of the water supply pipe (standard unit): 1.50m

"Hazardous symbol
Voltage"
(dependently on the model) the hoseis fitted with an electrical device
Connecting the hot water:
Check that your original hose is designed for connection to the hot water supply (red marking on the hose).

If you use a self-piercing tap, check
that there is sufficient water flow.
Check that the seal is fitted and that the connection is tight.
If necessary, you can alter the hose's direction. To do this, loosen the connection at the bottom left on the rear of the machine and swivel it as necessary. Fully tighten the connection again and check that there are no leaks.
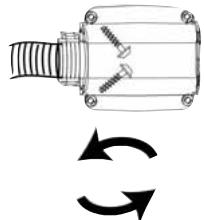
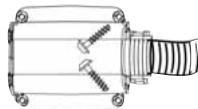
For dishwashers fitted with safety hoses:
You must remove the protective cover (see the drawing
opposite) to alter the hose's direction. To do this, loosen the two screws (end fitting T20), remove the protective cover, position the connection in the direction you wish
and then replace the protective cover.
When you are making a new installation, you must use a new hose to connect the machine to the water supply: you must not re-use the old hose.

Installing your dishwasher
Draining away the waste water
Length of the drain hose: standard 1.50m. If necessary, you can increase the length of the drain hose (4m max.). In this case, check that the machine drains correctly.
Connect the drain hose:
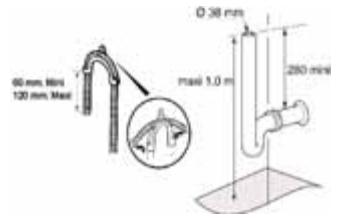
- To a ventilated siphon
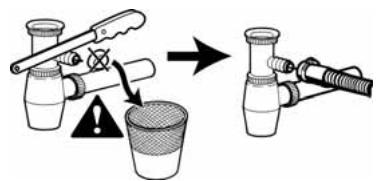
- To a sink U-bend
Remove the stopper form the U-bend.
Remove the rubber stopper and, if necessary, add a collar.
- Directly to your sink
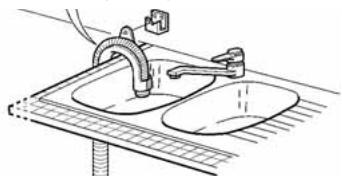
Ensure that you hold your drain hose in place with the end connector to avoid flooding.
For machines installed in columns, the height of the drain hose must not be higher than the top of the machine.

NB: Pull the pipe
when installing it to avoid kinking it.

Electrical connection
Mains voltage: 220-240V
Fuse: 10A, 13A or 16A
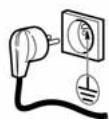
The socket outlet must be grounded to Earth.
In all cases, the connection must comply with the standards in force in the country concerned, together with the supplementary regulations of the Electricity Authority. The machine must be switched off when the connection is made to the electrical circuit.

We cannot be held
liable for any damage caused by the faulty earthing of the machine.
If you have any doubts regarding the condition of your installation, do not hesitate to have it checked by a qualified electrician.
The machine must be installed so that the socket remains accessible.
Installing your dishwasher
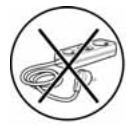
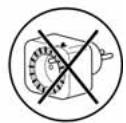
Do not use an electrical extension, a double socket or an electrical timer. The installation must comply with the country's prevailing norms.
Your dishwasher complies with European Directives 73/23/EEC (Low Voltage Directive) and 89/336/EEC (Electromagnetic Compatibility), modified by Directive 93/68/EEC.

Replacing thepower cable
For your safety, this operation must be performed by the manufacturer's After-Sales department or a person with similar training and experience in order to avoid any risk.

IMPORTANT for the dishwasher without plug.
The wires in this mains lead ar coloured in accordance the following
code :
Green & Yellow
Earth
Blue
Neutral
Brown
Live
As the colours of the wires in the mains lead of this appliance may not correspond with the terminal in your plug, proceed as follows; The wire which is coloured Green and Yellow must be connected to the terminal which is marked with the letter «E» or by the earth symbol ± or coloured Green end Yellow.
The wire which is coloured Blue must be connected to the terminal which is marked with the letter «N» or coloured Black.
The wire which is coloured Brown must be connected to the terminal which is marked with the letter «L» or coloured Red.
Installing your dishwasher
Foam strip and soundproofing seal To provide better noise insulation on built-in appliances, install the soundproofing seals and the foam strip supplied with your machine (depending on the model).
Installation of the adjustable plinth on built-in appliances (depending on the model)
Depending on the mode
Safety instructions

For your safety's sake, never leave your dishwasher's door fully open after use.

If the machine is operating incorrectly, disconnect it from the electricity supply (remove the plug) or switch off the circuit involved and the water supply tap. Contact our After-Sales department.

If your dishwasher is being installed on a carpeted floor, make sure to adjust the feet to leave a ventilation space under the machine
Building in under a hob

If your worktop is fitted with a built-in hob over your dishwasher, you must provide thermal insulation on top of the machine. You can use this insulation kit from your dealer. Take care to leave a space open the gas pipe and the top of your machine.
Installing your dishwasher
Dishwasher with built-in hob

To avoid hindering manipulation of the cooking utensils, we would recommend that you install the dishwasher so that there are units or walls at least 30cm to the right and left of the hob. This can be reduced but must not be less than 4cm between the edge of a stand and any unit or wall rising above the height of the worktop to the left of the dishwasher to avoid any risk of damage.

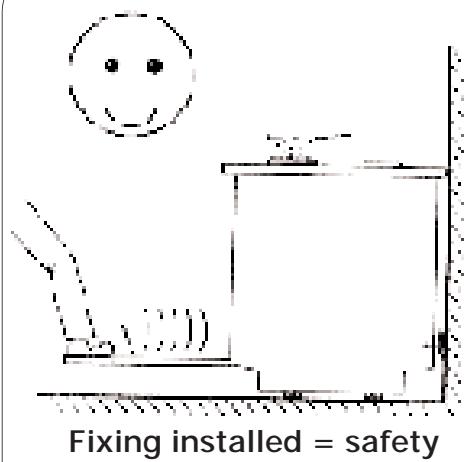
- Your dishwasher combines 2 functions, which means that it must be connected to the wall so that it is completely safe to this is to prevent a child, who may accidentally lean on the door while unloading or unloading the dishes, from causing a hot (boiling) pan on the hob to fall, resulting in severe burns or scalds. A set of doors and an anti-tilt device are supplied with this machine. Potential that these instructions be observed.

Unless the anti-tilt device is installed correctly, the machine will not operate. See the notice stuck onto the machine.
Putting a facing on the door: please refer to Page 20
Pages
Tia kaotepn nxouovwn, too0eTrote Tnv noia nov npapadiedetai uci u e to πluvtnpio (avaloya u e to oovteLo):
① -EiEeTLeiyo npoC ta πiω to i o yia va eapuOeTe tnv nxoouwtiKn noia sto kαtwmuεpoc tou a a i i eó i a p u o e i 0e tpia onmuia (akpa kai Kevtro).
② -PvOiOTe to KevIpo Tns nOdiac KoBovTc to xepi mia n epiooTopec oupides afou koyete tnv akpn e eva yaiidi.