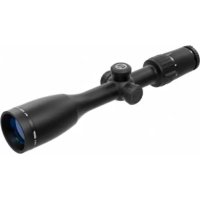
Jaeger - Riflescope Yukon - Free user manual and instructions
Find the device manual for free Jaeger Yukon in PDF.


User questions about Jaeger Yukon
0 question about this device. Answer the ones you know or ask your own.
Ask a new question about this device
Download the instructions for your Riflescope in PDF format for free! Find your manual Jaeger - Yukon and take your electronic device back in hand. On this page are published all the documents necessary for the use of your device. Jaeger by Yukon.
USER MANUAL Jaeger Yukon
text_image
YUKON® ADVANCED OPTICS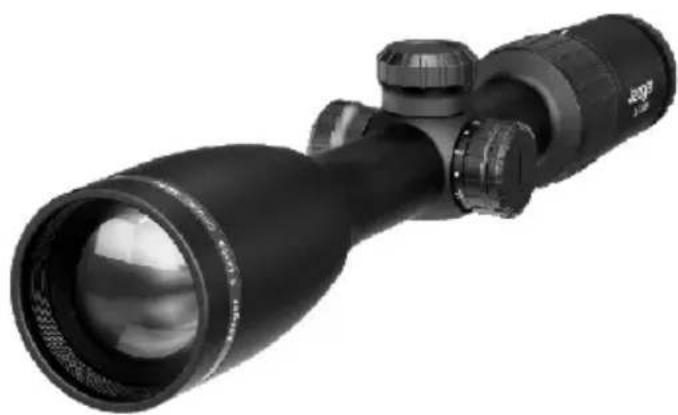
natural_image
Black optical optical device with lens and aperture (no visible text or symbols)
www.yukonopticsglobal.com
ENGLISH / FRANÇAIS / DEUTSCH / ESPAÑOL / ITALIANO / PYCCKIЙ
Attention!
The optical sight Jaeger 3-12x56 (#23028) requires a license if exported outside your country.
Attention!
* The sight is supplied with one of the reticles. Name of the reticle is shown in sight's name and SKU number (for example, "23026 X01i" – model Jaeger 1.5-6x42 with reticle X01i).
PACKAGE CONTENTS
• Optical sight Jaeger
• Eyepiece and lens caps
- User manual
- Lens cloth
- Warranty card
For improvement purposes, design of this product is subject to change.
FEATURES
- Reinforced body (designed to mount front lens attachment)
• Various reticles with multi-level illumination
• Turrets resettable to zero - Wide field of view
• High shock resistance – up to 7000 Joules
• Nitrogen-filled optical channel
• Waterproof and dust resistant - Long eye relief
• Precision windage/elevation adjustment
• Multicoated lenses
DESCRIPTION
Optical sights Jaeger are designed for target shooting using weapon of various calibres, including large ones.
- Jaeger 1-4x24 - is a light and compact sight designed primarily for driving hunt.
- Jaeger 1.5-6x42 - is a universal model for driving hunt, shooting moving targets at short distances and average distances.
- Jaeger 3-9x40 - is designed for shooting in low light conditions small-, average- and large-sized targets at short, average and long distances. This model features a perfect balance between weight/size and range of magnifications.
- Jaeger 3-12x56 – is a model with a high light gathering capacity which allows use even in the twilight. The model is suitable for shooting small targets at long distances.
OPERATION
Battery installation
- Unscrew the cover of the battery container.
- Remove the protective film from the battery.
• Install a CR2354 battery into the battery container according to the marking, tighten the cover.
Focusing the eyepiece
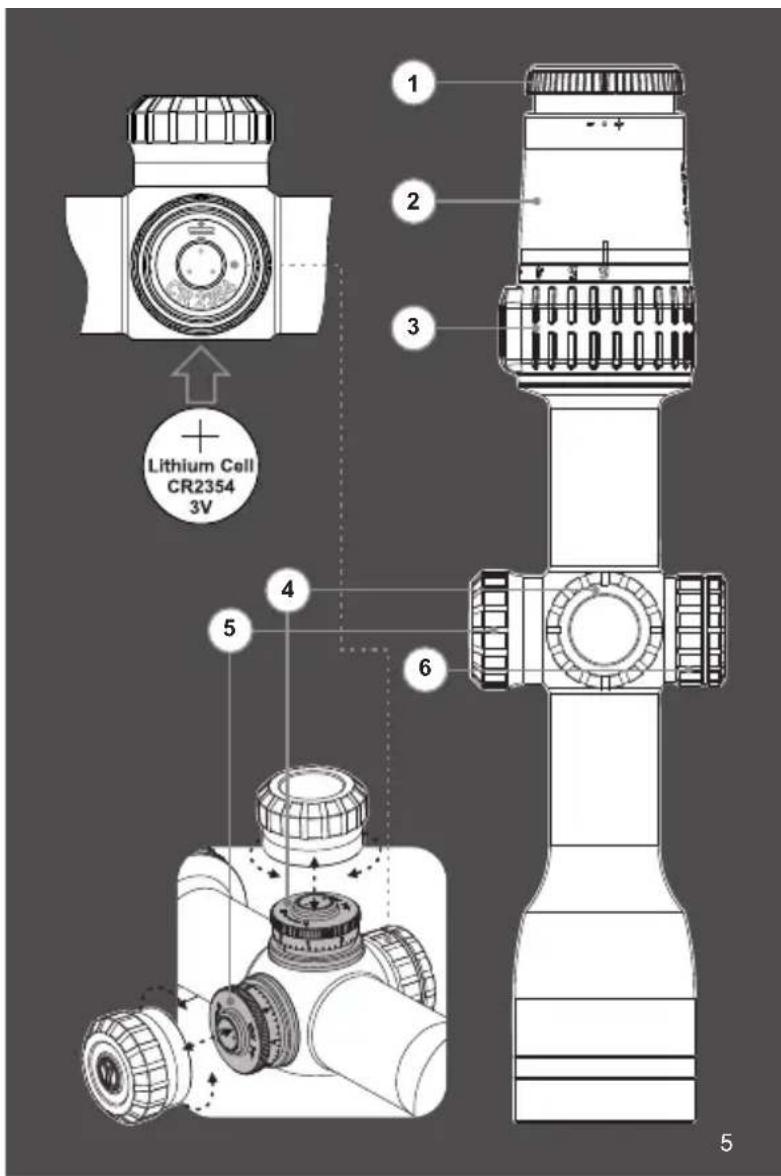
- Look at a distant object through the eyepiece (2), eye relief should be around 90 mm.
- If the reticle image is blurry, rotate the diopter adjustment ring (1) until the image is sharp and clear.
WARNING: Never look at the sun through the riflescope (or any other optical instrument) - it may permanently damage your eyes.
text_image
Lithium Cell CR2354 3V 1 2 3 4 5 6 5Mounting on a rifle
- To ensure precise shooting the sight should be correctly mounted on a rifle.
- Use a high-quality mount with bases (not included) designed to fit your type of rifle.
- The scope should be mounted as low as possible without touching either the barrel or the receiver. Before tightening the mount rings make sure you have the necessary eye relief that allows you to see a full field of view.
WARNING: If the scope does not have sufficient eye relief, its rearward motion may injure the shooter when the rifle recoils.
ZEROING
(The below described zeroing procedure is designed for Jaeger sights with reticles X01i, T01i or M01.
Zeroing procedure for sights with X02i reticle can be found in the X02i description file).
Bore sighting is a preliminary procedure to achieve proper alignment of the sight with the rifle's bore.
Set a target at a distance of about 100 m.
- Mount the rifle with the riflescope installed on a bench rest.
- Aim at a target.
- Adjust the eyepiece (1) to achieve a sharp image of the target.
• Take aim and shoot at the centre of the target. - If the point of impact did not match with the aiming point, unscrew the caps of windage (3) and elevation (4) turrets and use the turrets to line up the centre of the reticle and the point of impact as follows:
-
if the point of impact is lower than the aiming point,
-
weapon requires shot correction upward (U), corresponding to counterclockwise turn of the elevation turret (4).
- if the point of impact is higher than the aiming point, weapon requires shot correction downward (D), corresponding to clockwise turn of the elevation turret (4).
- if the point of impact is to the left of the aiming point, weapon requires shot correction to the right (R), corresponding to counterclockwise turn of the windage turret (5).
- if the point of impact is to the right of the aiming point, weapon requires shot correction to the right (L), corresponding to clockwise turn of the windage turret (5).
• Take two shots. If required, re-zero the reticle. - After zeroing pull out the windage/elevation turrets from the catch and set the zero mark of the subring to the index point. Push the turret down in the catch. The index is useful to find the original location again for later reticle adjustments in the future.
ATTENTION! Each "click" of the Adjustment Scale Ring will change bullet impact by 1/4 MOA (Minute of Angle) which equates to 7 mm at 100 meters (for the model #23025: 12 MOA - 15 mm at 100 m).
AIMING RETICLES
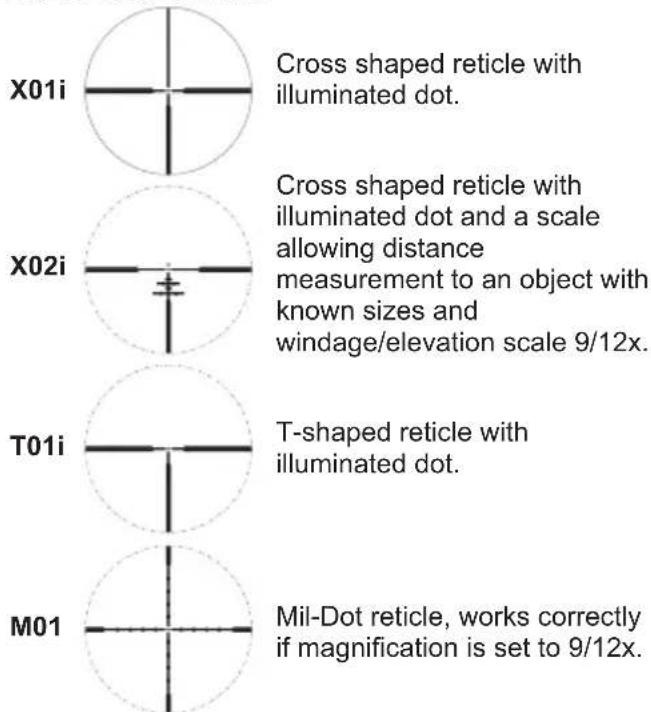
All Jaeger optical sights are equipped with various types of reticle (see the table below). All reticles have a red illuminated dot. To change illumination power, rotate the knob (6) opposite the corresponding mark on the housing showing one of the eight illumination levels. After setting the required value, rotate the knob per one click clockwise or counterclockwise to turn off the illuminated dot.
Reticle illumination is powered by a single CR2354
Lithium battery. To replace the battery, unscrew the cover of the knob (6) counterclockwise and insert a new battery with "+" facing upwards.
Note: please note that if the sight is to be used with a Night Vision attachment, reticle illumination level should be set to "NV".
JAEGER RETICLES
text_image
X01i Cross shaped reticle with illuminated dot. X02i Cross shaped reticle with illuminated dot and a scale allowing distance measurement to an object with known sizes and windage/elevation scale 9/12x. T01i T-shaped reticle with illuminated dot. M01 Mil-Dot reticle, works correctly if magnification is set to 9/12x.The reticles in the Jaeger sights are in the second (rear) image level. The advantage of such location is that the reticle is not magnified during magnification change but always remains the same.
But the angular size of the reticle changes proportionally to the change of magnification.
CHANGE OF MAGNIFICATION
To change magnification, rotate the Zoom Ring (3) to align the required number on the power scale with the index dot.
When still-hunting or stalking game, a variable scope should be set to lower magnifications at close range. Higher magnifications should be reserved for precise long-range shots.
TECHNICAL INSPECTION
It is recommended that you inspect the riflescope before every use. Make sure to check for the following:
- Visually inspect that the unit is free from any physical damage: cracks, dents or signs of corrosion which may impair full functionality.
- Check the sturdiness and proper fit of the mounting system.
- Ensure that the objective lens and eyepiece are free of cracks, grease spots, dirt, water stains and other residue before use.
- Visually inspect the condition of the battery and the battery compartment the battery should be free of electrolyte and oxidation residue, especially where the battery makes contact with metal.
TECHNICAL MAINTENANCE
Technical maintenance should be done no less than twice a year, and is comprised in the following steps:
- Clean the outside metallic and plastic surfaces from dust, dirt and moisture wipe the scope with a soft lint free cloth.
- Clean the battery compartment's electric contact points using an oil-free solvent.
- Inspect the eyepiece lens and the objective lens and gently blow off any dust and sand, and clean using lens cleaner and a soft clothsee section entitled «GUIDELINES FOR OPERATION».
STORAGE
Always store the unit in a dry, well-ventilated space.
WARRANTY
The Manufacturer warrants its products against defects in materials and workmanship for a period of ten years from the moment of purchase or from the manufacturing date if there is no receipt to prove purchase.
To avoid any problems, we recommend becoming familiar with the device's user manual.
The warranty does not cover any external damage to the device, its casing or adjustable parts' movements (i.e. smooth movement or rough movement).
The manufacturer has the right to render the warranty null and void in the following cases:
if the device has been modified or tampered with;
- if the device has been dropped or has marks of mechanical or chemical damage;
- if the device has been tampered with by an unauthorized repairer;
- if the device has been damaged as a result of fire or natural disasters;
- if the device has been damaged as a result of liquids or other substances getting inside.
In the event of activating the warranty repair service, please contact the distributor where the device was purchased or contact the national distributor in your country.
Any product returned under this warranty should be packaged in a sturdy, outsideshipping carton, to prevent damage in transit.
In addition, it must be accompanied with the following items:
• Letter explaining the unit's problem.
- Copy of the original receipt showing when and where the product was purchased.
- Return shipping information, including return address and contact person.
Please contact our service centre with any questions you may have – e-mail:
euservice@yukonopticsglobal.com
FRANÇAIS
CARACTÉRISTIQUES
Environment protection first!
Your appliance contains valuable materials which can be recovered or recycled.
Leave it at a local civic waste collection point.