ACCCFEH5C - TV Accessories LG - Free user manual and instructions
Find the device manual for free ACCCFEH5C LG in PDF.
| Product type | Fixed ceiling mounting kit |
| Brand | LG |
| Model | ACCCFEH5C |
| Usage | Mounting a TV on the ceiling |
| Compatibility | Concrete ceiling only |
| Number of people required for installation | At least 2 people |
| Package contents | T-con unit, covers, type B pipes, screws (M3 x L5.5, M4 x L6, M3 x L4.5, M4 x L8, M4 x L10), HDMI cables (FRONT and REAR), 16/22 pin cables (with and without red marker), ceiling fixings, washers, nuts |
| Optional accessories | Type A pipe, additional covers |
| Required drilling depth | 45 mm to 55 mm |
| Drill bit diameter | 14.5 mm |
| Tightening torque of anchor screws | 45 kgf/cm |
| T-con unit fixing screws | M4 x L8 (6 screws), M4 x L6 (4 screws) |
| Type of included cables | HDMI (2), 16/22 pin cables (2) |
| Safety | Do not install on plasterboard or fibreboard (MDF) ceiling |
| Maintenance | Clean with a soft, dry cloth |
Frequently Asked Questions - ACCCFEH5C LG
User questions about ACCCFEH5C LG
0 question about this device. Answer the ones you know or ask your own.
Ask a new question about this device
Download the instructions for your TV Accessories in PDF format for free! Find your manual ACCCFEH5C - LG and take your electronic device back in hand. On this page are published all the documents necessary for the use of your device. ACCCFEH5C by LG.
USER MANUAL ACCCFEH5C LG
natural_image
Diagram of a circular mechanical component with four labeled parts and directional arrows indicating motion (no text or symbols)
natural_image
Diagram of a mechanical device with an inset showing motion direction and rotation arrows (no text or symbols)text_image
Diagram showing cable connection transformation from two cable bundles to a multi-band cable, with labeled components and directional arrow.
flowchart
graph LR
    A["Device with 16 Units"] --> B["Device with 22 Units"]
    B --> C["Final Device with 22 Units"]
text_image
Diagram illustrating a mechanical or electrical device with labeled components and a magnified inset showing connections to four different components.natural_image
Technical diagram of an industrial machine with a magnified inset showing internal components and wiring (no text or symbols)natural_image
Technical diagram of a mechanical device with an inset showing internal wiring and a circular component (no text or symbols)natural_image
Technical diagram of a mechanical device with internal components and directional arrows indicating motion (no text or symbols)natural_image
Diagram of a mechanical device with rotating components and directional arrows indicating motion (no text or symbols)
natural_image
Diagram of a device with rotating components and directional arrows, no text or symbols presentnatural_image
Technical line drawing of a mechanical device with rotating arms and a base mount (no text or symbols)! 맹커 나사의 고정 방법
natural_image
3D illustration of a twist drill bit with spiral grooves (no text or symbols)●
natural_image
Simple geometric diagram with two stacked rectangles, one white and one gray, forming a T-shape (no text or symbols)●

natural_image
Diagram of a mechanical component with a threaded shaft and central bore, no text or symbols present천장 부착판 고정용 앵커 나사
4
natural_image
Pure mechanical assembly diagram showing a bolt and spring without any text or symbols●
text_image
와셔/ 너트6
natural_image
Mechanical assembly diagram showing a bolt inserted into a housing with a spring-loaded component (no text or labels)natural_image
Diagram of a mechanical device with rotating components and directional arrows, no text or symbols presenttext_image
Diagram showing network topology with labeled connectors and connectors, including a device and a close-up of connected cables.text_image
Diagram showing a server rack connected to a device with labeled front/rear ports and directional arrows indicating connection.text_image
Technical diagram showing mechanical assembly steps with numbered annotations and directional arrows indicating motion or movement.natural_image
Technical line drawing of a computer drive chassis with ports and connectors (no text or labels)
text_image
Diagram showing connection between a device and an electrical outlet, with labeled components and cable connections.
LG
Life's Good
OWNER'S MANUAL
Fixed Ceiling Mount Kit
Please read this manual carefully before operating your set and retain it for future reference.
ACC-CF-EH5C
text_image
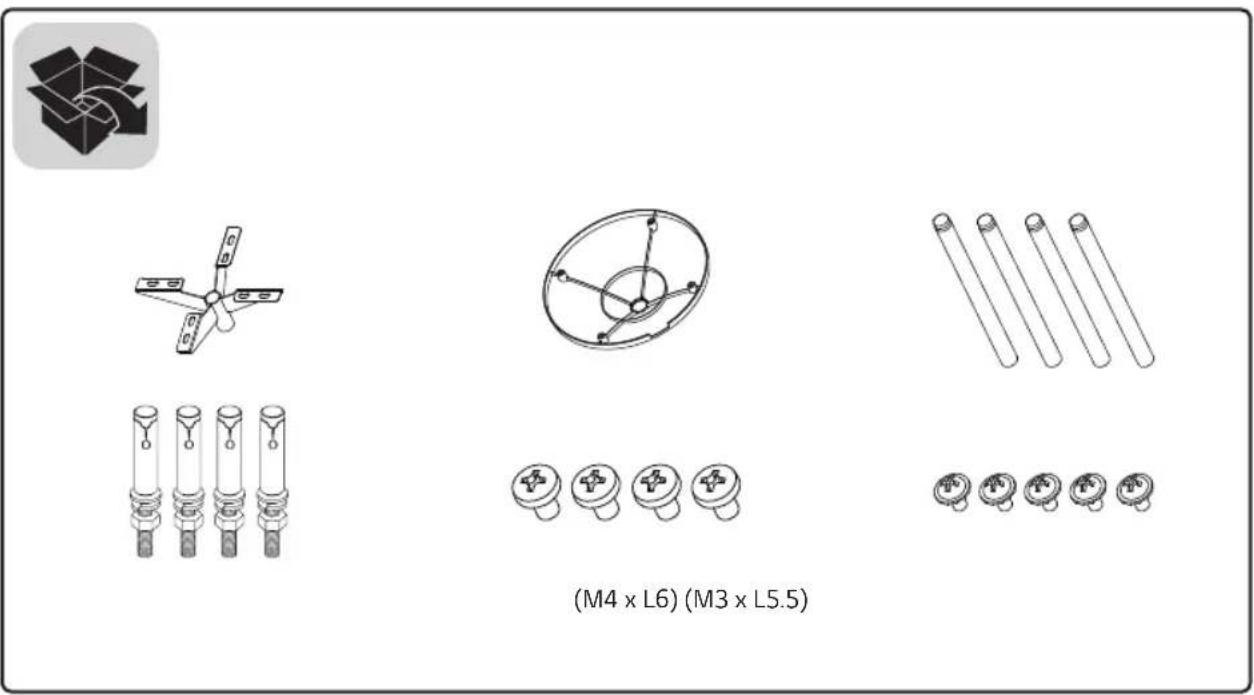
(M4 x L6) (M3 x L5.5)
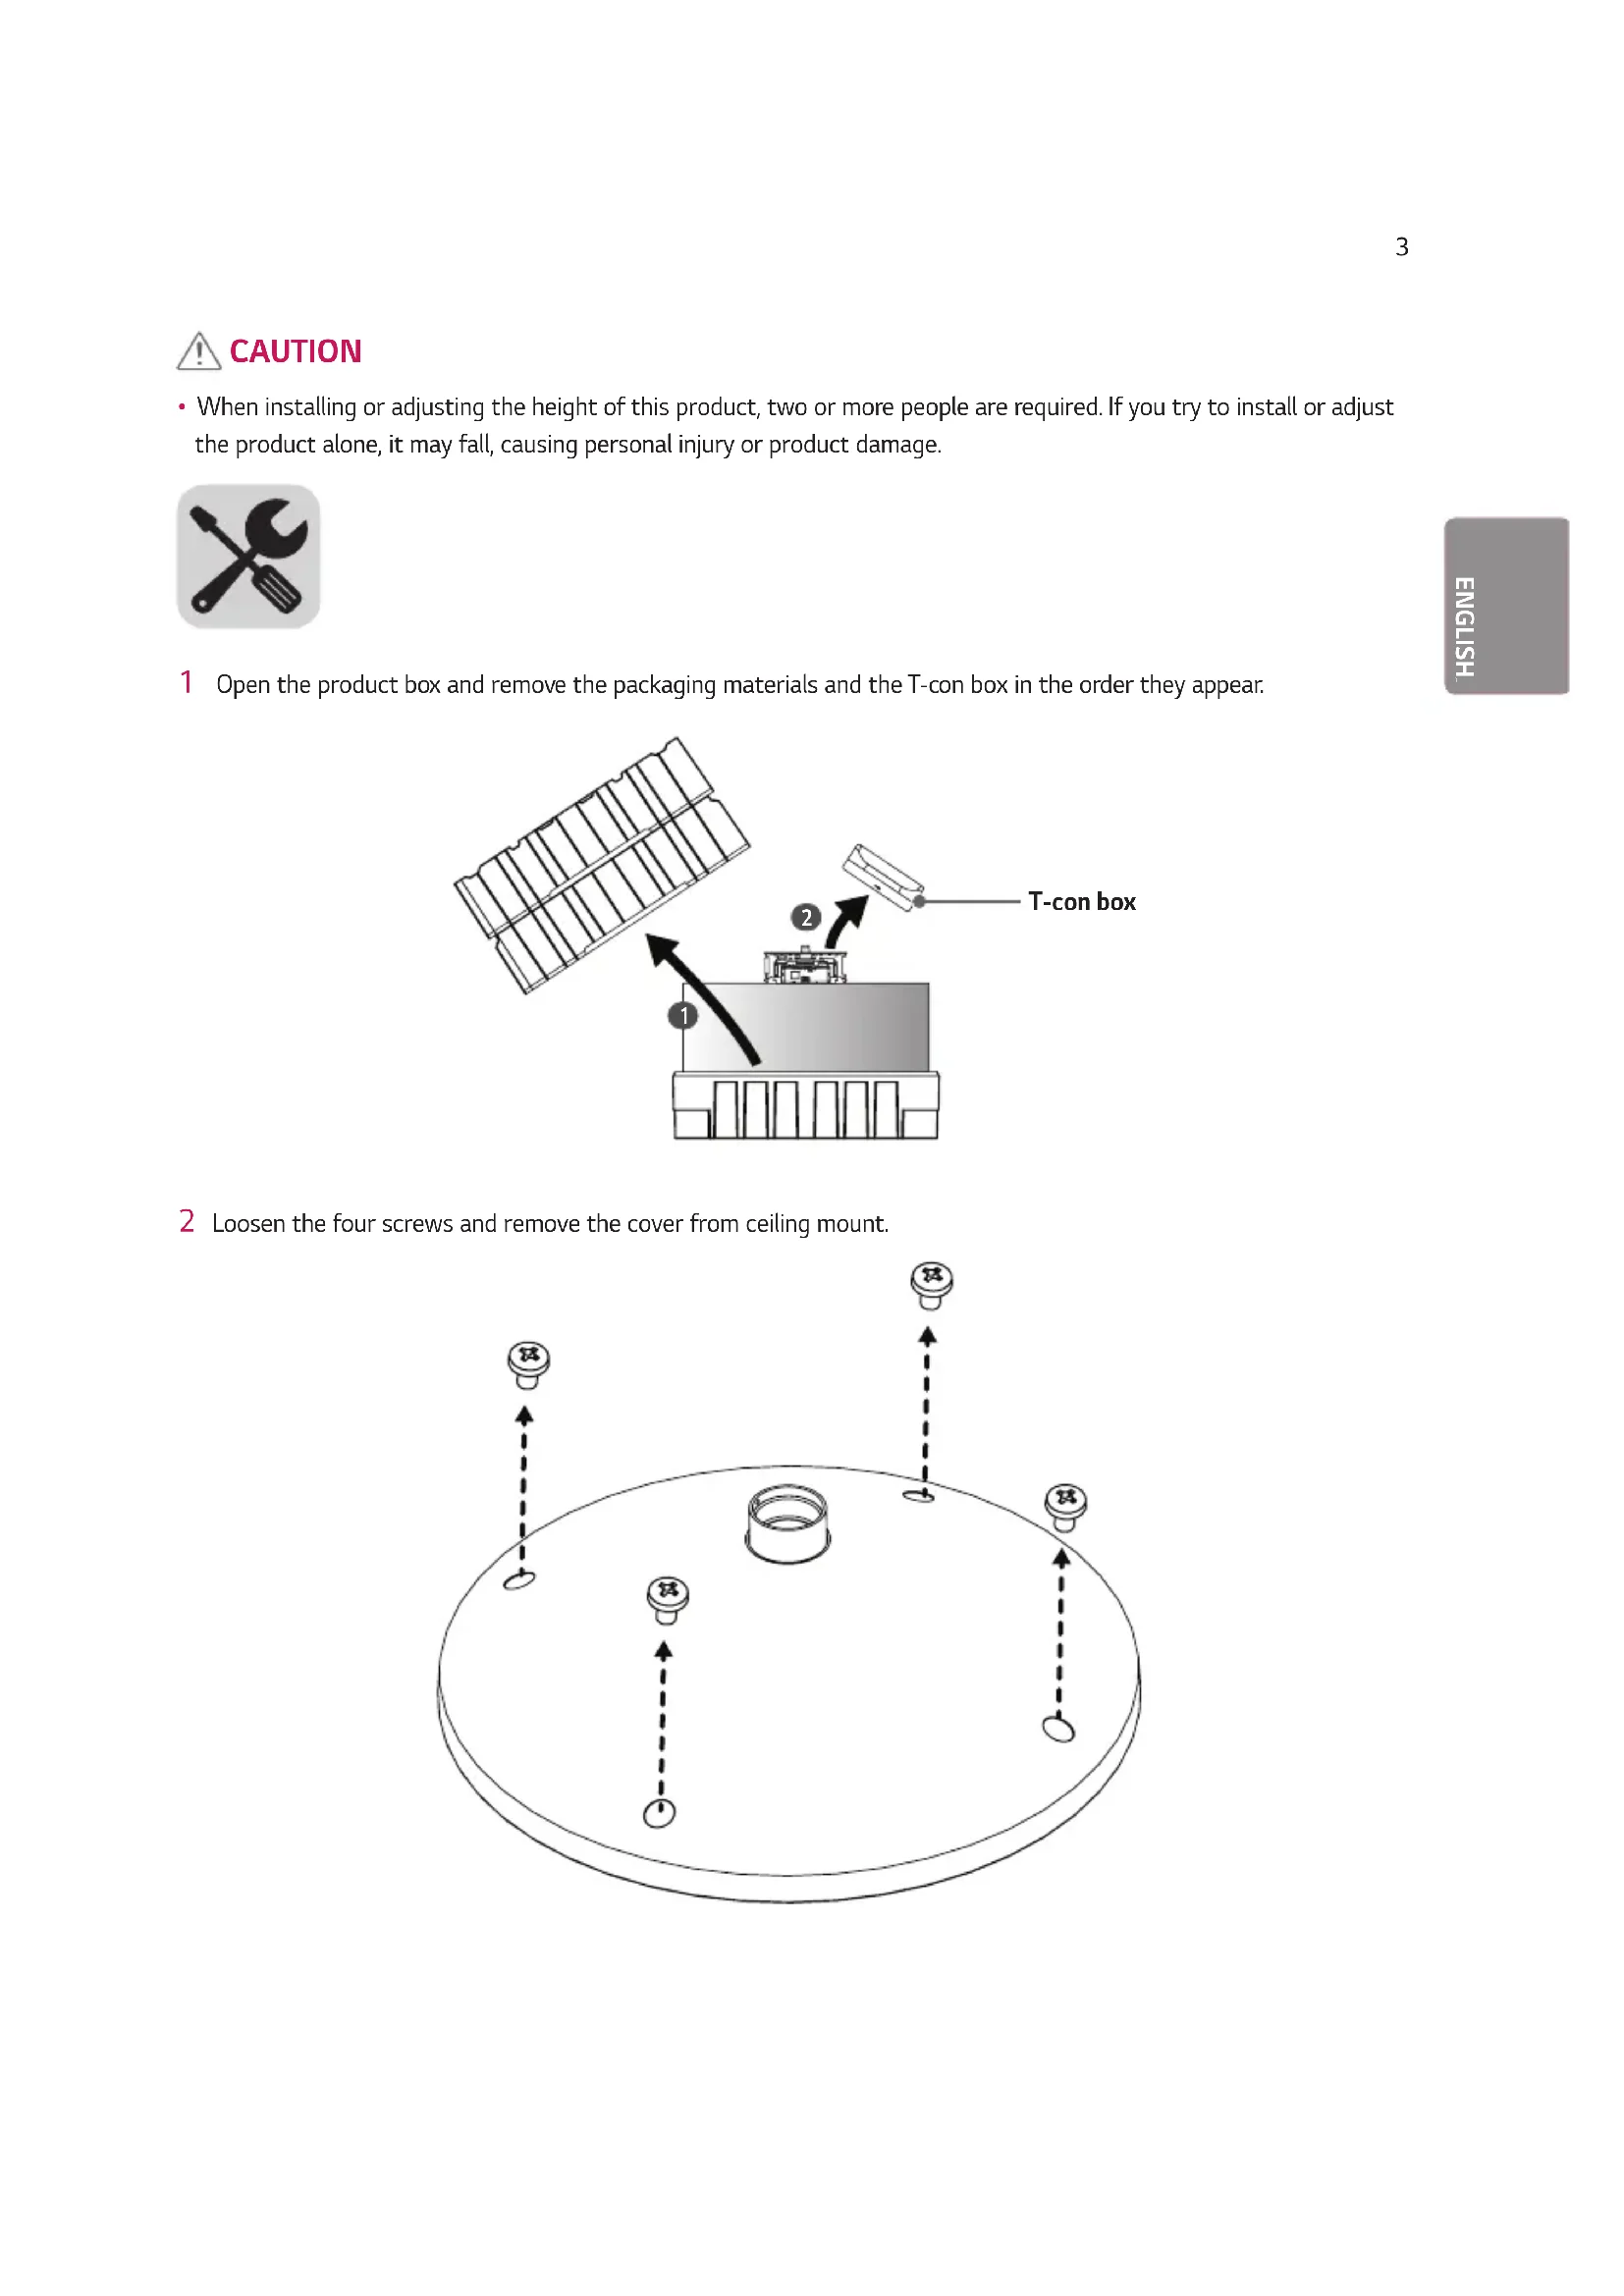
CAUTION
- When installing or adjusting the height of this product, two or more people are required. If you try to install or adjust the product alone, it may fall, causing personal injury or product damage.

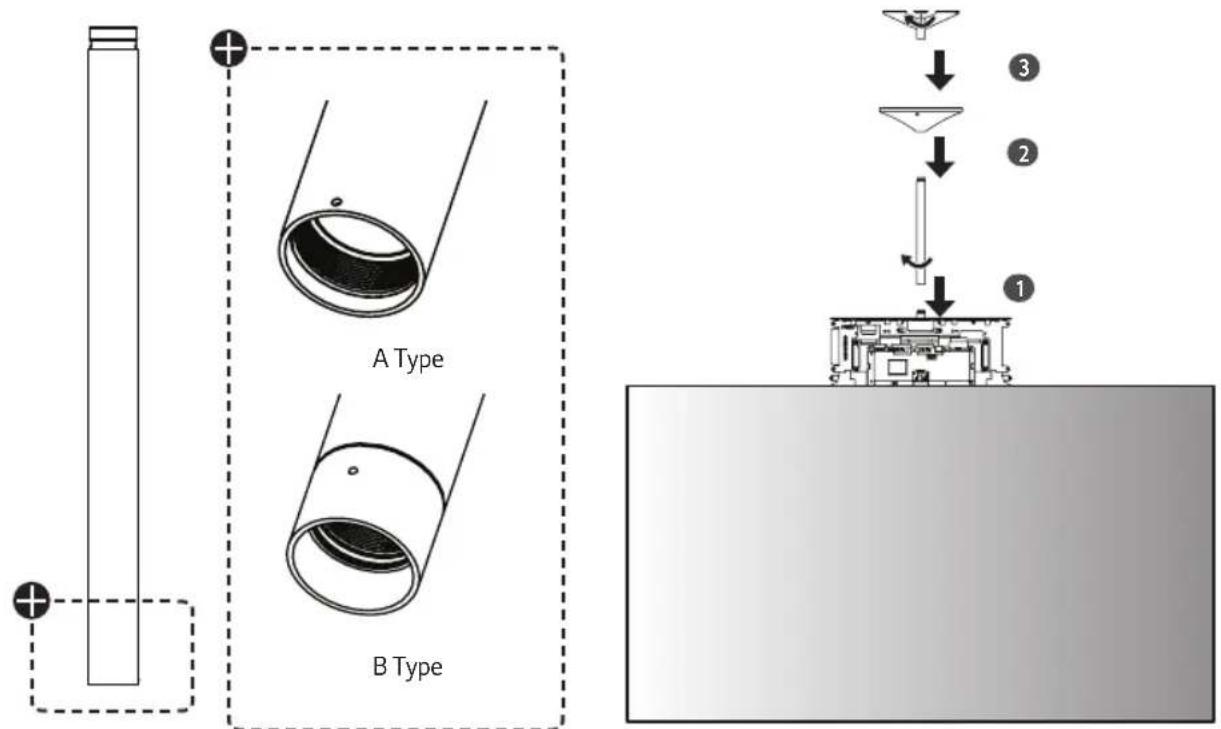
1 Open the product box and remove the packaging materials and the T-con box in the order they appear.
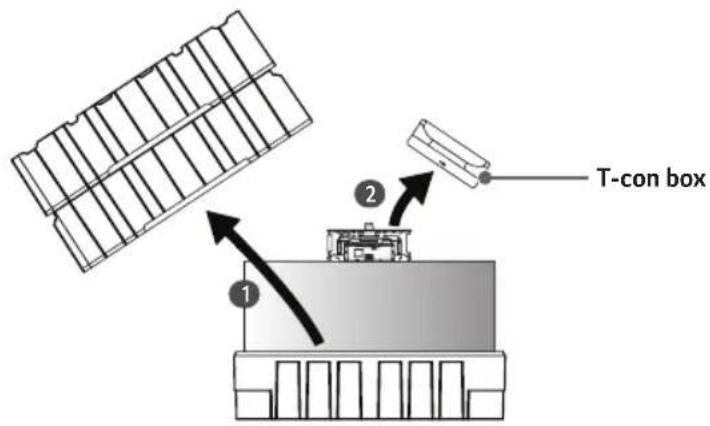
text_image
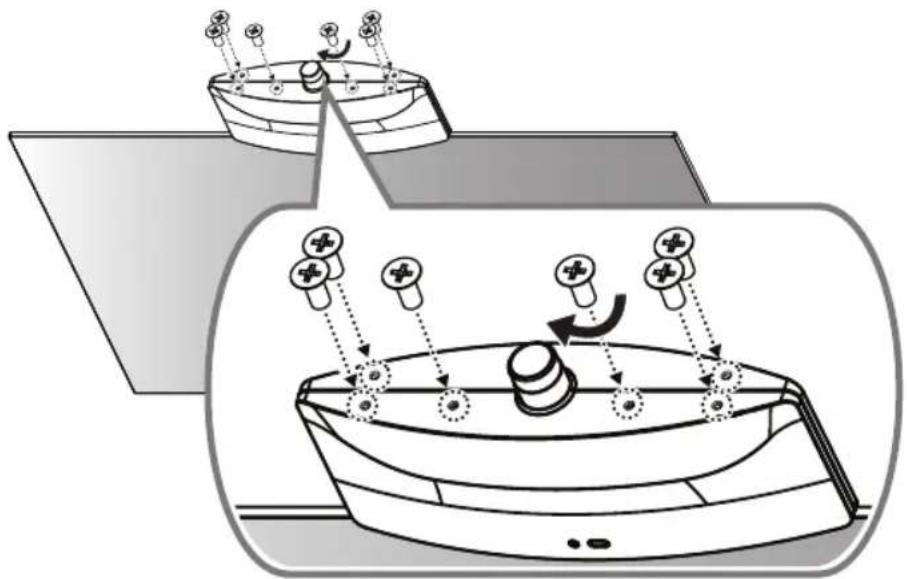
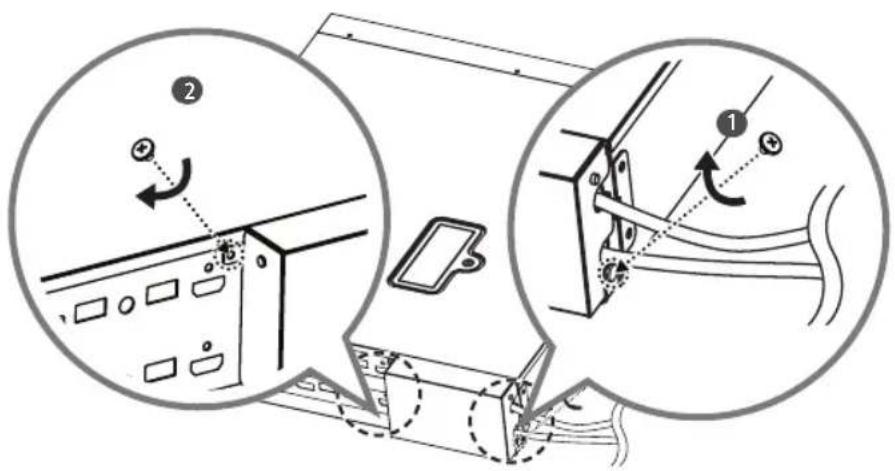
T-con box 1 22 Loosen the four screws and remove the cover from ceiling mount.
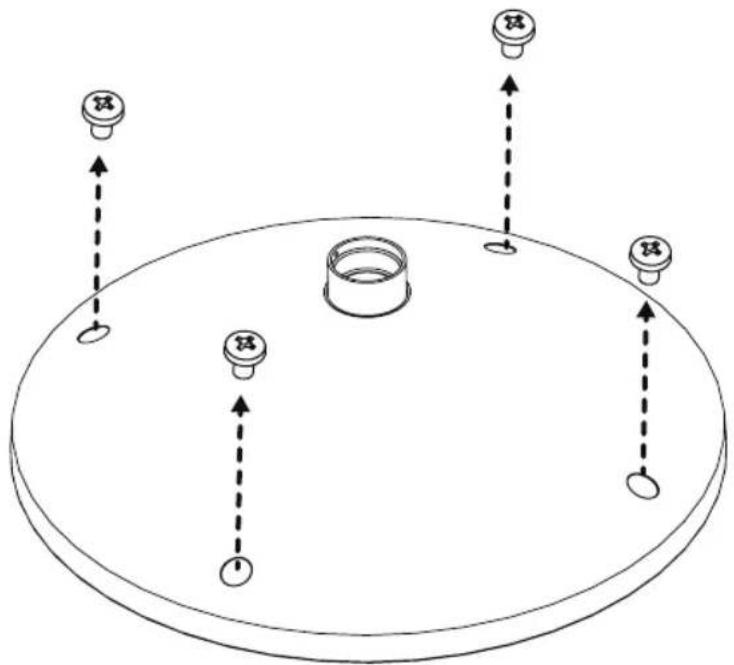
natural_image
Diagram of a circular mechanical component with four labeled parts and directional arrows indicating motion (no text or symbols)3 Assemble the B Type pipe, cover and ceiling mount in order. Additional A Type pipes and covers are optional.
text_image
A Type B Type4 Fasten a screw (M3 x L5.5) in each screw hole between the pipes to affix them together.
natural_image
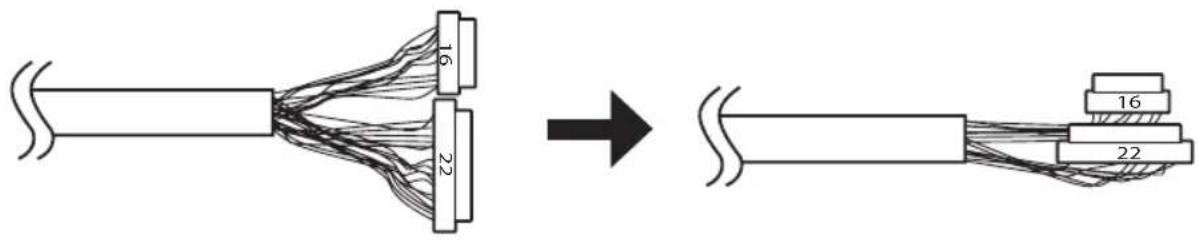
Diagram showing a mechanical device with a magnified inset illustrating rotational motion (no text or symbols)5 Fold the connectors on the opposite side of the 16/22-pin cables to make them parallel to the cable.
text_image
16 22 → 16 226 Insert the connectors of the 16/22-pin cables into the tubes.

flowchart
graph LR
    A["Line with 16 Units"] --> B["Arrow pointing to a Box"]
    B --> C["Final Cable with 22 Units"]
7 Pass the arranged 16/22-pin cables and HDMI cables through the pipe, and reassemble the set.
text_image
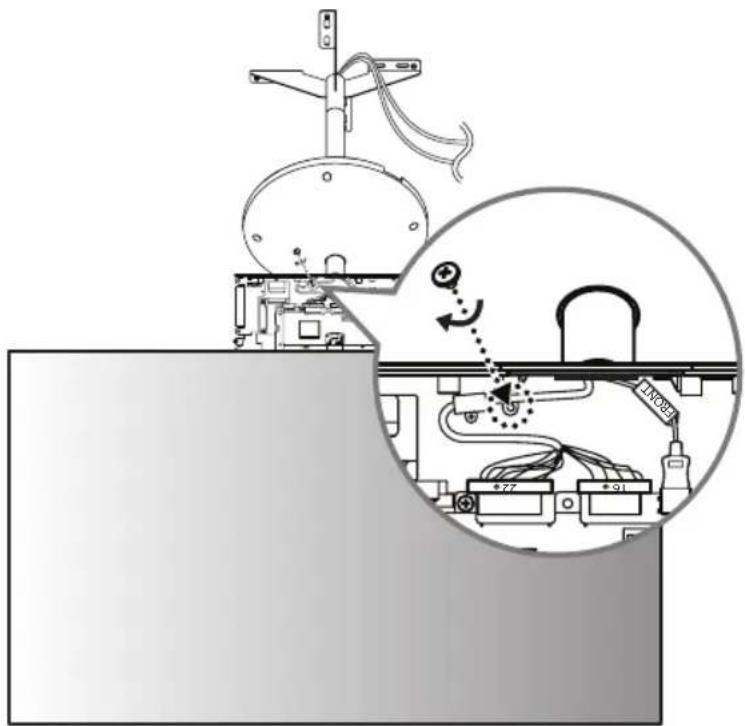
Diagram illustrating a mechanical or electrical system with labeled components and a magnified inset showing connections between devices.8 Connect the HDMI cable with the label marked "FRONT" to the FRONT side. Insert the 16/22-pin cable with the red mark into the cable holder and attach it using a screw (M3 x L4.5).
text_image
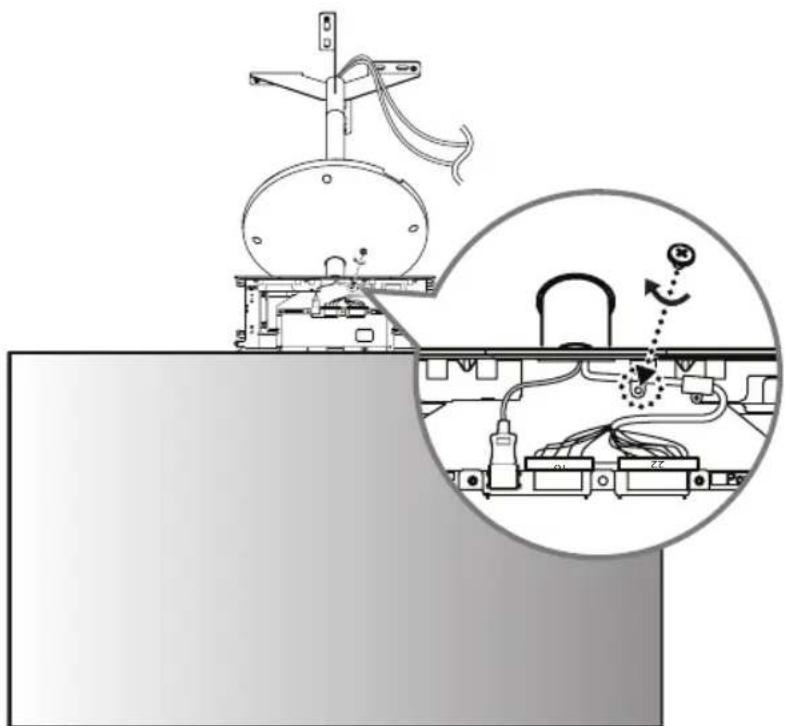
Technical diagram showing a mechanical assembly with labeled components and a magnified inset highlighting a connection mechanism.9 Connect the HDMI cable without the label marked "FRONT" to the REAR side. Insert the 16/22-pin cable without the red mark into the cable holder and attach it using a screw (M3 x L4.5).
natural_image
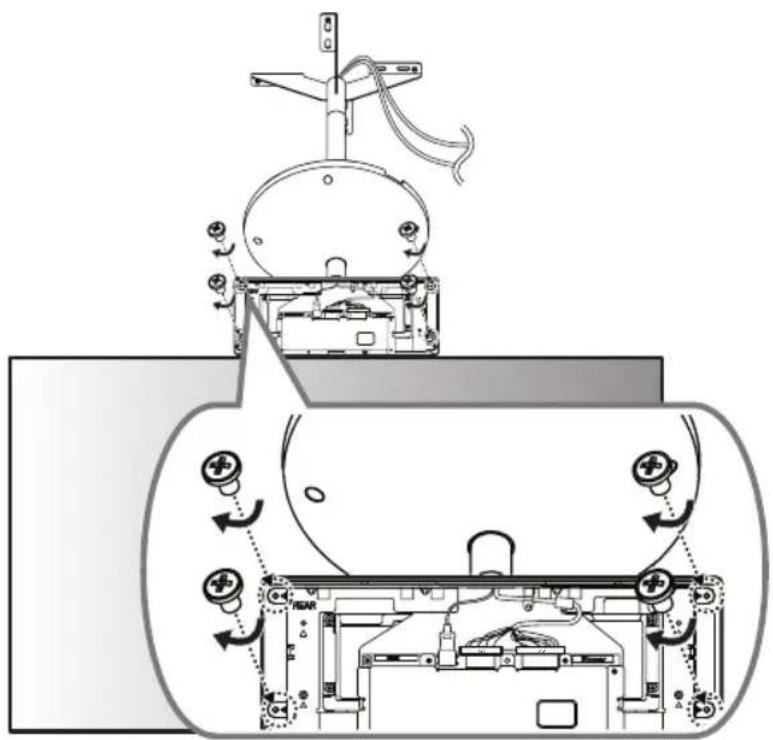
Technical diagram of a mechanical device with an inset showing internal wiring and a circular component (no text or symbols)10 Cover the FRONT side with the side of the T-con box cover that has the IR receiver and attach it using four screws (B x L6) on the opposite side.
text_image
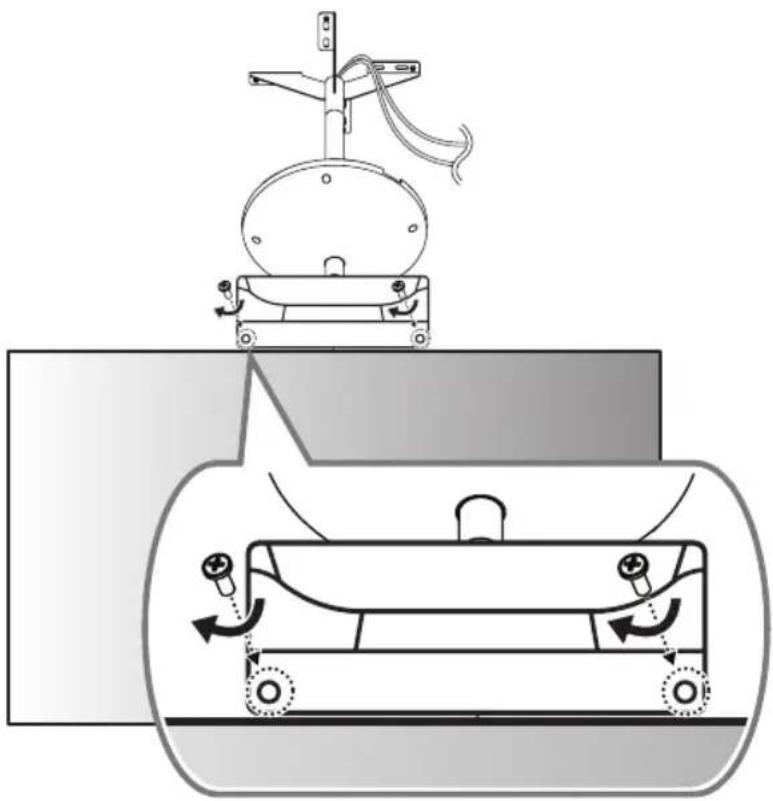
Technical diagram of a mechanical device with labeled components and directional arrows indicating motion or assembly.11 Cover the REAR side with the other T-con box cover and attach it using two screws ( 3 × L10 ).
natural_image
Diagram of a mechanical device with rotating components and directional arrows indicating motion (no text or symbols)12 Fasten six screws (M4 x L8) to the bottom part of the T-con cover.
natural_image
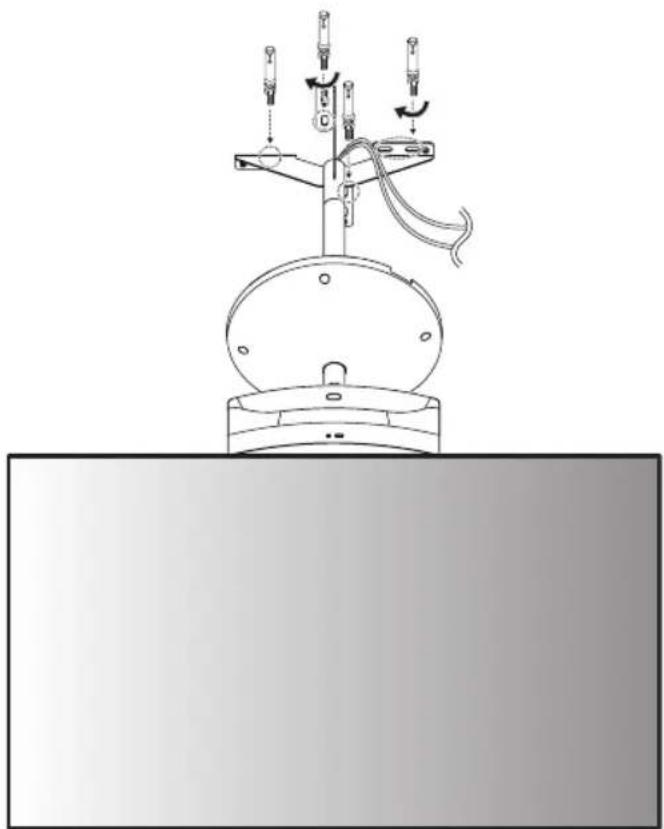
Diagram of a medical or laboratory procedure showing two views of a device with force vectors and components (no text or symbols)13 Install the device on the ceiling using four anchor bolts.
natural_image
Technical line drawing of a mechanical device with rotating arms and a base plate (no text or symbols)! FIXING THE ANCHOR SCREWS
- Check the ceiling material and the thickness of the finish material. The provided anchor screws can only be used if the ceiling is made of concrete. Do not mount the device on ceilings made of plaster board or medium-density fiberboard (MDF).
1
natural_image
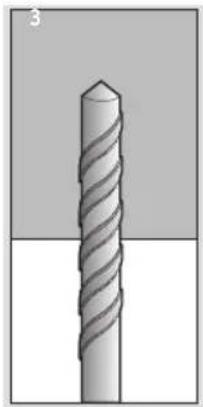
3D illustration of a twist drill bit with spiral grooves (no text or symbols)●
natural_image
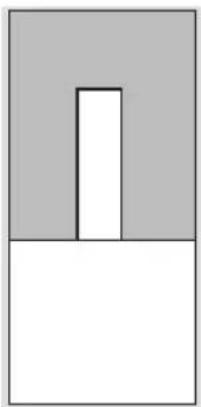
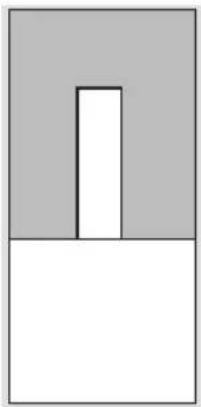
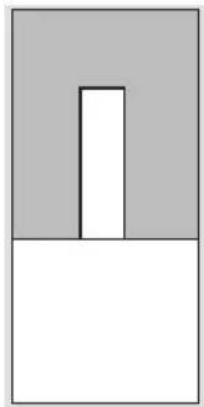
Simple geometric diagram with two stacked rectangles, one white and one gray, forming a T-shape (no text or symbols)●

natural_image
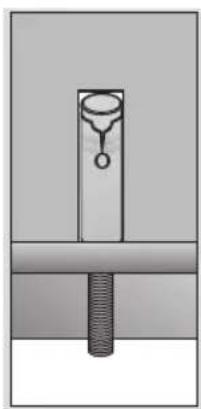
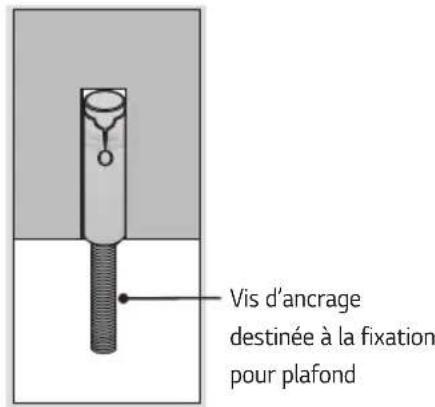
Diagram of a mechanical component with a threaded shaft and circular end cap, no text or symbols presentAnchor screw for ceiling mount
4
natural_image
Pure mechanical assembly diagram showing a bolt inserted into a housing (no text or symbols)●
text_image
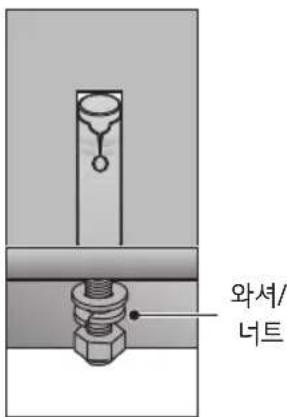
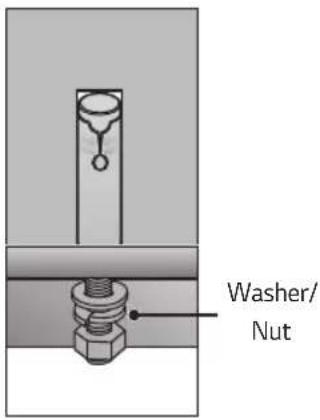
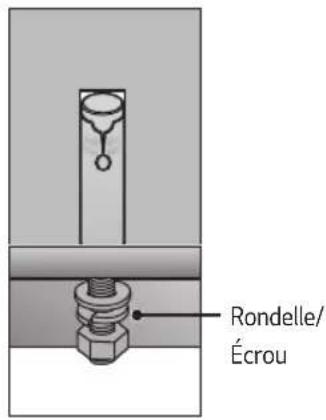
Washer/ Nut6

natural_image
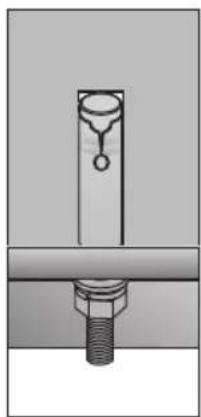
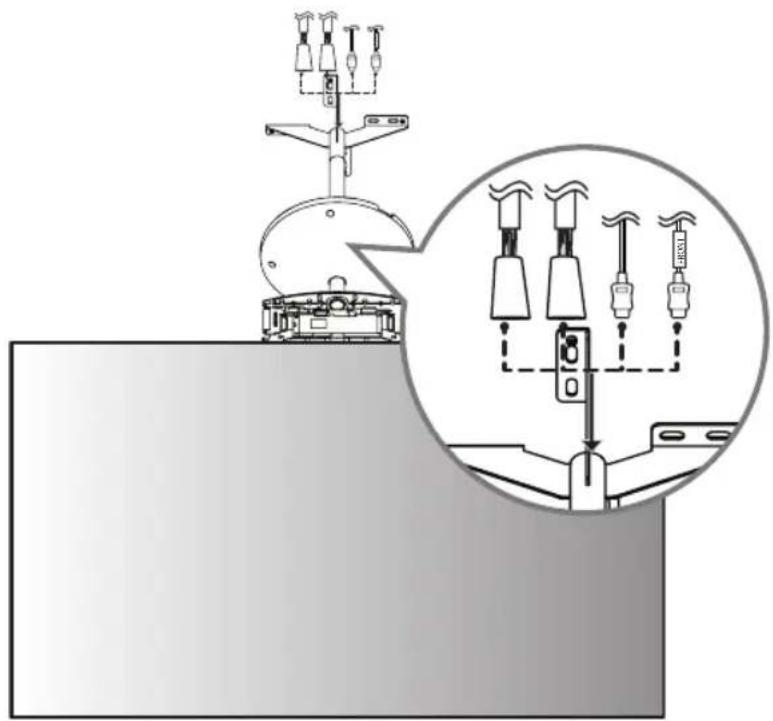
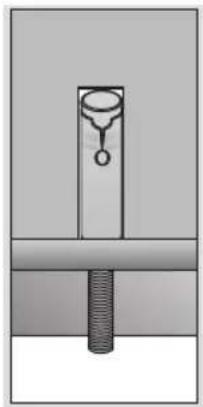
Mechanical assembly diagram showing a bolt inserted into a shaft with a spring-like component (no text or symbols)1 Drill a hole 45 mm (1.7 inches) to 55 mm (2.1 inches) deep using a 14.5 mm (0.5 inches) drill bit on the position you want to install your anchor.
2 Clean out the drilled hole.
3 Insert the provided anchor screw into the hole.
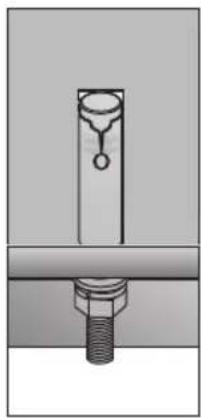
4 Place the ceiling mount close to the ceiling so it matches the position of the screws.
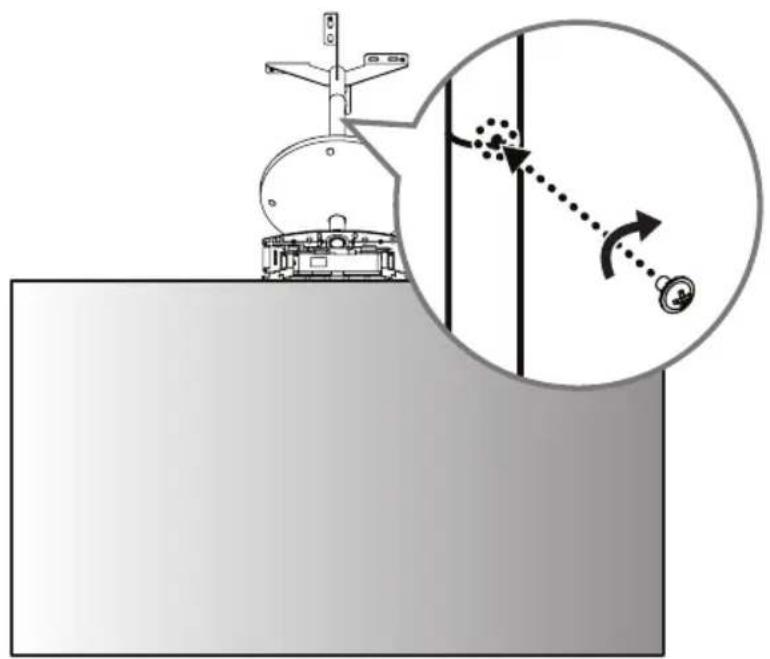
5 Fasten the washers and nuts in order. Tighten the screws using a torque of at least 45 kgf/cm.
6 Tighten the washers and nuts until they are completely fastened.
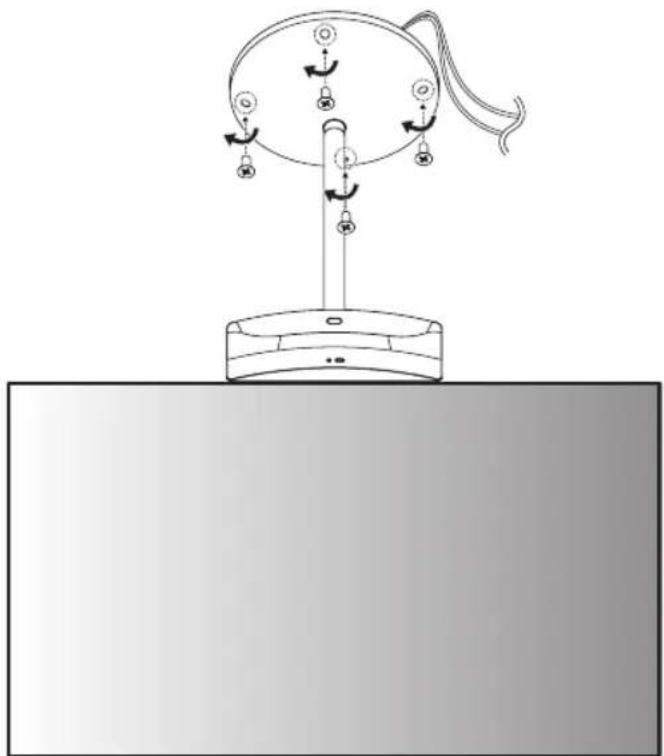
14 Fix the cover in place using four screws (M4 x L6).
natural_image
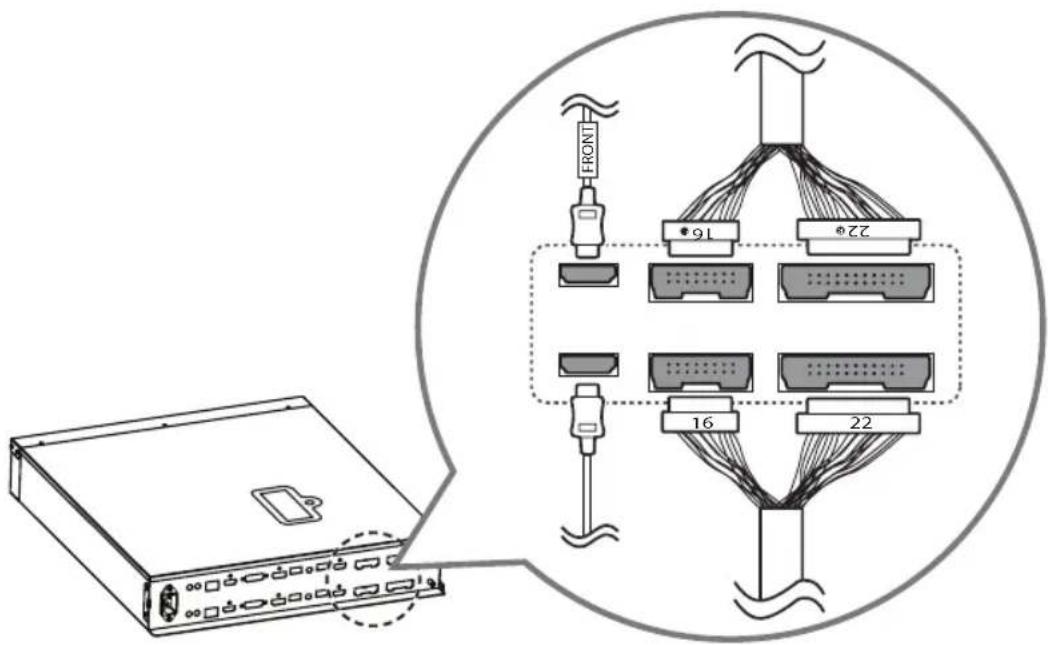
Diagram of a device with rotating components and directional arrows, no text or symbols present15 Connect the cables to the Signage box. Here, the HDMI cable with the FRONT label is attached to the top, and the HDMI cable without the FRONT label is attached to the bottom. The 16/22-pin cable with the red mark must be connected to the upper part.
text_image
Diagram showing network topology with labeled connectors and connectors, including a device and a close-up of connected cables.16 Attach the 16/22-pin cables using two screws (M3 x L4.5).

text_image
Diagram showing a device connected to a connector with labeled front/rear ports and directional arrows indicating connection.17 Position the jack cover so the cables fit into the cut spaces and attach it using two screws (M3 x L4.5).
text_image
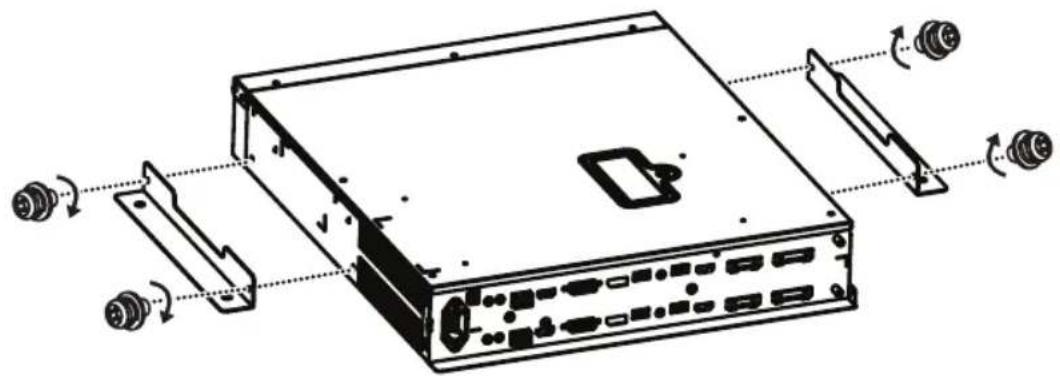
Technical diagram showing mechanical assembly steps with numbered annotations and directional arrows indicating motion or movement.18 Attach the mounting brackets to the Signage box using four screws (M4 x L8).
natural_image
Technical line drawing of a server rack with ports and connectors, showing internal components and rotation arrows (no text or labels)
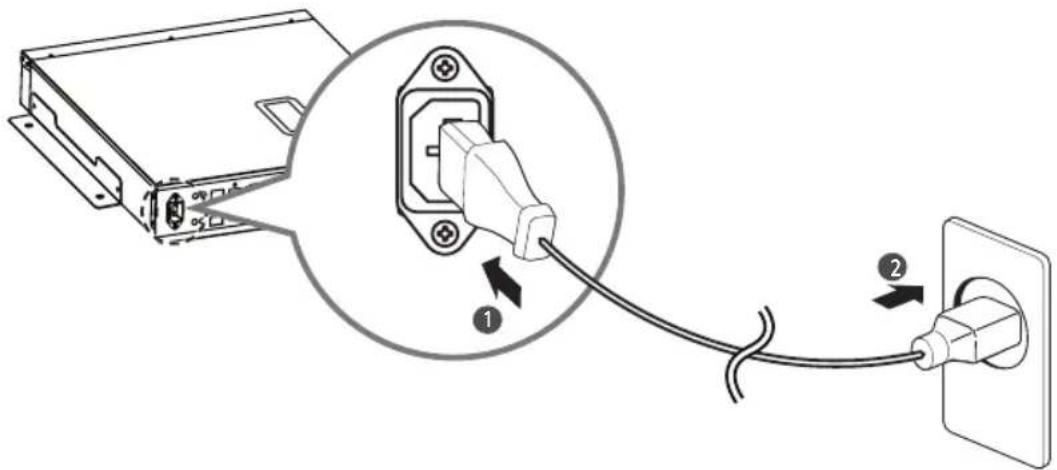
Connect the power cable to the Signage box.
text_image
Diagram showing connection between a computer power adapter and an electrical outlet, with labeled components and cable connections.
LG
Life's Good
MANUEL D'UTILISATION
natural_image
Diagram of a circular object with four labeled circular components and directional arrows indicating motion or force (no text or symbols)natural_image
Diagram of a radar or satellite system with an inset showing angular measurement and rotation direction (no text or symbols)text_image
Diagram showing cable assembly process with labeled components and directional arrow indicating transformationtext_image
Diagram illustrating a mechanical or electrical device with labeled components and a magnified inset showing connections to four different devices.text_image
Technical diagram showing a mechanical assembly with labeled components and a magnified circular detail highlighting a connection point.natural_image
Technical diagram of a mechanical device with an inset showing internal wiring and a circular annotation (no text or symbols present)text_image
Technical diagram of a mechanical device with labeled components and directional arrows indicating motion or assembly.natural_image
Diagram of a mechanical device with rotating components and motion arrows, no text or symbols presentnatural_image
Diagram of a medical or laboratory procedure showing two views of a device with forceps and arrows indicating movement (no text or symbols present)natural_image
Technical line drawing of a mechanical device with rotating arms and a base plate (no text or symbols)! FIXATION DES VIS D'ANCRAGE
natural_image
3D illustration of a twist drill bit with spiral grooves (no text or symbols)●
natural_image
Simple geometric diagram with two stacked rectangles, one white and one gray, forming a T-shape (no text or symbols)●
natural_image
Pure mechanical assembly diagram showing a bolt inserted into a housing (no text or symbols)●
text_image
Rondelle/ Écrou6
natural_image
Mechanical assembly diagram showing a bolt inserted into a housing with a vertical rod and circular component (no text or symbols)natural_image
Diagram of a mechanical device with rotating components and directional arrows, no text or symbols presenttext_image
Diagram showing network topology with labeled connectors and connectors, including a device and a close-up of connected cables.text_image
Diagram showing a device connected to a front/rear panel with directional arrows and labels like FRONT, REARtext_image
Technical diagram showing two views of a device with labeled components and directional arrows indicating motion or assembly.natural_image
Technical line drawing of a computer rack with ports and connectors, showing internal components and rotation arrows (no text or labels)
text_image
Diagram showing cable connection between a device and an electrical outlet, with labeled components 1 and 2.
LG
Life's Good