
SLPAC105W - Fan SereneLife - Free user manual and instructions
Find the device manual for free SLPAC105W SereneLife in PDF.
| Product Type | Portable air conditioner with ventilation and dehumidification functions |
| Brand | SereneLife |
| Model | SLPAC105W |
| Power Supply | 220 V / 50 Hz |
| Rated Power | 960 W (cooling) |
| Cooling Capacity (ASHRAE) | 9,000 - 10,000 Btu/h |
| Maximum Coverage Area | Up to 300 ft² (28 m²) |
| Airflow | 360 m³/h |
| Operating Modes | Cooling, Fan, Dehumidification |
| Fan Speed | 2 speeds (low/high) |
| Programmable Timer | 0 to 24 hours |
| Noise Level | 65 dBA |
| Refrigerant | R290 (245 g) |
| Dimensions (L x D x H) | 70.1 x 32.5 x 29.5 cm |
| Remote Control | Yes (AAA batteries included) |
| Air Filter | Washable and removable |
| WiFi Function | Yes, via Smart Life app |
| Amazon Echo Compatibility | Yes (Smart Life skill) |
| Exhaust Kit | Hose and window installation plate included |
| Safety | Auto shut-off when full tank, frost protection, error detection |
| Maintenance | Clean filter every 2 weeks, drain tank |
| Repairability | Filter and parts accessible by certified technician |
| Power Cord Length | 1.7 m (5.6 ft) |
Frequently Asked Questions - SLPAC105W SereneLife
User questions about SLPAC105W SereneLife
0 question about this device. Answer the ones you know or ask your own.
Ask a new question about this device
Download the instructions for your Fan in PDF format for free! Find your manual SLPAC105W - SereneLife and take your electronic device back in hand. On this page are published all the documents necessary for the use of your device. SLPAC105W by SereneLife.
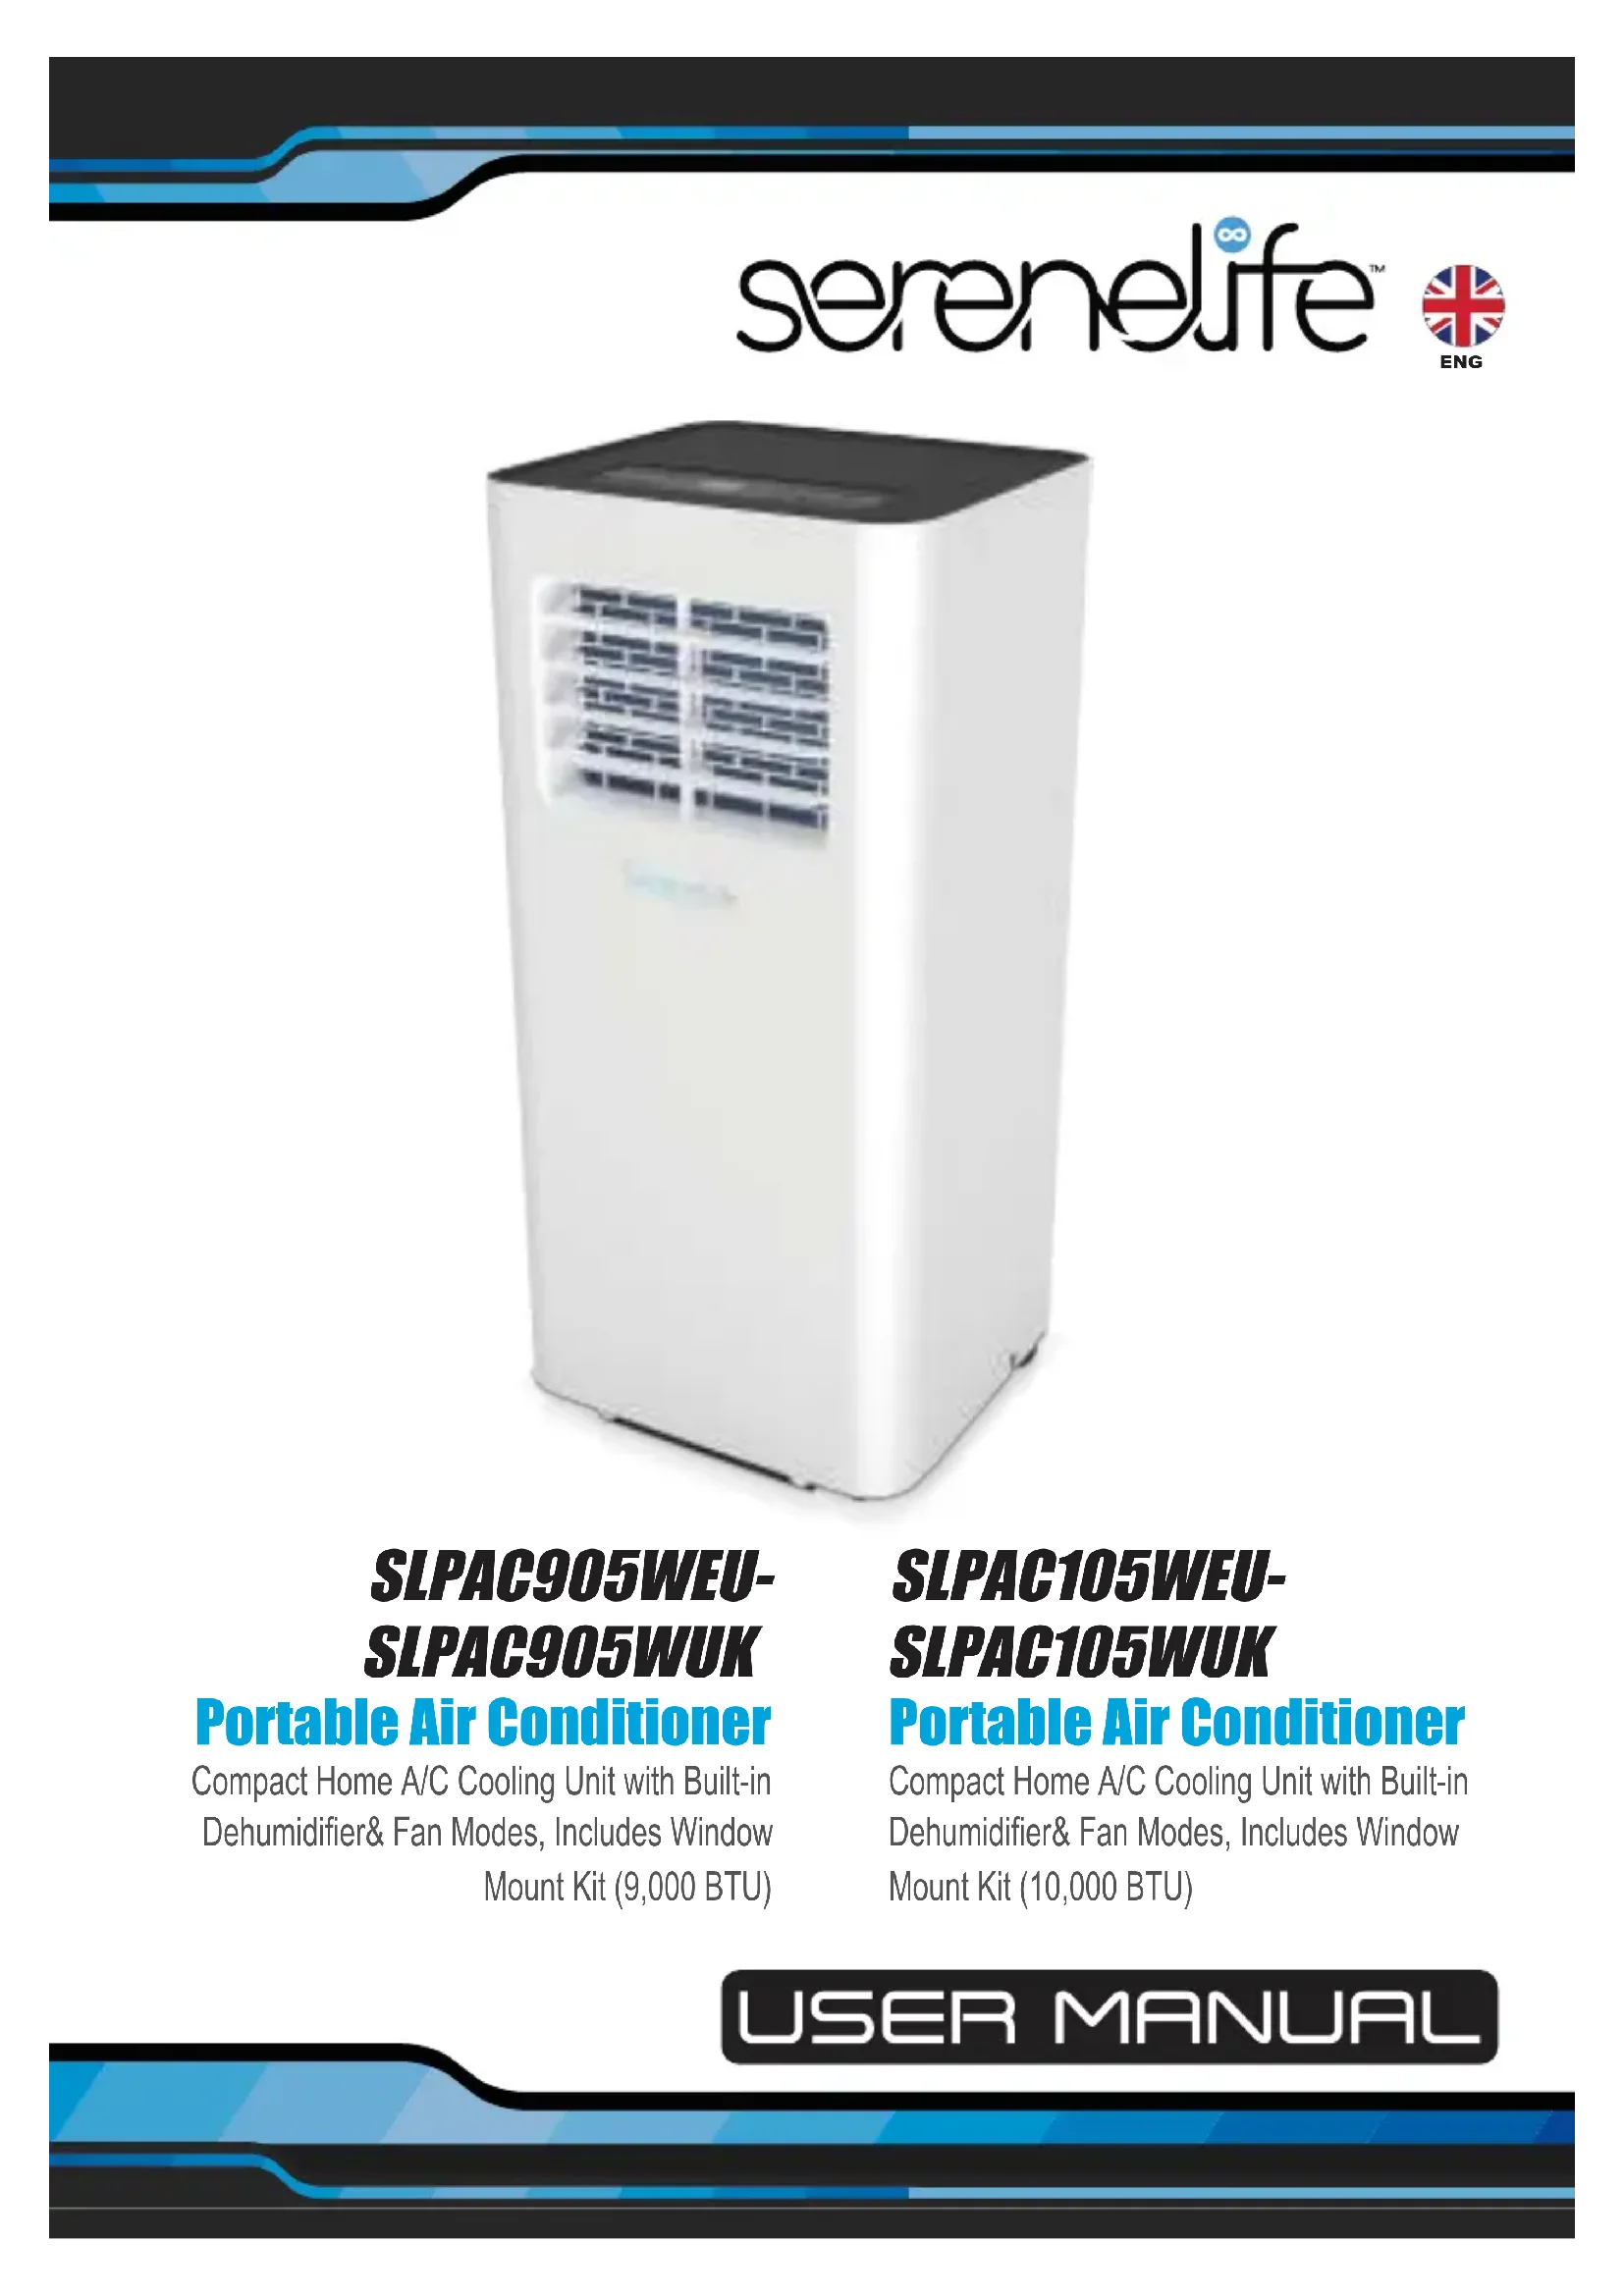
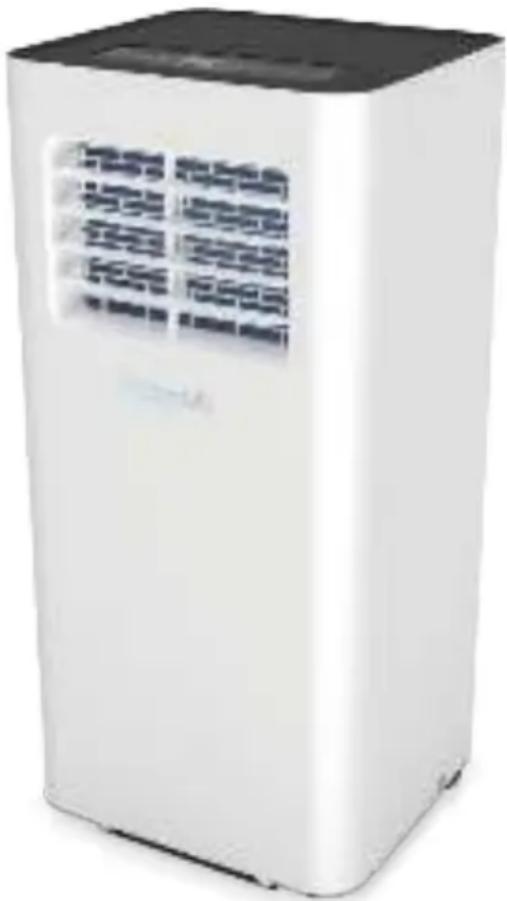
USER MANUAL SLPAC105W SereneLife
Compact Home A/C Cooling Unit with Built-in
Dehumidifier& Fan Modes, Includes Window
Mount Kit (9,000 BTU)
SLPAC105WEUSLPAC105WUK
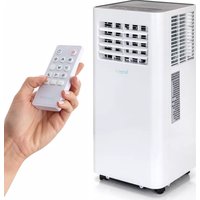
Portable Air Conditioner
Compact Home A/C Cooling Unit with Built-in
Dehumidifier& Fan Modes, Includes Window
Mount Kit (10,000 BTU)
USERMANUAL
SAFETY INSTRUCTIONS
IMPORTANT!
AIR CONDITIONERS MUST ALWAYS BE STORED AND TRANSPORTED UPRIGHT, OTHERWISE IRREPARABLE DAMAGE MAY BE CAUSED TO THE COMPRESSOR; IF IN DOUBT WE SUGGEST WAITING AT LEAST 24 HOURS FOLLOWING INSTALLATION BEFORE STARTING THE UNI

- Carefully read the instructions before installing and/or operating the unit.
This appliance is for indoor use only.
This unit must be only connected to a 220-240 V / 50 Hz earthed outlet. - Installation must be in accordance with regulations of the country where the unit is used.
- If you are in any doubt about the suitability of your electrical supply have it checked and, if necessary, modified by a qualified electrician.
- This air conditioner has been tested and is safe to use. However, as with any electrical appliance - use it with care.
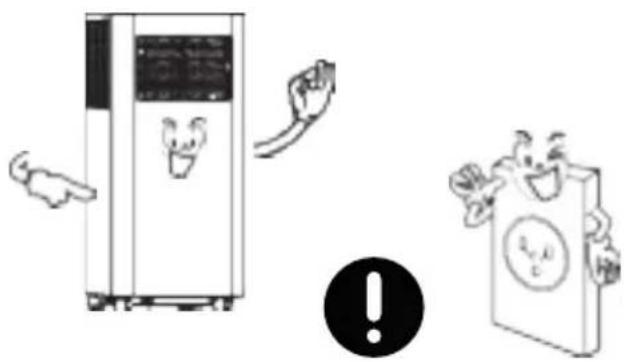
- Disconnect the power from the appliance before dismantling, assembling or cleaning.
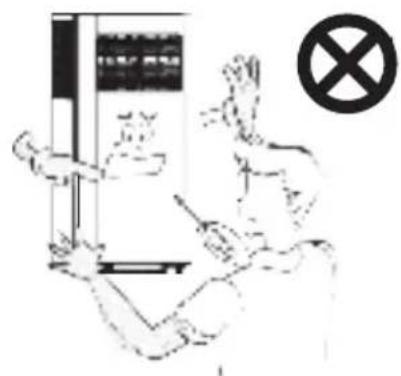
- Avoid touching any moving parts of the appliance.
- Never insert fingers, pencils or any other objects though the guard.
- This appliance is not intended for use by persons (including children) with reduce physical, sensory or mental capabilities. It is also not intended for use by those with a lack of experience and knowledge, unless they have been given supervision or instruction concerning the use of the appliance by a person responsible for their safety.
- Do not leave children unsupervised with this appliance.
- Do not clean the unit by spraying it or immersing it in water.
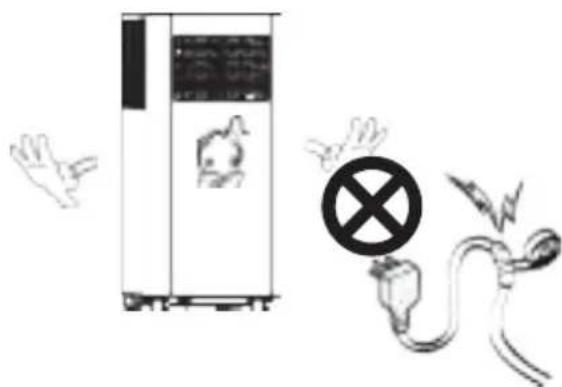
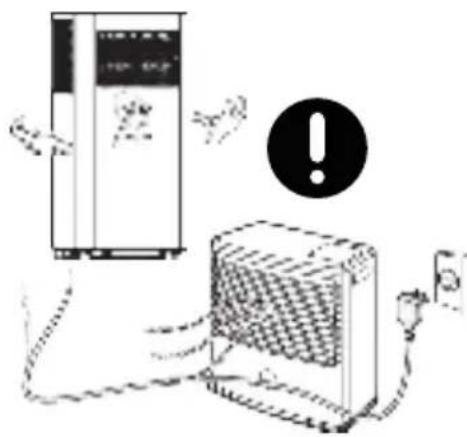
- Never connect the unit to an electrical outlet using an extension cord. If an outlet is not available, one should be installed by a qualified electircian.
-
Do not operate the unit unless it has been fully installed following the guidance provided within this manual.
-
Never operate this appliance if the cord or plug is damaged. Ensure the power cord is not stretched or exposed to sharp objects/edges.
- A damaged supply cord should be replaced by the manufacturer or a qualified electrician in order to avoid a hazard.
- Any service other than regular cleaning or filter replacement should be performed by an authorized service representative. Failure to comply could result in a voided warranty.
- Do not use the appliance for any purpose other than its intended use.
- Avoid restarting the air conditioner unless 3 minutes have passed since being turned off. This prevents damage to the compressor.
- Never use the main plug as a switch to start and turn off the air conditioner. Use the provided ON/OFF button located on the control panel.
- The appliance should not be installed in laundry or wet rooms.
- The appliance must be installed in a room without sources of ignition (for example: open flames, an operating gas appliance or an operating electric heater).
- The unit must be installed on a solid vertical wall by a competent person.
The electricity supply must only be connected after installation is complete.
R290 refrigerant gas complies with European environmental directives.
R290 has a low GWP (Global Warming Potential) of 3. - The air conditioner contains about 245g of R290 refrigerant gas.
- Do not install or store in an unventilated space with an area smaller than 12m^2 per unit. The room must be such as to prevent stagnation of possible leaks of refrigerant gas as there could be a danger of fire or explosion hazard should the refrigerant come into contact with electric heaters, stoves or other sources of ignition.
- If the appliance is installed, used or stored in an unventilated room, the room must be such as to prevent stagnation of possible leaks or refrigerant gas as there could be a danger of fire or explosion should the refrigerant come into contact with electric heaters, stoves or other sources of ignition.
- Refrigerant gas may be odourless.
-
Do not use the product and contact he retailer for advice, if damage has occurred to the unit which may have compromised the refrigerant system.
-
Any repairs or maintenance must only be carried out on the unit by a suitably qualified engineer. Before opening and servicing the unit the authorized engineer must be in possession of a copy of the manufacturer's service manual and must follow the safety information contained within it to ensure all hazards are minimized.
- The refrigerant system should not be perforated or punctured.
NOTE: Some pictures and information may vary from the final product. This is due to continual product improvement.
CONTENTS
User Tips
Precautions 6
SafetyWarnings 8
Tips 11
Product Overview
Main Components 12
Control Panel and Remote Control 13
Operation
Place and Install 14
How to Operate 18
Clean and Maintenance
Drainage 19
Body Clean 19
Common Failures and Diagnosis
Intelligent Error Detection 21
Troubleshooting 22
Features and Technical Specs 23
Wifi Operation Instruction 25
Amazon Echo Operation Instruction 35
USER TIPS

Please avoid such operations, in case of any safety and health risks.

Such instructions are to be followed, for safety and health concerns.
PRECAUTION
For household use only
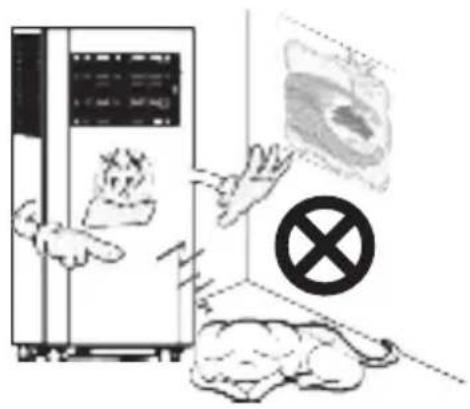
For indoor use only; please place the A/C in a dry environment.
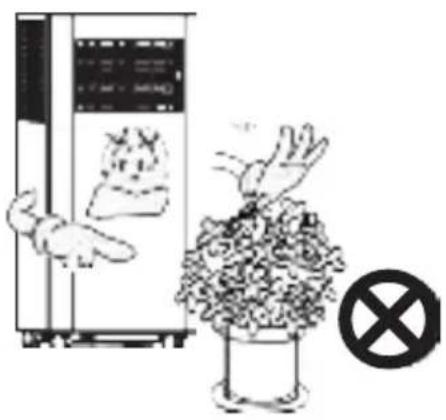
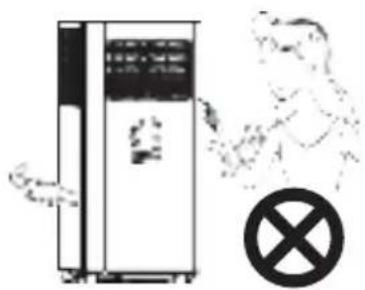
In case of a blocked air exchange, never stack any items around the machine.
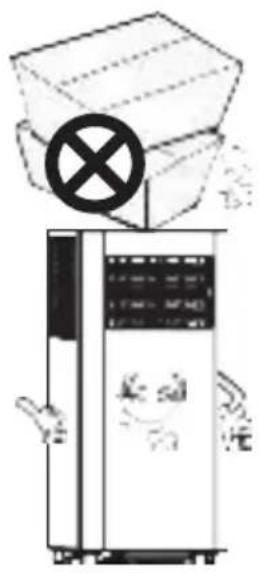
To avoid damages, never place any heavy items on the machine.
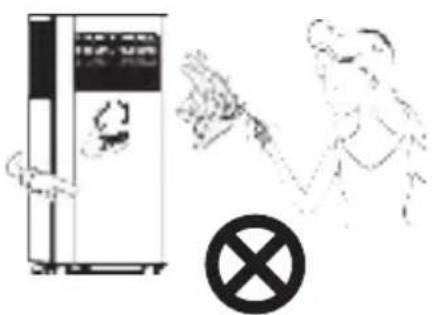
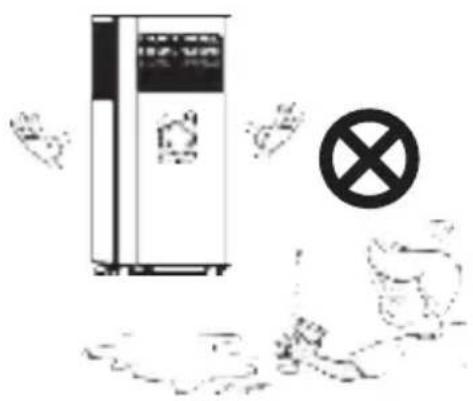
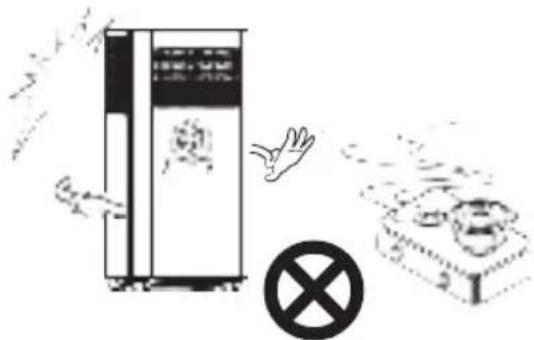
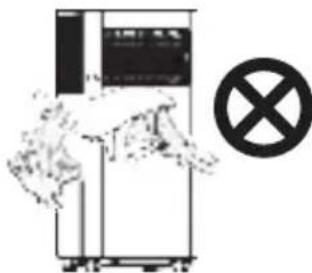
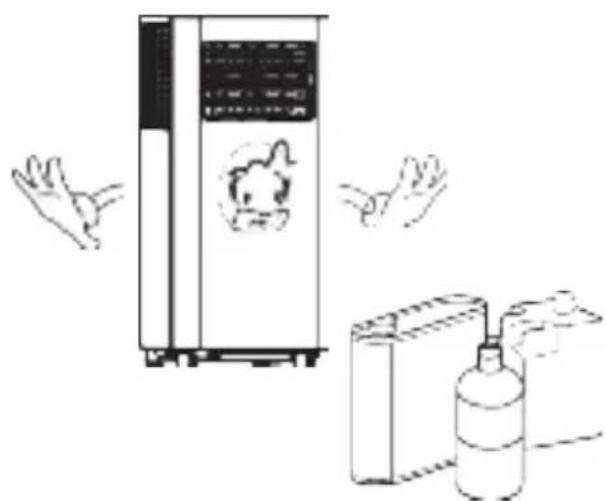
Do not operate the machine with wet hands or in a humid environment.
Please wipe the machine with a soft cloth, instead of wax, diluent or irritant detergent.
Clean the filter once every two weeks
For your health, never drink condensed water discharged from the machine.
Please unplug the power cord, if the machine will not be used for a long time.
Non-professionals are not allowed to dismantle or repair the machine.
SAFETYWARNINGS
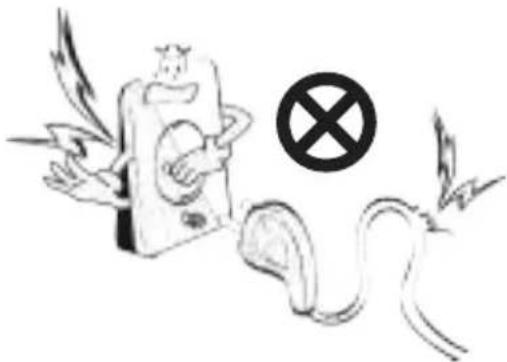
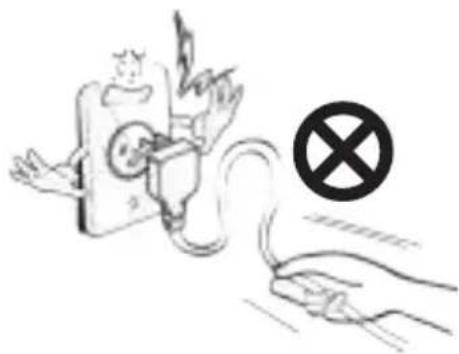
Damaged power cord or plug shall not be used. Never plug to a loose socket.

Never damage the power cord, or use unlicensed power cord. Make sure voltage is right.
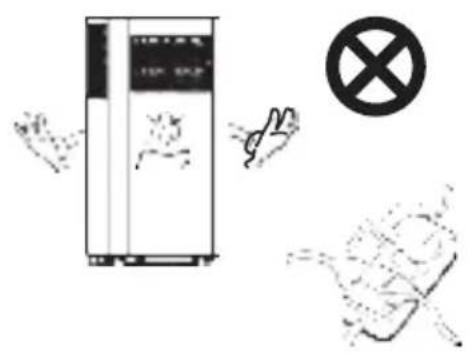
Do not modify or extend the power cord.
A grounded outlet is suggested for the machine.
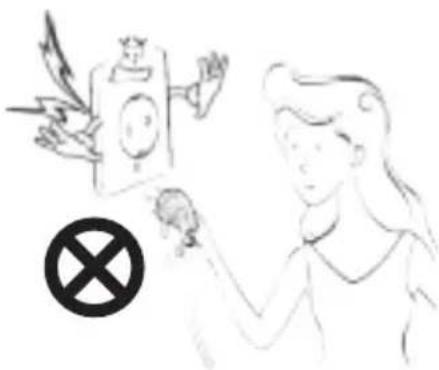
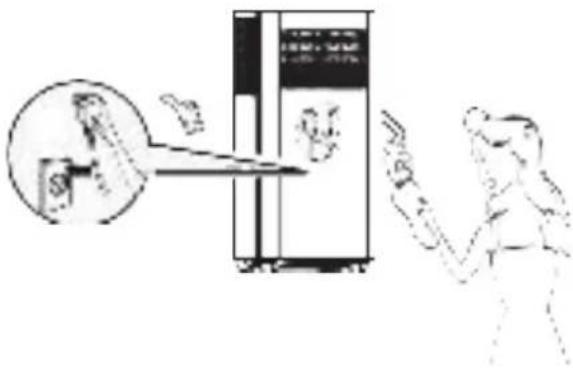
In case of electric shock, never plug/unplug with wet hands.
To unplug, pull the plug end instead of wires.
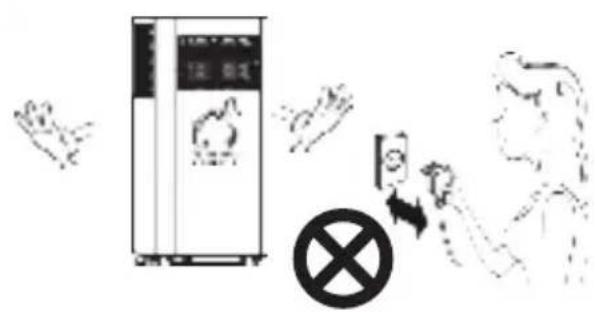
Never control on/off status by directly plugging/unplugging.

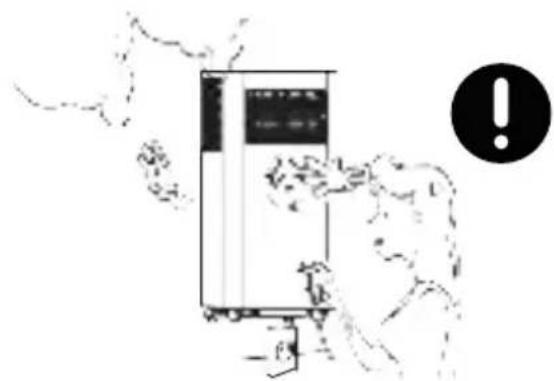
Please turn off the machine before unplugging.
Never overload the socket.
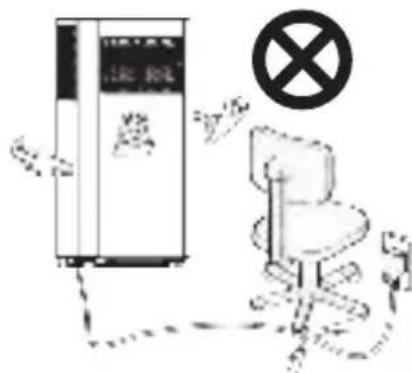
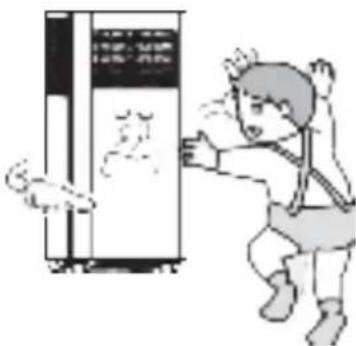
Keep away from heat sources or direct sunlight exposure.
If there is any actue noise, smell or smoke, turn off and unplug for diagnosis.
In case of electric shock, never damage the power cord by placing heavy objects on it.
Never insert fingers or any hard objects into the louver.
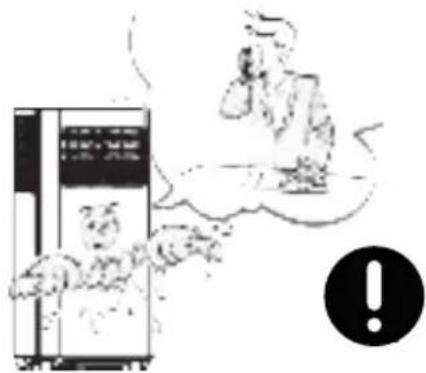
If water enters, turn off and unplug in time; and call for check and repair from a professional.
If gas leakage happens, open the window for ventilation before plugging the machine.
Keep electrical parts away from water.
Please turn off and unplug before wiping, cleaning or replacing components.
The appliance can be used by children of or above 8 years old and persons with reduced physical, sensory or phycological capabilities, if they have been given supervision and instruction concerning proper use and hazards of the appliance.
TIPS
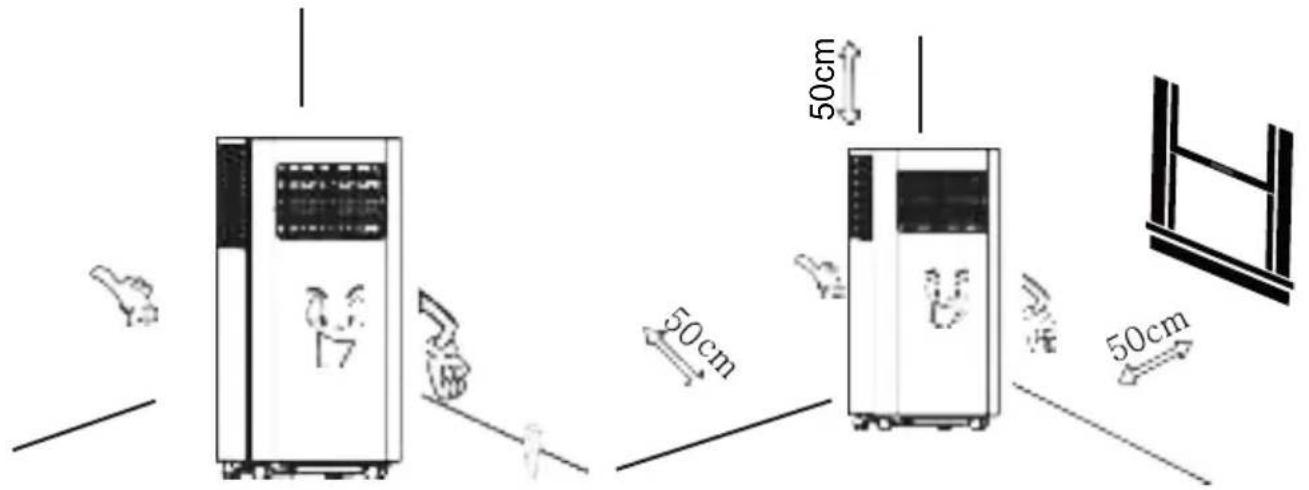
For a proper work of compressor, place the machine vertically on an even ground.
For a proper ventilation, keep the machine at least 50cm from objects nearby.
Never use the appliance near gasoline or other flammable objects.
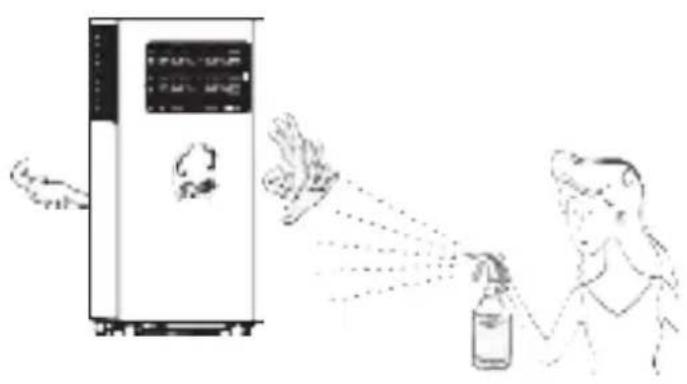
Keep the appliance from spraying
deform and electrical parts may even be damaged.
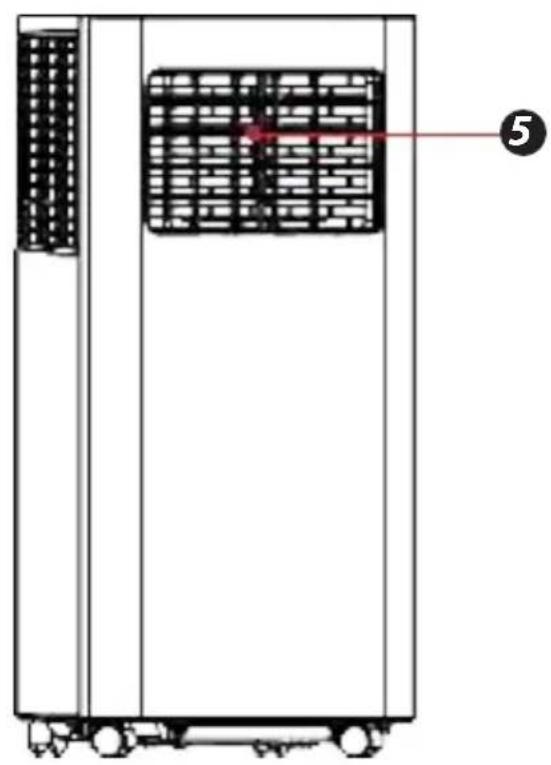
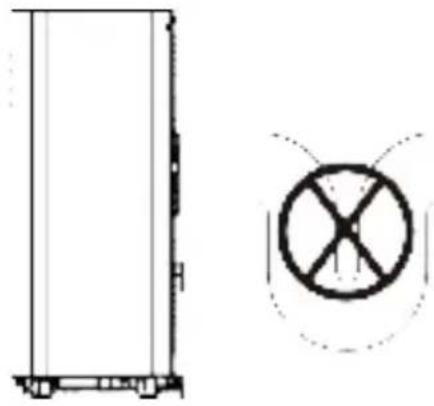
PRODUCT OVERVIEW
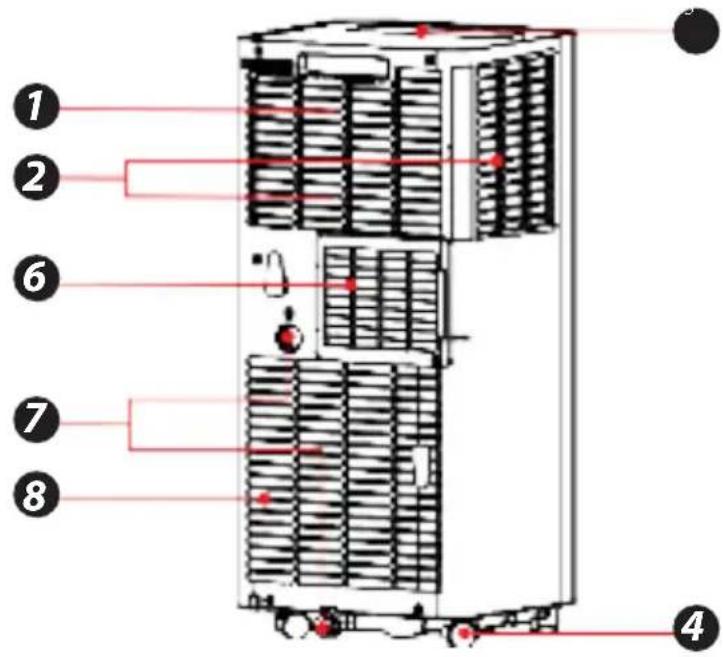
Main Components
- Handle
- Air Inlet Grille (Up)
- Control Panel
- Casters
- Louver
- Air Outlet Grille
- Drainage Hole
- Air Inlet Grille (Down)
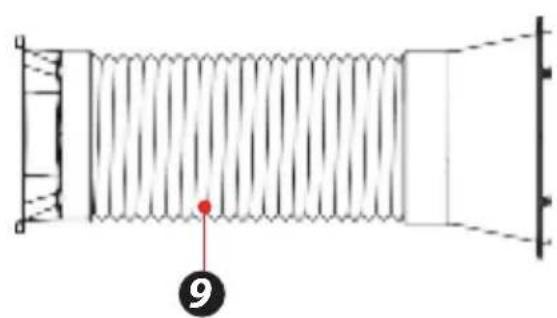
- Air Exhaust Duct Assembly
- Window Sealing Kit
CONTROL PANEL AND REMOTE CONTROL
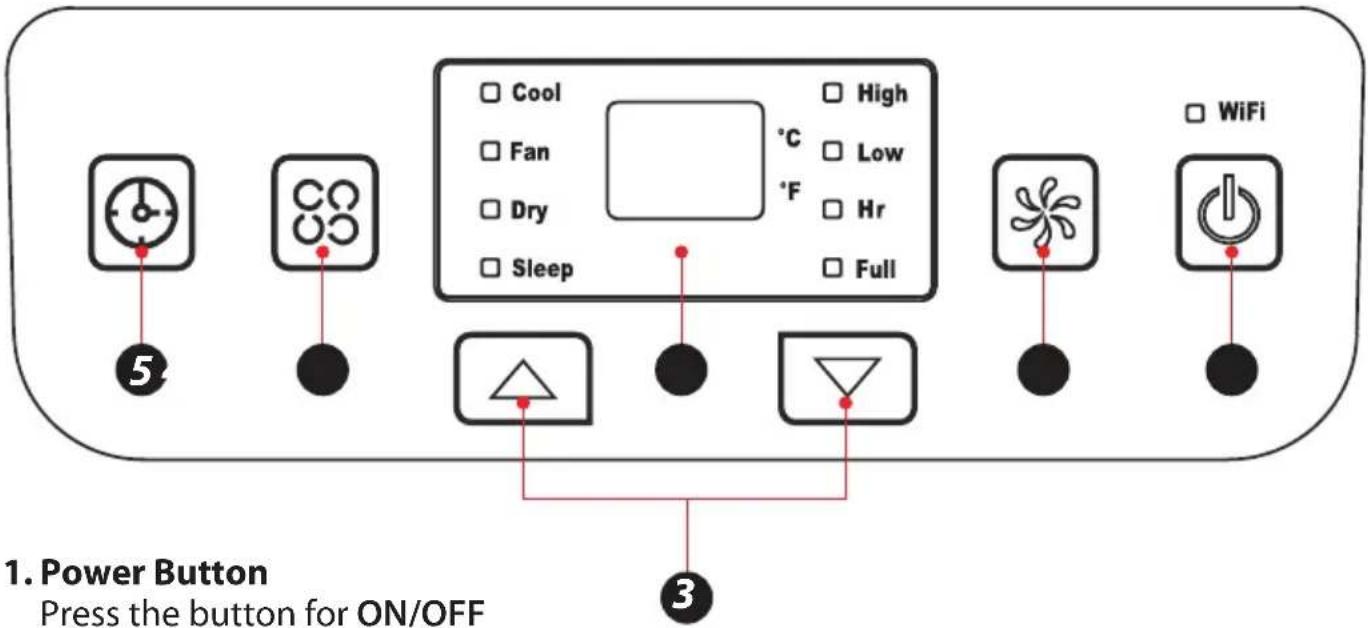
Press the button for ON/OFF
2. Fan Speed Button
Press the key to choose high/low speed to active the wifi in standby mode, press this key for 3s sparing function.
3. UP/Down Button for Temperature and Timer
Under cooling mode, press the keys could increase or decrease setting temperature; In timer mode, press the keys could set time to turn on. By pressing the keys together, switch between ^ C and ^ F can be made.
4.ModeButton
Press the key to choose cooling, fan, dry.
5. Timer Button
Press the key at stand by mode would set ON time. Press the key at ON mode would set OFF time.
6. Temperature and Timer Display
The window will indicate temperature and time.
7. Temperature Switch Button
The button is to switch between ^ C and ^
8. Sleep button
The button is to choose sleep mode.
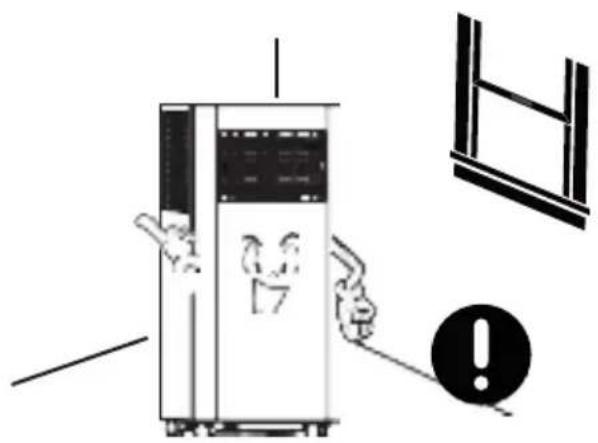
OPERATION
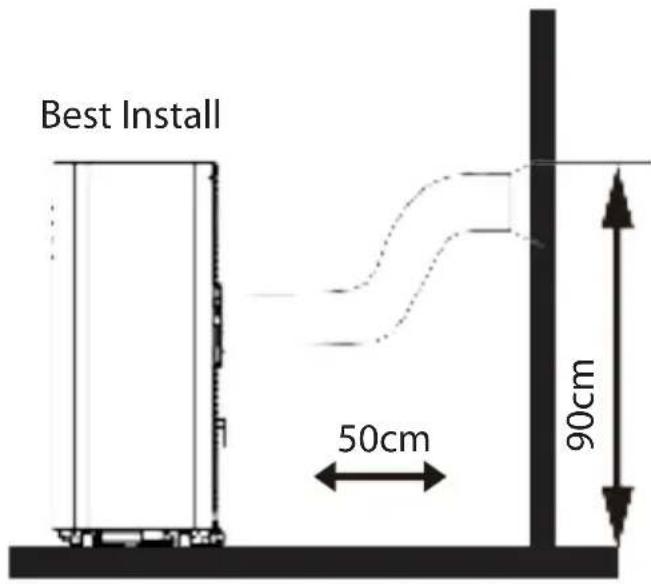
Place & Install
Place
- Place the machine on the horizontal floor near the window.
- For proper ventilation and best machineperformance, keep the appliance at least 50cm from objects nearby.
Install
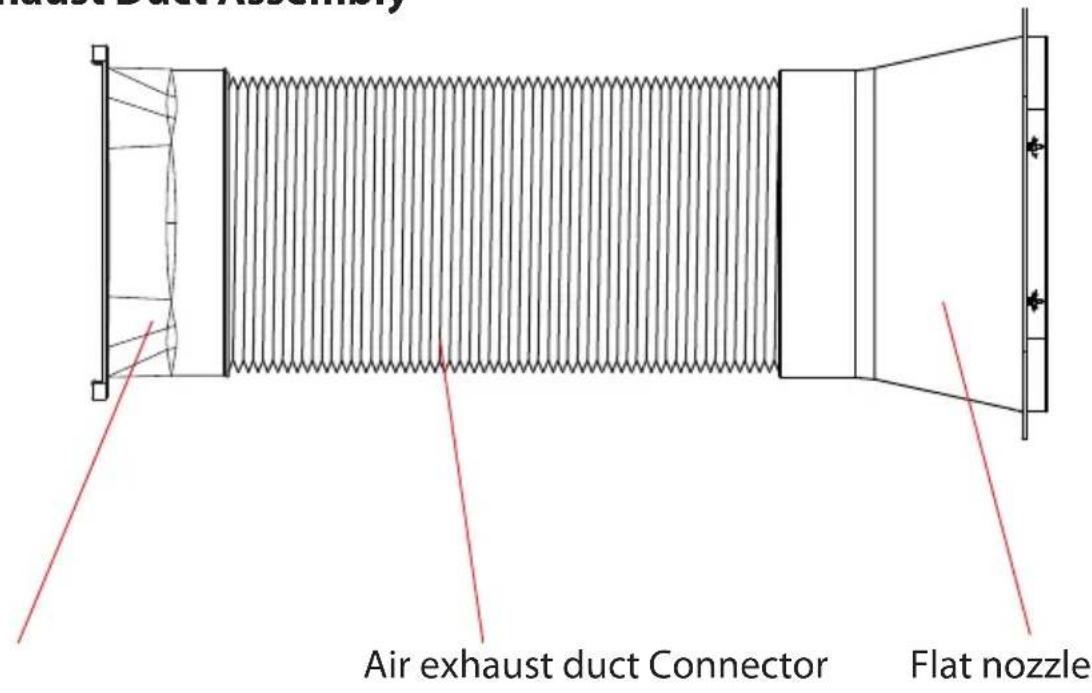
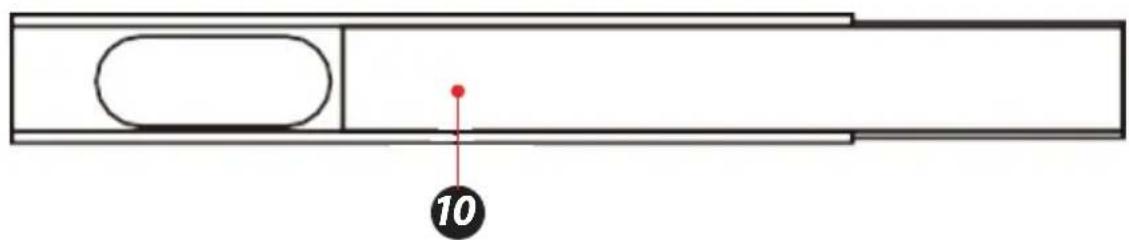
Air Exhaust Duct Assembly
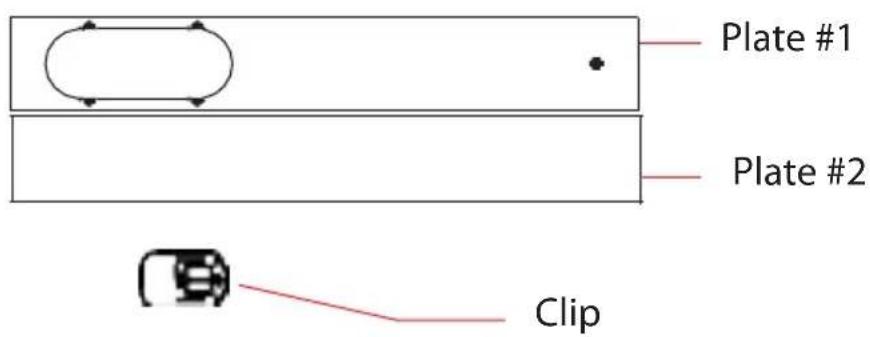
Clip-fixture Type
Step 1:
Clip-fixture Type
1.Measure window size;
2. Adjust Length of the plate according to window size;
3. Lock the plate
Step 2:
Fix the plate to window
Step 3:
Swirl the exhaust pipe assembly (exhaust fitting end) into the rear panel outlet (counterclockwise).

Step 4:
Insert the exhaust pipe assembly (exhaust port end) into the window seal panel assembly and screw it up.
Impression Drawing of Completion
Incorrect installation
- It's important to keep the exhaust duct smooth. Incorrect installation will affect work of the A/C.
- Prevent the exhaust duct from sharp bending.
- Ensure air can flow smoothly in the duct.
Warning
The exhaust duct is designed especially for this model. Don't replace or lengthen it; otherwise, it will result in failure.
Notice:
The air exhaust duct can stretch up to 1500mm. To avoid bending, stretch it as short as possible
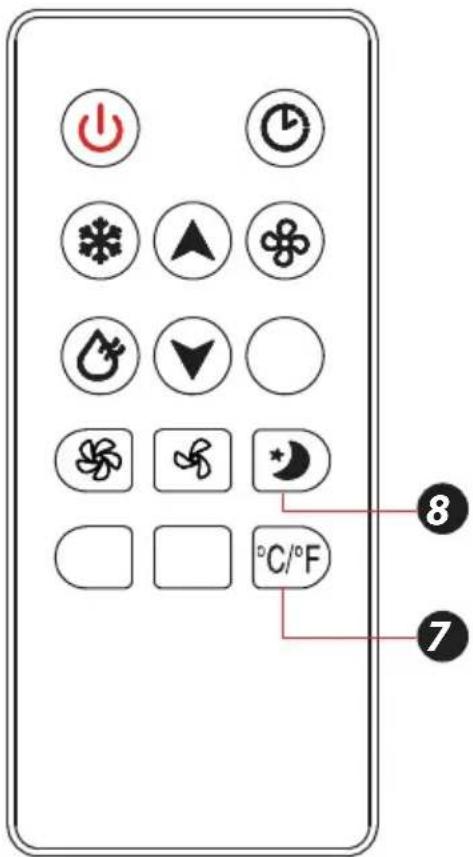
REMOTE CONTROL
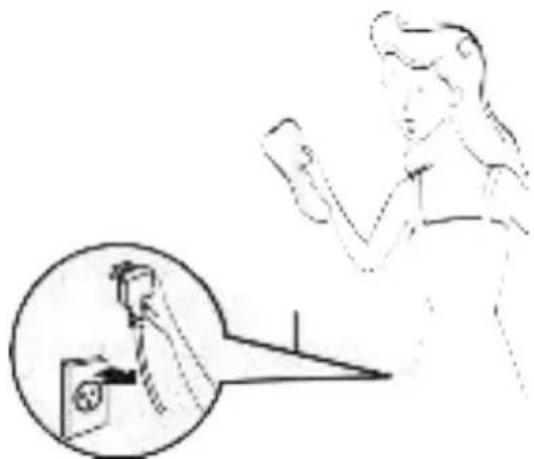
Please install the battery correctly before using the remote control. The specific steps are as follows:
- Slide to open the battery cover on the back;
install electrodes correctly when inserted; - Fit the batteries in place.
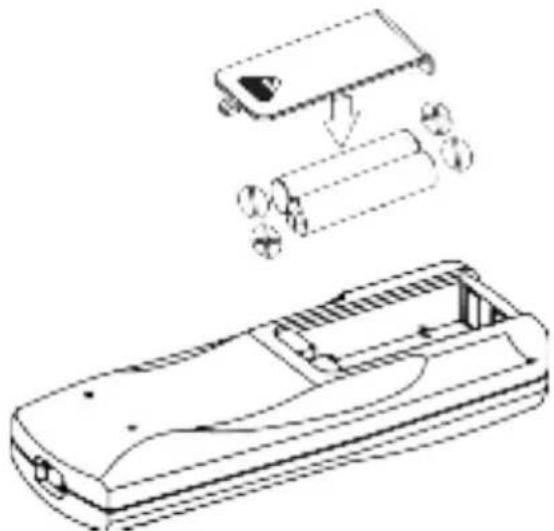
Warning:
- Only AAA DC 1.5V batteries are allowed, never use chargeable batteries or other types of batteries.
- Replace both batteries; never mix new battery with old one.
- Please remove batteries if the appliance is not to be used for a long time.
Warning:
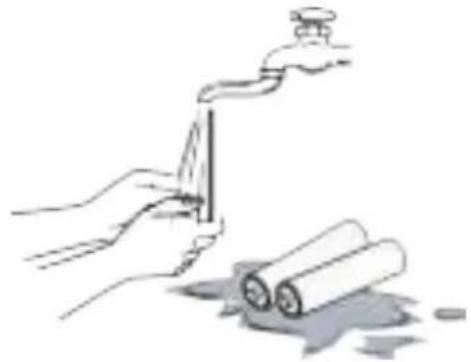
- Never use leaked batteries;
- Chemicals in batteries could result in such health-hazards as burns. If liquid in batteries splashes to skin or clothes, please wash with clean water in time. If batteries are swallowed, please rinse mouth immediately with clean water and then go to the doctor.
HOW TO OPERATE
Cooling Mode
- Under cooling mode, cooling indicator will light on.
- Temperature Setting is from 60^ to 86^ .
- Press Fan Speed Button to choose from low/high fan speed.
Fan Mode
- Under Fan mode, indicator will be on.
- Press Fan Speed Button to choose from low/high fan speed.
- Temperature cannot be set under this mode.
Dry Mode
- Dry indicator will be on under this mode.
- Remove water plug (see right), insert one end of pipe to drainage hose, theother end would be in water tank or water channel.
- If ambient Temp. ≥ 17^ or 62^ compressor starts and follow below sequence:
- If ambient Temp. ≤ 15^ or 59^ compressor stops; when it reaches ≥ 17^ , compressor starts again. (There would be a 3-min delay for compressor protection)
Fan runs with a fixed low speed. - Temp. is fixed.
Notes: Under dry mode, please dismantle air exhaust duct or performance will be affected and water full alarm "FL" will buzz.)
Heating Mode (not available for cooling only model).
- Under this mode, heating indicator will light up.
- Press UP/DOWN button to select Temp. between 16^ C to 30^ C (60°F to 86°F)
- Press Fan Speed button to set low/high speed.
TIMER MODE
- In standby mode, press Timer button to set ON time. A range of 0 to 24 Hours could be set with UP/DOWN button. Timer indicator will light up in this mode.
- Under running statepress Timer button to set OFF time. A range of 0 to 24 Hours could be set with UP/DOWN button. Timer indicator will light up inthis mode.
CLEAN AND MAINTENANCE
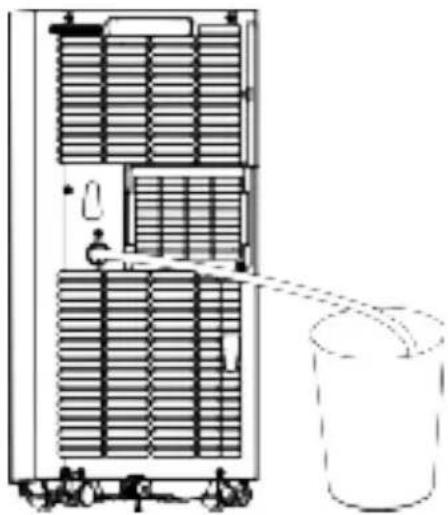
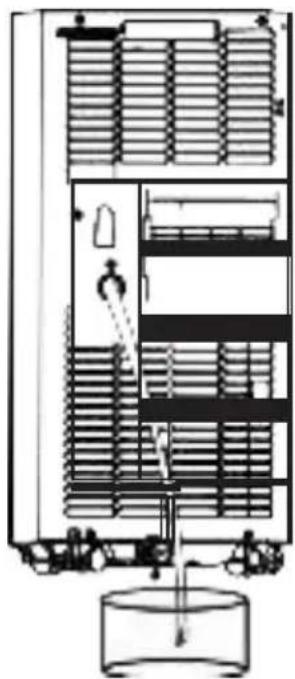
Drainage
With self-evaporating system, the appliance could perform better and save energy in a way of cooling down condenser by reusing condense water.
The appliance would display "FL" with buzz sound, if built-in water container is full. After compressor stops, please drain water as follows:
- Unplug and dismantle air exhaust duct;
- Move the appliance to a right place;
- Pull out the water plug, and drain all water;
- Re-insert the water plug;
- Re-install the air exhaust duct, restart the appliance.
MAINTENANCE
Warning:
In case of electric shock, turn off and unplug before repair or maintenance.
Body Clean
- Unplug before cleaning.
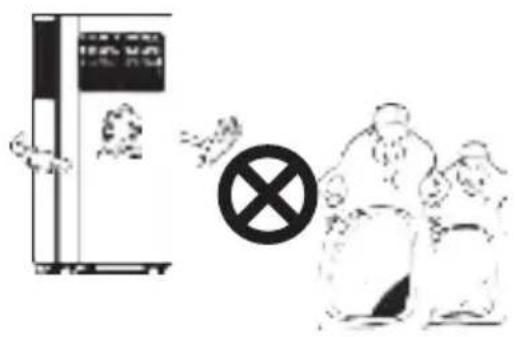
- Clean with soft and half-wet cloth. In case of damage to appearance or the appliance, never use chemical reagent, such as benzene, alcohol and gasoline.
- Never let splash water enter the appliance.
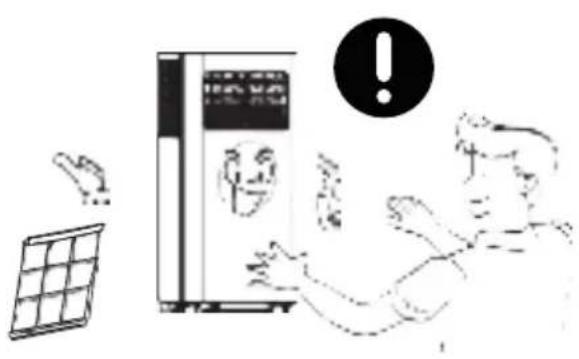
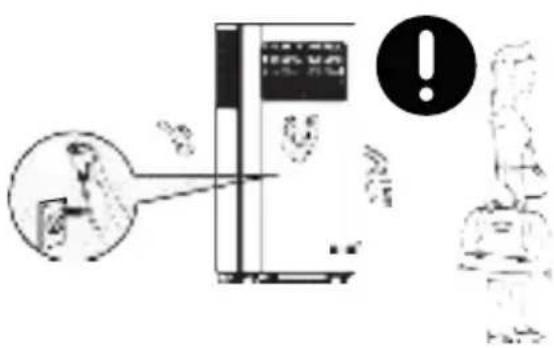
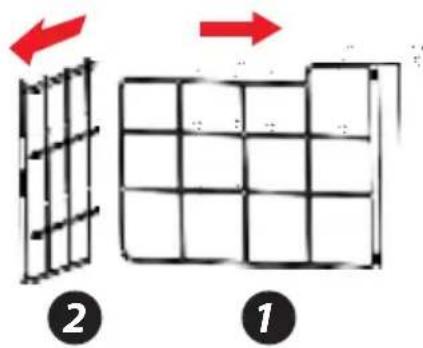
Filter is to be cleaned once every two weeks. If air quality indoor is poor, it has to be washed more often, or performance of the appliance would be lowered due to blocked filter screen. Please follow below instructions for cleaning:
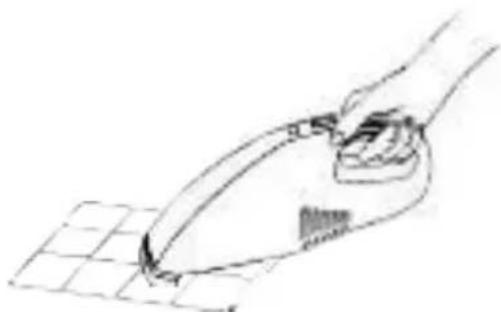
Take off air-inlet grille as indicated in the photo; pull out the filters. Clean the filter in 40^ or 104^ warm water or water with neutral detergent; dry the filter in a cooling area.
Re-install the filter and grille after drying completed; restart the appliance.

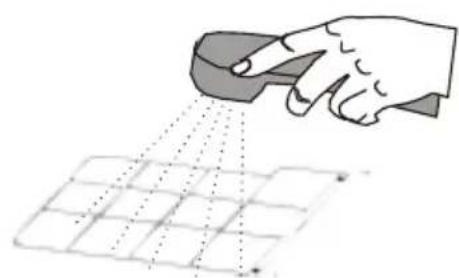
If filter is dirty, clean in 40^ (104^) warm water or in water with neutral detergent.
If filter is not that dirty, clean the dust with a vacuum cleaner.
Warning:
Do not wash with filter in water above 40^ (104°F) or with irritating detergent such as alcohol, gasoline and benzene. In case of deforma 9 tion, filters are to be kept away from heat sources and dried naturally in a cooling area. Never operate the appliance when filter is not installed.
Seasonal Maintenance
If the appliance will not be in use for a long time, please maintain by following below
1.Pull out water plug for drainage.
2. Run in Fan mode for at least 2 hours to dry internal parts.
3. Turn off and unplug.
4.Clean the filter and reinstall.
5.Dismantle the air exhaust duct and keep it well.
6.Take off batteries.
7.Wrap the appliance in a plastic bag and
8. keep in a dry and cooling place
If the appliance haven't been used for a long time, please pay attention to the following when to be used again:
1.Make sure water plug and filter are installed.
2.Never use damaged power cord; Check before use.
3.Insert batteries.
4.Assemble other parts according to the instruction.
COMMON FAILURES AND DIAGNOSIS
Intelligent Error Detection
| Error-detecting code | Multi-functional defection |
| E1 | Error of the coil's temperature sensor |
| E2 | Error of indoor temperature sensor |
| E4 | Anti-freezing protection: temperature of the coil is too low and the whole A/C is off. When temperature excesses 8°C (46.4°F), the protection is released and previous working state is recovered. |
TROUBLESHOOTING
The following table lists the common faults and maintenance methods of this series of portable A/C. When the machine is in abnormal operation, the following table can be used for simple diagnosis and maintenance. If it still can't be solved, please contact professional maintenance personnel.
| TROUBLE CAUSE | SOLUTION | |
| The A/C doesn't work | No display | Reset circuit breaker on AC cord |
| The display panel displays "FL" | Restart the A/C after power off and draining, then it will become normal | |
| Time OFF function is started | The A/C can be restarted 3 minutes after being turning off | |
| The A/C starts frequently | Direct sunlight | Draw the curtain |
| Doors and windows keep open; there are lots of people or heat source in room | Close doors and windows, remove heat source | |
| Clean or replace itFilter screen is very | ||
| Air inlet or air outlet is blocked | Remove the stem | |
| Loud noise on the A/C | The A/C is placed unevenly | Place it at even and firmground, avoid shaking |
| The compressor doesn't work | Its delay protection started | Wait for 3min, turn on after temperature decreases |
FEATURES:
- Metal Control Box to Prevent from Fire and Exploding
- Rotary Compressor
Universal Castors for Moving Freely - Wifi function
- Lightweight & Portable A/C Unit
- Compact Freestanding Room Air Conditioner
(3) Operation Modes: AC Cooling/Dehumidifier/Fan - Hassle-Free, Quick Setup Cooling
- Simple Electric Plug-in Operation
- Convenient Wide-Area Climate Control Room AC Coverage
- Push Button Control Panel with LED Display
- Time, Temperature & Fan Speed Adjustment Settings
- Includes Universal Window Mount AC Exhaust Kit
- Removable & Washable Air Filter Screen
- Modern Style, Sleek Body Housing
- Energy Efficient: Low Power Consumption
- Low Noise Level Motor
- Rolling Wheels for Easy Portability
Used for Home, Office, School & Business Rooms
WHAT'S IN THE BOX:
- AC Unit
- Exhaust Hose
Window Installation Plate - Remote Control
TECHNICAL SPECS:
- Power Supply: 220V/50Hz
- Rated Power: 960W/1120w
- Refrigerant Type: R290
Cooling capacity (ASHRAE): 9,000/10,000 Btu/h - Coverage Area: Cools Rooms up to 250/300 Square Feet
Air Flow: 360 Cubic Meters / Hour - Operating Modes: Cool / Fan / Dry (Dehumidifier)
- Moisture Removal / Dehumidifier: 0.9/1.0 Liters / Hour
- Operating Noise Level: 65 dBA
- Fan Speed Settings: Two Level, Low/High
- Temperature Unit Selectable: ^ C / ^ F (Celsius/Fahrenheit)
- Adjustable Timer Settings: Up to 24 Hours
- Battery Operated Remote Control, Requires (2) x 'AAA' Batteries, Included
- Power Cable Length: 5.6^ ft.
- Product Dimension (L x W x H): 70 x 32.5 x 29.4 cm/27.6" x 12.8" x 11.6" inches

WARNING:
This product can expose you to a chemical or group of chemicals, which may include "Acrylonitrile" which is known in the state of California to cause cancer, birth defects, or other reproductive harm. For more info, go to https://www.p65 warnings.ca.gov/.
WiFi operation instruction
Download and Install APP
- Use your phone to scan the QR code below or search "Smart Life" in application market to download and install the App.

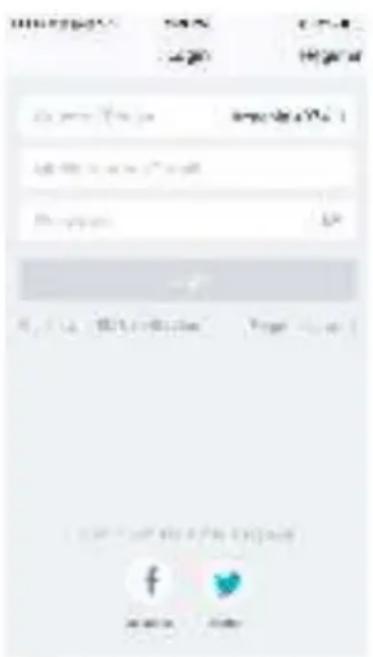
Registration
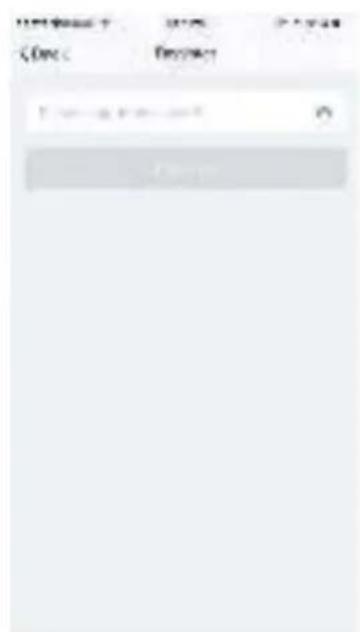
- If you don't have an App account, register an account or sign in with verification code by SMS. This page describes the registration process.
- Tap to enter registration page
- The system automatically recognizes your country / area. You can also select your country code. Enter the mobile number / E-mail and tap "Next", as shown in the picture 1
- If you enter the mobile number, then enter the verification code in the message, as shown in the picture 2, and enter the password, tap
- "Confirm" to finish your registration.
- If you enter the E-mail, enter the password as shown in the picture 4, and tap "Confirm" to finish your registration.
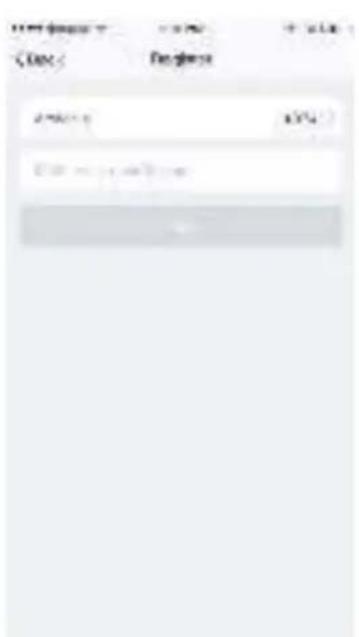
Picture 1
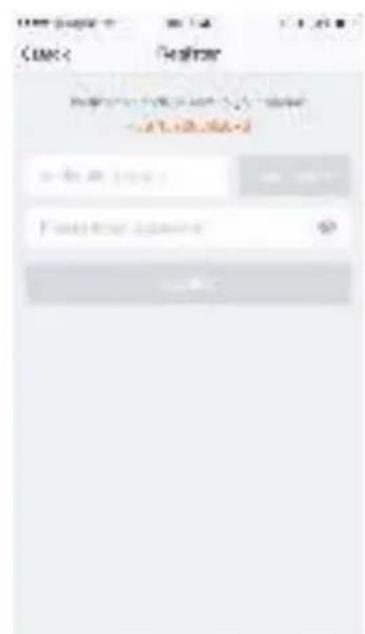
Picture 2
Picture 3
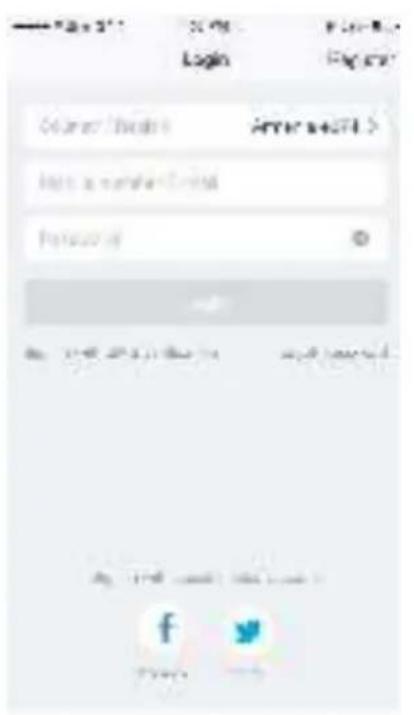
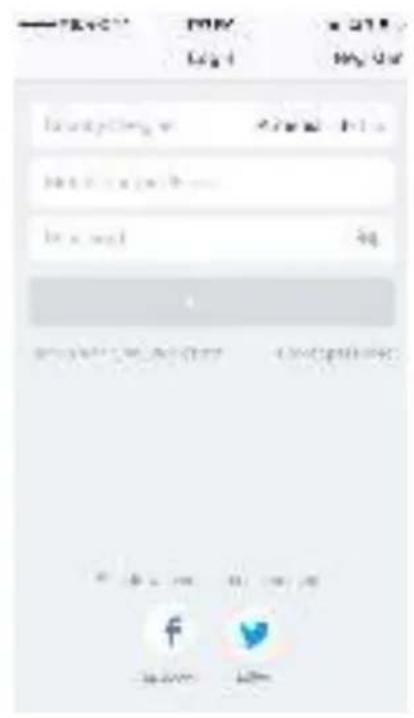
Sign in with user name and password
- The system automatically recognises your country / area. You can also select your country code. Enter the mobile number/E-mail and tap "Next".
- Enter your registered mobile number or Email, and password to login.
Sign in with social media account
If you have installed Facebook or Twitter in your smart phone, tap the corresponding icons and then sign in the App after social network authentication.
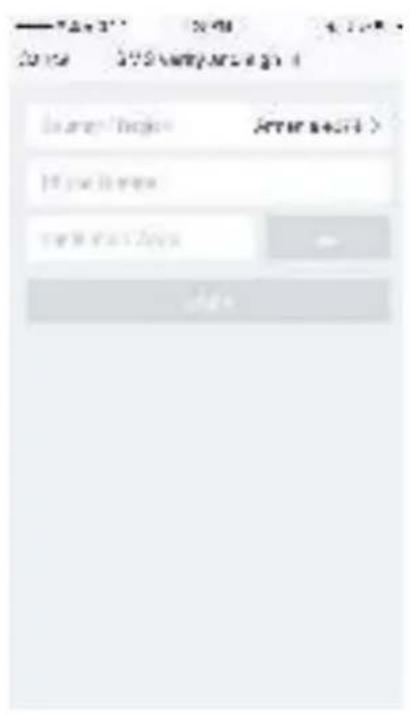
Sign in with verifica:on code via SMS
- Tap "Sign in with SMS verification", to new page.
- The system automatically recognises your country / area. You can also select your country code by yourself.
- Enter the mobile number and tap "Get" to get a message.
- Enter the verifica<on code in the message and tap "Login" to login the App.
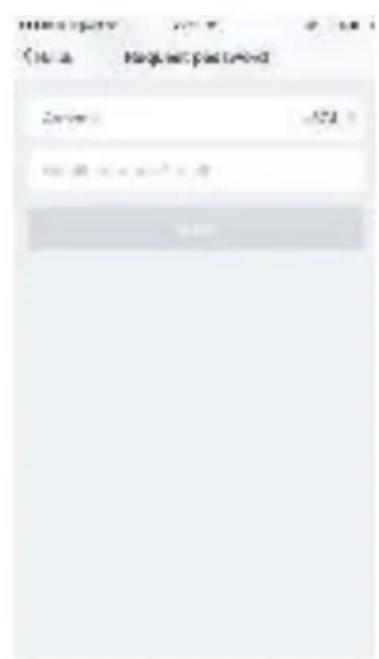
Forgot password
To find your password back, please follow the procedures:
1.Tap "Forgot password", as shown in the picture 1.
2. The system automatically recognizes your country / area. You can also select your country code by yourself. Enter the mobile number / E-mail and tap "Next", as shown in the picture 2.
3. Enter the verification code in the message/E-mail, as shown in the picture 3, and enter the new password, tap"Confirm" to finish.

Picture 1 Picture 2 Picture 3
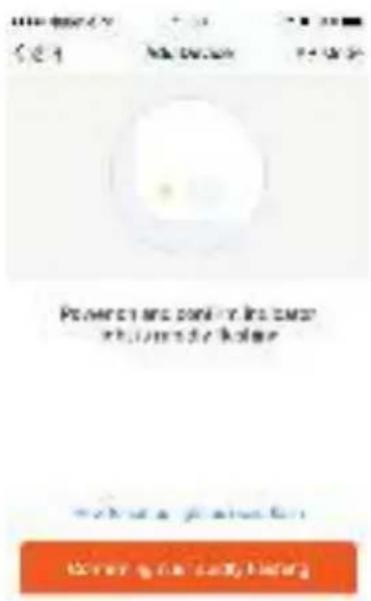
Connect device
- Plug the PAC, the PAC will be in stand by mode. (Do not turn on the unit until the wifi connection is successful.)
- Press the SPEED button for 3 seconds to enter wifi connect mode. (Also use SPEED as reset button)
- Enter the App, tap" + "in the upper right of the page to enter network connection page, as shown in the picture
4.There are two network connection methods (Normal mode and AP mode). Normal mode is default. Users could tap the upper right corner to switch the connection method to AP mode.
Notes: How to set indicator light as rapid flashing (normal mode) or slowly flashing (AP mode).
Step 1 Plug the unit

Step 2 Hold the reset button for 5s.

Step 3 Confirm indicator light is now rapidly flashing

Step 4 Hold reset button for 5s until indicator light is slowly flashing
For normal mode
- Please make sure the device's indicator light rapidly flashes (2 times per second), tap to go on to the next step (picture 1).
2.If indicator light is not rapidly flashing, tap "how to set indicator light as rapid flashes" to view operation processes.
picture 1
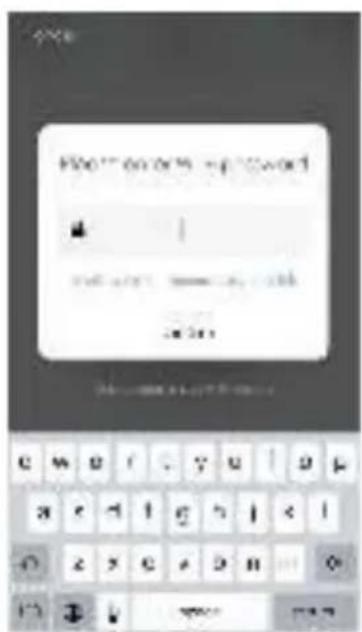
- Select the Wi-Fi under which device is working, enter password and tap "Confirm" to enter network connection process, as shown in the picture below (picture 2).
- If you select normal mode to connect device to the network, the App goes through the processes as shown in the picture 3.
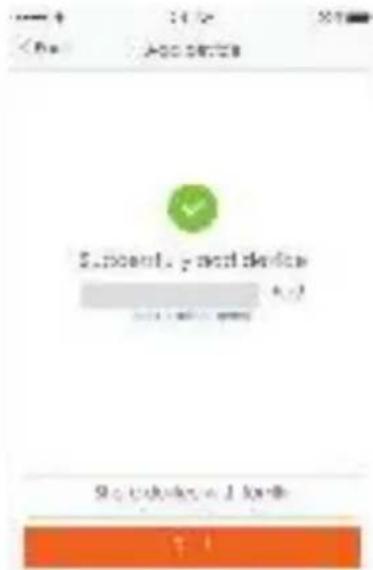
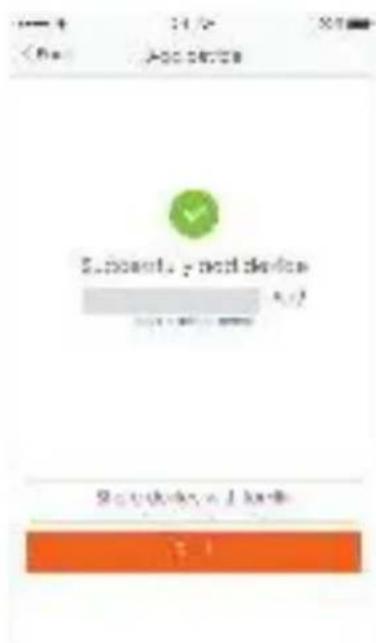
- After the network connection is successfully, the App page will be shown in the picture 4

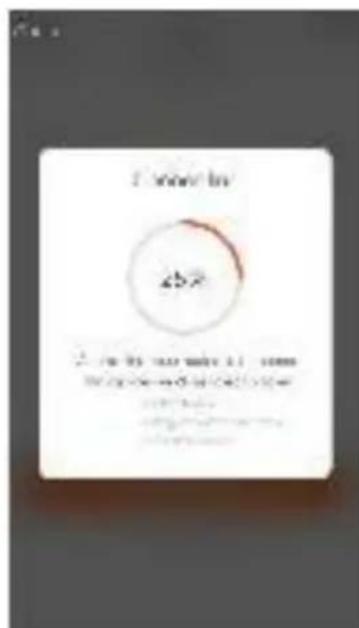
picture 2 picture 3 picture 4
For AP mode
- Please make sure the device's indicator light slowly flashes (1 time every 3 seconds), tap to go on to the next step.
2.If indicator light is slowly flashing, tap "how to set indicator light as slow flashes" to view operation processes. - Select the Wi-Fi under which device is working, enter password and tap "Confirm" to enter network connection process, as shown in the picture 2.
- After connecting with the hotspot, back to the network connection page to enter network connection process. The App goes through as shown in the picture 3.
5.Picture 4 shows the App page when the network connection is successful.

picture 1 picture 2 picture 3
Note:
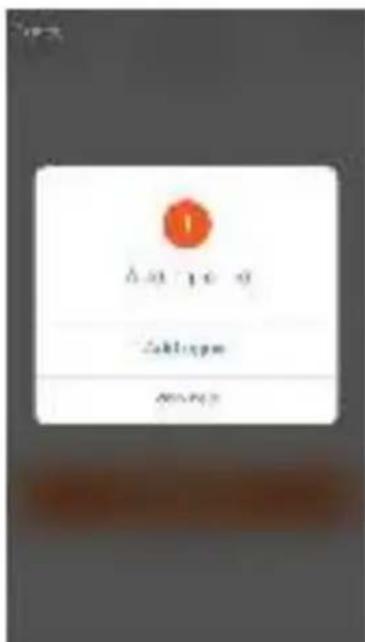
If your App interface is shown as picture 5, it means that the network connection failed. You could try by connecting again or view help.
picture 5picture 4
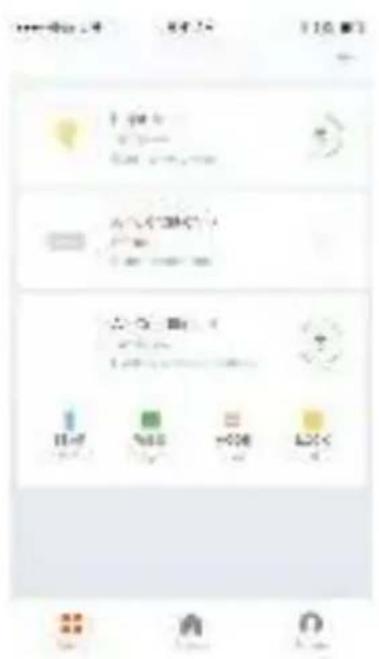
1. Control device
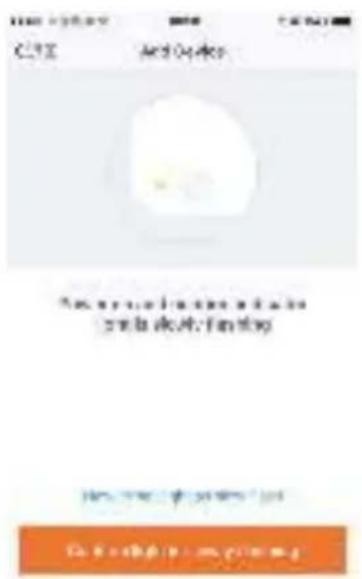
After successfully configuring the devices, the smart device will be shown on the home page. Tap to enter its control page
Note:
1.When device is online, it support short-cut operations 2.When device is offline, it displays "Offline" and can be controlled.
2. Smart life scenario
Smart life scenario supports that devices perform corresponding actions under various conditions.
The main conditions include:
1.Temperature
2.Humidity
3.Weather
4.PM2.5
5.Air quality
6.Sunrise & sunset time
7. Device's actions (such as turn on/off)
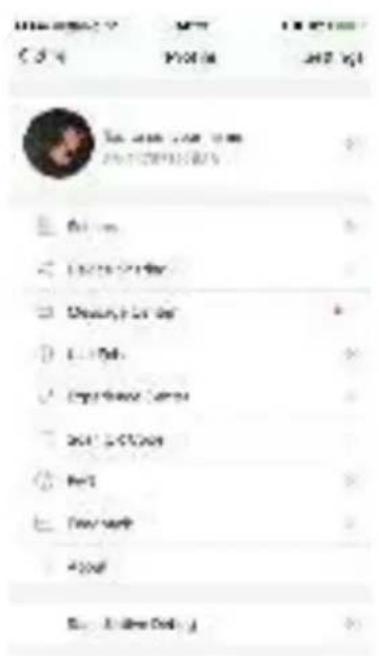

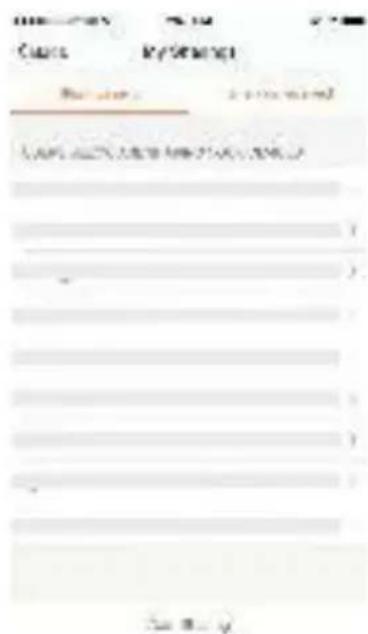
Personal Profile
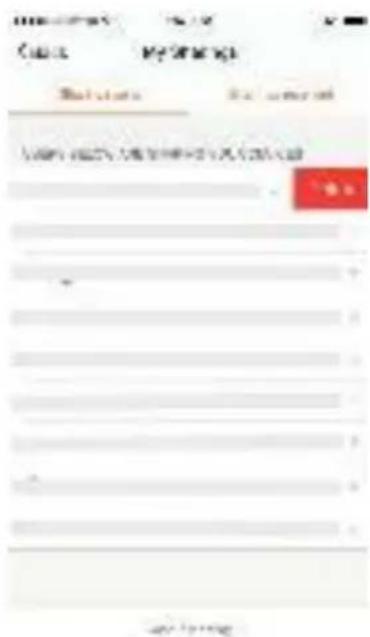
"Profile" page is where users could manage personal information. The key information is as follows:
Personal information
- Smart life scenario
devices
3.Message center
4.F.A.Q
5.Entry to submit feedback
6.About
Profile
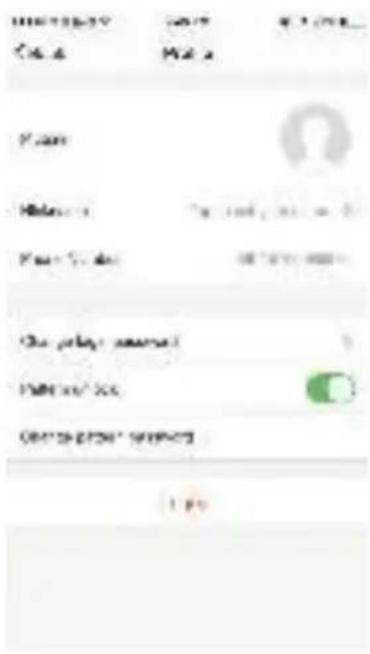
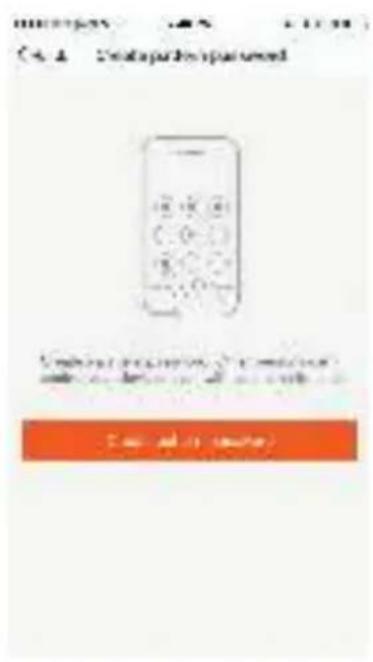
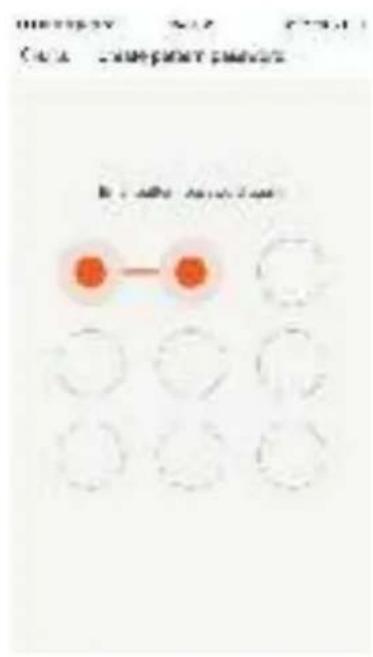
"Profile" page is for displaying personal account information. You can change login password, binding mobile number, set pattern unlock on this page.
Profile-Pattern Unlock
Profile-Pattern Unlock Tap "Pattern unlock" to set your pattern. After setup, you have to enter your pattern to use the App.
Profile-Device Sharing
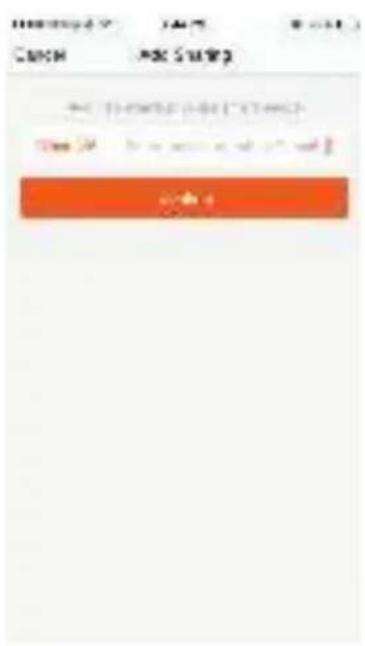
Add sharing:
As shown in the left picture, users could input a new member's mobile number and share the device with him. The new member could then control the shared device.
Sharing sent list:
The list shows all members who are added by your account. You can delete the member and delete the sharing by swiping left.
Sharing received:
The list shows all devices that your account has received. You can delete the sharing by swiping left.
Message center:
Including notifications of new device and new sharing.
Feedback:
Entry where users could submit their feedback.

App's other related information include:
- Tap on "rate us", App will be redirected to a corresponding App market, where you could rate us.
2.Show App version number
Remark:
- The pictures used in this wifi section are iOS app interface, Android version is a bit different.
- Product and software update periodically, the number and app interface in this manual are only for example. No extra notification on further changes.
Amazon Echo Operation Instruction
1. What you need to get started
Before using Echo to control your smart devices, make sure you meet the following conditions
1.Stable Wi-Fi network which could access to Amazon server.
2. An Echo device, including Echo, Echo Tap, or Echo Dot.
3.An Amazon account.
4. Smart Life app and a related account.
5. Smart devices.
2. Add devices in Smart Life app (Refer to App Instruction)
You can skip this part if you've already add some devices to your Smart Life account, and in the meantime the devices' name are easily recognized. 2.1 Download Smart Life app (Refer to App Instruction)
You can scan the QR code below to download the Smart Life app:

You can also search "Smart Life" in either App Store or Google Play to install the App.
2.2 Register a Smart life account and sign in the app (Refer to App Instruction)
Open the Smart Life App, tap "Register" to register an account, then sign in the App.
2.3 Add device and change device's name (Refer to App Instruction) Sign in with the Smart Life account, add the device, then change device name to a easily recognized word or phrase, like "bedroom air conditioner".
3. Set up Amazon Echo and enable Smart Life Skill
User can configure Echo through web or Alexa app.
Web configuration link: http://alexa.amazon.com/spa/index.html Search "Amazon Alexa" in App Store or Google Play to install the app. We take app configuration as an example. Configuration through
3.1 Set up Echo with Alexa app
You can skip this part if your Echo is already set up
- Make sure your Echo device is energized.
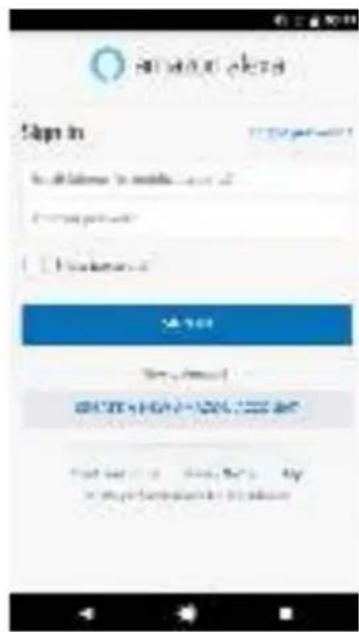
- Open the Alexa app by tapping the app icon on your mobile device.
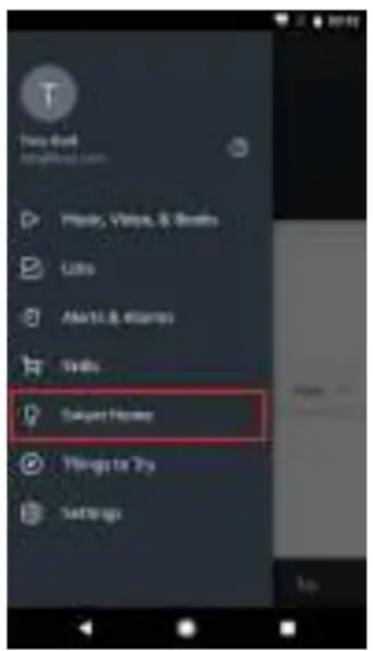
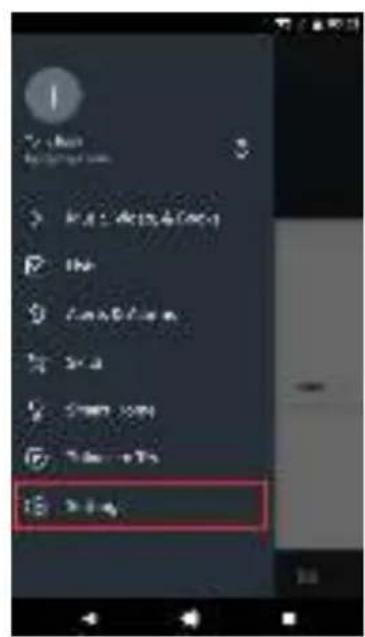
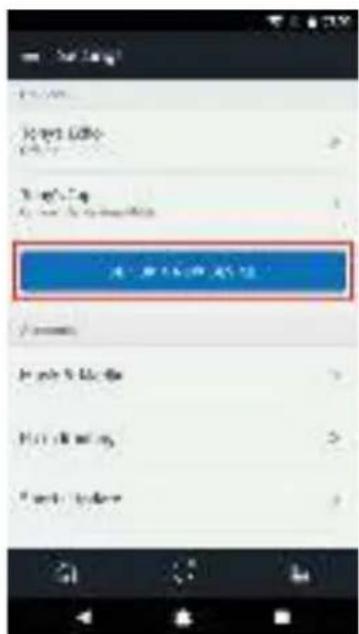
- Type in your Amazon account and password, then tap "SIGN IN".4. Tap the hamburger menu on the top left corner, select "Settings", then tap "SET UP A NEW DEVICE".


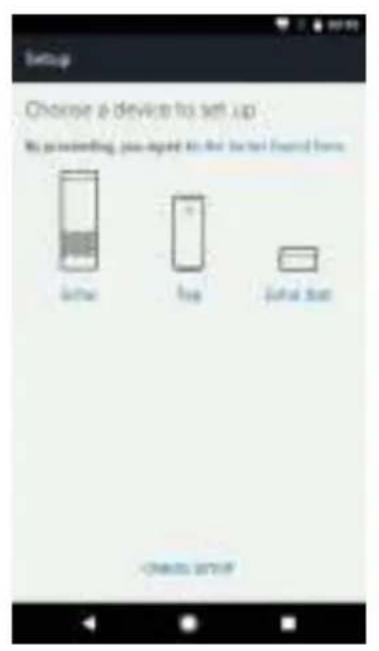
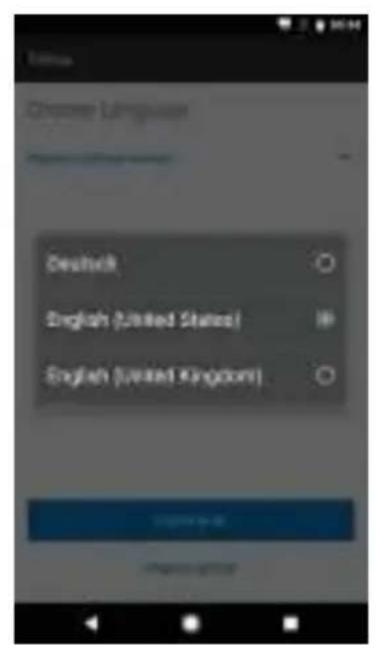
- Select your Echo model, choose a proper language, then tap "CONNECT TO WI-FI".
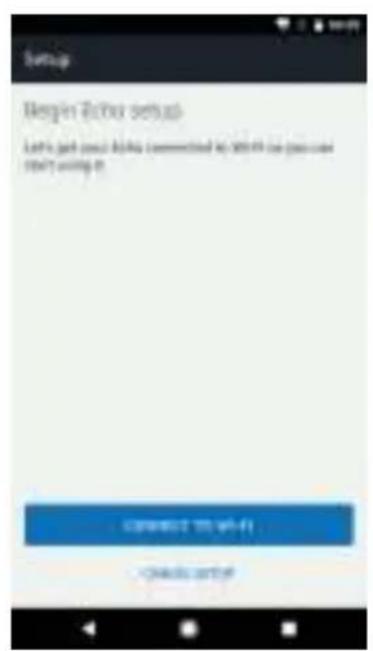
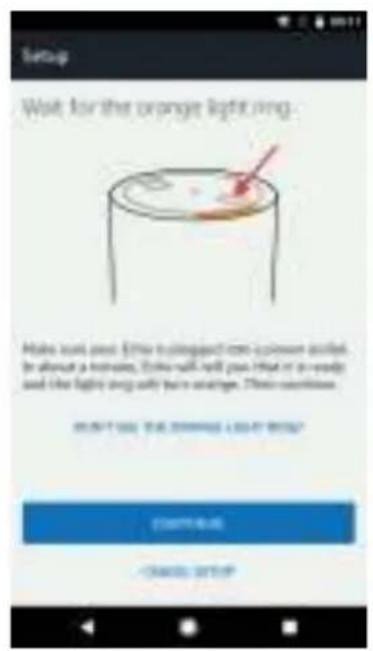
- Long press the dot button on the top of your Echo device until the orange light shows up, then tap "CONTINUE". When your phone is connected to Echo, tap "CONTINUE".
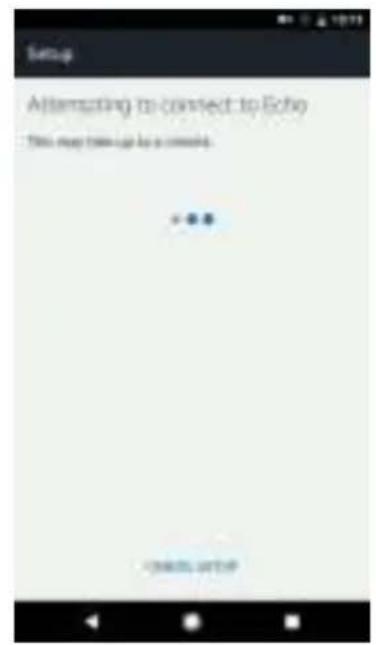
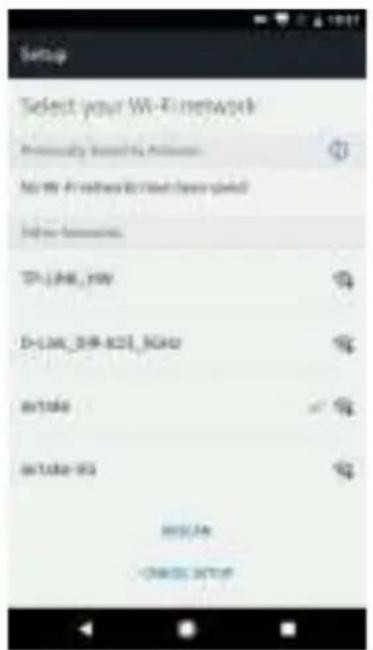
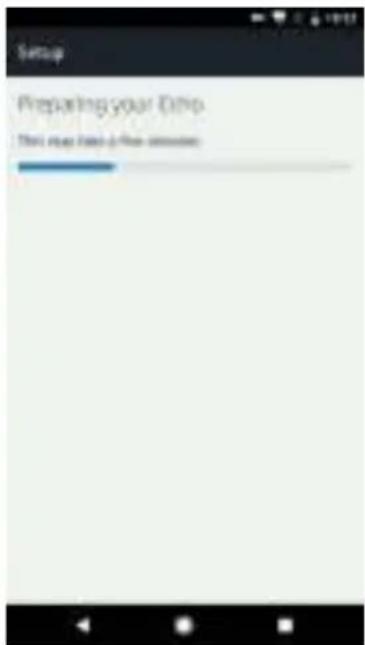
- Select a Wi-Fi to let Echo have the access to the internet. Type in the Wi-Fi password, then tap "CONNECT". Echo may take several minutes to connect the network.

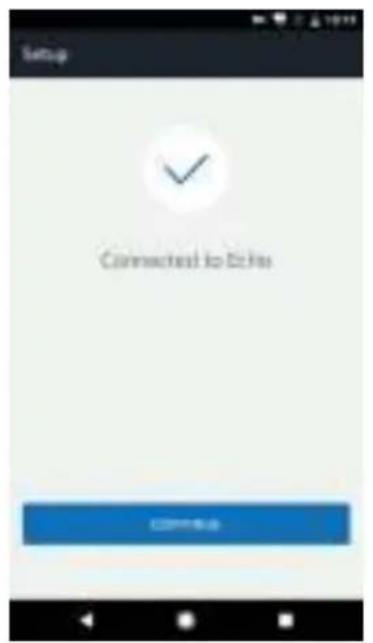
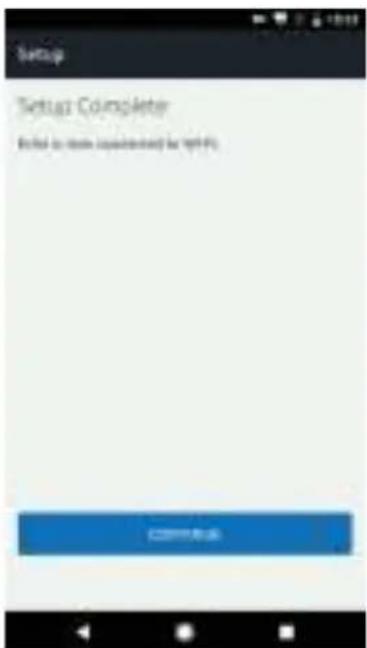
- Tap "CONTINUE" when Echo is connected to the network. After an introduction video, tap "CONTINUE" to finish the setup.

3.2 Link Smart Life account to Alexa
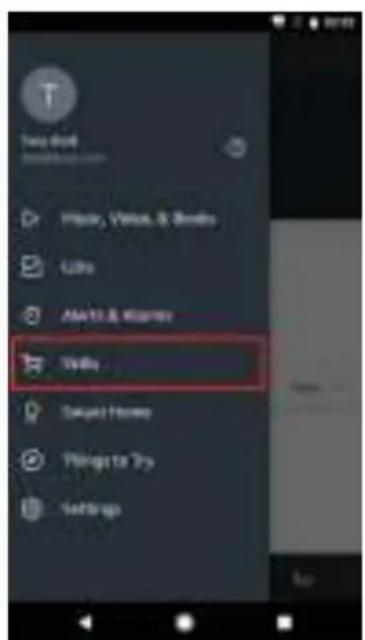
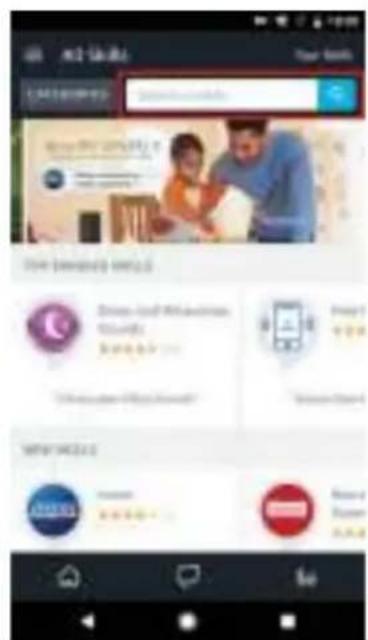
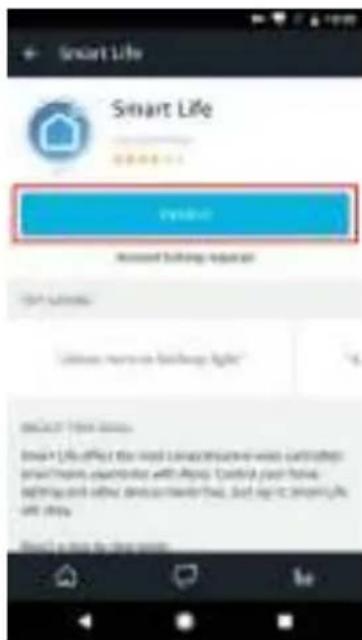
- Tap "Skills" in the hamburger menu, then search "Smart Life". Select "Smart Life" and tap "ENABLE" to enable the Skill.
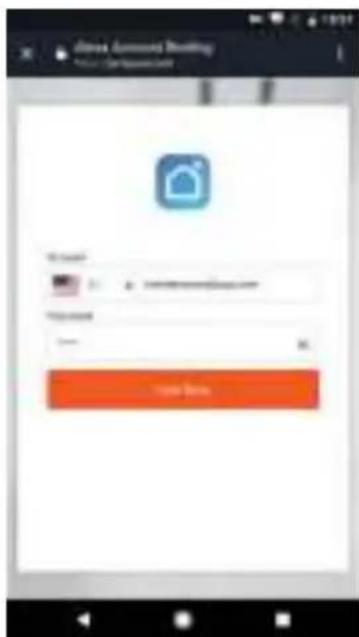
- You will be redirected to the account link page. Type in your Smart Life account and password, don't forget to select the country/region where your account belongs to. Then tap "Link Now" to link your Smart Life account. The country/region, the account, and the password must match with the exact content in Step 2.2.

4. Control your smart devices through Echo
4.1 Discover devices
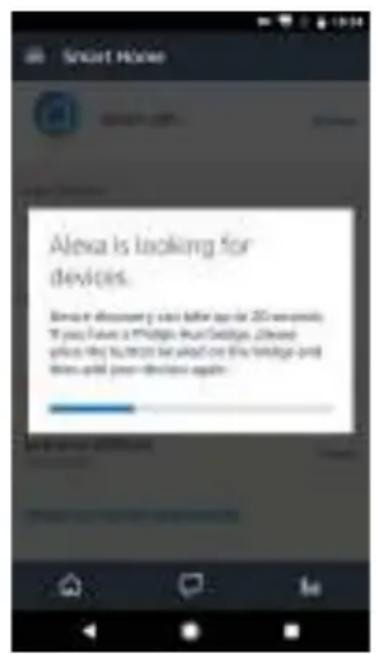
Echo needs to discover your smart devices before it controls them. You can say "Alexa, discover devices" to Echo. Echo will discover devices which have already been added in the Smart Life app. You can also tap "DISCOVER" to discover the smart devices. Discovered devices will be shown in the list.

Note: every time you change the device's name on Smart Life app, Echo must re-discover before you control them.
4.2 Control devices by voice commands
Now you can control your smart devices through Echo. You can use the following commands to control your devices (e.g., bedroom air conditioner):
Alexa, turn on/off bedroom air conditioner.
Alexa, set bedroom air conditioner to 70F
Alexa, increase/decrease the temperature.
serenelife
serenelife

SPA
SLPAC905WEUSLPAC905WUK
Compartmention recibida:
Image 1 Image 2 Image 3
Connect device

Step 3 Confirm indicator light is now rapidly flashing

Step 4 Hold reset button for 5s until indicator light is slowly flashing
Pour le mode normal

Image 2 Image 3 Image 4
Pour le mode AP
picture 1 picture 2 picture 3
Remarque:
- Make sure your Echo device is energized.
- Open the Alexa app by tapping the app icon on your mobile device.
- Type in your Amazon account and password, then tap "SIGN IN".4. Tap the hamburger menu on the top left corner, select "Settings", then tap "SET UP A NEW DEVICE".

4.2 Control devices by voice commands
CO ZNAJDUJE SIE W OPAKOWANIU
Akilli Hata Tespiti 21
Sorun Giderme 22
2. Akilieating senaryosu
Questions or Comments
We are here to help!
Phone: 1.718.535.1800
Serenelifehome.com/ContactUs


- SLPAC105WEUSLPAC105WUK
- Portable Air Conditioner
- SAFETY INSTRUCTIONS
- IMPORTANT!
- CONTENTS
- User Tips
- Product Overview
- Operation
- Clean and Maintenance
- Common Failures and Diagnosis
- PRECAUTION
- SAFETYWARNINGS
- TIPS
- Main Components
- CONTROL PANEL AND REMOTE CONTROL
- Fan Speed Button
- UP/Down Button for Temperature and Timer
- 4.ModeButton
- Timer Button
- Temperature and Timer Display
- Temperature Switch Button
- Sleep button
- Place & Install
- Place
- Install
- Step 1:
- Clip-fixture Type
- Step 2:
- Fix the plate to window
- Step 3:
- Step 4:
- Incorrect installation
- Warning
- Notice:
- REMOTE CONTROL
- Warning:
- HOW TO OPERATE
- Cooling Mode
- Fan Mode
- Dry Mode
- TIMER MODE
- Drainage
- MAINTENANCE
- Body Clean
- Seasonal Maintenance
- If the appliance haven't been used for a long time, please pay attention to the following when to be used again:
- Intelligent Error Detection
- TROUBLESHOOTING
- FEATURES:
- WHAT'S IN THE BOX:
- TECHNICAL SPECS:
- WiFi operation instruction
- Download and Install APP
- Registration
- Sign in with user name and password
- Sign in with social media account
- Sign in with verifica:on code via SMS
- Forgot password
- Connect device
- For normal mode
- For AP mode
- Note:
- Control device
- Smart life scenario
- Personal Profile
- Profile
- Profile-Pattern Unlock
- Profile-Device Sharing
- Add sharing:
- Sharing sent list:
- Sharing received:
- Message center:
- Feedback:
- App's other related information include:
- Remark:
- Amazon Echo Operation Instruction
- What you need to get started
- Add devices in Smart Life app (Refer to App Instruction)
- Set up Amazon Echo and enable Smart Life Skill
- Set up Echo with Alexa app
- Link Smart Life account to Alexa
- Control your smart devices through Echo
- Discover devices
- Control devices by voice commands
- serenelife
- SLPAC905WEUSLPAC905WUK
- Compartmention recibida:
- Pour le mode normal
- Pour le mode AP
- Remarque:
- CO ZNAJDUJE SIE W OPAKOWANIU
- Akilieating senaryosu
Brand : SereneLife
Model : SLPAC105W
Category : Fan