ProMouse M8800 - Computer Mouse Cherry - Free user manual and instructions
Find the device manual for free ProMouse M8800 Cherry in PDF.
| Product type | Optical wireless mouse |
| Brand | Cherry |
| Model | ProMouse M8800 |
| Technology | 2.4 GHz radio |
| Resolution | 800 dpi |
| Power supply | 2 rechargeable alkaline LR6 (AA) batteries, 2.2 to 3.3 V SELV |
| Current consumption | max. 30 mA |
| Service life (charged batteries) | approx. 3 months (typical office use) |
| Charging time | 12 to 18 h |
| Range | 20 m (optimal environment) |
| Frequency channels | 16 |
| Transmission power | Adjustable from -20 dBm to 0 dBm |
| Receiver | USB, power supply 5 V/DC ±5 % SELV |
| Operating temperature | 0 °C to +50 °C |
| Storage temperature | -20 °C to +60 °C |
| Supported operating systems | Windows 98/ME/2000/XP |
| Included software | Cherry KeyM@n |
| Additional functions | USB cable charging, CONNECT encryption, power saving mode, frequency and power adjustment |
| Maintenance and cleaning | Clean with a slightly damp cloth and mild detergent; do not use solvents |
| Safety | Do not open the battery compartment unnecessarily; use only the provided cable for charging |
| Disposal | Comply with local regulations for batteries and electronic equipment |
| Package contents | Mouse, receiver, charging cable, 2 rechargeable batteries, software CD, manual |
Frequently Asked Questions - ProMouse M8800 Cherry
User questions about ProMouse M8800 Cherry
0 question about this device. Answer the ones you know or ask your own.
Ask a new question about this device
Download the instructions for your Computer Mouse in PDF format for free! Find your manual ProMouse M8800 - Cherry and take your electronic device back in hand. On this page are published all the documents necessary for the use of your device. ProMouse M8800 by Cherry.
USER MANUAL ProMouse M8800 Cherry
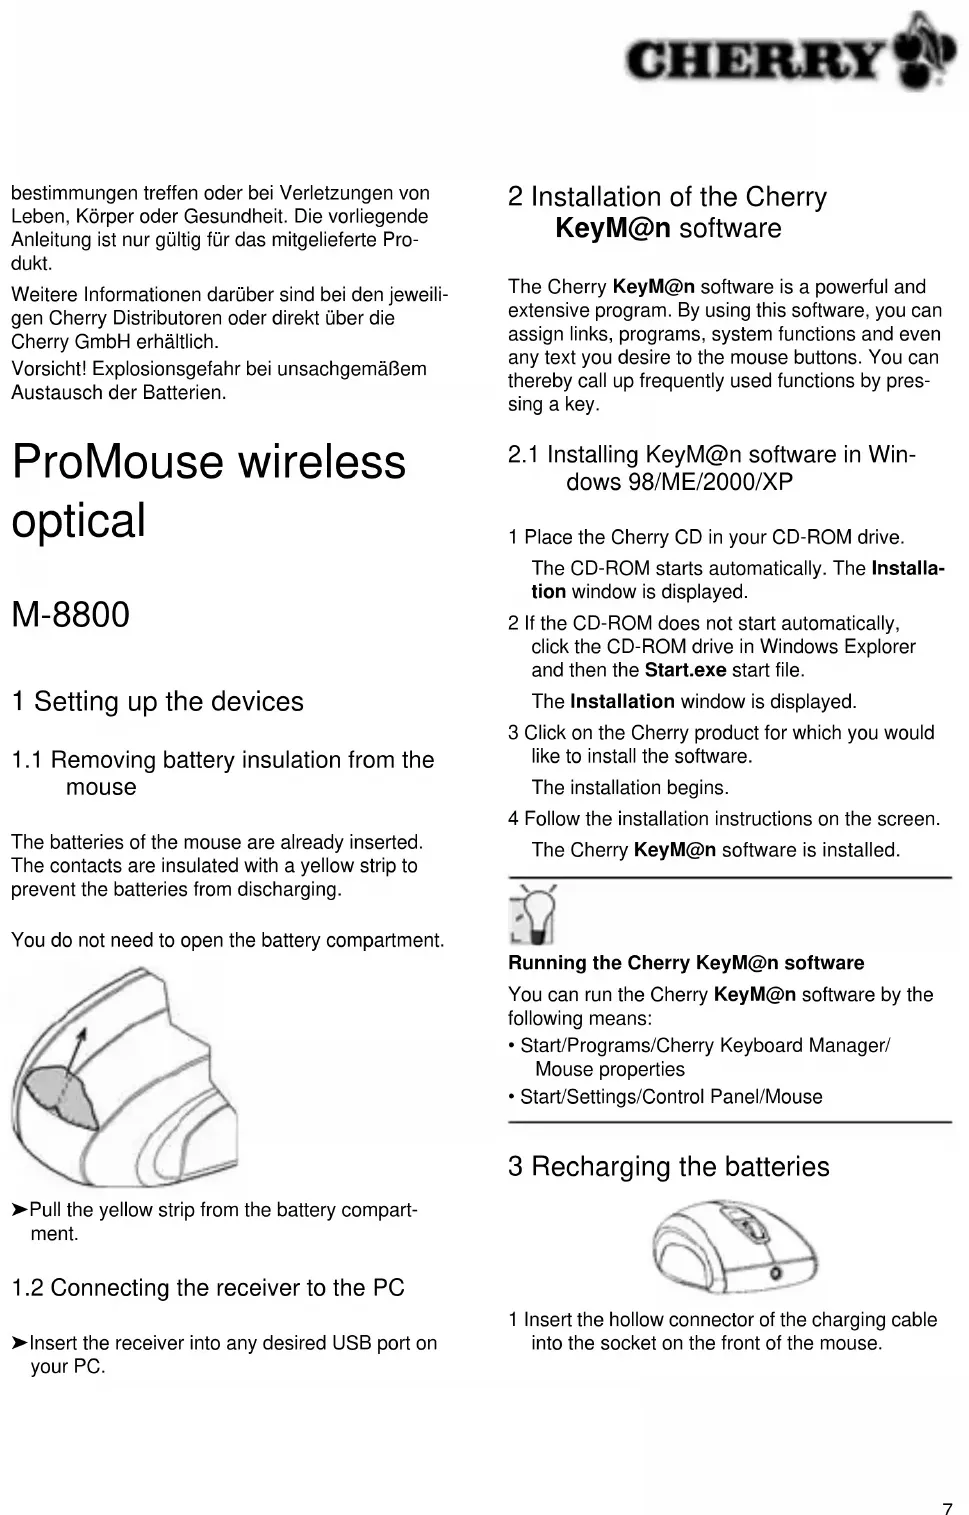
ProMouse wireless optical
M-8800
ProMouse wireless optical
M-8800
1 Setting up the devices
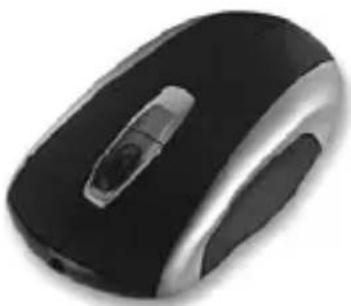
1.1 Removing battery insulation from the mouse
The batteries of the mouse are already inserted. The contacts are insulated with a yellow strip to prevent the batteries from discharging.
You do not need to open the battery compartment.
Pull the yellow strip from the battery compartment.
1.2 Connecting the receiver to the PC
Insert the receiver into any desired USB port on your PC.
2 Installation of the Cherry KeyM@n software
The Cherry KeyM@n software is a powerful and extensive program. By using this software, you can assign links, programs, system functions and even any text you desire to the mouse buttons. You can thereby call up frequently used functions by pressing a key.
2.1 Installing KeyM@n software in Windows 98/ME/2000/XP
1 Place the Cherry CD in your CD-ROM drive. The CD-ROM starts automatically. The Installation window is displayed.
2 If the CD-ROM does not start automatically, click the CD-ROM drive in Windows Explorer and then the Start.exe start file. The Installation window is displayed.
3 Click on the Cherry product for which you would like to install the software. The installation begins.
4 Follow the installation instructions on the screen. The Cherry KeyM@n software is installed.

Running the Cherry KeyM@n software
You can run the Cherry KeyM@n software by the following means:
- Start/Programs/Cherry Keyboard Manager/ Mouse properties
- Start/Settings/Control Panel/Mouse
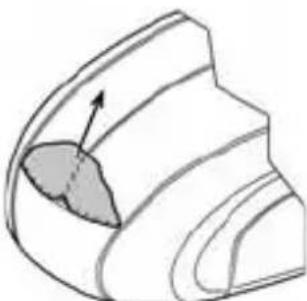
3 Recharging the batteries
1 Insert the hollow connector of the charging cable into the socket on the front of the mouse.
2 Connect the charging cable to a USB port of the PC.
You can continue working while charging is taking place.
3.1 Tips for charging the alkaline batteries
A complete charge of the alkaline batteries lasts approx. 12 to 18 hours. The charging circuit prevents overcharging.
When a red LED flashes on the receiver, the batteries must be charged.
Proper charging extends the service life of the alkaline batteries.

Caution!
Alkaline batteries are damaged when charged with a conventional charging unit
1 Charge alkaline batteries of the mouse with the charging cable only.
2 Do not use an external charging unit.
4 Using the functions of the mouse

Prerequisite for optimal use
Using the mouse on a bright, textured surface increases its effectiveness:
- optimal movement detection
- longer battery life
Reflective surfaces are not suitable for use with the mouse.
4.1 Inserting the batteries into the mouse
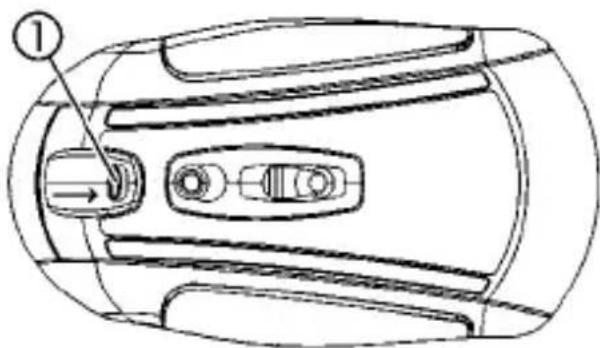
1 Press the latch ① on the underside of the mouse to the middle of the mouse.

2 At the same time, slide the cover of the battery compartment on the back of the mouse towards the top of the mouse.
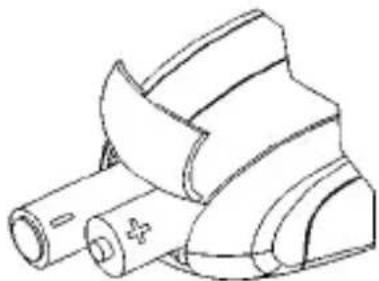
3 Insert both included rechargeable alkaline AA (LR6) batteries in the battery compartment in accordance with the + / - markings.
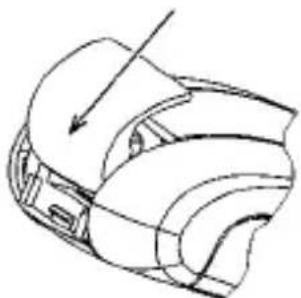
4 Slide the cover of the battery compartment from the top of the mouse into the side guides until it locks.
4.2 Switching the mouse off/on
Switch the mouse off to save power and to protect it against unintended actuation during transport.
1 Keep the left and right mouse buttons and the wheel button pressed simultaneously for 3 seconds.
The mouse is switched off.
2 Keep the left and right mouse buttons and the wheel button pressed simultaneously again for 3 seconds.
The mouse is switched on again.
4.3 Activating Cherry Power Safe Mode
The Cherry Power Safe Mode switches the mouse off after 17 minutes of not being moved. The battery service life is extended by approx. 15% by this. Pressing a mouse button or actuating the wheel switches it back on.

Small DIP switches
The DIP switches of the mouse in particular are very small due to the compact size. Use a pointed object to change the switch setting.
1 Open the battery compartment of the mouse.
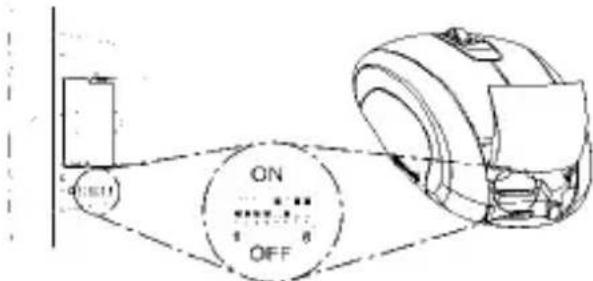
2 Set DIP switch 6 to the ON setting.
3 Close the battery compartment.
5 Encryption (CONNECT)
5.1 Activating encryption

Encryption of the wireless transmission
The mouse is ready for operation following connection and is unencrypted at the factory.
You can conveniently activate encryption via the Cherry KeyM@n software or on the receiver.
1 Navigate to the Wireless tab of the Cherry KeyM@n software: Start/Settings/Control Panel/Mouse/Wireless, click on the CONNECT button and follow the on-screen instructions.
- or - Press the button on top of the receiver until the red LED flashes.
2 Press the CONNECT button on the underside of the mouse until the red LED goes out.

Automatic deactivation of encryption with removal of batteries
Encryption is deactivated when you remove the batteries from the mouse for 1 minute. It must be reactivated each time after the batteries are removed.
5.2 Deactivating encryption (Resetting devices to state of delivery)
Resetting the receiver
1 Remove the receiver from the USB port.
2 Keep the CONNECT button on the top of the receiver pressed and insert the receiver back into the USB port.
Resetting mouse
1 Remove the batteries from the mouse for 1 minute.
2 Set the DIP switches of the mouse transmission frequency to channel 1. See Chap. 6 "Sendefrequency einstellen".
3 Reinsert the batteries in the mouse.
6 Setting the transmission frequency
1 Open the battery compartment of the mouse.
2 Change the position of the DIP switches 1 to 4 of the mouse according to Table Chap.6.1 "Sendefrequenzen". Switch toward position digit = OFF. Switch away from position digit = ON.
3 Reactivate encryption. See Chap. 5.1 "Verschlussung aktivieren".
6.1 Transmission frequencies
The devices are factory-set to channel 1. Switch toward position digit = OFF - Switch away from position digit = ON
Transmission frequencies that can be set:
| Chan-nel | DIP switch Fre- | quency range (GHz) | |||
| 1 | 2 | 3 | 4 | ||
| 1 OFF OFF OFF OFF 2.412 | |||||
| 2 ON OFF OFF OFF 2.413 | |||||
| 3 OFF ON OFF OFF 2.414 | |||||
| 4 O N O N O | O F F | ||||
| 5 OFF OFF ON OFF 2.416 | |||||
| 6 ON OFF ON OFF 2.417 | |||||
| 7 OFF ON ON OFF 2.418 | |||||
| 8 O N O N O | O N O | ||||
| 9 OFF OFF OFF ON 2.420 | |||||
| 10 ON OFF OFF ON 2.421 | |||||
| 11 OFF ON OFF ON 2.422 | |||||
| 12 ON ON OFF ON 2.423 | |||||
| 13 OFF ON ON ON 2.424 | |||||
| 14 ON OFF ON ON 2.425 | |||||
| 1 5 | O F F O N O | ||||
| 16 ON ON ON ON 2.427 | |||||
7 Setting the transmission output
The maximum transmission output is set when the product is delivered. With optimal environmental conditions, you can achieve a maximum range of approx. 20m . It makes sense to decrease the transmission output to reduce power consumption. Please note that the transmission security is reduced with decreased transmission output. Additional related information is found in Chap. 8.2 "Die Übertragung ist gestört".
| DIP switch Range | |
| 7 | 8 |
| OFF | OFF Minimum |
| ON | OFF Average |
| OFF | ON High |
| ON | ON Maximum |
1 Open the battery compartment of the mouse.
2 Change the position of the DIP switches 7 and 8 according to the table. Switch toward position digit = OFF - Switch away from position digit = ON
3 Reactivate encryption. See Chap. 5.1 "Verschlussung aktivieren".
8 Troubleshooting
8.1 Mouse does not work
1 Check whether the batteries are inserted correctly. See Chap. 4.1 "Batterien in Maus einlagen".
2 Check whether the batteries are charged. See Chap. 3 "Batterien aufladen".
3 Activate encryption (CONNECT). See Chap. 5.1 "Verschlussung aktivieren".
4 Connect the receiver to another USB port on the PC.
8.2 Transmission is interrupted
1 Align the receiver in such a way that no obstacles are found between the receiver and the mouse.
2 It is advisable to change the transmission frequency if you are using several mice in a room, or to avoid interference with wireless LANs or other 2.4 GHz devices. See Chap. 6 "Sendefrequenz einstellen".
8.3 Cherry KeyM@n software does not function
1 Check whether software for a mouse is already present on the PC and uninstall it.
2 Check whether the user logged in on the PC has the rights to install the software (example: administrator rights in Windows 2000 and XP).
3 Check whether your operating system is supported by the software.
9 Tips
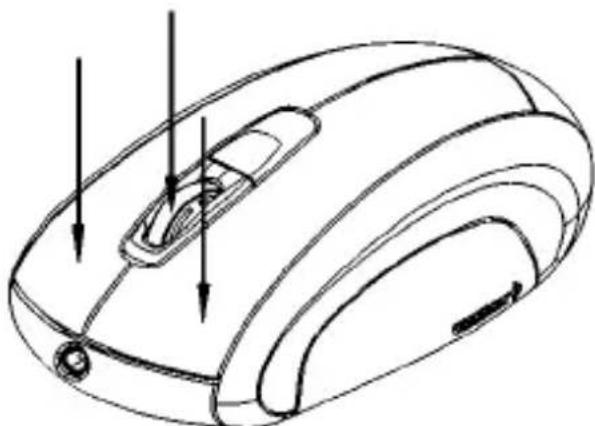
9.1 Cleaning the mouse

Caution!
Damage may be caused by harsh cleaning agents or liquids in the mouse
1 Do not use solutions such as gasoline or alcohol and scouring agents or scouring sponges for cleaning.
2 Prevent fluids from entering the mouse.
1 Clean the mouse with a slightly damp cloth and some mild cleaning agent (e.g.: dishwashing liquid).
2 Dry off the mouse with a soft, lint-free cloth.
9.2 Disposal
Dispose of the batteries and the mouse in accordance with local regulations.
9.3 RSI syndrome

RSI syndrome
RSI stands for "Repetitive Strain Injury". RSI results from small, continually repeated movements.
Typical symptoms are discomfort in the fingers or neck. Additional information can be found at: www.cherry.de/risi and www.cherry.de/gesundheit.
1 Set up your workspace for maximum ergonomic benefit.
2 Position the keyboard and mouse in such a way that your upper arms and wrists are on either side of your body and are stretched out.
3 Take several short breaks, with stretching exercises if necessary.
4 Change the position of your body often.
10 Technical data
10.1 Wireless mouse
| Designation Value | |
| Resolution 800 dpi | |
| Battery type 2 rechargeable alkaline batteries, type AA (LR6) | V SELV |
| Supply voltage 2.2 to 3.3 | |
| Current consumption max. 30 mA | |
| Operating duration with charged batteries | approx. 3 months of normal use in an office setting |
| Charging period approx. | 12 to 18 h |
| Frequency channels 16 | |
| Range 20 m under optimal conditions | |
| Transmission output sett | -20 dBm to 0 dBm |
| Storage temperature range | -20 °C to +60 °C |
| Operating temperature range | 0 °C to +50 °C |
10.2 Wireless receiver
| Designation Value | |
| Supply voltage 5.0 V/DC | ±5 % SELV |
| Current consumption typ. | 30 mA |
| Sensitivity -80 dBm | |
| Storage temperature range | -20 °C to +60 °C |
| Operating tempera-ture range | 0 °C to +50 °C |
11 Contact
Cherry GmbH
CherrystaBe
Please have the following information on hand when contacting technical support:
- Item and serial No. of the product
Name and manufacturer of your PC/ notebook or motherboard - Operating system and, if applicable, installed service pack version
12 General advice
Cherry continuously optimizes products as new technologies are developed. For this reason we reserve the right to make technical alterations. The evaluation of product reliability and the definition of the product's technical performance are carried out according to Cherry's own requirements in order to meet internationally recognized regulations and standards. Requirements in addition to these can be met through mutual cooperation. Improper usage, handling, storage and external influences could lead to faults and defects during use.
We do not accept warranty for defects caused by alterations to our product by the user and shall not be held liable for unauthorized modifications. All repairs must be made by Cherry or an officially appointed organization or persons. Possible compensation claims against Cherry or its nominated officers - whatever the legal justification including physical or stress related injuries - are excluded. Exceptions to this exist in the case of intent or gross negligence on the part of Cherry, infringements of Product Liability Law or in cases of injury, bodily harm or risk to health. These operating
instructions only apply to the accompanying product.
Full details can be obtained from your local Cherry dealer or direct from Cherry GmbH.
Caution! The batteries could explode if exchanged improperly.
ProMouse wireless optical
M-8800
13.1 Federal Communications Commission (FCC) Radio Frequency Interference Statement
Information to the user: This equipment has been tested and found to comply with the limits for Class B digital device, pursuant to Part 15 of the FCC Rules. These limits are designed to provide reasonable protection against harmful interference in a residential installation. This equipment generates, uses and can radiate radio frequency energy
and, if not installed and used in accordance with the instructions, may cause harmful interference to radio communications. However, there is no guarantee that interference will not occur in a particular installation. If this equipment does cause harmful interference to radio or television reception, which can be determined by turning the equipment off and on, the user is encouraged to try to correct the interference by one or more of the following measures:
- Reorientate or relocate the receiving antenna.
- Increase the separation between the equipment and receiver.
- Connect the equipment into an outlet on a circuit different from that to which the receiver is connected.
- Consult the dealer or an experienced radio/ TV technician for help.
Caution: Any change or modifications not expressly approved by the party responsible for compliance could void the user's authority to operate the equipment.
13.2 Canadian Radio Interference Regulations
This digital apparatus does not exceed the Class B limits for radio noise emissions from digital apparatus set out in the Radio Interference Regulations of the Canadian Department of Communications.
CE-Declaration of Conformity
Hersteller:Manufacturer:
CHERRY GmbH
Anschrift: Address:
ChemystraBe D-91275 Auerbach/Opf.
Council Directive relating to electrical equipment designed for use with in certain voltage limits
89/336/EWG
Council Directive relating to electromagnetic compatibility
99/5/EWG
Council Directive relating to radio equipment and telecommunications terminal equipment
W. Schrüle/
Director of Engineering
Cherry GmbH
Cherystasse