M5001 - Computer Mouse Cherry - Free user manual and instructions
Find the device manual for free M5001 Cherry in PDF.
Document temporarily unavailable
The manual is currently being transferred to our new server. It will be accessible again in a few hours. Thank you for your patience.
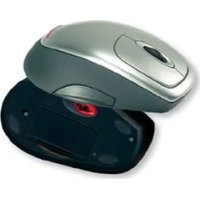
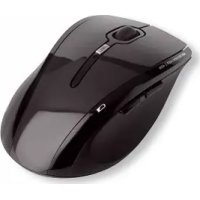
| Product type | Wired or wireless computer mouse depending on version |
| Dimensions (L x l x h) | Approx. 125 x 70 x 40 mm |
| Weight | Approx. 100 g (without batteries) |
| Power supply | USB (wired) or 2 AA batteries (wireless) |
| Connectivity | USB (wired) or USB receiver (wireless) |
| Number of buttons | 5 programmable buttons + clickable scroll wheel |
| Scroll wheel | Scroll wheel with click function and fast/automatic scrolling |
| Configuration software | Cherry Power WheelMouse (Mouse Properties window) |
| Programmable functions | Assignment of functions to buttons: primary button, context menu, fast scrolling, HyperGrid, Windows keys (Start, Internet, Explorer), copy/cut/paste, function keys (F1-F12), etc. |
| HyperGrid | Context menu with 9 common Windows functions (accessible via a button) |
| Pointer revolution | The pointer automatically moves to the opposite edge of the screen when it goes beyond an edge |
| Pointer hiding | Automatic hiding while typing |
| Sonar | Highlights the pointer position with a flashing circle (Ctrl key) |
| Slow movement | Slows down the pointer for increased precision (Shift key) |
| Automatic selection | Activates a window by pointing to its title bar, without clicking |
| Orientation | Adjustment of horizontal mouse movement |
| Pointer speed | Adjustable (slow to fast) |
| Double-click speed | Adjustable (slow to fast) |
| Pointer trail | Display of a trail (adjustable length) - available on Windows 9x/NT |
| Scroll wheel scrolling | Adjustable: number of lines per notch or whole page; rotation direction reversible |
| Battery indicator (wireless) | Symbol in the taskbar indicating charge status (full/discharged) |
| Supported operating systems | Windows 95/98/ME/2000/XP |
| Maintenance and cleaning | Clean with a soft, dry cloth. Do not use abrasive products. |
| Safety | Do not expose to humidity or extreme temperatures. Risk of explosion if batteries are replaced incorrectly (wireless version). |
| Spare parts and repairability | Repairs only by Cherry or an authorized professional. No spare parts available for the user. |
| General information | Manual available in several languages. Software version: indicated in the Info tab. |
Frequently Asked Questions - M5001 Cherry
User questions about M5001 Cherry
0 question about this device. Answer the ones you know or ask your own.
Ask a new question about this device
Download the instructions for your Computer Mouse in PDF format for free! Find your manual M5001 - Cherry and take your electronic device back in hand. On this page are published all the documents necessary for the use of your device. M5001 by Cherry.