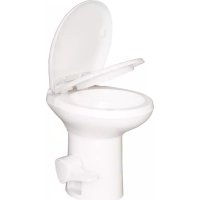
SLCATL420 - Pressure washer SereneLife - Free user manual and instructions
Find the device manual for free SLCATL420 SereneLife in PDF.


| Product Type | Gravity Flush Toilets |
| Brand | SereneLife |
| Model | SLCATL420 |
| Construction Material | HDPE, PP |
| Weight Capacity | 330 lbs (149.7 kg) |
| Seat Height | 478 mm |
| Dimensions (L x W x H) | 500 mm x 390 mm x 890 mm |
| Water Inlet Diameter | 1/2 inch |
| Waste Outlet Diameter (Exterior) | 95 mm (3.7 inches) |
| Waste Outlet Diameter (Interior) | 87 mm (3.4 inches) |
| Control Type | Foot Pedal Operation |
| Flush Function | 3-Way T-Flush Flushing |
| Seat and Cover | Regular size, soft close |
| Installation | Two-bolt design, fits most flanges |
| Maximum Water Pressure | 0.4 MPa |
| Maximum Water Temperature | 40 °C |
| Surface | Glossy, easy to clean |
| Maintenance | Periodic cleaning of flush valve, silicone lubrication |
| Box Contents | Toilet, 2 T-bolts, flange and gasket, water inlet gasket, 4 screws |
Frequently Asked Questions - SLCATL420 SereneLife
User questions about SLCATL420 SereneLife
0 question about this device. Answer the ones you know or ask your own.
Ask a new question about this device
Download the instructions for your Pressure washer in PDF format for free! Find your manual SLCATL420 - SereneLife and take your electronic device back in hand. On this page are published all the documents necessary for the use of your device. SLCATL420 by SereneLife.
USER MANUAL SLCATL420 SereneLife
natural_image
White ceramic toilet with open lid and handle, no visible text or symbolsSLCATL420
Gravity Flush ToiletHigh Profile
with Foot Pedal Operation, T-Type Water Outlets
USER MANUAL
Gravity Flush Toilet User Manual
Main Features:
- Premium user comfort. Full size & soft-close seat and lid, large toilet bowl and 478mm seat height brings greater homelike performance.
- Easy to flush. High gloss toilet bowl with original T type 3 way flush flowcreates high-speed, full bowl flushing.
- Ergonomically enhanced pedal operation. Lower pedal height for easier use. One-direction action to open drain valve and flush.
- Easy installation. Two bolts design fits most existing toilet floor flanges, greatfor new or replacement installation. Just place on floor flange, tighten boltsconnect water and it's ready.


natural_image
White ceramic toilet with open lid and handle, no visible text or symbols1.Components

2.Product and mounting dimension:

Ref.Description
| A 390mm / 15.4" |
| B 500mm / 19.7" |
| C 233mm / 9.2" |
| D 485mm / 19.1" |
| E 380mm / 15.0" |
| F 890mm / 35.0" |
Ref.Description
| G Minimum: 200mm / 7.9" |
| H Minimum: 200mm / 7.9" |
| I Minimum: 200mm / 7.9" |
| J 170mm / 6.7" |
| K 102mm / 4.0" |
| L 210mm / 8.5" |
The outside diameter of the toilet drain outlet: 95mm / 3.7"; The inner diameter of the toilet drain outlet: 87mm / 3.4"
3.Installation
Note:
- Be sure foot pedal, when pressed, touches same flat surface on which toilet is installed.
-
Ensure water supply pressure is no more than 0.4Mpa.
• Hot water more than 40 degrees is forbidden. -
To replace an older toilet, turn off water supply to toilet. Remove and drain water supply line. Remove toilet hold-down bolts/screws. Remove toilet from floor. Remove and discard old flange seal and hold-down bolts. Verify center of floor flange is at least 200mm/7.9" from back wall(Fig.1).
-
If installing a new floor flange, make certain that toilet mounting holes are located at the correct angle (Fig.1). Floor flange must be secured to floor with a minimum of four screws. Insert two supplied T-bolts into slots in floor flange(Fig.2).
- 3) Verify that floor flange seal is installed on base of toilet. Carefully set toilet over floor flange. Align holes in toilet base with T-bolts as toilet is lowered onto floor flange.
- Install floor mounting nuts onto T-bolts. When tight, base should be securely attached and flat against floor. Attach bolt covers onto nuts
- Connect water supply line to 12 inch water inlet and turn on water supply line. (Fig.3)-Flush toilet several times and check for leaks.

- Fig. 1

natural_image
Close-up of a black plastic clamp bracket with metal pins and a magnified inset showing a bolt and nut assembly (no text or symbols visible)- Fig. 3

Before connecting your pipe connector (plastic one is recommended) to the 12 inch water inlet (1/4-20 British thread), make sure there is a sealing ring in the pipe connector. If not, the attached sealing ring must be placed to ensure perfect sealing.
After connecting water supply, flush the toilet several times to check leaks.
4.Operation
1. Add water to bowl
To add water to the toilet, press the flush pedal part way down. Water flows into the bowl while flush valve remains closed. If the flush valve moves, let up on the pedal slightly. Adding water to an empty bowl helps prevent holding tank odors from entering the living space. Adding water is recommended prior to flushing solids and toilet paper.(Fig.4)
2. Flush toilet
To flush, press pedal down until it contacts the floor. Release pedal after complete flush.(Fig.5)
When flushing liquids, press the pedal for 1-2 seconds. When flushing solids, press pedal until contents are rinsed from bowl. Flushing longer than necessary will cause holding tank to fill too quickly. A small amount of water will collect in the bowl after a flush t create an airtight seal.

natural_image
Diagram of a funnel-shaped container with internal flow and a downward arrow indicating fluid or movement (no text or symbols)Fig.4

natural_image
Diagram of a funnel-shaped object with internal structure and directional arrow (no text or symbols)Fig.5
5.Flush valve/ seal cleaning
After a period of time, mineral deposits from hard water may build up on the flush ball or seal, resulting in a slow water leak. To prevent this, periodically clean the flush valve and seal.
- Remove minor debris from the flush valve and seal by slowly pressing and releasing the flush pedal several times. This will loosen and rinse debris from the surfaces. Repeat several time for stubborn buildup (use a soft bristle brush if necessary).
- Lubricate the flush valve and seal periodically with silicone spray or paste lubricant.
6. Winterization and storage
This toilet is not intended for use when exposed to temperatures below freezing.
Before storing the toilet, you need drain water from the toilet according to the following procedures.
- Turn off water supply to toilet.
- Remove water supply line from water inlet.
- Place a small container under inlet to catch draining water.
- Press flush pedal and allow water to completely drain from water inlet.
- Leave water line disconnected until threat of freezing temperature is past.
FEATURES:
• Efficient Pedal Operation
• Home Comfort: Ergonomic Toilet Seat
• T-Type Water Outlet for Water Saving Covering the Entire Bowl Discharge
- Compact and Comfortable Seat Design
- Easy to install
- Glossy Finish Surface
- Easy to clean
- Sealing design to prevent odor.
• Made of HOPE and PP materials
• 2 Custom Low Profile Pedal Slots to Help Open and Close the RV Toilet Easily
- Distance From Center Of Bolt Holes To Back Wall Is Approximately 7.90"-inches
WHAT'S IN THE BOX:
• Construction Material: HDPE, PP
• Water Inlet Diameter: 1/2
• Weight Capacity: 330lbs.
- Outer Diameter of Wastewater Outlet: 3.7" -inches
- Inner Diameter of Wastewater Outlet: 3.4" -inches
• Suggested Water Pressure: 0.2-0.4Mpa
- Product Dimensions (Length x Width x Height): 19.1" x 15.4" x 19.7"-inches
serenelife™

Questions? Comments?
We are here to help!
https://serenelifehome.com/pages/contactus
serenelife™

natural_image
White ceramic toilet with open lid and side outlet pipe (no text or symbols visible)SLCATL420
natural_image
White ceramic toilet with open lid and side outlet (no text or symbols visible)1. COMPONENTES

| G Minimo: 200mm / 7.9" |
| H Minimo: 200mm / 7.9" |
| I Minimo: 200mm / 7.9" |
| J 170mm / 6.7" |
| K 102mm / 4.0" |
| L 210mm / 8.5" |
- Fig. 1

natural_image
Close-up of a black plastic clamp bracket with metal pins and a magnified inset showing a threaded bolt (no text or symbols visible)- Fig. 3

natural_image
Simple line drawing of a funnel with a handle and arrow indicating downward motion (no text or symbols)Fig.4

natural_image
Diagram of a funnel-shaped object with internal flow arrows and a blue arrow indicating direction (no text or symbols)Fig.5
5. LIMPIEZA DE LA VÁLVULA DE DESCARGA/SELLO
https://serenelifehome.com/pages/contactus
serenelife™

natural_image
White ceramic toilet with open lid and handle, no visible text or symbolsSLCATL420
natural_image
White ceramic toilet with open lid and side outlet (no text or symbols visible)1.COMPOSANTS

| G Minimo: 200mm / 7.9" |
| H Minimo: 200mm / 7.9" |
| I Minimo: 200mm / 7.9" |
| J 170mm / 6.7" |
| K 102mm / 4.0" |
| L 210mm / 8.5" |
natural_image
Close-up of a black plastic clamp bracket with metal pins and a magnified inset showing a bolt and nut assembly (no text or symbols visible)- Fig. 3

natural_image
Simple line drawing of a funnel with a water outlet and a blue arrow indicating flow direction (no text or symbols)Fig.4

natural_image
Diagram of a funnel-shaped object with internal flow arrows and a blue arrow indicating direction (no text or symbols)Fig.5
5.NETTOYAGE DE LA VANNE DE RINÇAGE/JOINT
Des question? Commentaires?
https://serenelifehome.com/pages/contactus
- SLCATL420
- Gravity Flush Toilet User Manual
- Main Features:
- 1.Components
- 2.Product and mounting dimension:
- 3.Installation
- Note:
- 4.Operation
- Add water to bowl
- Flush toilet
- 5.Flush valve/ seal cleaning
- Winterization and storage
- FEATURES:
- WHAT'S IN THE BOX:
- serenelife™
- COMPONENTES
- LIMPIEZA DE LA VÁLVULA DE DESCARGA/SELLO
- 1.COMPOSANTS
- 5.NETTOYAGE DE LA VANNE DE RINÇAGE/JOINT
Brand : SereneLife
Model : SLCATL420
Category : Pressure washer