Babyline Smart - Baby monitors Lionelo - Free user manual and instructions
Find the device manual for free Babyline Smart Lionelo in PDF.
| Product type | Baby monitor |
| Brand | Lionelo |
| Model | Babyline Smart |
| Dimensions (approx.) | 10 × 8 × 8 cm |
| Weight (approx.) | 200 g |
| Power supply | USB 5V (power adapter included) |
| Operating frequency | 2.412 – 2.472 GHz (Wi-Fi 2.4 GHz) |
| RF output power | 12.99 dBm |
| Storage | microSD card (FAT32 format, max 128 GB) or phone memory |
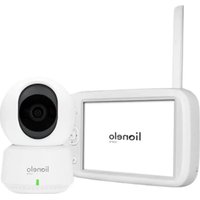
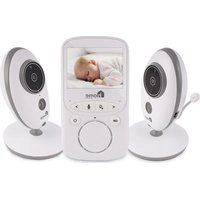
| Main features | Two-way communication, night vision up to 10 m, temperature and humidity sensor, motion and sound detection, lullaby playback, photo/video recording, image rotation |
| App | Lionelo Smart (iOS / Android) |
| Care and cleaning | Wipe with a dry cloth. Do not use abrasive cleaners or solvents. |
| Safety | Do not let children play with the device. Use only indoors in dry conditions. Keep at least 1 m away from the baby's crib. |
| Spare parts and repairability | Contact customer service. No user-accessible spare parts. |
| General information | Compliant with EU directives (RED, EMC, LVD, RoHS). Do not dispose of with household waste. |
Frequently Asked Questions - Babyline Smart Lionelo
User questions about Babyline Smart Lionelo
0 question about this device. Answer the ones you know or ask your own.
Ask a new question about this device
Download the instructions for your Baby monitors in PDF format for free! Find your manual Babyline Smart - Lionelo and take your electronic device back in hand. On this page are published all the documents necessary for the use of your device. Babyline Smart by Lionelo.
USER MANUAL Babyline Smart Lionelo
In case of any questions or comments on the purchased product, please contact us: help@lionelo.com
Producer:
BrandLine Group Sp. z o. o.
ul. A. Kriegewskiego 1, 61-248 Poznań, Poland
Product information
Frequency: 2.412-2.472 GHz
Output power RF: 12.99 dBm
Card format: FAT32
microSD card maximum capacity: 128 GB
Important
- This product is not a toy. Do not let children play with it.
- The product must be used in dry places only. It is forbidden to use it outdoors or on a wet surface.
- Do not touch the product if your hands are wet.
- If the product malfunctions or has been dropped or flooded, please contact the manufacturer's service center.
- Use only the power adapter supplied.
- It is forbidden to place the product near a cooker or other sources of heat.
- Installation must be carried out only by an adult. Keep minor pieces of the set out of reach of children.
-
The baby monitor cannot replace proper attention and parent's care.
-
Do not place the product and its cables in the playpen or within the child's reach. Place them at a distance of at least 1 m.
- Do not place the product near water or sources of fire.
- Do not touch plug pins with sharp or metal items.

The product complies with requirements of EU directives.
Pursuant to the Directive 2012/19/EU, this
product is subject to selective collection. The product must not be disposed of together with domestic waste because it may pose a threat to the environment and human health. The worn-out product must be handed over to the electrics and electronics recycling point.
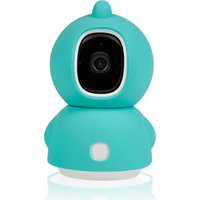
Set (fig. A)
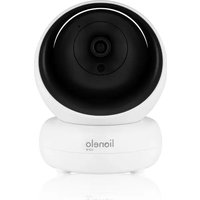
- Camera
- Power adapter
- USB cable
- Adhesive tape
- Mounting bracket x3
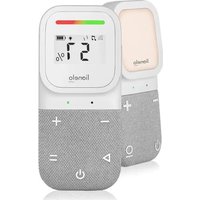
- Temperature and humidity sensor
- Screws x3
- Operating manual
- Decorative cover
- Rawlplugs x3
Product description (fig. B)
- Light indicator
- USB input
- Reset key
-
Loudspeaker
-
microSD card port
- Microphone
How to start the camera and run the application
Find and download Lionelo Smart application from iOS Store/Google Play store, or scan QR code at the beginning of the operating manual.
Note: Only Wi-Fi 2.4 GHz networks are supported. 5 GHz networks are not supported.
- Sign up in the application through your e-mail address. Accept the terms of use.
- Select the user name and password, and then click „Confirm". Enter the code you have received in your mailbox.
- While configuring, set the camera as close to the Wi-Fi router as possible to boost the pairing procedure (fig. 6).
Note: the camera can be added only to one account in the application. To add the camera to other account, it must be deleted from the previous account.
- Supply power to the camera through a USB cable.
- Select „Add new device".
- Reset the camera by pressing and holding the reset key for 5 seconds (3, fig. B).
- Select Wi-Fi network which you wish to connect to and enter the password.
- You will see QR code in the application. Place the mobile phone at a distance of about 20~cm from the camera (fig. 7). Wait for the camera to give a sound. Configuration should be completed within about 30 seconds.
Light indicator
-
The light glows in red - no connection.
-
The light flashes in red - the camera awaits Wi-Fi connection.
- The light glows in blue - the camera works properly.
- The light flashes in blue - the camera awaits connection to the application.
Device functions
- The application allows you to play melodies through the baby monitor.
- Videos and photographs are saved in the user's mobile phone, or on the microSD card, if it has been inserted into the baby video monitor.
- The application allows a two-way audio communication with the child.
- Image rotation in the screen - turn the video vertically and horizontally at any time.
- Motion and sound sensors will notify you in case of detection of motion or sound in the room.
- Day/ Night - this function assures a night vision of up to 10m
- Full description of application functions is available on Lionelo website.
Temperature and humidity sensor
Connect the temperature and humidity sensor to the longitudinal tip of the camera (fig. 8). After starting the camera, temperature and humidity in the room will be available in the application.
Reset key
Press and hold the reset key for 5 seconds to reset the camera and restore the factory settings.
How to install
The longitudinal tip can be set in any way (fig. 1). To install the camera on the wall, use the mounting bracket. The bracket can be attached to
the wall with the use of screws or adhesive tape (fig. 2).
How to install with screws
- Mark the spot on the wall in which you wish to drill holes for rawlplugs (fig. 3).
- Make a hole with a tool suitable for the specific surface and then put rawlplugs in (fig. 4).
- Fix the assembly bracket by screwing screws in (fig. 5).
- Place the camera on the wall and position for the best angle of view.
Troubleshooting
| Problem/question Possible solution | |
| The camera is not visible in the application. | Check Wi-Fi signal strength or place the camera near the router while configuring. Reset the camera and add it again. |
| The camera is still in the list of devices in the application after resetting. | Resetting changes camera settings only. The camera must also be deleted in the application. |
| How to change Wi-Fi network which the camera is connected to? | Delete the camera from the list of devices in the application, and then configure it again by connecting to other network. |
| The camera cannot identify microSD card. | It is advisable to insert microSD card when the camera is off. Make sure the card is available and comes in FAT32 format and its maximum capacity is 128 GB. Check Internet connection. |
| No notifications in the application. | Make sure the application works properly, and notifications have been activated. Check notification settings in the mobile phone. |
| The camera does not want to connect to the application. The message pops up to inform the camera has been paired before. | The camera can be added only to one account in the application. To add the camera to other account, it must be deleted from the previous account. |
The pictures are for reference only. The real design of the products may differ from the pictures presented.
PL
Drogi Kliencie!
BbIXoHnaMoUHocTbPc:12,99DbM
ΦopMaT KapTbl: FAT32
MaKcImaJIbHaЯ emKocTb KapTbI MicroSD: 128 GB
BaxknaHΦopMaçnA
- ΘтOT npoДуКТ HeЯВlaeTcra nrgyшко. He no3BOLЯITE DeTeM nrgpaTb C Hm.
- Даньий пюдукт поховпдя IncpoьзOBAHЯ TOльКВ cyxnxnomeших. He Incpoь3уITE erO Ha OTKpbITOM BO3dYxe nIHa BlaJXHOb NOBepxHocTn.
- He npikacaiTecb K n3deJIIno MOKpbIMn pyKaMn.
- EcIn n3dJIe He pa6oTaET TaK, KaK DoJxHo, IIn eCIn eTo yPoHnI INn Ha Hero npOJIIN BODy, O6paTntEcB B cepBnCHyO cnJx6y npOn3BOJNTeJIa.
- История Толбко旺盛 Риная, Вхордунь Компелков постарки.
- He cTaBbTe daHHoe ycTpoiCTBO pIaOM C PJIHTOJ IJI IN dpYrIMN NCTOuHnKamN TePna.
- MoHTaJ KdoJIKeH BbIPOJIHЯTbcra TOLbKO B3pOcIbIM. JepKInTe MeIKe IeTaII NoJaIbIwe OT pe6eHka.
- ΘлектpoHHa HЯн HeяВlaeTc7aMeHoHaДlexKaIepoiDHTeBCKO3a60TbI IN BHNMaHnY.
- He pa3meuTe n3dJIne n erO shHypbI B MaHeJce nII N B npedeJax doCraemocTn pe6eHka. Pa3meuTe nx Ha pacCToHnn He MeHee 1 metpa.
- He pa3meaIte 3TO n3dJIne B6JIIN BOJbI INCTOCHNka OrHЯ.
- HeПрinksaTeCsK 3y6uAM BnIKN OCTpbIMN IJI MTeaJIInueCKIMN npedMeTaMn.
ДанныnpodуктпорджгетраздельсомусборуotxoюВ.IpoукТ He cIeIyET yTnIIN3InpOBaTb BmecTe C 6bITOBbIMN OTXoIaMn,Tak KaK OH MoJKeT npedCTabIaTb yrpo3y ДЯ OkpykaHошeN cpeIbI N 3dOpOBbY cheLoBeka.ПoxaIyIcTa,BepHnTe BaIcTapbI npoduyKTв UcHTP yTnIIN3aUHn əJIeKtpnueckOroиəJIeKTPoHHO O6OpuDoBaHnY.
KoMnJIeKT (pIsc. A)
3aynck KaMepbI npNoJxHnA
Hайд nt e n 3a rgуз nt e npiloxke Hne Lionelo Smart b iOS Store / Google Play nIi oTcKaHnpyTe QR- kOd B hauale pykoBoDCTBa noIb3oBaTeJIa.
EN: Simplified EU declaration of conformity
BrandLine Group Sp. z o. o. hereby declares that the “ BABYLINE SMART” product complies with the directive: 2014/53/EU - RED Directive,2014/30/EU - EMC Directive, 2014/35/EU - LVD Directive, 2011/65/EU - RoHS Directive. Full content of EU declaration of conformity is available on the following website:
Detailed warranty conditions are available on the website:
Thank you for purchasing our product