
Black 400 - Camping BRAUN - Free user manual and instructions
Find the device manual for free Black 400 BRAUN in PDF.
| Product Type | Trail camera with infrared detection |
| Brand | Braun |
| Model | Black 400 |
| Power Supply | 8 AA 1.5V batteries or 6V/2A DC adapter or solar panel with 2500mAh battery |
| LCD Screen | 2.4 inches |
| Photo Resolution | 24, 20, 16, 12, 8, 5, 3, 1 Mpx |
| Video Resolution | 3840x2160, 2688x1520, 1920x1080, 1280x720, 720x480, 640x480 pixels |
| Photo / Video Format | JPEG / AVI |
| Lens | F 2.5, 90° field of view |
| Infrared Range | 3 to 20 meters |
| PIR Detection | Main detector + two side detectors |
| Connectivity | Wi-Fi, Bluetooth, USB 2.0, AV output |
| Memory Card | SD card up to 32 GB (class 10 or higher) |
| Main Functions | Photo, video, burst, time-lapse, motion detection, audio recording, image tagging |
| Solar Panel | DC 12V input, DC 6V/2A output (type C), built-in 2500mAh battery, IP65 water resistant |
| Operating Temperature | -20 to +60 °C (solar panel) |
| Solar Panel Dimensions | 97 x 70 x 43 mm |
| Maintenance | Clean lens with a soft cloth, protect from moisture, use quality batteries |
| Safety | Do not expose to extreme temperatures, use compliant adapters, do not short-circuit batteries |
Frequently Asked Questions - Black 400 BRAUN
User questions about Black 400 BRAUN
0 question about this device. Answer the ones you know or ask your own.
Ask a new question about this device
Download the instructions for your Camping in PDF format for free! Find your manual Black 400 - BRAUN and take your electronic device back in hand. On this page are published all the documents necessary for the use of your device. Black 400 by BRAUN.
USER MANUAL Black 400 BRAUN
natural_image
Military camouflage camera with hexagonal aperture and mounted sensor array (no visible text or symbols)6. Motion induction delay
9. Monitoring period
19. Automatically turn off WIFI
text_image
Setting Dele current file Delete all files Activate slideshow Write-protection MODE Back OK Select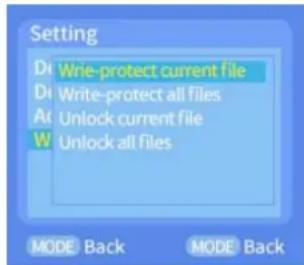
text_image
Setting Write-protect current file Write-protect all files Unlock current file Unlock all files MODE Back MODE Backtext_image
QR code with embedded logo in center, likely linking to a digital resource or websitetext_image
Hunting Camera Hunting Camera Connect camera Step One Bluetooth On Wifi Step Two Connect Wifi Connect cameratext_image
WIFI connection SSID:Hunting Cam Password:12345678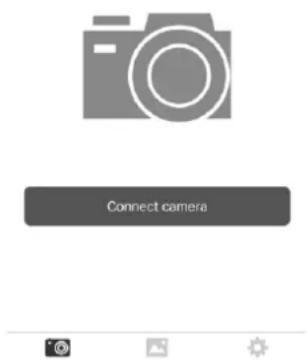
text_image
Connect cameranatural_image
Four-panel collage showing wildlife and animal photos with various animals, displayed in a mobile interface (no text or symbols on the images themselves)25. WLAN verlassen:
natural_image
Giraffe in a savanna landscape with camera interface buttons (no readable text or symbols on the image itself)text_image
Technical diagram showing two views of a device with labeled parts 3 and 5, likely from an engineering or manufacturing context.natural_image
Military camouflage camera with hexagonal aperture and mounted sensor array (no visible text or symbols)Thank you for buying our hunting camera. This product is a high-definition digital camera that can support record and observe wildlife. This camera has heat sensing animal/human sensing technology as well as automatically capture high-resolution images and smooth videos technology. This hunting camera will be in a state of energy saving when there is no detection of the animal (body) and can be alerted for a long time. In order to correctly and smoothly operate the camera, please read this manual carefully before using.
The contents contained in this manual refer to the latest information when the manual is written. Due to technical development and different production batches, it may be slightly different from your actual use. Please refer to the actual product functions.
Usage Notice
Instructions:
●Before using this product, please put in the batteries first. Find the battery box, put in eight pieces 1.5V AA batteries, and make sure the battery polarity is correct.
- When using a power adapter, find the DC port at the bottom of the camera and plug it in at the end of the power adapter to supply power. (Note: Use the DC 6.0V/2A adapter)
●Make sure to format the memory card before using it.
●This camera must use Class 10 or higher grade brand high speed SD card. The usage of the memory card is as follow:
- According to the instruction next to the memory card slot (chipset downward), push the SD card into the slot until the card is fully inserted.
●To remove the SD card, please gently press the back of the memory card inward and the card will pop out.
- After repeated or improper use, the performance of the memory card will degrade and it's recorded data will be damaged. Then you may need to buy a new memory card.
Note: The memory card will get hot after being used for a long time, which is totally normal.
- Left LED indicator light
- Camera lens
- Right PIR sensor
- Battery Bin switch button
- Right button
- Speaker
-
SD card slot
-
Medium LED indicator light
- Main PIR sensor
- LCD display
- OK button
14.Up button - DC Interface
-
OFF/SETUP/ON
-
Right LED indicator light
- Left PIR sensor
- The MENU button
- Left button
- Down button
- USB Interface
- AV Interface
| Key and interface | Functions |
| Left LED indicator light | The left LED light flashes green when the left and right sensor detect infrared body temperature |
| Medium LED indicator light | 1. In SETUP mode, the red light is on for manual shooting2. When WIFI is turned on but no connection, red light flashes3. The red light will always be on after the WIFI connection is successful. |
| Right LED indicator light | The right LED light flashes blue when the main sensor detects infrared temperature |
| The MENU button | 1. In the preview interface, click to enter the main menu and return to the previous menu2.In the playback interface, click to enter the Settings Menu and return to the previous menu |
| OK button | 1. In the video or photo preview interface, short press to take photos or videos2. Under menu setting, press to confirm3.In the playback interface, short press for video playback and pause function |
| Up button | 1. Short press in the menu setting mode to select upwards2. When setting the time or password, select the number upward.3. Press long for 3 seconds to open WIFI in the preview interface, and press short to close WIFI4. In the photo preview interface, press this button to switch to the video preview interface5.View playback Short press on toggle file |
| Down button | 1. In the menu setting mode, press to select down2. When setting the time or password, select the number downward.3. In the video preview interface, press this button to switch to the photo preview interface4.View playback Short press down to switch files |
| Left button | Press this key to select left when setting multiple digits in the sub menu |
| Right button | 1. Press this key to select right when setting multiple digits in the sub-menu2.In the preview interface, press the right button to enter playback, and press the right button again to exit playback |
| OFF/SETUP/ON | 1. Switch to OFF mode to shut down2. Switch to SETUP mode to setup3.Switch to ON mode to monitor |
| SD card slot | Open the front cover, insert the SD card (chipset downward) on the right of camera |
| DC interface | Use 6V power cord to connect the camera to power on |
| USB interface | USB cable connects camera and computer to transfer files |
| Speaker | Sounds are output from the speaker |
| AV interface | Open the front shell cover, use AV cord to connect to the AV interface on the right side of the machine to transmit images and videos to other display |
System settings
- Power on and off /System settings
●After putting the battery in, push the mode from "OFF" to "SETUP" to startup, and then you can set the function.
- Press the MENU button to switch back and forth between recording, photographing, playback, and setting menu modes (press MENU again in the secondary menu to return to the previous level)
●Under the menu settings, press OK to save the settings. In the video or photo interface, press OK to take photos and record videos.
- Switch to ON for monitoring mode: each function output will be executed when the switch is pushed to the ON position in each mode of photo, video, video + photo.
- Switch to "OFF" to shut down state, the LCD can not display anything.
2. Camera mode
●The camera has three modes: Photo mode, Video mode, Photo + Video mode
●Photo mode:
●The photo resolution settings, there are 24MP, 20MP, 16MP, 12MP, 8MP, 5MP, 3MP and 1mp. The larger the size is, the higher the image resolution is, the fewer photos can be stored by the memory card
●Video mode:
●The video resolution settings: 3840*2160P, 2688*1520P, 1920*1080P, 1280*720P, 720*480P, 640*480P. The video size increases with increase of the video resolution, leading to shorter video storage time. Likewise, the video size decreases with decrease of the video resolution, leading to longer video storage time.
●Photo + video mode: In on mode, the machine takes pictures and then records videos.
Note: In order to save power, the screen will be automatically turn off during the recording process.
3. Take continuous photos
●One, two and three continuous photo taking functions can be selected
- Video length
- Set the length of the video (3–59 seconds or 1–5 minutes). The longer the recording time is selected, the less the remaining recording time is. The system presets the video length is 5 seconds.
5. Voice recording
●You can choose to turn it on or off, the video has sound when it is on, and the video has no sound when it is off.
- Motion induction delay
- Set PIR sleep time (5-59 seconds or 1-60 minutes). The longer the time is, the less the shooting time will be. The PIR does not work during sleep, which can prevent the memory card from storing too many files and occupying the memory capacity.
7. Side PIR sensors
- You can choose to turn it on or off. If you choose on the range will get wider. When turned off, the side PIR sensors will turn off.
- PIR sensitivity
●The sensitivity of the main sensor should be set to "High" for interior areas and environments with little interference. Select "Medium" for exterior areas, and select "Low" for an environment with a high level of interference. "Low" is also suitable for cold environment.
- Monitoring period
- Set camera working time, choose "monitoring period", and then press OK key, select "on" to set the camera starting time and ending time, after setup is completed, it will record according the time you set. It can be set to XXX hours, XXX minutes and XXX seconds. (Note: when this function is on, PIR sensor does not work).
- Timelapse
- Set the camera timing interval for each shooting. You can set the hours, minutes and seconds (Note: when this function is on, PIR sensor does not work).
- Language
●This hunting camera supports multiple languages
- Time & Date
●Time & Date: Adjust the corresponding time and date according to the local time, then press up/down to modify the figure, press left/right to switch to the next value after setting, and press OK/MENU to return to the previous MENU.
●Time format: 12-hour or 24-hour setting
●Date format: it can set the format of day / month / year, year / month / day, month / day / year
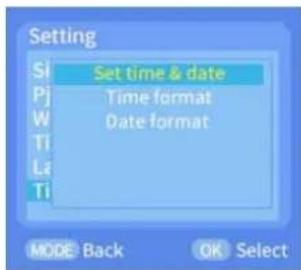
text_image
Setting Si Set time & date Pj Time format W Date format Ti La Ti MODE Back OK Select- Image tag
- Select time & date: Video and image will have time/date/temperature tag. - Select date: The video and picture captured will only be tagged with date/temperature (Note: no time to display).
Select Turn off: all videos and images captured will not be tagged.
- Password Setting
- Set the camera's power-on password: turn on the password setting to set the 4-digit plus letter combination among 0–9 and A–Z.
- Key sound
- Button sound can be set to turn on and off. When it is set to turn off, all sound of the buttons and switch are mute.
- Format
- SD card can be formatted, and all files will be cleared after formatting.
- The serial number
- Set a unique name for the camera with a 4-digit number combination of numbers and letters between 0-9 and A-z. (Note: The device name will be tagged in the video and image only if the image marking function is on)
- Restore factory settings
- When factory settings are restored, all functions are set to their initial state by default.
- Automatically turn off WIFI
●Auto WIFI Off: 1 minute/2 minutes/3 minutes
Determines after how long the WIFI will automatically be turned off.
When the camera is in ON or SETUP mode and the application is no longer used, if you forget to deactivate it after 1,2 or 3 minutes (depending on the setting of the “Auto WIFI Off” parameter) camera will return to ON mode or SETUP mode.
- WIFI SSID
●WIFI SSID name can be modified. After the modification, WIFI SSID name will be displayed. Mobile phone can search for this WIFI SSID name.
- WIFI password
- You can set the camera's WIFI password. After successful setting, you can only connect to the camera by entering the password.
- Playback mode
●Take down the hunting camera from the position of installation, set the switch from "ON" to "SETUP", press the right button to switch to playback mode, press up/down to view the videos and pictures captured, press OK to stop playback of video files, and press right button to return to standby mode
- Press the MENU key on the playback interface to enter the setting MENU.
●To delete the current and all: press OK to enter the delete menu to delete the selected pictures or videos in the camera memory card, select "Delete current" or "delete all", press OK to confirm, and press MODE to return to the previous menu in the setting process.
- Slide show: using this function, you can make the picture of the memory card play in the slide form, each display for 2 seconds, press OK to end the slide show.
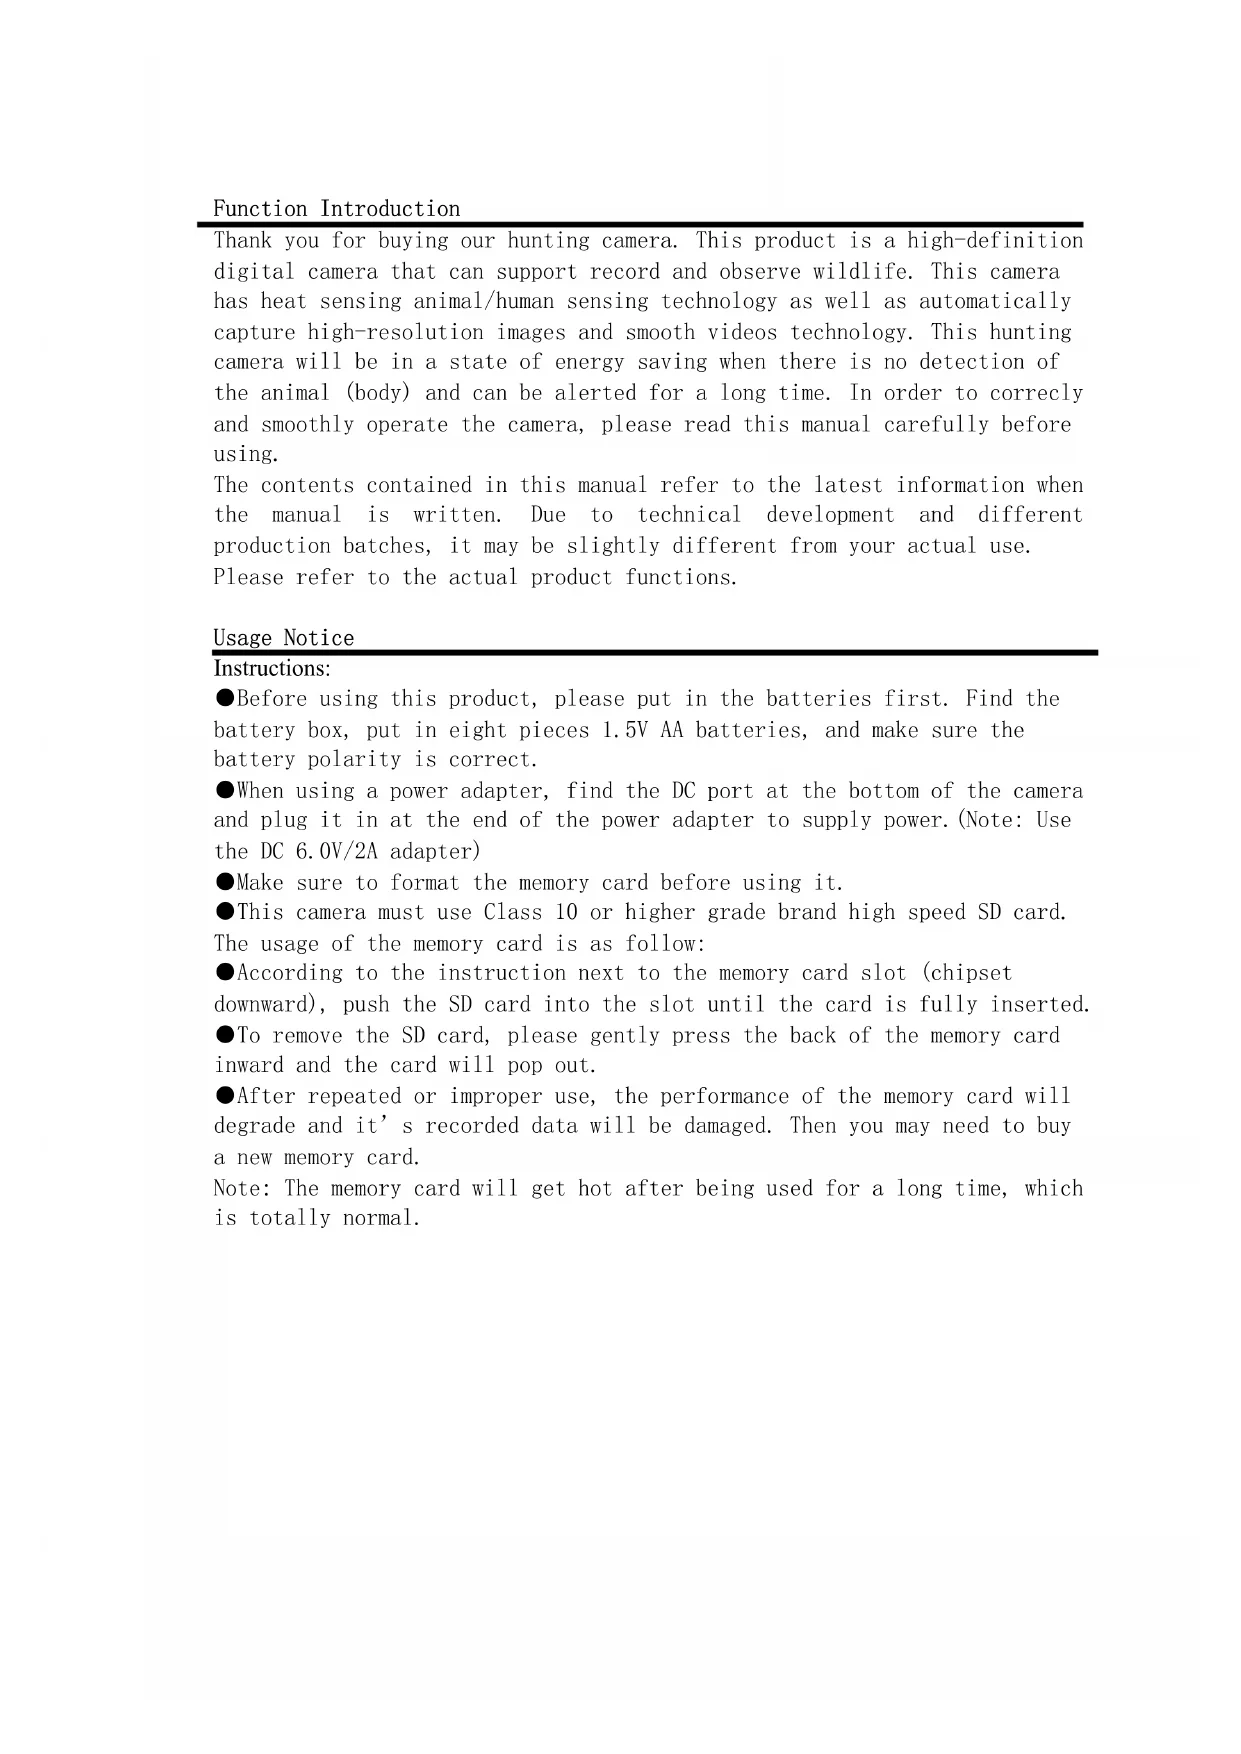
●Write protection: use this feature to prevent accidental deletion of documents.
- Select “Current Document Write-protect, All Documents Write-protect” to prevent memory card documents from being accidentally deleted.
- Select "Unlock current document, Unlock all Documents" to unlock related document protection.
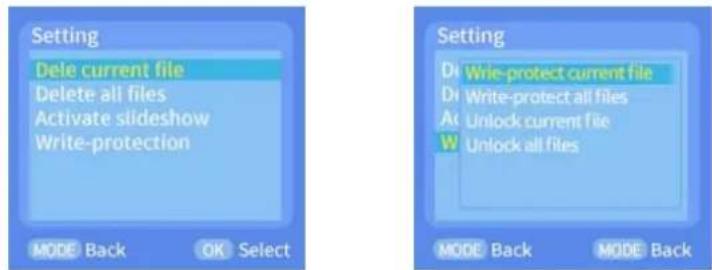
text_image
Setting Dele current file Delete all files Activate slideshow Write-protection MODE Back OK Select Setting Dr Wrie-protect current file Dr Write-protect all files At Unlock current file W Unlock all files MODE Back MODE Back- Bluetooth remote control to open WIFI and connect APP
(1) Before using the WIFI function, for Android smart phone, please go to Google Play and search "Hunting Camera" to download and install it. For IOS smart phone, please go to Apple Store and search "Hunting Camera" to download and install it.
(2) The mobile phone can scan the QR code to download the APP “Hunting Camera”

text_image
QR code with embedded logo in center, likely linking to a digital resource or website(3) Turn on Bluetooth
▲Firstly turn on the Bluetooth function of your mobile phone or enter the App "Hunting Camera", then click "The first step is to turn on Bluetooth WIFI", it will prompt "Turn on Bluetooth to allow "Hunting Camera" to connect accessories", select "Settings" to jump directly to
the phone's Bluetooth settings menu, and then turn on Bluetooth (Note: Bluetooth is off for this operation).
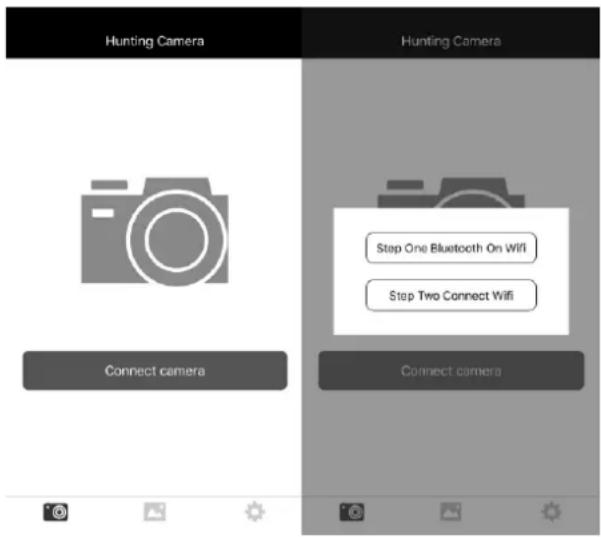
text_image
Hunting Camera Hunting Camera Connect camera Step One Bluetooth On Wifi Step Two Connect Wifi Connect camera(4) Open the WIFI
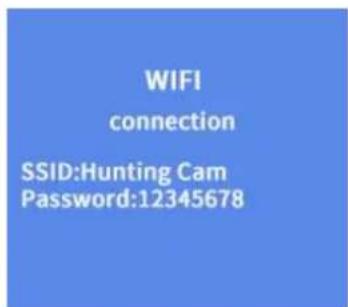
▲Manually turn on WIFI: when SETUP mode is set, press 3S on the video or photo preview interface to turn on WIFI, and the indicator light will shine. The "WIFI" interface will be displayed on the screen as shown as below:

text_image
WIFI Wait for connection SSID:Hunting Cam Password:12345678(5) Bluetooth opens WIFI to connect the camera:
▲In SETUP mode or ON mode, click "Connect camera" at the APP on the phone, click "Bluetooth opens WIFI at the first step", enter the Bluetooth, search and find the name Sulong xx:xx:xx:xx:xx:xx (12-digit X is a randomly generated MAC address) and select the corresponding Bluetooth name, you can choose "Enable WIFI, modify Bluetooth name, cancel".
(1) Select “Bluetooth to Turn on WIFI”, and the phone will automatically jump to the WIFI connection interface; Search for the WIFI name of the camera, and enter the original password: 12345678, after successful connection, you will see the interface on the camera. The APP will work after click “back”.
(2) Select "Modify Bluetooth Name", enter "Modify Device Name", you can enter up to 10 letters or numbers, Bluetooth name suffix MAC cannot be modified.
(3) Select “Cancel” will return to the Bluetooth.
Note: after successful connection, the hunting camera will enter the
screen protection state about 3 minutes; if you operate again, press any key on the camera, and the camera screen will light up again.

text_image
WIFI connection SSID:Hunting Cam Password:12345678
text_image
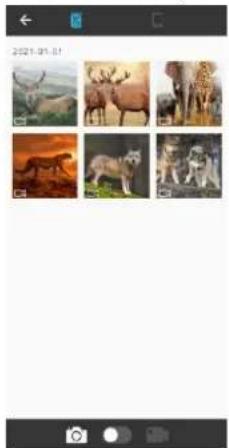
Connect camera- On the APP, you can preview the picture being taken in real time, record videos, take pictures, menu settings, file playback/download/delete, and download files can be viewed in the APP album, and can be deleted or shared individually.
natural_image
Grid of six animal photos including antelopes, wolves, and zebras, displayed in a photo editing interface (no text or symbols on images)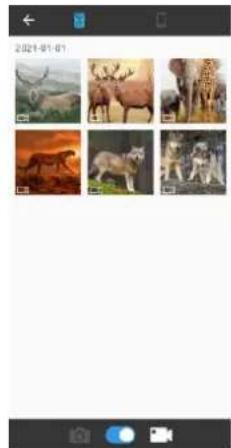
natural_image
Grid of six animal photos showing various animals and landscapes, including horses, deer, and animals in natural settings (no text or symbols visible)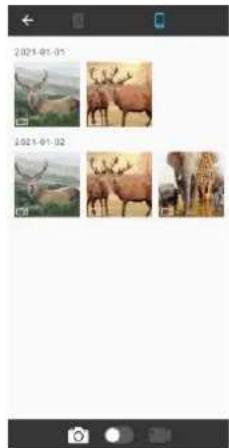
natural_image
Grid of four photos showing deer in various poses, each with a separate image and date label (2021-01-01, 2021-01-02), displayed in a smartphone interface.
natural_image
Collage of four animal photos showing various landscapes and animals, displayed in a photo editing interface (no text or symbols on the images themselves)25. Exit WIFI:
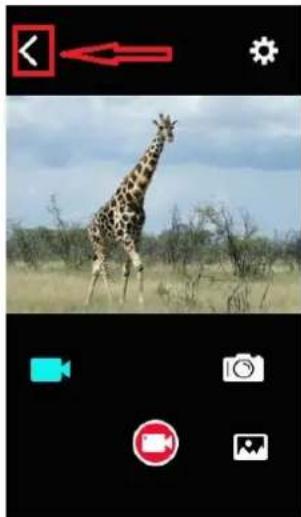
Method 1: press the return button on the top left of the APP (as shown in the picture) to prompt "Turn off the camera." Click "Cancel" will return to the APP interface. Click "connect the camera", then you can use the APP to continue. If you click "OK" then the APP and WIFI will Exit and close, and the camera will return to the preview screen also.
Method 2: Short press the "up" button on the camera to exit the WIFI. The camera will return to the video interface, and the indicator light will
turn off. At the same time the APP will exit the connection screen synchronously.
natural_image
Giraffe standing in a savanna landscape with camera interface buttons (no readable text or symbols on the image itself)-
After completing the use of APP, you can quit the APP, enter the phone to turn off WIFI and Bluetooth, and the device will automatically enter ON or SETUP mode.
-
When the camera turns ON WIFI or forgets to turn off WIFI after using, the camera will also be disconnected from the mobile phone network, after reaching the default time of "automatic WIFI off", the camera will automatically quit WIFI and return to ON(monitoring) or SETUP mode.
Description of Operating mode
- Calibrate the installation position of camera
In the test mode, the best shooting angle and range of the camera can be calculated.
- When calibrating, you can check the LED indicator lights of the PIR Sensors for help during calibration.
●The steps to calibrate the camera position are as follows:
1.1 Tie the camera to a tree or an object of 1-2m high, adjust the direction of the camera's lens.
1.2 If the indicator light of the corresponding PIR sensor is on, it means that the PIR sensor has detected a moving object. In this way, the best position for installing the camera can be calculated.
1.3 The indicator light will be on only when the sensor detects moving objects in the test mode, and the LED will be off in monitoring mode.
1.4 Ensure that the camera will not be interfered unnecessarily when it is working, and avoid direct sunlight near the branches.
- Normal operation mode
●In this mode, the camera is triggered by the sensor and enters the life
mode when the switch is on. After 5 seconds, the LED lights will be off and the camera will start to operate independently and enter the standby mode. Once an animal enters the detection area and detected by the PIR sensor, the camera will be activated and detect the motion track. If the object continues to move to the detection area detected by the main sensor, the camera will automatically take pictures and video. If the animal leaves the area detected by the sensor, the camera will turn off and return to standby mode.
3. Night mode
- At night, the infrared LED light will turn on automatically to provide necessary lighting. The LED light will illuminate objects with a range of about 3-20 meters. If the objects are too close to the camera, it may cause overexposure.
●In the night mode, the shot image can only display black or white. When recording video for a long time, low voltage may have a great impact on the stability of the machine, so do not record video at night when the power is low.
Note: The camera is used at night. When the battery voltage is low, the current will increase due to the infrared light emitting. Low-voltage operation may have a great impact on the stability of the machine. The camera cannot take pictures/videos or capture very dark images. But does not affect daytime photography or video recording.
Image / data output
1. TV connection
This camera can transmit video to external monitor or TV, please follow the instructions below:
●Turn on the TV and connect the TV to the camera with AV data cable.
●Turn on the camera and turn the switch to "setup".
●After successful connection, the camera will enter the playback mode, and the LCD screen will turn black, and the captured picture will be displayed on the TV screen.
- Connect to your computer to download photos/videos
●After the camera is connected to the computer and enters the removable disk mode, a removable disk will be added in the "My Computer" window. Taken photos or videos will be stored in the "DCIM\100MEDIA" directory on the removable disk. You can enter this directory to copy files to your computer hard disk.

Note: Do not disconnect the data cable during file downloading to avoid data loss, and do not plug or unplug the memory card when connected.
Technical Parameters
| LCD SCREEN | 2.4 inch |
| Camera | 4mega pixel |
| Lens | F2.5 FOV 90° |
| Photo resolution | 24M、20MP、16MP、12MP、8MP、5MP、3MP、1MP |
| Video | 3840*2160P、2688*1520P、1920*1080P、1280*720P、720*480P、640*480P |
| Photo/Video Format | JPEG/AVI |
| Menu language | English, Chinese, German, French, Italian, Spanish, Portuguese, Dutch, Japanese and Danish |
| TF card | TF card support 32GB |
| USB | USB 2.0 |
| DC | External DC power supply (6V/2A) |
| MIC | Support |
| Speaker | Support |
Note: the product design specifications are formulated according to the latest information in the preparation of this manual, and are subject to change without notice. Please refer to the actual camera.
Solar Panel Function description
●it can charge the battery under the sun outside
●it can charge the battery with an adapter
text_image
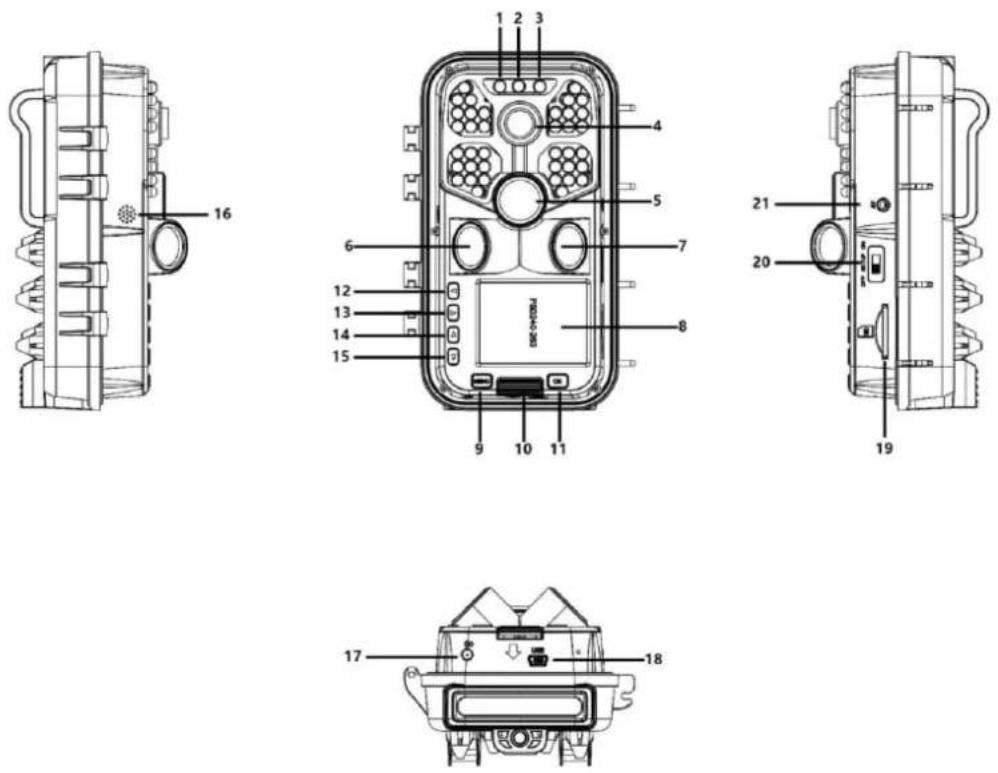
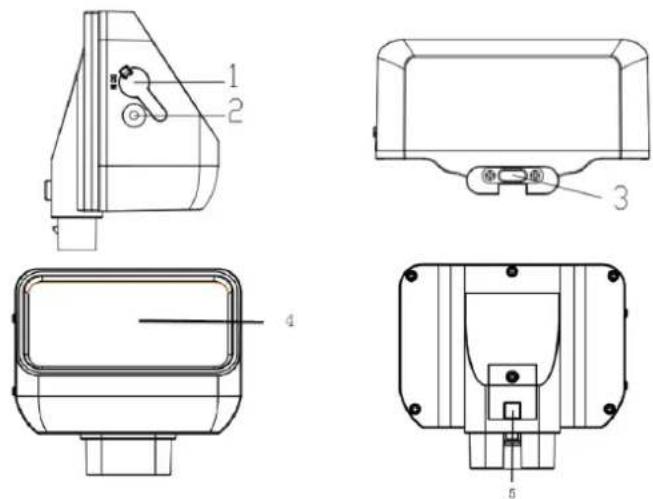
Technical drawings of a device with labeled components, including front, top, side, and top views.- DC IN 2. LED indicator 3. DC OUT(TYPE-C)
- Solar panels 5. Lock switch
Function declaration:
- DC IN: it can charge the solar bank with an adapter(12V/1A,
Spec.: Φ2.5MM/0.65MMW stylet) - DC OUT: Solar DC output to Hunting Camera, (TYPE-C port, install on top of camera)
- LED indicator: When the adapter recharges the solar power, the red light is on, once full, the red light is off. When the solar bank is recharged, the blue light is on, once full, the blue light is off
- Solar panels: When the sun shines on the solar panels, the panels can convert light energy into electricity to recharge the battery
- Lock switch: Align the clasp position, Press down the solar bank, the Lock snaps automatically, Press the lock button to pull out the solar bank
Installation and Attention
- When installing solar panels, don't let other leaves and objects hold the sun's rays where the sun can shine. It's best to install them in the open place
- Connect the connection line from the DC out of the solar bank to the camera DC IN, then it can be used
●About the solar bank, if there is any ports not to use, please plug the hole with the silicone to prevent leakage into the machine inside
Parameter
Product: Solar Power Bank
DC IN: DC 12V
DC OUT: DC6.0V/2A Max (TYPE-C port)
Capacity: 2500MA
Over charge protection & Over discharge protection: Yes
Water resistant: IP65
Operating temperature: -20^ to +60^
Dimension: 97x70x43MM
Note: Product design specifications are based on the latest information at the time of writing this manual. Subject to change without notice, please refer to the actual camera.
natural_image
Military camouflage camera with hexagonal aperture and mounted sensor array (no visible text or symbols)text_image
Setting Delete current file Delete all files Activate slideshow Write-protection MODE Back OK Select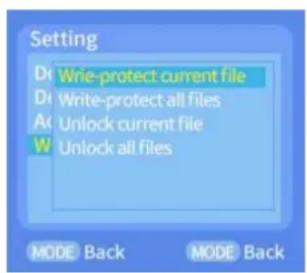
text_image
Setting Write-protect current file Write-protect all files Unlock current file Unlock all files MODE Back MODE Backtext_image
QR code with embedded logo in center, likely linking to a digital resource or website(3) Activer le Bluetooth
text_image
Hunting Camera Hunting Camera Connect camera Step One Bluetooth On Wifi Step Two Connect Wifi Connect camera(4) Activer le Wi-Fi
text_image
WIFI Wait for connection SSID:Hunting Cam Password:12345678text_image
WIFI connection SSID:Hunting Cam Password:12345678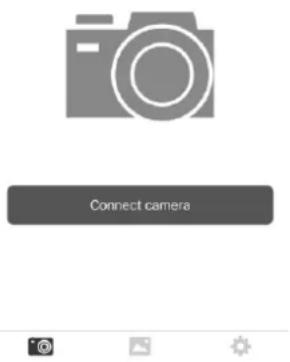
text_image
Connect cameranatural_image
Four-panel photo collage showing wildlife and animal photos with various animals, displayed on a smartphone (no text or symbols in the images themselves)natural_image
Giraffe in a savanna landscape with camera interface icons (no text or symbols on the image itself)text_image
Technical diagram showing two views of a mechanical component with labeled parts 3 and 5natural_image
Military camouflage camera with hexagonal aperture and mounted sensor array (no visible text or symbols)text_image
Setting Dele current file Delete all files Activate slideshow Write-protection MODE Back OK Select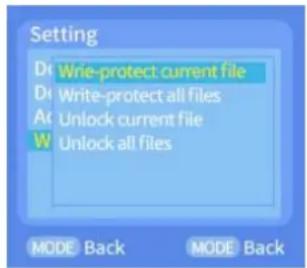
text_image
Setting Write-protect current file Write-protect all files Unlock current file Unlock all files MODE Back MODE Backtext_image
QR code with embedded logo in center, likely linking to a digital resource or websitetext_image
Hunting Camera Hunting Camera Connect camera Step One Bluetooth On Wifi Step Two Connect Wifi Connect cameratext_image
WIFI Wait for connection SSID:Hunting Cam Password:12345678text_image
Hunting Camera Connect cameranatural_image
Giraffe in a savanna setting with camera interface buttons (no readable text or symbols on the image itself)text_image
Technical diagram showing two views of a mechanical component with labeled parts 3 and 5DC OUT: 6 V/2A CC Max (porta TYPE-C)
Capacità: 2500 mA
natural_image
Military camouflage camera with hexagonal aperture and mounted sensor array (no visible text or symbols)text_image
Setting Delete current file Delete all files Activate slideshow Write-protection MODE Back OK Select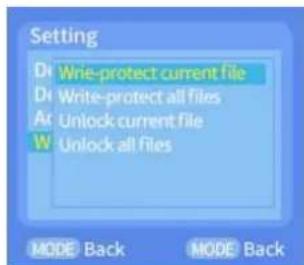
text_image
Setting Write-protect current file Write-protect all files Unlock current file Unlock all files MODE Back MODE Backtext_image
QR code with embedded logo in center, likely linking to a digital resource or website(3) Activar Bluetooth
text_image
Hunting Camera Hunting Camera Connect camera Step One Bluetooth On Wifi Step Two Connect Wifi Connect camera(4) Activar el wifi
text_image
WIFI Wait for connection SSID:Hunting Cam Password:12345678(5) Activar el wifi mediante Bluetooth: