B360WC - Weather Station Baldr - Free user manual and instructions
Find the device manual for free B360WC Baldr in PDF.

User questions about B360WC Baldr
0 question about this device. Answer the ones you know or ask your own.
Ask a new question about this device
Download the instructions for your Weather Station in PDF format for free! Find your manual B360WC - Baldr and take your electronic device back in hand. On this page are published all the documents necessary for the use of your device. B360WC by Baldr.
USER MANUAL B360WC Baldr
WIRELESS COLOR WEATHER STATION WITH 3 REMOTE SENSORS
text_image
MINI-HOURS FORECAST 28:00 28:00 28:00 28:00 188.8 m/Av 88 % 188.8 m/Av 88 % 188.8 m/Av 88 % 188.8 m/Av 88 % BALDR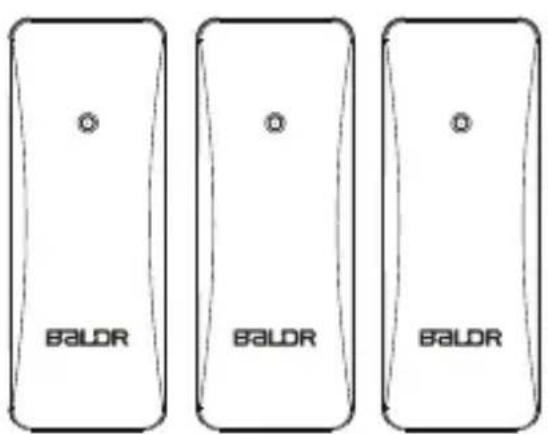
text_image
BALDR BALDR BALDRWe thank you for your purchase of Baldr wireless color weather station with 3 remote sensors. It has been designed and constructed using innovative components and techniques to enable the perfect display. Please read the instructions carefully to become familiar with the properties and functions before you use the unit.
For the start-up of this device:
Main unit by Ac adaptor(included) or 3xAAA batteries(no included)
Sensor by 6 x AA batteries (not included)
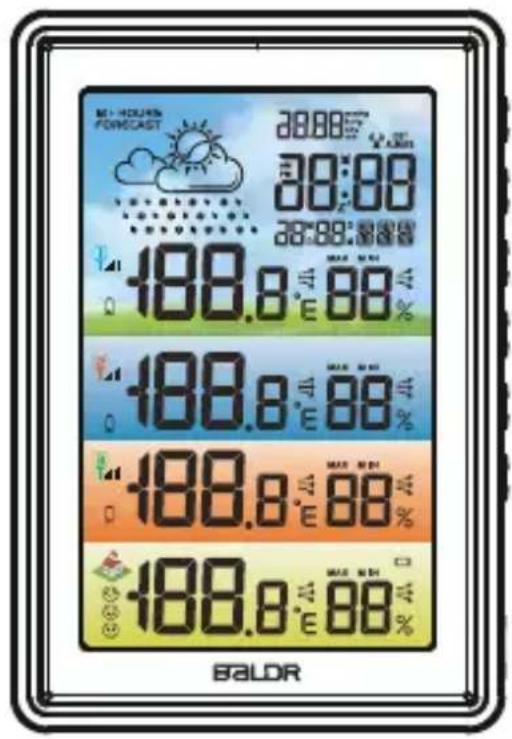
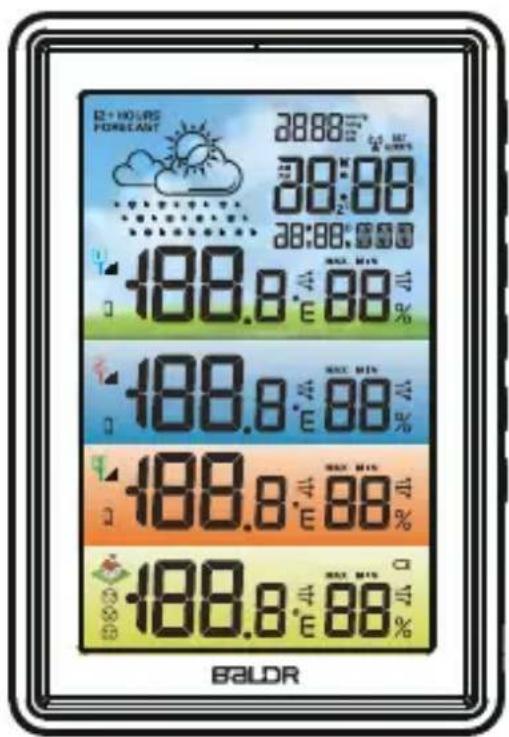
OVERVIEW
MAIN UNIT
text_image
7 6 9 8 4 3 2 1 188.0 E 88 % 188.0 E 88 % 188.0 E 88 % 188.0 E 88 % 5 BALDR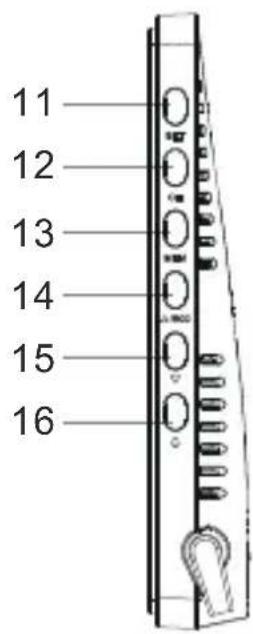
text_image
11 12 13 14 15 16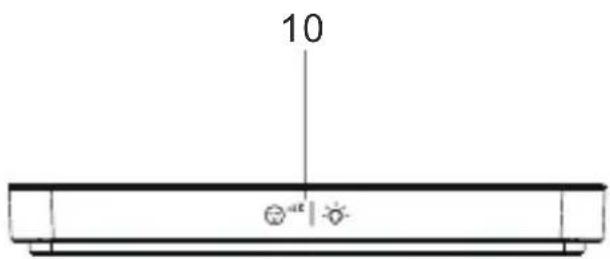
text_image
10 a e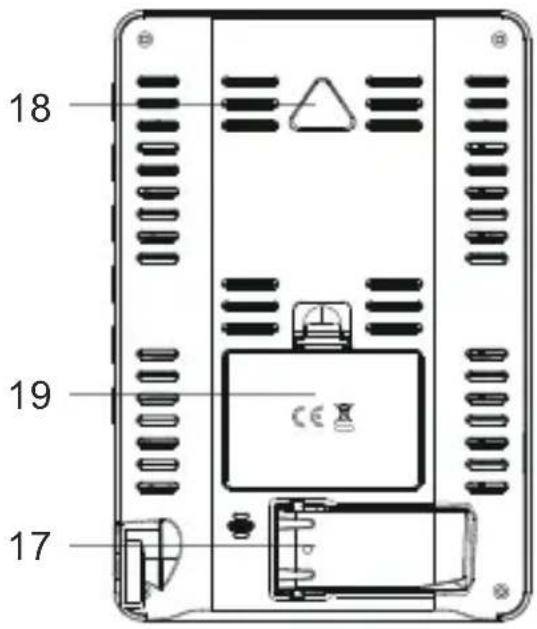
text_image
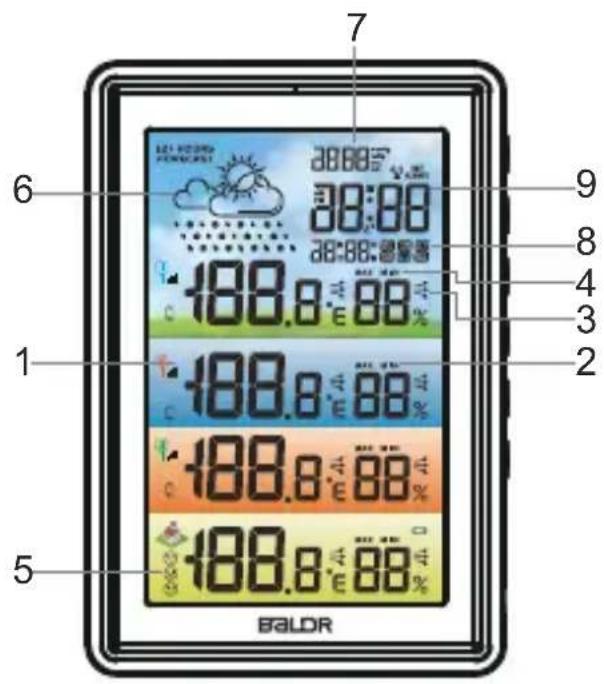
18 19 17- Temperature and humidity of channel 1/2/3
- Max/min record of channel 1/2/3
- Indoor temperature and humidity
- Max/min record of indoor temperature and humidity
-
Three comfort level indication
-
Weather forecast
Weather forecast for next 12-24 hours
- Barometric pressure
Barometer display in mmHg, inHg or hPa/mb
- Calendar display
Weekdays in 7 languages
9.Current time
12/24 hour format selectable
-
“ 😊 ^a2 | 🍒 ” button
-
"SET" button
Enter into time setting
- "CH" button
Clear sensors data and re-registration
- "MEM" button
Check or clear Max/min record
- “ ▲/RCC ” button
Switch C/F, RCC function or increase the data
- “▼” button
Switch 12/24 H or decrease the data
- “ ” button
Check alarm time, turn on/off alarm, enter into alarm setting
-
Stand bracket
-
Hanging hole
-
Battery compartment
Notes:
The default year is 2020, if the weekday display is incorrect. Please confirm year was set correct. (for manual setting only)
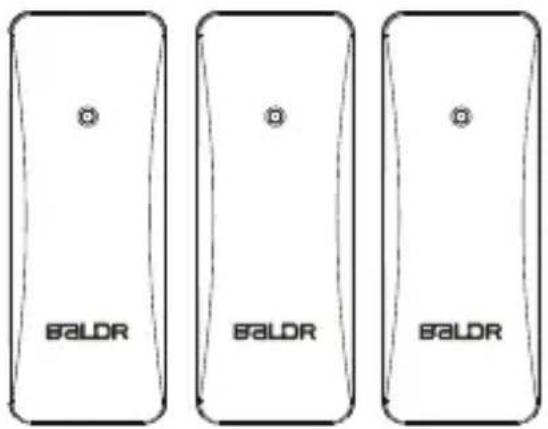
OUTDOOR SENSOR
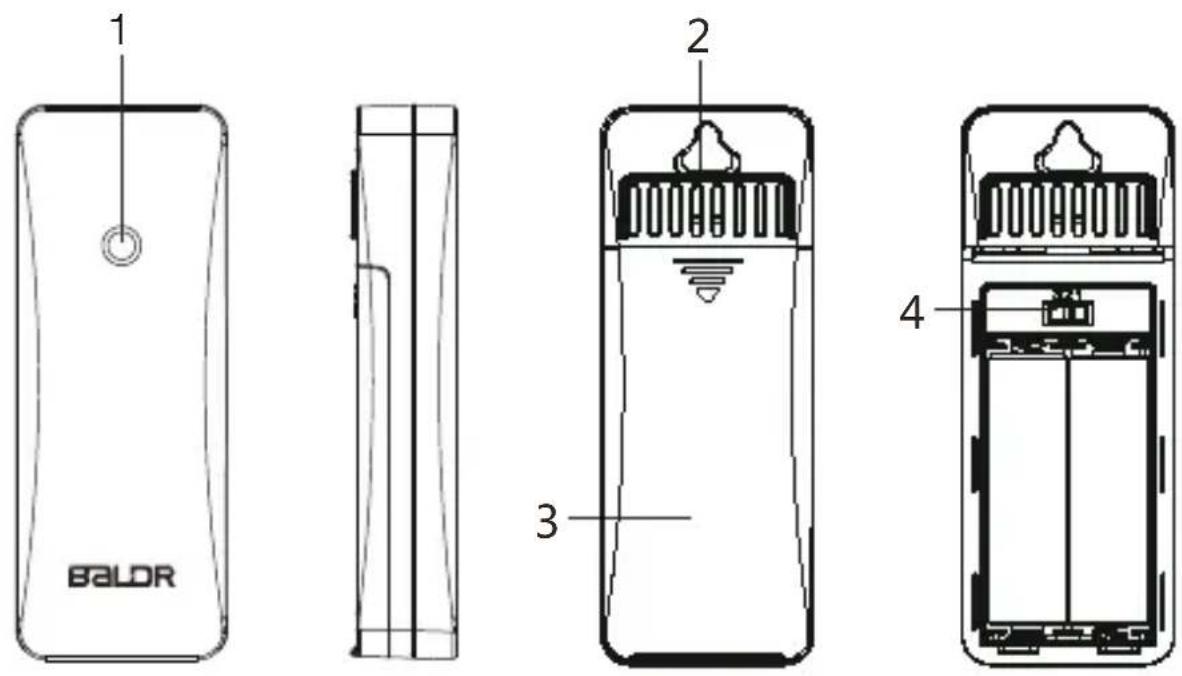
- Signal light
- Hanging hole
- Battery compartment
- Channel 1-2-3 switch
FEATURES
- Clear color LCD display
- DCF Radio controlled time
- Weather forecast for next 12-24 hours with barometer
- Four groups of temperature & humidity data
•Max/min record of temperature & humidity - Comfort level indication
•In/outdoor humidity range: 1%-99%
- Calendar, alarm and snooze function
•Time display in 12/24H
- White backlight with dimmer
PACKAGE CONTENT
Following contents are included in the package:
1 x Weather Station Main Unit
3 x Remote Sensors
1 x AC Adaptor
1 x User Manual
GETTING START
BALDR recommends high quality alkaline or lithium batteries for the best product performance. Heavy duty or rechargeable batteries are not recommended.
MAIN UNIT INSTALLATION
Install 3xAAA batteries or plug the adaptor to a powered outlet.
SENSOR INSTALLATION
- Remove the battery compartment cover;
- Insert 2 x AA batteries in each sensor matching the polarity
- Replace the battery cover.
SENSOR SETUP
- Switch the button of 3 sensors to CH1, CH2 and CH3 (the channel of each sensor should be different from others).
- Power the main unit prior to load the batteries of sensor.
Note: 1. Main unit will auto receive outdoor signal after power on, the receiving status will last for max 3 minutes. The receiving antenna signal will flash. If no signal received in 3 minutes, it will stop receiving outdoor signal.
- If the main unit is out of 3 minutes' signal receiving window, you need to press and hold the "CH" button to enter signal receiving again.
MAIN UNIT SETUP
When power on or reset, LCD will full display for 3 seconds with “BI” sound.
The default value is :
| Pressure Unit | Weekday Language | Display Time D | Date Format Dis | display Date |
| hPa/mb GER | 0:00(24H format) | D/M 15.June 2020 | ||
| Temperature Unit | RCC Function Zone Alarm Time | ||
| ON 0 0:00 Alarm OFF | |||
Barometer Calibration
- After power on, the pressure reading will be flashing for 10 seconds. If there is no need for calibration, touch the top button to exit setting. If calibration is required, you can press “▲/RCC” or “▼” button to adjust data; press and hold “▲/RCC” or “▼” button will quickly change the value by 8 steps.
- If no operation within 10 seconds, it will automatically save and exit setting.
- Barometer range: 800-1100hPa/mb (600-825 mmHg,23.62 -29.53inHg).
RF Signal Receiving
After barometer setting, It will start receiving 3 outdoor sensors' signal for 3 minutes. If all 3 channels signal received within 3 minutes or receiving window ends, it will enter into DCF signal receiving window.
DCF Signal Receiving
- After RF signal receiving, it will start searching radio signal for 7 minutes with the antenna symbol displaying on screen, Meanwhile, the backlight brightness will automatically adjust to 3% (default brightness: 100%).
- Once signal received, the main unit will display the received time/month/date/weekday.
- Daily RCC signal receiving: there are regular radio signal receiving at 1:00AM, 2:00AM, 3:00AM, 4:00AM, 5:00AM each day. It starts receiving signal at 1:00AM everyday. For each day, once signal received at any one receiving time, it will stop receiving signal that day.
- Manual receiving: press and hold “▲/RCC” button to enter RCC signal receiving.
- During receiving, press and hold “▲/RCC” button to exit RCC receiving.
*RCC symbol display:
a. When receiving signal, RCC icon will be flashing by "1HZ".
b. When signal successfully received, LCD will display complete RCC icon and exit RCC receiving.
c. If no signal is received, the RCC icon will disappear.
Manual Settings
-
After signal received, if there is no need for other settings, you can just finish reading here. If there is other setting requirements. Please check the following steps. Or if there is no signal received, you can follow bellow steps for manual setting.
-
Press and hold “ SET ” button to enter into setting, press “ SET ” button to skip setting steps or go to the next setting option.
- Press “ SET ” to select Weekday Language. Default setting :GER. Press the“▲/RCC” or “▼” button to select
optional. (English/German/Italian/French/Dutch/Spanish/Danish)
*Tips: press and hold “▲/RCC” or “▼” button will quickly change the value by 8 steps.
- Press “SET” to select Hours. Press “▲/RCC” or “▼” button to adjust the value.
- Press “ SET ” to select Minutes. Press “ ▲/RCC” or “ ▼ ” button to adjust the value.
- Press “SET” to select Year. Press “▲/RCC” or “▼” button to adjust the value.
- Press “ SET ” to select Month&Date display format. Default setting : D/M. Press the“▲/RCC” or “▼” button to select M/D or D/M format. (M: Month ,D: Date)
- Press “ SET ” to select the Month. Press “ ▲/RCC ” or “ ▼ ” button to adjust the value.
- Press “SET” to select the Date. Press “▲/RCC” or “▼” button to adjust the value.
- Press “SET” to select the Barometric Unit. Default setting : hPa/mb. Press “▲/RCC” or “▼” button to select unit: mmHg, inHg or hPa/mb optional.
-
Press “ SET ” to select the RCC. Default setting : ON. Press “ ▲/RCC” or “ ▼ ” button to select OFF or ON.
-
Press “SET” to select Time Zone. Default setting : 0. Press “▲/RCC” or “▼” button to select time zone from -12 H to +12 H.
- Press “ SET ” to select Weather. Press “ ▲/RCC” or “ ▼ ” button to select weather : Sunny, Sunny To Cloudy, Cloudy, Rainy or Stormy optional.
- Press "SET" to confirm and exit.
- During setting, touch top button to save and exit setting.
- During setting, if no operation for 10 seconds, it will automatically save and exit setting.
ALARM FUNCTION
Alarm Time Setting
- Press and hold “ 🔊 ” button to enter into alarm time setting.
- Press “▲/RCC” or “▼” button to adjust data; press and hold “▲/RCC” or “▼” button will quickly change the value by 8 steps.
- The setting order is: Hour → Minute → Exit.
- During setting, touch top button to save and exit setting.
- During setting, if no operation for 10 seconds, it will automatically save and exit setting.
- The alarm is default ON after setting the alarm time. Alarm symbol 📋 will display on screen.
Alarm ON/OFF Setting
- When in time display mode, press “ 🔊 ” button to check alarm time. Press “ 🔊 ” button twice to turn ON/OFF alarm by the ON/OFF of symbol 🔊 .
- When in alarm time display mode, press “ 🔊” button to turn on/off the alarm by the ON/OFF of symbol 🔔.
SNOOZE FUNCTION
- When the alarm is ringing, press any other button except top button to stop the alarm. And the alarm will restart next day.
- Or when alarm is ringing, press the top button to activate snooze function. The alarm will ring again in 5 minutes snooze interval. And the “ z^z ” symbol will be flashing on screen to indicate the snooze mode. Press any other button except top button to exit the snooze mode. And the alarm will restart next day.
- When alarm rings, the ascending "Bibi" alarm sound will last for 2 minutes if no operation.
- Press “MEM” button to check maximum temperature and humidity, the value will display for 5 seconds.
- Press “MEM” button second time to check the minimum temperature and humidity, the value will display for 5 seconds.
- Press "MEM" button third time will return to standard mode.
- Press and hold "MEM" button will clear the max and min record and reactivate the memory.
- Normally, the Max and Min record will update every 24 hours at 0:00.
TEMPERATURE
-
After power on ,the indoor temperature will display automatically, it will update reading each 30 seconds and start to receive outdoor signal which lasts for max 3 minutes.
-
Indoor temperature display range:-10 122 be :"LL.L"; for temperature higher than +50 will be :"HH.H".
-
Outdoor temperature display range :-40 140 be :"LL.L"; for temperature higher than +60 will be :"HH.H".
-
Arrow indication for temperature changes:
→ will display when temperature changes less than 1 one hour or compared with last reading;
→ will display when the reading increase by 1 hour or compared with last reading.
will display when the reading decrease by 1 hour or compared with last reading.
-
Accuracy: ±1
-
Press “▲/RCC” button to switch from Celsius degree to Fahrenheit degree.
HUMIDITY
-
After power on, the indoor humidity will display automatically, it will update reading each 30 seconds and start to receive outdoor signal which lasts for max 3 minutes.
-
Humidity display range: 1%-99%; for humidity lower than 1%, the reading will be “1%”; for humidity higher than 99%, the reading will be “99%”.
accuracy is ±5%, if out of this range the accuracy will be ±8%.
- Arrow indication for humidity changes:
will display when humidity changes less than 3% RH within one hour or compared with last reading;
→ will display when the reading increase by 3% RH within one hour or compared with last reading.
will display when the reading decrease by 3% RH within one hour or compared with last reading.
- Humidity resolution: 1%.
COMFORT LEVEL INDICATOR
| Display |  |  |  |
| Humidity DRY 1%-39% | COMFORT 40%-70% | WET 71%-99% | |
RF RE-REGISTRATION
- Press and hold the "CH" button to clear all sensors data and start receiving signal again.
WEATHER FORECAST
- The weather forecast icon will show after power on. There are 5 kinds of weather modes: Sunny, Sunny To Cloudy, Cloudy, Rainy, Stormy. The weather icon displays are based on the hourly calculation of indoor/outdoor temperature & humidity and barometer data. The forecast is for next 12 hours with 70%-75% accuracy.
- After powering on, touch “ 😊” button to adjust the brightness of the backlight.
- Backlight brightness can be selected from 3%,50%,100% and off.
- Powered by batteries, If no operation within 10 seconds, it will automatically turn off backlight.
LOW BATTERY INDICATORS
- About Outdoor Sensor: When battery indicator shows next to the outdoor temperature, replace batteries in your outdoor sensor.
- About Main Unit: When battery indicator shows next to your indoor temperature, replace battery.
TROUBLE SHOOTING
| Problem | Possible Solution |
| Outdoor reading is flashing or showing dashes | Flashing of the outdoor reading is generally an indication of wireless interference.1. Bring both the sensor and display indoors, side by side and remove batteries from each.2. Make sure the 1-2-3 switch on both units match.3. Reload batteries in outdoor sensor.4. Reload batteries in main unit.5. Let both units sit within a couple feet of each other for a few minutes to gain a strong connection before taking sensor to outdoor area. |
| No outdoor sensor reception | 1. Reload the batteries of both outdoor sensor and main unit. Please refer to the SENSOR SETUP section.2. Relocate the main unit and/or the outdoor sensor. The units must be within 100m(328ft) of each other.3. Make sure both units are placed at least 0.9 m (3 ft) away from electronics that may interfere with the wireless communication (such asTVs, microwaves, computers, etc).4. Use standard alkaline batteries. Do not use heavy duty or rechargeable batteries. NOTE: It may take a few minutes for main unit and sensor to synchronize after batteries are reloaded. |
| Inaccurate temperature/humidity | Make sure both the main unit and sensor are placed out of direct sunlight and away from any heat sources or vents. |
| “HH.H/LL.L” display in indoor and/or outdoor temperature | If the temperature is higher than the detection range, “HH.H” will display on screen for indication; if lower than the detection range, “LL.L” will display on screen for indication. |
| If your BALDR product does not operate properly after trying the troubleshooting steps, please contact the seller on your order page or shoot an email to: service@baldr.com. | |
PLACEMENT INSTRUCTION
BALDR sensors are sensitive to surrounding environmental conditions. Proper placement of both the main unit and outdoor sensor are critical to the accuracy and performance of this product.
Main Unit Placement
Place main unit in a dry area free of dirt and dust. To help ensure an accurate indoor temperature measurement, be sure to place the Main unit away from heat sources or vents.
Outdoor Sensor Placement
Sensor must be placed outside to observe outdoor conditions. Sensor is water resistant for water splashes and is designed for general outdoor use, however, to extend its life place the sensor in an area protected from direct weather elements. The best location is 1.2 to 2.4 meters (4 to 8 feet) above the ground with permanent shade and plenty of fresh air to circulate around the sensor.
Important Placement Guidelines
- The distance between main unit and transmitter should be at least 1.5\~2 meters (5\~6.5 feet) away from any interfering sources such as computer monitors or TV sets.
-
To maximize wireless range, place units away from large metallic items, thick walls, metal surfaces, or other objects that may limit wireless communication.
-
Please do not use other electrical products such as headphones or speakers operating on the same signal frequency.
- Neighbors using electrical devices operating on the same signal frequency can also cause interference.
PRECAUTIONS
- Do not clean any part of the product with benzene, thinner or other solvent chemicals. When necessary, clean it with a soft cloth.
- Never immerse the product in water. This can cause electrical shock and damage the product.
- Do not subject the product to extreme force, shock, or fluctuations in temperature or humidity.
- Do not tamper With the internal components.
- Do not mix new and old batteries or batteries of different types.
- Do not mix alkaline, standard or rechargeable batteries with this product. Remove the batteries if storing this product for a long period of time.
- Do not dispose of this product as unsorted municipal waste. Collection of such waste separately for special treatment is necessary.
WARRANTY
BALDR provides a 1-year limited warranty on this product against manufacturing defects in materials and workmanship. Warranty service can only be performed by our authorized service center. The original dated bill of sale must be presented upon request as proof of purchase to us, or our authorized service center.
The warranty covers all defects in material and workmanship with the following specified exceptions:(1) damage caused by accident, unreasonable use or neglect (including the lack or reasonable and necessary maintenance); (2) damage occurring during shipment (claims must be presented to the carrier); (3) damage to, or deterioration of any accessory or decorative surface;(4) damage resulting from failure to follow instructions contained in your owner's manual.
This warranty covers only actual defects within the product itself, and does not cover the cost of installation or removal from a fixed installation, normal set-up or adjustments, claims based on misrepresentation by the seller or performance variations resulting from installation-related circumstances. To receive warranty service, the purchaser must contact with BALDR nominated service center for the problem determination and service procedure.
Thank you for your choice of BALDR products!
DRAHTLOSE FARB WETTERSTATION MIT 3 FERNSENSOREN
text_image
D+ HOURS FORECAST 28:00 AM 30:00 30:00 188.8 m/45 188.8 m/45 188.8 m/45 188.8 m/45 BALDR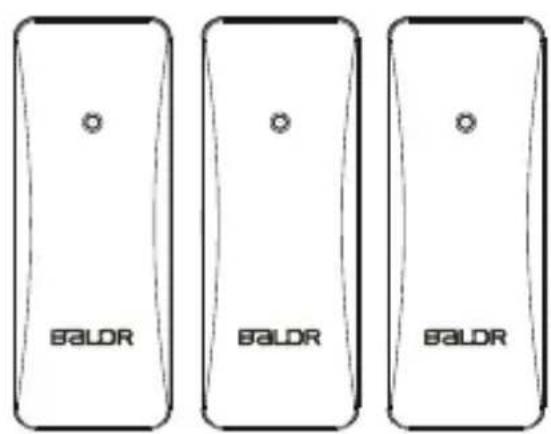
text_image
BALDR BALDR BALDRtext_image
6 7 8 9 1 188.8 °C 88% 2 3 4 5 188.8 °C 88% 188.8 °C 88% 188.8 °C 88% EALOR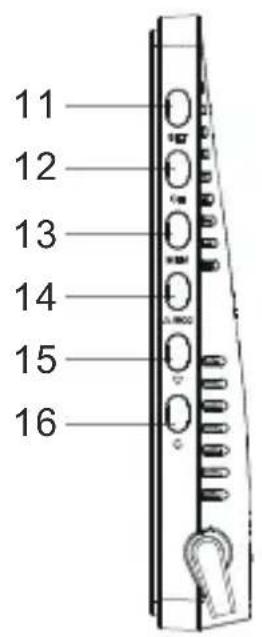
text_image
11 12 13 14 15 16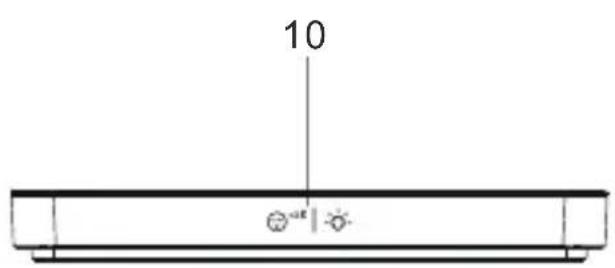
text_image
10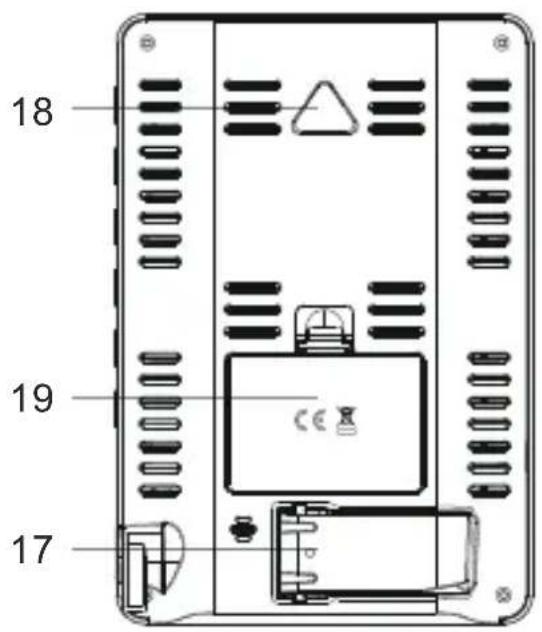
text_image
18 19 17text_image
BY HOURS FORECAST 28:00 AM 28:00 PM 28:00 NO 188.8 m/Av 88% 188.8 m/Av 88% 188.8 m/Av 88% 188.8 m/Av 88% BALDR