ME 3030B - Detector Gigahertz Solutions - Free user manual and instructions
Find the device manual for free ME 3030B Gigahertz Solutions in PDF.

User questions about ME 3030B Gigahertz Solutions
0 question about this device. Answer the ones you know or ask your own.
Ask a new question about this device
Download the instructions for your Detector in PDF format for free! Find your manual ME 3030B - Gigahertz Solutions and take your electronic device back in hand. On this page are published all the documents necessary for the use of your device. ME 3030B by Gigahertz Solutions.
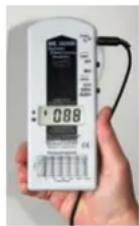
USER MANUAL ME 3030B Gigahertz Solutions
Rev. 2.0 - 1010 / DRU00189
Danke!
We thank you for the confidence you have shown in buying this product. It allows for a qualified evaluation of the exposure caused by AC electric and AC magnetic fields according to the internationally recognized TCO guideline and the recommendations of the building biology.
In addition to this manual you can watch the tutorial videos on our website concerning the use of this meter.
Please read this manual carefully prior to using the meter. It contains important information concerning the safety, usage and maintenance of this meter.
Grazie!
natural_image
Two-panel image showing a person using a handheld device on a wall and a red table with a mounted device (no visible text or symbols)natural_image
Person using a handheld device on a kitchen counter, with a close-up of a digital display showing a 2D screen (no visible text or symbols)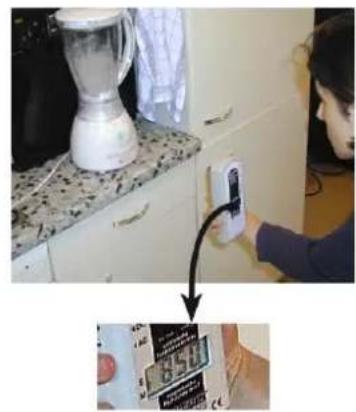
natural_image
Person installing a wall-mounted device on a kitchen appliance (no visible text or symbols)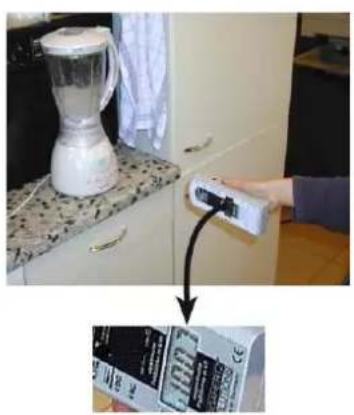
natural_image
Kitchen interior with a blender and a hand holding a control panel, showing a close-up of a product packaging (no visible text or symbols)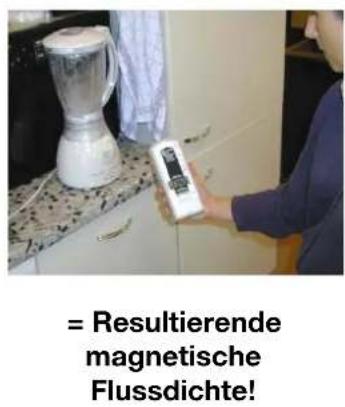
General Hints for Measuring
As the field strength increases when coming closer to sources of EMF pollution, it is possible to locate these by following the higher readings until reaching the emitting source. The tone signal provided facilitates this process. As fields (especially magnetic fields) can penetrate even massive construction material, the sources might even be located outside the building, e.g. high-tension power lines, electrified railway trails, transformers as well as neighbouring houses and apartments.
Ideally, all measurements are to be repeated during various times of the day and on different days of the week in order to identify fluctuations.
Measurement Instructions – Electric Fields
According to relevant guidelines (TCO etc.), the field meter should be connected to ground potential in order to obtain reliable, reproducible testing results.
Grounding the Field Meter:
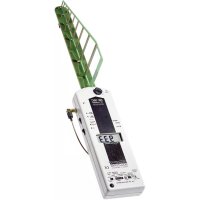
Insert the plug of the enclosed grounding cable into the dedicated socket of the meter 1= and run the cable along the side of the case to the back (see picture). Make sure that neither the grounding cable nor the user's hand is in the front of the meter (falsifies the reading!).
Unvarnished metal piping for water, gas or heating is especially adequate for grounding with the grounding cable, if need be a small blank wire will help making the contact. A large nail in the wet ground of the garden is fine, too. Professionals can also use the earth contact of a wall socket.
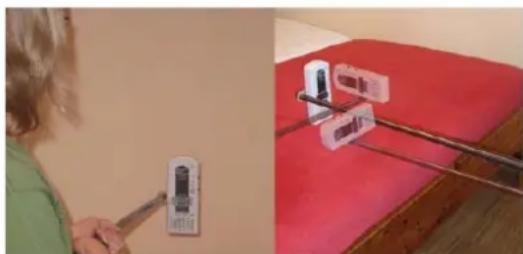
Turn on the field meter and set it to "E" (ME 3840B: Set the filter to "50 Hz"). Keep the meter close to your body. The further away from the body it is held, or if it is even put down, the more the testing results tend to become distorted into the higher range. During testing please make sure that the person performing the survey, as well as anybody else present, is located behind the meter. Proceed as follows:
- Move slowly through the room to be measured. Stop frequently and take measurements pointing to all directions including ceiling and floor.
- Move into the direction of the highest reading in order to identify the field source.
- In places where people spend substantial amounts of time, such as in bed or at a workplace, check all directions as mentioned above until you have reached the maximum reading at the spot, where the body of the person would be located.
An EMR survey of sleeping areas should be conducted under "sleep conditions," with all electrical equipment turned on or off as you have it at night. Under certain circumstances the electric field strength might even be higher if these items are switched off!
Some guidelines recommend the so-called “potential-free” measurement of electric fields, i.e. without needing to ground the meter. A potential-free measurement is, in principle, very adequate for the measurement of the total pollution. However, in order to obtain valid results, this method requires a great deal of know how, the use of a non-conductive holder (e.g. the PM2 by Giga-
natural_image
Two-panel image showing a person using a tool on a wall and another with a red tablecloth displaying a device (no visible text or symbols)hertz Solutions), three measurements in the three dimensional axes XYZ (see figure on the left) and the vectorial addition ^2 of their results.
Far more adequate for the most important task,
which is the identification of the sources of pollution, would be an earthed measurement, though, which is why this procedure is especially recommended for the private use. For more background information to potential-free measurements please see our website.
Recommended Exposure Limit AC Electric Field: Below 10 V/m, preferably below 1 V/m
(at 50/60 Hz for grounded measurement)
For potential-free measurement: below 1.5 pref. 0.3 V/m
Measurement Instructions – Magnetic Field:
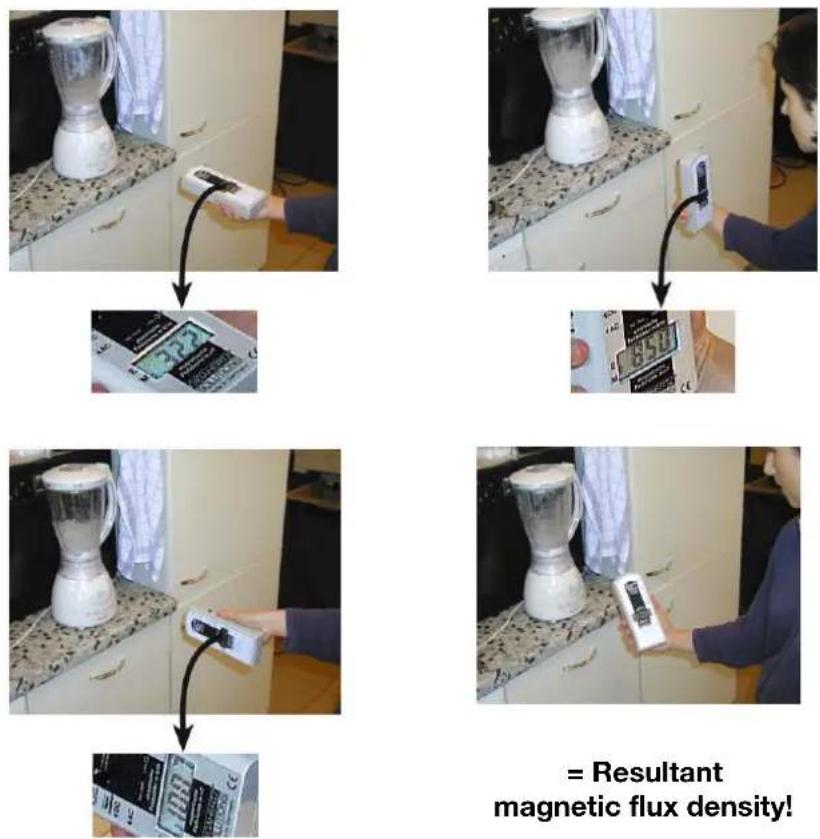
Turn on the field meter and set the switch "Field Type" to "M" for AC magnetic field. (ME 3840B only: Turn the knob for the frequency filter to "50/60 Hz"). The field meter does not need to be grounded, persons present do not affect the testing results and there is no need to hold the meter close to your body. Proceed as follows:
- Move slowly through the room to be measured with special regard to the sleeping or working place.
- There is no need to turn the meter into different directions like for the E-field, instead check all three orientations from time to time as shown in the following pictures.
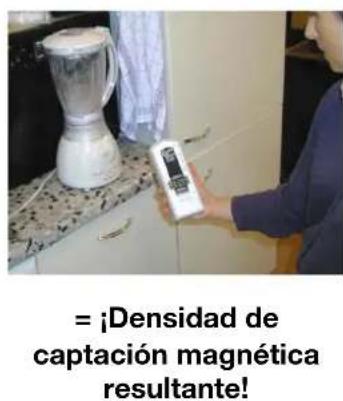
- In practice it is usually sufficient to "rotate" the meter out of your wrist until you have the position / direction of the highest reading (fourth picture below). In this direction the meter shows the so-called "resulting" field strength resp. magnetic flux density.
Please note:
- Quick movements induce short peaks of pseudo readings that have nothing to do with actual fields (due to the earth's static magnetic field)
- Let the display settle for 2 seconds after every change of direction.
Recommended Exposure Limit AC Magnetic Field: Below 200 nT, preferably below 20 nT
(Magnetic flux density at 50/60 Hz).
(Conversion nT to mG (Milligauss): 200 nT = 2 mG)
ME 3840B only: Frequency Analysis
AC fields are not only defined by their field strength, but also by the frequency with which the polarity of the field changes. The ME3840 B can separate the following common frequencies and frequency bands:
1) 5 Hz to 100 kHz Good for overall considerations.
2) 16.7 Hz Overhead railway wires in Germany, France, Norway, Austria, Sweden and Switzerland.
3) 50 Hz to 100 kHz Electric power grid and its harmonics.
4) 2 kHz to 100 kHz "Artificial harmonics" above 2 kHz (e.g. from many AC-adaptors, energy-saving bulbs, TV-sets). Corresponds to band 2 of the Swedish TCO guideline. A factor 10 lower safe limits are recommended for this range!
Battery, Auto-Power-Off, Low batt.
The meter is powered by a 9 V battery, situated in the battery compartment on the back of the meter.
The meter will automatically be shut off after 40 minutes of continuous use in order to save battery capacity.
When “Low. Batt.” appears in the centre of the display, the field meter will be turned off after 3 min. in order to avoid measurement errors.
Possibilities of Remediation
If possible, increase the distance to the source of pollution
Correct "Plugging":
Switch the meter to "E" and place it between e.g. the bedside light and the pillow. Switch off light. Reverse direction of plug by 180° and re-insert it. Logical: leave plug in the direction of lowest readings. This trick works best for an inline cable-switch of e.g. the lamp.
Use shielded socket-lines with two pole switch and shielded connection cables (for available versions check our website).
Install an automated “demand switch” in the house fuse box which cuts out electricity as soon as the last load is switched off and automatically reconnects as soon as electricity is needed again. As long as everything is switched off, there is no tension on the line and hence no pollution in the room. This is the most comfortable and effective measure you can take. Check www.gigahertz-solutions.com for most sophisticated and well reputed models.
It's easy to check for yourself whether a demand switch is a good investment for you (easiest in pairs):
- One person reads the meter on the bed to be inspected. Switch the meter to "E".
- The other person switches off the relevant fuses (one by one and different combinations)
- Install the demand switch into those circuits which show the highest reduction of field strength.
Further hints, literature and contact information regarding professional “building biologists” can be found on our website.
Italiano
natural_image
Person using a wall-mounted switch device on a red surface, with a close-up of the device mounted on a pole (no visible text or symbols)natural_image
Kitchen appliance with a blender and digital thermometer being connected to a digital display (no visible text or symbols)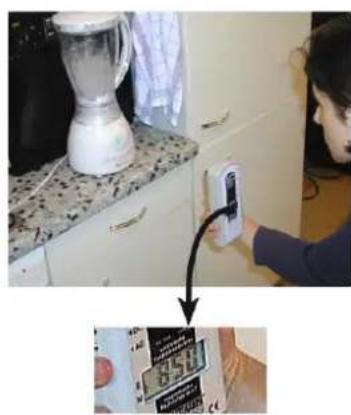
natural_image
Person using a smart home control device on a kitchen counter, with a close-up of hands holding a tablet (no visible text or symbols)
natural_image
Kitchen kitchen scene with a blender and a hand holding a control panel, showing a close-up of the product box (no visible text or symbols)
natural_image
Person using a handheld device on a wall, with red table background showing a red table (no visible text or symbols)natural_image
Kitchen appliance with a blender and a control panel, showing a close-up of its interior (no visible text or symbols)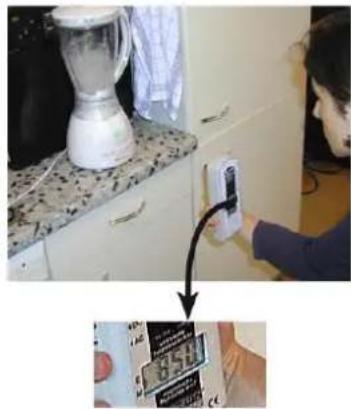
natural_image
Person installing a smartphone on a kitchen appliance, with a close-up of hands holding the tablet (no visible text or symbols)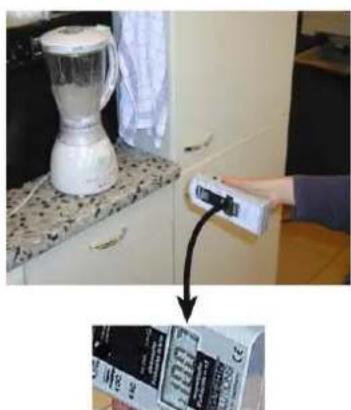
natural_image
Kitchen kitchen scene with a blender on a counter and a hand holding a remote control (no visible text or symbols)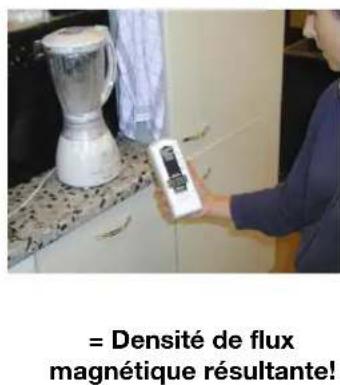
natural_image
Two-panel image showing a person using a handheld device on the left and a close-up of a red table with a small object mounted on a stand on the right (no visible text or symbols)natural_image
Kitchen appliance with a blender and digital thermometer, showing a close-up of its screen (no visible text or symbols)
natural_image
Person installing a wall-mounted device on a kitchen appliance (no visible text or symbols)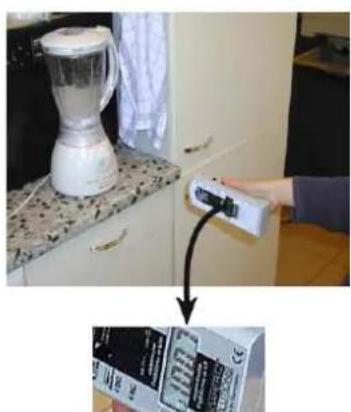
natural_image
Kitchen appliance with a blender and a digital controller, showing a close-up of its product packaging (no visible text or symbols)