HydroClean SC930A - Vacuum Cleaner Sanitaire - Free user manual and instructions
Find the device manual for free HydroClean SC930A Sanitaire in PDF.
User questions about HydroClean SC930A Sanitaire
0 question about this device. Answer the ones you know or ask your own.
Ask a new question about this device
Download the instructions for your Vacuum Cleaner in PDF format for free! Find your manual HydroClean SC930A - Sanitaire and take your electronic device back in hand. On this page are published all the documents necessary for the use of your device. HydroClean SC930A by Sanitaire.
USER MANUAL HydroClean SC930A Sanitaire
Commercial Hard Floor Washer
Model SC930
Important safety instructions .....2
What's in the carton ....3
How to identify parts .....4
How to assemble ....5
Cleaning and sanitizing formulas .....5
Filling the solution tank .....6
Cleaning hard floors .....7
Maintenance: Dirty water tank .....8-9
Maintenance: Self-cleaning function . . .10
Maintenance: Electronic alerts .....11
Maintenance: Brush roll and chamber .12
Troubleshooting ....13
Warranty and service information .....14
Spanish user guide .....15-28
French user guide .....29-42
How to order replacement parts .....43

natural_image
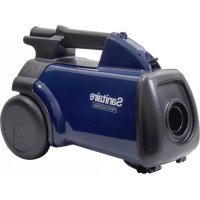
Black and white photo of a vacuum cleaner with extended handle and base (no visible text or symbols)READ ALL INSTRUCTIONS BEFORE USING YOUR HARD FLOOR WASHER
When using an electrical appliance, basic precautions should be observed, including the following:

text_image
WARNINGTO REDUCE THE RISK OF FIRE, ELECTRIC SHOCK OR INJURY:
- Connect to a properly grounded outlet only. See grounding instructions. Do not modify the 3-prong grounded plug.
- Do not leave appliance when it is plugged in. Unplug from outlet when not in use and before servicing.
- Use indoors only.
- Do not allow to be used as a toy. Close attention is necessary when used by or near children.
- Do not use for any purpose other than described in this User's Guide. Use only manufacturer's recommended attachments.
- Do not use with damaged cord or plug. If appliance is not working as it should, or has been dropped, damaged, left outdoors, or dropped into water, have it repaired at an authorized service center.
- Do not pull or carry by cord, use cord as a handle, close a door on cord, or pull cord around sharp edges or corners. Do not run appliance over cord. Keep cord away from heated surfaces.
- Do not unplug by pulling on cord. To unplug, grasp the plug, not the cord.
- Do not handle plug or appliance with wet hands.
- Do not put any object into openings. Do not use with any opening blocked; keep openings free of dust, lint, hair, and anything that may reduce air flow.
- Keep hair, loose clothing, fingers, and all parts of body away
from openings and moving parts.
- Turn off all controls before plugging or unplugging appliance.
- Use extra care when cleaning on stairs.
- Do not use to pick up flammable or combustible materials (lighter fluid, gasoline, kerosene, etc.) or use in areas where they may be present.
- Do not use appliance in an enclosed space filled with vapors given off by oil base paint, paint thinner, some moth proofing substances, flammable dust, or other explosive or toxic vapors.
- Do not use to pick up toxic material (chlorine bleach, ammonia, drain cleaner, etc.).
- Do not pick up anything that is burning or smoking, such as cigarettes, matches, or hot ashes.
- Use only cleaning products recommended for use with this appliance to prevent internal component damage. See the Cleaning and Sanitizing Formulas section of this guide.
- Do not immerse. Use only on surfaces moistened by the cleaning process.
- Keep appliance on a level surface.
• Always install float before any wet pick-up operation. - Do not carry the appliance while in use.
- Do not use without filter in place.
- Plastic film can be dangerous. To avoid danger of suffocation, keep away from children.
- Do not use extension cords or outlets with inadequate current carrying capacity.
SAVE THESE INSTRUCTIONS
THIS MODEL IS FOR COMMERCIAL USE
WARNING
Improper connection of the equipment-grounding conductor can result in a risk of electrical shock. Check with a qualified electrician or service person if you aren't sure if the outlet is properly grounded. DO NOT MODIFY THE PLUG. If it will not fit the outlet, have a proper outlet installed by a qualified electrician. This appliance is designed for use on a nominal 120-volt circuit, and has a grounding attachment plug that looks like the plug in the drawing to the right. Make certain that the appliance is connected to an outlet having the same configuration as the plug. No plug adapter should be used with this appliance.
GROUNDING INSTRUCTIONS
This appliance must be connected to a grounded wiring system. If it should malfunction or break down, grounding provides a safe path of least resistance for electrical current, reducing the risk of electrical shock. The cord for
this appliance has an equipment-grounding conductor and a grounding plug. It must only be plugged into an outlet that is properly installed and grounded in accordance with all local codes and ordinances.
natural_image
Simple line drawing of a wall-mounted device connected to a cable (no text or symbols)WARNING
Plastic film can be dangerous. To avoid danger of suffocation, keep away from babies and children.
WARNING
Do not plug in the Sanitaire® Floor Washer until you are familiar with all instructions and operating procedures.
WARNING
To reduce the risk of electric shock, turn power switch off and disconnect plug from electrical outlet before performing maintenance or troubleshooting checks.
natural_image
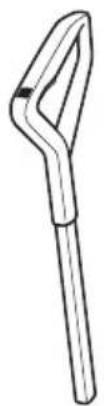
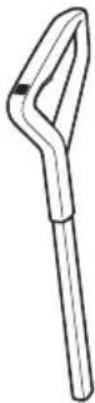
Line drawing of a vacuum cleaner (no text or symbols)Body
natural_image
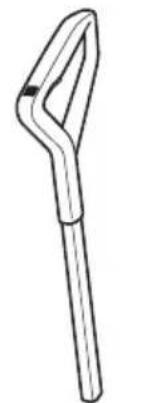
Simple line drawing of a tool handle (no text or symbols)Handle grip
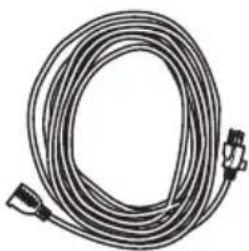
natural_image
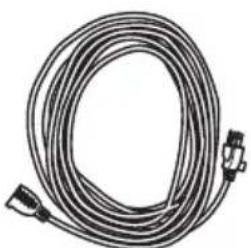
Coiled cable with connectors, no visible text or symbols
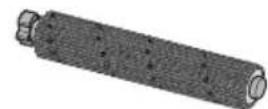
Multi-surface brush roll
FilterExtension cord
Extension cords
When using an extension cord with your unit, refer to the following table to determine the required A.W.G. wire size. Make sure extension cord is in good condition and correct size. Use only three-wire extension cords that have three-prong grounding plugs and grounding receptacles that accept the appliance's plug.
| Length of extension cord | ||||
| 25 feet | 50 feet | 100 feet | 150 feet | |
| 110V-120V | 7.5 meter | 15.25 meter | 30.5 meter | 45.7 meter |
| Amps | A.W.G. wire size | |||
| 0-6 | 18 | 16 | 16 14 | |
| 7-10 | 18 | 16 | 16 14 | |
WARNING: To reduce the risk of personal injury due to a loose electrical connection
between the appliance's plug and extension cord, firmly and fully attach the appliance plug to the extension cord.
Periodically check the connection while operating to ensure it is fully attached. Do not use an extension cord that provides a loose connection. A loose connection may result in overheating, fire, and increases the risk of a burning.
To reduce the risk of disconnection of the appliance cord from the extension cord during operating, secure the extension cord to the appliance plug using the cord lock as shown in the assembly instructions.
Maintain appliance with care – Inspect extension cords periodically and replace if damaged.
text_image
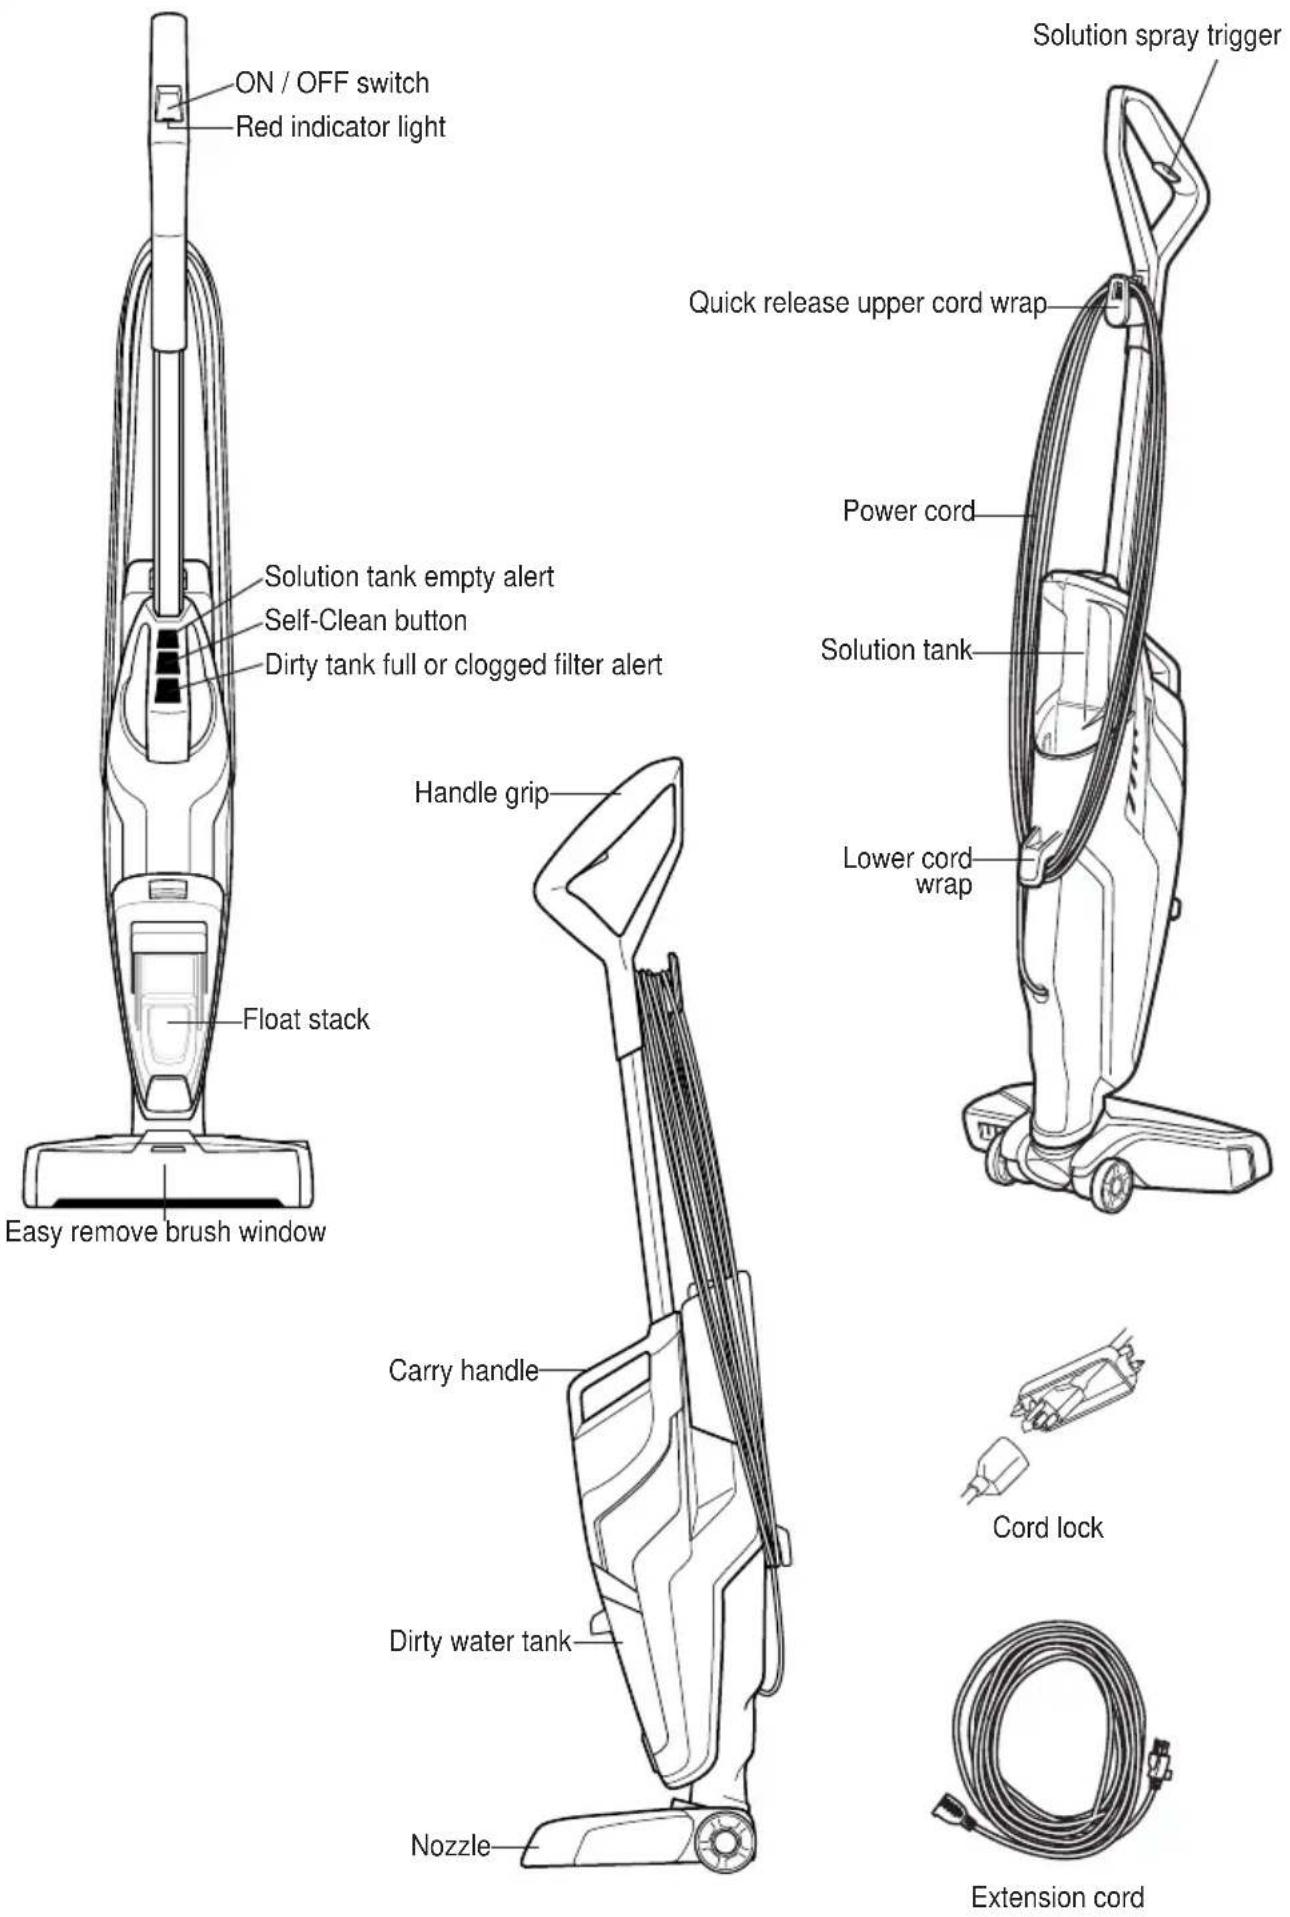
ON / OFF switch Red indicator light Solution tank empty alert Self-Clean button Dirty tank full or clogged filter alert Float stack Easy remove brush window Handle grip Carry handle Dirty water tank Nozzle Solution spray trigger Quick release upper cord wrap Power cord Solution tank Lower cord wrap Cord lock Extension cordHOW TO ASSEMBLE
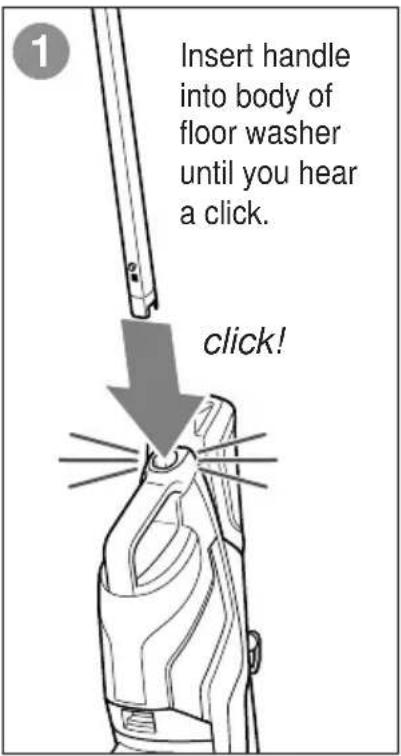
The Sanitaire® Hard Floor Washer comes in four easy to assemble components and does not require any tools to assemble:
- Handle • Body • Solution tank • Extension cord

WARNING
Do not plug in the Sanitaire® Hard Floor Washer until you are familiar with all instructions and operating procedures.
text_image
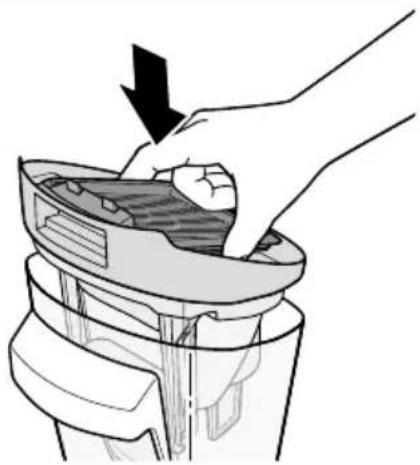
Insert handle into body of floor washer until you hear a click. click!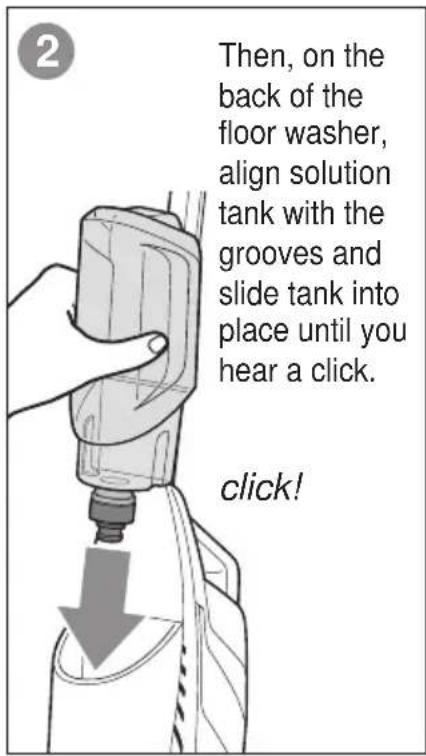
text_image
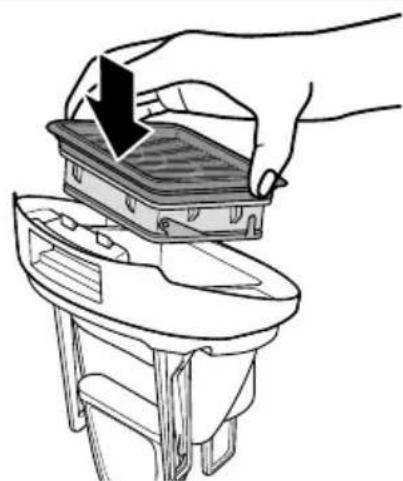
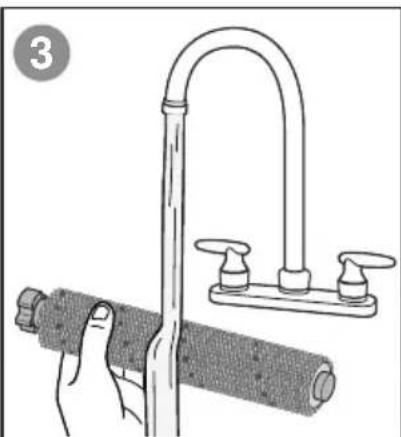
Then, on the back of the floor washer, align solution tank with the grooves and slide tank into place until you hear a click. click!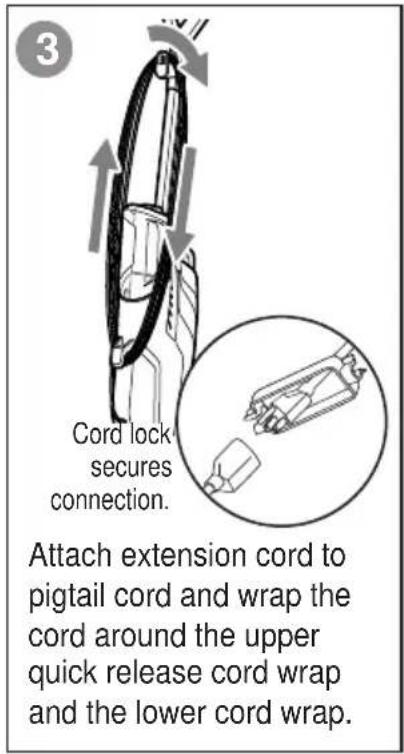
text_image
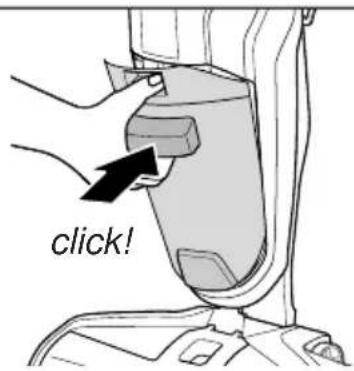
3 Cord lock secures connection. Attach extension cord to pigtail cord and wrap the cord around the upper quick release cord wrap and the lower cord wrap.NOTE: To easily unwrap the cord for use, turn the quick release cord wrap downward to remove the cord from the cord wrap.
CLEANING & SANITIZING FORMULAS

WARNING
To reduce the risk of fire and electric shock due to internal component damage, use only recommended cleaning formulas intended for use with the floor washer.
Recommended Sanitaire® formulas – For a list of additional recommended formulas from other brands go to the Sanitaire® HydroClean™ Hard Floor Washer page on www.sanitairecommercial.com. Always use recommended formulas in your floor washer. Other solutions may harm the machine and void the warranty.
Cleaning formula
| Sanitaire®Hard Floor Cleaner | |
| For cleaningALL sealed floors | |
| Item no. 3135 |
Sanitizing formula
| Bissell®Hard Floor Sanitize | |
| For sanitizingALL sealed floors | |
| Item no. 2504L |

WARNING
Fill with warm (140°F/60°C MAX) tap water and add the recommended formula. DO NOT USE BOILING WATER. DO NOT HEAT WATER OR TANK IN MICROWAVE
1
The solution tank is located on the back of the floor washer.
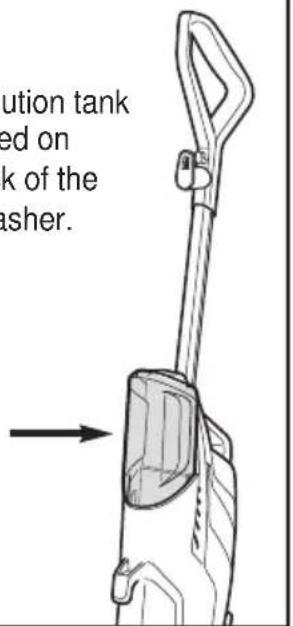
text_image
ution tank ed on k of the asher.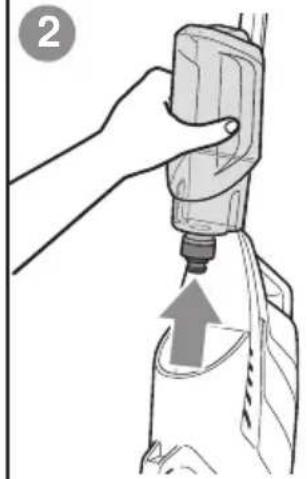
natural_image
Illustration of a hand using a tool to lift a bottle, with an arrow indicating upward motion (no text or symbols)Lift the solution tank straight up to remove from the floor washer.
natural_image
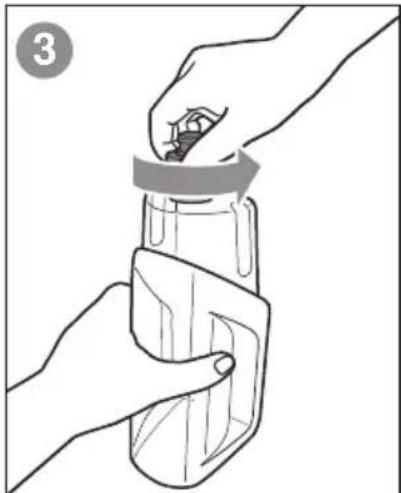
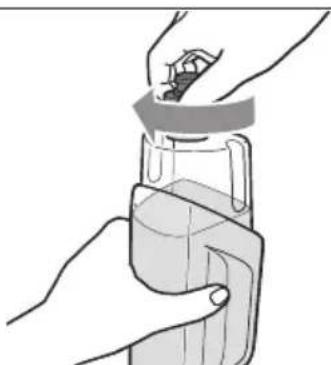
Illustration of hands holding a bottle with a lid, no text or symbols presentUnscrew the cap from the solution tank.
4
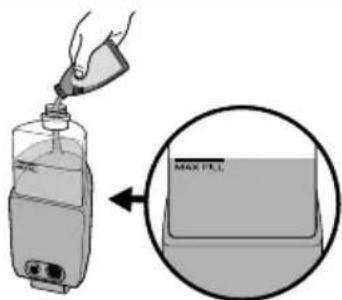
text_image
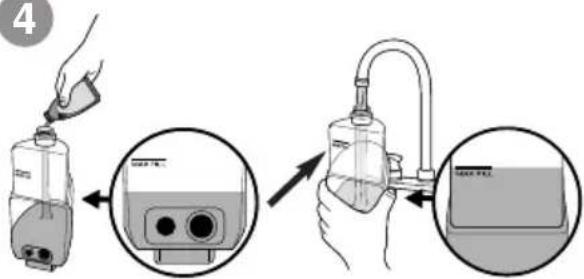
Diagram showing a hand pouring liquid into a device with a close-up view of the device's internal components.Only for Sanitaire solution:
- Fill solution tank with 5 ounces of Sanitaire cleaning or sanitizing solutions.
- Fill the remainder of the solution tank with warm tap water to Maximum Fill Line. (Water to solution ratio = 6:1)
text_image
MAX FILLFor other recommended solutions:
- Fill solution tank with "ready to use" (pre-diluted) formula to Maximum Fill Line.
- Follow manufacturers recommended solution ratio for cleaning and sanitizing hard floors.
5
natural_image
Illustration of a hand holding a glass jar with a lid, no text or symbols presentScrew the cap back onto the solution tank.
natural_image
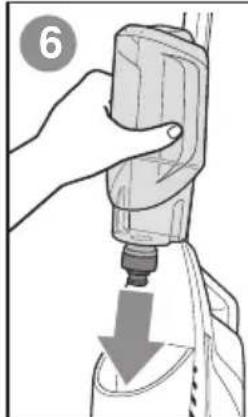
Illustration of a hand using a tool to press down a cylindrical object, with a downward arrow indicating compression (no text or symbols present)On the back of the floor washer, align solution tank with the grooves and slide tank into place until you hear a click.
click!

WARNING
Do not plug in the Sanitaire® Hard Floor Washer until you are familiar with all instructions and operating procedures.
1
natural_image
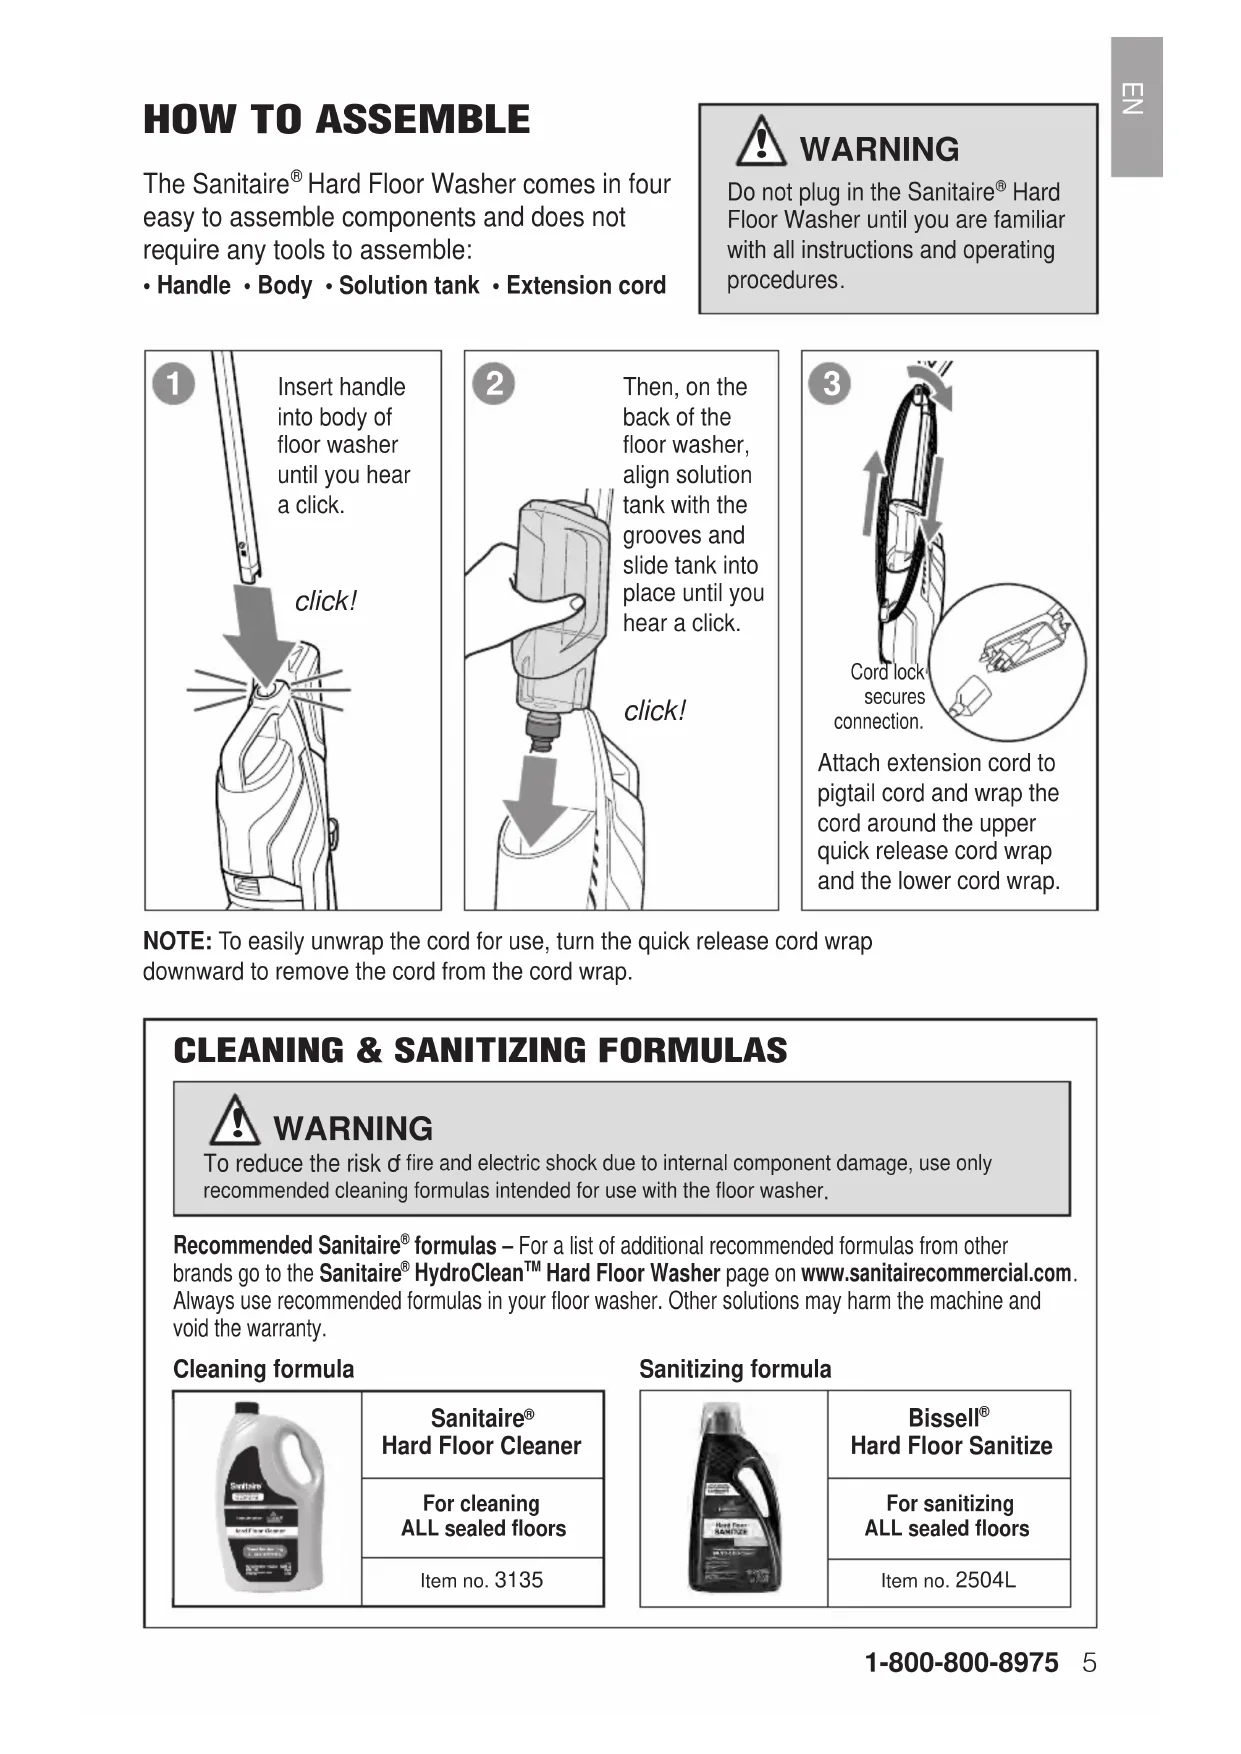
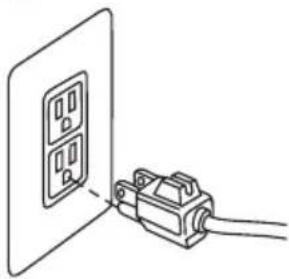
Simple line drawing of a wall-mounted electrical outlet connected to a cable (no text or symbols)Plug floor washer into a properly grounded outlet.
2

natural_image
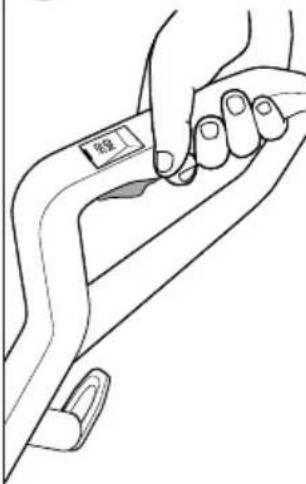
Line drawing of a hand gripping a curved object with a small inset showing a label (no text or symbols present)Turn the machine ON. The dry vacuum will turn on. To turn OFF, press the button a second time.
3
natural_image
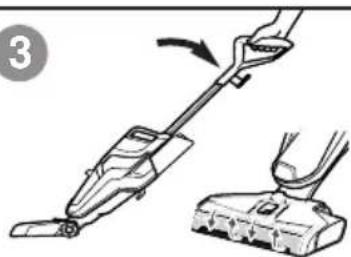
Illustration of a hand using a vacuum cleaner to lift a small electronic device (no text or symbols visible)Recline the body of the floor washer backward to start the brush roll spinning.
To stop the brush roll
spinning, you will need to
stand the floor washer upright.
4
text_image
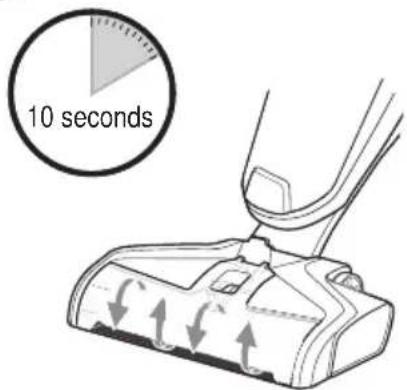
10 secondsBefore each use, hold the solution spray trigger for 10 seconds to prime the system with cleaning solution. LED lights illuminate when holding the trigger.
NOTE: When solution is flowing, you will see bubbles forming at the edges of the brush roll window.
5
natural_image
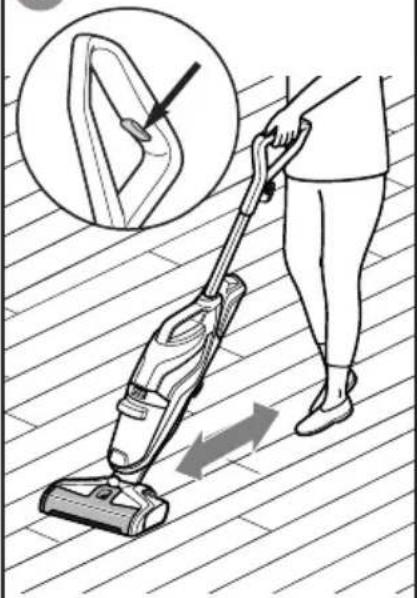
Illustration of a person using a vacuum cleaner on a striped floor, with an inset showing the wheel and hand positioning (no text or symbols)To clean, hold the solution spray trigger to apply solution on both forward and backward passes.
6
text_image
螺纹To dry hard floors faster, release the trigger and clean a second pass without dispensing solution.
TIP: For overly challenging and stuck-on messes on your hard floors, hold the Sanitaire® Hard Floor Washer over the mess. Using short passes while holding the trigger allows the multi-surface brush to go to work.
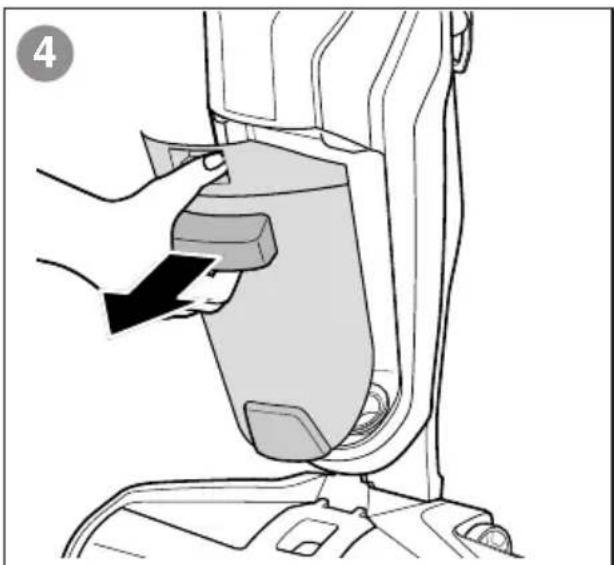
MAINTENANCE: DIRTY WATER TANK
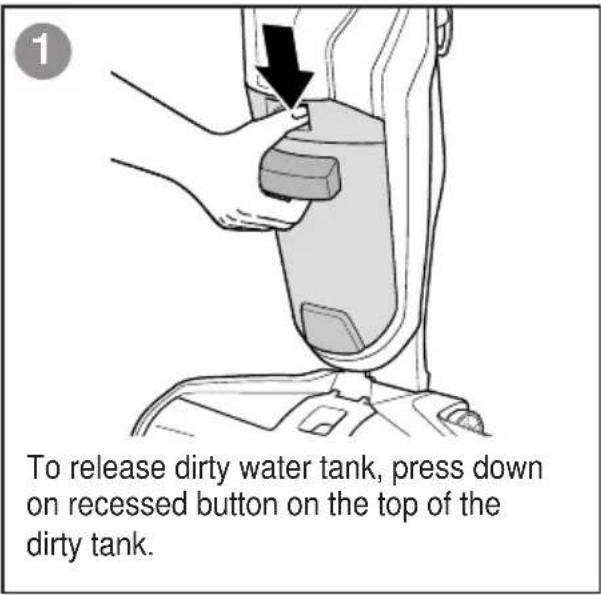
text_image
To release dirty water tank, press down on recessed button on the top of the dirty tank.
text_image
2 Grab the front handle while pressing down on button and pull dirty water tank away from the floor washer.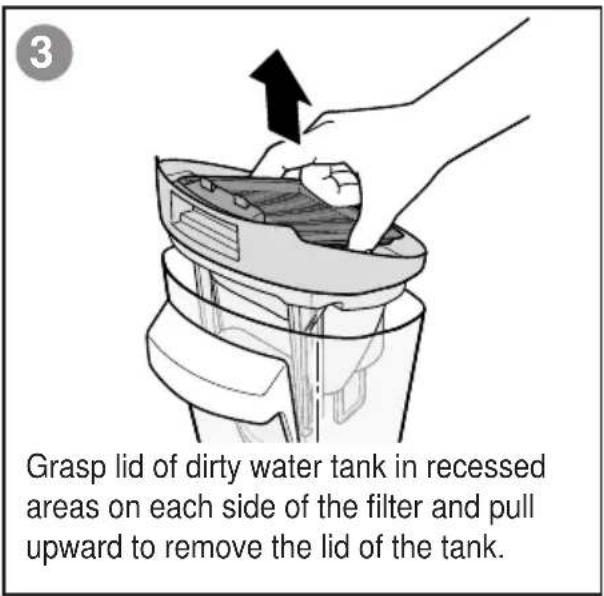
text_image
Grasp lid of dirty water tank in recessed areas on each side of the filter and pull upward to remove the lid of the tank.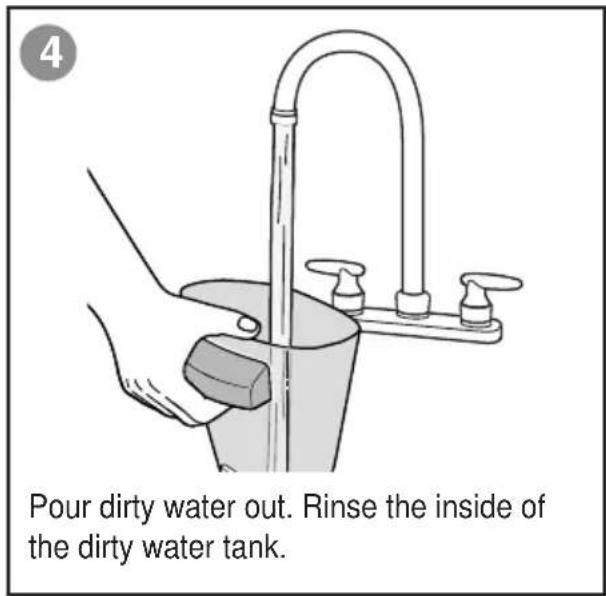
text_image
Pour dirty water out. Rinse the inside of the dirty water tank.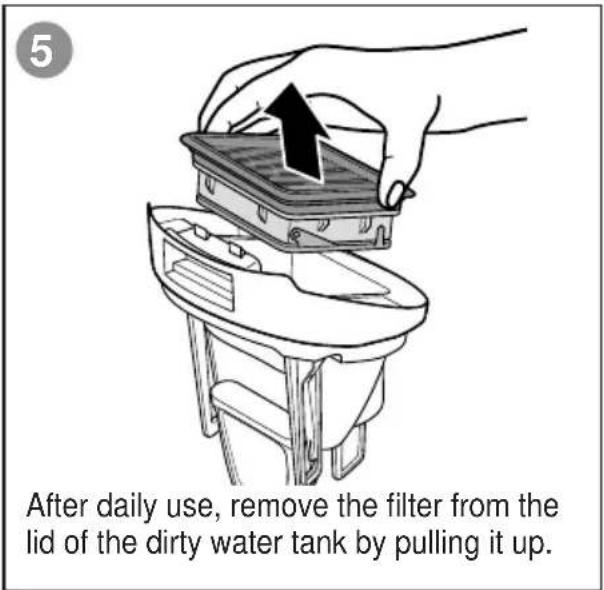
text_image
5 After daily use, remove the filter from the lid of the dirty water tank by pulling it up.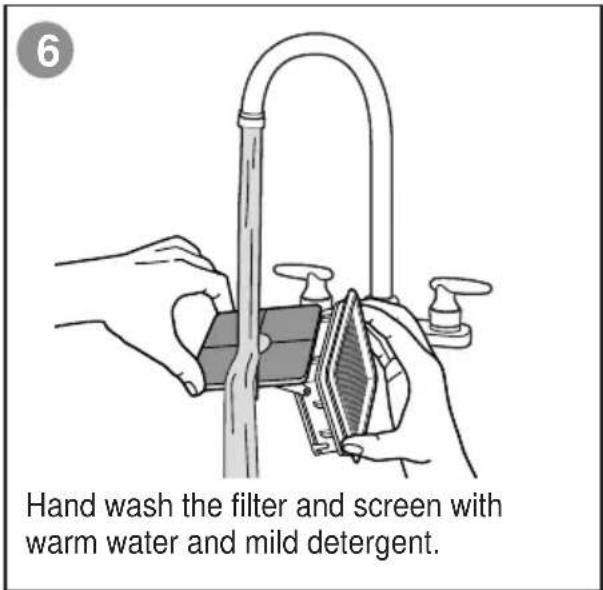
text_image
Hand wash the filter and screen with warm water and mild detergent.MAINTENANCE: DIRTY WATER TANK (cont.)
7
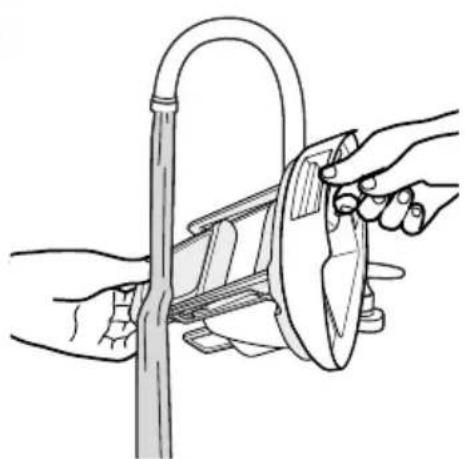
natural_image
Illustration of hands using a tool to clean or adjust a curved pipe (no text or symbols present)Rinse the float located at the bottom of the dirty water tank lid.
8
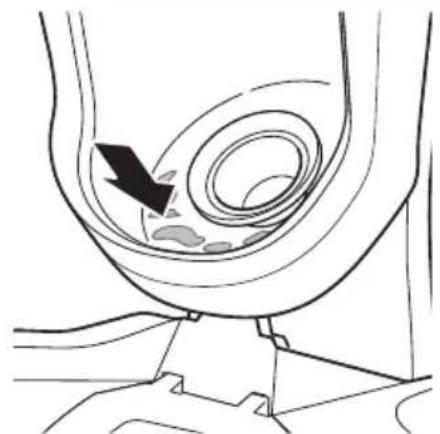
natural_image
Diagram of a medical procedure showing a catheter insertion into a device (no text or labels present)If the inside area where the dirty water tank sits is dirty, wipe it clean with a rag or towel.
9
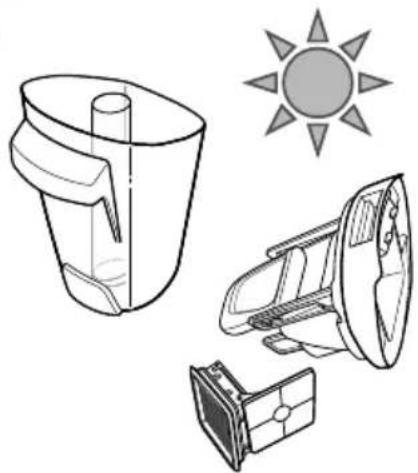
natural_image
Technical line drawing of a solar-powered blender with sun icon (no text or symbols)Allow parts to dry.
10
natural_image
Line drawing of a hand placing a plastic tray into a small container (no text or symbols)Place filter back into the lid of the dirty water tank.
11
natural_image
Illustration of a hand removing or discharging a mechanical component into a cylindrical container (no text or symbols)Reassemble the lid of dirty water tank.
12
text_image
click!Angle the dirt tank back into body of floor washer inserting bottom first. Then tilt the top of the dirt tank toward the floor washer and push into place until you hear a click.
text_image
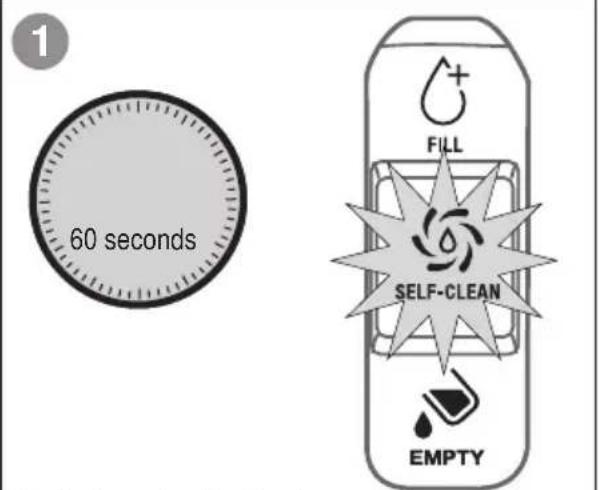
1 60 seconds FILL SELF-CLEAN EMPTYSelf-cleaning indicator
After use, turn power OFF, place the handle in upright position and depress the self-clean button. The indicator light will blink for 60 seconds while clean solution is dispensed on the brush roll and vacuumed back into the dirty water tank. Floor washer will shut off when cycle is complete. Repeat as necessary. Empty dirty water tank when finished.
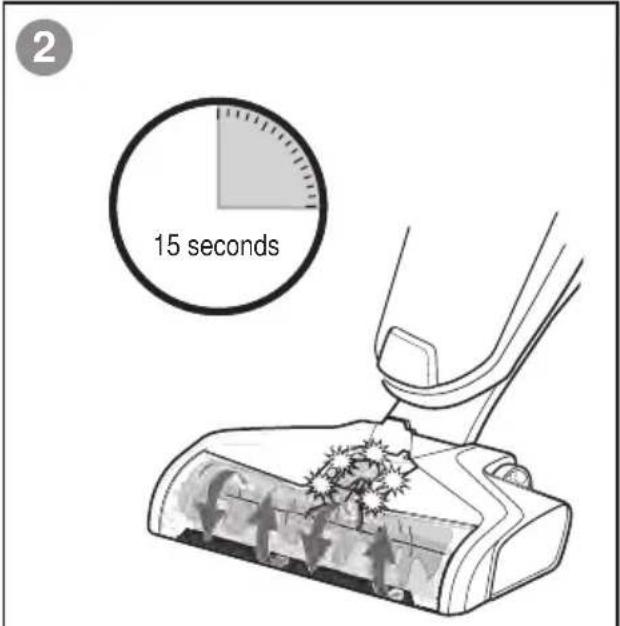
text_image
2 15 seconds15 second wash cycle
Pump activation lights ON. Solution will flow on brush roll.

text_image
3 45 seconds45 second dry cycle
Pump activation lights OFF. No solution flowing on brush roll.
natural_image
Line drawing of a hand inserting a component into a device (no text or symbols)Empty dirty water tank
SEE MAINTENANCE: DIRTY WATER TANK pages 8-9.
NOTE: Store floor washer in a protected, dry area. Since this product uses water, it must not be stored where there is a danger of freezing. FREEZING WILL DAMAGE INTERNAL COMPONENTS AND VOID THE WARRANTY.
MAINTENANCE: ELECTRONIC ALERTS
Indicator lights to alert when dirty water tank is full, filter is clogged, solution tank is empty and improper installation of the filter or brush roll.
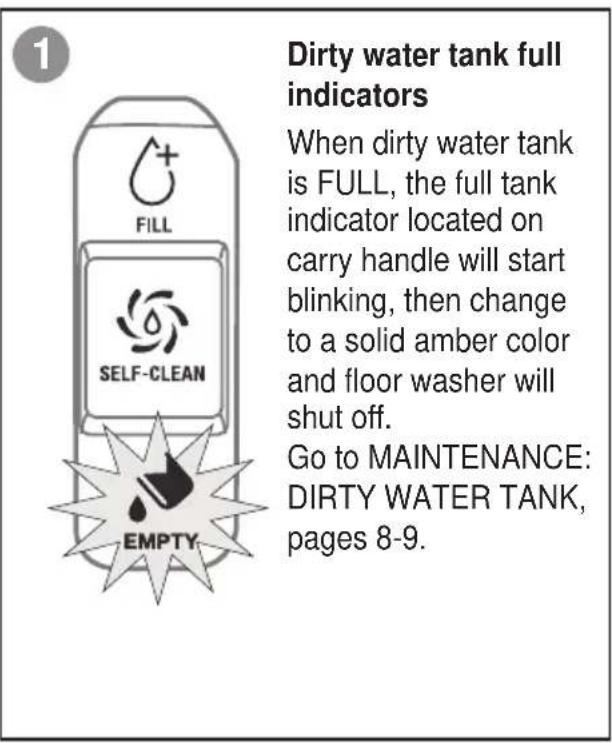
text_image
1 Dirty water tank full indicators When dirty water tank is FULL, the full tank indicator located on carry handle will start blinking, then change to a solid amber color and floor washer will shut off. Go to MAINTENANCE: DIRTY WATER TANK, pages 8-9.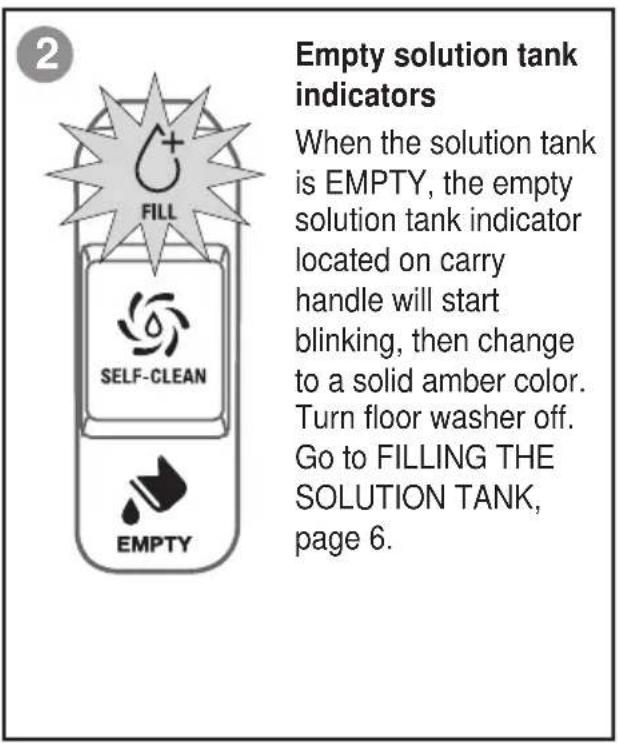
text_image
Empty solution tank indicators When the solution tank is EMPTY, the empty solution tank indicator located on carry handle will start blinking, then change to a solid amber color. Turn floor washer off. Go to FILLING THE SOLUTION TANK, page 6.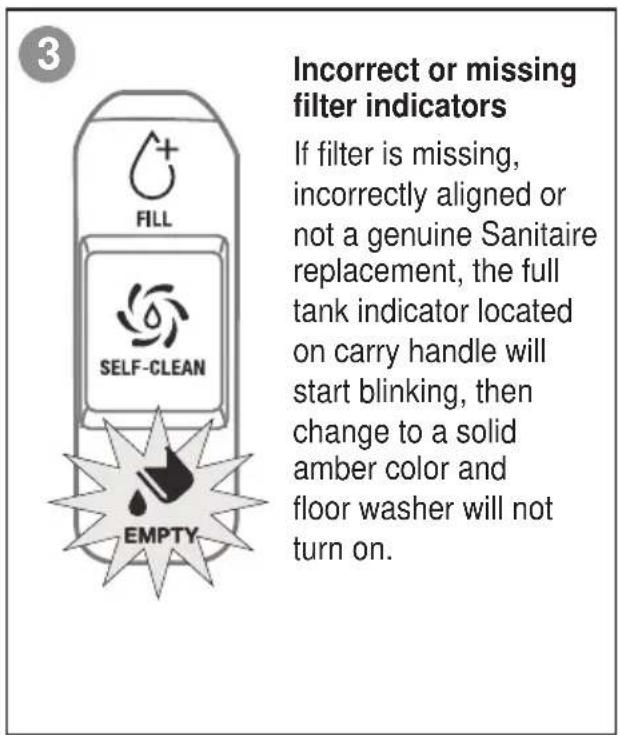
text_image
Incorrect or missing filter indicators If filter is missing, incorrectly aligned or not a genuine Sanitaire replacement, the full tank indicator located on carry handle will start blinking, then change to a solid amber color and floor washer will not turn on.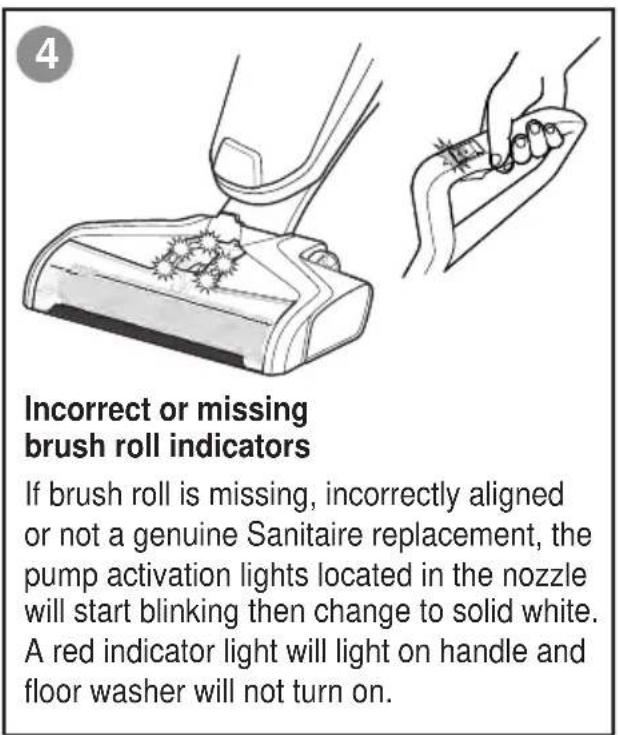
text_image
Incorrect or missing brush roll indicators If brush roll is missing, incorrectly aligned or not a genuine Sanitaire replacement, the pump activation lights located in the nozzle will start blinking then change to solid white. A red indicator light will light on handle and floor washer will not turn on.MAINTENANCE: BRUSH ROLL AND CHAMBER

WARNING
Brush may start unexpectedly. To reduce the risk of injury from moving parts, turn power OFF and unplug floor washer before cleaning or troubleshooting.
natural_image
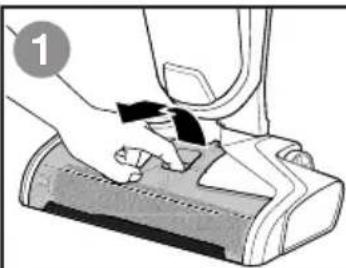
Illustration of a hand pressing down on a device component (no text or symbols visible)Grasp brush roll cover and press latch while pulling upward to remove.
natural_image
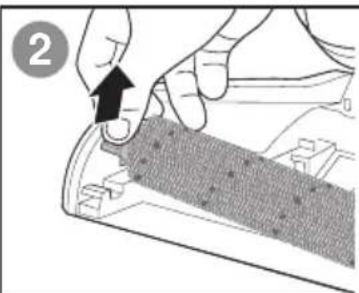
Close-up of hands installing a component with a black arrow pointing to it (no text or symbols visible)Pull brush roll out by grabbing the brush roll tab and pulling upward.
natural_image
Illustration of a hand holding a pipe with a hose, next to a curved pipe assembly (no text or symbols)With warm water, rinse your brush roll cover and brush roll.

natural_image
Line drawing of a hand cleaning a small mechanical component (no text or symbols)If your brush roll cover is dirty, clean with a rag or towel.
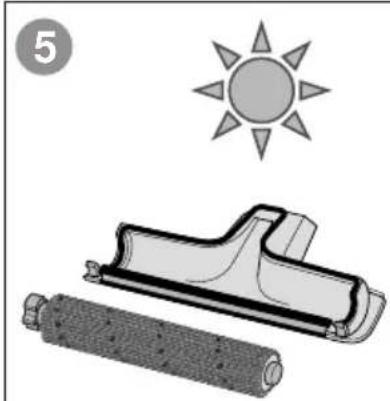
natural_image
Illustration of a sun symbol above a rolled roller and a flat roller, both without any text or symbols.Let your brush roll and brush roll cover dry before reassembling.
TIP: Running your floor washer with a wet brush roll will help the brush roll dry faster. The trigger should not be pressed.
NOTE: The brush roll is not dishwasher or automatic washing machine safe. Please follow cleaning instructions.
natural_image
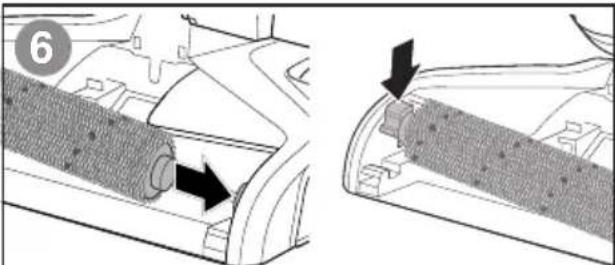
Technical diagram showing two views of a mechanical component with arrows indicating direction (no text or symbols present)Replace brush roll by inserting the brush roll end into the right side of the nozzle. Then lock the pull-tab into place by pressing downward.
text_image
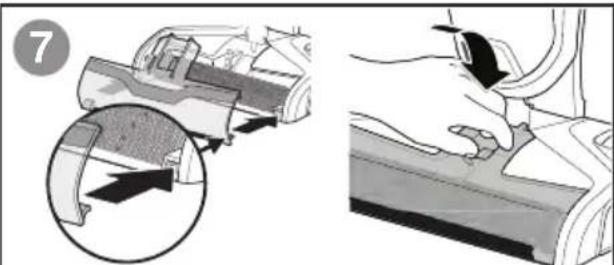
Diagram illustrating a mechanical device with an arrow indicating movement, alongside a close-up of the component being held by a hand.Replace the brush roll cover by first lining up both brush roll cover tabs with the edges of the nozzle. Then press the brush roll cover back into place until you hear a click.

WARNING
To reduce the risk of fire, electric shock or injury, turn power OFF and disconnect plug from electrical outlet before performing maintenance or troubleshooting.
| Problem | Possible causes | Remedies |
| Reduced spray OR no spray | Solution tank may be empty. | Refill tank. |
| Solution tank may not be seated completely. | Turn power OFF / Remove and reseat tank. | |
| System isn't completely primed. | Hold trigger for 10 to 15 seconds. If no spray after 15 seconds, turn power OFF, unplug power cord, then plug back in. Turn power ON and repeat holding trigger for 10 seconds. | |
| Brush window is not latched in place. | Turn power OFF / Unplug floor washer and re-install brush window. | |
| Not holding trigger to spray solution. | Hold trigger continuously while using the floor washer. | |
| Spray tips on nozzle clogged. | Use a paper clip to clean the spray tips located underneath the brush roll window. | |
| Loss of suction power | Tanks may not be seated properly. | Turn Power OFF / Remove both tanks and reseat them so they fit properly. |
| Dirty tank has picked up maximum amount of dirty water and has reached full line. | Empty dirty tank and make sure to make slow cleaning passes back and forth while cleaning. | |
| Brush cover is not latched in place. | Turn Power OFF / Unplug floor washer and re-install brush cover. | |
| Debris channel in nozzle is clogged. | Clean the channel with a paper towel. | |
| Filter clogged by debris. | Remove debris clogging the filter screen and clean the filter. | |
| Brush roll is not turning | Brush roll is not installed properly. | Turn Power OFF / Unplug floor washer and follow instructions on page 12 for replacing brush roll. |
| Floor washer is standing upright. | Recline floor washer to make brush roll turn on. | |
| Obstruction has caused brush roll to stop. | Turn Power OFF / Unplug floor washer and remove brush window and brush roll cleaning hair and string off of brush ends. | |
| Floor washer won't turn on | Obstruction has caused brush roll to stop and shut down floor washer. | Unplug floor washer to reset the system. While the machine is unplugged, remove the brush cover and brush roll cleaning hair and string off of brush ends. |
| Handle not inserted properly into body of floor washer. | Remove the handle and re-insert into the body of the floor washer making sure to push down until you hear a "click." | |
| Brush roll is missing, misaligned or not a genuine Sanitaire replacement. | Make sure genuine Sanitaire brush roll is properly installed. | |
| Filter is missing, misaligned or not a genuine Sanitaire replacement. | Make sure genuine Sanitaire filter is properly installed. | |
| Dirty tank is full. | Empty tank. | |
| Filter is clogged. | Clean or replace filter. | |
| Floor washer is leaking | Cap of clean water tank is not closed properly. | Remove the clean water tank and re-apply the cap. |
| Floor washer is streaking | Too much water applied. | Go over area without spraying down water. |
| Previous floor care products used. | Contact product manufacturer regarding how to remove. | |
| Floor washer is not drying floor | Brush roll cover not on tight. | Remove brush roll cover and reattach making sure latch clicks in place. |
| Filter is clogged. | Remove filter and clean thoroughly. See EMPTY DIRTY WATER. | |
| Continuous use with solution trigger depressed. | Release solution trigger and use an additional forward and reverse stroke over area cleaned. |
WARRANTY
This warranty gives you specific legal rights, and you may also have other rights which may vary from state to state. If you need additional instruction regarding this warranty or have questions regarding what it may cover, please contact Sanitaire® Customer Service by E-mail, telephone or regular mail as described below.
Limited Two-Year Warranty
Subject to the *EXCEPTIONS AND EXCLUSIONS identified below, upon receipt of the product Sanitaire will repair or replace (with new, refurbished, lightly used, or remanufactured components or products), at Sanitaire's option, free of charge from the date of purchase by the original purchaser, for two years any defective or malfunctioning part.
See information below on "If your Sanitaire product should require service". This warranty does not apply to fans or routine maintenance components such as filters, belts or brushes. Damage or malfunction caused by negligence, abuse, neglect, unauthorized repair, or any other use not in accordance with the user guide is not covered.
Some states do not allow the exclusion or limitation of incidental or consequential damages, so the above limitation or exclusion may not apply to you.
\*EXCEPTIONS AND EXCLUSIONS FROM THE TERMS OF THE LIMITED WARRANTY
THIS WARRANTY IS EXCLUSIVE AND IN LIEU OF ANY OTHER WARRANTIES, EITHER ORAL OR WRITTEN. ANY IMPLIED WARRANTIES WHICH MAY ARISE BY OPERATION OF LAW, INCLUDING THE IMPLIED WARRANTIES OF MERCHANTABILITY AND FITNESS FOR A PARTICULAR PURPOSE, ARE LIMITED TO THE TWO-YEAR DURATION FROM THE DATE OF PURCHASE AS DESCRIBED ABOVE.
Some states do not allow limitations on how long an implied warranty last so the above limitation may not apply to you.
NOTE: Please keep your original sales receipt. It provides proof of date of purchase in the event of a warranty claim.
SERVICE INFORMATION
If your Sanitaire product should require service
You will find the nearest Sanitaire Authorized Service Center in your area online at sanitairecommercial.com under service locator or contact Sanitaire Customer Service.
If you need information about repairs or replacement parts, or if you have questions about your warranty, contact Sanitaire Customer Service.
Website:
natural_image
Black and white photo of a vacuum cleaner with handle and base (no visible text or symbols)natural_image
Diagram of a wall-mounted electrical connector connected to a cable (no text or symbols)CONTENIDO DE LA CAJA
ADVERTENCIA
natural_image
Line drawing of a vacuum cleaner (no text or symbols)Cuerpo del aparato
natural_image
Line drawing of a plunger tool (no text or symbols)natural_image
Coiled black cable with two connectors at ends (no text or symbols visible)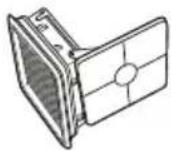
natural_image
Illustration of a hand using a handheld tool to lift a bottle, with an arrow indicating upward motion (no text or symbols present)natural_image
Illustration of hands holding a bottle with a scroll, no text or symbols presentnatural_image
Illustration of a hand holding a glass mug with liquid, no text or symbols presentnatural_image
Illustration of a hand using a drill bit to lift a cylindrical object, with a downward arrow indicating force (no text or symbols present)natural_image
Illustration of hands using a tool to cut a pipe or pipe with a flat blade (no text or symbols)natural_image
Medical illustration showing a catheter insertion into a cavity with an arrow indicating the insertion direction (no text or symbols present)natural_image
Technical line drawing of a mechanical component with sun symbol (no text or labels)natural_image
Illustration of a hand placing a small box into a plastic container on a side table (no text or symbols)natural_image
Illustration of a hand placing a component into a cylindrical container with a black arrow indicating direction (no text or symbols)text_image
12 j clic!natural_image
Line drawing of a hand inserting a device into a vacuum cleaner's air gap (no text or symbols)natural_image
Illustration of a hand pressing down on a mechanical component (no text or symbols visible)natural_image
Illustration of hands using a tool to adjust or install a textured material (no text or symbols visible)natural_image
Illustration of a hand using a tool to lift a cylindrical object, with a curved pipe and two side handles (no text or symbols)natural_image
Line drawing of a hand cleaning a vacuum cleaner's air gap (no text or symbols)natural_image
Illustration of a sun, a rolled-up box, and a cylindrical object (no text or symbols)natural_image
Technical illustration showing two views of a mechanical component with arrows indicating direction (no text or symbols present)natural_image
Illustration showing a car interior with a magnified inset of the engine compartment (no text or symbols)natural_image
Black and white photo of a vacuum cleaner with extended handle and base (no visible text or symbols)INSTRUCTIONS IMPORTANTES DE SÉCURITÉ
VEUILLEZ LIRE TOUTES LES INSTRUCTIONS AVANT D'UTILISER VOTRE MACHINE POUR LAVER LES PLANCHERS
natural_image
Simple line drawing of a wall-mounted electrical connector with wires extending from it (no text or symbols)CONTENU DE LA BOÎTE

AVERTISSEMENT
natural_image
Line drawing of a vacuum cleaner (no text or symbols)Boîtier
Poignée
natural_image
Coiled cable or hose with connectors, no visible text or symbols
natural_image
Illustration of a hand using a tool to lift a bottle, with an arrow indicating upward motion (no text or symbols present)natural_image
Illustration of hands holding a bottle with a lid, no text or symbols presentnatural_image
Illustration of a hand holding a glass jar with a lid, partially open to reveal liquid (no text or symbols)text_image
Diagram showing a hand pouring liquid into a bottle labeled 'PVC' with an inset magnified view of the device's internal structure.natural_image
Illustration of a hand using a tool to lift a cylindrical component, with a downward arrow indicating force or direction (no text or symbols present)natural_image
Illustration of a hand pressing down on a mechanical component with a black arrow indicating the step (no text or symbols present)natural_image
Line drawing of a hand inserting a device into a machine component (no text or symbols)natural_image
Illustration of a hand placing a component into a cylindrical container with an upward arrow (no text or symbols)natural_image
Illustration of a hand using a tool to clean or wash a water bottle (no text or symbols present)natural_image
Illustration of a hand placing a component into a small appliance with an arrow indicating motion (no text or symbols)natural_image
Illustration of hands using a tool to adjust or install a mechanical component, no text or symbols presentnatural_image
Illustration of hands using a tool to cut a pipe or pipe with a flat blade (no text or symbols)natural_image
Medical illustration showing a catheter insertion into a device with an arrow indicating the insertion direction (no text or symbols present)natural_image
Technical line drawing of a mechanical component with sun symbol (no text or labels)natural_image
Illustration of a hand placing a component into a small container with a downward arrow (no text or symbols)natural_image
Diagram of a hand pressing down on a mechanical component with a black arrow indicating force (no text or symbols present)text_image
15 secondsCycle de lavage de 15 secondes
text_image
45 secondsnatural_image
Line drawing of a hand inserting a small object into a device component (no text or symbols)natural_image
Illustration of a hand pressing down on a device component (no text or symbols visible)natural_image
Close-up of hands installing a component with a black arrow pointing to it (no text or symbols visible)natural_image
Illustration of a hand holding a pipe with a curved pipe above, alongside a cylindrical object (no text or symbols)natural_image
Line drawing of a hand cleaning a vacuum cleaner's seat (no text or symbols)natural_image
Illustration of a sun and two cylindrical objects, one with textured surface and the other with a flat blade (no text or symbols)natural_image
Technical diagram showing two views of a mechanical component with arrows indicating direction (no text or symbols present)natural_image
Illustration showing a mechanical component being inserted into a car, with magnified detail view (no text or symbols)\*EXCEPTIONS ET EXCLUSIONS DES CONDITIONS DE LA GARANTIE LIMITÉE
CETTE GARANTIE EST EXCLUSIVE ET REMPLACE TOUTE AUTRE GARANTIE, VERBALE OU ÉCRITE. TOUTES LES GARANTIES IMPLICITES POUVANT RÉSULTER DE L'APPLICATION D'UNE LOI, Y COMPRIS LES GARANTIES IMPLICITES DE QUALITÉ MARCHANDE ET DE CONVENANCE À UN USAGE PARTICULIER, SONT LIMITÉES À LA DURÉE DE DEUX ANS À COMPTER DE LA DATE D'ACHAT, TEL QUE STIPULÉ CI-DESS.