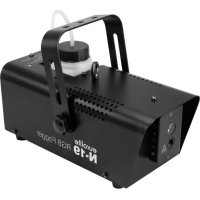
N110 - Effect machine Eurolite - Free user manual and instructions
Find the device manual for free N110 Eurolite in PDF.

| Product Type | Smoke Machine |
| Brand | Eurolite |
| Model | N110 |
| Power Supply | 230 V / 50 Hz |
| Power Consumption | 1000 W |
| Emission Range | Approx. 5 m |
| Heating Time | Approx. 7 minutes |
| Liquid Consumption | Approx. 75 ml/min |
| Emission Volume | Approx. 400 m³/min |
| Tank Capacity | 1.5 liters |
| Dimensions (L x W x H) | 435 x 270 x 280 mm |
| Weight | 7 kg |
| Main Functions | Continuous or interval smoke emission, wired remote control included, electronic temperature control |
| Liquid Type | Water-based smoke fluid, recommended Eurolite |
| Maintenance and Cleaning | Regular cleaning of the heating element with a purge liquid, dusting with a non-linting damp cloth, replace the fuse with an identical model |
| Safety | Minimum distance of 50 cm from the nozzle, do not aim at people or flames, suspended installation with safety sling, protection against moisture, disconnect before maintenance |
| Installation | On flat surface or suspended with included mounting bracket, max tilt angle 15°, mounting height > 100 cm requires safety sling |
| Included Accessories | Start/interval remote control, mounting bracket, safety eyelet |
| Spare Parts and Repairability | User-replaceable fuse, original parts recommended, repairs by qualified personnel |
| General Information | Compliant with EN 60335-1, indoor use, store dry, do not use flammable liquids |
Frequently Asked Questions - N110 Eurolite
User questions about N110 Eurolite
0 question about this device. Answer the ones you know or ask your own.
Ask a new question about this device
Download the instructions for your Effect machine in PDF format for free! Find your manual N110 - Eurolite and take your electronic device back in hand. On this page are published all the documents necessary for the use of your device. N110 by Eurolite.
USER MANUAL N110 Eurolite
Safety instructions:
Caution! In dense, smoke-saturated surroundings, the oxygen portion is substantially reduced!
Smoke use only in well ventilated rooms!
The smoke density must be portioned in a way that the sight will always be above 5m - Danger of anxiety state due to missing orientation!
The residence time of persons in smoke-filled rooms with less than 15m of sight must never exceed 5 minutes.
Smoke-filled rooms must never be locked - Danger of panic among the locked persons!
Every smoke-filled room must be overseen by a skilled person.
Operating instructions:
This product is a smoke-fluid for creating show effects.
The smoke must only be used for a short period - never smoke permanently!
The use of smoke-fluid is only allowed for adults.
MULTI-LANGUAGE-INSTRUCTIONS
Inhaltsverzeichnis
Table of contents
Sommaire
Contenido
Deutsch
Installation 14
Connection with the mains 16
OPERATION 16
CLEANING AND MAINTENANCE 16
Cleaning the heating element 16
Replacing the fuse 17
TECHNICAL SPECIFICATIONS 17
Français
INTRODUCTION 18
INSTRUCTIONS DE SECURITE 18
EMPLOI SELON LES PRESCRIPIONS 19
DESCRIPTION DE L'APPAREIL 20
Features 20
Keep this device away from rain and moisture! Never open the housing!
For your own safety, please read this user manual carefully before you initially start-up.
Every person involved with the installation, operation and maintenance of this device has to:
- be qualified
- follow the instructions of this manual
INTRODUCTION
Thank you for having chosen a EUROLITE N-100 smoke-machine.
Unpack your smoke-machine.
Before you initially start-up, please make sure that there is no damage caused by transportation. Should there be any, consult your dealer and do not use the device.
SAFETY INSTRUCTIONS
CAUTION!
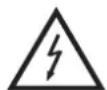
Be careful with your operations. With a dangerous voltage you can suffer a dangerous electric shock when touching the wires!
This device has left our premises in absolutely perfect condition. In order to maintain this condition and to ensure a safe operation, it is absolutely necessary for the user to follow the safety instructions and warning notes written in this user manual.

Important:
Damages caused by the disregard of this user manual are not subject to warranty. The dealer will not accept liability for any resulting defects or problems.
If the device has been exposed to drastic temperature fluctuation (e.g. after transportation), do not switch it on immediately. The arising condensation water might damage your device. Leave the device switched off until it has reached room temperature.
This device falls under protection-class I. The power plug must only be plugged into a protection class I outlet.
English
Always plug in the power plug least. Make sure that the power-switch is set to OFF position before you connect the device to the mains.
Never let the power-cord come into contact with other cables! Handle the power-cord and all connections with the mains with particular caution!
Make sure that the available voltage is not higher than stated on the rear panel.
Make sure that the power-cord is never crimped or damaged by sharp edges. Check the device and the power-cord from time to time.
CAUTION! Before filling the machine disconnect from mains.
Never drink fluid or use it on the inside or outside of a human body. If fluid gets in contact with skin or eyes, rinse thoroughly with water. If it is necessary call a doctor immediately!
DANGER OF EXPLOSION! Never add flammable liquids of any kind to the fog liquid.
Keep device upright.
Never aim the output nozzle directly at people or at open flames.
DANGER OF BURNING! Keep minimum distance of 50 cm to nozzle!
For overhead use (mounting height >100cm ), always fix the fixture with an appropriate safety-rope.
Always disconnect from the mains, when the device is not in use or before cleaning it. Only handle the power-cord by the plug. Never pull out the plug by tugging the power-cord.
Unnused machines must be disconnected from the mains. If the power plug or the power switch is not accessible, the device must be disconnected via the mains.
Keep away children and amateurs!
Never leave this device running unattended.
OPERATING DETERMINATIONS
This device is a smoke-machine for creating a thick smoke made of a special smoke fluid. This product is only allowed to be operated with an alternating voltage of 230V , 50Hz and was designed for indoor use only.
Do not shake the device. Avoid brute force when installing or operating the device.
When choosing the installation-spot, please make sure that the device is not exposed to extreme heat, moisture or dust. There should not be any cables lying around. You endanger your own and the safety of others!
Before filling the device disconnect from mains. Never fill in any hot liquids.
Only use high-quality, water-based smoke fluid recommended by the manufacturer. Other smoke fluids may cause clogging.
Always make sure there is sufficient smoke fluid in the fluid tank. Operating this smoke-machine without smoke fluid will cause damage to the pump as well as over-heating of the heater.
Operate the device only after having familiarized with its functions. Do not permit operation by persons not qualified for operating the device. Most damages are the result of unprofessional operation!
Always store the device dry!
English
Always drain the tank and please use the original packaging if the device is to be transported.
Please consider that unauthorized modifications on the device are forbidden due to safety reasons!
Never remove the serial barcode from the device as this would make the guarantee void.
If this device will be operated in any way different to the one described in this manual, the product may suffer damages and the guarantee becomes void. Furthermore, any other operation may lead to dangers like short-circuit, burns, electric shock, etc.
DESCRIPTION OF THE DEVICE
Features
Powerful smoke-machine
Ideal for small to medium-sized discotheques or small stages • On/Off remote-control included • With mounting-bracket for hanging installation • Economic temperature-control of the heating element • Wide range of accessories available
Overview
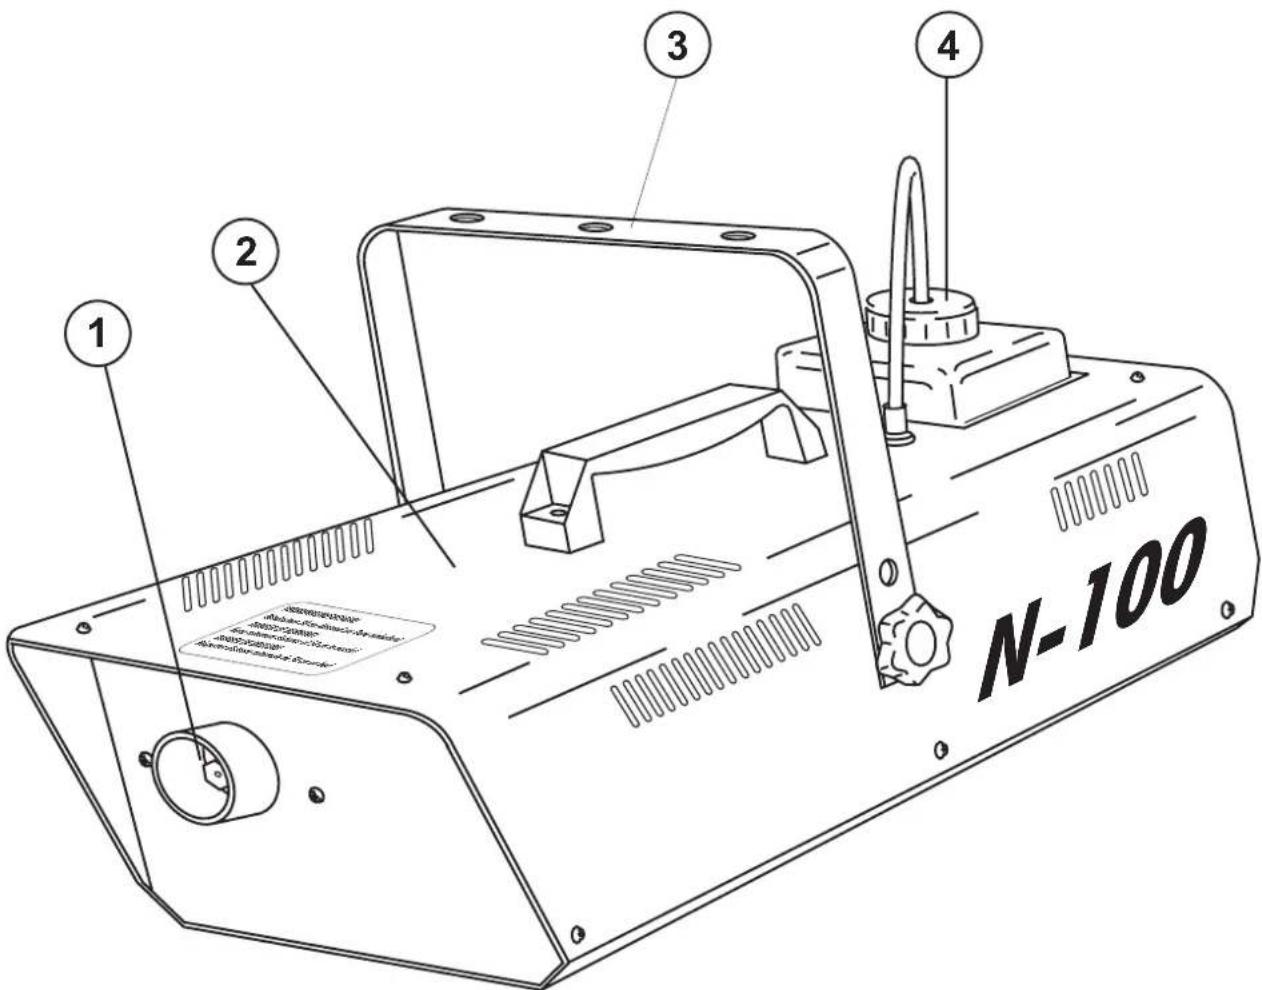
(1) Escape nozzle
(2) Housing
(3) Mounting bracket
(4) Fluid tank
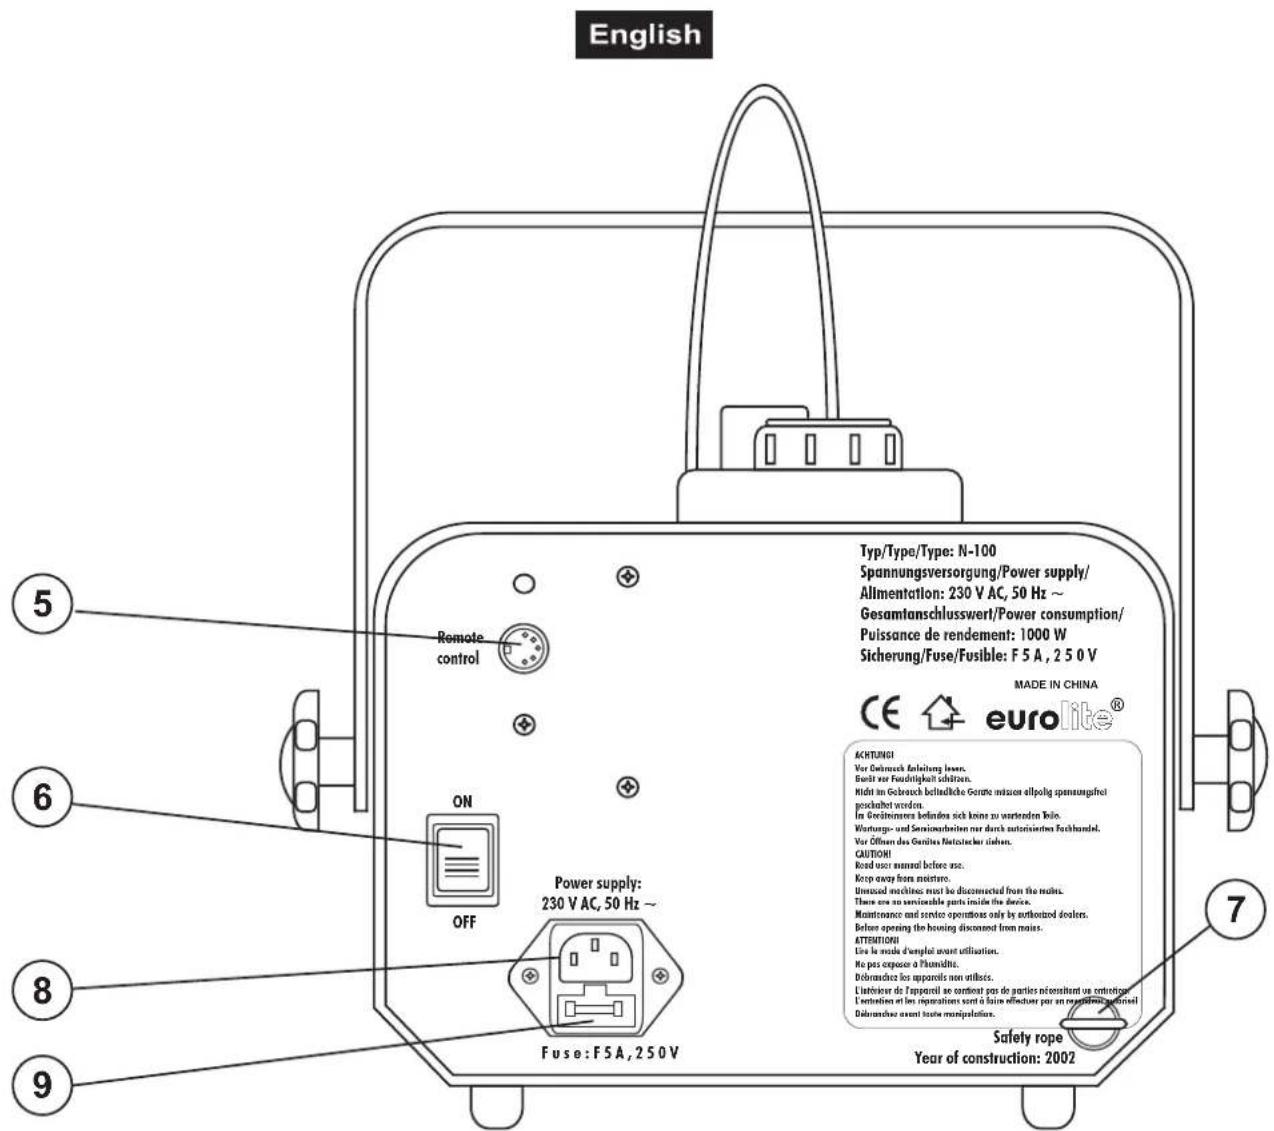
(5) Remote control-socket
(6) Power switch
(7) Attachment eyelet
(8) Power supply
(9) Fuseholder
STARTING OPERATION
Install the device on a plane surface.
The fluid tank of the device needs to be filled with smoke fluid before starting up operation and always disconnected from the mains as fluid could be spilled.
Only use quality smoke fluids available at your dealer. We recommend high-quality Eurolite smoke fluids (e.g. Eurolite Smoke Fluid "P" professional, 5 l) with TUV-certificate. You must not use substances that are classified as "dangerous working material" or "inflammable fluids".
If fluid should get into the interior of the device, disconnect from mains immediately and consult a technician.
Installation
Install the device in a well-ventilated area. The operation in an unsufficiently ventilated room can lead to a condensation of the smoke fluid. The resulting slippery surface can cause accidents. Keep a minimum distance of 20 cm around and above the device.
English
Furthermore do not orientate the escape nozzle directly in the direction of the audience's eyes. In order to create a good effect, there should be a distance between the device and the audience of at least 1.5m
Only install the smoke-machine on scratch resistant and water resistant surfaces.
Please make sure that the inclination angle does not exceed 15^ .
This device is constructed for a standing or hanging installation. If the device is to be installed overhead, the following safety instructions are binding:
Please consider the EN 60335-1:1996 and the respective national norms during the installation! The installation must only be carried out by an authorized dealer!
The installation of the device has to be built and constructed in a way that it can hold 10 times the weight for 1 hour without any harming deformation.
The installation must always be secured with a secondary safety attachment, e.g. an appropriate catch net. This secondary safety attachment must be constructed in a way that no part of the installation can fall down if the main attachment fails.
When rigging, derigging or servicing the device staying in the area below the installation place, on bridges, under high working places and other endangered areas is forbidden.
The operator has to make sure that safety-relating and machine-technical installations are approved by an expert before taking into operation for the first time and after changes before taking into operation another time.
The operator has to make sure that safety-relating and machine-technical installations are approved by an expert after every four year in the course of an acceptance test.
The operator has to make sure that safety-relating and machine-technical installations are approved by a skilled person once a year.
Procedure:
The device should be installed outside areas where persons may walk by or be seated.
IMPORTANT! OVERHEAD RIGGING REQUIRES EXTENSIVE EXPERIENCE, including (but not limited to) calculating working load limits, installation material being used, and periodic safety inspection of all installation material and the device. If you lack these qualifications, do not attempt the installation yourself, but instead use a professional structural rigger. Improper installation can result in bodily injury and or damage to property.
The device has to be installed out of the reach of people.
Caution: Devices in overhead installations may cause severe injuries when crashing down! If you have doubts concerning the safety of a possible installation, do NOT install the device!
Before rigging make sure that the installation area can hold a minimum point load of 10 times the device's weight.
Mount the device with the bracket to your trussing system using an appropriate clamp. The hole in the mounting bracket has a diameter of 10mm .
For overhead use, always install a safety-rope that can hold at least 12 times the weight of the fixture. You must only use safety-ropes with screw-on carabines. Pull the safety-rope through the attachment eyelet on the rear panel of the device and over the trussing system or a safe fixation spot. Insert the end in the carabine and tighten the safety screw.
Adjust the desired inclination-angle via the mounting-bracket and tighten the fixation screws.
DANGER TO LIFE!
Before taking into operation for the first time, the installation has to be approved by an expert!
Connection with the mains
Connect the device to the mains with the power-plug.
The occupation of the connection-cables is as follows:
| Cable Pin International | |
| Brown Live L | |
| Blue Neutral N | |
| Yellow/Green Earth |
The earth has to be connected!
OPERATION
Switch the device on via the power switch. Connect the remote control with the Remote Control-socket.
After a certain warm-up time, the device is ready to operate. Then the stand-by lamp of the remote control lights up. By operating the smoke switch on the remote control the smoke emission starts. It may happen that the stand-by lamp turns off and the smoke emission stops. In this case the device is heating up again and will be ready to operate in approx. 1-2 min. This process guarantees an appropriate vaporization temperature and the best smoke emission possible. The temperature is regulated by a high quality thermostat.
CAUTION: The escape nozzle will heat up during operation. Therefore do not touch the nozzle until it has cooled down completely.
CLEANING AND MAINTENANCE
DANGER TO LIFE!
Disconnect from mains before starting maintenance operation!
We recommend a frequent cleaning of the device. Please use a soft lint-free and moistened cloth. Never use alcohol or solvents!
Clean the escape nozzle frequently from smoke fluid residues.
Cleaning the heating element
The heating element should regularly be cleaned every 30 operational hours in order to avoid clogging. Use smoke machine cleaner available at your dealer.
Procedure:
Fill cleaner into empty tank. Run the machine several times in a well-ventilated room only. The number of repetitions depends on the pollution level of the vaporizing elements. After use clean all remaining cleaner and rinse the tank thoroughly.
The EUROLITE smoke fluids we recommend are non-hazardous to the environment and can be disposed of via the sewage system.
There are no servicable parts inside the device except for the fuse. Maintenance and service operations are only to be carried out by authorized dealers.
English
There are no servicable parts inside the device except for the fuse. Maintenance and service operations are only to be carried out by authorized dealers.
Replacing the fuse
If the fine-wire fuse of the device fuses, only replace the fuse by a fuse of same type and rating.
Before replacing the fuse, unplug mains lead.
Procedure:
Step 1: Open the fuseholder on the rearpanel with a fitting screwdriver.
Step 2: Remove the old fuse from the fuseholder.
Step 3: Install the new fuse in the fuseholder.
Step 4: Replace the fuseholder in the housing.
Should you need any spare parts, please use genuine parts.
If the power supply cable of this device will be damaged, it has to be replaced by a special power supply cable available at your dealer.
If defective, please dispose of the unusable device in accordance with the current legal regulations.
Should you have further questions, please contact your dealer.
TECHNICAL SPECIFICATIONS
| Power supply: 230 V/50 Hz |
| Power consumption: 1000 W |
| Smoke-output: approx. 5 m |
| Warm-up time: approx. 7 min. |
| Fluid consumption: approx. 75 ml/min. |
| Output volume: approx. 400 m³/min. |
| Tank capacity: 1.5 l |
| Dimensions (LxWxH): 435 x 270 x 280 mm |
| Weight: 7 kg |
Please note: Every information is subject to change without prior notice. 03/02 ©