TWO30YS - Oven THERMADOR - Free user manual and instructions
Find the device manual for free TWO30YS THERMADOR in PDF.

User questions about TWO30YS THERMADOR
0 question about this device. Answer the ones you know or ask your own.
Ask a new question about this device
Download the instructions for your Oven in PDF format for free! Find your manual TWO30YS - THERMADOR and take your electronic device back in hand. On this page are published all the documents necessary for the use of your device. TWO30YS by THERMADOR.
USER MANUAL TWO30YS THERMADOR
Side Trim Kit for Side-by-side Installation of Thermador® Wall Ovens
TWO30YS

natural_image
Plated dish of cooked meat with garnishes, accompanied by asparagus and a wine glass on a wooden table (no text or symbols visible)THERMADOR.COM
Table of CONTENTS
Safety Definitions 3
IMPORTANT SAFETY INSTRUCTIONS 4
Appliance Handling Safety 4
Electric Safety 4
Proposition 65 Warning 4
Preparation 5
Before you Begin 5
Installation Instructions 5
Attaching the Rating Label 7
Installing the Ovens 7
THERMADOR® Support 7
Service 7
Parts and Accessories 7
This THERMADOR Appliance is made by
BSH Home Appliances Corporation
1901 Main Street, Suite 600
Irvine, CA 92614
Questions?
1-800-735-4328
www.thermador.com
We look forward to hearing from you!
Safety Definitions
WARNING
This indicates that death or serious injuries may occur as a result of non-observance of this warning.
CAUTION
This indicates that minor or moderate injuries may occur as a result of non-observance of this warning.
NOTICE: This indicates that damage to the appliance or property may occur as a result of non-compliance with this advisory.
Note: This alerts you to important information and/or tips.
IMPORTANT SAFETY INSTRUCTIONS READ AND SAVE THESE INSTRUCTIONS
IMPORTANT: SAVE THESE INSTRUCTIONS FOR THE LOCAL ELECTRICAL INSPECTOR'S USE.
INSTALLER: LEAVE THESE INSTALLATION INSTRUCTIONS WITH THE UNIT FOR THE OWNER.
OWNER: PLEASE RETAIN THESE INSTRUCTIONS FOR FUTURE REFERENCE.
WARNING
If the information in this manual is not followed exactly, fire or shock may result causing property damage or personal injury.
WARNING
Do not repair, replace or remove any part of the appliance unless specifically recommended in the manuals. Improper installation, service or maintenance can cause injury or property damage. Refer to this manual for guidance. All other servicing should be done by an authorized servicer.
Appliance Handling Safety
Do not lift appliance by door handle. Remove the door for easier handling and installation. See instructions in Use and Care Manual.
Unit is heavy. It is recommended that at least two people lift single ovens.

Hidden surfaces may have sharp edges. Use caution when reaching behind or under appliance.
Electric Safety
Before installing, turn power OFF at the service panel. Lock service panel to prevent power from being turned ON accidentally.
Proposition 65 Warning:
This product may contain a chemical known to the State of California, which can cause cancer or reproductive harm. Therefore, the packaging of your product may bear the following label as required by California:
STATE OF CALIFORNIA PROPOSITION 65 WARNING:
WARNING
Cancer and Reproductive Harm - www.P65Warnings.ca.gov
Preparation
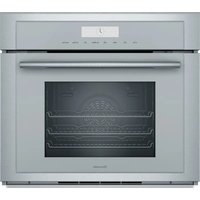
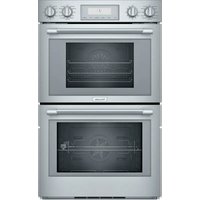
The TWO30YS side trim kit is compatible with certain Thermador Masterpiece® and Thermador Professional® Series conventional ovens when used in a side-by-side configuration. Please refer to the Combination Guide for a complete model list and more details.
Before you Begin
Note: It is recommended to change the side trims prior to installing the oven in the cabinetry in order to access the side trim screws.
If the appliances are already installed, turn the power OFF at the service panel. Remove the ovens from the cabinetry to enable access to side trim screws.
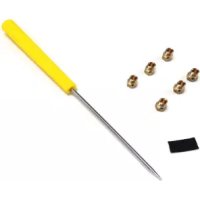
Tools and Parts Needed
• T-20 screwdriver
- Gloves
Installation Instructions
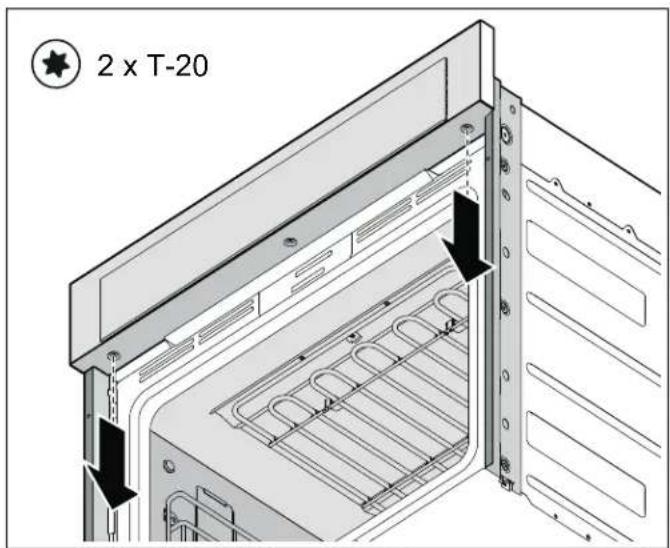
1. Removing the control panel
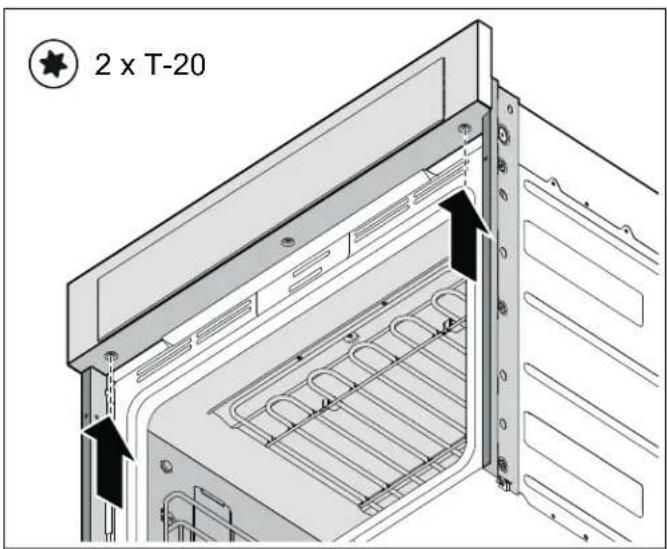
With a T-20 screwdriver, remove the two (2) silver control panel screws on the underside of the control panel. Please, do not remove the middle screw. It holds the control panel together.
text_image
2 x T-20Parts Included
natural_image
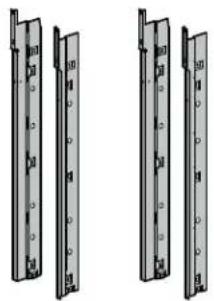
Two identical mechanical frame structures with mounting holes and mounting brackets (no text or symbols)- Firmly grasp both sides of the control panel. Rotate the panel up a few degrees and then lift to disengage the hooks from the side trims. Rest the control panel on top of the appliance. Take care not to disconnect or pinch any wires.
natural_image
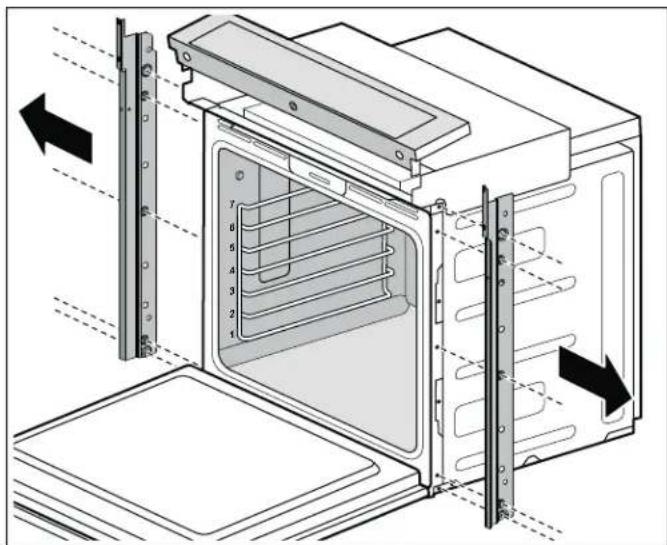
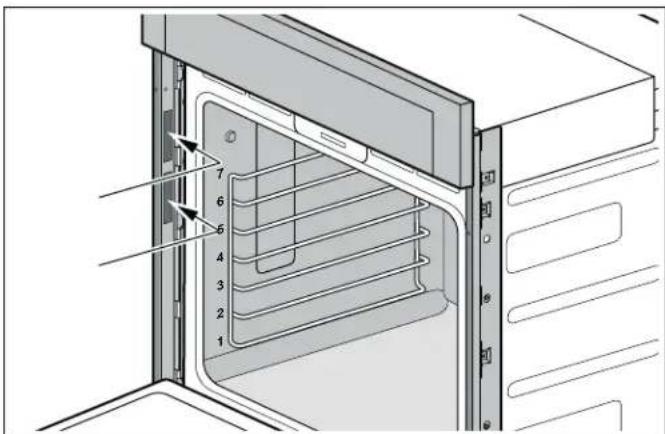
Technical diagram of an oven with numbered shelves and a black arrow indicating rotation (no text or symbols)3. Removing the side trims
With a T-20 screwdriver, remove the five (5) screws securing the side trim to each side of the oven; set the screws aside.
Note: On ovens with side-swing doors, pay special attention to the three (3) silver machine screws in the center of the trim, on the hinge-side of the oven. These screws must be re-installed in their original locations when the new trim is installed.
text_image
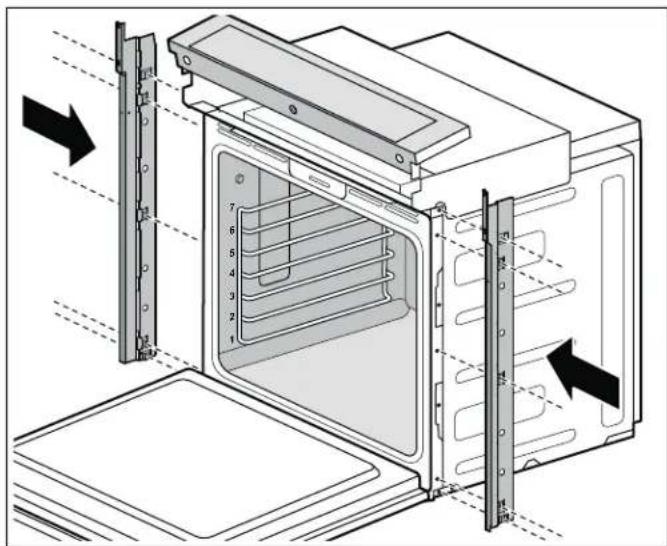
Technical diagram of an oven with numbered components and directional arrows indicating assembly or movement4. Installing the side trims
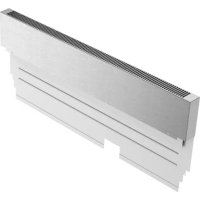
At the top of the replacement trims, the slots will face up and toward the front of the appliance. Install the new right and left side trims, securing them with the five (5) original screws previously removed from each side.
text_image
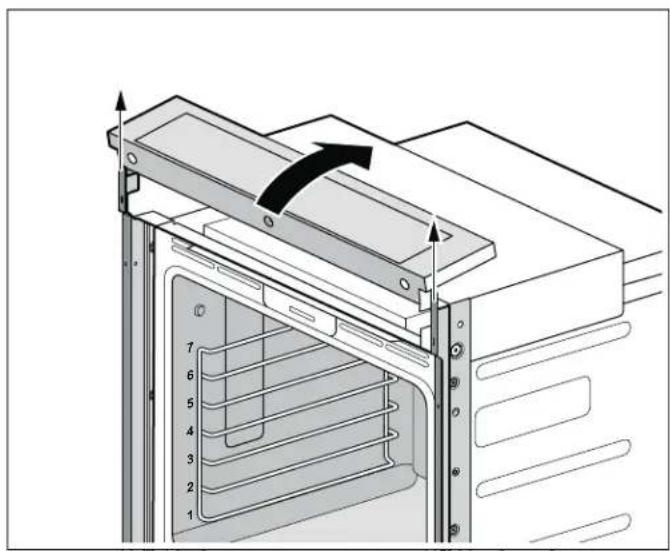
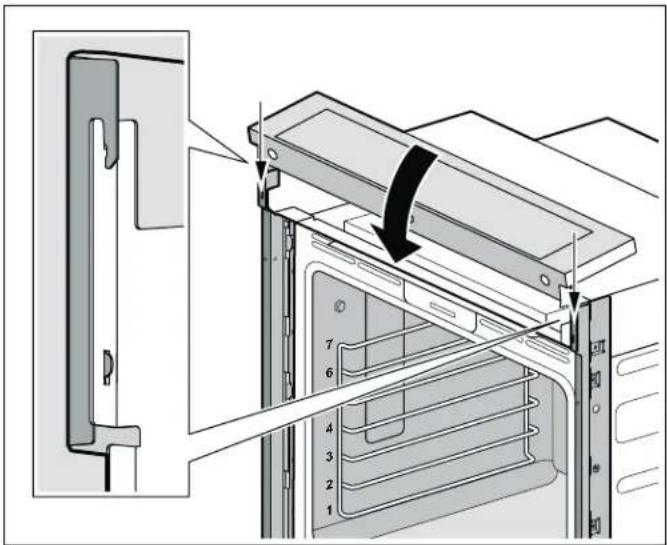
Technical diagram of an oven with numbered components and directional arrows indicating assembly or installation steps5. Reinstalling the control panel
Firmly grasp both sides of the control panel. Locate the hook features of the control panel onto the top of the side trims. Then rotate the control panel back into position. Take care not to disconnect or pinch any wires.
text_image
Technical diagram showing a door panel installation with numbered components and directional arrows indicating assembly or movement.- With a T-20 screwdriver, reinstall the two (2) silver control panel screws on the underside of the control panel.
text_image
2 x T-20Attaching the Rating Label
The model number and serial number or FD number are printed on the rating label. Refer to the rating label on the appliance when requesting service.
The rating label location varies based on the oven model.
- Detach the plastic bag from the top of the appliance housing and locate the rating label inside.
- Remove the adhesive backing. Attach the label to the correct trim piece on the inside face of the side trim piece.
Label location for single ovens with side hinge
The rating labels are opposite the door hinge. For left-hinge doors, the rating labels will be on the right side trim. For right-hinge doors, the rating labels will be on the left side trim.

text_image
Technical diagram of an oven with numbered components and directional arrows indicating assembly or component alignment.Label location for single ovens with bottom hinge
The rating labels are on the left side trim.
text_image
Technical diagram of an oven with numbered components and internal structure, likely for assembly or cleaning instructions.Installing the Ovens
Install the ovens according to the appliance's Installation Instructions.
THERMADOR® Support
Service
We realize that you have made a considerable investment in your kitchen. We are dedicated to supporting you and your appliance so that you have many years of creative cooking.
Please do not hesitate to contact our STAR® Customer Support Department if you have any questions or in the unlikely event that your THERMADOR® appliance needs service. Our service team is ready to assist you.
USA
800-735-4328
www.thermador.com/support
Canada
800-735-4328
www.thermador.ca
Parts and Accessories
Parts, filters, descalers, stainless steel cleaners and more can be purchased in the THERMADOR® eShop or by phone.
USA
http://store.thermador.com/us
Canada
- If you live in any of the Atlantic provinces, Ontario, or Québec contact:
Marcone
1.800.287.1627
- If you live in any of the Territories, Manitoba, Saskatchewan, Alberta, or British Columbia contact:
Reliable Parts
1.800.663.6060
Table de MATIÈRES
www.P65Warnings.ca.gov
Préparation
natural_image
Three identical mechanical frame diagrams with mounting holes, shown from different angles (no text or symbols)natural_image
Technical diagram of an oven with a black arrow indicating rotation or movement, showing internal structure and ventilation slots (no text or symbols)text_image
Technical diagram of an oven with numbered components and directional arrows indicating assembly or movement.text_image
Technical diagram of an oven with numbered compartments and directional arrows indicating assembly or movement.text_image
Technical diagram showing a door panel installation with numbered components and directional arrows indicating assembly or movement.1901 Main Street, Suite 600
Irvine, CA 92614
¿Preguntas?
1-800-735-4328
www.thermador.com