
K1500G - Drain cleaning machine RIDGID - Free user manual and instructions
Find the device manual for free K1500G RIDGID in PDF.
| Product Type | Gasoline Drain Cleaner |
| Brand | Ridgid |
| Model | K1500G |
| Power Source | 6 hp gasoline engine |
| Cleaning Capacity | Pipes 2" to 10" diameter, up to 300 feet (91 m) |
| Rotation Speeds | 1st: 333 rpm, 2nd: 425 rpm, 3rd: 500 rpm, reverse: 250 rpm |
| Transmission | 3 forward speeds + reverse, instant response clutch |
| Weight | 86 kg (190 lb) |
| Compatible Cables | C-10 (for 2"), C-11, C-12, C-14, C-15 (1/2" to 3/4" pitch) |
| Cleaning Tools | Augers, cutters (grease, sawtooth, helical), chains, scrapers, etc. |
| Clutch | Instant response, immediate stop when lever is released |
| Safety | Leather glove included, eye protection mandatory, rear guide hose, emergency stop by releasing clutch |
| Routine Maintenance | Lubricate clutch jaws after each use, rinse cables, grease mechanisms every 3 months |
| Adjustments | Clutch axial play adjustment, drive belt tension |
| Warranty | Ridgid Lifetime Warranty |
| Included Accessories | Glove A-1, fitting wrench A-12, rear guide hose (depending on version) |
| Uses | Cleaning of drain pipes, septic tanks, sewers (2" to 10") |
Frequently Asked Questions - K1500G RIDGID
User questions about K1500G RIDGID
0 question about this device. Answer the ones you know or ask your own.
Ask a new question about this device
Download the instructions for your Drain cleaning machine in PDF format for free! Find your manual K1500G - RIDGID and take your electronic device back in hand. On this page are published all the documents necessary for the use of your device. K1500G by RIDGID.
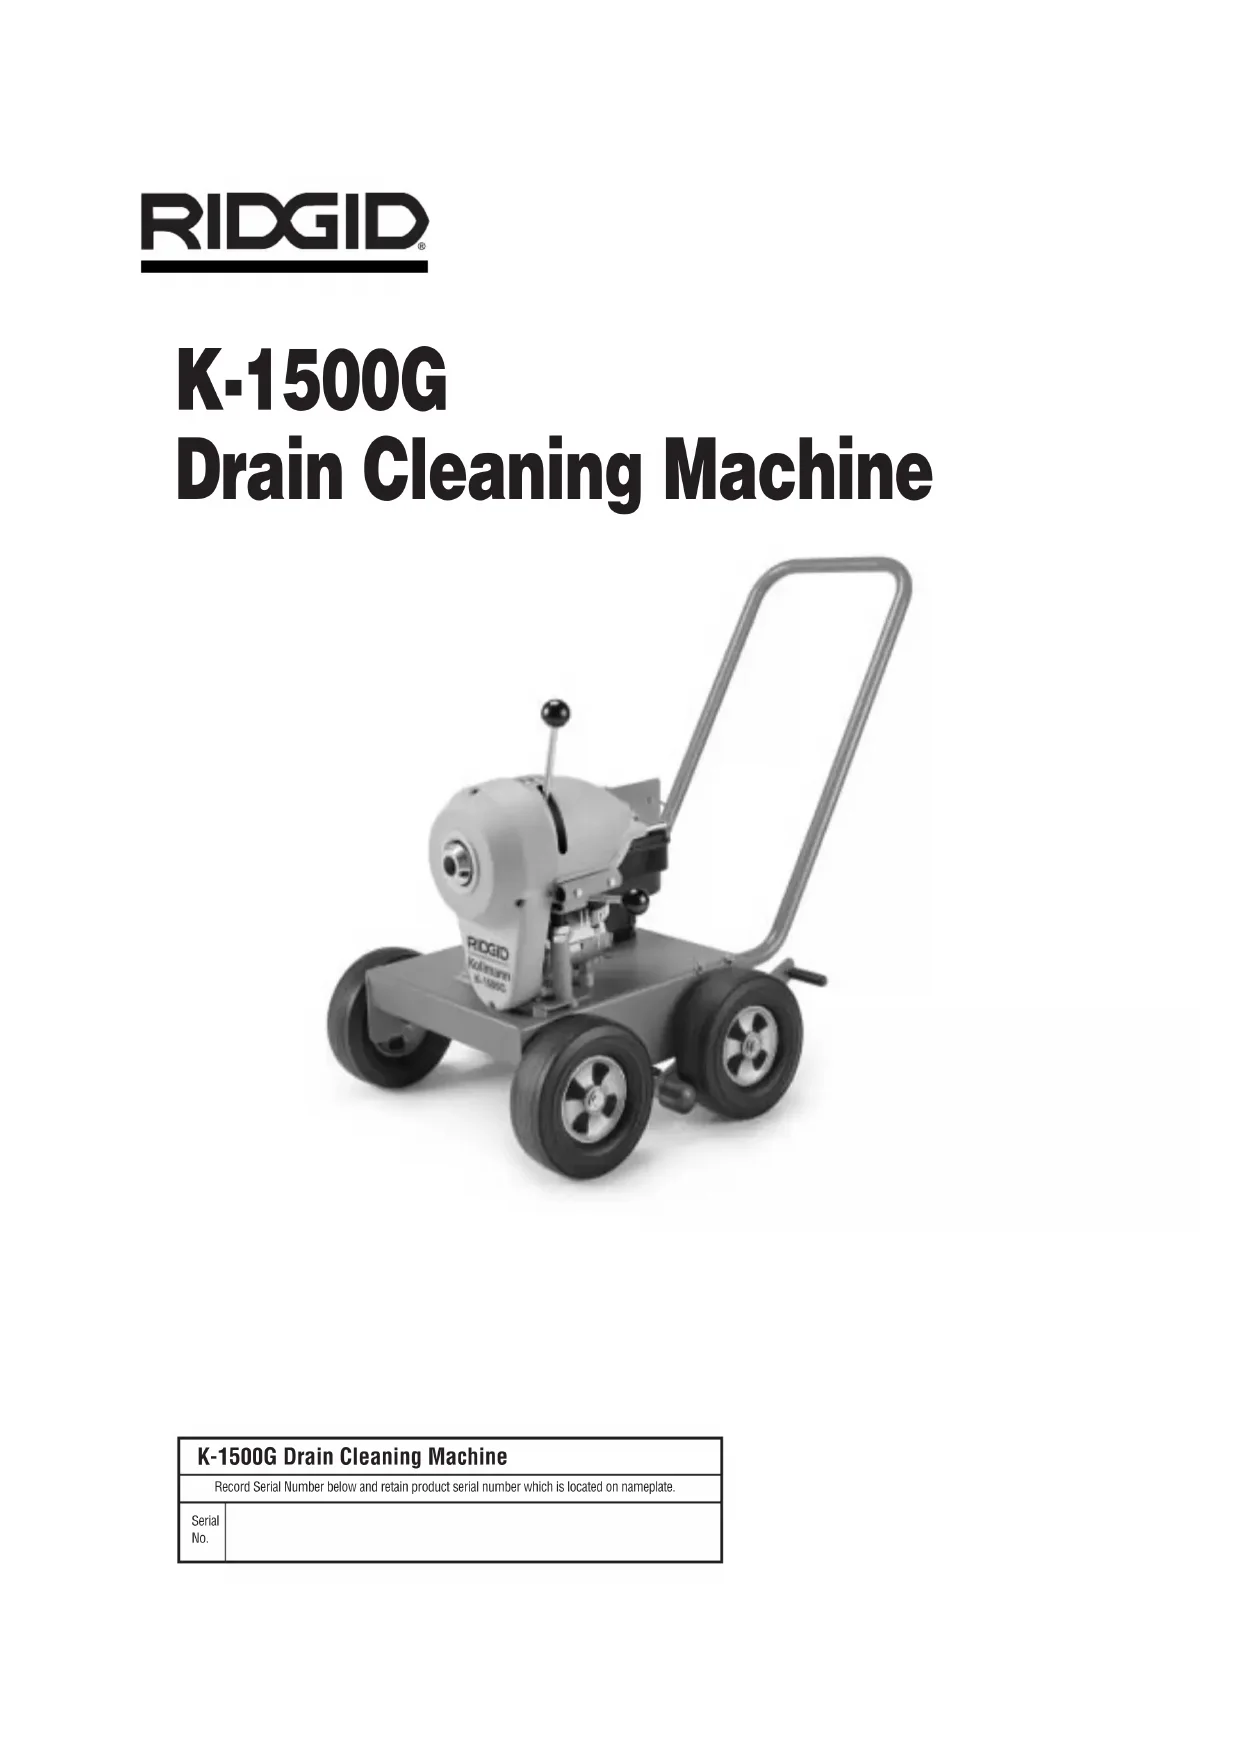
USER MANUAL K1500G RIDGID
Drain Cleaning Machine
WARNING!
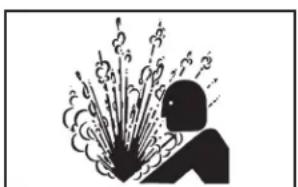
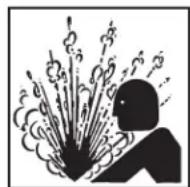
Read this Operator's Manual carefully before using this tool. Failure to understand and follow the contents of this manual may result in carbon monoxide poisoning, fire and/or serious personal injury.
RIDGID
Table of Contents
Recording Form for Machine Model and Serial Number 1
General Safety Information
Work Area Safety 2
Personal Safety 2
Tool Use and Care 2
Service 2
Specific Safety Information
Drain Cleaner Safety 2
Description, Specifications and Standard Equipment
Description 3
Specifications 3
Standard Equipment. 4
Cables and Tools 4
Machine Assembly
Instructions for Installing Handle 4
Instructions for Engine. 5
Machine Inspection 5
Machine and Work Area Set Up 5
Operation Instructions 6
Special Procedures
Reverse Operation 8
Cable Applications 8
Accessories
Cable Selection 9
Tool Selection. 9
Accessories 9
Maintenance Instructions
Lubrication 10
Cables 10
Clutch Jaw Replacement 10
Removing Clutch End Play. 10
V-Belt Adjustment. 11
Machine Storage 11
Service and Repair 11
Lifetime Warranty . Back Cover
K-1500G Drain Cleaning Machine
| K-1500G Drain Cleaning Machine | |
| Record Serial Number below and retain product serial number which is located on nameplate. | |
| Serial No. | |
General Safety Information
WARNING! Read and understand all instructions. Failure to follow all instructions listed below may result in carbon monoxide poisoning, fire and/or serious personal injury.
SAVE THESE INSTRUCTIONS!
Work Area Safety
- Keep your work area clean and well lit. Cluttered benches and dark areas invite accidents.
- Do not operate power tools in explosive atmospheres, such as in the presence of flammable liquids, gases, or dust. Tools create sparks which may ignite the dust or fumes.
- Keep bystanders, children, and visitors away while operating a tool. Distractions can cause you to lose control.
- Keep the engine at least one meter (3 feet) away from buildings and other equipment during operation. Do not place flammable objects close to engine. Procedures should be followed to prevent fire hazards and to provide adequate ventilation.
Personal Safety
- Stay alert, watch what you are doing and use common sense when operating a power tool. Do not use tool while tired or under the influence of drugs, alcohol, or medications. A moment of inattention while operating power tools may result in serious personal injury.
- Dress properly. Do not wear loose clothing or jewelry. Contain long hair. Keep your hair, clothing, and gloves away from moving parts. Loose clothes, jewelry, or long hair can be caught in moving parts.
- Remove adjusting keys or wrenches before turning the tool ON. A wrench or a key that is left attached to a rotating part of the tool may result in personal injury.
- Do not over-reach. Keep proper footing and balance at all times. Proper footing and balance enables better control of the tool in unexpected situations.
- Use safety equipment. Always wear eye protection. Dust mask, non-skid safety shoes, hard hat, or hearing protection must be used for appropriate conditions.
Tool Use and Care
-
Do not force tool. Use the correct tool for your application. The correct tool will do the job better and safer at the rate for which it is designed.
-
Store idle tools out of the reach of children and other untrained persons. Tools are dangerous in the hands of untrained users.
- Maintain tools with care. Keep cutting tools sharp and clean. Properly maintained tools with sharp cutting edges are less likely to bind and are easier to control.
- Check for misalignment or binding of moving parts, breakage of parts, and any other condition that may affect the tool's operation. If damaged, have the tool serviced before using. Many accidents are caused by poorly maintained tools.
- Use only accessories that are recommended by the manufacturer for your tool. Accessories that may be suitable for one tool may become hazardous when used on another tool.
- Disconnect the spark plug wire before making any adjustments or repairing tool. Such preventative measures reduce the risk of starting the tool accidentally.
- Keep handles dry and clean; free from oil and grease. Allows for better control of the tool.
Service
- Tool service must be performed only by qualified repair personnel. Service or maintenance performed by unqualified repair personnel could result in injury.
- When servicing a tool, use only identical replacement parts. Follow instructions in the Maintenance Section of this manual. Use of unauthorized parts or failure to follow maintenance instructions may create a risk of injury.
Specific Safety Information
WARNING
Read this operator's manual carefully before using the K-1500G Drain Cleaner. Failure to understand and follow the contents of this manual may result in carbon monoxide poisoning, fire and/or serious personal injury.
Call the Ridge Tool Company, Technical Service Department at (800) 519-3456 if you have any questions.
Machine Safety
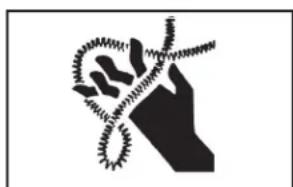
- Wear leather mitt provided with the machine. Never grasp a rotating cable with a rag or glove. Could become wrapped around the cable and cause serious injury.
- Do not overstress cables. Keep hand on the cable
for control when machine is running. Overstressing cables because of obstruction may cause twisting, kinking or breaking of the cable and result in serious injury.
- Position machine within three feet of inlet. Use front end guide hose when it is difficult to locate the machine near the access or clean-out. Greater distances can result in cable twisting or kinking.
- Do not operate machine in (REV) reverse. Operating machine in reverse can result in cable damage and is used only to back tool out of an obstruction.
- Operate machine from the side with the cable clutch. Allows for better control of the machine.
- Use rear guide hose. Prevents cable from whipping and picking up debris.
- Never operate machine with belt guard removed. Fingers can be caught between the belt and pulley.
- Be careful when cleaning drains where cleaning compounds have been used. Avoid direct contact with skin and eyes. Serious burns can result from some drain cleaning compounds.
- Machine is made to clean drain lines 2W to 10W diameter. Follow instructions in Operator's Manual on machine uses. Other uses may increase the risk of injury.
- Use caution when handling gasoline. Refuel in well-ventilated area. Do not overfill fuel tank and do not spill fuel. Make sure tank cap is closed properly. Gasoline is extremely flammable and is explosive under certain conditions.
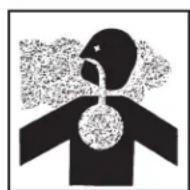
- Never run the engine in an enclosed or confined area. Exhaust contains poisonous carbon monoxide gas; exposure may cause loss of consciousness and may lead to death. Exhaust also contains chemicals that the State of California believes may cause cancer or reproductive harm.
- Be careful not to touch the muffler while it is hot. To avoid severe burns or fire hazards, let the engine cool before transporting or storing it indoors. The muffler becomes very hot during operation and remains hot for a while after stopping the engine.
Description, Specifications and Standard Equipment
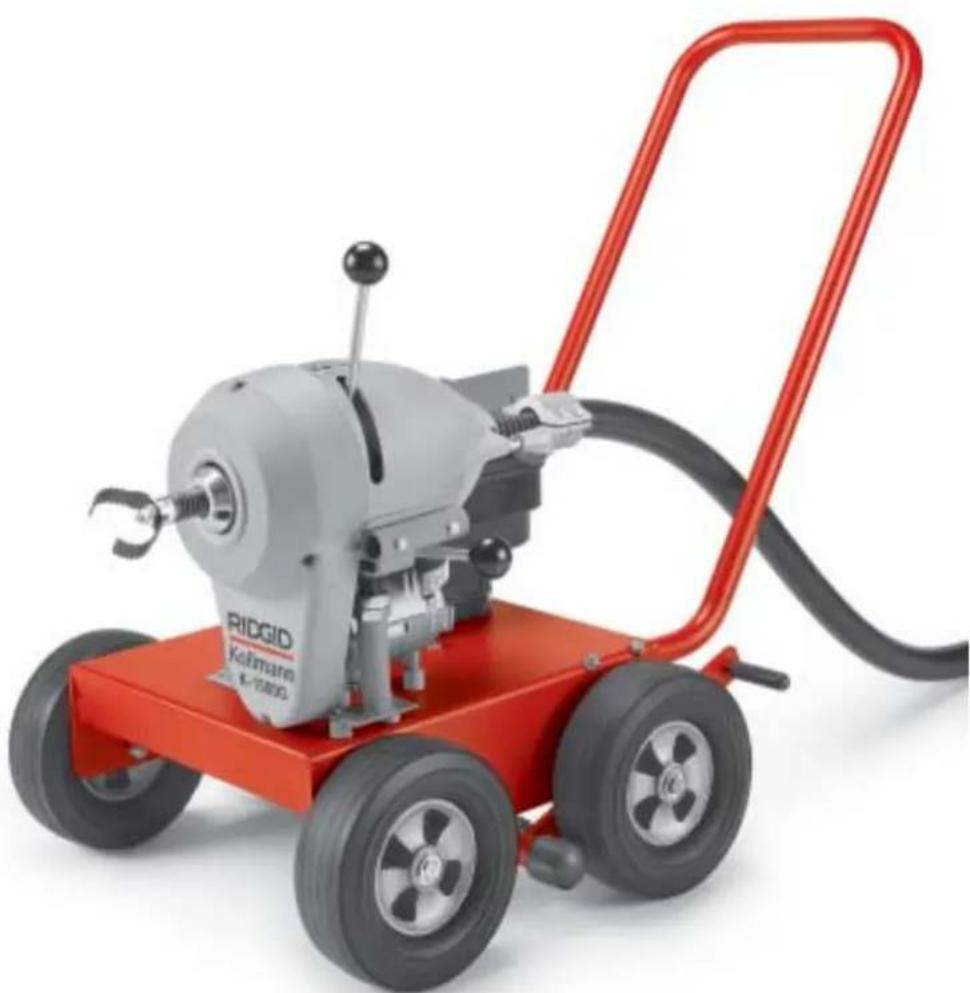
Description
The RIDGID K-1500G Drain Cleaning Machine is designed to clean 2w to 10w lines in diameter and 300 feet in length. Machine is driven by a 6 HP gasoline engine and has a transmission with three forward speeds and one reverse.
Machine is designed to use sectional-type cable that has a quick coupling system for disconnecting tools. The cable is manually fed in and out of the machine and the rotation of the cable is controlled by a clutch handle. The cable stops instantly when the clutch handle is released.
Specifications
Line Capacity. 2w through 10w lines, 300w in distance using _8 or 1^1 / 4W cable
Clutch............Instant Acting
Cable Speed
Transmission has three FORWARD speeds and one REVERSE. Use 3rd gear, 500 RPM for most drain cleaning applications. A slower cable speed, 2nd or 1st gear, may be more effective depending on the nature of the obstruction.
1st Gear. 333 RPM
2nd Gear 425 RPM
3rd Gear .500 RPM
REVERSE 250 RPM
Engine .6 HP Gasoline Engine with Reversible gear transmission and automatic throttle control
NOTE! Use only NO-LEAD gasoline in engine
Weight 190 Lbs.
Standard Equipment
Machine Options
| Catalog No. | Model No. | Description |
| 44587 | K-1500G | Machine Only with A-1 Glove, A-12 Coupling Pin Key and A-34-10 Rear Guide Hose |
| 48462 | K-1500G w/C-14 | Machine with Standard Equipment, includes: - Ten Sections Of C-14 Cable, Total 150 Feet - Three A-8 Cable Carriers - A-1 Left-Hand Mitt - A-12 Coupling Pin Key - A-34-12 Rear Guide Hose - A-2864 Hex Key - A-3516 Hex Key - A-3 Tool Box - T-2 Heavy-Duty Straight Auger - T-4 Heavy-Duty Funnel Auger - T-6 Retrieving Auger - T-8 Grease Cutter - T-13 Sawtooth Cutter - T-50 Sharktooth Cutter |
Cables and Leaders
| Catalog No. No. | Model Description | on |
| 92280 C | 11 15w | Standard All-Purpose Wind, 3/8W Pitch. Good for 4w Traps, 3w - 8w Lines. |
| 62285 C | 12 15w | Extra-Heavy-Duty Wind, 3/8W Pitch. 4w - 10w Long Runs, No 4w Traps. |
| 62295 C | 14 15w | Heavy-Duty Wind, 1/2w Pitch. 3w - 10w Lines Through Cleanout, No 4w Traps. |
| 62300 C | 15 15w | Extra-Flexible Wind, 7/8w Pitch. 3w - 6w Lines Good for Traps. |
| 63090 T | 27 1 | 1/4w x 25w Leader |
| 62275 C | 10 15w | Standard All-Purpose Wind, Requires A-368X Jaws and 7/8w Tools |
NOTE! C-10 (^7 / 8 Dia.) cable should be used to clean 2W diameter drains. Requires A-368X jawset and ^7 / _8W tools.
Tools for C-11, C-12, C-14 and C-15 Cables 1 / 4W
| Catalog No. | Model Description | |
| 62840 T-1 Straight | Auger | |
| 61800 T-2 Heavy-Duty Straight Auger | ||
| 63105 T-3 Funnel Auger | ||
| 61790 T-4 Heavy-Duty Funnel Auger | ||
| 63190 T-5 Straight | Retrieving Auger | |
| 63195 T-6 Funnel | Retrieving Auger | |
| 63200 T-7 Hook Auger | ||
| 63205 T-8 Grease | Cutter, 2 | 1/2N |
| 63210 T-9 Grease | Cutter, 3 | 1/2N |
| 62845 T-10 Grease | Cutter, 4 | 1/2N |
| 59480 T-11 "H" Cutter, 2 | 1/2N | |
| 59485 T-12 "H" Cutter, 3 | 1/2N | |
| 61970 T-13 Sawtooth Cutter, 2 | 1/2N | |
| 61975 T-14 Sawtooth Cutter, 3 | 1/2N | |
| 61770 T-15A Expanding Cutter, 4W | - 6w | |
| 61825 T-15B Expanding Cutter, 6W | - 8w | |
| 61960 T-16 Spiral Bar Cutter, 4W | ||
| 61850 T-17 Spiral Bar Cutter, 6W | ||
| 61855 T-18 Spiral Bar Cutter, 8W | ||
| 59625 T-21 Spiral Sawtooth Cutter, 2 | 1/2N | |
| 63075 T-22 Spiral Sawtooth Cutter, 3w | ||
| 63085 T-23 Spiral Sawtooth Cutter, 4w | ||
| 59765 T-24 4-Blade Cutter, 2 | 1/2N | |
| 59770 T-25 4-Blade Cutter, 3 | 1/2N | |
| 59775 T-26 4-Blade Cutter, 4 | 1/2N | |
| 59780 T-26A 4-Blade Cutter, 5 | 1/2N | |
| 98030 T-50 Three Blade, 3w< 4w< 5w | ||
| 98035 T-50-1 Sharktooth Cutter, 3w | ||
| 98040 T-50-2 Sharktooth Cutter, 4w | ||
| 98045 T-50-3 Sharktooth Cutter, 6w | ||
| 63110 T-31 Chain Knocker, 3w< 4w Pipe | ||
| 63115 T-32 Chain Knocker, 6w Pipe | ||
| 63120 T-33 Chain Knocker, 8w Pipe | ||
| 63145 T-38 Flue Brush, 1 | 1/2N | |
| 63150 T-39 Flue Brush, 2w | ||
| 63155 T-40 Flue Brush, 2 | 1/2N | |
| 63160 T-41 Flue Brush, 3w | ||
| 63165 T-42 Flue Brush, 3 | 1/2N | |
| 63170 T-43 Flue Brush, 4w | ||
| 63175 T-44 Flue Brush, 4 | 1/2N | |
| 63240 T-45 Flue Brush, 5w | ||
| 63180 T-46 Flue Brush, 5 | 1/2N | |
| 63185 T-47 Flue Brush, 6w | ||
NOTE! See Ridge Tool Catalog for complete listing of tools and accessories.
Machine Assembly
WARNING
To prevent serious injury, proper assembly of the K-1500G Drain Cleaning Machine is required. The following procedures should be followed:
Instructions for Installing Handle
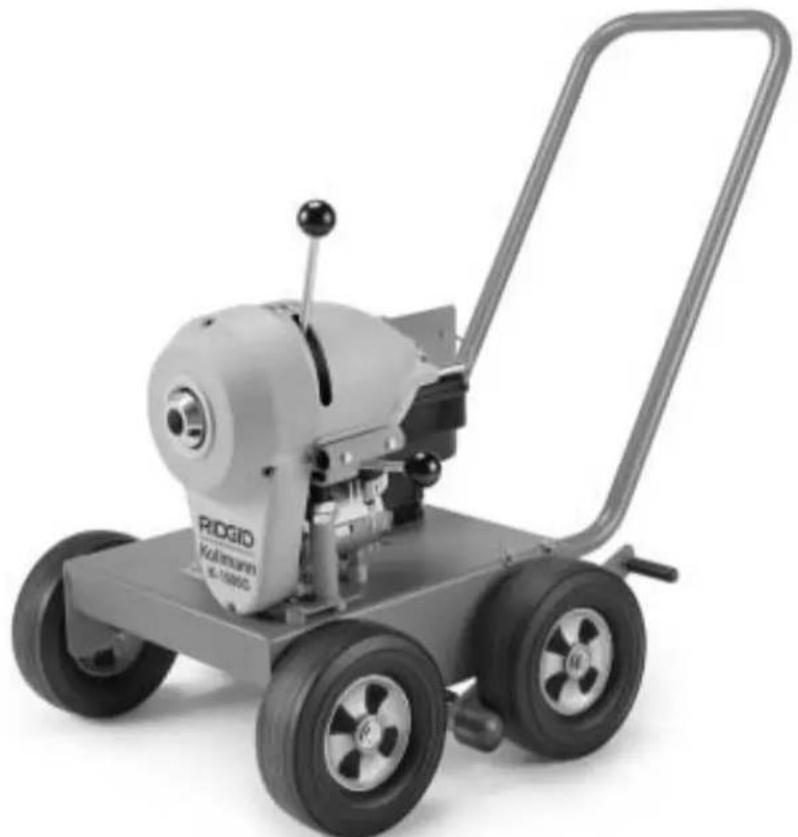
- Insert handle assembly into handle opening in base and attach by means of four 36 bolts provided (Figure 1).
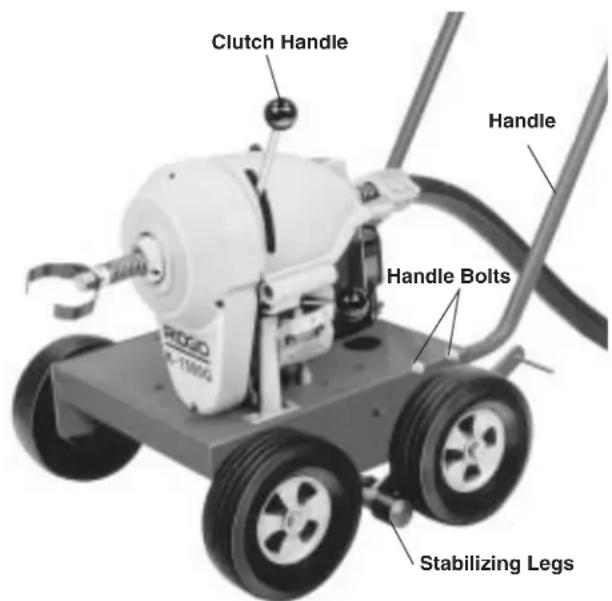
Figure 1 - K-1500G Drain Cleaner
Instructions for Engine
- Engine is shipped without oil. Fill with oil prior to starting engine (See enclosed Engine Owner's Manual for details).
CAUTION Failure to fill engine with oil will result in engine failure.
Machine Inspection
WARNING
To prevent serious injury, inspect your Drain Cleaning Machine. The following inspection procedures should be performed before each use.
- Check engine crankcase oil level. If low, add oil (see enclosed Engine Owner's Manual for details).
- Check engine fuel level. If low, add unleaded gasoline with a pump octane rating of 86 or higher. (See enclosed Engine Owner's Manual for details).
WARNING Use caution when handling gasoline. Refuel in well-ventilated area. Do not over fill fuel tank and do not spill fuel. Make sure tank cap is closed properly.
- Inspect the Drain Cleaning Machine for any broken, missing, misaligned or binding parts as well as any other conditions which may affect the safe and normal operation of the machine. If any of these conditions are present, do not use the Drain Cleaning Machine until any problem has been repaired.
- Lubricate the Drain Cleaning Machine, if necessary, according to the Maintenance Instructions.
- Use tools and accessories that are designed for your drain cleaner and meet the needs of your application. The correct tools and accessories allow you to do the job successfully and safely. Accessories suitable for use with other equipment may be hazardous when used with this drain cleaner.
- Clean any oil, grease or dirt from all equipment handles and controls. This reduces the risk of injury due to a tool or control slipping from your grip.
- Inspect the cutting edges of your tools. If necessary, have them sharpened or replaced prior to using the Drain Cleaning Machine. Dull or damaged cutting tools can lead to binding and cable breakage.
- Inspect cables and couplings for wear and damage. Cables should be replaced when they become severely worn or corroded. A worn cable can be identified when the outside coils become flat.
WARNING Worn or damaged cables can break causing serious injury.
Machine and Work Area Set-Up
WARNING
To prevent serious injury, proper set-up of the machine and work area is required. The following procedures should be following to set-up the machine.
-
Check work area for:
-
Adequate lighting.
- Flammable liquids, vapors or dust that may ignite.
- Adequate ventilation for engine exhaust.
WARNING Exhaust contains poisonous carbon monoxide gas. Exposure may cause loss of consciousness and may lead to death.
- Position the Drain Cleaning Machine within 3~V of sewer inlet.
WARNING Greater distance can result in cable twisting or kinking.
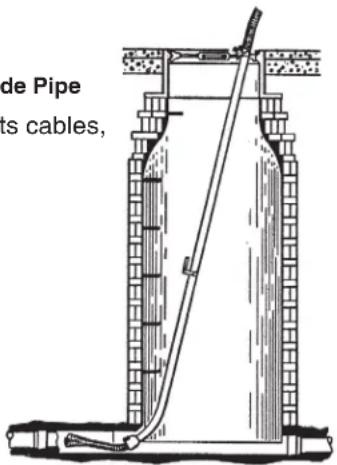
NOTE! A front guide hose A-20 is available for areas where the machine cannot be positioned within 3 feet of inlet. Manhole guide pipe A-17 supports cable when used in manholes.
- Engage stabilizer legs to prevent movement of the machine (Figure 1).
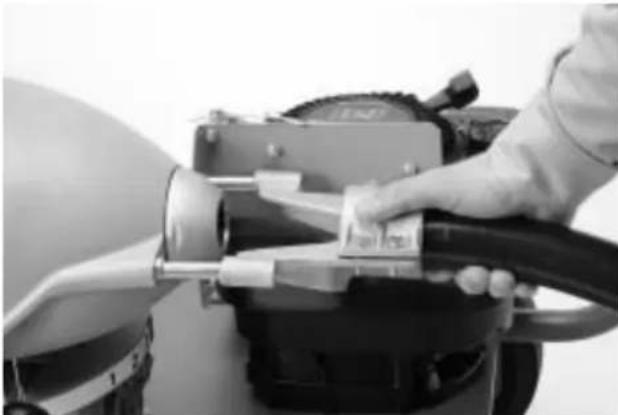
Figure 2 - Rear Hose Attachment
- Attach the rear guide hose by sliding guide hose adapter onto the guide hose pins (Figure 2).
WARNING Do not use machine without rear guide hose attached. Prevents cable whipping and possible entanglement.
- Insert first cable into front of machine (female end first) and push through guide hose until approximately one foot remains out the front of the machine (Figure 3).
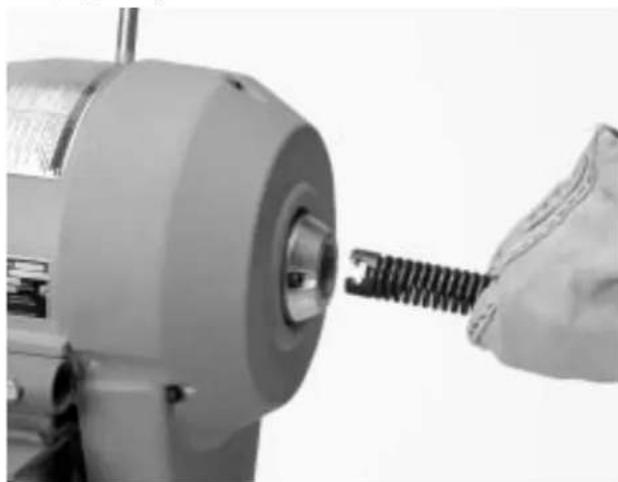
Figure 3 - Inserting Cable Into Front Of Machine
WARNING Never couple more than one cable at a time. Cable will extend behind rear guide tube.
6. Select and install the proper tool to the end of the cable. The T-Slot Coupler allows the tool to be snapped into the cable coupler (Figure 4). To remove tool, use the pin key to depress the plunger and slide the coupling apart.
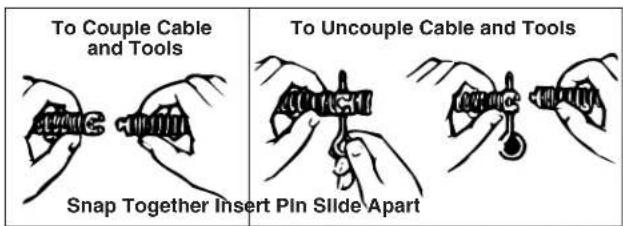
Figure 4 - Coupling and Uncoupling Tools and Cables
NOTE! Proper Tool Selection
A good rule of thumb is to use a tool at least 1w smaller than the line to be cleaned. The style of the tool is determined by the nature of the job and is left up to the operator.
Operating Instructions

Wear mitts with rivets provided with machine. Never grasp a rotating cable with a rag, cloth or leather glove that may become wrapped around the cable causing serious injury.
Always wear eye protection to protect your eyes against dirt and other foreign objects. Wear rubber soled, non-slip shoes.
Do not operate if clutch handle is damaged or does not function properly. Clutch is a safety feature designed to stop rotation of cable when released.
Never run engine in an enclosed or confined area.
CAUTION It is important to know approximate distance from inlet to main sewer or septic tank. Over-running cable too far into main sewer or septic tank can cause cables to knot up and prevent their return through small lines. If main is 12 inches or larger and standard 114 cable is being used, do not allow more than 10 to 15 feet of overrun. When working into a septic tank do not allow more than 3 to 5 feet overrun.
- Place transmission shift lever in N (Neutral) position.
-
Set choke control handle at CHOKE and turn engine over a few times with pull starter.
-
When engine "catches" set choke control handle at RUN and pull throttle control to desired speed.
- Assume the correct operating posture in order to maintain proper balance (Figure 5).
WARNING Should an unexpected situation arise, this posture provides you with the opportunity to keep control of the machine and cable.
- Be sure you can quickly release the clutch handle.
- Hand must be on the cable to control its twisting action when it hits an obstruction.
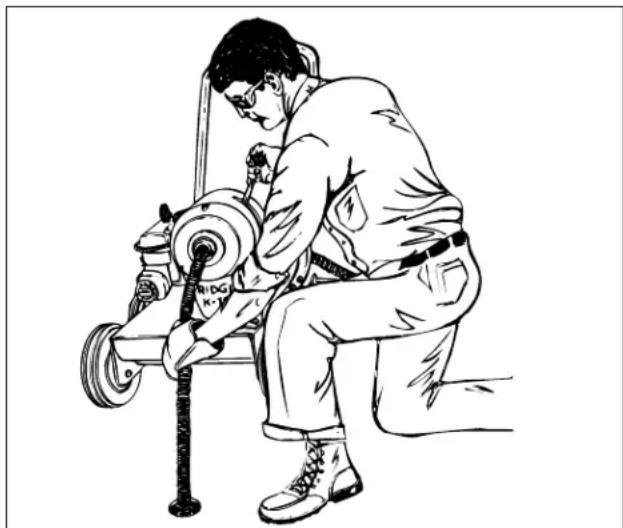
Figure 5 - Operating Drain Cleaning Machine
- Pull sufficient cable out of the machine to start tool and cable into the sewer inlet. Push cable into inlet as far as it will go.
- Pull enough extra cable through machine to form almost a half circle between machine and line opening.
- Hold cable loosely in mittened hand (left hand), shift transmission into 3rd forward gear position.
NOTE! The cable will not rotate.
8. With mitted hand on cable, push down on clutch handle with opposite hand to engage cable. Push down on top of the cable loop with a definite snap to advance the cable.
NOTE! A slow or gradual engaging of the clutch handle causes excessive wear of the jaw set. The clutch is instant-acting and returning clutch handle to its original position frees cable instantly.
9. As soon as excess cable has gone into line, release clutch handle and pull six to ten inches of cable out of machine with mitted hand.
- To add cable, the following procedure should be followed:
After reaching the end of each cable section, shift transmission to NEUTRAL.
- Secure the cable by looping it in the line (Figure 6). This procedure is especially useful when cleaning a line with a steep grade.
- W ith line secured, insert another section of cable in through the front of the machine (female end first) until approximately one foot remains out the front of the machine.
- Attach cable to cable in line and resume operation.
- Continue to feed the cable into the line until resistance or obstruction is encountered. This will become apparent to operator as it will be difficult to feed additional cable into line and/or the cable will have a tendency to twist sideways in operator's hands.
- If cable loads down in the obstruction, relieve load by pulling back on cable with short, quick jerks to free cutter. Slowly advance cable back into the obstruction. Repeat this process until the obstruction is clear. Remember, make sure the cutter is rotating at all times and never force the cable. At this point, progress depends upon the sharpness of the tool and nature of the obstruction.
WARNING
Do not allow tension to build up in the cable. This will happen if the cutting tool hits a snag and stops turning, but the motor and cable continue to rotate. Torque builds until the cable suddenly twists, potentially wrapping around your hand or arm. This can happen quickly and without warning, so proceed slowly and carefully as you feed the cable into the drain. Releasing clutch handle will stop the cable rotating and releases the torque. If tool gets hung up in an obstruction, refer to Reverse Operating Instructions in the "Special Procedures" section.
- Once obstruction is cleared, it is recommended that operator flush debris from line with running water. Repeat Step 11 several times if necessary for thorough cleaning job and then work cable through additional stoppages as required.
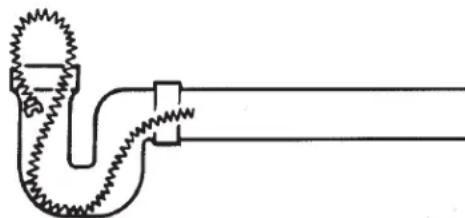
Figure 6 - Looping Cable In Line
-
To retrieve cable from drain line, the following procedure should be followed:
-
Leave in FOR (forward) gear.
- Push down on clutch handle to engage cable. With mitted hand pull cable out of line (if possible) or hold cable against edge of inlet to thread the cable out until loop forms in front of the machine.
NOTE! By holding the cable against the edge of the inlet, the rotation will rapidly "thread" the cable out of the line.
- When loop forms, release clutch handle and push excess cable back through machine. Disconnect one section at a time.
WARNING When disconnecting sections, remember to shift transmission to NEUTRAL.
- Once section of cable is removed, insert the secured cable in through the front of the machine and continue removing sections until tool on last section of cable is just inside sewer inlet.
WARNING Never retract tool from sewer inlet while cable is rotating. Tool can whip causing serious injury.
15. Shift transmission to NEUTRAL position.
16. Pull remaining cable and tool from sewer.
17. Turn off engine and disengage stabilizer legs.
CAUTION After using, thoroughly flush and drain cables, couplings and tools with water due to damaging effects of some drain cleaning compounds.
NOTE: When placing removed cables back into cable carrier, reconnect all cables. This assures easy removal at next job.
Special Procedures
Reverse Operation
Running machine in reverse will cause premature failure of cable. Use reverse only to free a tool or cable caught in an obstruction. If this should occur, immediately release clutch handle and let engine speed return to idle. Shift transmission to the REV (reverse) direction. Engage clutch handle only until cable or tool is free of obstruction. Once it is free, release clutch handle immediately. As soon as tool is free and engine speed has returned to idle, shift transmission to a FORWARD gear position.
WARNING Never operate this machine in REV (reverse) for any other purpose. Operating in reverse can damage a cable and cause serious injury.
Cable Applications
Standard Cable Standard 7 / 8W or 7 / 4W cable can be
used in straight lines from 3W through 6w and through fittings (Figure 7).
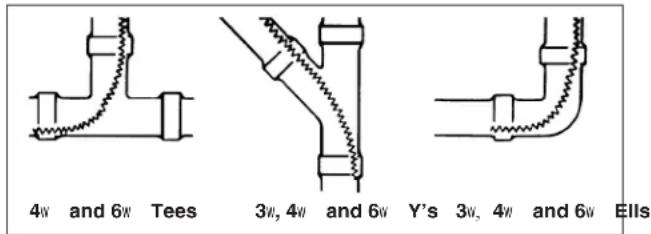
Figure 7 - Standard Cable Application
Heavy Duty Cable Where conditions allow, heavy-duty 1% cable, such as C-14, should be used for faster results and longer cable life. The heavy-duty cables work effectively in 4w through 8w straight lines (Figure 8).
NOTE! This type cable should not be used in areas where 4w "P" traps or 4w running traps are currently in use.

Figure 8 - Heavy Duty Cable Application
Faster Cleaning Obstructions of grease or fats can be cleaned faster and more effectively by bending the cable about 6w or 8w behind the cutter (Figure 9).
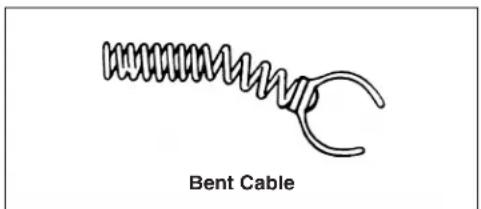
Figure 9 - Bending Cable for Faster Cleaning
Accessories
WARNING Only the following RIDGiD products have been designed to function with this Drain Cleaning Machine. Other accessories suitable for use with other tools may become hazardous when used on the machines. To prevent serious injury, use only the recommended accessories.
Cables and Leaders
| Catalog No. | Model No. | Description |
| 92280 | C-11 | 15V Standard All-Purpose Wind, 3/8N Pitch. Good for 4W Traps, 3W - 8W Lines. |
| 62285 C | 12 15V | Extra-Heavy-Duty Wind, 3/8N Pitch. 4W - 10W Long Runs, No 4W Traps. |
| 62295 | C-14 | 15V Heavy-Duty Wind, 1/2N Pitch. 3N - 10W Lines Through Cleanout, No 4W Traps. |
| 62300 | C-15 15V | Extra-Flexible Wind, 1/2N Pitch. 3N - 6W Lines Good for Traps. |
| 63090 | T-27 1 | 1/400 x 25V Leader |
| 62275 | C-10 | 15V Standard All-Purpose Wind, Requires A-368X Jaws and 7/8N Tools |
NOTE! C-10 (^7 / w Dia.) cable should be used to clean 2w diameter drains. Requires A-368X jawset and ^7 / w tools.
NOTE! A-17 Manhole Guide Pipe
Adjusts 7v to 12v , supports cables, when used in manholes.
Tools for C-11, C-12, C-14 and C-15 Cables 1/4w
| Catalog No. No. | Model Description | |
| 62840 T-1 Straight Auger | ||
| 61800 T-2 Heavy-Duty Straight Auger | ||
| 63105 T-3 Funnel Auger | ||
| 61790 T-4 Heavy-Duty Funnel Auger | ||
| 63190 T-5 Straight Retrieving Auger | ||
| 63195 T-6 Funnel Retrieving Auger | ||
| 63200 T-7 Hook Auger | ||
| 63205 T-8 Grease Cutter, 2 1/2N | ||
| 63210 T-9 Grease Cutter, 3 1/2N | ||
| 62845 T-10 Grease Cutter, 4 1/2N | ||
| 59480 T-11 "H" Cutter, 2 1/2W | ||
| 59485 T-12 "H" Cutter, 3 1/2W | ||
| 61970 T-13 Sawtooth Cutter, 2 1/2W | ||
| 61975 T-14 Sawtooth Cutter, 3 1/2W | ||
| 61770 T-15A Expanding Cutter, 4W - 6W | ||
| 61825 T-15B Expanding Cutter, 6W - 8W | ||
| 61960 T-16 Spiral Bar Cutter, 4W | ||
| 61850 T-17 Spiral Bar Cutter, 6W | ||
| 61855 T-18 Spiral Bar Cutter, 8W | ||
| 59625 T-21 Spiral Sawtooth Cutter, 2 1/2W | ||
| 63075 T-22 Spiral Sawtooth Cutter, 3W | ||
| 63085 T-23 Spiral Sawtooth Cutter, 4W | ||
| 59765 T-24 4-Blade Cutter, 2 1/2W | ||
| 59770 T-25 4-Blade Cutter, 3 1/W | ||
| 59775 T-26 4-Blade Cutter, 4 1/W | ||
| 59780 T-26A 4-Blade Cutter, 5 1/W | ||
| 98030 T-50 Three Blade, 3W < 4W < 5W | ||
| 98035 T-50-1 Sharktooth Cutter, 3W | ||
| 98040 T-50-2 Sharktooth Cutter, 4W | ||
| 98045 T-50-3 Sharktooth Cutter, 6W | ||
| 63110 T-31 Chain Knocker, 3W < 4W Pipe | ||
| 63115 T-32 Chain Knocker, 6W Pipe | ||
| 63120 T-33 Chain Knocker, 8W Pipe | ||
| 63145 T-38 Flue Brush, 1 1/W | ||
| 63150 T-39 Flue Brush, 2W | ||
| 63155 T-40 Flue Brush, 2 1/W | ||
| 63160 T-41 Flue Brush, 3W | ||
| 63165 T-42 Flue Brush, 3 1/W | ||
| 63170 T-43 Flue Brush, 4W | ||
| 63175 T-44 Flue Brush, 4 1/W | ||
| 63240 T-45 Flue Brush, 5W | ||
| 63180 T-46 Flue Brush, 5 1/W | ||
| 63185 T-47 Flue Brush, 6 | ||
NOTE! See Ridge Tool Catalog for complete listing of tools and accessories.
Accessories
| Catalog No. | Model Description | |
| 59470 A-8 Cable Carrier, 60" Capacity (1 "4"W) | ||
| 59210 A-10 Cable Carrier, 150" Capacity (1 "4"W) | ||
| 59415 A-34-10 10" Rear Guide Hose | ||
| 59395 A-34-12 12" Rear Guide Hose | ||
| 59400 A-34-16 16" Rear Guide Hose | ||
| 59300 A-20 8" Front Guide Hose Assembly | ||
| 59205 A-1 Left-Hand Mitt | ||
| 59295 A-2 Right-Hand Mitt | ||
| 59360 A-3 Tool Box | ||
| 59225 A-12 Coupling Pin Key | ||
| 59440 A-4 Trap Spoon (30") | ||
| 59240 A-17 Manhole Guide Pipe | ||
| 59320 A-369X 1 | 1/4"W Replacement Jawset | |
Maintenance Instructions
WARNING
Disconnect the spark plug wire before performing maintenance or making any adjustment.
Moving Parts Lubrication
Grease all exposed moving parts such as rocker arms and main bearing approximately every three months. Make sure to grease main bearing through grease fitting inside clutch handle slot.
Clutch Jaws Lubrication
Clean and lubricate clutch driver jaws with oil after each use.
Cables
Cables should be thoroughly flushed with water to prevent damaging effects of sediment and drain cleaning compounds. Periodically lubricate cables and couplings with RIDGID Cable Rust Inhibitor.
When not in use, store cables indoors to prevent deterioration by the elements.
WARNING Cables should be replaced when they become severely corroded or worn. A worn cable can be identified when outside coils of cable become flat.
Clutch Jaw Replacement
- Remove three screws holding the front guard to the housing.
- Remove two screws from the nose piece assembly (Figure 11).
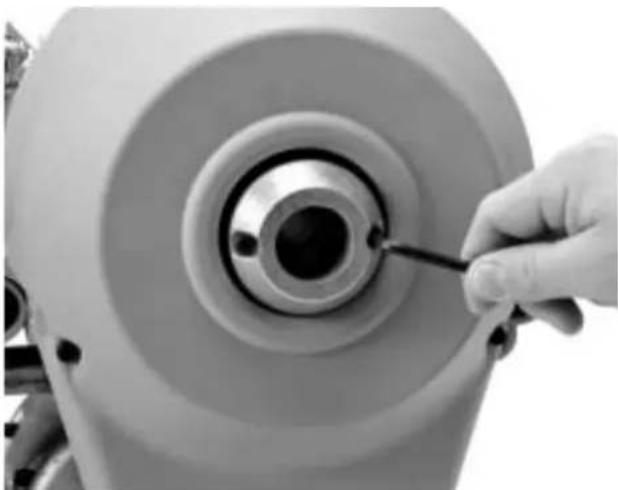
Figure 11 - Replacing Clutch Jaws
- Slide out clutch driver jaws and replace with desired size jaws.
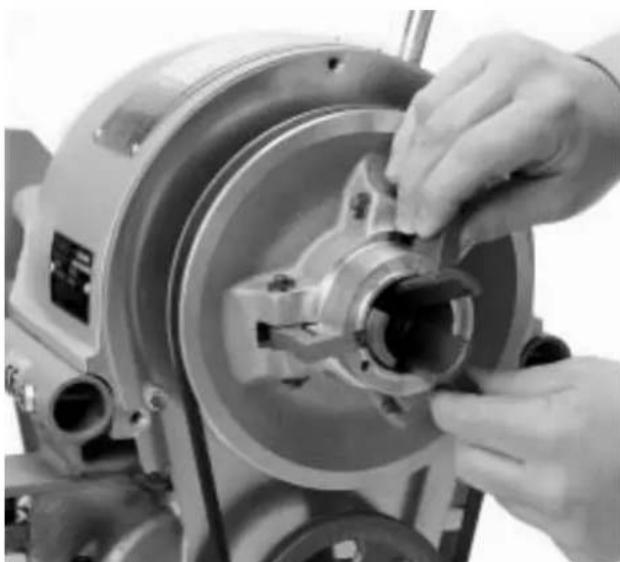
Figure 12 - Replacing Clutch Jaws
- Replace nose piece assembly, screws and guard.
WARNING Never operate machine with belt guard removed. Fingers can be caught between the belt and pulley.
Removing Clutch End Play
- To remove end play from clutch, loosen screw in lock and adjusting nut (Figure 13).
- Turn lock and adjusting nut clockwise until snug against body, then back off one half turn.
- Tighten screw in lock and adjusting nut.
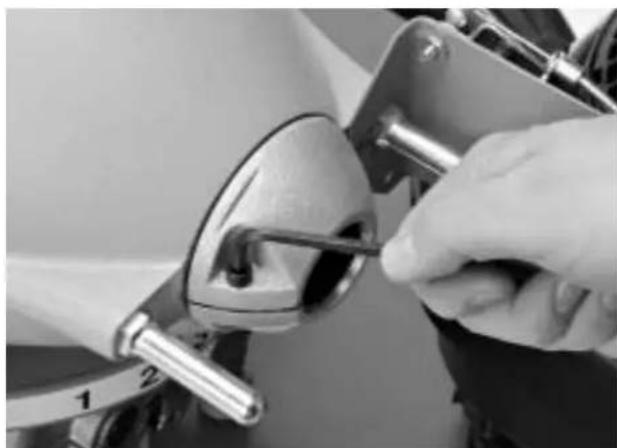
Figure 13 - Removing Clutch End Play
V-Belt Adjustment
Check V-belt periodically for loosening. V-belt should be kept tight at all times.
- To tighten V-belt, remove guard.
- Turn belt tension hex nut slowly clockwise until V-belt stiffens.
- Replace guard.
NOTE! Proper tension is realized when V-belt moves approximately _4W under finger pressure.
WARNING Never operate machine with belt guard removed. Fingers can be caught between the belt and pulley.
Machine Storage
WARNING Motor-driven equipment must be kept indoors or well covered in rainy weather. Store the machine in a locked area that is out of reach of children and people unfamiliar with drain cleaners. This machine can cause serious injury in the hands of untrained users.
If machine has been exposed to freezing weather, unit must be run for ten (10) to twenty (20) minutes without load to warm up. Failing to do this will result in frozen bearings.
Service and Repair
WARNING
The "Maintenance Instructions" will take care of most of the service needs of this machine. Any problems not addressed by this section should only be handled by an authorized RIDGID service technician.
Machine should be taken to a RIDGID Independent Authorized Service Center or returned to the factory. All repairs made by Ridge service facilities are warranted against defects in material and workmanship.
WARNING When servicing this machine, only identical replacement parts should be used. Failure to follow these steps may create a risk of serious injury.
If you have any questions regarding the service or repair of this machine, call or write to:
Ridge Tool Company
Technical Service Department
400 Clark Street
Elyria, Ohio 44035-6001
Tel: (800) 519-3456
E-mail: TechServices@ridgid.com
For name and address of your nearest Independent Authorized Service Center, contact the Ridge Tool Company at (800) 519-3456 or http://www.ridgid.com
CONSERVEZ CES INSTRUCTIONS!
Configurations dispensibles
Technical Service Department
400 Clark Street
Elyria, Ohio 44035-6001
Telephone: (800) 519-3456
E-mail: TechServices@ridgid.com
Cables paraUNCHOS USOs
Cables estandar Se usa cable estandar de 7 / 8 o 1 14 pulgada en desagues rectilineos de 3 a 6 pulgadas y a工程技术 de acoplamente (Figura 7).
Technical Service Department
400 Clark Street
Elyria, Ohio 44035-6001
RIDGID ^S tools are warranted to be free of defects in workmanship and material.
How long coverage lasts
This warranty lasts for the lifetime of the RIDGID tool. Warranty coverage ends when the product becomes unusable for reasons other than defects in workmanship or material.
How you can get service
To obtain the benefit of this warranty, deliver via prepaid transportation the complete product to RIDGE TOOL COMPANY, Elyria, Ohio, or any authorized RIDGIDb INDEPENDENT SERVICE CENTER. Pipe wrenches and other hand tools should be returned to the place of purchase.
What we will do to correct problems
Warranted products will be repaired or replaced, at RIDGE TOOL'S option, and returned at no charge; or, if after three attempts to repair or replace during the warranty period the product is still defective, you can elect to receive a full refund of your purchase price.
What is not covered
Failures due to misuse, abuse or normal wear and tear are not covered by this warranty. RIDGE TOOL shall not be responsible for any incidental or consequential damages.
How local law relates to the warranty
Some states do not allow the exclusion or limitation of incidental or consequential damages, so the above limitation or exclusion may not apply to you. This warranty gives you specific rights, and you may also have other rights, which vary, from state to state, province to province, or country to country.
No other express warranty applies
This FULL LIFETIME WARRANTY is the sole and exclusive warranty for RIDGID® products. No employee, agent, dealer, or other person is authorized to alter this warranty or make any other warranty on behalf of the RIDGE TOOL COMPANY.

Ce qui est couvert?
Elyria, Ohio 44035-6001

Que cubre


- Drain Cleaning Machine
- WARNING!
- Table of Contents
- General Safety Information
- Specific Safety Information
- Description, Specifications and Standard Equipment
- Machine Assembly
- Special Procedures
- Accessories
- Maintenance Instructions
- K-1500G Drain Cleaning Machine
- SAVE THESE INSTRUCTIONS!
- Work Area Safety
- Personal Safety
- Tool Use and Care
- Service
- WARNING
- Machine Safety
- Description
- Specifications
- Standard Equipment
- WARNING
- Instructions for Installing Handle
- Instructions for Engine
- Machine Inspection
- Machine and Work Area Set-Up
- NOTE! Proper Tool Selection
- Operating Instructions
- Reverse Operation
- Cable Applications
- Moving Parts Lubrication
- Clutch Jaws Lubrication
- Cables
- Clutch Jaw Replacement
- Removing Clutch End Play
- V-Belt Adjustment
- Machine Storage
- Service and Repair
- CONSERVEZ CES INSTRUCTIONS!
- Configurations dispensibles
- Cables paraUNCHOS USOs
- How long coverage lasts
- How you can get service
- What we will do to correct problems
- What is not covered
- How local law relates to the warranty
- No other express warranty applies
- Ce qui est couvert?
- Que cubre
Brand : RIDGID
Model : K1500G
Category : Drain cleaning machine