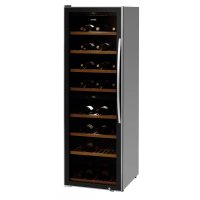
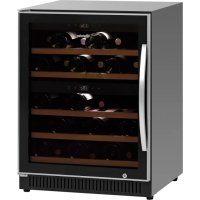
2Z 180FL - Beverage fridge BARTSCHER - Free user manual and instructions
Find the device manual for free 2Z 180FL BARTSCHER in PDF.


| Product type | Beverage refrigerator |
| Brand | Bartscher |
| Model | 2Z 180FL |
| Code-No. | 700132 |
| Capacity | 180 bottles (top: 80, bottom: 100) |
| Dimensions (W x D x H) | 600 x 750 x 1860 mm |
| Weight | 86.35 kg |
| Power supply voltage | 220-240 V, 50/60 Hz |
| Power | 0.15 kW |
| Climate class | ST (16 °C - 38 °C) |
| Energy efficiency class | C |
| Number of temperature zones | 2 |
| Temperature range | 5 °C to 20 °C (per zone) |
| Cooling type | Compressor |
| Defrost | Automatic |
| Lighting | LED (switchable per zone) |
| Exterior material | Lacquered steel, glass |
| Interior material | Steel |
| Number of shelves | 8 (wooden, sliding) |
| Door | 1 glass door with lock, right stop |
| Handle | Ergonomic stainless steel |
| Feet | 4 feet (3 large + 1 adjustable) |
| Special features | Digital display, touch control, UV filter, fan |
Frequently Asked Questions - 2Z 180FL BARTSCHER
User questions about 2Z 180FL BARTSCHER
0 question about this device. Answer the ones you know or ask your own.
Ask a new question about this device
Download the instructions for your Beverage fridge in PDF format for free! Find your manual 2Z 180FL - BARTSCHER and take your electronic device back in hand. On this page are published all the documents necessary for the use of your device. 2Z 180FL by BARTSCHER.
USER MANUAL 2Z 180FL BARTSCHER
natural_image
Exterior view of a modern stainless steel refrigerator with multiple shelves (no visible text or symbols)700131
2Z 180FL
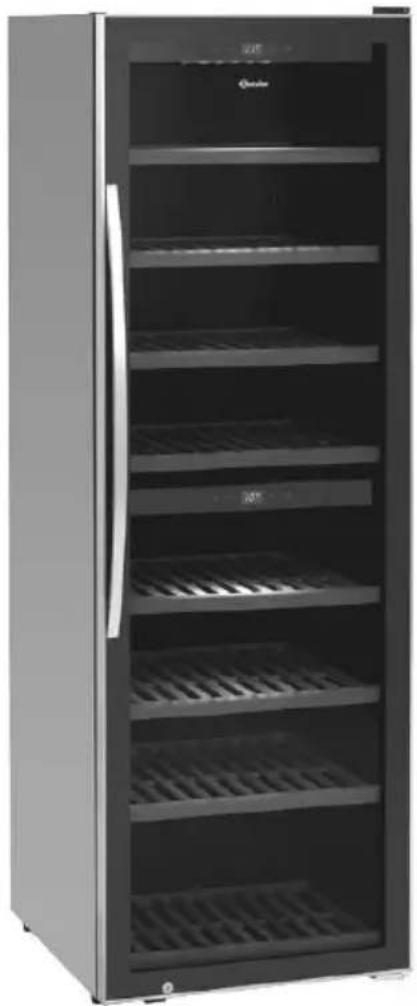
natural_image
Front view of a modern stainless steel refrigerator with multiple shelves and grilles (no visible text or symbols)700132
ENGLISH ____ from page 21 to 40
natural_image
Three identical white cylindrical objects with black outlines, arranged horizontally on a gray background (no text or symbols)normaler Boden
natural_image
Pure diagram of three parallel cylindrical objects with rounded ends, no text or symbols presentunterer Boden
natural_image
Close-up of a ceiling light fixture with indicator lights and a 1:5 scale (no text or symbols visible)natural_image
Interior view of an industrial or laboratory equipment setup with electrical components and wiring (no visible text or symbols)Manuelles Abtauen
1.1 Key to symbols 22
1.2 Safety instructions 23
1.3 Proper use....27
2. General information.... 28
2.1 Liability and Warrantees 28
2.2 Copyright protection 28
2.3 Declaration of conformity.... 28
3. Delivery range, transport, package, storage.... 29
3.1 Delivery range and transport inspection 29
3.2 Packaging....29
3.3 Storage.... 30
4. Technical data .... 30
4.1 Technical specification .... 30
4.2 Overview of parts 32
5. Installation and operation.... 33
5.1 Installation 33
5.1.1 Unpacking....33
5.1.2 Preset 33
5.1.3 Feet 34
5.1.4 Fixing of handle 34
5.1.5 Wooden shelves: 34
5.2 Electric connection 35
5.3 Operation.... 35
6. Cleaning 37
7. Possible Malfunctions 38
8. Discarding old devices 40
Bartscher GmbH
Read this instruction manual before using and keep them available at all times!
This instruction manual contains information about the installation, operation and maintenance of the device and should be consulted as an important source of information and reference guide.
Awareness of the safety instructions and instructions for use in this manual will ensure the safe and correct use of the device.
In addition to the information given here, you should comply with any local Health and safety Controls and generally applicable safety regulations.
The instruction manual forms part of the product and should be kept near the device and easily accessible for anyone carrying out the installation, servicing, maintenance or cleaning.
Please keep these instructions and give them to future owners of the device.
1. Safety
This device is designed in accordance with the presently applicable technological standards. However, the device can pose a danger if handled improperly and inappropriately.
All persons using the device must follow the recommendations and instructions in this instruction manual.
1.1 Key to symbols
In this manual, symbols are used to highlight important safety instructions and any advice relating to the device. The instructions should be followed very carefully to avoid any risk of accident, personal injury or material damage.

WARNING!
This symbol highlights hazards which could lead to injury.

WARNING!
This symbol highlights dangerous situations which could lead to injury or death.
FIRE HAZARD / FLAMMABLE MATERIALS HAZARD / EXPLOSION
HAZARD!
This symbol highlights potentially dangerous situations which could lead to injury or death.

CAUTION!
This symbol highlights dangerous situations which could lead to light injuries, or damage, malfunction, and/or destruction of the device.
NOTE!
This symbol highlights recommendations and information aimed for effective and trouble-free device operation.
1.2 Safety instructions
- The device can be used by children 8 years and up, as well as by people with disabilities and those with limited experience/ knowledge as long as they are under supervision or have been instructed on proper use of the device and its possible dangers. Children should not play with the device. Cleaning and maintenance cannot be performed by children younger than 8 years old and must be done under supervision. Children under the age of 8 years old must be kept away from the device and its power cord.
- Only use the device indoors.
- The device must be operated in correct and safe technical condition only. In case of operational problems disconnect the device from the power supply (pull the plug from the socket) and contact the service company.
- Prevent access of children to the package materials like plastic bags and foamed polystyrene elements. Suffocation hazard!
- Only a qualified technician and using original spare parts and accessories should carry out repairs and maintenance of the device. Do not attempt to repair the device yourself.
- Do not use any accessory or spare parts that have not been recommended by the manufacturer. These can be dangerous for the user or lead to damages of the device or personal injury, and further, the warranty expires.
- To prevent hazards and to ensure optimum efficiency, no modifications or alterations to the device that are not explicitly approved by the manufacturer may be undertaken.

DANGER! Electric shock hazard!
To avoid the hazard results please follow the safety instructions below.
- Never allow the power cable to come into contact with heat sources or sharp edges. The power cable should not hang over the side of the working surface. Ensure that no one can step on or trip over the cable.
- The power cable must not be folded, bent or tangled, and must always remain fully unrolled. Never place the device or other objects on the power cable.
- Do not cover the cable. Keep away the cable from operating range and do not immerse it into water.
- Check the power cord regularly for damage. Do not use the device if the power cord is damaged. If this cable is damaged, it must be replaced by customer service or a qualified electrician in order to avoid dangers.
- The supply cable must be disconnected from the socket only by pulling the plug.
- Never carry or lift the device by the supply cable.
- In any case do not open the device housing. In case of electrical or mechanical modifications the electric shock hazard will occur.
- Do not use any acid agents and make sure no water ingresses the device.
- Never operate the device with moist hands or standing on wet floor.
- Remove the plug from its socket:
- when the device is not used,
- in case of anomalies during operation,
- before cleaning.
FIRE HAZARD / FLAMMABLE MATERIALS HAZARD / DSION HAZARD!
Incorrect operation of the device may cause fire or explosion hazard due to ignition of its content.
To avoid the hazard please follow the safety instructions below:
- Do not use any electric devices in the device.
- Never use any flammable liquids for cleaning the device or its parts. Gases releasing during above activities may cause fire or explosion hazard.
- Do not store or use petrol or other flammable liquids and gases in the vicinity of this or any other device. Those gases may cause fire or explosion hazard.
- Do not put any explosive materials, like sprays filled with flammable propellants, into the device.
- The cooling system in the device may be damaged.
1.3 Proper use

CAUTION!
The device has been designed and manufactured for the industrial use and should be operated only by the qualified personnel of the restaurants, canteens and similar places.
The operational safety of the device is assured only in case of proper use, according to the operation manual.
All technical activities like installation and maintenance must be performed by the qualified service personnel only.
The wine cooler is intended only for wine cooling.

CAUTION!
Any use going beyond the intended purpose and/or any different use of the device is forbidden and is not considered as conventional.
Any claims against the manufacturer or his authorized representative as a consequence of experiencing damages resulting from unconventional use are impossible.
The operator is liable for all damages resulting from inappropriate use.
2. General information
2.1 Liability and Warrantees
All the information and instructions in this manual take into account standard safety regulations, current levels of technical engineering as well as the expertise and experience we have developed over the years.
The instruction manual was translated with all due care and attention. However, we do not accept liability for any translation errors. The German version of this instruction manual is definitive.
If the delivery consists of a special model, the actual scope of delivery may differ from the descriptions and illustrations in this manual. This is also the case for special orders or when the device has been modified in line with new technology.

CAUTION!
Read this manual carefully and thoroughly before any operation of the device, and especially before turning it on!
Manufacturer is not liable for any damages or faults caused by:
- violation of advice concerning operation and cleaning;
- use other than designed;
- alterations made by user;
- use of inadequate spare parts.
We reserve the right to make technical changes for purposes of developing and improving the useful properties.
2.2 Copyright protection
The instruction manual including any texts, drawings, images or other illustrations is copyright. No part of this publication may be reproduced, transmitted or used in any form or by any means without permission in writing from the manufacturer. Any person who commits any unauthorized act in relation to this publication shall be liable to claims for damages. All rights reserved.
NOTE!
The contents, texts, drawings, pictures and any other illustrations are copyright and subject to other protection rights. Any person unlawfully using this publication is liable to criminal prosecution.
2.3 Declaration of conformity

The device complies with the current standards and directives of the EU. We certify this in the EC declaration of conformity. If required we will be glad to send you the according declaration of conformity.
3. Delivery range, transport, package, storage

CAUTION!
- The wine cooler should be transported in the vertical position only.
- Due to high weight of the device it should be transported, unpacked, and installed by two persons.
- Prevent access of children to the package materials like plastic bags and foamed polystyrene elements. There is the suffocation hazard!
3.1 Delivery range and transport inspection
The wine cooler is in standard delivered with the following elements:
■ Device
- 7 wooden shelves (700131) / 8 wooden shelves (700132)
- Operation manual
■ Handle with screws for fixing
Please check the delivery upon completeness and transport damage immediately after receipt. In case of visible damage do not accept or accept the delivery with reservation only.
Note the extent of damage on the carrier's bill of delivery. Trigger off the complaint. Hidden damages should be reclaimed immediately after notice, as claims for damages can only be asserted within the effective period for complaints.
3.2 Packaging
Please do not throw away the covering carton of your device as it might be useful for storage purposes, when moving or, in case of damages, when the device must be sent back to a repair center. The outer and inner packing material should be removed completely from the device before installation.

If you liked to dispose the packing, consider the regulations applicable in your country. Supply re-usable packing materials to the recycling.
Please inspect the device upon completeness. In case any part is missing please contact our customer service center immediately.
3.3 Storage
Keep the package closed until installation and under consideration of the outside indicated positioning- and storage markings.
Packages should be stored under consideration of the following:
- do not store outdoors,
- keep it dry and dust-free,
- do not expose it to aggressive media,
- do not expose it to direct sunlight,
- avoid mechanical shocks and vibration,
- in case of longer storage (> 3 months) make sure you check the state of the packaging and the parts regularly, if required refresh or renew.
4. Technical data
4.1 Technical specification
Construction:
■ Double glazing, insulating glass with UV filter
- Thermostat
■ Digital display
■ Control: touch, electronic
■ Cooling: Compressor
■ Insulation: thermal
■ Automatic thawing function
■ Drip water evaporation
■ Fan
■ Number of doors: 1, lockable
■ right side, door hinge side cannot be changed
■ Lighting: LED, can be switched separately per temperature zone
■ Vibration-dampened feet for quiet operation
- Ergonomic handle
| Name | Wine cooler | |
| Model: | 126FL | 2Z 180FL |
| Code-No.: | 700131 | 700132 |
| Material: | lacquered steel, glass interior: steel | |
| Colour: | black | |
| Climate class: | ST | ST |
| Energy class: | B | C |
| Ambient temperature: | 16 °C to 38 °C | |
| Cooling medium: | R600a | R600a |
| Capacity: | 313 litres upper part: 138 litres lower part: 175 litres | 453 litres upper part: 219 litres lower part: 234 litres |
| Capacity: | 126 bottles: upper part: 54, lower part: 72 | 180 bottles: upper part: 80, lower part: 100 |
| Number of shelves: | upper part: 3 lower part: 4 | upper part: 4 lower part: 4 |
| Type of shelves: | wooden shelves, ball bearings, drawer: 275 mm | |
| Dimensions of shelves: | 1 x W 505 x D 340 mm 6 x W 505 x D 440 mm | 1 x W 505 x D 425 mm 7 x W 505 x D 440 mm |
| Number of temperature zones: | 2 | 2 |
| Temperature range: | upper part: 5 °C - 20 °C lower part: 5 °C - 20 °C | upper part: 5 °C - 20 °C lower part: 5 °C - 20 °C |
| Dimensions: | W 595 x D 625 x H 1590 mm | W 600 x D 750 x H 1860 mm |
| Power supply: | 0.15 kW/220-240 V 50/60 Hz | 0.15 kW/220-240 V 50/60 Hz |
| Weight: | 76.05 kg | 86.35 kg |
We reserve the right to implement the technical modifications!
4.2 Overview of parts
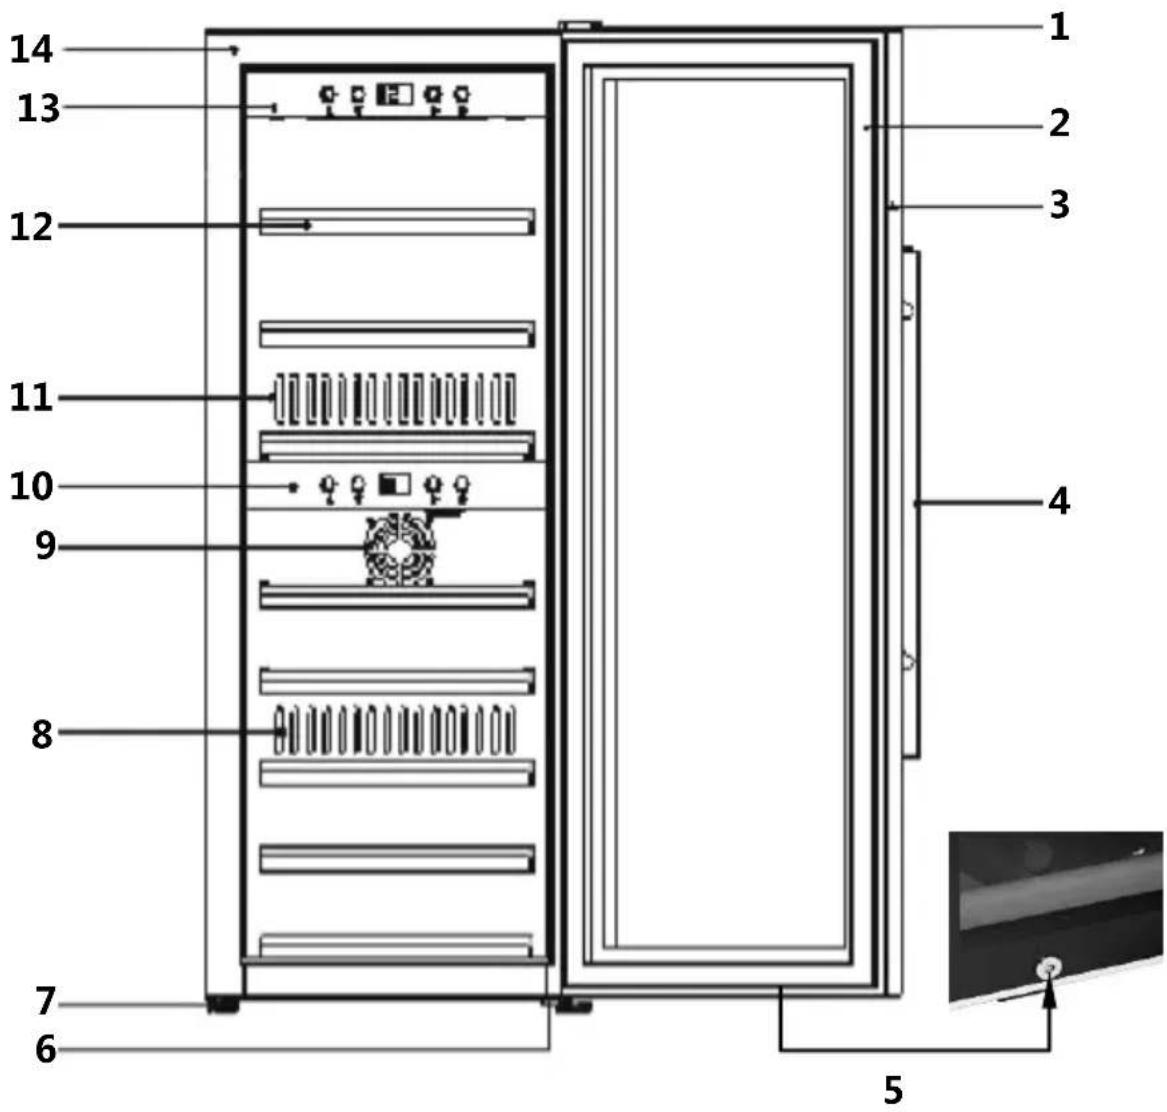
1 Upper hinge cover
2 Door seal
3 Door frame (lockable)
4 Door handle
5 Lock
6 Lower handle with foot adjustment
7 Foot (3)
8 Hot air outlet
9 Air inlet
10 Lower control panel
11 Cold air outlet
12 Wooden shelves: 7 pcs. (700131) / 8 pcs. (700132)
13 Lower control panel
14 Housing
5. Installation and operation
5.1 Installation
5.1.1 Unpacking
The device should be unpacked in the following way:
- Remove the device from the carton box, then remove the external and internal package.
- Clean the interior with warm water and soft cloth. Follow instructions in section 6 "Cleaning".
- In order to avoid scratches and stains remove the protective foil just before installing the device in its place.

CAUTION!
Never remove the rating plate or any warning signs from the device.
5.1.2 Preset
- Place the device on an even and safe surface which supports the weight of the device and assures stability at full load.
- Do not place the device in direct sunlight or in the vicinity of heat sources (cooker, radiator, heating devices, etc.). Direct sunlight may cause changes in the acrylic surface and the heat sources have negative impact on energy consumption.
- The ambient temperatures below 16 °C and above 38 °C may lead to limited functionality of the device.
- The device is designed for indoor operation only. Never place the device in humid or wet environment.
- Do not place the device in hot environment or in the vicinity of flammable materials.
- The device requires sufficient air circulation for correct operation. Assure the minimum side distance of 10 cm of the device.
- Do not remove or block the holes of the device.
- The electric socket should be easily accessible so it it possible to quickly disconnect the supply cable when necessary.
-
Installation and assembly of this device in the non-stationary location (e.g. ship) should be realized by the specialized companies/persons only, after assuring the fulfilment of conditions necessary for safe operation of the device.
-
Due to energy savings make sure that the door of the device is closed during its operation.
- In case of moving the device to another location disconnect the power supply and remove the plug from the socket. Remove all content from the device. Due to safety reasons fix all loose elements inside. Fix the door with use of adhesive tape. The wine cooler should be transported in the vertical position only.
5.1.3 Feet
The device is equipped with 3 large feet and 1 small adjustable foot. Adjust the foot in such way that the device stands straight and does not sway.
5.1.4 Fixing of handle
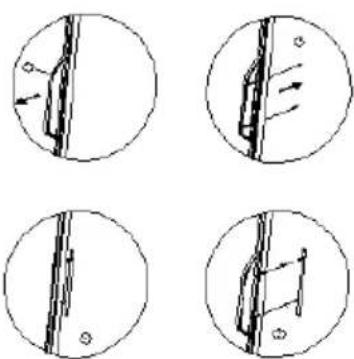
Before the first use fix the supplied stainless steel handle to the device door with use of screws.
Move the rubber seal on the door internal side left or right to uncover the fixing holes. Fix the handle to the door using supplied set of screws.
Then replace the seal in correct position.
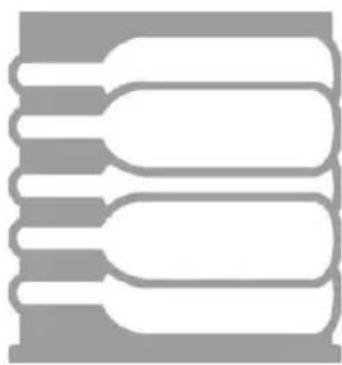
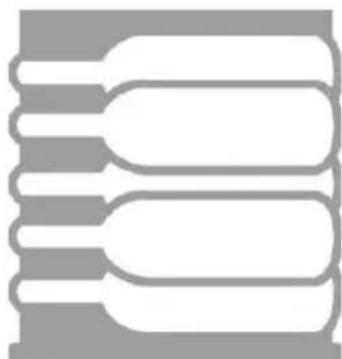
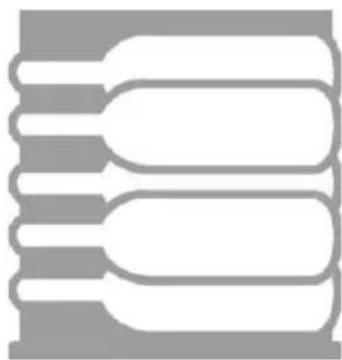
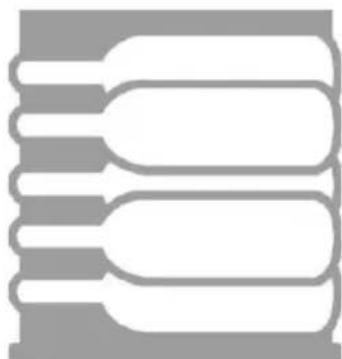
5.1.5 Wooden shelves:
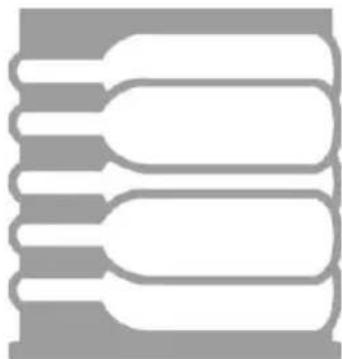
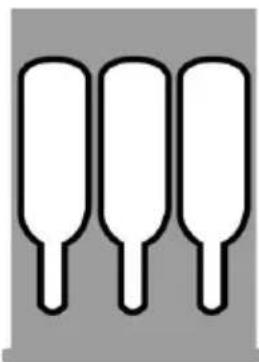
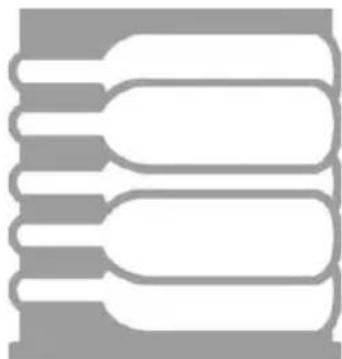
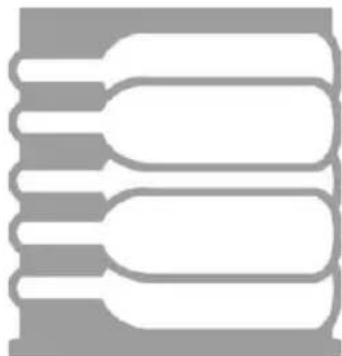
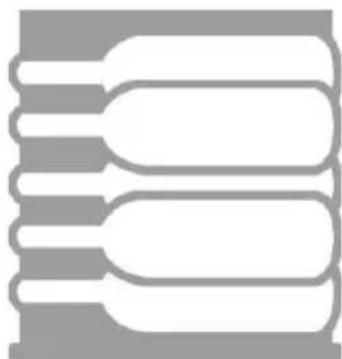
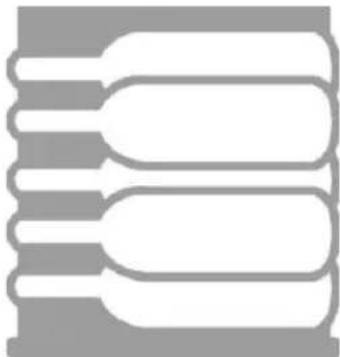
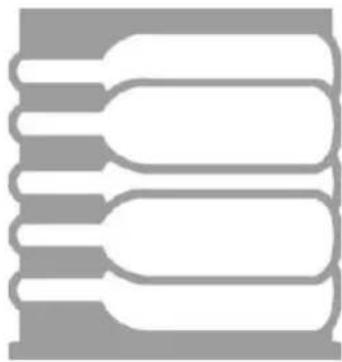
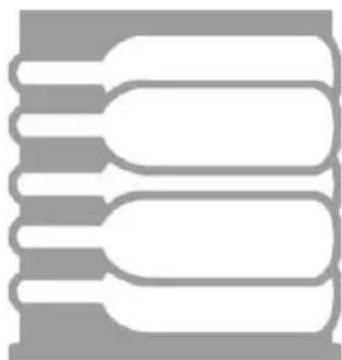
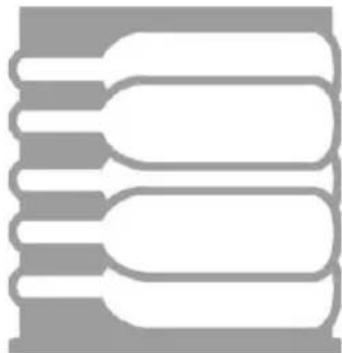
Each wooden shelf may be removed to allow for storage of bigger bottles.
natural_image
Three identical white cylindrical objects with black outlines, arranged horizontally on a gray background (no text or symbols)Intermediate shelf
natural_image
Pure diagram of three parallel cylindrical objects with rounded ends, no text or symbols presentLower shelf
Before removing the shelf the bottles must be removed first. Then lift the shelf slightly and pull it out (loose the screws when required).
NOTE!
Make sure that the wooden shelves are properly snapped before placing bottles on them. Pay attention to uniform distribution of load inside the device.
5.2 Electric connection

DANGER! Electric shock hazard!
The device can cause injuries due to improper installation! Before installation and connecting the local power grid specification should be compared with that of the device (see rating plate). Connect the device only in case of compliance!
- Wait 12 hours before connecting the device to the socket, connect it, and place the wine bottles inside.
- The power supply circuit with the socket must be protected by the fuse of at least 16A. The device should be connected directly to the wall socket. Due to fire hazard do not use any adapters or extension cords.
The electric safety of the device may be assured only when it is connected to correctly realized electric system with the protective wire. It is forbidden to connect the device to the socket without the protective wire. When in doubts, the house electric system should be checked by the qualified technician. The manufacturer is not responsible for damages caused by connecting the device to the missing or interrupted protective wire.
5.3 Operation
Control elements and display

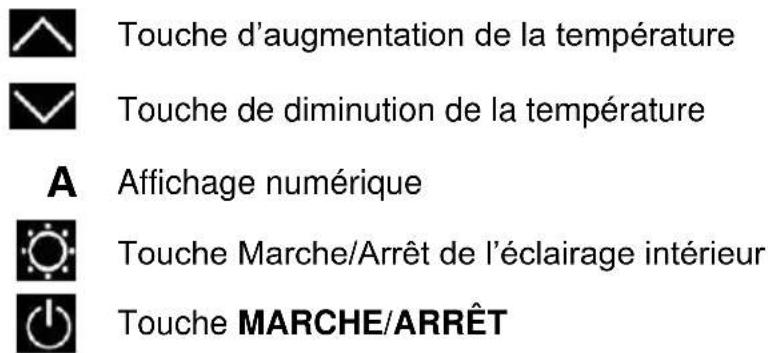
A

Temperature increase button

Temperature decrease button

Digital display

Internal light ON/OFF switch

ON/OFF button
- The temperature zones of the wine cooler are controlled independently with use of control elements.
- Pressing ON/OFF 📄 on allows for turning on
• on the upper control panel: device and upper temperature zone;
• on the lower panel: lower temperature zone.
- The digital display shows current average temperature for a given temperature zone.
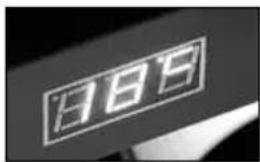
- The buttons and are used for adjustment of the following temperature settings: from 5 °C to 20 °C in the upper and lower temperature zone.
- Recommended storage temperature for white wine: 6 °C - 10 °C, for red wine: 12 °C - 18 °C.
- If both temperature zones are used, the temperature in the upper zone should be lower than in the lower zone.
- The lower temperature zone may be deactivated so only the upper zone remains active.
- Wait until the device reaches the preset temperature and put the wine bottles inside.
Hint: Keep in mind that in case of maximum load of the device chambers it must work longer to reach the preset temperature.
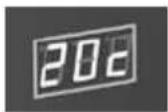
When preset temperature (e.g. 20^ C) is reached, in the bottom and on the right side of temperature value “c” character appears.
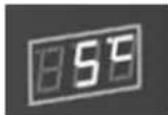
When preset temperature (e.g. 5°C) is not reached yet, the character “c” is displayed in the top and on the right side of temperature value.
- By pressing two buttons and simultaneously for 5 seconds it is possible to switch between °C and °F.
- With use of buttons and it is possible to adjust temperature every 1^ C .
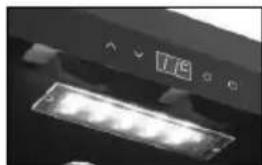
- Button used for turning on and off the internal light; LED lamp is installed under the ceiling of a given chamber.
natural_image
Close-up of a kitchen counter with a recessed LED and illuminated slide (no visible text or symbols)- Temperature in the device depends on environment, number of stored bottles, and preset temperature.
- Moreover the device is equipped with heating, so in case of lower ambient temperatures it may maintain wine temperature at desired level.
- When the device is no longer used, turn it off using ON/OFF and disconnect from the power supply (pull the plug!).
6. Cleaning

WARNING!
Before cleaning disconnect the device from the power supply (pull the plug!).
Do not use pressurized water jest for cleaning!
Protect the device from the water penetration.

CAUTION!
Do not use any aggressive and abrasive cleaning agents or solvents.
- Clean the device before restarting it.
- Clean the device regularly during operation. Pay attention to the following instructions for cleaning the individual elements.
Device interior
- Clean the device interior with warm water, using gentle washing agent and soft cloth. Then dry the cleaned surfaces thoroughly using a soft cloth.
Door seal
○ In order to assure correct operation of the device make sure that the door seal is clean.
Housing
- Clean the device exterior with soft cloth, soaked in warm water and gentle cleaning agent. Then dry the device thoroughly with soft cloth.
Exhaust hole/fan
The cooling efficiency may be reduced due to accumulation of dust or other contaminants blocking the exhaust holes. If necessary, clean the exhaust holes with the vacuum cleaner.
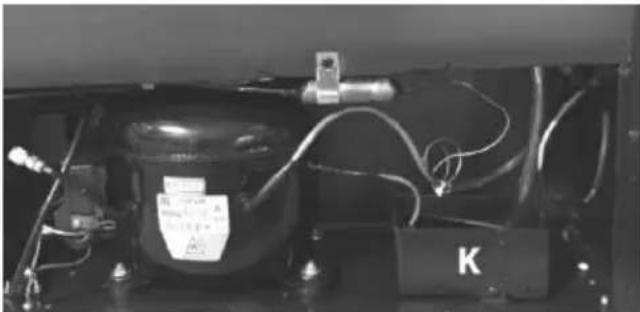
Condensate tank/drip tray (K)
○ Condensate should be periodically removed with use of sponge. That tank is located in the back of the device, on the right side.
natural_image
Interior view of an industrial appliance with visible wiring, a black container labeled 'K', and a connector (no readable text or symbols)Manual thawing
The device should be thawed at least every 6 months. When the device door is often opened thawing should be performed more frequently. Turn the device off and remove the plug from the socket. Then start the manual thawing. Pay attention to the drip tray (K) filling and remove water.
7. Possible Malfunctions
In case of malfunction, disconnect the device from its power source. Before contacting the service or sales agent, verify - based on the table below - whether it is possible to eliminate disruption in operation.
| Failure | Possible cause/solutions |
| The wine cooler is not working. | - The plug is not connected to the socket or incorrect network voltage.- Damaged or blown fuse. |
| The cooling efficiency is insufficient or the device is not reaching the preset temperature. | - Check temperature settings.- The ambient conditions may require other settings.- The door is opened too often.- The door is not completely closed.- The door seal does not assure sufficient sealing.- The wine cooler does not have sufficient distance to other objects.- Thaw the device. |
| The light is not working. | - Contact the service company. |
| Vibrations. | - Check if the device is levelled. |
| The device operation is too loud. | - The device is not levelled.- Check fan.- Loose parts.- The device is touching the wall. |
| The door is not closing properly. | - The device is not levelled.- The door is installed in the opposite way or incorrectly.- Worn out seal.- Lowered shelves. |
| LED display is not showing anything.LED display: “Lo”. | - The main switchboard is not working.- Damaged power supply plug.- Problem in the printed circuit.- Contact the service company. |
| The buttons are not working. | - The temperature controller is damaged. |
| The compressor does not start. | - The compressor does not start when the ambient temperature is lower than the preset temperature. |
| The compressor starts again. | - The compressor stops working after reaching the preset temperature but starts again until the preset temperature is reached. |
| Dew on the cooler surface. | - Dew appears on the front glass, especially when the device operates in humid environment. It is connected with humidity of air contacting the wine cooler. Remove dew using a soft cloth. |
| Bubbling sound of a liquid. | - Sound of compressor operation when it starts or stops.- Sound of refrigerant in the circuit. |
| Condensate in the cooler. | - The door has been left opened for a long time in humid environment or has been opened frequently. Leave the door closed for as long as possible. |
| Error E2. | - Contact the service company. |
If you cannot remove the malfunctions:
- do not open the body,
- notify the customer service point or contact the sales agent, while providing the following information:
■ type of malfunction:
■ article and serial number (rating plate at the rear of the device).
8. Discarding old devices
The electric and electronic devices often contain valuable materials. They also contain harmful plastics, necessary for their operation and safety. In case of disposing as a common waste material or incorrect utilization they may pose threat for human health and environment. Therefore in any case the device should be disposed as a common waste.
After the operational period old device should be utilized according to valid regulations. Use the list of collection points for your location to return the electric and electronic devices. We recommend contacting the professional company of proper unit of the local authorities.

CAUTION!
To exclude any abuse and the dangers involved make the waste device unfit for use before disposal. For that purpose disconnect device from mains supply and remove mains connection cable from the device.
NOTE!
Make sure that old device is stored beyond the reach of children until its removal: remove the door and leave shelves inside so children are not able to enter the device.
The propellant used in the device is flammable. Its utilization should be realized according to the valid regulations.
Bartscher GmbH
4.1 Indications techniques
Matière:
natural_image
Three identical white cylindrical objects with black outlines, arranged horizontally on a gray background (no text or symbols)natural_image
Pure diagram of three parallel cylindrical objects with rounded ends, no text or symbols presentTablette inférieure
A
natural_image
Close-up of a computer monitor with a stylized logo and control buttons (no readable text)natural_image
Interior view of an appliance showing a black cylindrical component with wiring and a labeled switch (no readable text or symbols)Dégivrage manuel
natural_image
Three identical white cylindrical objects with black outlines, arranged horizontally on a gray background (no text or symbols)Mensola normale
natural_image
Pure diagram of three horizontal cylindrical objects with rounded ends, no text or symbols presentMensola inferiore
natural_image
Close-up of a ceiling-mounted LED indicator with control buttons (no visible text or symbols)natural_image
Interior view of an electrical enclosure with visible wiring and components (no readable text or symbols)natural_image
Three identical white cylindrical objects with black outlines, arranged horizontally on a gray background (no text or symbols)Bandeja normal
natural_image
Pure diagram of three parallel cylindrical objects with rounded ends, no text or symbols presentBandeja de abajo
natural_image
Close-up of a kitchen counter with a highlighted rectangular object and control buttons (no visible text or symbols)natural_image
Interior view of an appliance showing a black cylindrical component with wiring and a labeled 'K' block (no readable text or symbols beyond labels)natural_image
Three identical white cylindrical objects with black outlines, arranged horizontally on a gray background (no text or symbols)Prateleira comum
natural_image
Pure diagram of three parallel cylindrical objects with no text or symbolsPrateleira inferior
natural_image
Close-up of a kitchen appliance with a digital display showing '7.15' and illuminated items (no readable text or symbols)natural_image
Interior view of an appliance showing a black cylindrical component with wiring and a labeled switch (no readable text or symbols)Degelo manual
natural_image
Three identical white cylindrical objects with black outlines, arranged vertically on a gray background (no text or symbols)Normale planchette
natural_image
Pure diagram of three parallel cylindrical objects with no text or symbolsOnderste planchette
natural_image
Close-up of a kitchen counter with a digital display showing '7.15' and illuminated items (no readable text or symbols)natural_image
Interior view of an appliance showing electrical components and wiring (no visible text or symbols)Manueel ontdooien
natural_image
Three identical white cylindrical objects with black outlines, arranged horizontally on a gray background (no text or symbols)Standard hylde
natural_image
Pure diagram of three parallel cylindrical objects with rounded ends, no text or symbols presentNedre hylde
natural_image
Close-up of a ceiling light fixture with indicator lights and a 15-pin button (no visible text or symbols)natural_image
Interior view of an appliance showing electrical components and wiring (no visible text or symbols)Manuel afrimning
natural_image
Three identical white cylindrical objects with black outlines, arranged horizontally on a gray background (no text or symbols)natural_image
Pure diagram of three horizontal cylindrical objects with rounded ends, no text or symbols presentnatural_image
Close-up of a kitchen appliance with a highlighted LED and illuminated buttons (no visible text or symbols)natural_image
Interior view of an industrial or laboratory equipment unit with visible wiring and a labeled component 'K' (no readable text or symbols beyond labels)Ручная оттайка
natural_image
Three identical white cylindrical objects with black outlines, arranged horizontally on a gray background (no text or symbols)Normal raf
natural_image
Pure diagram of three parallel cylindrical objects with rounded ends, no text or symbols presentAlt raf
natural_image
Interior view of an industrial machine with visible wiring, a black component labeled 'K', and no readable text or symbols.natural_image
Three identical white cylindrical objects with black outlines, arranged horizontally on a gray background (no text or symbols)Zwykła półka
natural_image
Pure diagram of three parallel cylindrical objects with rounded ends, no text or symbols presentDolna półka
natural_image
Close-up of a kitchen counter with a highlighted rectangular object (no visible text or symbols)natural_image
Interior view of an industrial electrical enclosure with visible wiring and components (no readable text or symbols)Ręczne rozmrażanie
natural_image
Three identical white cylindrical objects with black outlines, arranged horizontally on a gray background (no text or symbols)Normální police
natural_image
Pure diagram of three horizontal cylindrical objects with rounded ends, no text or symbols presentSpodní police
natural_image
Close-up of a kitchen counter with a digital display and illuminated tray (no visible text or symbols)natural_image
Interior view of an appliance showing internal components including a black cylindrical tank, wiring, and labeled blocks (K), with no visible text or symbols.Ruční rozmrazování
natural_image
Three identical white cylindrical objects with black outlines, arranged horizontally on a gray background (no text or symbols)Obična polica
natural_image
Pure diagram of three parallel cylindrical objects with rounded ends, no text or symbols presentDonja polica
Kako biste izvadili drvenu policu, najprije izvadite boce. Nakon toga oprezno podignite i izvadite policu (eventualno prethodno popustite vijke).
NAPOMENA!!
Obratite pozornost da se drvene police dobro ugnijezde prije nego na njih stavite boce. Boce treba ravnomjerno rasporediti unutar uređaja.
natural_image
Close-up of a ceiling-mounted LED indicator with control buttons (no visible text or symbols)- Temperatura u uređaju ovisi o temperaturi okoline, količini boca i postavljenoj temperaturi.
Osim toga uređaj je opremljen grijanjem – u slučaju niže temperature uređaj može održavati temperaturu vina na razini adekvatnoj za konzumaciju.
Ako uređaj više ne koristite, isključite ha pomoću prekidača UKLJ./ISKLJ. i isključite iz napajanja (izvadite utikač!).
6. Čišćenje

UPOZORENJE!
Prije čišćenja uređaj isključite iz električnog napajanja (izvadite mrežni utikač!).
Za čišćenje uređaja nikada ne koristite mlaz vode pod pritiskom!
Pazite da u uređaj ne dopre voda.

OPREZNO!
natural_image
Interior view of an appliance showing internal components including a black cylindrical tank, wiring, and a labeled component 'K' (no readable text or symbols beyond labels)Ručno odleđivanje
○ Uređaj treba odleđivati barem jednom u šest mjeseci. U slučaju čestog otvaranja vrata, odleđivanje treba izvoditi češće. Uređaj isključite i izvadite utikač iz utičnice. Treba obratiti pozornost za stupanj napunjenosti ladice (K) i uklanjati vodu koja se skuplja prilikom odleđivanja.
7. Moguće smetnje
natural_image
Three identical white cylindrical objects with black outlines, arranged horizontally on a gray background (no text or symbols)Sima polc
natural_image
Pure diagram of three horizontal cylindrical objects with rounded ends, no text or symbols presentAlsó polc
natural_image
Close-up of a computer monitor with a stylized logo and control buttons (no readable text)natural_image
Interior view of an appliance showing internal components including a black cylindrical tank, wiring, and a labeled component 'K' (no readable text or symbols beyond labels)Kézi leolvasztás
natural_image
Three identical white cylindrical objects with black outlines, arranged horizontally on a gray background (no text or symbols)Συνηθισμένο ράφι

natural_image
Pure diagram of three parallel cylindrical objects with rounded ends, no text or symbols presentΚάτω ράφι
natural_image
Close-up of a ceiling-mounted LED indicator with no visible text or symbolsnatural_image
Interior view of an appliance showing internal components including a black cylindrical body, wires, and a labeled component 'K' (no readable text or symbols beyond labels)Χειροκίνητη απόψυξη

- Manuelles Abtauen
- General information.... 28
- Delivery range, transport, package, storage.... 29
- Technical data .... 30
- Installation and operation.... 33
- Cleaning 37
- Possible Malfunctions 38
- Discarding old devices 40
- Read this instruction manual before using and keep them available at all times!
- Safety
- Key to symbols
- WARNING!
- FIRE HAZARD / FLAMMABLE MATERIALS HAZARD / EXPLOSION
- HAZARD!
- CAUTION!
- NOTE!
- Safety instructions
- DANGER! Electric shock hazard!
- FIRE HAZARD / FLAMMABLE MATERIALS HAZARD / DSION HAZARD!
- Proper use
- General information
- Liability and Warrantees
- Copyright protection
- Declaration of conformity
- Delivery range, transport, package, storage
- Delivery range and transport inspection
- Packaging
- If you liked to dispose the packing, consider the regulations applicable in your country. Supply re-usable packing materials to the recycling.
- Storage
- Technical data
- Technical specification
- Construction:
- Overview of parts
- Installation and operation
- Installation
- Unpacking
- Preset
- Feet
- Fixing of handle
- Wooden shelves:
- Electric connection
- Operation
- Control elements and display
- Cleaning
- Device interior
- Door seal
- Housing
- Exhaust hole/fan
- Condensate tank/drip tray (K)
- Manual thawing
- Possible Malfunctions
- If you cannot remove the malfunctions:
- Discarding old devices
- Indications techniques
- Matière:
- Dégivrage manuel
- Degelo manual
- Manueel ontdooien
- Manuel afrimning
- Ручная оттайка
- Ręczne rozmrażanie
- Ruční rozmrazování
- NAPOMENA!!
- Čišćenje
- UPOZORENJE!
- OPREZNO!
- Ručno odleđivanje
- Moguće smetnje
- Kézi leolvasztás
- Χειροκίνητη απόψυξη
Brand : BARTSCHER
Model : 2Z 180FL
Category : Beverage fridge