Jumpstarter - Trampoline Klarfit - Free user manual and instructions
Find the device manual for free Jumpstarter Klarfit in PDF.

User questions about Jumpstarter Klarfit
0 question about this device. Answer the ones you know or ask your own.
Ask a new question about this device
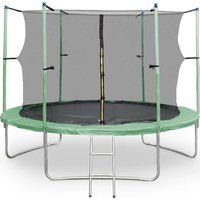
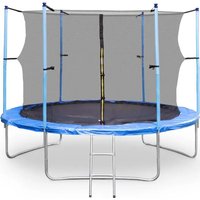
Download the instructions for your Trampoline in PDF format for free! Find your manual Jumpstarter - Klarfit and take your electronic device back in hand. On this page are published all the documents necessary for the use of your device. Jumpstarter by Klarfit.
USER MANUAL Jumpstarter Klarfit
Berlin Brands Group UK Ltd
PO Box 1145
Oxford,OX19UW
United Kingdom
English 23
Français 43
Espanol 63
Italiano 83
SICHERHEITSHINWEISE
Congratulations on purchasing this device. Please read the following instructions carefully and follow them to prevent possible damages. We assume no liability for damage caused by disregard of the instructions and improper use. Scan the QR code to get access to the latest user manual and more product information.

CONTENT
Safety Instructions 24
Causes of Accidents 26
Methods for Accident Prevention 27
Individual Parts 29
Assembly 32
Individual Parts of the Safety Net 35
Assembly of the Safety Net 37
Testing the Trampoline 41
MANUFACTURER & IMPORTER (UK)
Manufacturer:
Chal-Tec GmbH, Wallstrasse 16, 10179 Berlin, Germany.
Importer for Great Britain:
Berlin Brands Group UK Ltd
PO Box 1145
Oxford,OX19UW
United Kingdom
SAFETY INSTRUCTIONS
- Read this manual carefully before setting up and using the device. Safe and effective use of the device can only be achieved if the device is properly set up, maintained and used. Make sure that all persons using this device are informed about the warnings and safety instructions.
- Before training on this device, seek medical attention and check for physical or health conditions that may prevent the safe and efficient use of this device. If you are taking any medication that affects blood pressure, heart rate, or cholesterol, it is important to consult a physician before you start exercising.
- Pay attention to the signals of your body. Wrong or excessive exercise can be harmful. Stop exercising immediately if you notice any of the following symptoms: chest pain or tightness, irregular heartbeat, extreme shortness of breath, signs of lightheadedness, dizziness or nausea. If you notice any of these symptoms, you should consult a doctor before continuing.
- This device is not intended to be used by persons (including children) with limited physical, sensory or mental faculties or with a lack of experience and / or lack of knowledge, unless directed or supervised by a person responsible for their safety or familiarized with instructions on how to use the device. Children should be supervised to ensure that they do not play with the device.
- Set up the device on a dry and even surface.
- Before each workout, make sure that all screws and fasteners are properly tightened.
- The safety of the device can only be guaranteed if the device is regularly cleaned and examined for possible damage or wear and tear.
- Only use the device as intended. If you discover any defective components during setup or inspection, or if you notice any unusual noises on the device during exercise, stop exercising immediately. Only use the device again after the problem has been identified and solved.
- Wear appropriate clothing when using the device. Avoid loose clothing that could catch on the unit and restrict your freedom of movement.
The device is approved for domestic use.
The device is not suitable for therapeutic use. - Be careful when lifting or moving the unit. Use back-friendly lifting techniques and seek assistance in moving the device.
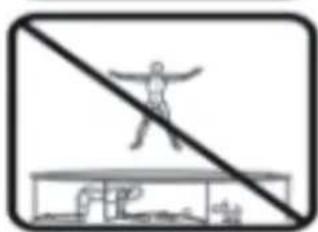
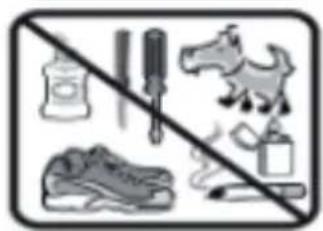
- Remove items under the trampoline.
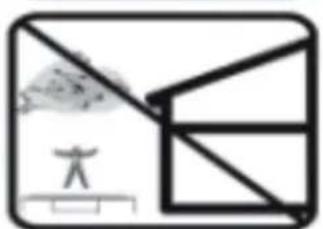
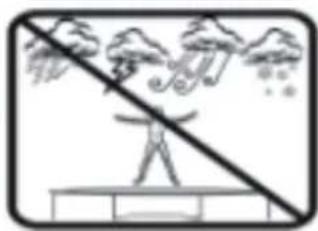
- Do not use in rain, wind or thunderstorms. Do not leave outdoors in bad weather. The frame of the trampoline can conduct electricity. Do not allow to come into contact with electricity. Caution during thunderstorms.
- Inspect the trampoline for damaged, worn or broken parts before each use. These can damage the safety of the trampoline and must be replaced immediately. The trampoline may only be used again after these are restored.
- Avoid objects that could catch, such as clothing with hooks.

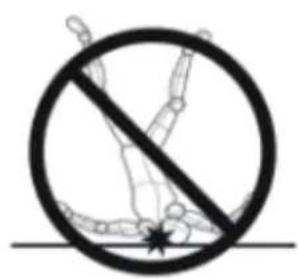
DANGER
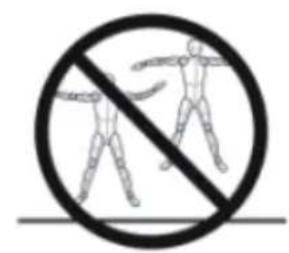
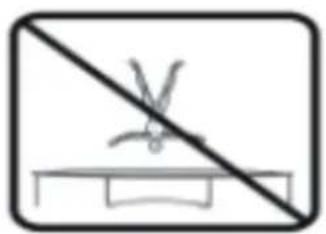
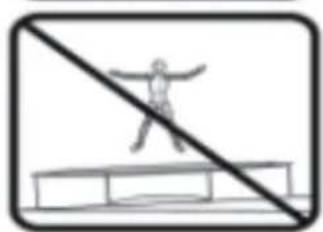
Risk of injury! There must never be more than one person jumping on the trampoline: risk of injury due to collisions. Do not attempt a somersault: there is a risk of landing on the head, which in the worst cases can cause paralysis or even death.
Small objects / packaging parts
Keep small objects and packaging out of the reach of children to prevent children from swallowing them. Do not let small children play with plastic fi lm.
Transport of the device
Please keep the original packaging. To ensure adequate protection during transport, pack the device in its original packaging.
Cleaning the outer surface
Do not use volatile liquids, such as insect sprays. Excessive pressure during wiping can damage the surfaces. Do not use abrasives or other chemical cleaning agents. A soft cloth is enough.
Usage
- The use of the trampoline is not suitable for medical and/or professional purposes.
The body weight of the user must not exceed 120kg
Danger for children
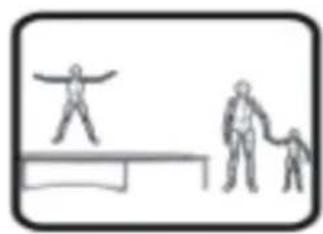
Children should not use the trampoline unattended.
- Trampolines are not suitable those with a height of under 51cm or for children under 8 years of age. These children cannot assess the dangers of playing. Accordingly, the trampoline should be inaccessible to children and pets when it is stored.
Notes on setup
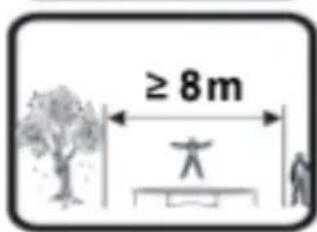
- Keep a safety distance of 8m to electrical cables, branches, pools, grills and fences.
- A clearance space of at least 7.30m is necessary above the trampoline
- Set up only on a level, fi rm and uniform ground.
CAUSES OF ACCIDENTS
Somersaults
No somersaults may be performed on the trampoline, as a landing on the head or neck can lead to neck or back injuries or even paralysis and death. Injuries may even be caused by uncontrolled jumping back and forth.
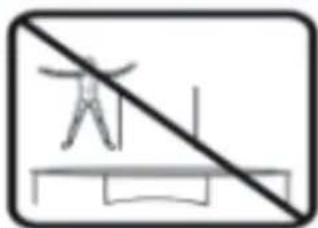
Multiple users at the same time
Several users who use the trampoline at the same time automatically increase the risk of accidents. These users could collide, land incorrectly or even fall off the trampoline.
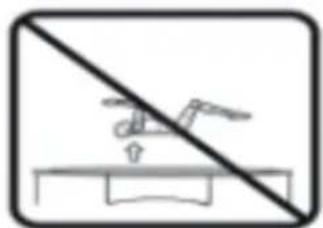
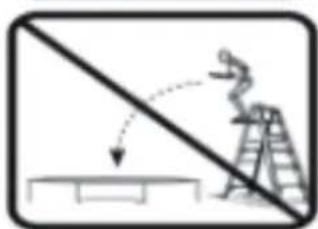
Getting on and off
Please be very careful when getting on and off of the trampoline. Do not jump onto the trampoline from higher locations (ladder, roof, etc.). Young children may need help getting on and off. Do not climb onto the cover pads. Hold onto the frame as you dismount.
Frame and springs
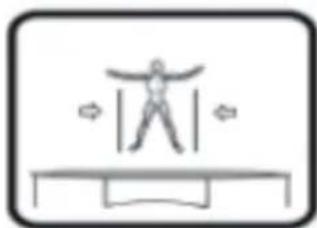
When jumping you should always focus on the middle of the trampoline. This reduces the risk of falling when landing on the frame or the springs. Frames and springs must always be completely covered by the cover mats.
Loss of control
Incorrectly landing on the spring mat, frame or cover mat as well as falling from the trampoline can lead to injuries. Basic jumps must be mastered before making more difficult jumps. If the jumper is tired or attempts a jump that exceeds his or her ability, there is a risk of losing control. To regain control of a jump, pull in your knees.
Foreign objects
Do not use the trampoline if pets, people or objects are under the trampoline. While jumping, do not hold anything in your hands or place anything on the trampoline. When another user uses the trampoline, you should make sure that there are no branches, power cables etc. above the trampoline.
Faulty maintenance
Always inspect the trampoline for torn or worn mats and covers, bent frames, missing parts, loose or broken springs, and frame stability before use. Defective or worn parts must be replaced immediately. Until fully restored, do not use the trampoline.
Bad weather
The trampoline should only be used in good weather. A wet jumping mat is too slippery to jump on properly. In gusty or strong winds, you risk losing control while jumping. This trampoline is intended for in-house use.
Unlimited access
When the trampoline is not in use, the access area should be closed so that children cannot play on the trampoline unattended.
METHODS FOR ACCIDENT PREVENTION
User:
Basic knowledge of the trampoline is a must. The user should first learn how to perform a low and above all controlled jump, and in addition the basic landing positions and combinations before starting with advanced jumping exercises. It is important that all users understand why the jumps must be performed in a controlled manner. A controlled jump means that the jump and the landing are the same (see „Basic Jumping Techniques" section). Learn more about training material from trained trampoline instructors.
Supervisor:
The safety instructions should be strictly followed and enforced by the supervisor. All users of the trampoline should be well informed by the supervisor. If no supervision can be guaranteed, the trampoline must be dismantled. In addition, the user must be informed by the supervisor about all warnings.
Instructions for using the trampoline
- Please make sure that the zipper of the safety net is 100% closed and that all three boarding hooks are rehooked before jumping.
- Do not intentionally jump into the safety net, it is only designed so that persons cannot fall from the trampoline. Intentionally jumping into the safety net can cause the trampoline to tip over or damage the net. Misuse of the safety net is considered negligent use.
- For additional stability you can place sandbags on the trampoline feet. This prevents the trampoline from tipping over when loaded sideways.


INDIVIDUAL PARTS
EN
| Trampoline 3 feet Trampoline 4 feet | |
| Trampoline 5 feet Trampoline 6 feet | |

| Part Ø 1.40 m Ø 1.80 m Ø 2.40 | m Ø 3 m Ø 3 | m | |||
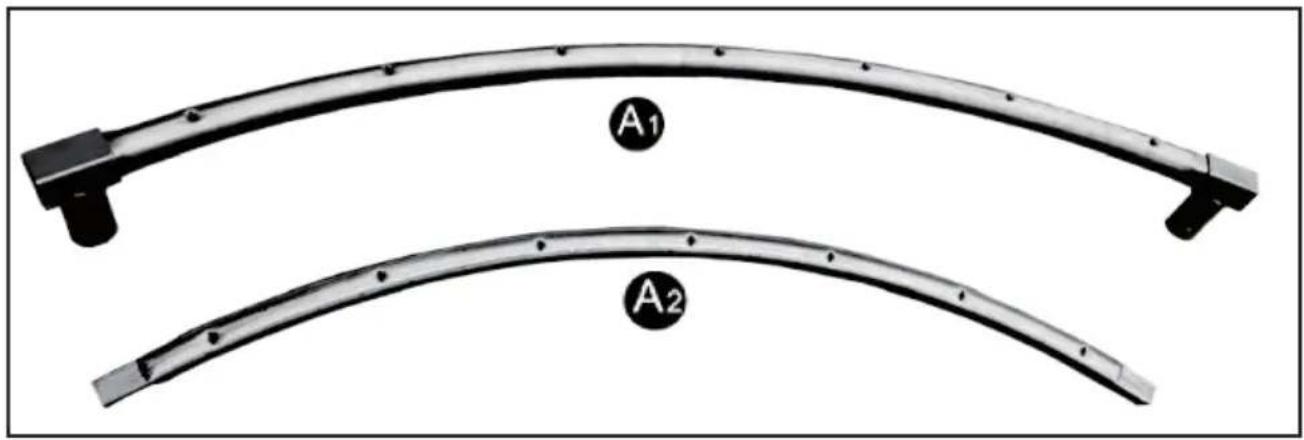
| A1 | Guide rail 3 x 3 x 3 x 3 x 3 | x | |||
| A2 | Guide rail 3 x 3 x 3 x 3 x 3 | x | |||
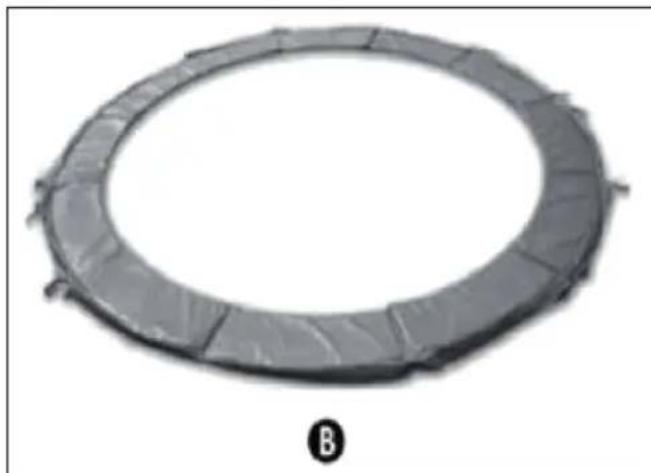
| B | Cover 1 x 1 x 1 x 1 x 1 x | ||||
| C | Jumping mat 1 x 1 x 1 x 1 x 1 x | 1 x | |||
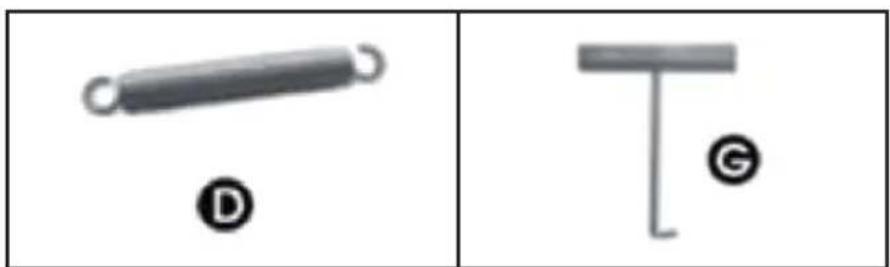
| D | Springs 30 x 36 x 42 x 54 x | 54 x | |||
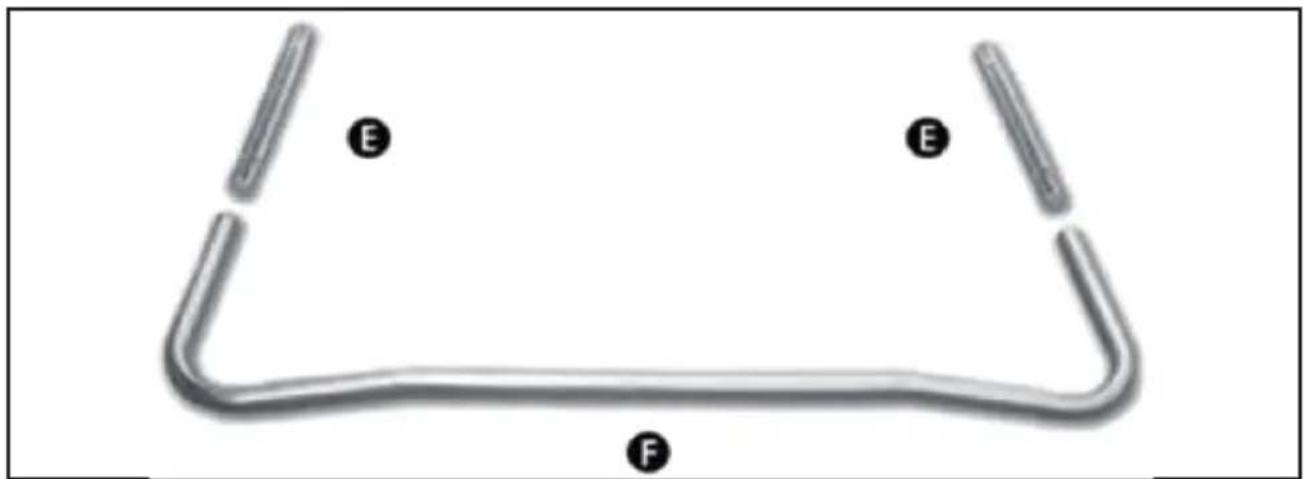
| E | Extension | - | - | - | - |
| F | Base | 3 x 3 x 3 | x 3 x 3 x | ||
| G | Spring tool | 1 x 1 x 1 x 1 x 1 x | |||
| Part | Ø 3.7 m | Ø 4 m | Ø 4.27 m | Ø 4.57 m | Ø 4.88 m | |
| A1 | Guide rail 4 x 4 x 4 x 5 x 6 | x | ||||
| A2 | Guide rail 4 x 4 x 4 x 5 x 6 | x | ||||
| B | Cover 1 x 1 x 1 x 1 x 1 x | |||||
| C | Jumping mat 1 x 1 x 1 x 1 x | 1 x | ||||
| D | Springs 72 x 80 x 80 x 90 x | 108 x | ||||
| E | Extension | 8 x | 8 x | 8 x | 10 x | 12 x |
| F | Base | 4 x 4 x 4 x 5 x 6 x | ||||
| G | Spring tool | 1 x 1 x 1 x 1 x 1 x | ||||
ASSEMBLY
Note: The device is designed to be put together by two physically fit adults. Persons involved in the assembly should wear protective footwear, gloves and sturdy clothing.
NOTE: The following pictures show the assembly. The equipment and appearance of the trampoline may vary slightly depending on the trampoline model.
| 1 2 | |
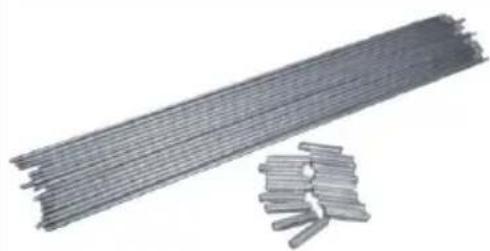
| Place all trampoline parts in groups in front of you, as shown in picture 1. | Attach the leg extensions to a leg base and secure together with the screws. Repeat for all leg supports. |
| 3 | 4 |
| Slide the guide rails together to form a circle. To close the circle, 2 persons may be required, one person using the last guide rail and the other person holding the linkage on the opposite side. (Make sure the guide rails (A1/A2) are correctly positioned, see step 4.) | Assemble the circle and the previously mounted feet as shown above to form a trampoline frame. Make sure that each stand is connected to two guide rails (A1), as shown in the picture (4) and in the figure below. |
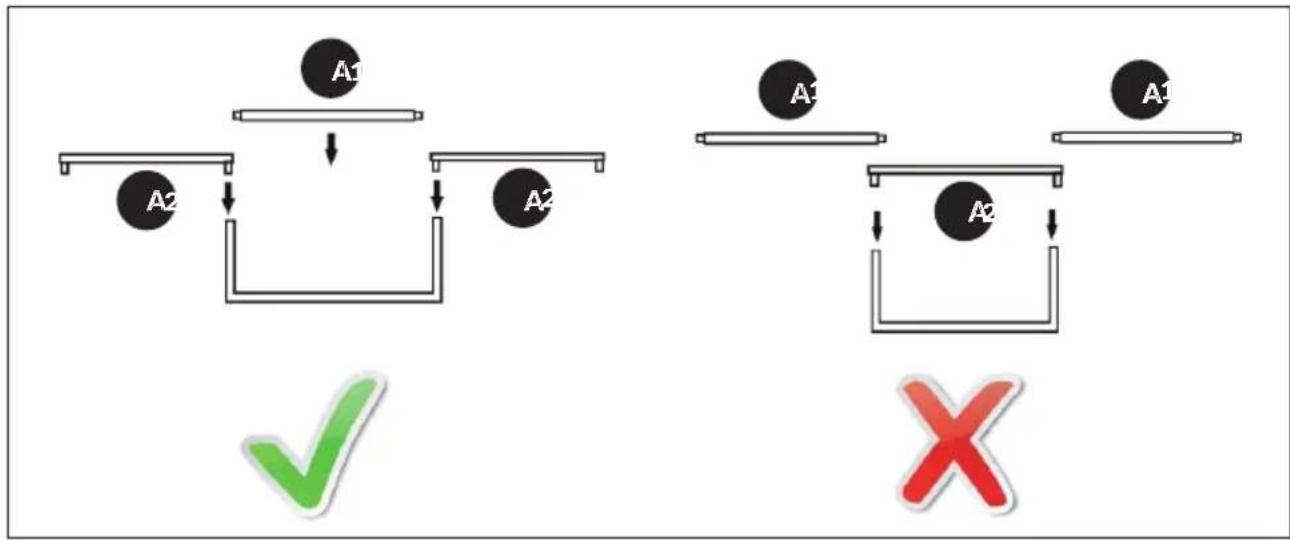
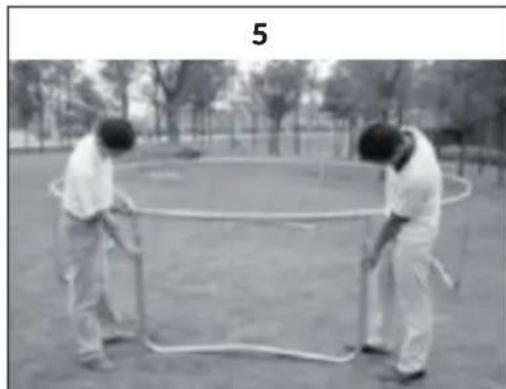
Attach the feet assembled in step 2 to the guide frame assembled in step 3.
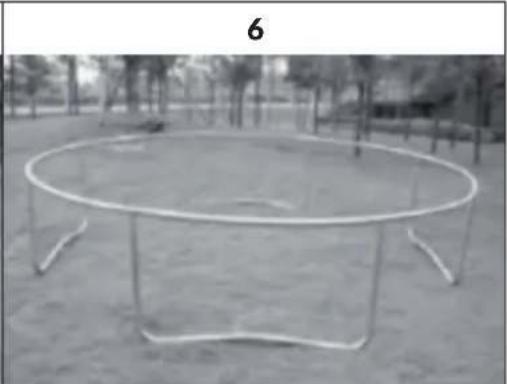
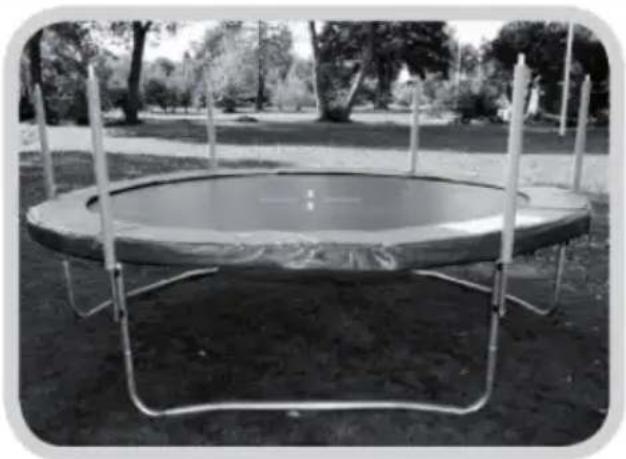
At this point the trampoline should look as shown in the picture above.
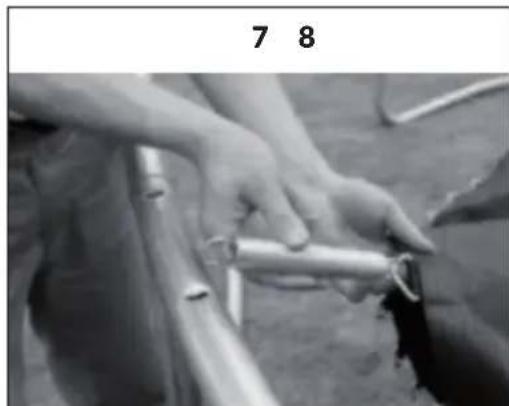
Place the jumping mat with the stitched side down in the middle of the basic frame and fasten a spring in one of the triangle rings of the mat. Then attach the other end of the spring to the frame.
Repeat step 7 directly opposite where you fixed the first spring. Then attach two more springs halfway between the first two springs, directly across from each other. This will ensure an equal tension between the springs.
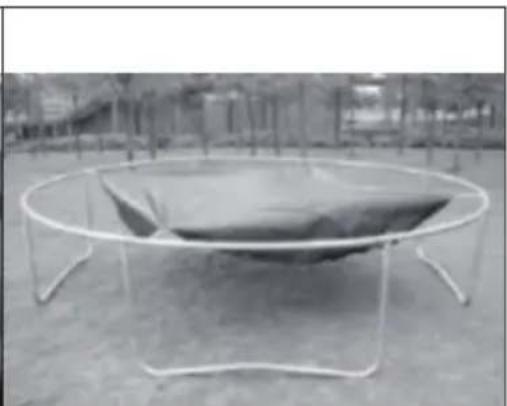
| 910 | |
| Repeat process for the remaining springs. Use the spring tool, as shown above. Attention! Risk of injury from the spring snapping open or shut. | Springs under heavy tension may require adjacent springs to be attached at every four or five holes, so the spring tension is distributed equally. |
| 11 12 | |
| Attach the remaining springs until all springs are attached onto the frame. | Place the cover on the outer edge so that all springs are covered. |
| 13 14 | |
| Attach the cover to the trampoline frame with all cords. | After completion of the work, check the assembly again thoroughly before you start trampoline jumping (see section “Testing the trampoline”). |
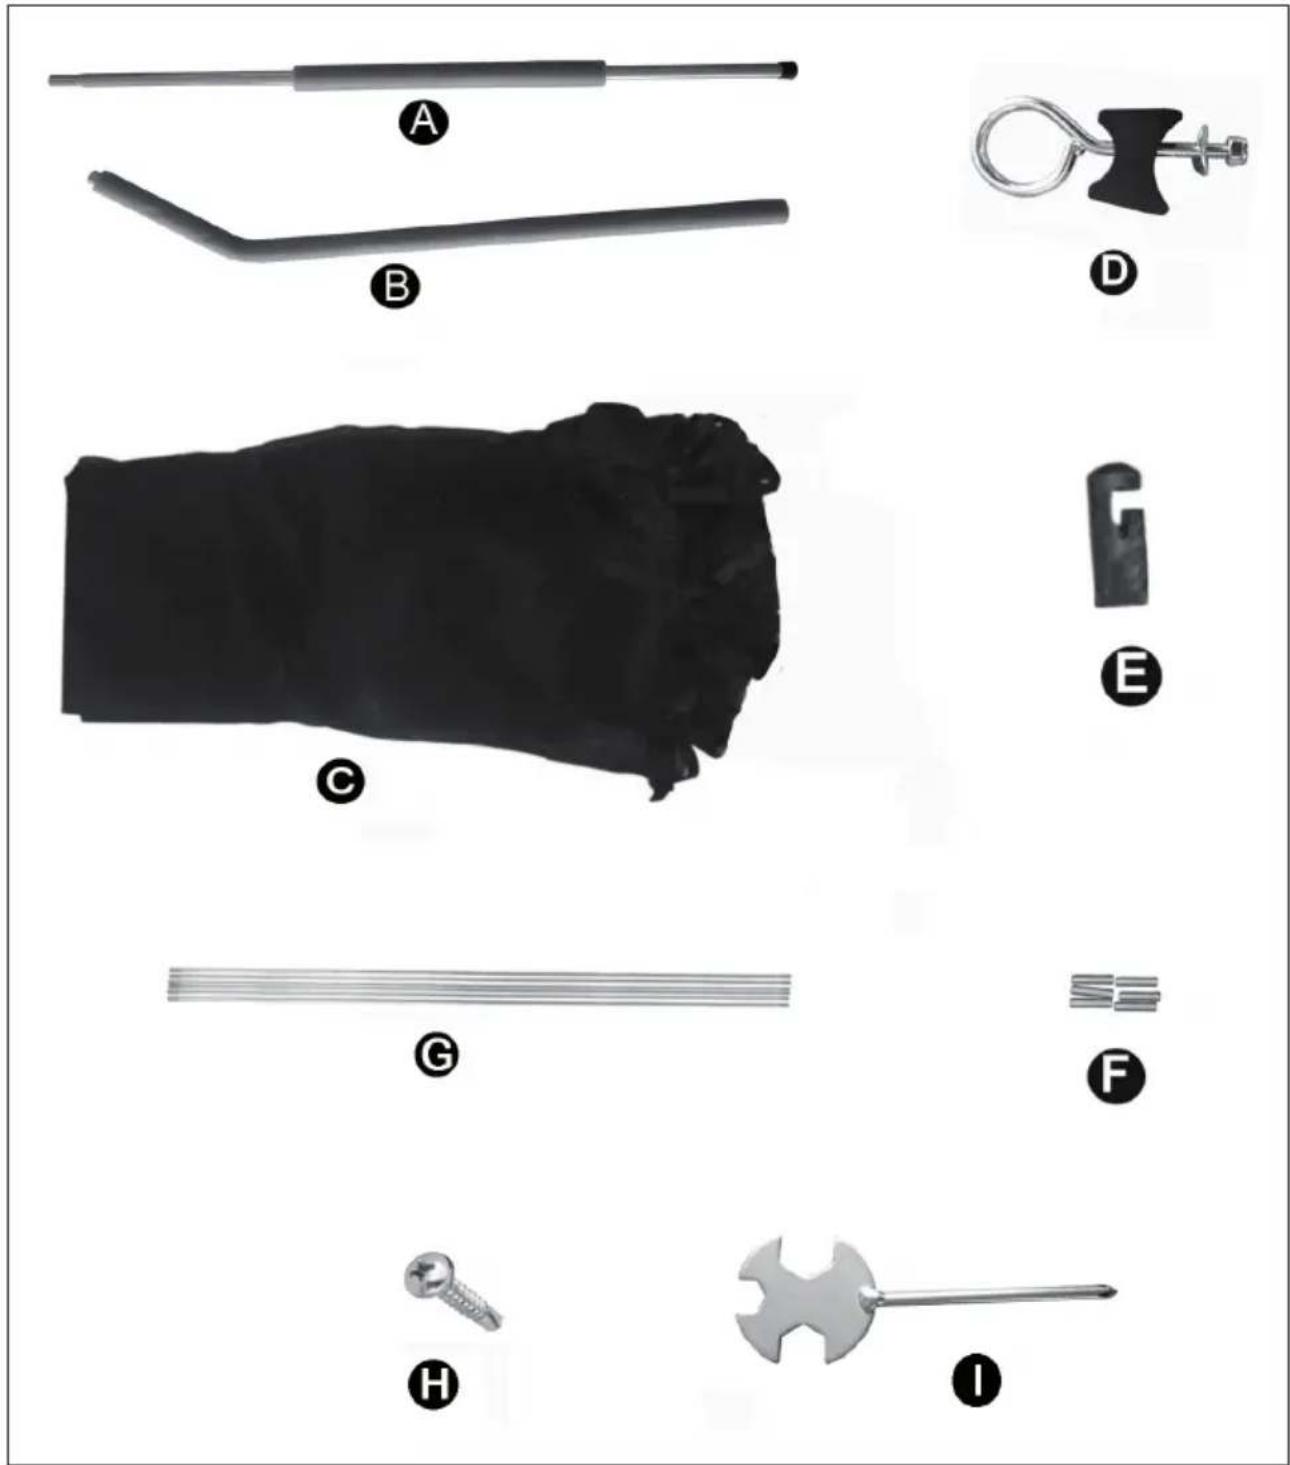
| Part Ø 1.80 m Ø | 2.40 m Ø 3 m | Ø 3.70 m | |||
| A | Upper rod 6 x 6 x 8 x 8 x | ||||
| B | Lower rod 6 x 6 x 8 x 8 x | ||||
| C | Safety net 1 x 1 x 1 x 1 x | ||||
| D | Quick clamps 12 x 12 x 12 | x 16 x | |||
| E | Plastic holder 1 x 1 x 1 x 1 x | x | |||
| F | Coupling nut 6 x 6 x 8 x 10 x | x | |||
| G | Metal rod | 6 x 6 x 8 x | 10 x | ||
| H | Screws | 12 x 12 x 12 | x 16 x | ||
| I | Spanner | 1 x 1 x | 1 x 1 x | ||
| Part | Ø 4 m Ø | 4.27 m Ø 4.5 | 7 m Ø 4.80 m | |
| A Upper rod | 6 x 6x | 10 x 12x | ||
| B Lower rod | 6 x 6x | 10 x 12x | ||
| C Safety net | 1 x 1 x 1 x 1 x | |||
| D Quick clamps | 16 x 16 x 20 x 24 x | |||
| E Plastic holder | 1 x 1 x 1 x 1 x | |||
| F Coupling nut | 12 x 12 x 14 x 16 x | |||
| G Metal rod | 12 x 12 x 14 x 16 x | |||
| H Screws | 16 x 16 x 20 x 24 x | |||
| I | Spanner | 1 x 1 x 1 x 1 x | ||
ASSEMBLY OF THE SAFETY NET
An overview of the required individual parts of the safety net (marked A - I) can be found in the previous section "Individual parts of the safety net".
Note: Two adults in good physical condition are required for the following assembly. For your safety, you should wear proper shoes and clothing. Failure to follow these instructions and warning may result in injury.
NOTE: The following pictures show the installation of the safety net. Equipment and appearance may vary slightly depending on the model.
1
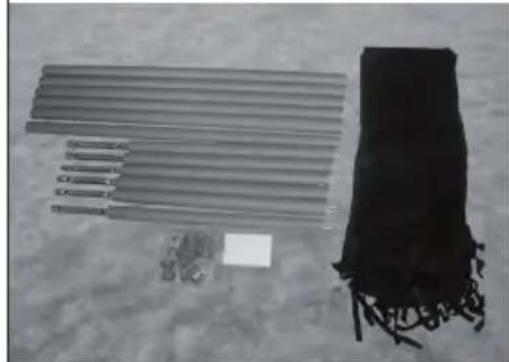
Place all individual parts in front of you before assembly. The construction of the safety net should be carried out by two persons. Start by assembling the poles.
2
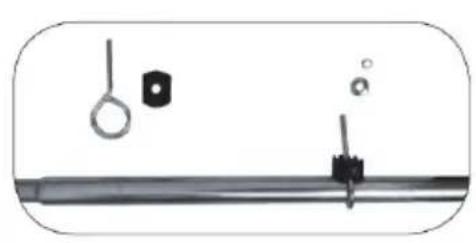
Use the quick clamp to secure the lower rod to the trampoline stand as shown. Tighten the screws using the spanner.
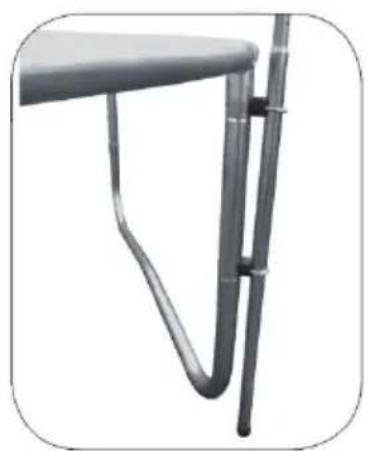
3
At this point the trampoline should look as shown in this picture.
| 4 | 5 |
| Mount the plastic holder to the upper rods with screws. Use a screwdriver to tighten the screws. | Connect the upper and middle rods with screws. |
| 6 | |
| Repeat steps 4 and 5 until all rods are assembled. Now the trampoline should look as shown in the picture. | |
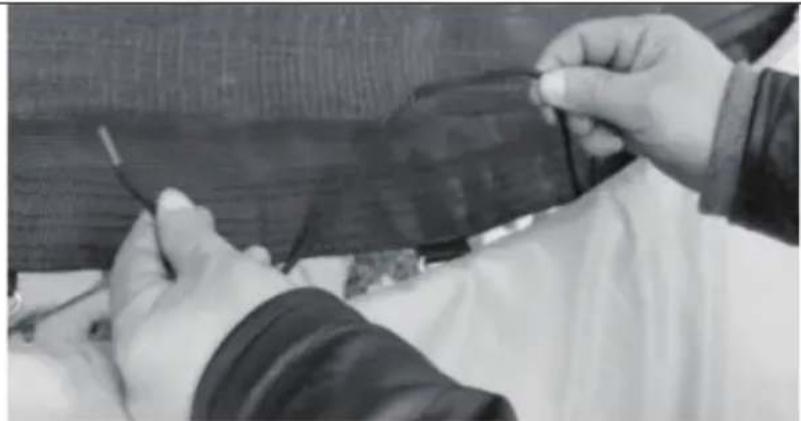
7
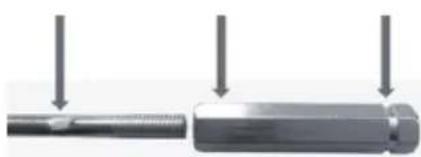
Connect half of the metal rods (G) one by one with the nuts to form a long metal rod. Connect the other half of the metal rods (G) with the nuts one after the other to form a second long metal rod.

8
Push the two long metal rods into the top pocket of the safety net as shown in the picture.

9
Connect the ends of the two long metal rods to form a circle.
10
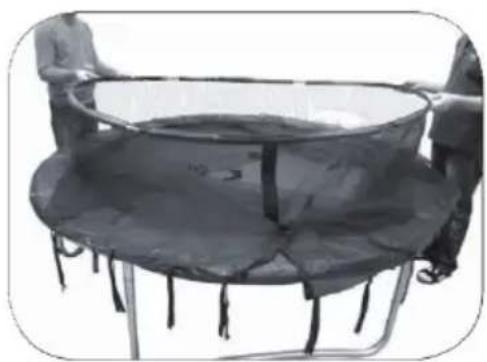
Hang the circular metal rods of the safety net into the plastic holders of the metal rods mounted vertically on the trampoline as shown. Two adults are required for this assembly step.
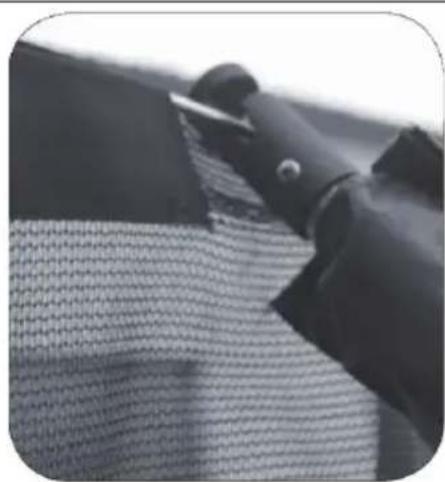
11
Use the string to connect the bottom of the safety net to the triangle rings as shown in the picture.
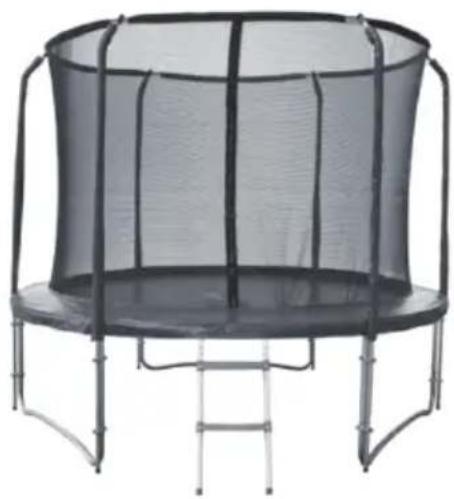
12
Your trampoline is now fully assembled and ready for use.
TESTING THE TRAMPOLINE
After assembling the trampoline, it is important that you perform the following safety checks:
Trampoline safety check
- Use a screwdriver to check that all screws are tight.
- Look under the trampoline mat and check that all springs are firmly attached to the frame and triangle rings.
- Move the trampoline in all directions and check the stability of the frame.
- Use both hands to place your body weight on a section of the trampoline and release to check that the floor is level.
- Check the cover and make sure that it completely covers all springs and the frame.
- Make sure the strings of the cover are tied securely.
Safety net security check:
- Hold on to a pole net and check that all housing bars are stable by shaking them.
- Check the safety net and the rod sheathings for tears in the stitching or material.
- Check the function of the net closure and the entrance hooks.
- Check that all safety net hooks are attached to the triangle ring under the trampoline.
Once all checks have been performed and the trampoline has passed all initial tests (above), a person can test the trampoline by continuously jumping in the middle of the trampoline for 5 minutes. When the trampoline feels sturdy, the test is complete.
Chere cliente, cher client,
Berlin Brands Group UK Ltd
PO Box 1145
Oxford,OX19UW
United Kingdom
CONSIGNES DE SECURITÉ
CAUSES POSSIBLES D'ACCIDENT
Saltos
Berlin Brands Group UK Ltd
PO Box 1145
Oxford,OX19UW
United Kingdom
PRODUTTORE IMPORTATORE (UK)
Produtlore:
Chal-Tec GmbH, Wallstraße 16, 10179 Berlin, Germania.
Berlin Brands Group UK Ltd
PO Box 1145
Oxford,OX19UW
United Kingdom