Elite EF15P - Speaker YORKVILLE - Free user manual and instructions
Find the device manual for free Elite EF15P YORKVILLE in PDF.
User questions about Elite EF15P YORKVILLE
0 question about this device. Answer the ones you know or ask your own.
Ask a new question about this device
Download the instructions for your Speaker in PDF format for free! Find your manual Elite EF15P - YORKVILLE and take your electronic device back in hand. On this page are published all the documents necessary for the use of your device. Elite EF15P by YORKVILLE.
USER MANUAL Elite EF15P YORKVILLE
SERVICE MANUAL EF15P SMT Disclaimer Due to the complex nature of the use of SMT installed components in Yorkville equipment, we highly caution all service technicians in attempting to repair or replace SMT factory installed components. Many of these components may be glued prior to initial soldering. Replacing SMT components requires expensive specialized de-soldering equipment and training. Yorkville Sound will repair and replace defective SMT components to ensure proper quality assurance and installation is maintained. U.S.A. Yorkville Sound Inc. 4625 Witmer Industrial Estate Niagara Falls, New York 14305, USA Voice: 716-297-2920 Fax: 716-297-3689 WORLD HEADQUARTERS CANADA Yorkville Sound Limited 550 Granite Court Pickering, Ontario
Warning: When using electric products, basic precautions should always be followed, including the following:
IMPORTANT SAFETY INSTRUCTIONS
FOLLOW ALL INSTRUCTIONS SUIVEZ TOUTES LES INSTRUCTIONS AVIS: AFIN DE REDUIRE LES RISQUE DE CHOC ELECTRIQUE, N’ENLEVEZ PAS LE COUVERT (OU LE PANNEAU ARRIERE) NE CONTIENT AUCUNE PIECE REPARABLE PAR L’UTILISATEUR. CONSULTEZ UN TECHNICIEN QUALIFIE POUR L’ENTRETIENT CE PRODUIT EST POUR L’USAGE À L’INTÉREUR SEULEMENT. LES PACKS BATTERIES INSTALLÉS NE DOIVENT PAS ÊTRE EXPOSÉS À UNE CHALEUR EXCESSIVE TELLE QUE LE ENSOLEILLEMENT, LE FEU OU SIMILAIRES. CAUTION: TO REDUCE THE RISK OF ELECTRIC SHOCK, DO NOT REMOVE COVER (OR BACK). NO USER SERVICEABLE PARTS INSIDE. REFER SERVICING TO QUALIFIED SERVICE PERSONNEL. THIS DEVICE IS FOR INDOOR USE ONLY! INSTALLED BATTERY PACKS SHALL NOT BE EXPOSED TO EXCESSIVE HEAT SUCH AS SUNSHINE, FIRE OR THE LIKE. SEPARATECOLLECTION WEEE DO NOTPUSH OR PULLCAUTION: OVERHEAD LOADATTENTION: CHARGE AÉRIENNE The Lightning Flash with arrowhead symbol within an equilateral triangle, is intended to alert the user to the presence of uninsulated "dangerous voltage" within the product enclosure that may be of sufficient magnitude to constitute a risk of shock to persons The exclamation point within an equilateral triangle is intended to alert the user to the presence of important operating and maintenance (servicing) instructions in the literature accompanying the product 1. Read these instructions. 2. Keep these instructions. 3. Heed all warnings. 4. Follow all instructions. 5. Do not use this apparatus near water. 6. Clean only with dry cloth. 7. Do not block any ventilation openings. Install in accordance with the manufacturer’s instructions. 8. Do not install near any heat sources such as radiators, heat registers, stoves, or other apparatus (including amplifiers) that produce heat. 9. Do not defeat the safety purpose of the polarized or grounding-type plug. A polarized plug has two blades with one wider than the other. A grounding type plug has two blades and a third grounding prong. The wide blade or the third prongs are provided for your safety. If the provided plug does not fit into your outlet, consult an electrician for replacement of the obsolete outlet. 10. Protect the power cord from being walked on or pinched particularly at plugs, convenience receptacles, and the point where they exit from the apparatus. 11. Only use attachments/accessories specified by the manufacturer. 12. Use only with the cart, stand, tripod, bracket, or table specified by the manufacturer, or sold with the apparatus. When a cart is used, use caution when moving the cart/apparatus combination to avoid injury from tip-over. 13. Unplug this apparatus during lightning storms or when unused for long periods of time. 14. Refer all servicing to qualified service personnel. Servicing is required when the apparatus has been damaged in any way, such as power-supply cord or plug is damaged, liquid has been spilled or objects have fallen into the apparatus, the apparatus has been exposed to rain or moisture, does not operate normally, or has been dropped. WARNING:
- To reduce the risk of fire or electric shock, do not expose this apparatus to rain or moisture and objects filled with liquids, such as vases, should not be placed on this apparatus.
- To completely disconnect this apparatus from the ac mains, disconnect the power supply cord plug from the ac receptacle.
- The mains plug of the power supply cord or appliance coupler shall remain readily accessible. Le symbole représentant un éclair avec une flèche à l’intérieur d’un triangle équilatéral est utilisé pour prévenir l’utilisateur de la présence d’une tension électrique dangereuse non isolée à l’intérieur de l’appareil. Cette tension est d’un niveau suffisamment élevé pour représenter un risque d’électrocution Le symbole représentant un point d’exclamation à l’intérieur d’un triangle équilatéral, signale à l’utilisateur la présence d’instructions importantes relatives au fonctionnement et à l’entretien de l’appareil dans cette notice d’installation
DESIGNED & MANUFACTURED BY
Contains Transmitter Module FCC ID: WAP2011 This device complies with Part 15 of the FCC Rules. Operation is subject to the following two conditions: (1) this device may not cause harmful interference, and (2) this device must accept any interference received, including interference that may cause undesired operation. Enable / Disable Hold 4 sec. to reset LED Flashing: Ready to Connect LED On: Connected
CAUTION: REPLACE FUSE WITH
SAME TYPE AND RATING
DESIGNED & MANUFACTURED BY
A-Z1463 / 1v0 Contains Transmitter Module FCC ID: WAP2011 This device complies with Part 15 of the FCC Rules. Operation is subject to the following two conditions: (1) this device may not cause harmful interference, and (2) this device must accept any interfer- ence received, including interference that may cause undesired operation. Enable / Disable Hold 4 sec. to reset LED Flashing: Ready to Connect LED On: Connected LINE IN MIC IN MIXER ENABLE MAIN IN Phantom +24V MAIN DSP LINK BLUETOOTH CONTROL EF15P LEVEL LEVEL LEVEL
CAUTION: REPLACE FUSE WITH
SAME TYPE AND RATING
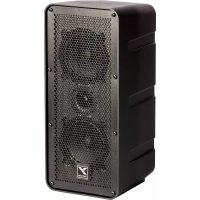
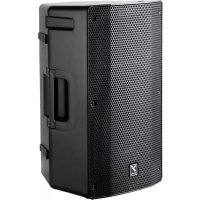
EF15P YorkvilleEF10P EF12P EF15P EF215P System Type 2-Way 2-Way 2-Way 2-Way Active or Passive Active Active Active Active Program Power (watts) 500 watts (1000 watts Peak) 1200 watts (2400 watts Peak) 1200 watts (2400 watts Peak) 1200 watts (2400 watts Peak) Max SPL (dB) 128dB Peak (122dB Continuous) 131dB Peak (125dB Continuous) 133dB Peak (127dB Continuous) 133dB Peak (127dB Continuous) Frequency Response (Hz +/- 3dB) 56 - 20k (Hz +/- 3dB) 47 - 16k (Hz +/- 3dB) 43 - 16k 40 – 16k (Hz +/- 3dB) Crossover Frequency (Hz)
Driver Configuration 10-inch, 1.3-inch Diaphragm 12-inch, 3-inch Diaphragm 15-inch, 3-inch Diaphragm 2 X 15-inch, 3-inch Diaphragm HF Driver(s) 1.3-inch Voice coil (Titanium Diaphragm) 3-inch Voice coil (Titanium Diaphragm) 3-inch Voicecoil (Titanium Diaphragm) 3-inch Voicecoil (Titanium Diaphragm) HF Dispersion (°H x °V) 100x40 60x40 60x40 60x40 LF Driver(s) 10-inch Neo magnet w/2.5-inch Voice coil 12-inch Neo magnet w/3-inch Voice coil 15-inch neo magnet w/3-inch Voice coil 2 X 15-inch neo magnet w/3-inch Voice coil HF Power Amplifier (watts)
HF Amplifier Type 2-Tier Class H 3-Tier High Headroom 3-Tier High Headroom 3-Tier High Headroom LF Power Amplifier (watts) 400
Main In / Link Thru Combi-Jack Combi-Jack DSP
ADC DAC RCA XLR XLR2
Main In / Link Thru Combi-Jack EF215P Combi-Jack 1/8-inch TRS XLR XLR DSP
ADC DACM1497 02 Parts Reference List 9/28/2020 REF YS # Description REF YS # Description REF YS # Description REF YS # Description REF YS # Description REF YS # Description AI-ASS M1497-59 EF15P/12P/POWER SUPPLY INPUT C80
DPDT MINI PC VERT SNP ALT
8283 __4.7UH 20% COIL 12MM SMT
7730 __2.2UH COIL SMT
2910 120.0UH COIL SR4018T 1R6 SMT
R134 7635 W100 221R 1% 0805 SMT RESM1802 Parts Reference List 12/13/2018 REF YS # Description REF YS # Description REF YS # Description REF YS # Description REF YS # Description
7730 __2.2UH COIL SMT
2910 120.0UH COIL SR4018T 1R6 SMT
8283 __4.7UH 20% COIL 12MM SMT
HC3 CHGND2 CHGND1 Connected to CHGND2 through the chassis. Connected to CHGND1 through the chassis. Use a wire to connect these two points when working on the bench. Use a wire to connect these two points when working on the bench.
_W6_Power Supply PCB
R202 CH_GndConnection to CHGND2 in Use a wire to connect these two points when working on the bench. Power Supply through the chassis. Connected to Main Input at top left. W250 619R0
BICK LRCK TDMIN SDTO1
AUDIO PROCESSOR CORE
R104 DAC_DATA DAC_BCLK DAC_LRCLK RESET_DAC W125 10K
K K J J I I H H G G F F E E D D C C B B A A Power Supply Section: Product(s):
VIEWED FROM WIRE SIDE
VIEWED FROM WIRE SIDE
2. BEND C51 TO BOARD AND APPLY RTV TO HOLD IT.
MARKED W3 CONNECTOR - YS PART# 4018 AS DNS CHANGE FUSE PART NUMBER FOR CE FROM 2475 TO 2473 (T1.6A) Update labels on W6 and W7 connector pinout drawings.
C34 W5_C140C26C111C29R100C88
MAIN INPUTHORN+_SWOOFER_PRE_OUT
2. BEND C51 TO BOARD AND APPLY RTV TO HOLD IT.
MARKED W3 CONNECTOR - YS PART# 4018 AS DNS CHANGE FUSE PART NUMBER FOR CE FROM 2475 TO 2473 (T1.6A) Update labels on W6 and W7 connector pinout drawings.
K K J J I I H H G G F F E E D D C C B B A A Product(s): X8025 1 5Sheet OfPCB#: Rev#: V05 Powered speaker cabinet Description:
-80V HIOUT -80V HIOUT WGND +44V
K K J J I I H H G G F F E E D D C C B B A A Woofer Amplifier/PS Section: Product(s):
.V02 RELEASED VERSION 2. MOVED R61_3T AWAY FROM 80V CONNECTOR PAD C12&C23 to 10U/25V. Change VBE res to center trim pot. Add D4 to cut turn off noise. Added 1N cap and 47R resistor between gate and source of Q10 FOR DETAILS SEE PC#9660 FOR M1501.
4 CORNER MOUNTING NUTS
R132 D30A R114 R118 R36 R119
.V02 RELEASED VERSION 2. MOVED R61_3T AWAY FROM 80V CONNECTOR PAD C12&C23 to 10U/25V. Change VBE res to center trim pot. Add D4 to cut turn off noise. Added 1N cap and 47R resistor between gate and source of Q10 FOR DETAILS SEE PC#9660 FOR M1501.
HC3 CHGND2 Connected to CHGND1 through the chassis. Use a wire to connect these two points when working on the bench.
_W6_Power Supply PCB
R202 CH_GndConnection to CHGND2 in Use a wire to connect these two points when working on the bench. Power Supply through the chassis. Connected to Main Input at top left. W250 619R0
R216 LINE IN3.5mm JCK
+1V8 SUPPLY ADAU1401
AUDIO PROCESSOR CORE
R104 DAC_DATA DAC_BCLK DAC_LRCLK RESET_DAC W100 10K0
MARKED W3 CONNECTOR - YS PART# 4018 AS DNS CHANGE FUSE PART NUMBER FOR CE FROM 2475 TO 2473 (T1.6A) Change RCA to 1/8". Move mixer switch to make room for Master pot center mark. BOARD BLANK AND PROJECT RENAMED P8802. SECTIONS NAMED M1802 (INPUT), M1803 (POWER SUPPPLY) AND M1804 (AC FILTER) Added a 0.4A fuse in series with -15v supply track followed by a 20V 3W zener to ground to protect if -80v shorts to -15v. Part additions for safety and value modifications to reduce parts count. Unpanelized P8802 into M1802, M1803, and M1804 Released M1802V01 Change pots P1, P2 (10K, #4434), and P3 (10K, #4432) to YS #4459 (10K) Update labels on W6 and W7 connector pinout drawings. V01 V01 V02p1 V01P0
NOL NOR NCL NCR NOR NOL
R11 R214 R98 R150 C55 R109 R154 R117
SCREWS AND BOLTS STANDOFFSNUTS
The input section needs to be air tight. All Vias and Part Holes must be filled with solder.1
MARKED W3 CONNECTOR - YS PART# 4018 AS DNS CHANGE FUSE PART NUMBER FOR CE FROM 2475 TO 2473 (T1.6A) Change RCA to 1/8". Move mixer switch to make room for Master pot center mark. BOARD BLANK AND PROJECT RENAMED P8802. SECTIONS NAMED M1802 (INPUT), M1803 (POWER SUPPPLY) AND M1804 (AC FILTER) Added a 0.4A fuse in series with -15v supply track followed by a 20V 3W zener to ground to protect if -80v shorts to -15v. Part additions for safety and value modifications to reduce parts count. Unpanelized P8802 into M1802, M1803, and M1804 Released M1802V01 Change pots P1, P2 (10K, #4434), and P3 (10K, #4432) to YS #4459 (10K) Update labels on W6 and W7 connector pinout drawings. V01 V01 V02p1 V01P0
-88V W2:14 HIOUTW2:15
-88V W2:16 HIOUTW2:17
W6_:1 -15v_ +15V_ +24v_ LOOUT -88V HIOUT 96KHZ LO+ LO+ LO- LO- HI+ HI+ HI- HI- WGND
CON_HOLE_128 HC2 CHGND1 Connected to CHGND2 through the chassis. Use a wire to connect these two points when working on the bench. D_GND_ +88V_S HORN+_S WOOFER+_S DO214AC 3SMAJ5932B 20V
K K J J I I H H G G F F E E D D C C B B A A Power Supply Section:Product(s):
VIEWED FROM WIRE SIDE
VIEWED FROM WIRE SIDE
_W6_Power Supply PCB
R29 -88V LOOUT R231 LOOUT R220 D17 R219
SCREWS AND BOLTS STANDOFFSNUTS
T1.6A (#2473)T3.15A (#2475)CHGND
M1804 was part of P8802. P8802 is now de-panelized into M1802, M1803, M1804
and changed W11 from 4162 to 4244.
M1804 was part of P8802. P8802 is now de-panelized into M1802, M1803, M1804
and changed W11 from 4162 to 4244.
.Printed In CANADA DOC-YS-Green-00-1v0PR02 • July 14, 2014 www.yorkville.comwww.yorkville.com REAL Gear. REAL People. REAL Gear. REAL People. Yorkville Sound 550 Granite Court Pickering, Ontario
To get the full Owner’s Manual please visit our website at http://www.yorkville.com/manuals/ or, if you need a printed version call 905-837-8777 The élite EF-Series powered cabinets include a built in mixer allowing microphones and/or line sources to be used directly. The Link connectors allow up to 16 EF-Series powered cabinets to be driven from a single source (a maximum of 3 mixers can be used simultaneously when Linking). To add a subwoofer to the system a 100 Hz high pass lter can be activated. Power Switch & Mode LED The switch turns the power On or O and the illumination of the Mode LED indicates that unit is on. Limit LED The amber Limit LED indicates that the cabinet is operating at full power and the limiter(s) are actively reducing the signal level. Clip LED The red Clip LED indicates that the signal level is excessive and is causing distortion. To reduce clipping, turn down the mixer levels. Main In/ Thru (Link) Connectors The Main In / Thru (Link) connectors allow powered cabinets to be driven from a single source. You can Link up to 16 EF-Series powered cabinets! The Main In / Thru (Link) jacks are the correct input to use when using an external mixer. Note: When operating from weaker signals, use the Line inputs of the rst cabinet in the chain. To ensure maximum hum rejection, the proper balanced cables must be used. Mixer On/Off This switch turns the internal mixer ‘on’ or ‘o.’ When the Mic or Line inputs are used, this switch must be set to the ‘on’ position. If these inputs are not being used, the mixer should be turned ‘o.’ Line Inputs The Line inputs allow line level sources such as digital media players (lap tops, tablets or smart phones) and CD players to be connected. Note: If a microphone is connected to Channel 1 it will have lower gain compared to Channel 2’s Mic input (Phantom power is NOT available on Channel 1). Line Control The Line control adjusts the input volume level of devices plugged into the Line input. Mic Inputs Any standard microphone may be connected to the Mic input. Phantom power is built-in. Mic Control The Mic control adjusts the volume level for the Mic input. Master Control This control adjusts the level of the individual cabinet. When Linking multiple cabinets use this control to individually adjust the relative volumes of each cabinet. Note: The Master control is designed to be used in the 12 o’clock (middle) position, only minor adjustments are recommended. Mode Selector The Mode Selector applies specic EQ and tone settings for the EF-Series powered cabinet. Club: Boosted bass and enhanced highs make this mode ideal for music playback. Concert: Allows instruments and vocals to be equally and naturally reproduced which is best for live performance. Vocal: Shaped response specically for the human voice range ensures vocal intelligibility. User: Flat by default, can be customized by a user through the Yorkville app with a maximum of ve dierent parametric equalization points with adjustable boost, cut and Q. Sub Switch For operation with a subwoofer, this switch shuts o the low frequency boost and lters out signals below 100 Hz. This only aects the signals to the internal amplier and does not aect signals going out from the internal mixer, or to signals passing through the Link connections. Bluetooth™ Control This control enables or disables the Bluetooth™ connection between a tablet or a smartphone using the Yorkville App. Pressing this control button for more than 4 seconds resets the EF-Series powered cabinet to factory settings. Faults and Internal Fuse A blown fuse generally means that excessive mains voltage has been applied or there’s a serious fault with the unit. Self re-setting thermal switches are built into the power transformer. These will not trip even under the most extreme operating conditions and are provided only for safety reasons. Powered EF-Series Yorkville Printed In CANADA QuickStart-EF_P-Series-1v7 • YS#QSTART-EFP • October 23, 2023www.yorkville.comwww.yorkville.com REAL Gear. REAL People. REAL Gear. REAL People. Yorkville Sound 550 Granite Court Pickering, Ontario
Many of the popular models in the Yorkville speaker cabinet line are now equipped with flying hardware for overhead suspension applications. Depending on the model, two or more internal braces have been provided for rigging purposes. Each brace contains two bolt holes and provides center-of-gravity fly-points for use with in-line or angular loads. Many of the models will support additional suspended cabinets according to their specified working load limits. IMPORTANT!! THE RIGGING OF LOUDSPEAKER SYSTEMS IS AN EXTREMELY SERIOUS MATTER. OVERHEAD RIGGING REQUIRES EXTENSIVE EXPERIENCE, INCLUDING (BUT NOT LIMITED TO) CALCULATING WORKING LOAD LIMITS, HARDWARE INSTALLATION, AND PERIODIC SAFETY INSPECTION OF ALL HARDWARE AND CABINETRY. IF YOU LACK THESE QUALIFICATIONS, DO NOT ATTEMPT THE INSTALLATION YOURSELF, BUT INSTEAD USE A PROFESSIONAL STRUCTURAL RIGGER. IMPROPER INSTALLATION CAN RESULT IN BODILY INJURY OR DEATH. CONSULT A STRUCTURAL ENGINEER TO CALCULATE ADDED LOADS FOR A BUILDING. STRUCTURAL REINFORCEMENT MAY BE NECESSARY TO INSURE A SAFE INSTALLATION.
4.5mm (7/32”) Hex Wrench Thread lock adhesive (Removable Type)
3. EYEBOLT INSTALLATION
a) Using a 4.5mm (7/32”) hex wrench, remove the flat head bolts from the top or bottom of the speaker enclosure to expose the tapped holes (on TX models, the flat head bolts are located within the track rails), as shown below. Be sure to keep these handy as they will be needed to seal the cabinet after the eyebolts are removed. IMPORTANT!! USE ONLY LOAD RATED FORGED EYEBOLTS. THESE MAY BE PURCHASED THROUGH YORKVILLE SOUND OR ATM FLY-WARE™. TO INSURE CABINET-BRACING STRENGTH, MAKE SURE ALL FLY-POINTS ARE SECURED WITH EITHER AN EYEBOLT OR FLAT HEAD HEX BOLT. b) Place a drop of thread-lock adhesive on the threads of the eyebolt and insert one into exposed hole. Tighten each eyebolt by hand until its fits snugly against the cabinet. Further tighten each eyebolt by rotating it another half turn. Be sure to insert eyebolts in the threaded hole directly in-line with the suspension cable. Always follow the eyebolt manufacturers installation and use instructions. c) Suspend each cabinet according to working load calculations and practices recommended by the rigging hardware manufacturer. IMPORTANT!! ON MODELS WITH ONLY TWO TOP SUSPENSION POINTS THE SUPPLIED PULL BACK AT THE REAR OF THE BOTTOM CENTER PANEL OF THE CABINET IS NOT TO BE USED AS A SUSPENSION POINT. THIS POINT TO BE USED FOR PULL BACK PURPOSES ONLY. IMPORTANT!! READ ALL ENCLOSED INSTRUCTIONS ABOUT PROPER USE OF HARDWARE. TO INSURE PROPER INSTALLATION, FOR TECHNICAL INFORMATION ON SUSPENSION TECHNIQUES AND EXTERIOR ACCESSORY INFORMATION WE SUGGEST CALLING ATM FLY-WARES TECHNICAL SERVICES IN THE UNITED STATES AT (310)639-8282 MONDAY THROUGH FRIDAY FROM 9 AM TO 6 PM (PST) OR FAX AT (310)639-8284. YORKVILLE SOUND MAKES NO CLAIMS AS TO THE SAFETY OF THE ENCLOSURES IF RECOMMENDED LOAD LIMITS AND HARDWARE ARE NOT STRICTLY ADHERED TO. NOR DOES IT MAKE ANY SAFETY CLAIMS TO THE RESULTANT INSTALLATION. IMPORTANT!! TRACK RAILINGS: UNITS THAT INCORPORATE THE TRACK RAILING SYSTEM HAVE THE SAME WORKING LOAD LIMITS AS THEY DO WHEN THEY ARE USED WITH EYEBOLTS. THESE RATINGS MAY BE LIMITED AND BASED ON THE RATINGS OF THE TRACK FITTINGS THEMSELVES. PLEASE ENSURE THAT THE RATING OF THE CERTIFIED TRACK FITTINGS EXCEEDS