SL451 - Sound level meters VOLTCRAFT - Free user manual and instructions
Find the device manual for free SL451 VOLTCRAFT in PDF.
| Brand | VOLTCRAFT |
| Model | SL451 |
| Category | Sound level meter |
| Product type | Class 2 digital sound level meter |
| Dimensions (L x H x D) | 76 x 278 x 50 mm |
| Weight | Approx. 350 g |
| Power supply | 9 V battery (type 1604A) or included 9 V DC power adapter |
| Consumption | Max. 16 mA |
| Battery life | Approx. 50 h (alkaline) |
| Display | 2000-count LCD, backlight |
| Resolution | 0.1 dB (2 updates/s) |
| Measuring ranges | 30 – 130 dB (autorange); manual: 30-80, 50-100, 80-130 dB |
| Frequency range | 31.5 Hz – 8 kHz |
| Evaluation filters | A (dBA) and C (dBC) |
| Response time | FAST (125 ms) / SLOW (1 s) |
| Accuracy | ±1.4 dB (at 1 kHz) |
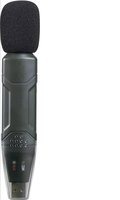
| Microphone | 1/2" electrostatic |
| Internal memory | 32,600 values with timestamp |
| Interface | USB (mini-USB) |
| Analog output | 3.5 mm jack: AC (max. 1 Vrms/130 dB) and DC (10 mV/dB) |
| Special functions | HOLD, MAX/MIN, data logger, adjustable auto-off, backlight |
| Included accessories | Power adapter, carrying case, windscreen, tripod, USB cable, 4 m microphone extension cable, Voltsoft software, battery |
| Operating temperature | 0 °C to +40 °C |
| Operating humidity | 10 – 90 % RH |
| Care and cleaning | Clean with a soft, damp cloth, no solvents. Replace the battery if the BAT symbol appears. |
| Safety | Use hearing protection in noisy environments. Do not expose to water, shocks, or extreme temperatures. Disconnect the battery if not used for extended periods. |
| Spare parts / Repairability | Spare battery (ref. 652509). Repairs by a specialist only. |
| General information | Compliant with IEC 61672-1 Class 2. Voltsoft software for data analysis. Manufacturer: Conrad Electronic SE. |
Frequently Asked Questions - SL451 VOLTCRAFT
User questions about SL451 VOLTCRAFT
0 question about this device. Answer the ones you know or ask your own.
Ask a new question about this device
Download the instructions for your Sound level meters in PDF format for free! Find your manual SL451 - VOLTCRAFT and take your electronic device back in hand. On this page are published all the documents necessary for the use of your device. SL451 by VOLTCRAFT.
USER MANUAL SL451 VOLTCRAFT
These Operating Instructions accompany this product. They contain important information on setting up and using the device. You should refer to these instructions, even if you are buying this product for someone else.
Please retain these Operating Instructions for future use! A list of the contents can be found in the Table of contents, with the corresponding page number, on page 24.
F
www.business.conrad.at
text_image
DATE 06-12 -17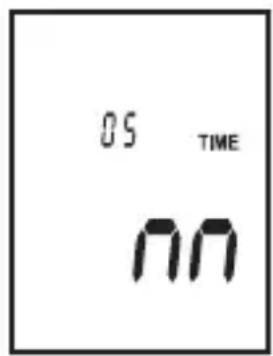
text_image
05 TIME nn- Introduction...... 25
- Intended Use 26
- Delivery content.... 27
- Symbol explanation 27
- Safety instructions 27
- Operating elements 30
- Software installation 32
- Initial operation 32
- Basic setup setting 33
- Device functions 35
- Carrying out a measurement.... 37
- Data logger.... 39
- Data transmission....40
- Analog signal output 40
- Maintenance and cleaning 41
- Troubleshooting.... 41
- Disposal 42
- Technical data 42
Dear Customer,
In purchasing this Voltcraft ^® product, you have made a very good decision for which we would like to thank you.
Voltcraft® - In the field of measuring, charging and network technology, this name stands for high-quality products which perform superbly and which are created by experts whose concern is continuous innovation.
From the ambitious hobby electronics enthusiast to the professional user, products from the Voltcraft® brand family provide the optimum solution even for the most demanding tasks. And the remarkable feature is: we offer you the mature technology and reliable quality of our Voltcraft® products at an almost unbeatable price-performance ratio. In this way, we aim to establish a long, fruitful and successful co-operation with our customers.
We wish you a great deal of enjoyment with your new Voltcraft® product!
All names of companies and products are trademarks of the respective owner. All rights reserved.
2. INTENDED USE
The sound level measuring device is a digital device for measuring the sound level in Decibel (dB) and corresponds to the demands of EN 61 672-1. The SL-451 is classified in Class 2 for general field tests (e.g. operative measurements). The measuring ranges can be calibrated via the integrated adjustment feature.
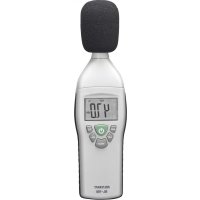
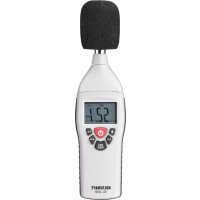
The values measured and the current measurement units/functions are displayed digitally on a large LCD (Liquid Crystal Display).
A bar graph display enables the detection of fast and short sound levels.
Two frequency weighting filters (A/C) and two time weightings (fast/slow) can be preselected and allow universal application.
Measuring is possible in a frequency range from 31.5 Hz (Hertz) up to 8 KHz (Kilo Hertz) as well as a sound level from 30 to 130 dB.
The maximum values as well as the display content can be saved.
In order to suppress interfering wind noise, the device features an attachable wind protector, which does not interfere with the sound level measuring.
The measuring device also features a display illumination. A data logger for internal measuring value recording is installed. The measuring values can be transferred to a computer and analysed there via the USB interface. A proportional voltage (10 mV DC/dB and max. 1 Vrms AC/130 dB) is output at the AC/DC analog output.
A 9-V block battery (type 1604A) or the power adapter are required for operation.
Measurements must not be carried out under unfavourable ambient conditions.
Unfavourable ambient conditions are:
- wetness or high air humidity
- dust and flammable gases, vapours or solvents
- thunderstorms or similar conditions such as strong electrostatic fields etc.
Unauthorised conversion and/or modification of the device are inadmissible because of safety and approval reasons (CE). Any usage other than described above is not permitted and can damage the product and lead to associated risks such as short-circuit, fire, electric shock, etc. Please read the operating instructions thoroughly and keep them for further reference.

Observe all safety instructions and information within this operating manual.
3. DELIVERY CONTENT
• Sound level measurement device • Power adaptor
- Carrying case • Tripod
• Wind protection • Screw driver which can be calibrated
- USB interface cable • 4 m microphone extension cable
- Software CD • Operating instructions
- 9 V block battery
4. SYMBOL EXPLANATION

An exclamation mark in a triangle indicates important instructions in this operating manual which absolutely have to be observed.

The symbol can be found when you are to be given tips and information on operation.
5. SAFETY INSTRUCTIONS

We do not assume liability for resulting damages to property or personal injury if the product has been abused in any way or damaged by improper use or failure to observe these operating instructions. The warranty/ guarantee will then expire! The icon with exclamation mark indicates important information in the operating instructions. Carefully read the whole operating instructions before operating the device, otherwise there is risk of danger.
Dear Customer, the following safety instructions are intended not only for the protection of your health but also for the protection of the device. Please read carefully through the following points:
Persons / Product
- The product is not a toy and should be kept out of reach of children and pets!
- On commercial premises, the accident prevention regulations of the Association of Industrial Professional Associations with respect to electrical systems and operating equipment must be observed.
- In schools, training centres, Hobby and DIY workshops, the handling of measuring appliances must be responsibly supervised by trained personnel.
- Wear suitable hearing protection in loud environments. Excess sound levels may cause hearing damage.
- When used in conjunction with other devices, observe the operating instructions and safety notices of connected devices.
- The product must not be subjected to heavy mechanical stress or intense vibration.
- The product must not be exposed to electromagnetic fields, extreme temperatures, direct sunlight or dampness.
- The device must not be exposed to humidity or liquids.
- The product should not be used immediately after it has been brought from an area of cold temperature to an area of warm temperature. Condensed water might destroy the product. Wait until the product adapts to the new ambient temperature before use.
- If there is reason to believe that safe operation is no longer possible, put the device out of operation and secure it against unintended operation. Safe operation is no longer possible if:
- the product shows visible damages,
- the product no longer works and
- the product was stored under unfavourable conditions for a long period of time,
- the product was subject to considerable transport stress.
- The manufacturer or supplier accepts no responsibility whatsoever for incorrect displays or the consequences which can arise from such incorrect displays.
(Rechargeable) batteries
- Correct polarity must be observed while inserting the (rechargeable) battery.
- The (rechargeable) battery should be removed from the device if it is not used for a long period of time to avoid damage through leaking. Leaking or damaged (rechargeable) batteries might cause acid burns when in contact with skin, therefore use suitable protective gloves to handle corrupted (rechargeable) batteries.
- (Rechargeable) batteries must be kept out of reach of children. Do not leave (rechargeable) batteries lying around, as there is risk, that children or pets swallow them.
- (Rechargeable) batteries must not be dismantled, short-circuited or thrown into fire. Never recharge non-rechargeable batteries. There is a risk of explosion!
Miscellaneous
- The product must not be used for medical or public purposes.
• Repair works must only be carried out by a specialist/ specialist workshop. - If you have queries about handling the device, that are not answered in this operating instruction, our technical support is available under the following address and telephone number:
If there are any technical questions, please contact:
International: www.conrad.com/contact
United Kingdom: www.conrad-electronic.co.uk/contact
6. OPERATING ELEMENTS
- Measuring microphone with wind protection
- LC display
- Button "REC" to record measuring values
- Button "SETUP" for basic settings
- Button "FAST/SLOW" for measuring time switching
- Button "MAX/MIN" for display of the maximum/minimum values
- Button "LEVEL" for switching the measuring range
- Button "Light" for display illumination
- Button "A/C" for rating curve
- "Hold" button to freeze a measuring value
- ON/OFF button
- Treaded socket for tripod
- Battery compartment on the back side
- Socket for power adaptor connection
- Mini-USB port for interface cable
- Analogue output
- CAL calibration potentiometer
Display symbols
A. MAX/MIN Recording of the maximum/minimum values
B. Bar graph Analog display with range indication
C. TIME/DATE Date/time display
D. Measuring value
E. Clock symbol Active auto power OFF function
F. BAT Battery replacement display
G. REC Active data recording
FULL Internal data memory full
H. dBA Weighting filter for A line (=hearing)
dBC Weighting filter for C line (=linear)
I. HOLD The current reading is held
J. AUTO Automatic measuring range setting is active
K. FAST Fast time benchmarking (125 ms/measuring operation)
SLOW Slow time benchmarking (1s/measuring)
L. OVER Measuring range is exceeded
UNDER Measuring range is undercut
7. SOFTWARE INSTALLATION
- Insert the CD into the CD-ROM of your computer.
- The installation will start automatically. If not, please go to your CD-ROM directory, and open the installation file "autorun.exe".
- Select your desired language from German, English and French.
- Follow the instructions on the dialog box, select the destination for the installation and complete the installation.
- For further information, please refer to the operating instructions on the CD provided.
- The enclosed software is the Voltsoft standard edition. The professional version (Voltsoft Data Logger, No. 10 13 33) is an optional item which you can purchase separately. If you purchase the professional version, you will get the license key. Follow the steps in the Voltsoft user manual, to register and upgrade your software to the professional version.
- Voltsoft software updates to the latest version of the Voltsoft program are available when the program is running and the Internet is connected; or check for the latest Voltsoft update via "http://www.conrad.com"
Inserting the batteries
Before the initial operation of this meter, you must first install a new 9 V block battery. Battery installation is described in the “Maintenance and cleaning” section.
Power unit operation
For long-term measuring operations, you have to use the enclosed power adaptor. Plug the power adaptor into the DC socket on the side and connect it with a suitable mains outlet.
The sound level measuring device SL-451 has an integrated data logger. The data logger can record measuring values with time stamp. Upon commissioning, you have to set the time and date.
To make the basic settings, proceed as follows:
Turn the measuring device off.
Keep the button "SETUP" depressed and turn the device on. Keep both buttons depressed until "TIME" appears on the display.
After letting go of both buttons, the setup menu with the default date display appears.
To access the individual setting points, press "SETUP" until the desired parameter appears.
You have to confirm and complete your settings by pressing "HOLD" for saving the data. Then the setup menu is terminated and the measuring display appears.

text_image
DATE 06-12 - 17Setting the time (minutes)
In the SETUP menu, press the button "SETUP" 1x.
The display for setting the minutes "m" appears.
Press the "LEVEL" button to set the current minute time. Keep the button depressed to set the value faster. The values ascend and start again at the beginning.
Switch to the next setting with the button "SETUP", or complete your setting with the button "HOLD".
text_image
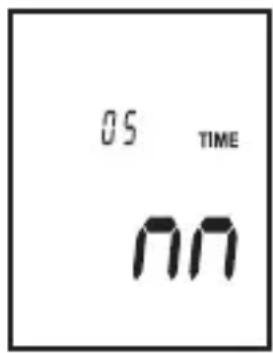
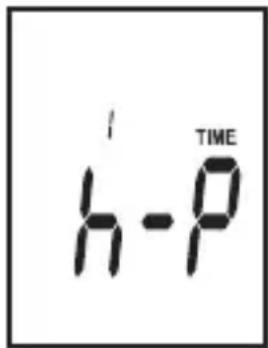
05 TIME nnSetting the time (hours)
In the SETUP menu, press the button "SETUP" 2x.
The display for setting the hours appears. The time format corresponds to 12h (P = afternoon / A = morning).
Press the “LEVEL” button to set the current time in hours. Keep the button depressed to set the value faster. the values ascend and start again at the beginning.
Switch to the next setting with the button "SETUP", or complete your setting with the button "HOLD".
Setting the date (day)
In the SETUP menu, press the button "SETUP" 3x.
The display for setting the day appears.
Press the “LEVEL” button to set the current day. Keep the button depressed to set the value faster. The values ascend and start again at the beginning.
Switch to the next setting with the button "SETUP", or complete your setting with the button "HOLD".
Setting the date (month)
In the SETUP menu, press the button "SETUP" 4x.
The display for setting the month appears.
Press the “LEVEL” button to set the current month. Keep the button depressed to set the value faster. The values ascend and start again at the beginning.
Switch to the next setting with the button "SETUP", or complete your setting with the button "HOLD".
text_image
h-P TIME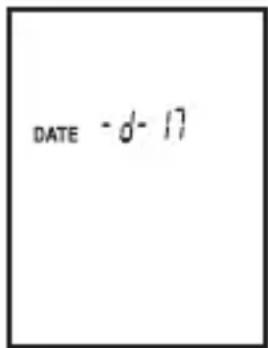
text_image
DATE - d- 17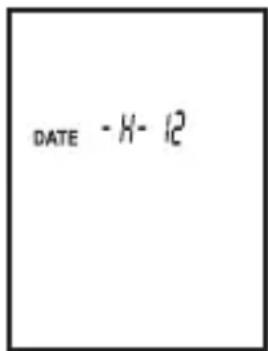
text_image
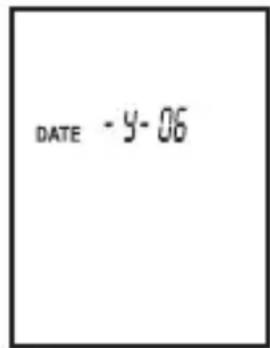
DATE -H-12Setting the date (year)
In the SETUP menu, press the button "SETUP" 5x.
The display for setting the year appears.
Press the “LEVEL” button to set the current year. Keep the button depressed to set the value faster. The values ascend and start again at the beginning.
Switch to the next setting with the button "SETUP", or complete your setting with the button "HOLD".
text_image
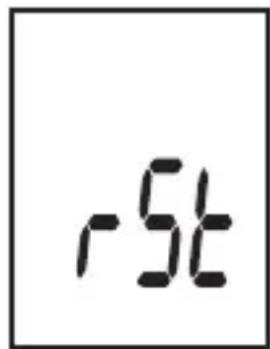
DATE - y-06Deleting the SETUP settings
The last menu point serves to delete all preset parameters. This is required when you need to change the batteries. Always delete the SETUPfunctions first prior to making the new settings.
In the SETUP menu, press the button "SETUP" 6x.
The display for deleting the settings appears. Press the button "SETUP" to access the first setting point or the button "HOLD" to delete the settings. After deletion, the device automatically switches to measuring mode.
text_image
-5t10. DEVICE FUNCTIONS
The sound level meter has various extra functions that make it easier to carry out measurements using the device and also extend its range of application. These extra functions are:
Auto power OFF function
In order to avoid that the operating life of the battery is shortened unnecessarily, an automatic switch-off function has been implemented. The device is automatically switched off if no button has been pressed over a period of about 15 minutes. You can switch the device back on with the "Power" button.
This function can be turned on and off in measuring operation by pressing the "SETUP" button.
HOLD function
The measured value currently being displayed is held in the display. The active function is shown in the display by "HOLD".
- Press the "HOLD" button to activate this function.
- Press again to switch back to the continuous measuring mode
MAX./MIN. function
With continuous measuring, the display only shows the maximum or minimum value. This measurement function makes it easier for you to determine the peak level. The active function is shown in the display by “MAX” or “MIN”.
Press the button “MAX/MIN” to activate this function. Each additional press of the button switches to the next display mode. MAX, MIN, normal measuring mode, MAX, MIN...
Frequency weighting A/C line
The frequency of the measuring signal is weighted with the help of two benchmark curves.
Line A represents the characteristic hearing line of the human ear. Humans perceive deep sounds as quieter than mid or treble sounds. Line C weighs the frequency spectrum linear and without filter (actual sound level).
Press the button "A/C" to switch this filter. The active filter is shown as "dBA" or dBC" on the display.
Switching the measuring range
The sound level meter has four measuring ranges. The bottom range is from 30 to 80 dB, the medium range from 50 to 100 dB, and the top range from 80 to 130 dB. The automatic range is from 30 to 130 dB. If one of these ranges is exceeded or undercut, “UNDER” or “OVER” appears on the display.
Switch to the next higher/lower measuring range. To switch, press the button "LEVEL".
Time rating FAST/SLOW
The signal can be measured with two different measuring intervals. For rapidly changing sound levels (horn, shot, etc.), you have to set the time rating to “FAST”. The measuring duration is 125 ms/measuring operation. For slow and persistent sound levels (noise, humming, etc.), the time rating must be set to “SLOW”. The measuring duration is 1 s/measuring operation.
To switch, press the button "FAST/SLOW".
11. CARRYING OUT A MEASUREMENT

Wear sufficient hearing protection when measuring loud sound sources. There is risk of hearing damage!
Observe the permissible ambient temperatures (Technical data) in order to avoid incorrect measurements.
Calibration
The sound level meter corresponds to the European standard EN 61 672-1 for sound level meters. To apply the device in line with the standard, it must be calibrated with the benchmark curve A (dBA) prior to each measuring operation, meaning tested and if necessary matched with a sound calibrator Class 2 acc. to IEC 60942. The accuracy must be checked again after each measuring operation.
Proceed as follows for calibration:
Switch the sound level meter on.
Select the corresponding settings (dBA, measuring range up to 100 dB or higher and FAST time rating).
If necessary, deactivate the the functions "MAX" and "HOLD".
Plug the microphone of the sound level meter into the opening of the sound calibrator. Ensure a tight fit so that the calibration chamber in the sound calibrator is sealed.
Set the following parameters on the sound calibrator: 94 dB at 1 kHz
The measuring device should now show a sound level of 94 dBA. If this is not the case, the measuring device must be calibrated.
With the enclosed screwdriver, carefully turn the calibration point on the side (CAL calibration potentiometer 17) until the value on the display is exactly 94.0 dBA.
The measuring device is ready for use.
Making measurements

You should always measure a sound source directly and at a distance of 1 m.
Make sure that there are no objects or persons between the microphone and the sound source.
- Point the sound level meter with the microphone directly on the sound source.
- In order to not influence the soundwaves, keep the measuring as far away from your body as possible at your outstretched arm or attach it to the enclosed tripod.
- If possible, move approx. 2 m away from the measuring spot.
- If necessary use the microphone extension cable supplied. Connect (screw) the extension cable between the microphone and the measuring device
- There is a tripod thread on the back of the casing.
- Avoid vibrations or movements.

In case of wind (>10 m/s), use the enclosed wind protector to not falsify the measuring value with the wind noise. The wind protector does not falsify the measuring value.
- For easier legibility at dusk or dark, you can illuminate the display. Press the button with the lamp symbol for this purpose. To turn off press this button again.
- Turn the display illumination and/or the measuring device off when not in use.
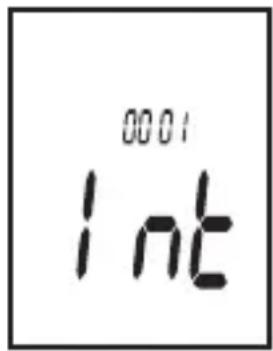
Changing the interval time
You can preset the interval time of the integrated data logger from 1 to 59 seconds. In REC mode, the data logger only records a measuring value in the prescribed interval.
To set this, proceed as follows:
Turn the measuring device off.
Keep the button "LIGHT" depressed and turn the device on.
Keep both buttons depressed until "INT" appears on the display.
Press the “LEVEL” button to set the interval time in seconds. Keep the button depressed to set the value faster. The values ascend and start again at the beginning.
You must terminate the setting with the button "HOLD", otherwise the value is not saved.
text_image
0001 IntStarting the recording
Once the setup settings and the interval times are set, you can start the measuring value recording.
Turn the measuring device on, and select the desired measuring parameters (measuring range, filter, etc.).
Press "REC". The recording starts. The display indicates the symbol "REC".
You stop the recording by pressing the button "REC" again.

To prevent data loss, first switch the measuring device off when the recording is completed (display "REC" is no longer visible).
- The recorded data can only be read out via the interface.
- If all memory slots are full, the display shows "FULL". Delete the memory after each data transfer.
Deleting the memory
A full memory can be deleted with a key combination.
Turn the measuring device off
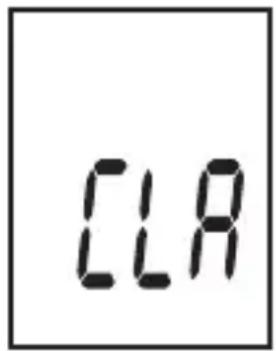
Keep the button "REC" depressed and turn the device on. Keep both buttons depressed until "CLR" appears on the display.
The memory is deleted. The measuring device automatically switches back to measuring operation.
text_image
CLA13. DATA TRANSMISSION
Via the integrated USB interface, you can transfer the saved measuring values to a software for saving and evaluating. Proceed as follows to connect the sound level meter to your computer:
Turn on the computer and the Voltsoft software.
Turn on the device and turn off the auto power off function (see chapter 10)
Connect the device to a vacant USB port on a personal computer.
The device is detected by the computer, follow the operating instructions of the Voltcraft software.
14. ANALOG SIGNAL OUTPUT
The sound level meter SL-451 has an analog signal output at which a voltage proportional to the measuring signal can be picked up. This output can be used for additional measuring functions like e.g. an X-Y scriber, etc. You can select between direct and alternate voltage.
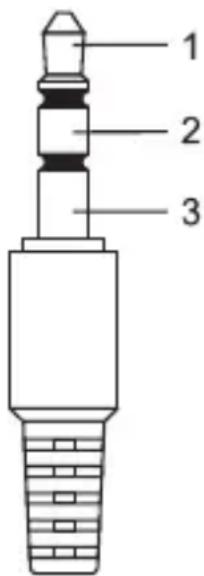
The connection is established via an optional 3.5 mm stereo jack plug. Depending on the purpose, connect the output to contact 1 and 3 (for AC) or contact 2 and 3 (for DC).
- 1 = AC output (max. 1 Vrms/130 dB, impedance 100 Ohm)
• 2 = DC output (10 mV/dB, impedance 1 kOhm)
• 3 = GND ground potential
Never short-circuit the output, otherwise it may be damaged.
text_image
1 2 315. MAINTENANCE AND CLEANING
The device is maintenance-free apart from the need to replace the batteries and cleaning it once in a while. Use a clean, lint-free, antistatic and slightly damp cloth to clean the device. Do not use any abrasive or chemical agents or detergents containing solvents.
Battery replacement
If the battery symbol appears on the display, the batteries have to be replaced as soon as possible to prevent inaccurate measurements. Proceed as follows to replace the batteries:
- Switch off the measuring instrument.
- Slide the battery compartment cover on the rear off the casing in the direction of the arrow.
- Replace the flat 9 V battery with a new one of the same type (e.g. 1604 or 6F22).
- Close the measuring instrument again carefully by proceeding in the reverse order.

Do not leave flat batteries in the device. Even batteries protected against leaking can corrode and thus release chemicals which may be detrimental to your health or destroy the battery compartment.
→ You can order a matching replacement battery stating the order number 652509.
16. TROUBLESHOOTING
In purchasing this device, you have acquired a product which has been designed with state-of-the-art technology and is operationally reliable. Nevertheless, problems or faults may occur. For this reason, the following is a description of how you can eliminate possible malfunctions yourself.
| Error Possible cause | |
| The device does not work. Is the battery dead? Check the battery status. | |
| No measuring value change. Is the HOLD function activated? | |
General
In order to preserve, protect and improve the quality of environment, protect human health and utilise natural resources prudently and rationally, the user should return unserviceable product to relevant facilities in accordance with statutory regulations.

essed-out wheeled bin indicates the product needs to be disposed separately and not as municipal waste.
Batteries / rechargeable batteries
The user is legally obliged (battery regulation) to return used batteries and rechargeable batteries. Disposing used batteries in the household waste is prohibited! Batteries/ rechargeable batteries containing hazardous substances are marked with the crossed-out wheeled bin. The symbol indicates that the product is forbidden to be disposed via the domestic refuse. The chemical symbols for the respective hazardous substances are Cd = Cadmium, Hg = Mercury, Pb = Lead.
You can return used batteries/ rechargeable batteries free of charge to any collecting point of your local authority, our stores or where batteries/ rechargeable batteries are sold.
Consequently you comply with your legal obligations and contribute to environmental protection!
18. TECHNICAL DATA
| System requirementsCPU:RAM:Harddisk:OS:Software support: | Pentium 600 MHz or above128 MB or above500 MB free spaceMicrosoft Windows® XP, 7, 8.1 or VistaTM.NET framework 2.0 |
| Observed standards: IEC 61672-1 Class 2 | |
| Operating voltage: 9 V block battery / power adaptor 9 V | |
| Current consumption: max. 16 mA | |
| Battery lifetime: aprox. 50 h (alkaline battery) | |
| Auto power off: After approx. 15 minutes if no button is pressed | |
| Display: LCD, 2000 counts | |
| Resolution: 0.1 dB (refresh 2/s) | |
| Data memory: 32600 memory slots | |
| Sound level range: 30 – 130 dB (auto range) | 30 – 80 dB/50 – 100 dB/80 – 130 dB |
| Measuring range: 30 – 130 dB | |
| Accuracy: ±1.4 dB | |
| Frequency range: 31.5 – 8000 Hz | |
| Volume range: 50 dB | |
| Frequency weighting: A and C | |
| Time rating: FAST (125 ms), SLOW (1 s) | |
| Microphone: 1,27 cm (1/2") electret condenser microphone | |
| Operating altitude: ≤2000 m | |
| Operating temperature: 0 to +40 °C | |
| Storage temperature: -10 to +60 °C | |
| Rel. air humidity: 10 – 90 % (Operation) | 10 – 75 % (Storage) |
| Interface: USB | |
| Dimensions (W x H x D): 76 x 278 x 50 mm | |
| Weight: approx. 350 g | |
Power adaptor
| Input voltage: | 100 – 240 V/AC, 50/60 Hz |
| Power input: | max. 0.25 A |
| Output voltage: | 9 V/DC |
| Output current: | 0.65 A |
The following list shows the correction data for the frequency response of the sound impact from the reference direction (columns “Characteristic”) as well as the error tolerances (column “Accuracy”).
| Nominal frequency (Hz) | A – Characteristic (dB) | C – Characteristic (dB) | Accuracy SL - 451 (dB) |
| 31.5 | -39.4 | -3.0 | ±3.5 |
| 63 | -26.2 | -0.8 | ±2.5 |
| 125 | -16.1 | -0.2 | ±2.0 |
| 250 | -8.6 | 0 | ±1.9 |
| 500 | -3.2 | 0 | ±1.9 |
| 1000 | 0 | 0 | ±1.4 |
| 2000 | +1.2 | -0.2 | ±2.6 |
| 4000 | +1 | -0.8 | ±3.6 |
| 8000 | -1.1 | -3.0 | ±5.6 |
If the sound impact angel deviates from 0^ , the following differential values result:
| Frequency, kHz | ±30° |
| 0.25 to 1 | 2.3 dB |
| >1 to 2 | 2.5 dB |
| >2 to 4 | 4.5 dB |
| >4 to 8 | 7.0 dB |
Page
France (email): technique@conrad-france.fr
text_image
DATE 06-12 -17Régler l'heure (minutes)
text_image
DATE 06-12 -17© Copyright 2014 by Conrad Electronic SE.
GB Legal Notice
This is a publication by Conrad Electronic SE, Klaus-Conrad-Str. 1, D-92240 Hirschau (www.conrad.com).
All rights including translation reserved. Reproduction by any method, e.g. photocopy, microfilming, or the capture in electronic data processing systems require the prior written approval by the editor. Reprinting, also in part, is prohibited. This publication represents the technical status at the time of printing.
© Copyright 2014 by Conrad Electronic SE.
© Copyright 2014 by Conrad Electronic SE.
NL Colofon
© Copyright 2014 by Conrad Electronic SE. V2_1014_02/VTP