
Flash HDSV19 - Vacuum Cleaner EUREKA - Free user manual and instructions
Find the device manual for free Flash HDSV19 EUREKA in PDF.

| Brand | Eureka |
| Model | Flash HDSV19 |
| Vacuum Type | Corded Stick Vacuum |
| Power Source | Mains (power cord) |
| Cleaning Modes | Bare floor and carpet (roller brush) |
| Motorized Floor Nozzle | Yes |
| Included Accessories | 2-in-1 Furniture Nozzle (brush/felt), Crevice Tool, Storage Base |
| Dust Cup | Removable, manual emptying |
| Pre-Motor Filter | Washable (cotton filter) |
| Post-Motor Filter | Washable |
| Thermal Cut-Off | Yes |
| Warranty | 2 years |
| After-Sales Service | Email: global_service@eureka.com |
| Recommended Maintenance | Regular cleaning of filters and roller brush |
| Safety Precautions | Do not vacuum liquids, unplug before maintenance, keep away from children |
| Repairability | Replacement parts available from manufacturer |
Frequently Asked Questions - Flash HDSV19 EUREKA
User questions about Flash HDSV19 EUREKA
0 question about this device. Answer the ones you know or ask your own.
Ask a new question about this device
Download the instructions for your Vacuum Cleaner in PDF format for free! Find your manual Flash HDSV19 - EUREKA and take your electronic device back in hand. On this page are published all the documents necessary for the use of your device. Flash HDSV19 by EUREKA.
USER MANUAL Flash HDSV19 EUREKA
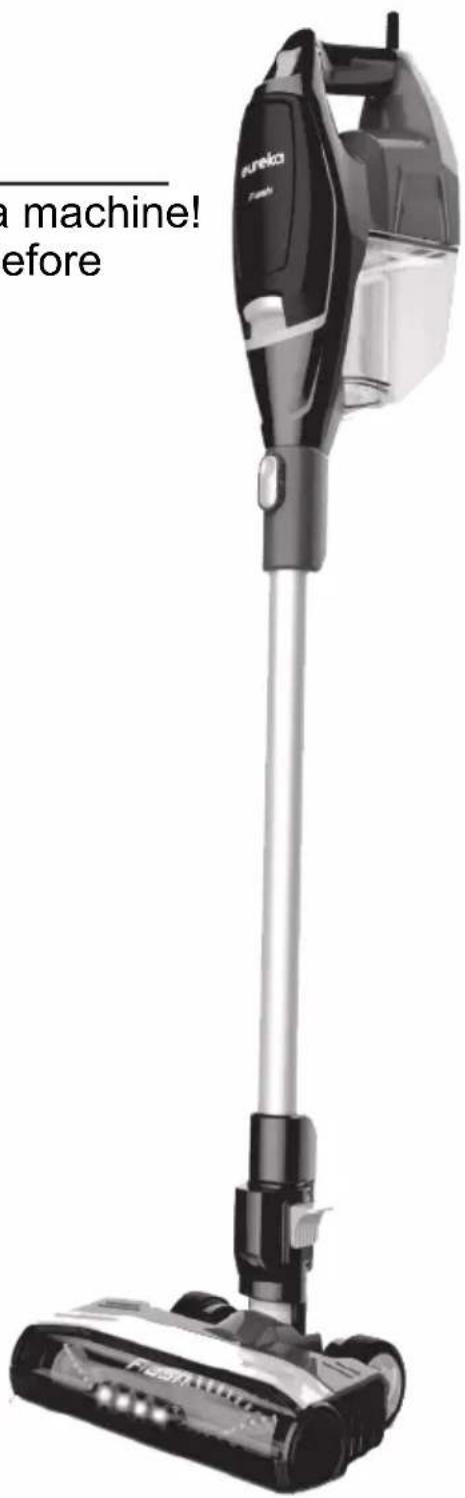
Thank you for purchasing your new Eureka machine! Please read this Owner's Guide carefully before operating, and keep it properly.

Electric vacuum cleaners
V19P11A510
CONTENTS
IMPORTANT SAFEGUARDS....3
PRODUCT INTRODUCTION ....5
OPERATIONS 8
CLEANING AND MAINTENANCE....12
PROBLEM SOLVING 15

Follow caution information wherever you see this symbol.
If the supply cord is damaged, it must be replaced by the manufacturer or its service agent or a similarly qualified person in order to avoid a hazard.
This appliance can be used by children aged from 8 years and above and persons with reduced physical, sensory or mental capabilities or lack of experience and knowledge if they have been given supervision or instruction concerning use of the appliance in a safe way and understand the hazards involved. Children shall not play with the appliance. Cleaning and user maintenance shall not be made by children without supervision.
Children should be supervised to ensure that they do not play with the appliance.


PLEASE RECYCLE.
OPEN OTHER END. DISPLAY THIS END DOWN. FOR HOUSEHOLD USE ONLY.

When using an electrical appliance, basic precautions should always be followed, including the following READ ALL INSTRUCTIONS BEFORE USING THIS VACUUM CLEANER
Failure to follow the warnings and instructions may result in electric shock, fire and/or serious injury.
WARNING
● Prevent unintentional starting. Ensure the switch is in the off-position before picking up or carrying the appliance. Carrying the appliance with your finger on the switch or energizing appliance that has the switch on invites accidents.
- Do not touch nozzle when the vacuum cleaner is on. Danger.
- Do not put any object into openings. Do not use with any openings blocked; keep free of dust lint hair and anything that may reduce air flow.
- Do not use outdoors or on wet surfaces. Do not operate the vacuum cleaner if it has been damaged in any way. Do not allow to be used as a toy. Close attention is necessary when used by or near children.
- Use only as described in this manual. Use only manufacturer's
recommended attachments.
- Do not unplug by pulling on cord. To unplug, grasp the plug, not the cord. This product is functioning at temperature range within 40°F - 104°F.
● Have servicing performed by a qualified repair person using only identical replacement parts. This will ensure that the safety of the product is maintained. - Do not modify or attempt to repair the appliance except as indicated in the instructions for use and care. This vacuum cleaner creates suction. Keep hair, loose clothing, fingers, and all parts of body away from openings and moving parts.
- Do not pick up anything that is burning or smoking, such as cigarettes, matches, or hot ashes. Do not use without filters in place. Use extra care when
cleaning stairs. Do not use to pick up flammable or combustible liquids, such as gasoline, or use in areas where they may be present.
- Store vacuum cleaner and charger indoors in a cool dry area. To avoid electric shock and / or cleaner damage, do not expose to weather elements.
- Keep your work area well lit. Unplug electrical appliances before vacuuming them.
- Do not incinerate this appliance even if it is severely damaged. Contact local waste facility
before discarding in trash.
- Do not leave appliance when plugged in. Unplug from outlet when not in use and before servicing.
- Do not pull or carry by cord, use cord as a handle, close a door on cord, or pull cord around sharp edges or corners. Do not run appliance over cord. Keep cord away from heated surfaces.
- Do not handle plug or appliance with wet hands.
● Turn off all controls before unplugging.
● Unplug before connecting crevice tool or 2-in-1 upholstery tool.
SAVE THESE INSTRUCTIONS
■ PRODUCT INTRODUCTION
WHAT COMES IN THE CARTON
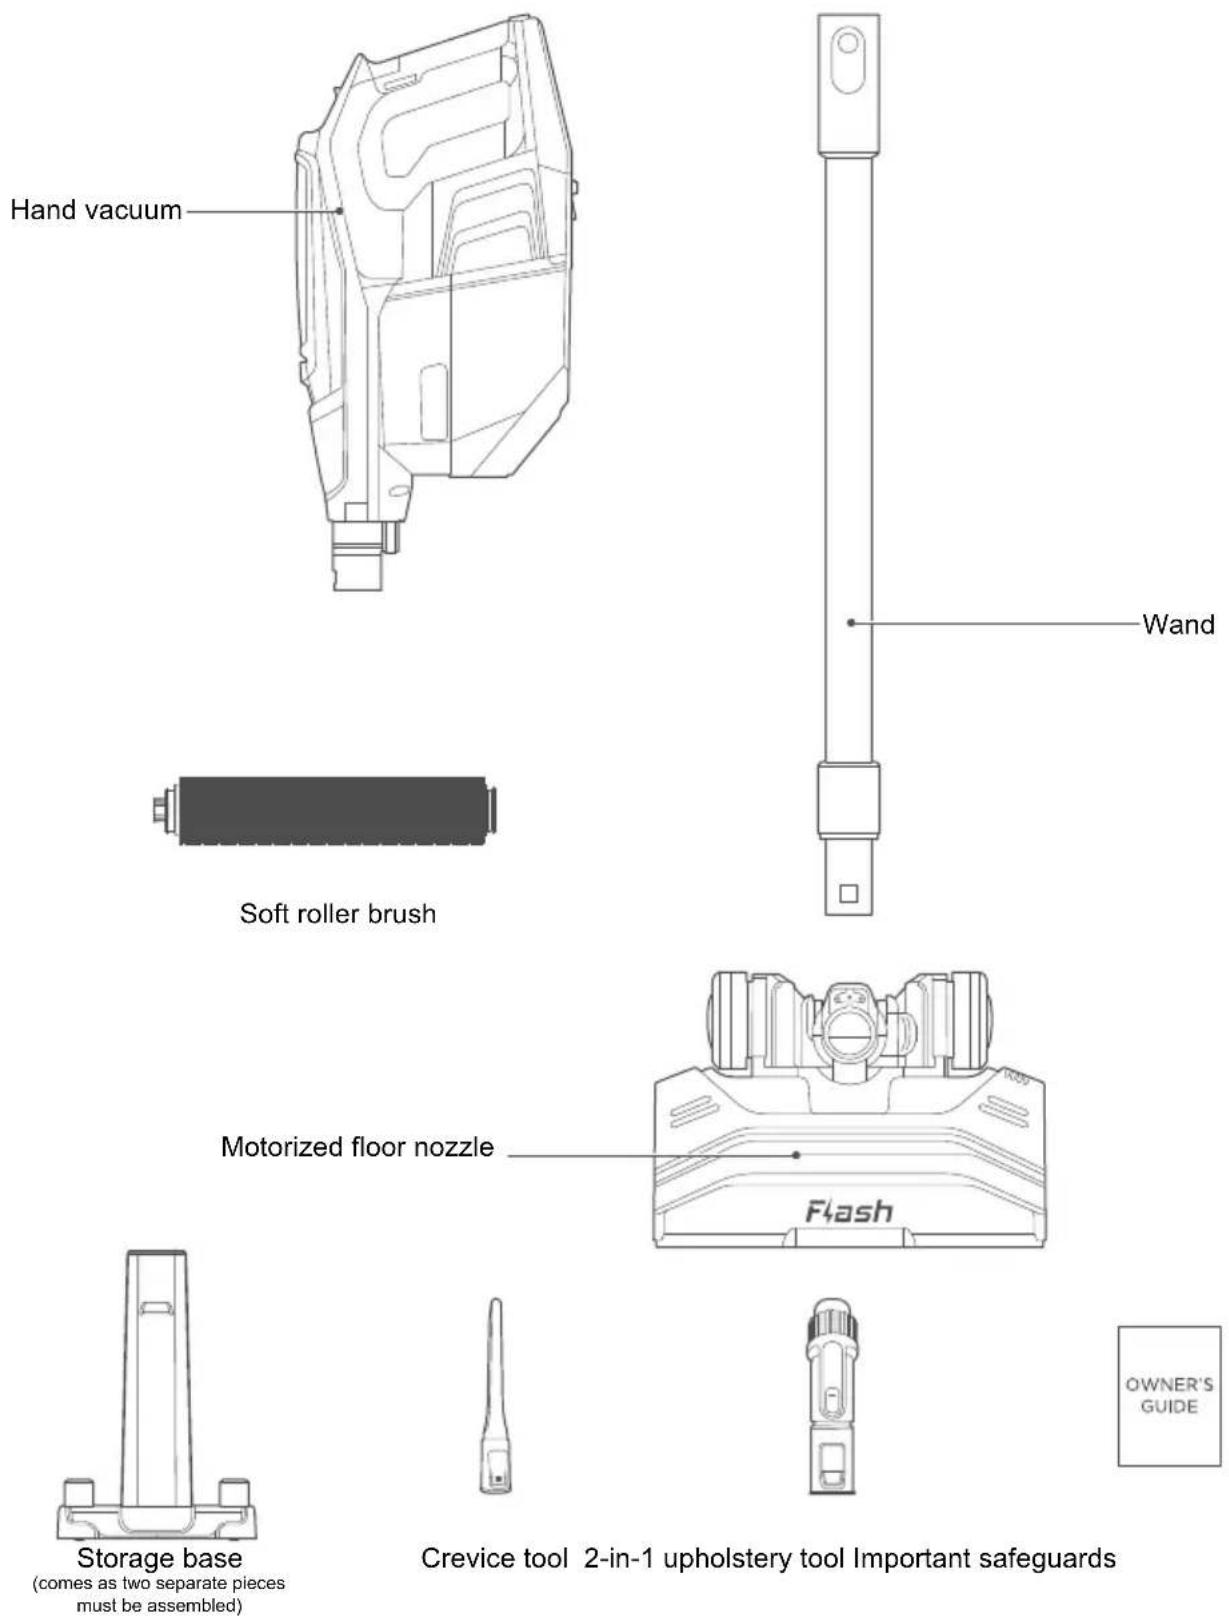
(comes as two separate pieces must be assembled)
■ PRODUCT INTRODUCTION
HOW TO IDENTIFY PARTS OF YOUR VACUUM CLEANER
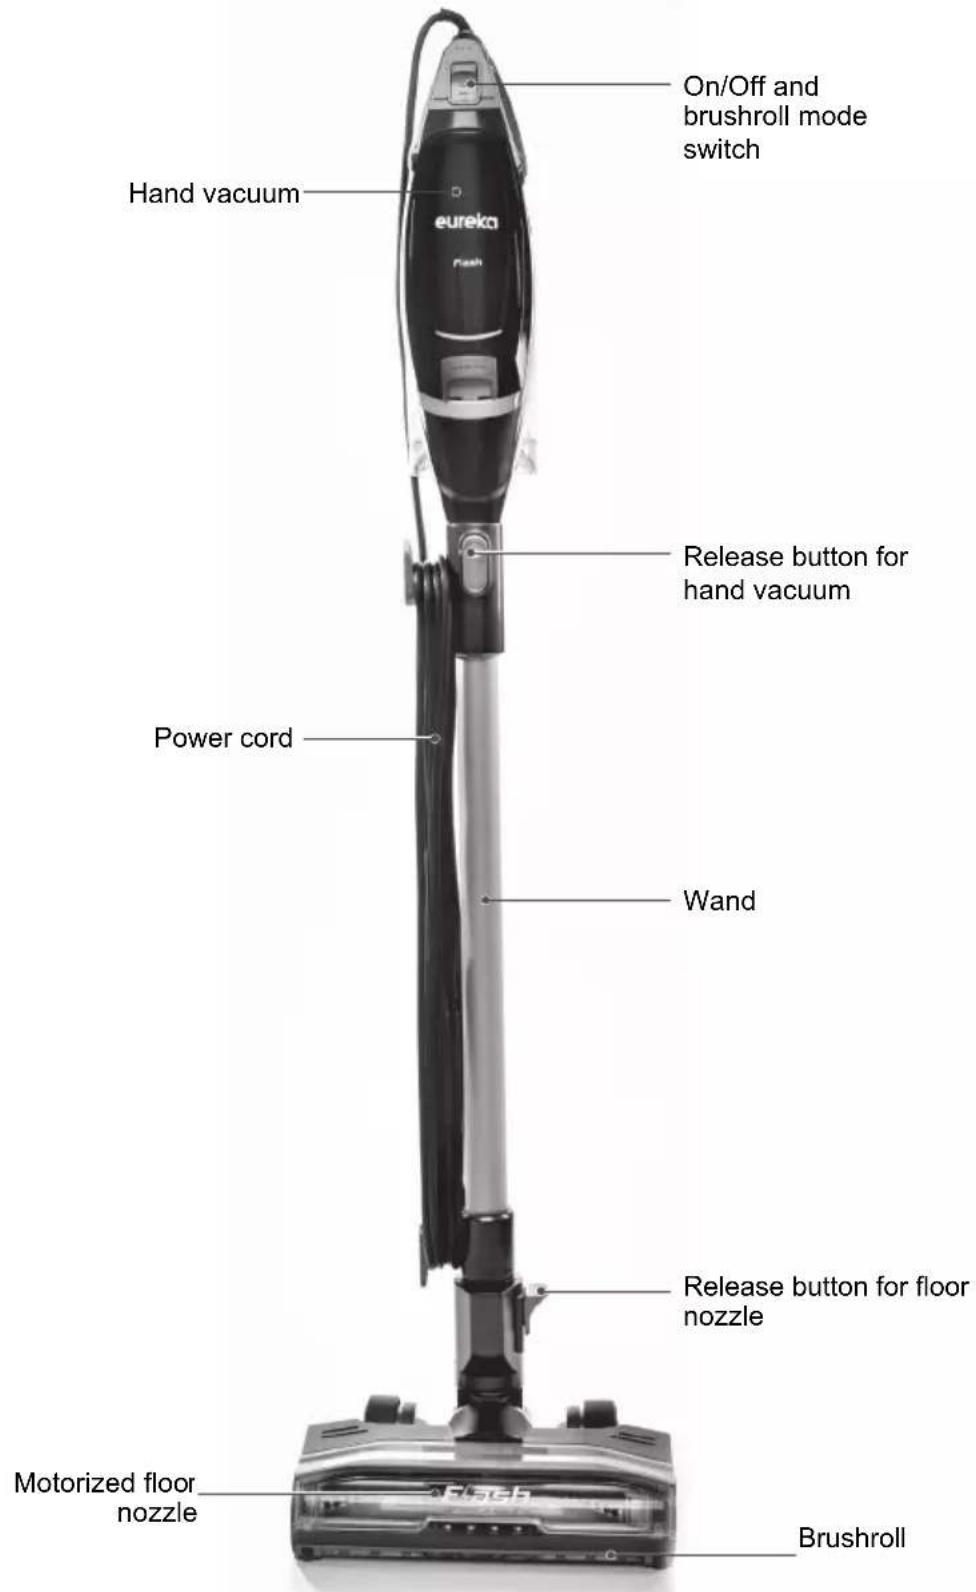
■ PRODUCT INTRODUCTION
HOW TO IDENTIFY PARTS OF YOUR VACUUM CLEANER
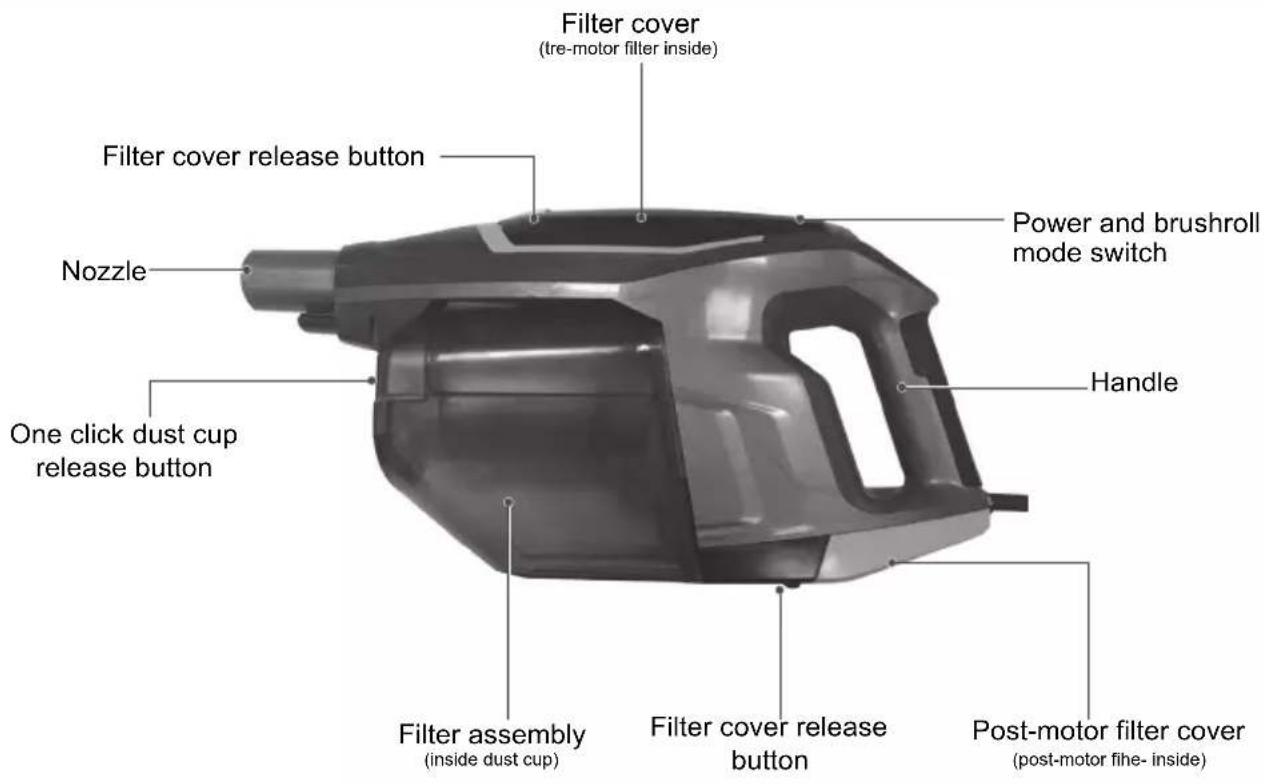
For filter maintenance instructions (see page 13)
■ OPERATIONS
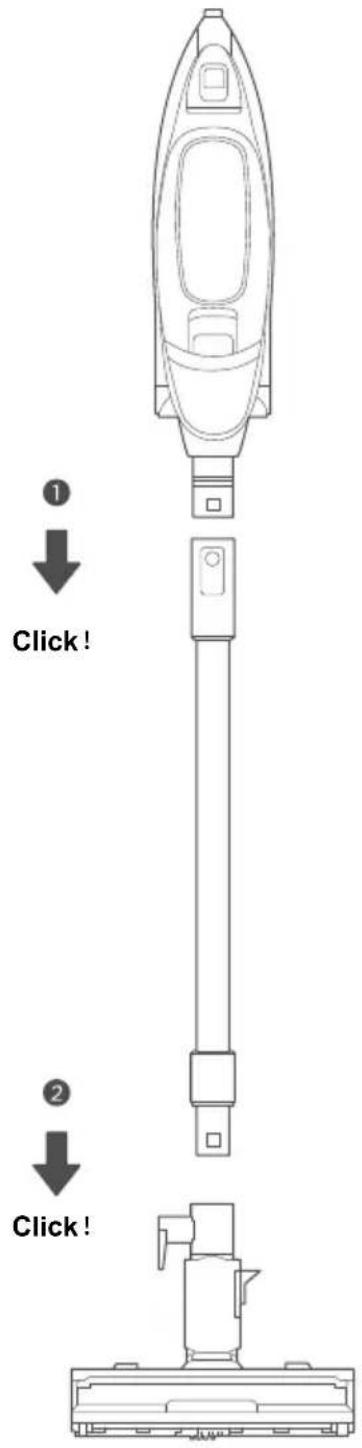
ASSEMBLY
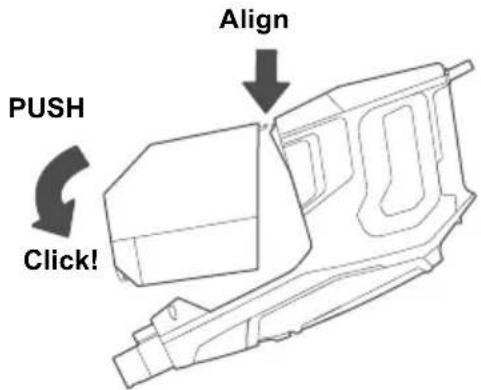
- Slide wand onto hand vacuum until it clicks (Fig. 1).
- Push wand into motorized floor nozzle until it clicks (Fig. 2).
■ OPERATIONS
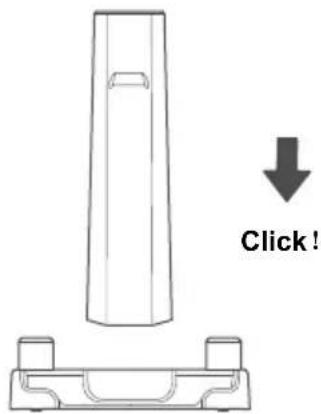
ASSEMBLY OF STORAGE BASE
- Insert storage base shaft into slot on base until it clicks into place. Ensure side of shaft that says Floor Nozzle goes in the same side as wheel well.
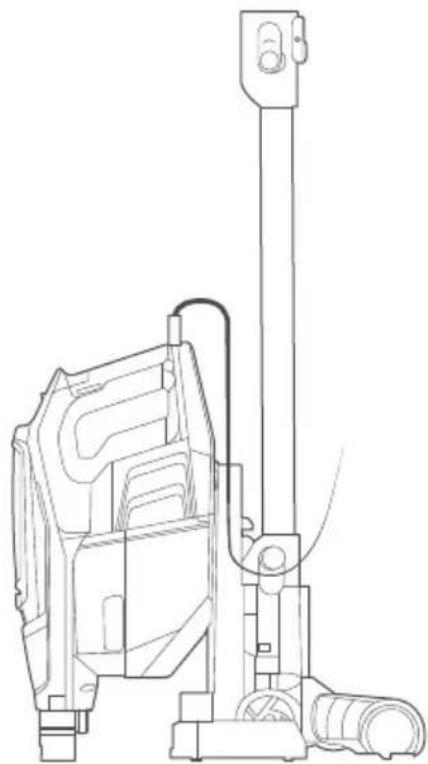
- Detach hand vacuum from wand
- Keep wand attached to floor nozzle and place in the wheel well rest on storage base
- On back of hand vacuum, slightly below the vent, locate the notch
- On upright portion of storage base locate the hook
- Align notch on hand vacuum so it rests on storage base hook
- Wrap power cord either around the cord wrap hooks on the wand or around the hand vacuum.
- Tools can be stored on the two side mounts
Tool base assembly
natural_image
Technical line drawing of a mechanical device with vertical support structure (no text or symbols)Note:
When lifting unit on storage base always make sure hooks are properly engaged with both the wand and the hand vacuum
■ OPERATIONS
WORKING
- Move power switch on handle to the first position for bare floor cleaning and second position to engage brushroll for carpet cleaning
- Using motorized floor nozzle, glide back and forth on area to be cleaned. Avoid oversized or sharp items (such as screws) with cleaner.
- Twist wrist to engage swivel function.
- When done, switch to off position
Power button/speed controls
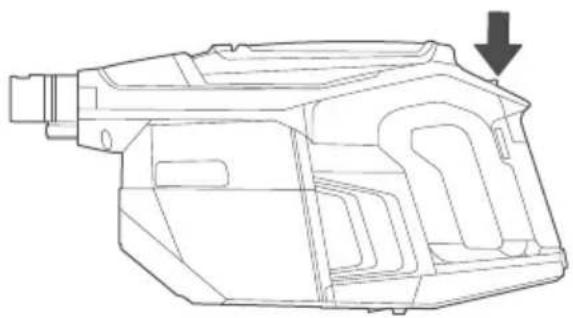
natural_image
Technical line drawing of a mechanical component with an arrow indicating direction (no text or symbols present)HOW TO USE HAND VACUUM AND ACCESSORIES

CAUTION
Moving parts! Always turn off hand vacuum before attaching accessories.
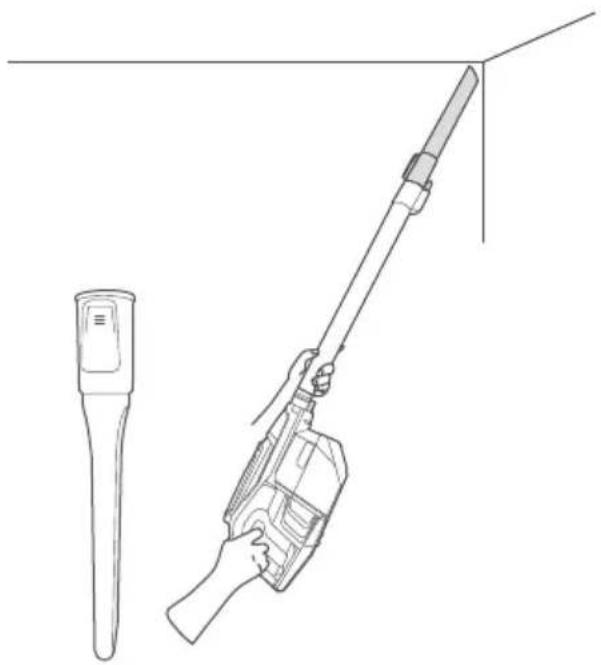
The hand vacuum can be used with or without tools.
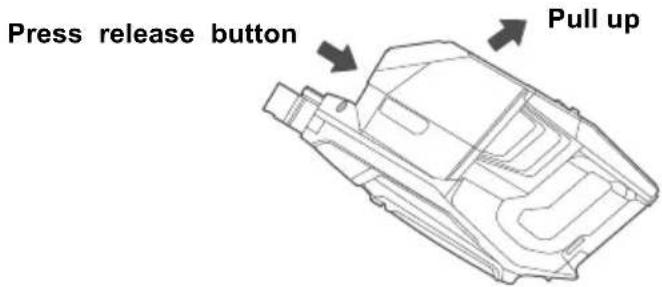
- To use without tools, press release button and remove wand. Collect debris directly with hand vacuum nozzle.
- To use tools with wand, press release button to remove motorized floor nozzle. Slide tool onto end of wand until it clicks.
- To use tools with hand vacuum only, press release button to remove wand, Slide tool onto hand vacuum until it clicks
natural_image
Line drawing of a handheld device with a cylindrical tip and a hand holding a tool, connected to a vertical line (no text or symbols)■ OPERATIONS
HOW TO USE HAND VACUUM AND ACCESSORIES
2-in-1 upholstery tool: Use brush to vacuum blinds, vents or upholstered surfaces. Use felt portion to clean delicate surfaces. To switch between felt and brush portions, press thumb release and slide brush up or down.

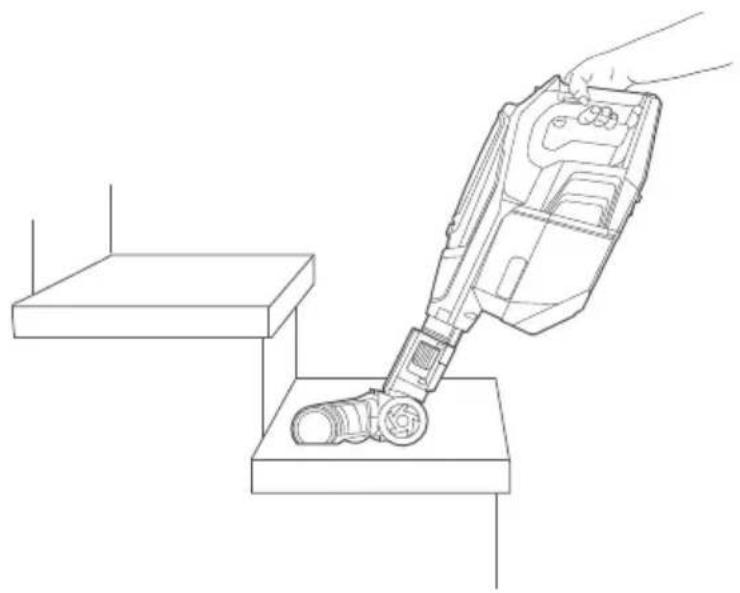
USE HAND VACUUM AND MOTORIZED FLOOR NOZZLE
Ideal for cleaning stairs.
- Press release button to remove wand from hand vacuum.
Attach motorized floor nozzle directly to hand vacuum until it clicks. - Use power switch button to go between settings to do barefloor cleaning or engage brushroll for carpets.
natural_image
Line drawing of a robotic vacuum cleaner performing step-by-step maintenance on a platform (no text or symbols)■ CLEANING AND MAINTENANCE
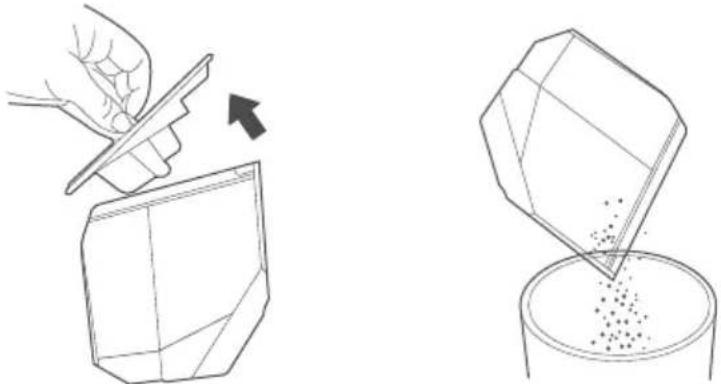
DISASSEMBLY AND CLEANING OF THE DUST CUP

CAUTION
Never operate vacuum cleaner without all filters, filter screen and dust cup in proper position.
WARNING: Moving parts!
- Click the dust cup release button, located on the bottom of the dust cup to detach it from the unit, and pull dust cup out.
- Use handle on top of dust cup to remove lid, empty dust cup and replace lid
natural_image
Illustration showing a hand using a tool to cut a geometric object and into a container filled with granules (no text or symbols)- To place dust cup back, align hooks on dust cup to slots on body and press up until it clicks into place
■ CLEANING AND MAINTENANCE
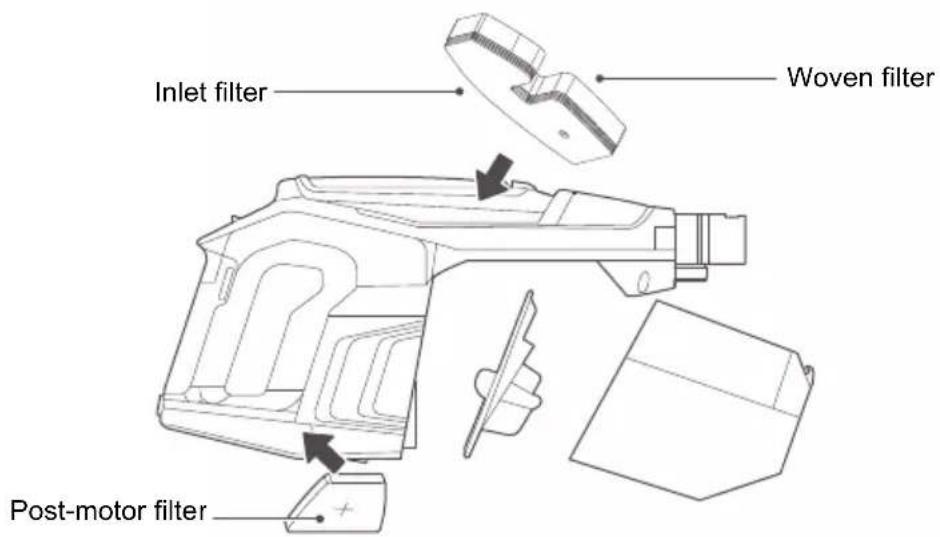
DISASSEMBLY AND CLEANING OF THE FILTER

CAUTION
-
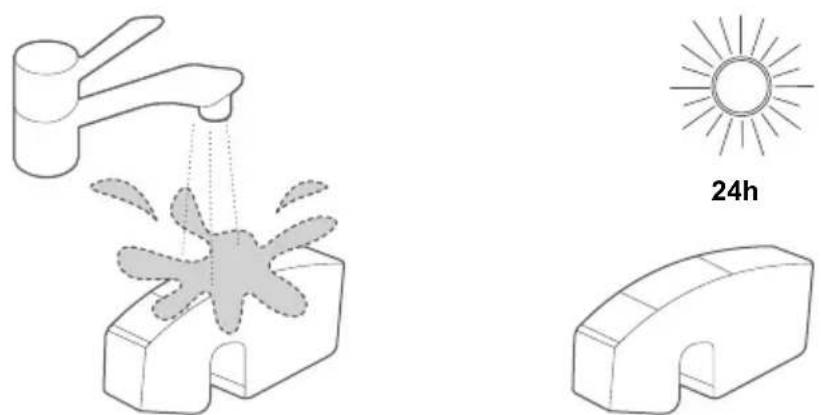
Filter cotton is washable;
-
Please make sure that each part is fully dry before installing after cleaning.
-
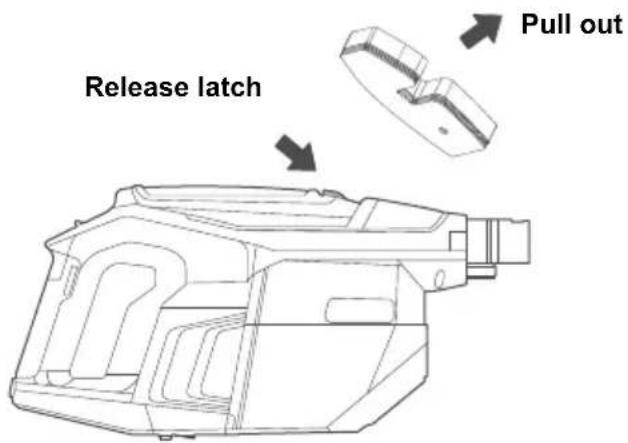
On front of hand vac, locate the latch and pull to remove plate and take out pre-motor filter. Just below the cord on the back of the hand vac, locate the latch to remove the vented plate and take out post-motor filter.
-
Lift out pre-motor filter and shake off dust frequently. Rinse filter and dry THOROUGHLY
-
Reattach filters.
-
Click corresponding plates back into place.
natural_image
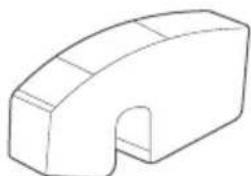
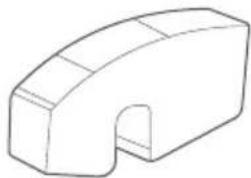
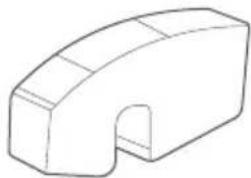
Illustration of a faucet spraying water onto a mechanical component, with a sun symbol and 24-hour time label (no text or symbols on the diagram itself)- The upper cover of the filter is added with screw posts for fixing the filter bracket, and the air inlet sponge is added with fixing holes. The air inlet sponge is fixed to the woven filter through the filter bracket. When the upper cover of the filter element is removed, the sponge is taken out synchronously.

natural_image
Technical line drawings of two boat-shaped components with no visible text or symbols■ CLEANING AND MAINTENANCE
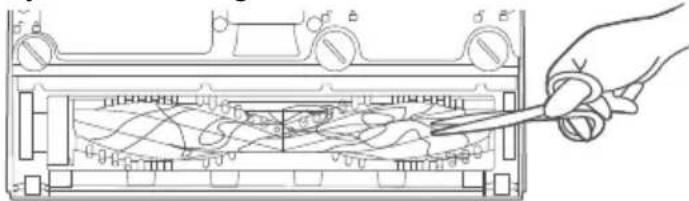
DISASSEMBLY AND CLEANING OF THE POWER BRUSH

CAUTION
- In order to avoid affecting the operation of the power brush, perform cleaning and maintenance when the roller brush or wheels are entangled or dirty;
-
Before disassembling and maintaining, be sure to stop the operation of the power brush.
-
Step on floor nozzle to lower handle. Turn vacuum face down on floor.
Use scissors to clip heavy threads or strings.
natural_image
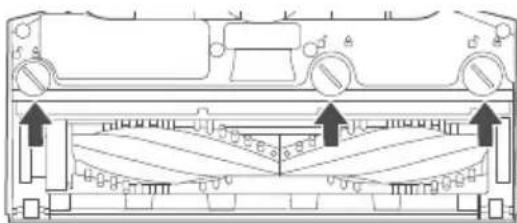
Line drawing of a hand using scissors to cut or wire around an electronic device casing (no text or symbols visible)- If debris cannot be removed easily, remove retainer to access brushroll. Using flathead screwdriver or coin turn screws to the 'unlock' position. Remove the brushroll and clear any tangled hair and remaining debris.
natural_image
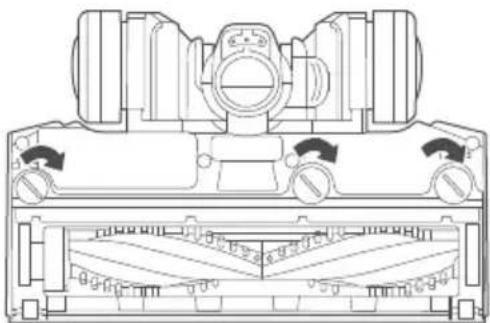
Technical line drawing of a vehicle chassis with structural components and directional arrows (no text or symbols)- To reassemble:
a. Align one end of brushroll with floor nozzle gear.
b. Press other end into slot.
c. Place retainer back in place and put in screws and turn to 'lock' position.
natural_image
Technical line drawing of a mechanical component with no visible text or symbols
CAUTION
Make sure vacuum cleaner is off and charging plug is unplugged.
NOTICE: THERMAL CUT-OFF
| This vacuum cleaner has a special thermostat that protects the vacuum cleaner in case of motor overheating. If the vacuum suddenly shuts off, proceed as follows:1) Check the vacuum for a possible source of overheating such as a full dust cup. blocked wand or clogged filters. If these conditions are found, fix them and wait at least 30 minutes before attempting to use the vacuum.2) After the 30 minute period, press the power button. | |
| Problem Solution | |
| Motor will not start | ● Push cord securely into electrical outlet, try another outlet or check circuit breaker.● See detailed "thermal cut-off" instructions above. |
| Not enough suction power | ● Empty dust cup and clean or change filters. See page 12 for maintenance instructions.● Remove clogs that restrict the airflow. |
| Brushroll will not turn | ● Check brushroll for debris. See page 14 for maintenance instructions. |
We Offer 2-Year Limited Warranty.
Email Our Customer Service:
global_service@eureka.com
eureka
SINCE 1909
eureka
Benutzerhandbuch

PLEASE RECYCLE.
OPEN OTHER END. DISPLAY THIS END DOWN. FOR HOUSEHOLD USE ONLY.

natural_image
Technical line drawing of a mechanical component with an arrow indicating direction (no text or symbols present)HANDSTAUBSAUGER UND ZUBEHÖR

ACHTUNG
natural_image
Line drawing of a handheld device with a hand holding a tool, next to a cylindrical device (no text or symbols)HANDSTAUBSAUGER UND MOTORISIERTE BODENDÜSE
natural_image
Line drawing of a robotic vacuum cleaner performing a step on a platform (no text or symbols)natural_image
Illustration showing a hand using a tool to cut a geometric object into a container with particles (no text or symbols)natural_image
Diagram showing a faucet spraying water onto a mechanical component (no text or symbols)
24 Stunden

natural_image
Simple line drawing of a 3D geometric shape resembling a curved bracket or mechanical part (no text or symbols)natural_image
Technical line drawing of two boat hulls (no text or symbols)
natural_image
Line drawing of a hand using a tool to interact with a device panel (no text or symbols visible)natural_image
Technical diagram of a vehicle interior showing dashboard, steering wheel, and front-mounted platform (no text or labels)natural_image
Technical line drawing of a mechanical component with no visible text or symbols
ACHTUNG

PLEASE RECYCLE.
OPEN OTHER END. DISPLAY THIS END DOWN. FOR HOUSEHOLD USE ONLY.

natural_image
Technical line drawing of a mechanical component labeled 'Flash' (no other text or symbols)
natural_image
Technical line drawing of a mechanical component with two mounting holes (no text or symbols)■ FUNZIONAMENTO
natural_image
Technical line drawing of a mechanical device with no visible text or symbolsNota:
natural_image
Line drawing of a handheld device with a cylindrical tool and a separate cylindrical device (no text or symbols)■ FUNZIONAMENTO
MODALITÀ DI UTILIZZO DELL'ASPIRATORE MANUALE E DEGLI ACCESSORI
UTILIZZO DELL'ASPIRATORE MANUALE E DELLA BOCCHETTA MOTORIZZATA PER PAVIMENTI
natural_image
Line drawing of a hand using a vacuum cleaner to clean or install a component on a step (no text or symbols)natural_image
Two-step illustration showing a hand using a tool to cut a geometric object into a container with particles (no text or symbols)natural_image
Diagram of a faucet spraying water onto a mechanical component (no text or symbols)
24 ore
natural_image
Simple line drawing of a 3D geometric shape resembling a bent or angular bracket (no text or symbols)natural_image
Technical line drawing of two boat hull designs (no text or symbols)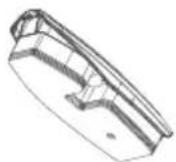
natural_image
Technical diagram of a mechanical component with mounting holes and internal structural elements (no text or labels)natural_image
Technical line drawing of a mechanical component with no visible text or symbols
ATTENZIONE

PLEASE RECYCLE.
OPEN OTHER END. DISPLAY THIS END DOWN. FOR HOUSEHOLD USE ONLY.

■ MESURES DE SÉCURITÉ IMPORTANTES
natural_image
Technical line drawing of a mechanical component with three mounting holes (no text or symbols)■ UTILISATION
ASSEMBLAGE DU SOCLE DE RANGEMENT
natural_image
Technical line drawing of a mechanical device with no visible text or symbolsRemarque :
natural_image
Technical line drawing of a mechanical component with an arrow indicating direction (no text or symbols present)natural_image
Line drawing of a handheld device with a cylindrical tool and a separate cylindrical device (no text or symbols)■ UTILISATION
UTILISER UN ASPIRATEUR À MAIN ET UN SUCEUR DE SOL MOTORISÉ
natural_image
Line drawing of a robotic vacuum cleaner performing step-by-step maintenance on a platform (no text or symbols)■ NETTOYAGE ET ENTRETIEN
RETRAIT ET NETTOYAGE DU BAC À POUSSIÈRE

ATTENTION
natural_image
Illustration showing a hand using a tool to cut a geometric object into a container with particles (no text or symbols)natural_image
Diagram of a faucet spraying water onto a mechanical component (no text or symbols)
24h
natural_image
Simple line drawing of a 3D geometric shape resembling a bent bracket or mechanical part (no text or symbols)natural_image
Technical line drawing of two boat hull designs (no text or symbols)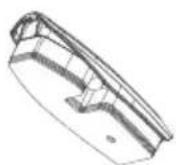
■ NETTOYAGE ET ENTRETIEN
RETRAIT ET NETTOYAGE DE LA BROSSE ÉLECTRIQUE

ATTENTION
natural_image
Diagram of a device with a hand holding a tool, showing internal waveform patterns (no text or symbols)natural_image
Technical diagram of a mechanical component with no visible text or symbolsnatural_image
Technical line drawing of a mechanical component with no visible text or symbols
ATTENTION

PLEASE RECYCLE.
OPEN OTHER END. DISPLAY THIS END DOWN. FOR HOUSEHOLD USE ONLY.

natural_image
Technical line drawing of a mechanical device with no visible text or symbolsNota:
natural_image
Technical line drawing of a mechanical component with an arrow indicating direction (no text or symbols present)CÓMO USAR EL ASPIRADOR DE MANO Y SUS ACCESORIOS

PRECAUCIÓN
natural_image
Line drawing of a handheld device with a cylindrical tool and a separate cylindrical device (no text or symbols)■ OPERACIONES
CÓMO USAR EL ASPIRADOR DE MANO Y SUS ACCESORIOS
USO DEL ASPIRADOR DE MANO Y LA QUILLA DE SUELO MOTORIZADA
natural_image
Line drawing of a robotic vacuum cleaner performing step-by-step cleaning (no text or symbols)■ LIMPIEZA Y MANTENIMIENTO
DESMONTAJE Y LIMPIEZA DEL DEPÓSITO DE POLVO

PRECAUCIÓN
natural_image
Illustration showing a hand using a tool to cut a geometric object into a container with particles (no text or symbols)natural_image
Diagram showing a faucet spraying water onto a mechanical component (no text or symbols present)
24 horas
natural_image
Simple line drawing of a 3D geometric shape resembling a bent bracket or mechanical part (no text or symbols)natural_image
Technical line drawing of two boat hull designs (no text or symbols)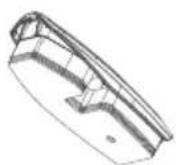
■ LIMPIEZA Y MANTENIMIENTO
DESMONTAJE Y LIMPIEZA DEL CEPILLO ELÉCTRICO

PRECAUCIÓN
natural_image
Diagram of a hand using scissors to cut or wire around an electronic device with no visible text or symbolsnatural_image
Technical line drawing of a mechanical component with mounting holes and internal structural elements (no text or symbols)natural_image
Technical line drawing of a mechanical component with no visible text or symbols