
THVC94BC - Vacuum Cleaner THOMSON - Free user manual and instructions
Find the device manual for free THVC94BC THOMSON in PDF.

| Product type | Robot vacuum cleaner |
| Brand | Thomson |
| Model | THVC94BC |
| Dimensions | Diameter 330 mm, height 76 mm |
| Net weight | 2.7 kg |
| Power supply | AC adapter 100-240 V ~ 50/60 Hz, output 19 V / 600 mA |
| Battery type | Rechargeable lithium 2500 mAh, non-replaceable |
| Charging time | Approximately 5 hours |
| Runtime | Approximately 120 minutes |
| Dust container capacity | 600 ml |
| Filters | Main HEPA filter and primary filter (washable) |
| Cleaning modes | Automatic, max power (single room), baseboard cleaning, manual control |
| Scheduling | Daily scheduling via remote control |
| Remote control | Included, AAA batteries not provided |
| Brushes | Main brush + 2 side brushes (left/right) |
| Charging base | Included, with contact pins |
| Automatic return to base | Yes, when battery is low or via remote control |
| Safety | Use by children aged 8 and above, avoid obstacles, do not use on balconies |
| Maintenance | Empty container, clean filters and brushes, charge pins |
| Package contents | Robot, charging base, remote control, adapter, side brushes, cleaning brush, HEPA filter, manual |
Frequently Asked Questions - THVC94BC THOMSON
User questions about THVC94BC THOMSON
0 question about this device. Answer the ones you know or ask your own.
Ask a new question about this device
Download the instructions for your Vacuum Cleaner in PDF format for free! Find your manual THVC94BC - THOMSON and take your electronic device back in hand. On this page are published all the documents necessary for the use of your device. THVC94BC by THOMSON.
USER MANUAL THVC94BC THOMSON
IMPORTANT SAFEGUARDS PLEASE READ THE SAFETY INSTRUCTIONS CAREFULLY BEFORE USING THE APPLIANCE AND KEEP FOR FUTURE REFERENCE.

- The battery must be disposed of safely.
- Do not use next to steps or on balconies. This machine does not have step avoidance sensors.
- This device can be used by children from 8 years old and by people with reduced physical, sensory or mental capacities or a lack of experience and knowledge provided they have been placed under supervision or that they have received instructions on how to use the
appliance safely and understand the dangers involved. Children must not play with the device. Cleaning and user maintenance must not be made by children without supervision.
- This appliance is intended for household use only.
- This unit is suitable for low to medium back carpets. It is not suitable for uneven floors or mixed carpets.
- Remove the side brush when cleaning the carpet pad to protect the side brush.
- If the power cord of the adapter is damaged, the adapter must be discarded.
- Recharge the battery (s) only with the charger supplied by the manufacturer.
- Use the device only with its battery (ies) specially created for this purpose. The use of any
other battery (s) could create a risk of explosion or fire
- Please use an adapter to use this product only.
- Do not use on damp or greasy dust.
- Before use, remove fragile objects (glass, light, etc.) and other objects likely to entangle the brushes.(long hair, plastic bag, rope, wire, etc.).
- Do not sit on the Machine and do not put heavy things on it.
- CAUTION: Make sure that the appliance can operate freely in the room (that it is not blocked by an obstacle, that it cannot overturn) and that there is no obstacle on which the device could fall and create a risk of danger (such as a lighted candle or a vase filled with water).
-
Regularly clean the machine. Empty the dust container.
-
Empty the dust container.
- Charge the machine without using it for three months.
- Only recharge it in the event of a low power alarm or when the power is turned off. Use it after having it fully charged.
- This appliance contains batteries that are non-replaceable
WARNING: For the purpose of recharging the battery, only use the detachable supply unit provided with this appliance.
- WARNING: Risk of entrapment. Keep loose clothing, hair, fingers, etc. away from brushes and motorized nozzles
- WARNING: The plug must be removed from the outlet before cleaning or servicing the appliance.
- Recharge the battery / robot only with the adapter supplied with the device.
- The external flexible cable of this adapter cannot be replaced; If the cord is damaged, the adapter should be discarded and replaced with an adapter of the same model.
IMPORTANT
It is forbidden to replace the power cable by yourself. In case of damage.
If the device has been dropped, please have a qualified person check it before using it again. Internal damage could cause accidents. For any type of problem or repair, please contact the after-sales service of the local distributor, the manufacturer or a qualified person, in order to avoid any risk of danger.
Disposal and environmental responsibility
In order to be environmentally friendly, we encourage you to dispose of the device correctly. You can contact local authorities or recycling centers for more information.
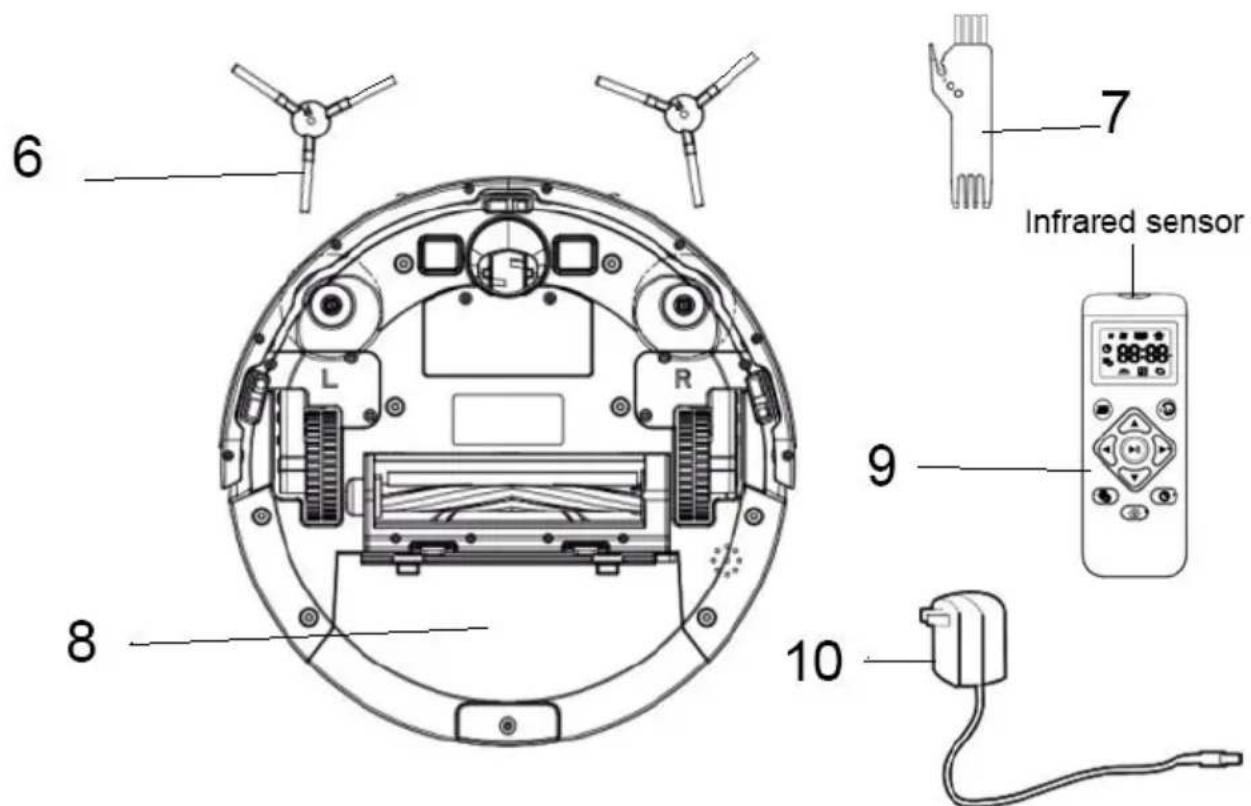
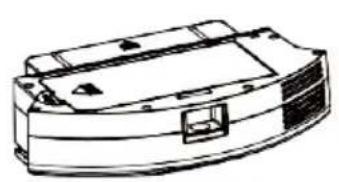
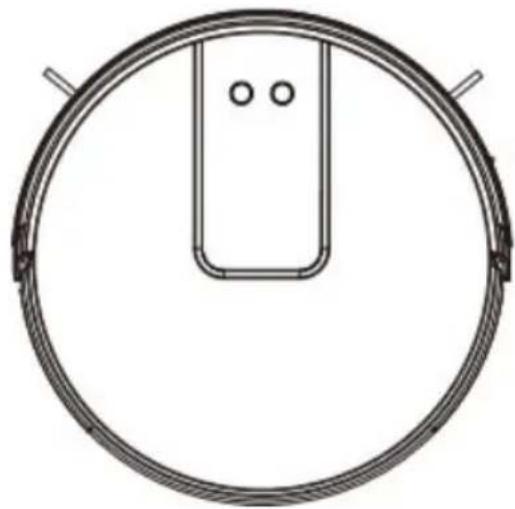
Getting to know your product
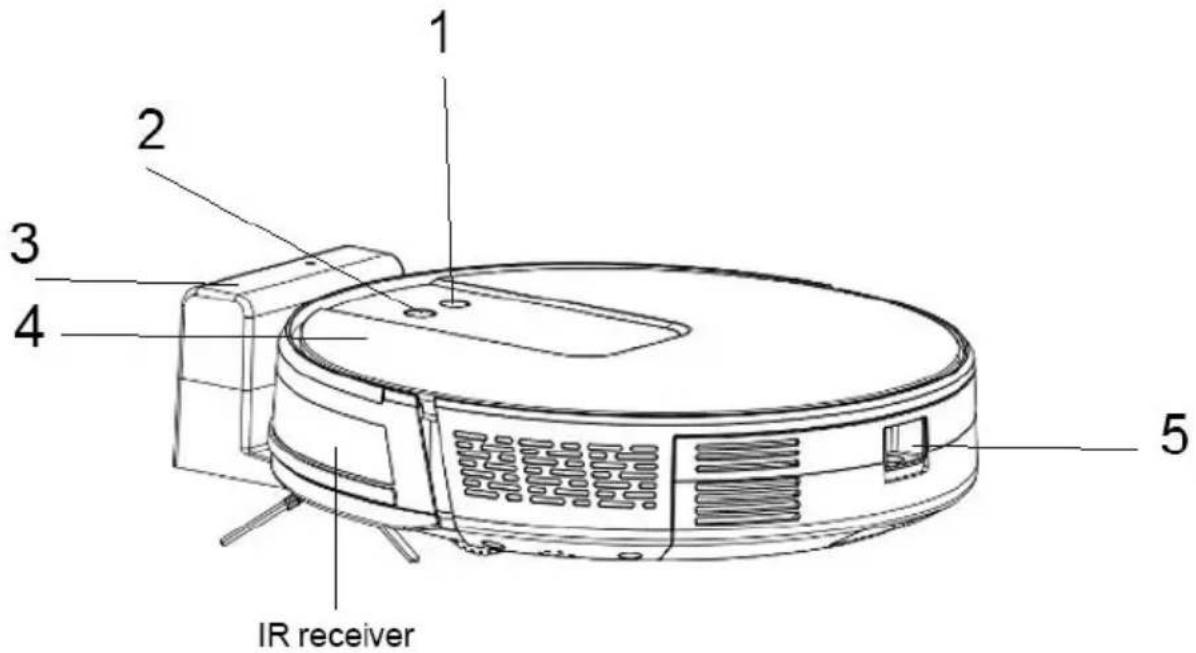
- Power key
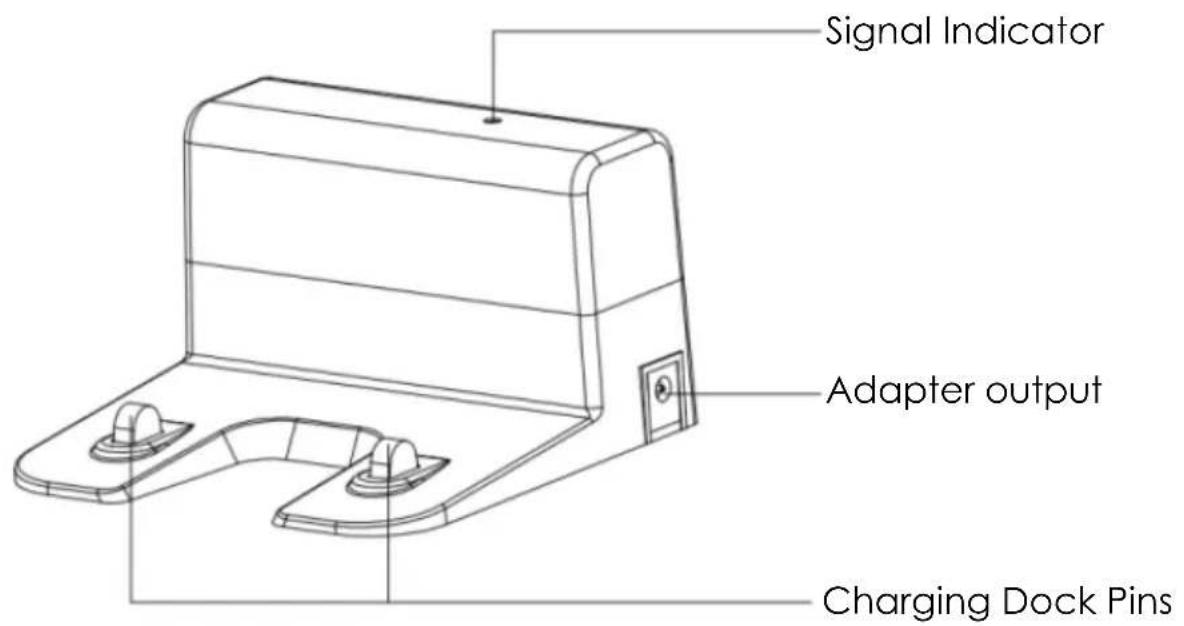
- Recharge main charging base
- Charging cradle
- Surface cover
-
Dust container button
-
Side brushes
- Cleaning brush
- Dust container
- Remote control
- Power Adaptor
Package Contents
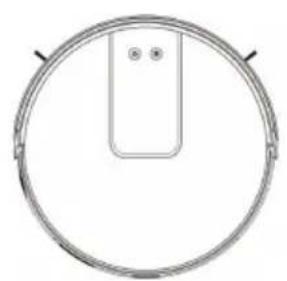
Robot
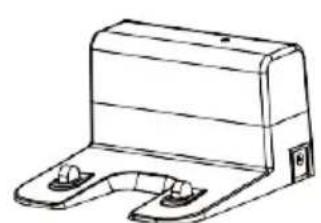
Charging dock
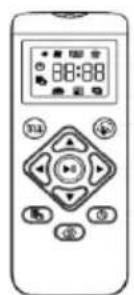
Remote Control (no battery)
Dust Container
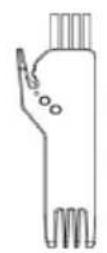
Cleaning Brush
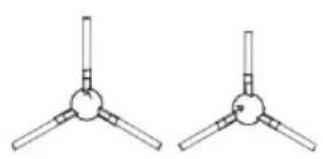
Side Brush

Power Adapter
Instruction manual
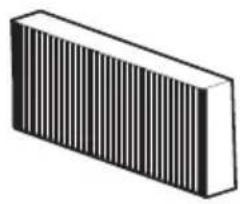
HEPA filter
Before using
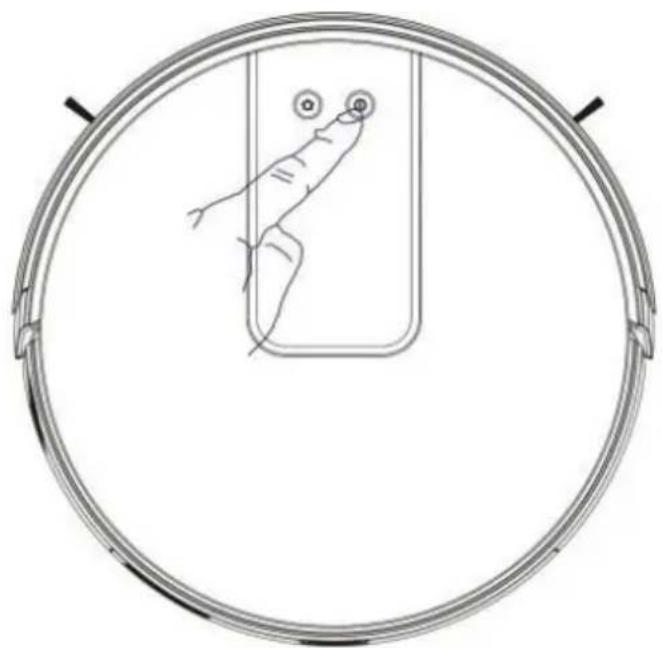
Before using the Robot, remove the protective strip on the Robot and remove the protective film on the charging dock.
Use of instruction
Robot charging
- Placing and charging: The charging base must be placed against the wall and placed on a flat ground. Do not place any objects close to the charging base to 0.5cm left and right of the base and 1.5m before the base.
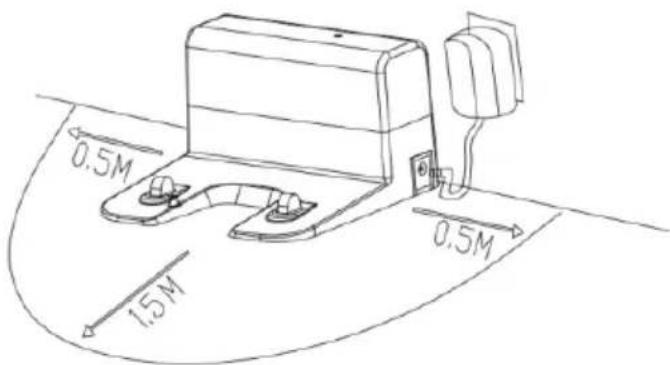
- Connect to the power supply.
- Installing side brushes: Install the side brushes according to the left and right (L/R).

- Charging: Place the Robot on the charging seat for charging (During charging, the indicator light flashes. When the charging is over, the light remains on. The charging time is about 5 hours.)
During the cleaning process, the Robot can sense that its power is insufficient and automatically enters "Back to Charge" mode" and automatically finds the charging seat to charge. You can also command the Robot to enter "Back to Charge" mode through the "Back to Charge" button on the remote control.
CHARGING ATTENTION
- The charging seat cannot be used in environments with a strong reflection such as direct sunlight and nearby mirrors. If there are any objects with strong reflection, please the shift to 7 cm from the bottom minimum.
- In order to ensure the normal working hours of the Robot, please fully charge it before use.
Cleaning Operation
According to different cleaning needs, this product has a variety of cleaning modes to choose from. You can start various cleaning modes through the Robot, remote control.
Available cleaning modes:
- Automatic cleaning
- Cleaning with max power (for one-piece suction)
- Cleaning baseboards
1)Automatic Cleaning
Cleaning mode: The most commonly used cleaning method is that the Robot uses a bow-shaped path to plan and clean the whole house according to the actual home environment.
Setting method: In the shutdown state, press ON/OFF hold the key, when the indicator light of the Robot is on, this indicates that the Robot is powered on. When the key is pressed for a short time, or press the automatic cleaning
bottom on the remote control, the Robot starts automatic cleaning. To enter the MAX power suction mode, Press the once more.
2) Cleaning with Max Power (for the aspiration of a single piece):
Cleaning mode: Perfect for cleaning in MAX power
Setting method: Click the "Mode Change" button on the remote control to select the Max Power mode to start the max power cleaning.
Friendly reminder: When one single room is in need of cleaning, please close the door and the Robot will do centralized cleaning in the room.
If this room does not have a charging base, the Robot will return to the original point after cleaning. Max Power mode is always in super suction cleaning mode.
3) Cleaning Baseboards
Cleaning mode: For indoor corners cleaning, the Robot cleans along the walls and returns to the charging base after the edge cleaning is finished.
Setting method: Click the "Mode Change" button on the remote control to select the Baseboard cleaning mode to start the edge cleaning.
Manual Control
Cleaning mode: Suitable for manual control to precision cleaning.
Setting method: Click the "Direction" button on the remote control to control the Robot to move forward and backward and turn.
Awaken and Shutdown
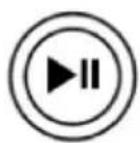
Pause: During the operation of the Robot, press the Robot key or "Pause" button on the remote control to pause the operation of the Robot.
Awaken: If the Robot stops working for more than ten minutes, it will automatically enter sleep mode (all the Robot lights are off). You can wake up the Robot by pressing the START / STOP button, or any button on the remote control to restart.
Shutdown: After the Robot stops working, press the ON/OFF key for a long time. When the indicator light of the Robot is off, it means the Robot is shutdown.
*After the Robot finishes its work, it is recommended not to shut it down, so as to keep it in a state of charge, in order to better carry out next time.
Time Scheduling Setting
Scheduling settings: Press the "Scheduling" button on remote control for a short time to set the daily programming.
After the setting is completed, the Robot will automatically clean up at the scheduled time every day.
PS: Before scheduling setting, you need to set up the Robot time through timing setting button on remote control.
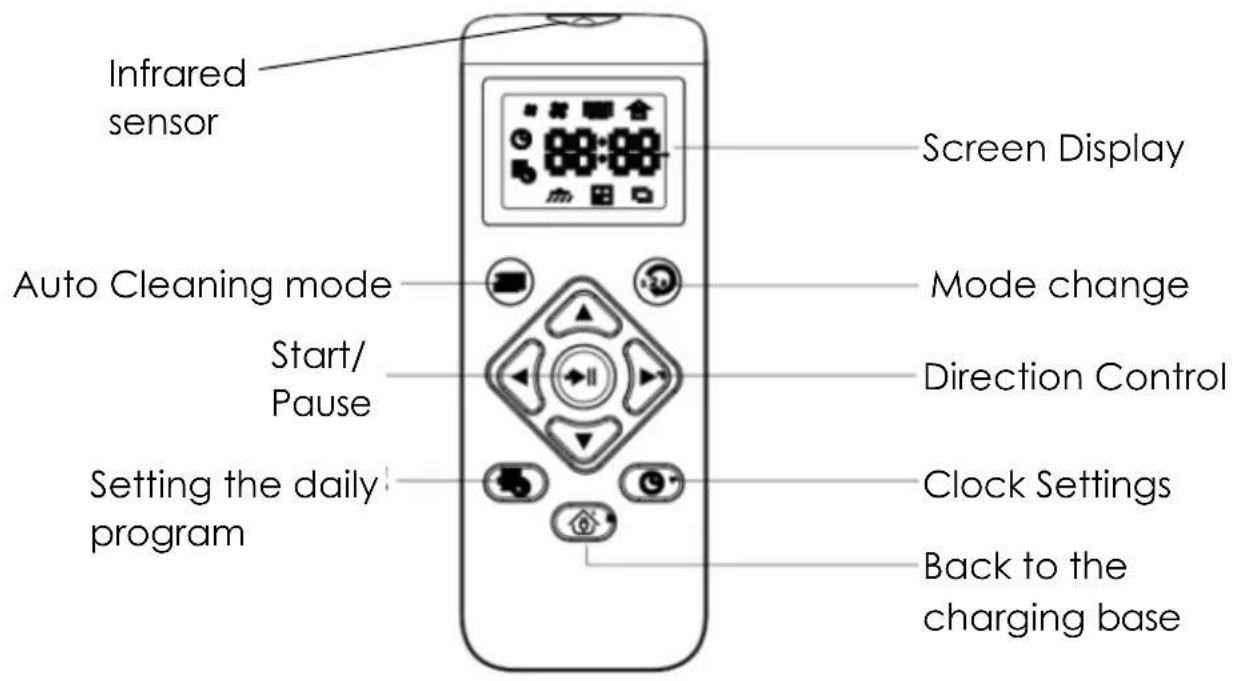
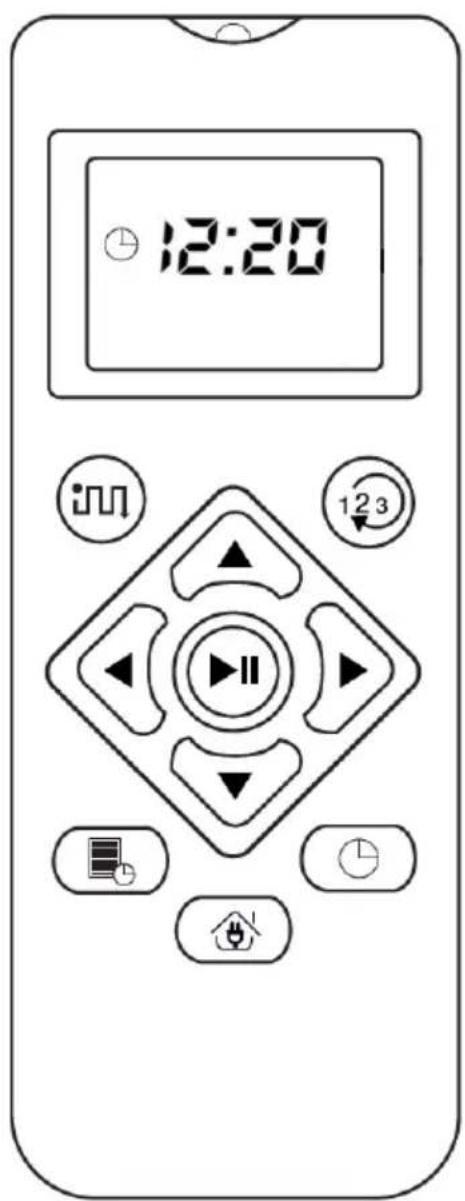
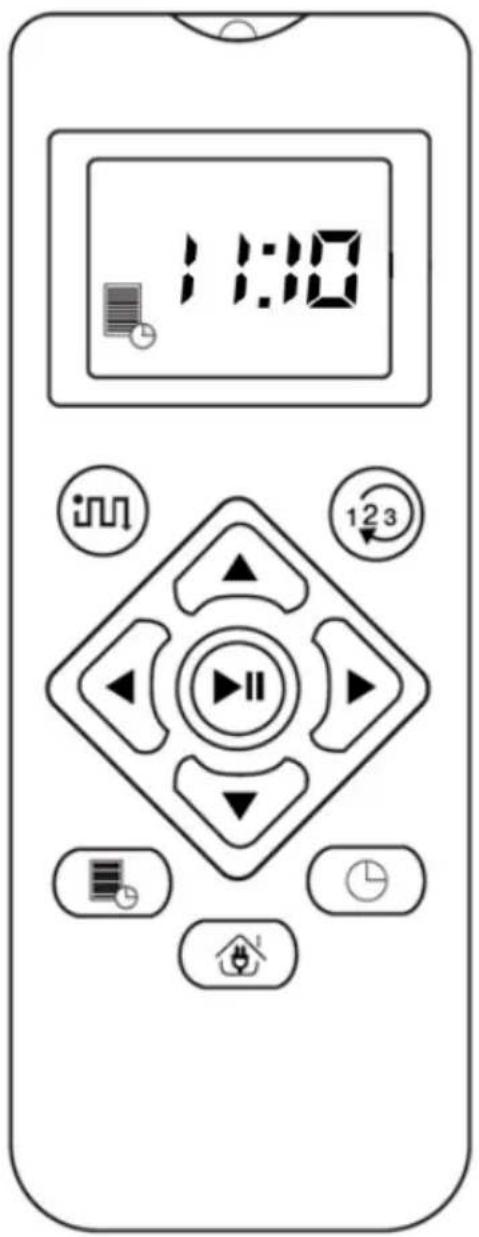
Remote Control
Avoid direct sunlight on the receiver of product, which may interfere with good signal reception. In some cases with high brightness, it is recommended to draw the curtains to avoid direct sunlight.
The transmitter of remote control must be directive towards the receiver when pressing the buttons of the desired function.
Do not use different type of batteries or new and worn batteries
Never use rechargeable batteries in this remote
Remote the batteries if you do not require the use of your remote control for a long time
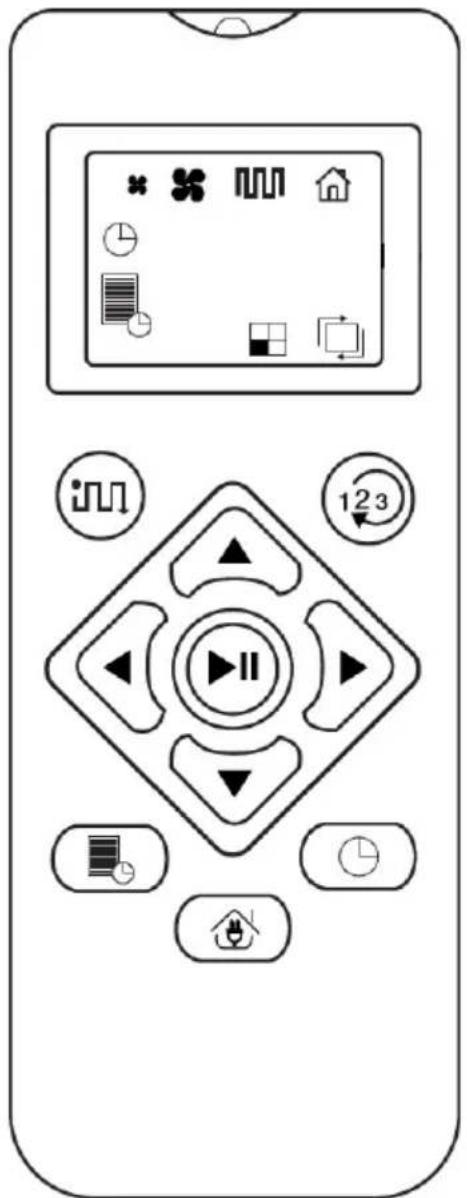
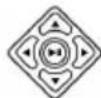
Manual mode: control your robot as you wish using the directional arrows

The logo appears when the robot is on its charging base

Setting the clock
Daily programming
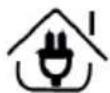
Return to charging base activation: the robot detects its base and automatically loads on it.
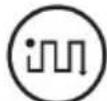
Automatic program by default: zig zag mode. Press once and the program starts at normal speed, press a second time and the power goes to maximum.

Normal power

Max power
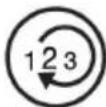
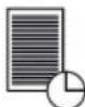
Changing programs, press this button and allow you access to the single room program and baseboard cleaning program.

Single program: 30 minutes program

Baseboard cleaning program: cleaning along the walls on the outer edge of the room

Press the clock button

The hours flash, you can change the time with the up or down directional arrows
Once the hours are set, press the right arrow to set the minutes
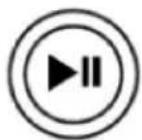
Confirm the daily programming by pressing the « play » button
Tap daily programming
The hours flash, you can then change the time with the up or down directional arrows
Once the hours are set, press the right arrow to set the minutes
Confirm the daily programming by pressing the « play » button
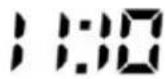
Note: every day at 11:10 am, your robot will come out of its base to carry out its cleaning cycle. As soon as the battery is low, it will automatically return to its charging base.
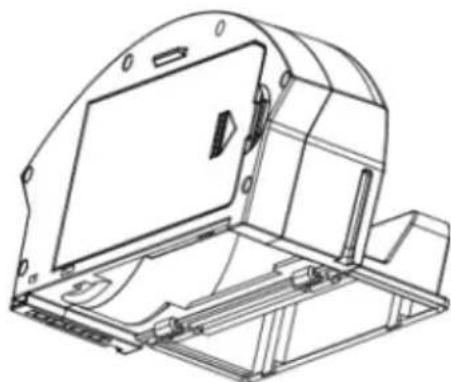
Cleaning & Maintenance
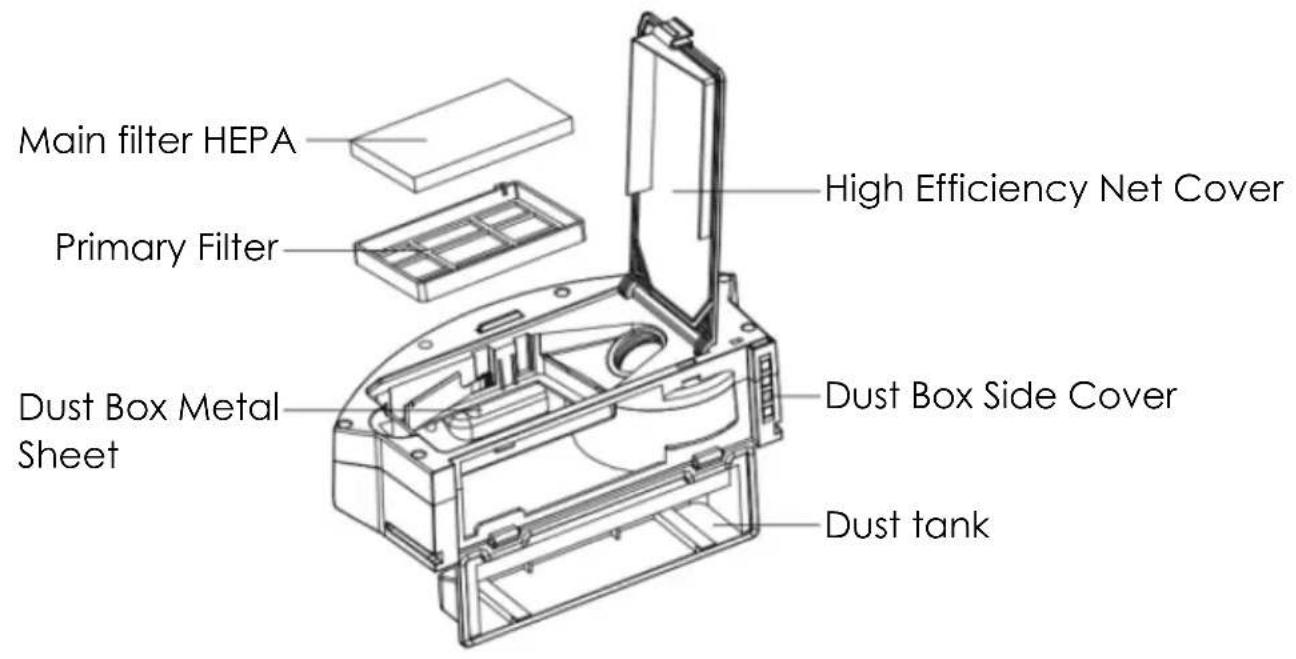
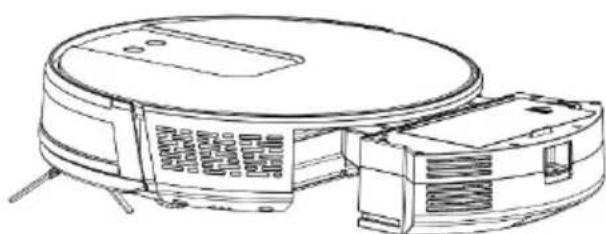
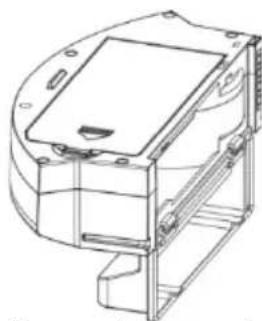
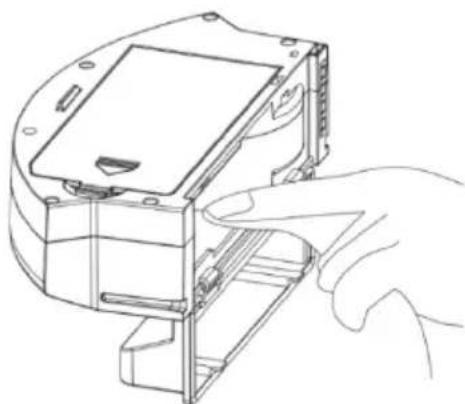
Dust Container
A. Press the dust container button to take out the dust container
B. Open the dust container side cover
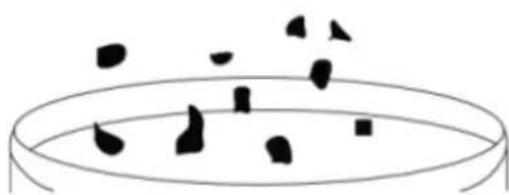
C. Dumping garbage
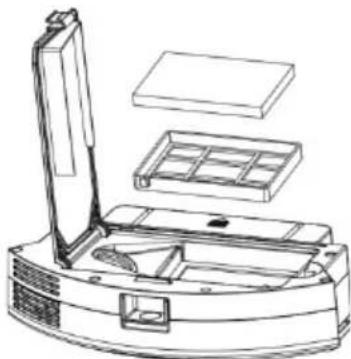
D. Open the high efficiency filter

E. Open the high-efficiency filter and take out the HEPA high-efficiency filter and the primary filter, it is not recommended to clean the high-efficiency filter with water. Tap gently to remove dust.
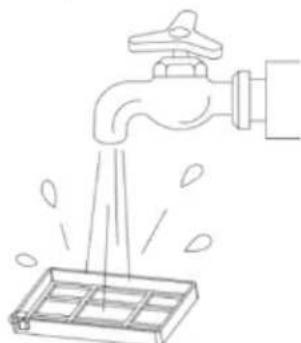
F. Rinse the primary filter
G. The dust container can be scrubbed clean with a dishcloth. Please pay attention: Do not wash the dust container with water.
H. Dry the dust box and filter assembly, and keep it dry to ensure its service life.
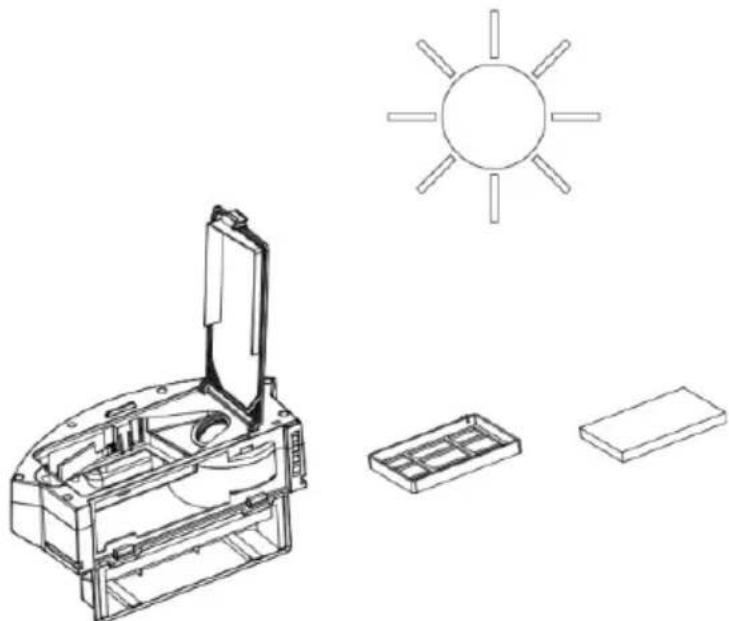
Note: It is recommended to wash the primary filter with water after use of about 15 - 30 days. The maximum service life of the high efficiency filter is 3 months.
I. 1) Replace the primary filter and the high efficiency filter into the dust container
Note: 1. Before installing the filter, please ensure that the high efficiency filter and the primary filter are in a dry state.
2) Do not expose the high efficiency filter and primary filter to the sunlight.
J. Close the dust container cover and install the dust container in the Robot.
Note: Do not wash the dust container with water.
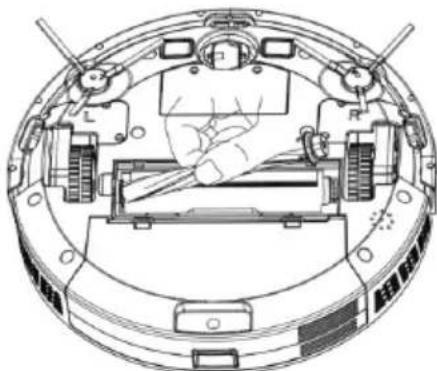
Main Brush and Side Brush
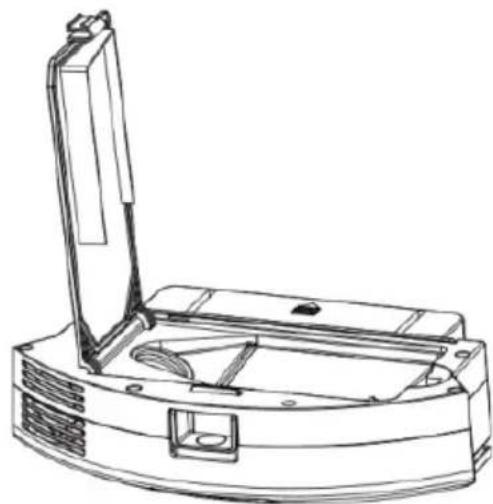
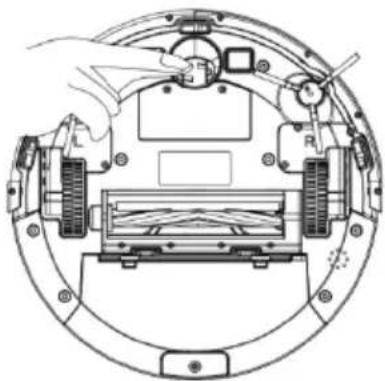
- Open the main brush cover assembly
- Take out the main brush shaft
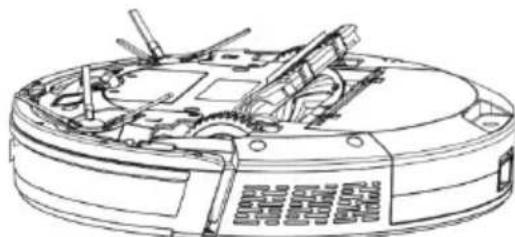
- Utility tool for cleaning for the main brush
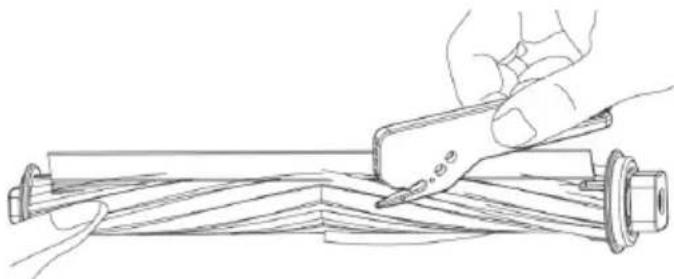
- Cleaning main brush and side brushes
Charging Dock pins, Vacuum Sensor, Drive Wheel and Universal Wheel
Kindly reminder: The interior of the charging base dock pins, the vacuum sensor and the bumper all contain sensitive Electronic components, please use a dry dishcloth when cleaning, and do not use a wet dishcloth, to prevent damage caused by water inflow.
Clean up charging dock pins
Clean drive wheels and universal wheel
If you do not use the product for a longtime, please fully charge it before storing. Turn off the robot and take care to supplying power to it every 3 months to maintain the battery life. If the battery is over discharged or is not used for a long time, the product may not be able to be charged. Please contact our company for after-sales maintenance, do not disassemble it yourself.
Trouble shooting
| No. Prompt Tone | Cause of Failure | Solution | |
| 1 | Dust container not installed | Dust container removed and not installed | Return the dust container to the Robot and press the cleaning |
| 2 | Battery failure | Abnormal battery charging | Contact after-sales test battery |
| 3 | Please check if the wheel is stuck | Wheel jammed | Check whether the wheel is entangled with foreign |
| objects and clean up the entangled objects. | |||
| 4 | Please check if the front of the robot is stuck | Front impact bracket stuck | Check whether the front of the robot can rebound normally |
| 5 | Robot connection failed | Machine failed to connect to server | Check whether the wireless network connected during distribution can connect to the internet |
| 6 | The battery is low, please charge the machine | Battery power less than 20 % | The machine automatically enters the recharge mode |
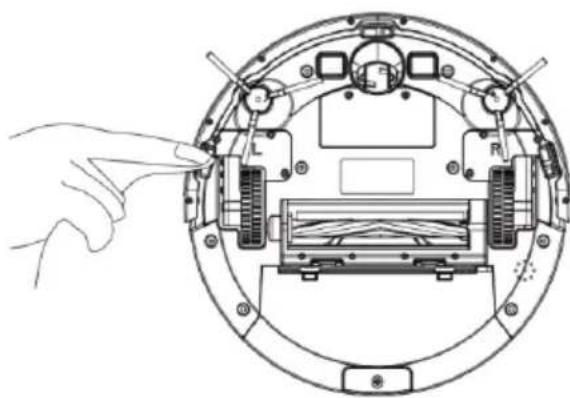
| 7 | Please check whether the side brush is tangled or jammed | Abnormal edge suction | Check whether the side brush is wound around the wire and fix this |
Technical Specification
| Model | THVC94BC |
| Power supply | Rechargeable battery |
| Remote Control Battery | “AAA” R03 X 2 (Excluded) |
| Voltage | GQ12-190060-AG Input:100-240V AC 50-60Hz Output:19V, 600mA |
| Battery | 2500 mAh rechargeable lithium battery pack |
| Charging time | Approximate 5 hours |
| Working time | Approximate 120 mins. |
| Capacity of dustbin | 600ml |
| Dimensions | Diameter: 330mm Width: 76mm |
| Net weight | 2.7 kg |
Data sheet of the external power sources of European Directive (EU) 2019/1782
| Value Unit | ||
| Model reference | GQ12-190060-AG | |
| Company name or trademark | Dong Guan City GangQi Electronic Co., Ltd. | |
| Input voltage | AC 100-240 | V |
| Input AC frequency | 50/60 | Hz |
| Output voltage | 19 | V |
| Output current 0.6 | AT | |
| Output power | 11.4 | W |
| Average efficiency in active mode | 84.42 | % |
| Low load efficiency (10%) | 78.08 | % |
| Power consumption without load | 0.084 | W |
Disposal:
The presence of this logo on the product means that disposal of the device is governed by Directive 2012/19 / EU dated 4 July 2012 on electrical and electronic equipment (WEEE).
Any hazardous substance in electrical or electronic equipment can have a potential impact on the environment and health during recycling. Consequently, at the end of useful life of the device, it should not be disposed of with municipal unsorted waste.
Your role as final consumers is crucial in terms of reuse, recycling and obtaining other types of value creation from this. You have the choice of different collection systems and exchanges organized by local authorities (recycling centers) and distributors. It is your duty to use these opportunities.
2. At the end of battery life:
This appliance contains battery that are non-replaceable.
Used batteries must be taken
care of by a selective collection system in order to be able to be recycled and thus reduce the impact on the environment.
When the battery reaches its end of useful life, you must deposit it in an appropriate selective collection system which will take care of its destruction and / or recycling.
- If the battery acid has leaked, avoid contact with skin, eyes and mucous membranes! Fluid leaking from the battery can cause skin rashes. Should any acid come into contact with the skin, rinse immediately and
abundantly the affected areas with clean water and consult a doctor without delay.
- The batteries must be installed respecting the polarity +/- .
- Do not recharge non-rechargeable batteries due to the risk of explosion.
IMPORTANT:
Under no circumstances should you throw the device or the battery on public roads.
The warranty does not cover wearing parts of the product, nor problems or damage resulting from:
(1) Surface deterioration due to normal wear and tear of the product;
(2) Defects or deterioration due to contact of the product with liquids and due to corrosion caused by rust or the presence of insects;
(3) Any unauthorized incident, abuse, misuse, modification, disassembly or repair;
(4) Any improper maintenance operation, use not in accordance with the instructions concerning the product or connection to an incorrect voltage;
(5) Any use of accessories not supplied or approved by the manufacturer.
The warranty will be void if the nameplate and / or serial number of the product is removed.
THOMSON is a trademark of Technicolor SA used under license by
This product is imported by: SCHNEIDER CONSUMER GROUP
12, rue Jules Ferry, 93110 Rosny-sous-Bois, FRANCE
THOMSON

- IMPORTANT SAFEGUARDS PLEASE READ THE SAFETY INSTRUCTIONS CAREFULLY BEFORE USING THE APPLIANCE AND KEEP FOR FUTURE REFERENCE.
- IMPORTANT
- Disposal and environmental responsibility
- Getting to know your product
- Package Contents
- Before using
- Use of instruction
- Robot charging
- CHARGING ATTENTION
- Cleaning Operation
- 1)Automatic Cleaning
- 2) Cleaning with Max Power (for the aspiration of a single piece):
- 3) Cleaning Baseboards
- Manual Control
- Awaken and Shutdown
- Time Scheduling Setting
- Remote Control
- Cleaning & Maintenance
- Dust Container
- Main Brush and Side Brush
- Charging Dock pins, Vacuum Sensor, Drive Wheel and Universal Wheel
- Data sheet of the external power sources of European Directive (EU) 2019/1782
- Disposal:
- At the end of battery life:
- IMPORTANT:
- THOMSON
Brand : THOMSON
Model : THVC94BC
Category : Vacuum Cleaner