Xtreme 2 SE - Fitness Equipment BOWFLEX - Free user manual and instructions
Find the device manual for free Xtreme 2 SE BOWFLEX in PDF.


User questions about Xtreme 2 SE BOWFLEX
0 question about this device. Answer the ones you know or ask your own.
Ask a new question about this device
Download the instructions for your Fitness Equipment in PDF format for free! Find your manual Xtreme 2 SE - BOWFLEX and take your electronic device back in hand. On this page are published all the documents necessary for the use of your device. Xtreme 2 SE by BOWFLEX.
USER MANUAL Xtreme 2 SE BOWFLEX
Thanks for choosing BowFlex Xtreme 2 SE as your fitness equipment. We are sincerely encourage you to read through this Owner's manual carefully before the assembling of your equipment started, especially of below WARNINGS! WARNINGS WILL REDUCE THE RISK OF BURNS, FIRE, ELECTRICAL SHOCK OR INJURY TO PERSONS.
Before exercising, find your equipment's serial number located on a white barcode sticker on product, and exercise in the space provided below.
ENTER YOUR SERIAL NUMBER AND MODEL NAME IN THE BOXES BELOW:
SERIAL NUMBER:
MODEL NAME: BowFlex Xtreme 2 SE
Refer to the SERIAL NUMBER and MODEL NAME when calling for service.
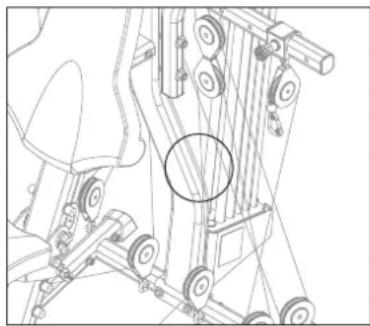
SERIAL NUMBER LOCATION

WARNING
- READ ALL INSTRUCTIONS BEFORE USING THIS EXERCISE EQUIPMENT.
All warnings and instructions should be read and proper instruction obtained prior to use. Use this equipment for its intended purpose ONLY.
If at any time the Warning stickers become loose, unreadable or dislodged, replace the labels, contact your local distributor for them.
- Keep children under the age of 13 away from this strength training equipment. Teenagers must be supervised at all times while using this equipment.
This equipment is not intended for use by persons with reduced physical, sensory or mental capabilities, or lack of experience and knowledge, unless they have been given supervision or instruction concerning use of the equipment by a person responsible for their safety.
- Inspect the machine before use. DO NOT use machine if it appears damaged or inoperable.
DO NOT exceed weight capacity of this equipment. Failure to comply will void the warranty.
- Make sure all adjustment devices are fully inserted and properly adjusted before use to avoid injury.
Injuries to health may result from incorrect or excessive training. Cease exercise if you feel faint or dizzy. Obtain a medical exam before beginning an exercise program.
- Keep body, clothing, hair, and fitness accessories free and clear of all moving parts.
- Make sure machine is stabilized on the floor and uneven surfaces are leveled before use.
-
It is essential that your equipment is used only indoors, in a climate controlled room.
-
Always fully stow all accessories between workouts. This helps keep you and everyone in your household safe, and helps preserve longevity of your equipment.
To assure that the safety level of this product is maintained, examine components for wear and tear on a regular basis. Components that are worn excessively or inoperable should be replaced immediately or the product should be put out of use until it is repaired.
DO NOT over exert yourself during exercise.
The equipment is only for indoor use at home, DO NOT to use in any commercial, rental, school or institutional setting.
- Consult a physician before starting an exercise program. Stop exercising if you feel pain or tightness in your chest, become short of breath, or feel faint. Contact your doctor before using the machine again.
Periodically inspect and test the locking mechanism for correct function. Follow the test procedures included in this manual.
- Before you start your workout, make sure that your surroundings are free from possible interference and third parties. Your workout free space should be 60~cm(2 feet) more than the maximum reach of the exercise in all directions.
- When hooking the resistance rods to the cable hooks, do not stand directly over the tops of the rods. Stand off to one side when connecting and disconnecting the resistance rods from the cables.

ADDITIONAL WARNING - ADJUSTABLE EQUIPMENT (FREE WEIGHT)
Before each use, examine this machine for loose parts or signs of wear. Inspect all cables, pulleys and their connections, making sure they are properly secured and attached, and show no signs of visible wear or damage. Contact Customer Service for repair information.
- SEAT ASSEMBLY PIN : Ensure that the seat assembly safety pin is fully inserted before using the machine. Failure to do so may result in injury.
DO NOT operate the machine if there is any noticeable damage to the cables or pulleys. If any damage is noticeable, contact local customer tech support.
- At no time should more than one person be on home gym while in operation.
DO NOT make any adjustments to the seat while sitting on it. DO NOT stand on the seat.
DO NOT jump on the machine.
DO NOT hang from bar. - At all times, stay out of the paths of moving rods.
- Disconnect the cables from resistance rods when your are not using your home gym.
To hook multiple rods up to one cable, bend the closest rod toward the cable and place the cable hook through that rod cap. You can then hook up the next closest rod through the same cable hook. - Hooking up the closest rod first prevents rods from crossing over the top of one another.

ADDITIONAL WARNING - Power Rod
- Keep at least 1.3m ( 50^ ) on each side of the machine clear. This is the recommended safe distance for access and passage around and emergency dismounts from the machine.
- Keep third parties out of this space when machine is in use or during maintenance check.
- Keep clear of Power Rod movement path during operation. Keep any bystanders clear of machine and Power Rod movement path during operation or during maintenance check.
- Never attempt to exercise with more resistance than you can safely and comfortably handle.
DO NOT use Dumbbells or other weight equipment to incrementally increase the weight resistance. Use only the weight resistance that came with your equipment. Never use the equipment for support during stretching or to attach and use resistance straps, ropes or other means. - Rods are under tension. Be careful when connecting the Selector Hook to the Rod. Correctly engage the Selector Hook to the Rod End. Be sure their is a solid connection before releasing the Rod.
- Never stand directly over the top of the rods. Stay off to the side while you attach the rods.
- Correctly adjust and safely engage all Positional Adjustment Devices. Make sure that the Adjustment Devices do not hit the user.
- Keep clear of Power Rod. movement path during operation. Keep any bystanders clear of machine and Power Rod. movement path during operation.
- Correctly engage the Selector Hook to the Rod End.
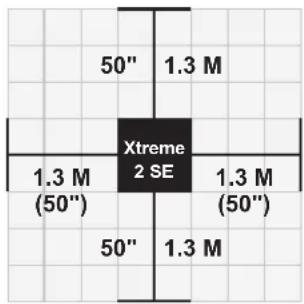
FREE AREA
Exercise on a level and stable base. There should be 1.3m (50") of free space each side surrounding.
- Do not exercise in any area that will block any vent or air openings. The equipment should not be located in a garage, covered patio,near water or outdoors.
CAUTION!
If you experience chest pains, nausea, dizziness or shortness of breath, stop exercising immediately and consult your physician before continuing.
TECH SPECS
| Assembled Dimensions (L x W x H) | 135 x 124 x 211 cm / 53” x 49” x 83.25” |
| Product Weight | 79 kg / 174 lbs. |
| Max User Weight | 136 kg / 300 lbs. |
From now on, you can assemble your equipment at your convenience. For detailed instructions on assembly, operation, programs, troubleshooting, and maintenance, please scan the QR code on the left side to access the complete manual.
If scanning the QR code fails, you can visit the website provided here: https://global.bowflex.com/en/manuals.html
WARRANTY
If your equipment requires warranty service, please contact local Customer Tech Support.

For assembly video, please visit: https://global.bowflex.com/en/assembly-videos.html

NEED HELP?
If you have any questions, need assistance with missing parts, or require technical support or maintenance for your equipment, please contact Customer Tech Support.
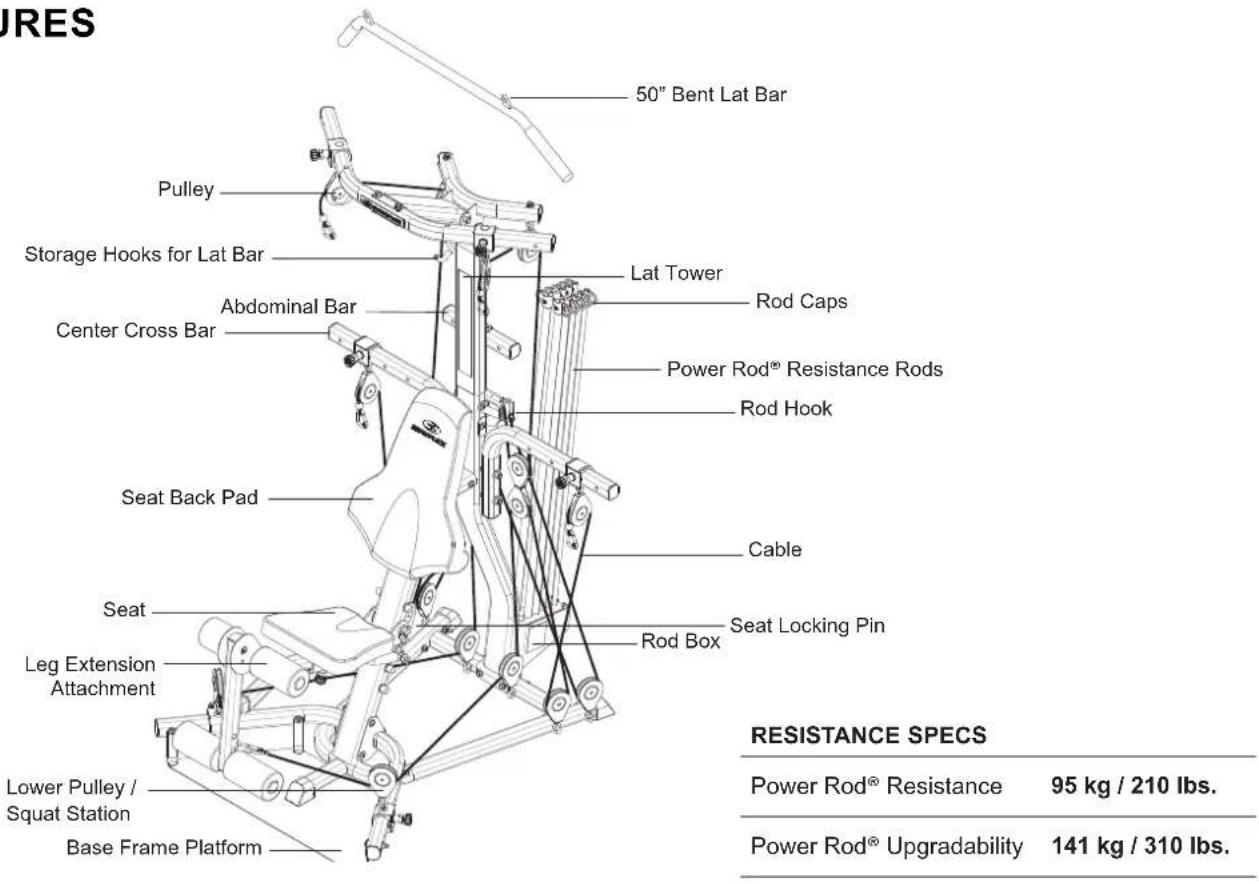
HARDWARE & TOOLS INCLUDED
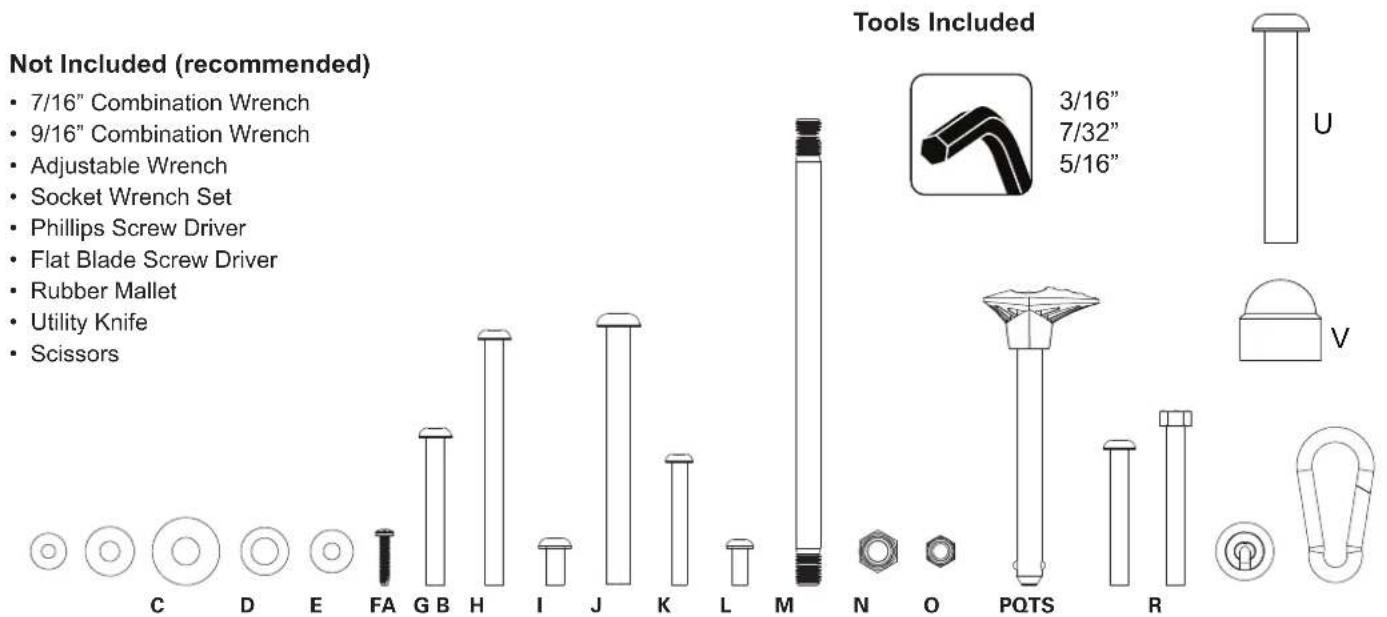
| Item Qty Description Item Qty Description | |||||
| A | 3 Flat | Washer 1/4" Regular | K | 2 Button Head Screw 5/16" X 2 1/2" | |
| B | 31 Flat | Washer 3/8" Regular | L | 4 Button Head Screw 5/16" X 3/4" | |
| C | 4 Flat | Washer 1/2" Wide | M | 2 Threaded Stud 1/2" X 9 1/2" | |
| D | 4 Flat | Washer 1/2" Regular | N | 6 Nylock Nut 1/2" | |
| E | 6 Flat | Washer 5/16" Regular | O | 11 Nylock Nut 3/8" | |
| F | 3 Phillips Screw #10-16 X 1" | P | 1 Seat Locking Pin | ||
| G | 2 Button Head Screw 3/8" X 3" | Q | 2 Button Head Screw 3/8" X 2 3/4" | ||
| H | 1 Button Head Screw 3/8" X 5" | R | 2 Hex Head Bolt 3/8" X 3 1/4" | ||
| I | 9 Button Head Screw 3/8" X 3/4" | S | 4 Cable End Stop Ball | ||
| J | 2 Button Head Screw 1/2" X 5 1/4" | T | 6 Snaphook | ||
| U | 4 | Button Head Screw 3/8" X 2 1/2" | V | 4 | Rubber End Cap |
ASSEMBLY
IMPORTANT: LEAVE ALL CABLES COILED AND WRAPPED UNTIL YOUR BOWFLEX XTREMEM 2 SE HOME GYM IS FULLY ASSEMBLED.
PARTS
| Item Qty Description Item Qty Description | ||||
| 1 | 1 Base Frame Assembly | 16 | 1 Lock Knob | |
| 2 | 1 Rod Pack 210# | 17 | 1 Seat Backbone Assembly | |
| 3 | 1 Lower Lat Tower | 18 | 1 Seat Bottom | |
| 4 | 1 Seat Support Rail | 19 | 1 Ab Crunch Crossbar | |
| 5 | 1 Squat Frame Left | 20 | 1 Ab Crunch Bracket | |
| 6 | 1 Squat Frame Right | 21 | 2 Pulley, Pair Floating | |
| 7 | 1 Squat Platform | 22 | 1 Lat Double Pulley / Housing | |
| 8 | 4 Pulley Slider, 4" w/o Decal | 23 | 1 Leg Extension Backbone | |
| 9 | 1 Rear Lat Crossmember | 24 | 1 Leg Extension Pin | |
| 10 | 1 Lat Cross Bar Assembly | 25 | 2 Tube, Foam Roller | |
| 11 | 1 Upper Lat Tower Tube | 26 | 4 Pad Foam Roller | |
| 12 | 1 Pulley Arm Assembly, Right | 27 | 4 End Cap 3/4" | |
| 13 | 1 Pulley Arm Assembly, Left | 28 | 1 Rod Cables Assembly, Pair | |
| 14 | 2 Pulley Slider, 4" w/ Decal | 29 | 1 Squat Cables Assembly, Pair | |
| 15 | 1 Seat Back Pad | |||
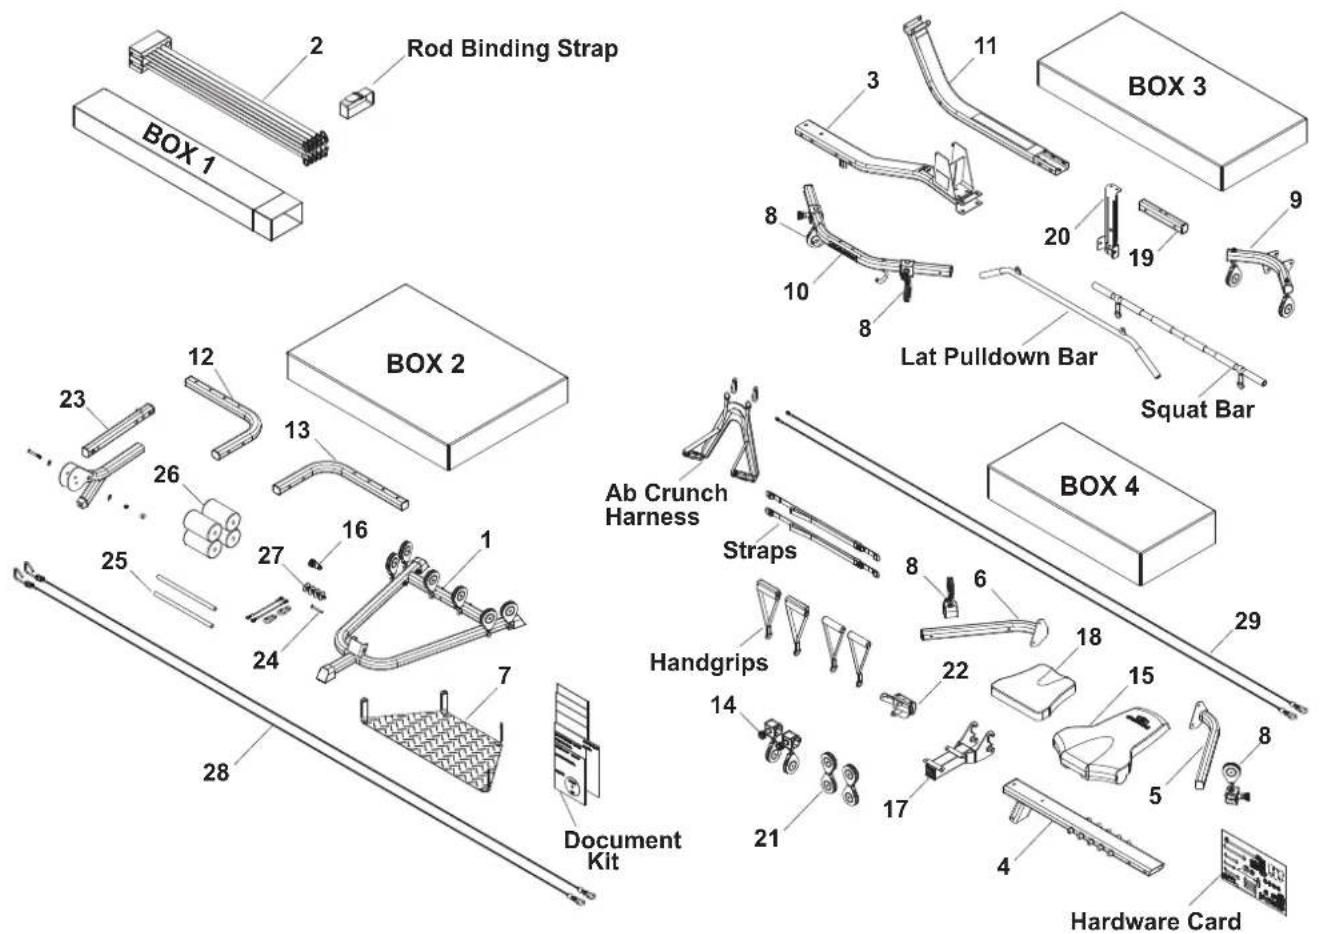
BOWFLEX XTREMEM 2 SE BOX CONTENTS
ASSEMBLY
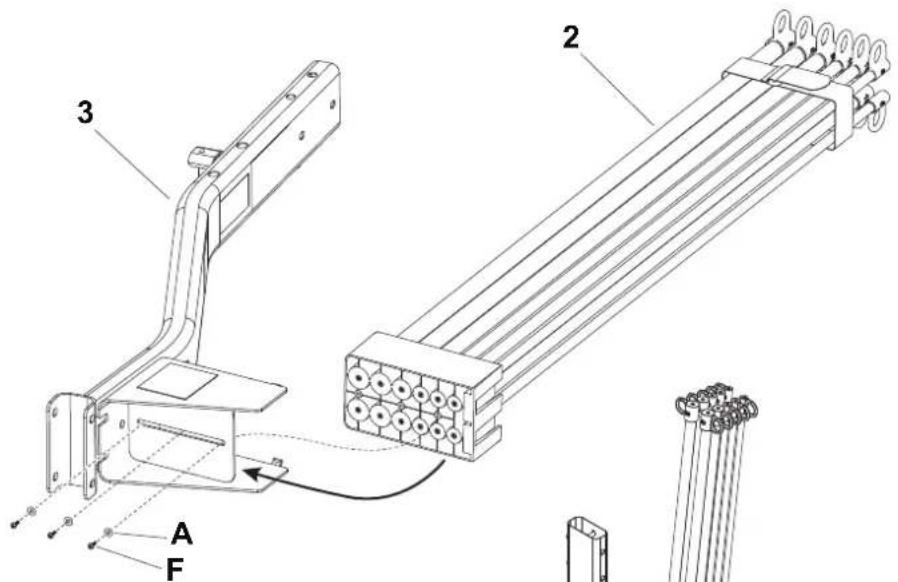
1. Install Power Rod® Pack to Lower Lat Tower Assembly
Parts:
- Lower Lat Tower (3)
Rod Box with Power Rod® Pack (2)
Hardware:
3 Phillips Screws #10 X 1" (F)
3 Flat Washers 1 / 4^(A)
Tool: Phillips Screw Driver
1-1 Lay parts on floor as shown. Firmly slide
1-2 Fasten the Rod Box to the Lower Lat Tower frame as shown. Tighten screws until snug.
2. Install Lower Lat Tower Assembly
Parts:
- Lower Lat Tower Assembly
- Base Frame Assembly (1)
Hardware:
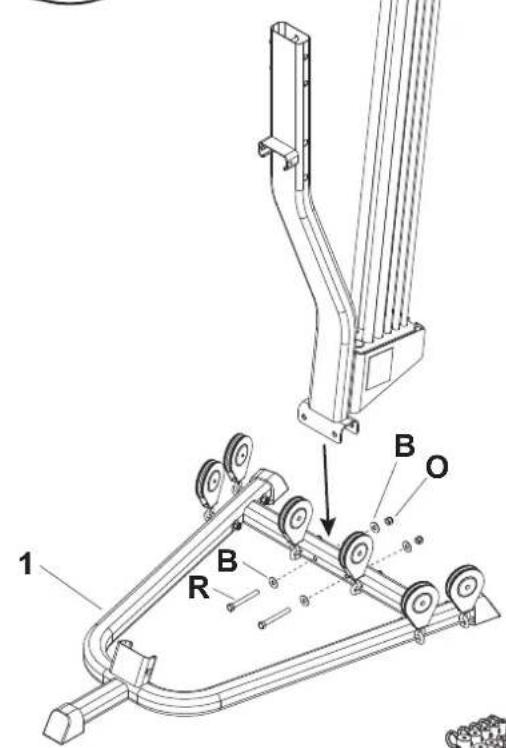
2 Hex Head Bolts 3/8" X 3 1/4" (R)
4 Flat Washers 3 / 8^ (B)
- 2 Nylock Nuts 3/8 (O)
Tool: 7/32" Hex Wrench
2-1 Align the Lower Lat Tower Assembly over the Base Frame.
2-2 Secure Lower Lat Tower Assembly using screws and washers as shown.
Finger tighten screws at this time.
3. Install Seat Support Rail
Parts:
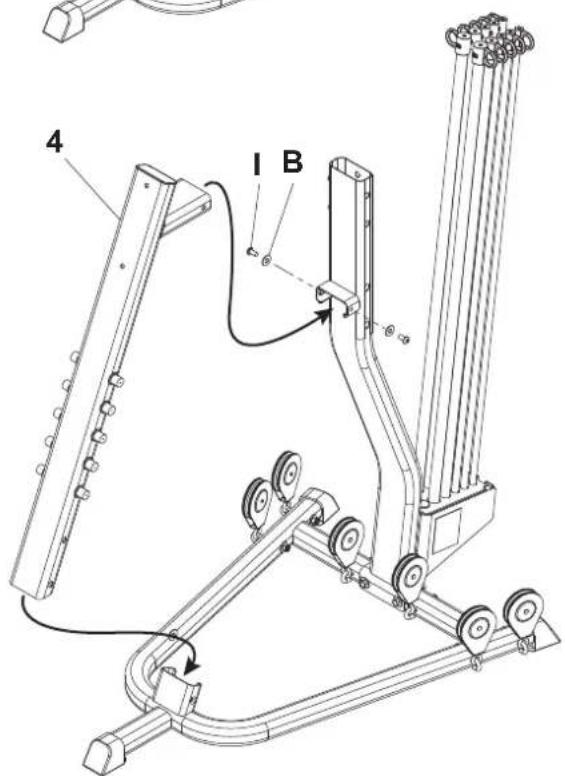
- Seat Support Rail (4)
- Base Frame Assembly
Hardware:
- 2 Button Head Screws 3/8 × 3/4 (I)
- 2 Flat Washers 3/8 (B)
Tool: 7/32" Hex Wrench
3-1 Slide the bottom of the Seat Support Rail onto the Base Frame connector as shown.
3-2 Slide the top of the Seat Support Rail onto the Lower Lat Tower Assembly connector as shown. Secure using screws and washers as shown. Finger tighten screws at this time.
Finger tighten screws at this time.
4. Install Squat Pulley Frame
Parts:
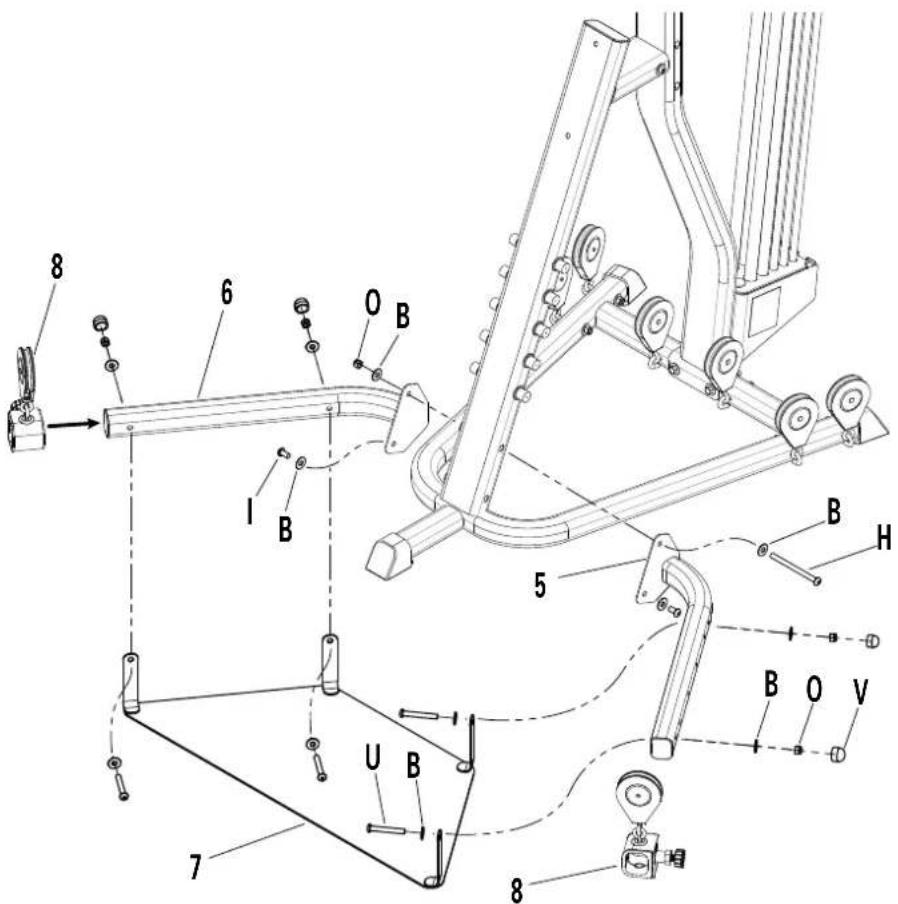
- Left Squat Pulley Frame (5)
Right Squat Pulley Frame (6) - Main Assembly
- 2 Slider Pulleys w/o Decal (8)
- Squat Platform (7)
Hardware:
- Button Head Screws 3/8'' × 5'' (H), 5 pieces
- Nylock Nuts 3/8" (O), 2 pieces
- Button Head Screws 3/8'' × 3/4'' (I), 12 pieces
- 4 Button Head Screws 3/8'' × 21/2'' (U)
- 4 Rubber End Caps (V)
Tool: 7/32" Hex Wrench, Adjustable or Socket Wrench
4-1 Place one Squat Pulley Frame on each side of the Seat Support Rail as shown, and align the top screw holes. Secure using a 3/8'' × 5'' screw, washer and nut in the top hole as shown.
4-2 Install screws and washers through the bottom holes of each Squat Pulley Frame into the Support Rail as shown.
4-3 Put the Squat Platform in position under the front foot of the Base Frame Assembly. Align the screw holes in the Squat Platform brackets with the screw holes on the inner side of each Squat Pulley Frame.
4-4 Slide one Slider Pulley onto the free end of the Left Squat Pulley Frame as shown.
Note: Be sure the Slider Pulley knob points away from the Squat Platform.
Lock the pulley in position near the Seat Support Rail.
4-5 Install the hardware to attach the Squat Platform to the Left Squat Pulley Frame.
4-6 Repeat Steps 4-3 through 4-5 for the Right Squat Pulley Frame.
ASSEMBLY
5. Install Pulley Arms
Parts:
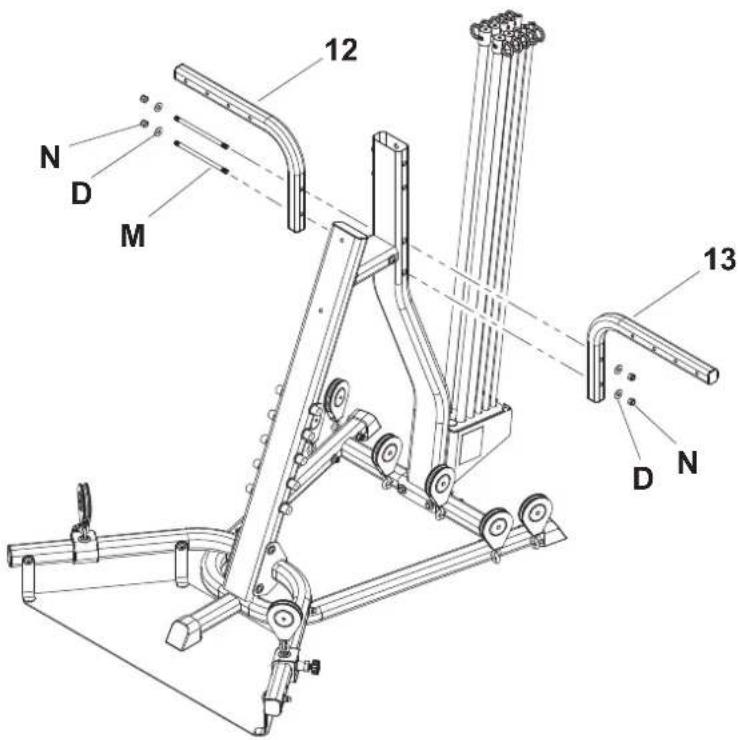
Right Pulley Arm (12)
- Left Pulley Arm (13)
- Main Assembly
Hardware:
- 2 Threaded Studs 1 / 2'' X 9 1/2" (M)
4 Nylock Nuts 1 / 2^ (N) - 4 Washers 1/2'' (D)
Tool: 3/4" Socket and Wrench, Adjustable Wrench, Rubber Mallet
5-1 in the Lower Lat Tower Assembly and secure using threaded studs, 1 / 2^n washers and nuts as shown.
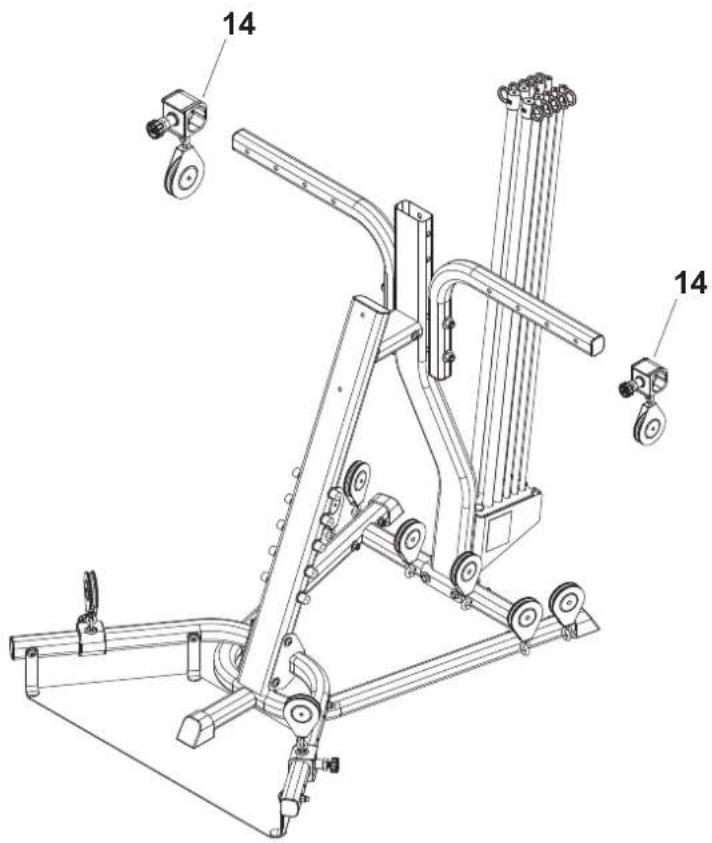
6. Install Slider Pulleys
Parts:
- 2 Slider Pulleys w/ Decal (14)
- Main Assembly
Tool: 3/16" Hex Wrench
6-1 Install a Slider Pulley onto each Pulley Arm as shown.
6-2 Choose any of the four holes to secure
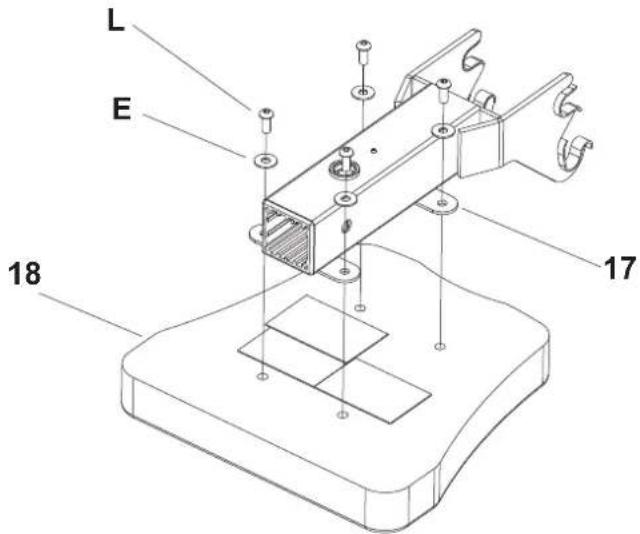
7. Seat Assembly
Parts:
- Seat Backbone (17)
- Seat Bottom (18)
Hardware:
- 4 Button Head Screws 5 / 16^ 3 / 4^ (L)
- 4 Washers 5/16" (E)
Tool: 3/16" Hex Wrench
7-1 Install the Seat Backbone to the underside of the Seat Pad using screws and washers as shown.
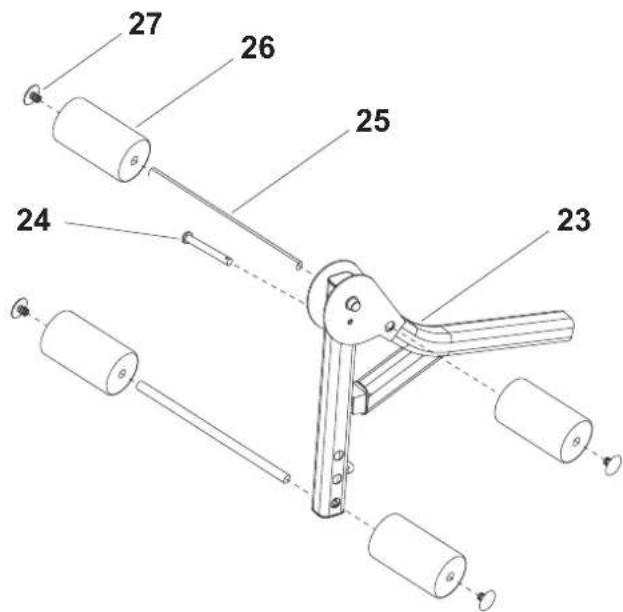
8. Leg Extension Assembly
Parts:
Leg Extension Backbone (23)
2 Chrome Tubes (25)
4 Foam Rollers (26)
4 End Caps (27)
Leg Extension Pin (24)
Tool: Rubber Mallet
8-1 Insert Chrome Tubes through the upper hole and one of the lower holes in the Leg Extension. (Select hole for your comfort level.)
8-2 Slide Foam Rollers onto the Chrome Tubes and secure with end caps. A rubber mallet may be needed to secure the end caps.
Note: The Leg Extension may be adjusted during workout to best suit your height and personal preferences.
ASSEMBLY
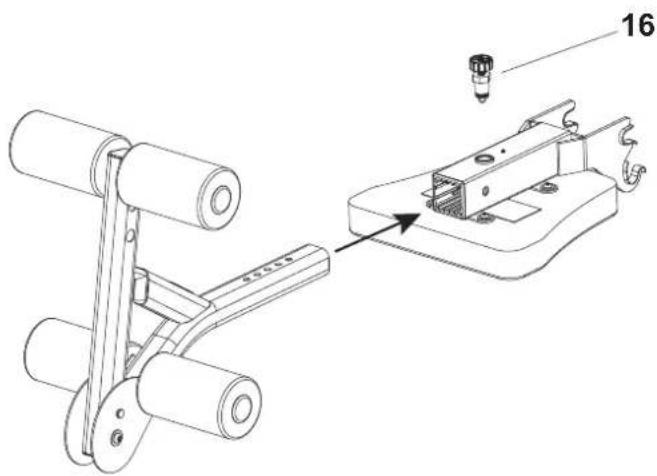
9. Install Leg Extension Assembly
Parts:
Leg Extension Assembly
- Lock Knob (16)
- Seat Assembly
Tool: 3/16" Hex Wrench
9-1 Insert Leg Extension Backbone into open end of Seat Backbone as shown.
9-2 Align one hole of the Leg Extension with the hole in the Seat Backbone to fit your height and secure with the Lock Knob as shown.
10. Install Seat Back Pad
Parts:
- Seat Back Pad (15)
- Main Assembly
Hardware:
- 2 Button Head Screws 5 / 16^n× 2 1/2" (K)
- 2 Washers 5/16" (E)
Tool: 3/16" Hex Wrench
10-1 Align the screw holes on the Seat Back Pad with the screw holes on the Seat Support Rail.
10-2 Install the Seat Back Pad to the Seat Support Rail using screws and washers as shown.
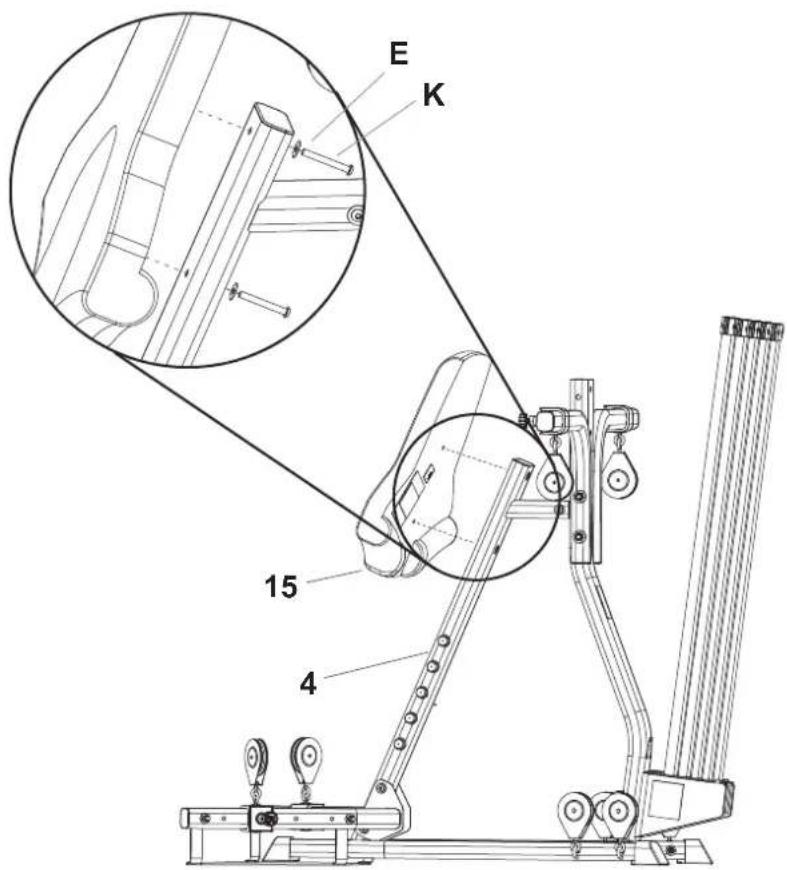
11. Install Seat Assembly
Parts:
- Seat Assembly
- Seat Locking Pin (P)
- Main Assembly
11-1 Align the top two hooks on the Seat Backbone (17) with one of the pairs of pins on the Seat Support Rail (4), as shown in Detail 11a.
11-2 Tip seat front up and slide hooks onto pins. Rotate seat down and back to use.
11-3 Slide the Seat Locking Pin through the holes in the Seat Backbone hooks to secure the seat assembly on the Seat Support Rail as shown in Figure 11b.
Note: Reverse procedure to remove seat.
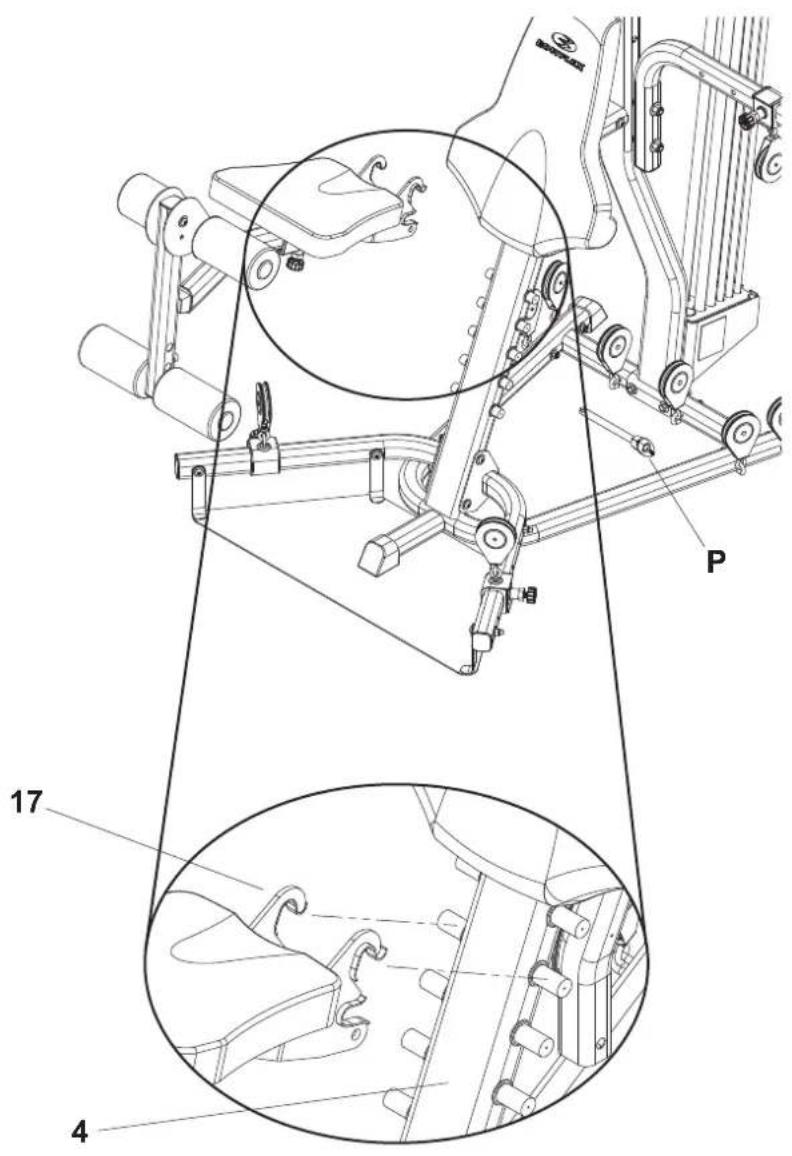
Detail 11a
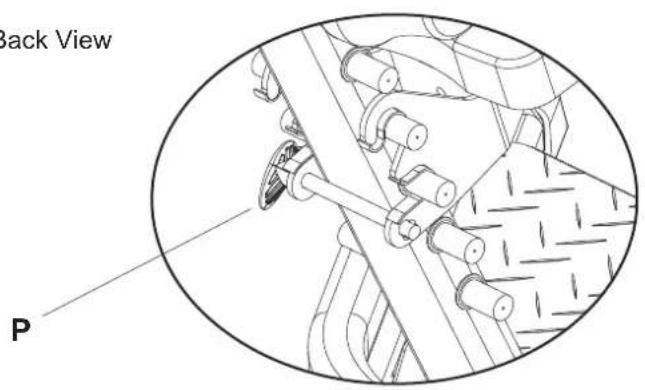
Detail 11b - Back View
ASSEMBLY
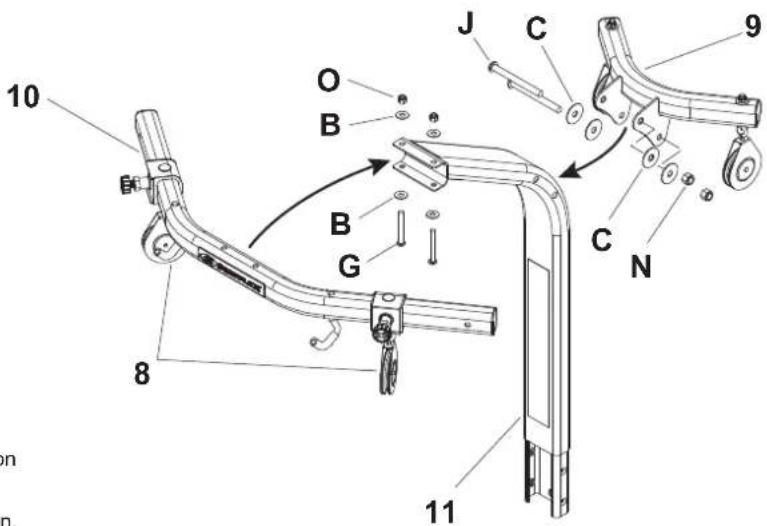
12. Upper Lat Tower Assembly
Parts:
- Upper Lat Tower (11)
Lat Cross Bar (10)
Rear Lat Crossmember (9)
Hardware:
- 2 Button Head Screws 3/8'' × 3'' (G)
- 4 Washers 3/8 (B)
- 2 Nylock Nuts 3/8 (O)
- 2 Button Head Screws 1/2'' × 5 × 1/4'' (J)
4 Wide Washers 1 / 2^ (C) - 2 Nylock Nuts 1/2^n (N)
Tool: 7 / 32^ Hex Wrench and Adjustable Wrench
12-1 Align the two holes on the Lat Cross Bar with those on the Upper Lat Tower as shown.
12-2 Attach using 3 / 8 screws, washers and nuts as shown.
Note: Do not tighten hardware at this time.
12-3 Align the bracket on the Rear Lat Crossmember with the bolt on the Upper Lat Tower as shown.
12-4 Attach using 1 / 2 screws, washers and nuts as shown.
12-5 Tighten all hardware from this step.
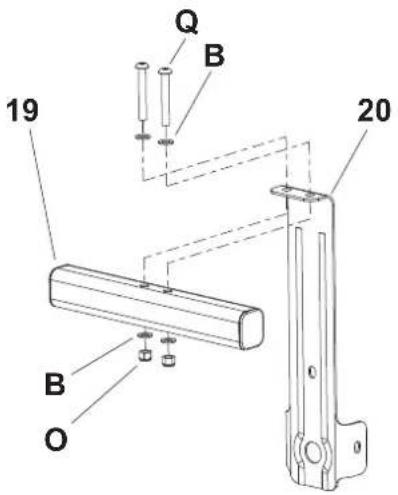
13. Ab Crunch Station Assembly
Parts:
Ab Crunch Bracket (20)
Ab Crunch Crossbar (19)
Hardware:
- 2 Button Head Screws 3 / 8'' × 2 3 / 4'' (Q)
- 4 Washers 3/8^ (B)
2 Nylock Nuts 3/8 (O)
Tool: 7/32" Hex Wrench
13-1 Attach the Ab Crunch Crossbar to the Ab Crunch Bracket as shown. Tighten all hardware from this step.
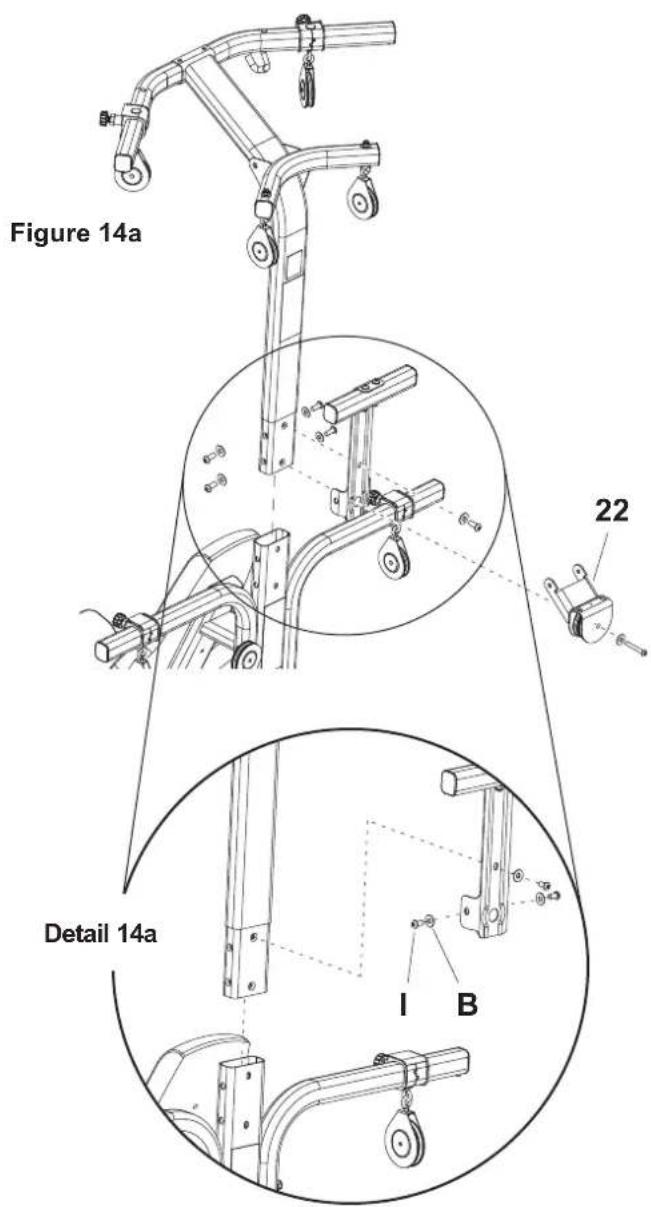
14. Install Upper Lat Tower Assembly, Ab Crunch Station and Lat Pulley
Parts:
- Upper Lat Tower Assembly
Ab Crunch Station
Lat Pulley Housing (22) - Main Assembly
Hardware:
- 5 Button Head Screws 3/8'' × 3/4'' (I)
- 5 Flat Washers 3/8 (B)
Tool: 7 / 32^ Hex Wrench
14-1 Slide the Upper Lat Tower Assembly onto the Lower Lat Tower as shown.
14-2 Place the Ab Crunch Bracket against back of the Lat Tower Assembly. Align the bolt holes on the Ab Crunch Bracket's side flaps with the lower bolt holes on the sides of the Lat Tower.
14-3 To attach the Ab Crunch Station to the Lat Tower, install a 3 / 4 screw and washer through the upper bolt hole on the Ab Crunch Station into the back of the Lat Tower as shown in Detail 14a. Secure the Ab Crunch Station to the sides of the Lat Tower with 2 screws and washers as shown in Detail 14a.
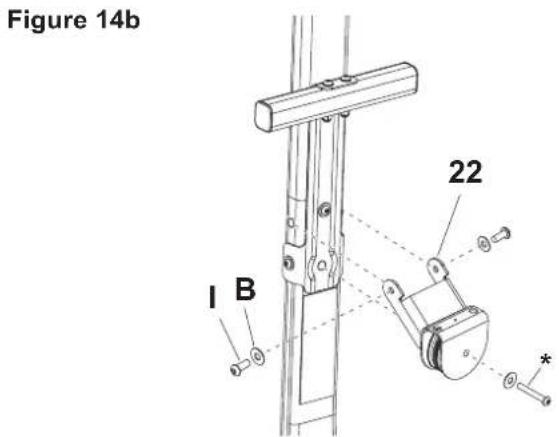
14-4 Remove the plastic cap from the end of the the long bolt (^*) already installed in the back of the Lat Pulley/ Housing. Finger tighten the bolt-it will be removed and reinstalled during Step 16 and 17.
14-5 Position the Lat Pulley Housing bracket against the Lat Tower, over the Ab Crunch Station. Align the bolt holes as shown in Figure 14b.
14-6 Place one washer over the end of each screw. Attach the Lat Pulley Housing to the Lat Tower by installing the screws loosely into the aligned holes as shown in Figure 14b.
Do not tighten hardware at this time.
ASSEMBLY
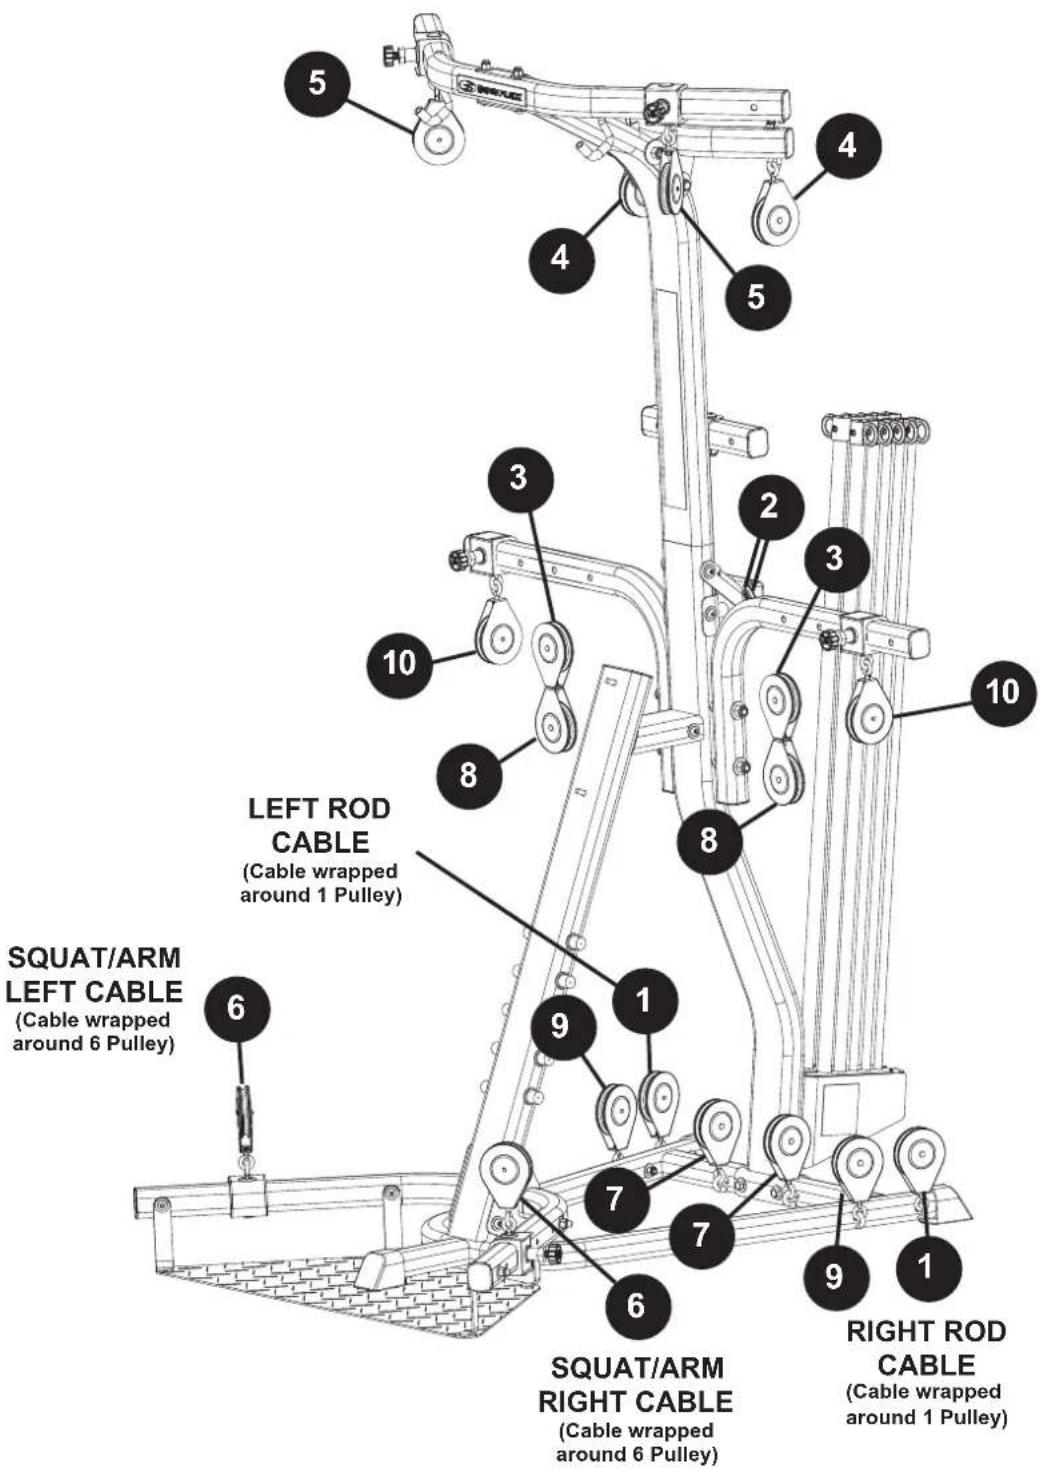
15. Cable and Pulley Routing - Overview
The figure below shows all Pulleys on the Bowfex Xtme 2 SE home gym. Subsequent images show how to connect and route each of the Cables through the Pulleys. (The Ab Crunch Station is not shown for clarity.) Connecting the Cables is much easier with a second person assisting you.
Note: All references to the right or left of the machine are from the viewpoint of standing in front of the machine facing the seat. Your machine may not match the image. For reference only.
16. Cable and Pulley Routing – Prepare Cables to be installed to the Lat Pulley Housing
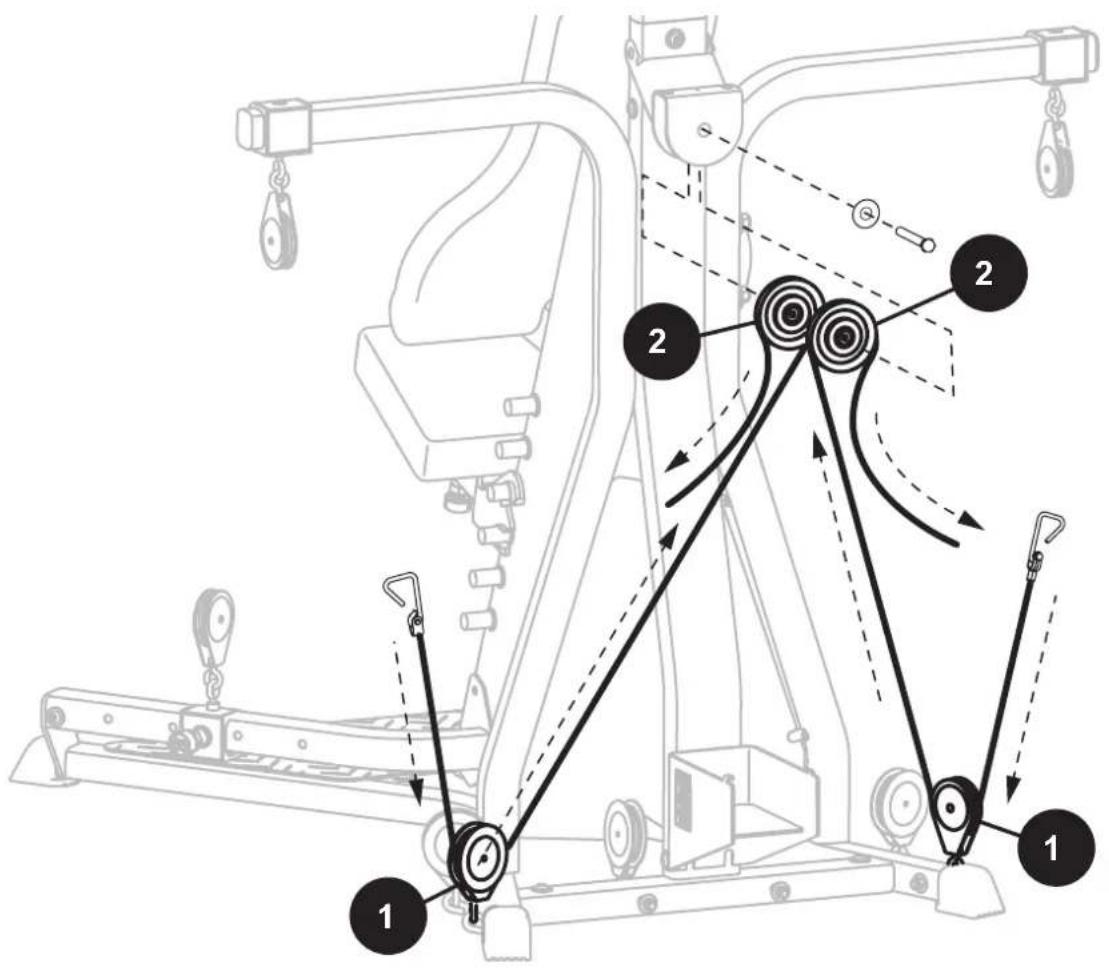
Locate the following items on the Lat Pulley Housing assembly:
(2) Pulleys - already installed, labeled as item 2 in figure
- 3/8" X 4 1/2" Hex Head Bolt - installed
- 3/8" Washer - already installed
Note: Connecting the Cables is much easier with a second person assisting you.
16-1 Remove the 412 Bolt and Washer from the back of the Lat Pulley Housing, and set safely aside for Step 18.
16-2 The 2 Pulleys will slide down and out of the housing without the hex bolt holding them in place. Unwrap the Right Pulley Cable on the Right Frame Rail. Thread the cable beneath and then over one Lat Pulley (2), following the arrows shown in Figure 16 and holding the cable tightly where indicated.
16-3 Repeat for the Left Pulley Cable (on the Left Frame Rail), without loosening your grip on the Right Pulley Cable.
17. Cable and Pulley Routing – Connect Pulleys and Cables to the Lat Pulley Housing
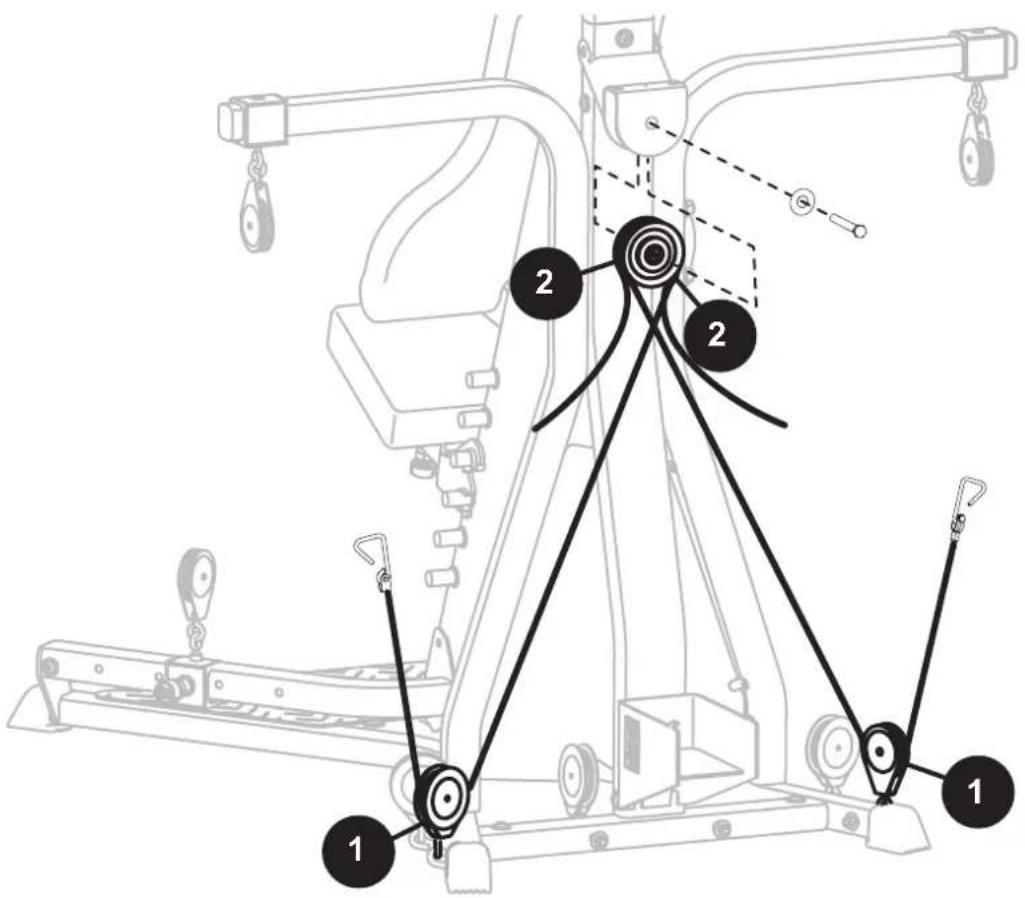
Locate the following items for the Lat Pulley Housing assembly:
(2) Pulleys from step 16
3/8" X 4 1/2" Hex Head Bolt -uninstalled in Step 16
3/8" Washer - uninstalled in Step 16
Note: Connecting the Cables is much easier with a second persn assisting you.
17-1 Holding both Cables from Step 16 in place, align the 2 Lat Pulleys as shown in Figure 17. Slide the Pulleys back into the Lat Pulley Housing, lining up the bolt holes in the Pulleys and Lat Pulley Housing.
17-2 Place the Washer over the 412 Bolt from Step 16. Slide the Bolt through the aligned holes in the Lat Pulley Housing and Lat Pulleys as shown in Figure 17.
17-3 Repeat for the Left Pulley Cable (on the Left Frame Rail), without loosening your grip on the Right Pulley Cable.
Tighten all hardware.
Note: You will probably need to push the Power Rod™ unit out of the way for this step. The Power Rod™ unit is not pictured for the sake of clarity.
18. Cable and Pulley Routing – Connect Rod Cables through the Right Floating and Lat Tower Pulleys
Locate the following items for the Lat Pulley Housing assembly:
3 & 8 Floating Pulleys (connected unit)
(2) Cable End Stop Balls with Core (see Detail)
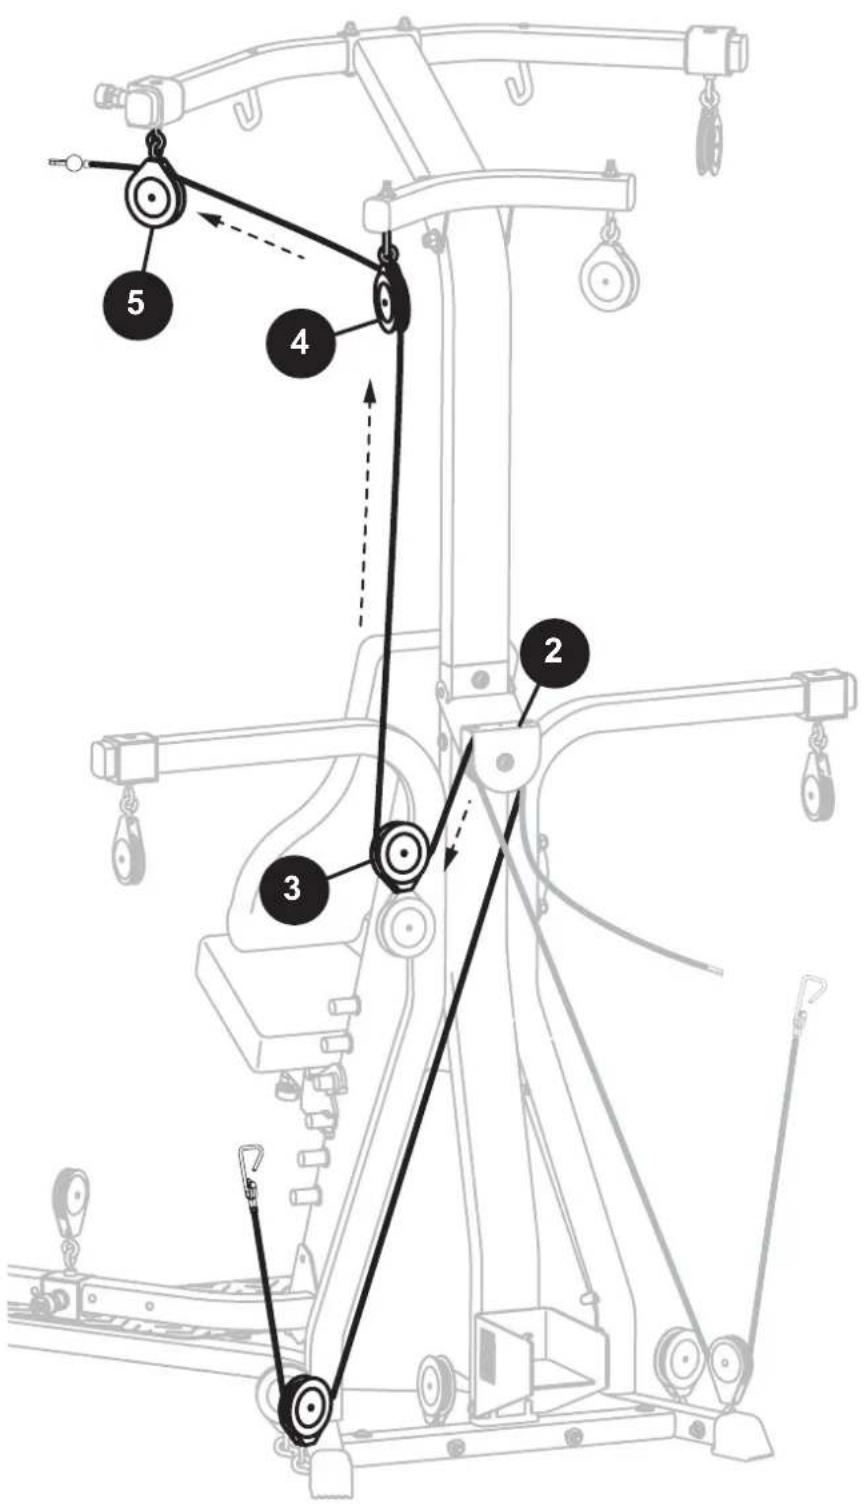
18-1 Locate the Right Rod Cable that you ran through the Lat Pulley Housing. Thread the Cable through the (3) Floating Pulley, as shown.
18-2 Continue to guide the Cable through the (4) Pulley on the Rear Lat Cross Bar, and then through the (5) Pulley on the Front Lat Cross Bar as shown.
18-3 Insert the Cable End through the Cable End Stop Ball, and attach the Cable Core to keep the Cable from slipping back through the Pulleys. See Figure 18b.
Note: The Cable End Stop Ball Core should fit over the Ferrule when installed correctly. Rotate the Core to align it with the groove in the Ball.
ASSEMBLY
18b. Cable and Pulley Routing - Connect Cable End Stop Ball with Core
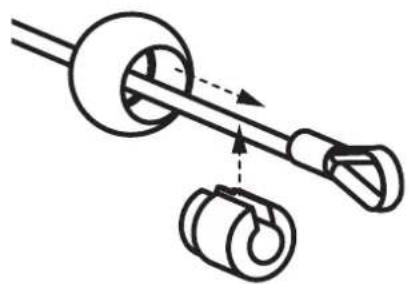
Figure 18b - Detail
18c. Cable and Pulley Routing – Connect Rod Cables through Left (3) Floating and Lat Tower Pulleys
Locate the following items for the Lat Pulley Housing assembly:
- 3 & 8 Floating Pulleys (connected unit)
(2) Cable End Stop Balls with Core (see Detail)
18-4 Repeat with Left Rod Cable and (3) and (8) Floating Pulleys, as shown in Figure 18c.
Note: Once the Cable End Stop Balls are attached, hook each Rod Hook onto the Lat Pulley Housing as shown in Figure 18d.
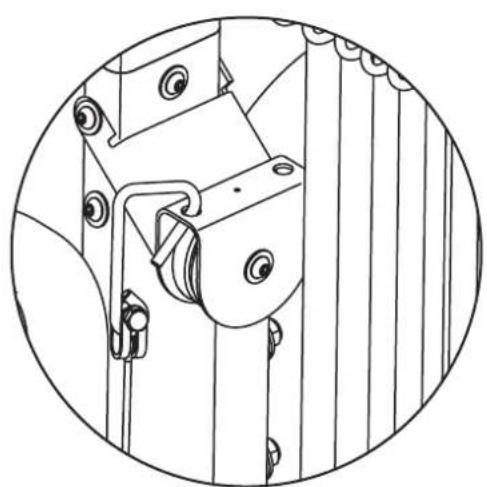
Figure 18d - Rod Hooks Storage on Lat Pulley Housing
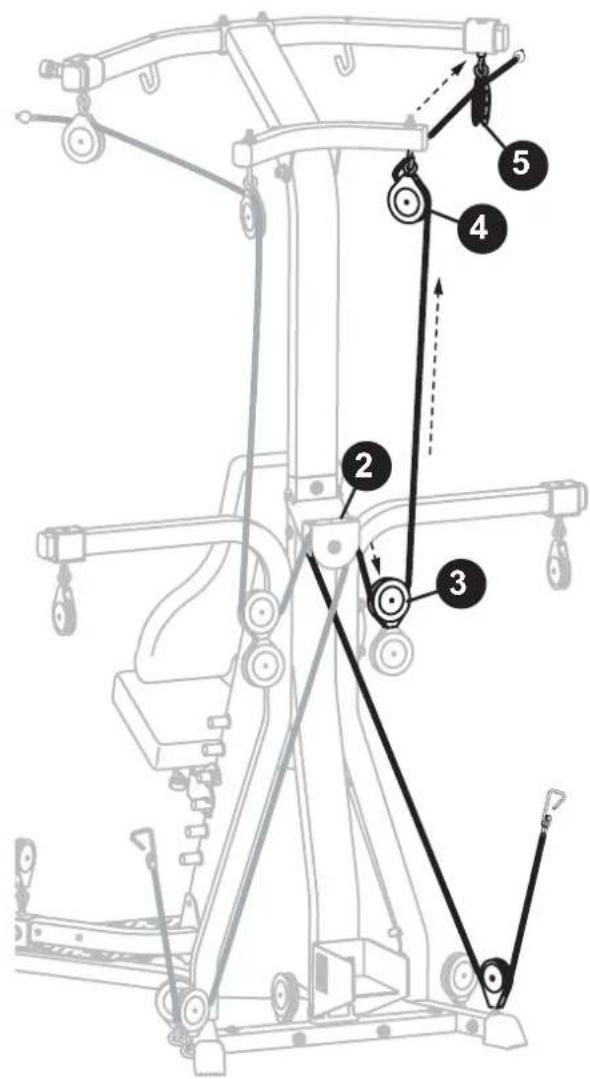
Figure 18c
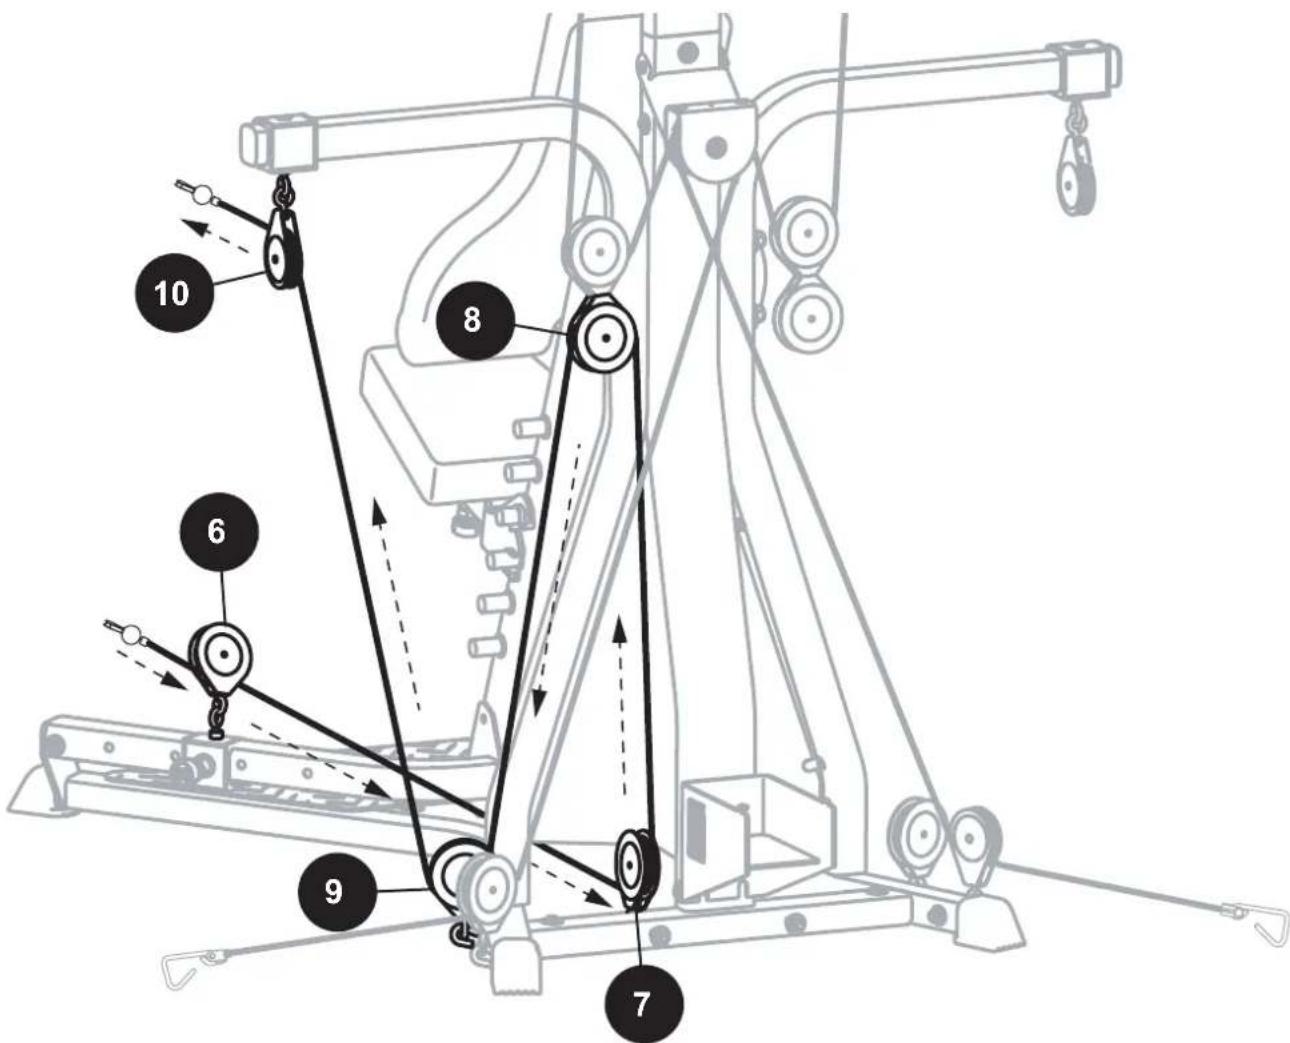
19. Cable and Pulley Routing – Connect Right Squat Cable through the Floating and Main Assembly Pulleys
Slide the Right Squat Frame Pulley (6) to the furthest back hole, as indicated in Figure 19.
Unwrap the Right Squat Cable from the (6) Pulley and guide the Cable, threading under and through the Rear Cross Bar Pulley (7), and up through the Floating (8) Pulley. Follow the arrows as indicated in Figure 19.
Continue to guide the Cable down through the Inner Right Frame Rail Pulley (9), up through the Right Pulley Arm Pulley (10), as shown in Figure 19.
Finally, insert the Cable End through the Cable End Stop Ball and attach the Cable Core, as completed during Step 18.
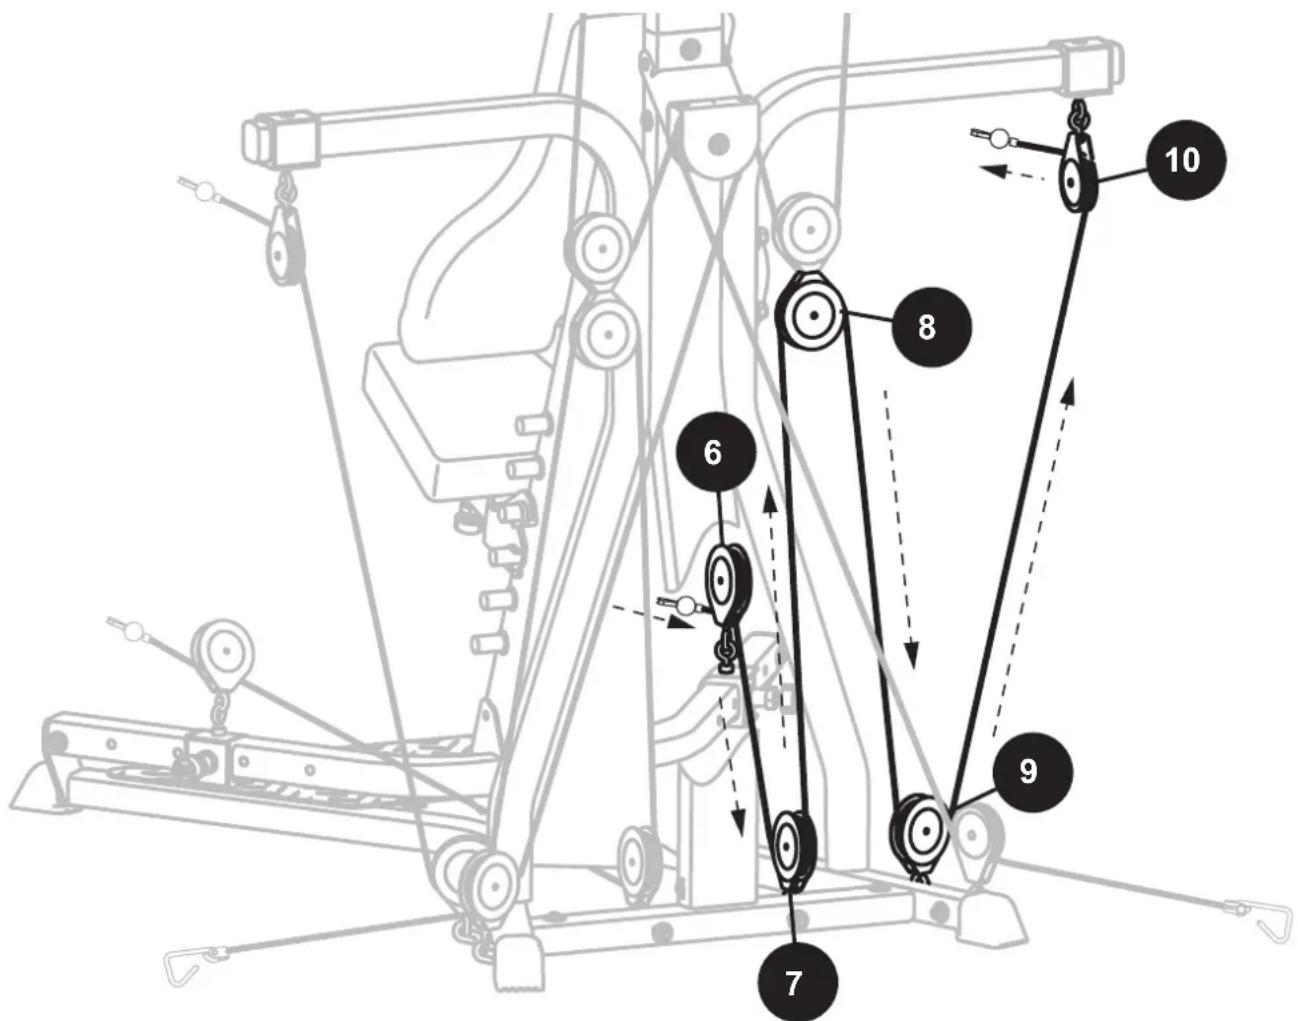
19b. Cable and Pulley Routing – Connect Left Squat Cable through the Floating and Main Assembly Pulleys
Repeat the same procedure completed during Step 19 for the Left Squat Cable.
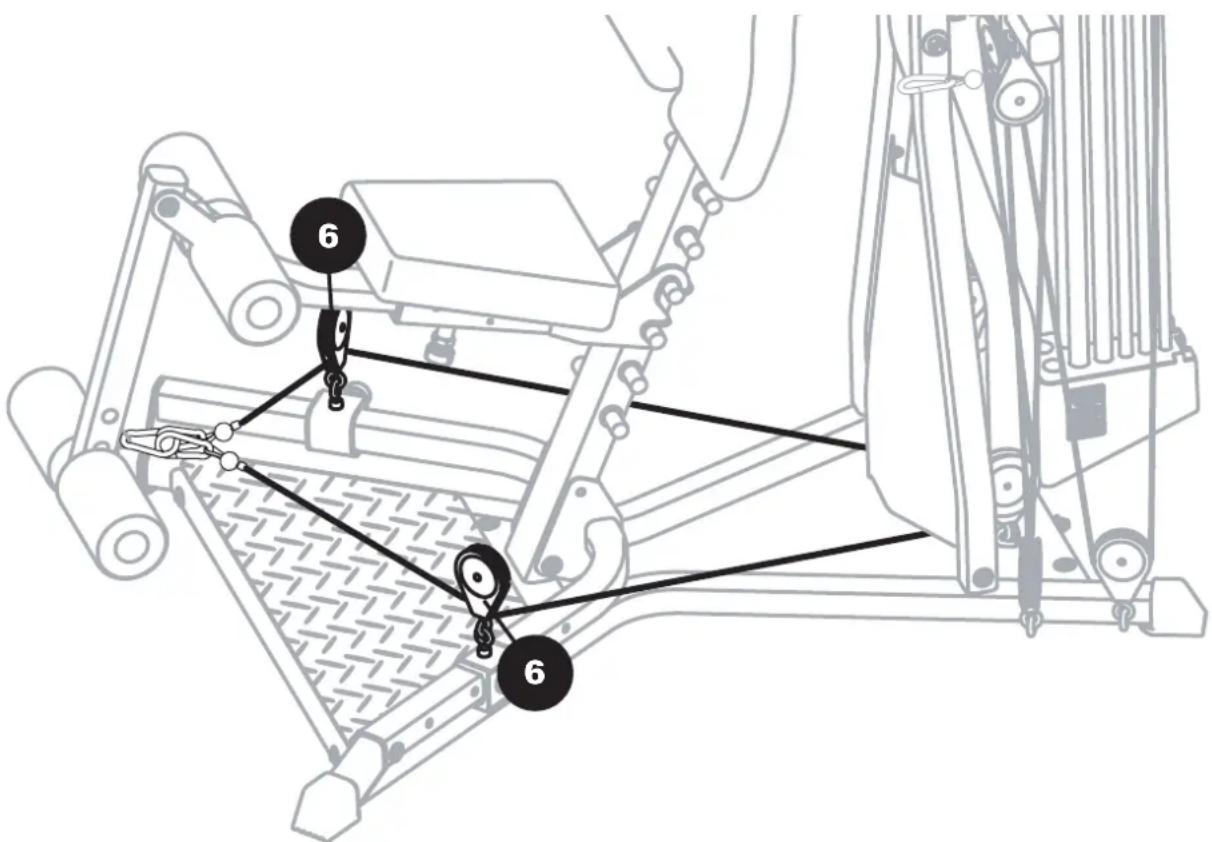
20. Cable & Pulley Routing
Unhook the Rod Hooks that were hooked to the Lat Pulley Housing in Step 18c (see Figure 18d).
Attach the hooks on the ends of the Left and Right Squat Cables to the Hook installed onto the Leg Extension, as shown in Figure 20.
21. Final Inspection
Inspect your machine to ensure that all fasteners are tight and components are properly assembled. Review all warnings affixed to machine.
Be sure to record the serial number in the field provided at the front of the Owner's Manual. Refer to the Safety Warning Labels and Serial Number section of the Owner's Manual.

Failure to visually check and test assembly before use can cause damage to the equipment. It can also cause serious injury to users and bystanders.
OPERATION
Power Rod® Resistance
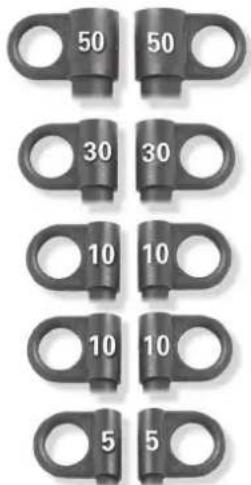
Power Rod® resistance rods are made from a special composite material. Your rods are sheathed with a protective black rubber coating. Each rod is marked with its weight rating on the "Rod Cap."
Adjusting and Understanding the Resistance
The standard Bowflex Xtreme® 2 SE home gym comes with 210 pounds of nominal resistance (one pair of 5 lb. (2.25 kg) rods, two pairs of 10 lb. (4.5 kg) rods, one pair of 30 lb. (13.5 kg) rods, and one pair of 50 lb. (22.5 kg) rods.
Note: Power Rod® Resistance Rods are manufactured using nylon composite material. The weight resistance measurements are estimates and resistance can vary based on environmental and usage patterns and other factors. Rod resistance will normally degrade over time and after extensive usage. If you have any questions regarding the resistance of your Power Rod® Resistance Rods, contact our Bowflex Customer Service department for assistance.
If you upgraded to a 310 (140 kg) or 410 pound (186 kg) capacity you will have an additional one or two pair of 50 lb. (22.5 kg) rods, respectively.
Connecting the Power Rod® Unit to the Cables
You may use one rod or several rods in combination, to create your desired resistance level.
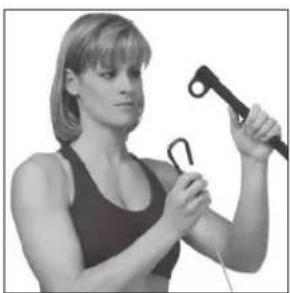
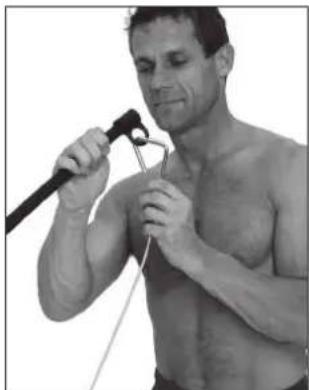
To hook multiple rods up to one cable, bend the closest rod toward the cable and place the cable hook through that rod cap. You can then hook up the next closest rod through the same cable hook.
Hooking up the closest rod first prevents rods from crossing over the top of one another.
Safety
You may use one rod or several rods in combination, to create your desired resistance level.

When hooking the Power Rod resistance rods to the cable hooks, do not stand directly over the tops of the rods. Stand off to one side when connecting and disconnecting the Power Rod resistance rods from the cables.
When You Are Not Using Your Home Gym
Disconnect the cables from the Power Rod® resistance rods when your are not using your Bowflex Xtreme® 2 SE home gym.

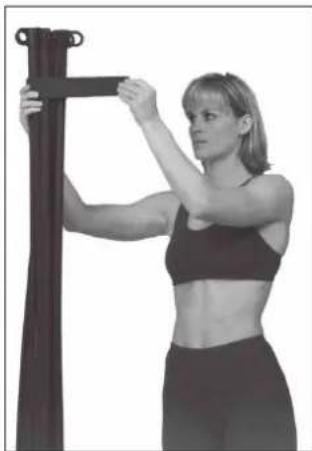
Keep the cables and Power Rod® units bound with the rod binding strap when not in operation, and be sure and remove the binding strap before beginning any exercises using the rods.

The Bowflex Xtreme® 2 SE Home Gym Pulleys
With the versatility to perform over 75 different exercises, the Bowflex Xtreme® 2 SE home gym is designed to give you the best workout possible. And with its innovative, easy-to-use multiple pulley system, you are guaranteed to maximize every exercise for every muscle group.
There are a few things you will need to remember to get the most from your Bowflex Xtreme 2 SE home gym Pulleys:
Slider Pulleys
The Bowflex Xtreme 2 SE home gym comes with adjustable "Slider" pulleys which can be personalized for your body by adjusting them to widths that fit your unique physique. There are Slider Pulleys on the Lat Tower (2 positions per side), Center Cross Bars (4 positions per side) and the Squat Pulley Frame (4 positions per side).
You will need to determine which Pulley positions are most comfortable for you when performing 'Standard' exercises, and then adjust the pulleys outward or inward to perform exercises in 'Wide' or 'Narrow' positions. Using the Slider Pulleys at wider or narrower positions for an exercise can target different parts of the same muscle group and increases the benefit of each exercise.
Pulley Locations
Below is a guide to the five different pulley positions used to perform a full workout routine:
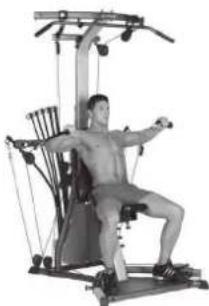
Center Cross Bar:
Standard position - used when performing exercises like a Bench Press or Chest Fly.
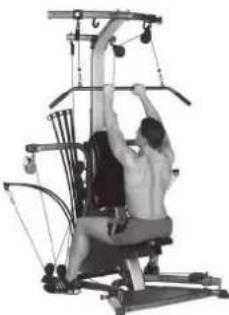
Lat Tower:
Used for exercises like Pulldowns and Pushdowns.
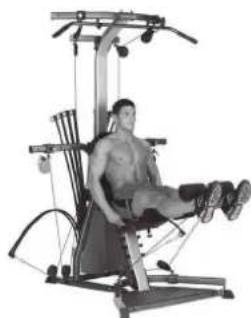
Leg Extension:
Active pulleys are on the squat pulley frame.
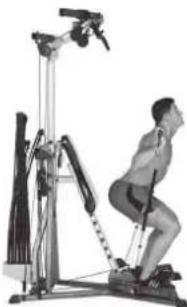
Squat:
Active pulleys are on squat pulley frame and on center cross bar.
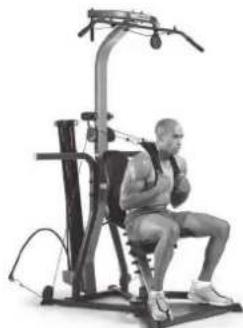
Abdominal Crunch position:
Active pulleys are on lat tower.
OPERATION
The Bowflex Xtreme® 2 SE Home Gym Cable Routing
To use the Ab Crunch position, you will move the Slider Pulleys and cables from the Center Cross Bar to the Abdominal Bar on the Lat Tower. Refer to the illustrations below for proper cable routing.
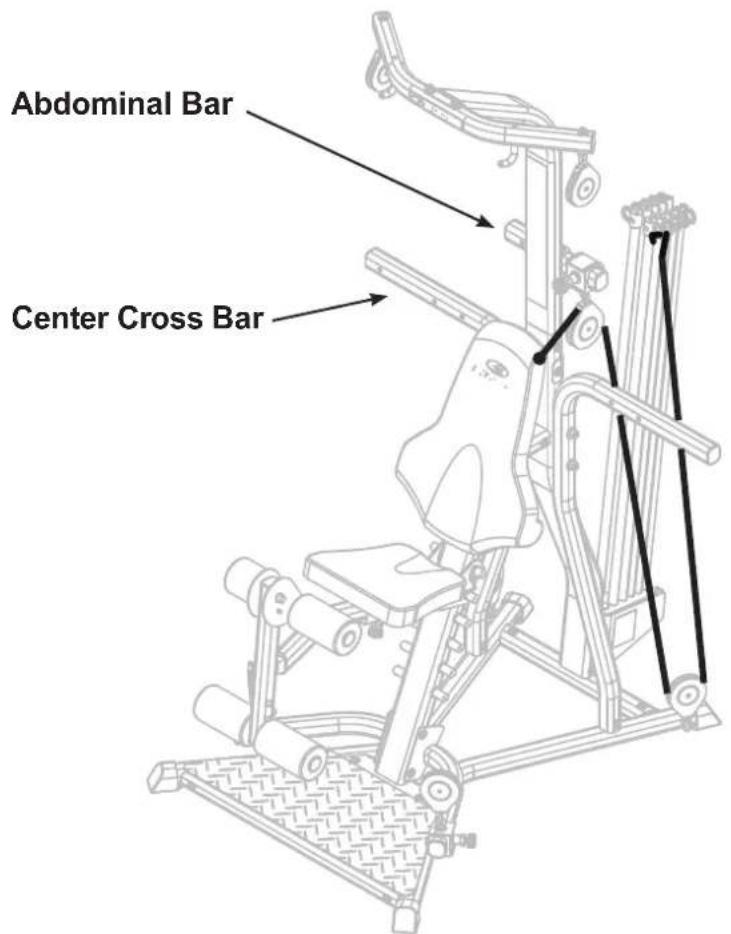

Keep your body weight centered on the machine, seat or base frame platform while exercising.
When using the machine for standing leg exercises, always hold the Lat Tower of the machine for stability.
Do not make any adjustments to the seat while sitting on it. Do not stand on the seat.
All exercises in this manual are based on the calibrated resistance and capacity levels of this machine. Only exercises included in this manual or in written materials authorized and supplied by Bowflex® are recommended for operation with this machine.
Seat Locking Pin
The Seat Locking Pin securely fastens the seat bottom bracket to the seat support rail. The locking pin serves to stabilize the seat for all exercises that require sitting or leaning on it. Make sure the seat has been secured before putting weight on it or attaching Power Rod resistance to cables attached to the Leg Extension attachment.
Handgrips and Straps
The handgrips fit snugly around your wrist, ankle, or instep. Attach grips to cables by snapping the cable clip onto the D-ring.
Standard Grip:
Grasp the handle and cuff together to form a grip without inserting your hand through the cuff portion. Most exercises utilize this grip. The Standard Grip also is used for Hammer Grip exercises, when you need to hold the hand grip vertically for greater wrist support.
Hand Cuff Grip:
Slip your hand through the cuff so that the foam pad rests on the back of your hand. Then grasp the remainder of the grip that is sitting in your palm. This method of gripping is great for exercises like front shoulder raises or any exercise where your palm is facing down.
Ankle Cuff Grip:
The cuff opening can be made larger to accommodate the ankle. Simply insert your hand in the cuff and slide it away from the handle. Insert your foot or ankle and tighten the grip by sliding the handle back toward the cuff.
Arch Cuff Grip:
The cuff opening can also fit securely over the arch of your foot. For this grip, insert your foot through the cuff until it is around the arch of your instep, and tighten the cuff around your heel to secure the grip.
Lat Pulldown Bar
The Lat Pulldown Bar enhances exercises that work back, shoulders and triceps muscles.
Leg Extension Attachment
The leg extension attachment enables you to work the major muscle groups in the legs.
Squat Bar
The Squat Bar enhances exercises that work back, shoulders and triceps muscles.
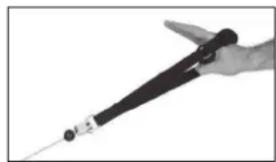
Abdominal Crunch Shoulder Harness
The ab harness gives you the ability to strengthen the muscles of the abdomen by safely adding resistance to abdominal exercises. When using the ab harness, relocate the pulleys from the chest bar to the short abdominal bar.
Attach the snap hooks to the D-rings on both ends of the harness. Place the harness on your shoulders letting the handles hang over your chest. Grab both handles. With high resistance, a cross arm opposite-handle grip may be used.

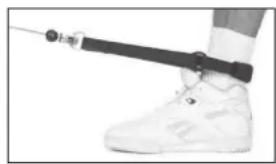
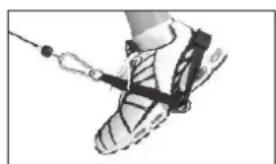
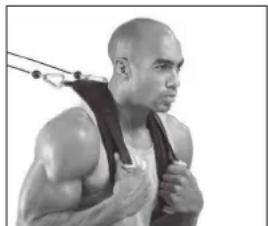
Safety

Make sure that the seat has been stabilized with the seat locking pin before sitting or putting weight on the seat.
Before using the grips, straps, lat bar, or ab harness, make sure that all fasteners are in place and tightened.
Make su vvre that auxiliary cables for the lat bar and leg extension are securely fastened to the primary cables on the unit.
Always use the lock knob on the slider to secure pulleys. Do not allow pulleys to change position during any exercise.
Always use the bar holders to support the lat bar or remove the bar when not in use.
Do not hang from the Lat Tower nor attempt to perform "chin ups" from the bar.
Never pull on the bar unless there is resistance attached to it.
Always use the Lock Knob to secure the attachment to your Bowflex Xtreme 2 SE home gym.
TROUBLESHOOTING
Your home gym is designed to be reliable and easy to use. However, if you experience a problem, please reference the troubleshooting guide listed below.
PROBLEM: The cables feel rough and are noisy during use.
SOLUTION: Verify the following:
IS THERE ANY NOTICABLE DAMAGE TO THE CABLES?
IF YES: Contact customer tech support and replace the cable(s).
IF NO: Verify that all cables are secured into the pulleys.
- Verify that the weight stack guide rods are lubricated.
- Verify that there is no excessive slack in the cables.
NOTE: If there is excessive slack adjust cable tension (see next page)
PROBLEM: Weight selector pin cannot be inserted.
SOLUTION: Verify the following:
ARE THE HOLES ALLIGNED THROUGH THE WEIGHT PLATE AND BAYONETED?
IF YES: · Verify that the selector pin isn't bent or damaged.
IF NO: Adjust threaded bolt on top plate so that the holes in the bayoneted align with the weight plate.
NOTE: Always maintain at least 1/2^ of threaded bolt in bayoneted.
If the above troubleshooting section does not remedy the problem, discontinue use.
PLEASE CALL CUSTOMER TECH SUPPORT.
MAINTENANCE

Inspect your machine for any worn or loose components prior to use. Tighten or replace any worn or loose components prior to use. Pay close attention to cables, straps, or harness and their connections.
Review all warning notices.
The safety and integrity designed into a machine can only be maintained when the equipment is regularly examined for damage and repaired. It is the sole responsibility of the owner to ensure that regular maintenance is performed. The owner is responsible to make sure that regular maintenance is done. Worn or damaged components must be repaired or replaced immediately. Only manufacturer supplied components should be used to maintain/repair the equipment.
Clean the bench with a non-abrasive household cleaner after each use. This will keep it looking new. Do not use automotive cleaner, which can make the bench too "slick."
WORKOUT GUIDE
Working Out
A workout begins in your mind's eye. With concentration and visualization you can approach your workout with a positive, constructive attitude. A good pre-workout mental routine is to sit and relax, so that you can focus on what you are about to do and think about achieving your end goal.
Warming Up
We recommend that you warm up by doing light stretching and performing light exercises on the Bowflex Xtreme® 2 SE home gym.
Your Routine
The workout portion of your fitness routine is the series of exercises devoted to your particular goals. Remember, make sure to have fun!
Cool Down
An essential part of the exercise routine is the cool down. Gradually reduce the level of exercise intensity so that blood does not accumulate in one muscle group, but continues to circulate at a decreasing rate. Remember to gradually move yourself into a relaxed state.
Breathing
The most important part of breathing during exercise is, quite simply, that you do it. Breathing in or out during the actual performance is not dependent upon the direction of air flow relative to exertion. It is, in fact, a mechanical process that changes the position of your spine as your rib cage moves. Here are some tips for breathing:
1) Be cautious when you are concentrating or exerting effort. This is when you will probably hold your breath. DO NOT hold your breath. Do not exaggerate breathing. Depth of inhalation and exhalation should be natural for the situation.
2) Allow breathing to occur, naturally, don't force it.
THE WORKOUTS
20 Minute Better Body Workout
Frequency: 3 Days Per Week (M-W-F) Time: About 20 Minutes
Start by performing one set of each exercise. Warm up with a light resistance that you can perform easily for 5-10 reps without fatiguing. Focus on practicing and learning your technique before increasing the resistance. Then move to a more challenging resistance that you can perform no less than 10 reps and no more than 15 reps without your form deteriorating. As you become stronger, you can advance to two sets for each exercise. Complete all sets of each exercise before moving on to the next one. Rest 30 to 45 seconds between sets. Move slowly on each rep. Use a pace that would allow you to stop the movement instantly at any point in the rep. Count three seconds up and three seconds down and work to fatigue during each set.
| Body Part Exercise | Sets Reps | ||
| Chest Bench Press | -2 10-15 | ||
| Back Bent Over Row | 1-2 10-15 | ||
| Shoulders Crossover | Rear Deltoid Rows 1-2 10-15 | ||
| Arms Biceps Curl 1-2 | 10-15 | ||
| Triceps Pushdown 1-2 10-15 | |||
| Legs Leg Extension | 1-2 10-15 | ||
| Trunk | Standing Low Back Extension | 1-2 10-15 | |
| Seated Abdominal Crunch | 1-2 10-15 |
THE WORKOUTS
Advanced General Conditioning
Frequency: 4 Days Per Week (M-T-TH-F) Time: About 35-45 Minutes
When you are proficient in performing the exercise techniques of the above routine and are no longer realizing results, or have become just plain bored, it is time to change your program. You can increase your training with this "split system" routine that works opposing muscle groups on different days. To do this, you'll increase your resistance when you can perform 12 reps perfectly, and you'll increase your volume by performing more sets and more exercises. Move slowly on each rep. Use a pace that would allow you to stop the movement instantly at any point in the rep. Count three seconds up and three seconds down and work to fatigue during each set.
| Day 1 & 3 Body Part Exercise Sets Reps | |||
| Chest Bench Press | -3 10-12 | ||
| Shoulders Seated Sh | shoulder Press 1-3 10-12 | ||
| Arms Triceps Pushdown | own 1-3 10-12 | ||
| Biceps Curl 1-3 10-12 | |||
| Legs Leg Extension | -3 10-12 | ||
| Day 2 & 4 Body Part Exercise Sets Reps | |||
| Back Bent Over Row | 1-3 10-12 | ||
| Seated Lat Pulldowns | 1-3 10-12 | ||
| Shoulders Crossover | Rear Deltoid Row | 1-3 10-12 | |
| Arms Biceps Curl 1-3 | 10-12 | ||
| Reverse Curl | 1-3 10-12 | ||
| Trunk | Standing Low Back Extension | 1-3 10-12 | |
| Seated Abdominal Crunch | 1-3 10-12 | ||
20 Minute Upper/Lower Body
Frequency: 4 Days Per Week (M-T-TH-F) Time: About 20 Minutes
This program provides you with a quick and effective workout that combines muscle conditioning with some cardiovascular benefits. Do this routine when you are limited in time or just want a variation to your normal routine. Perform this program training 2 days, resting 1 to 2. Perform all exercises to near failure, stopping at the point that your technique starts to deteriorate. Rest only 20-30 seconds between sets. As you get stronger, increase the number of sets you perform. Move slowly on each rep. Use a pace that would allow you to stop the movement instantly at any point in the rep. Count three seconds up and three seconds down.
| Day 1 & 3 Body Part Exercise Sets Reps | |||
| Chest Bench Press | -3 12-15 | ||
| Back Bent Over Row | 1-3 12-15 | ||
| Shoulders Crossover | Rear Deltoid Rows | 1-3 12-15 | |
| Arms Biceps Curl 1-3 | 12-15 | ||
| Triceps Pushdown 1-3 12-15 | |||
| Day 2 & 4 Body Part Exercise Sets Rep | |||
| Legs Leg Extension | 1-3 12-15 | ||
| Standing Hip Extension | 1-3 12-15 | ||
| Standing Hip Abduction | 1-3 12-15 | ||
| Standing Low Back Extension | 1-3 12-15 | ||
| Trunk | Seated Abdominal Crunch | 1-3 12-15 | |
Body Building
Frequency: 3 Days On, 1 Day Off Time: About 45-60 Minutes
Body building requires focused concentration and dedication to training, as well as proper eating habits. Train each muscle group to failure before moving on to the next exercise. Do not neglect any muscle group. If needed, include an aerobic activity to increase your caloric expenditure and help to reduce your body fat levels to achieve a defined muscular look. Rest 30-60 seconds between each set and exercise. Focus on proper form. Tighten the muscle before you move, squeeze the muscle as you move, cramp the muscle at the point of full contraction, and resist the movement as you lower the weight. Move slowly on each rep. Use a pace that would allow you to stop the movement instantly at any point in the rep. Count three seconds up and three seconds down and work to fatigue during each set.
| Day 1 Body Part | Exercise Sets Reps | |||
| Chest Bench Press 2 | -4 8-12 | |||
| Chest Fly 2-4 8-12 | ||||
| Shoulders Seated Sh | shoulder Press 2-4 8-12 | |||
| Crossover Rear Deltoid Row 2-4 8-12 | ||||
| Lateral Shoulder Raise 2-4 8-12 | ||||
| Shoulder Shrug 2-4 8-12 |
| Day 2 Body Part | Exercise Sets Reps | |||
| Back Bent Over Row | 2-4 8-12 | |||
| Seated Lat Pulldowns 2-4 8-12 | ||||
| Arms | Biceps Curl | 2-4 8-12 | ||
| Reverse Curl | 2-4 8-12 | |||
| Triceps Pushdown | 2-4 8-12 | |||
| Triceps Extension | 2-4 8-12 |
| Day 3 Body Part Exercise Sets Reps | |||
| Chest Squat | 2-4 8-12 | ||
| Leg Extension | 2-4 8-12 | ||
| Standing Heap Extension | 2-4 8-12 | ||
| Standing Low Back Extension | 2-4 8-12 | ||
| Trunk | Seated Abdominal Crunch | 2-4 8-12 | |
| Seated Oblique Abdominal Crunch 2-4 8-12 |
True Aerobic Circuit Training
Frequency: 2-3 Times Per Week Time: About 20-60 Minutes
Circuit training is a great way to achieve the benefits of strength training and cardiovascular training in one quick, challenging routine. By returning to an aerobic exercise between each set you are increasing your aerobic capacity, endurance and burning fat as energy. The idea is to move quickly from exercise to exercise, taking only as much rest between sets as it takes to set up the next exercise (less than 20 seconds). One circuit equals one set of each exercise. Initially, start with completing one round of Circuit 1. Then add an additional round of the same circuit. Once you reach three rounds of Circuit 1, add one round of Circuit 2. Add additional rounds of Circuit 2 as your fitness level increases. Do not let your heart rate exceed 220 minus your resting heart rate. Perform each rep of each exercise slowly and with perfect technique. Count three seconds up and three seconds down.
Any type of aerobic exercise can be used for this routine. Some examples are: jumping jacks, jogging in place or stair climbing.
| Circuit 1 Body Part Exercise Reps | ||
| Chest Aerobic Exercise | Bench Press 30 – 60 Seconds | 8-12 |
| Legs Aerobic Exercise | Squat 30 – 60 Seconds | 8-12 |
| Back Aerobic Exercise | Bent Over Row 30 – 60 Seconds | 8-12 |
| Trunk Aerobic Exercise | Seated Abdominal Crunch 30 – 60 Seconds | 8-12 |
| Circuit 1 Body Part Exercise Reps | ||
| Shoulders Aerobic Exercise | Seated Shoulder Press 30 – 60 Seconds | 8-12 |
| Legs Aerobic Exercise | Legs Extension 30 – 60 Seconds | 8-12 |
| Back Aerobic Exercise | Seated Lat Pulldowns 30 – 60 Seconds | 8-12 |
| Trunk Aerobic Exercise | Standing Low Back Extension 30 – 60 Seconds | 8-12 |
| Arms Biceps Curl | 8-12 |
Strength Training
Frequency: 3 Days Per Week (M-W-F) Time: About 45-60 Minutes
This program is designed to emphasize overall strength development. This is an advanced routine to be used only after you have progressed from the advanced general conditioning routine and only after you have perfected your exercise techniques. Work each set to near exhaustion. If you can perform more than 5 to 8 reps, you should increase your resistance 5 pounds and decrease your reps to 5. Rest 60 - 120 seconds between each set and exercise. Focus on proper form. Tighten the muscle before you move, squeeze the muscle as you move, cramp the muscle at the point of full contraction, and resist the movement as you lower the weight. Move slowly on each rep. Use a pace that would allow you to stop the movement instantly at any point in the rep. Count two seconds up and four seconds down and work to fatigue during each set.
| Day 1 Body Part | Exercise Sets Reps | ||
| Chest Bench Press | 2-4 5-8 | ||
| Chest Fly | 2-4 5-8 | ||
| Shoulders Seated Sh | Shoulder Press | 2-4 5-8 | |
| Crossover Rear Deltoid Row | 2-4 5-8 | ||
| Shoulder Shrug | 2-4 5-8 |
| Day 2 Body Part | Exercise Sets Reps | |||
| Chest Bent Over Row | 2-4 5-8 | |||
| Seated Lat Pulldowns | 2-4 5-8 | |||
| Shoulders Biceps Curl | 2-4 5-8 | |||
| Reverse Curl | 2-4 5-8 | |||
| Triceps Pushdown | 2-4 5-8 | |||
| Triceps Extension | 2-4 5-8 |
| Day 3 Body Part | Exercise Sets Reps | ||
| Legs Squat | 2-4 5-8 | ||
| Leg Extension | 2-4 5-8 | ||
| Standing Low Back Extension | 2-4 8-12 | ||
| Trunk Seated Abdominal Crunch | 2-4 5-8 | ||
CHEST EXERCISES
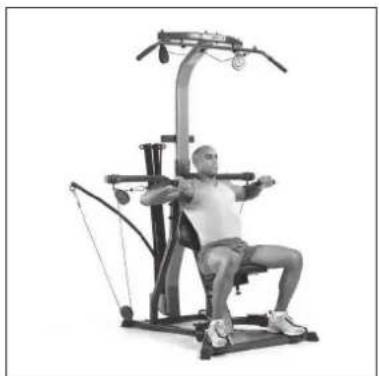
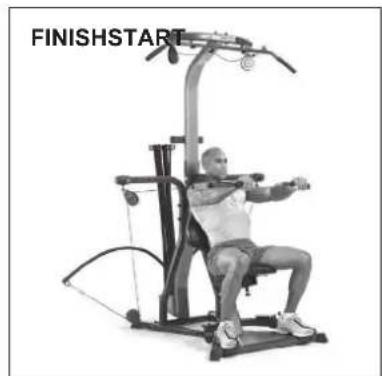
Bench Press - Shoulder Horizontal Adduction (and Elbow Extension)
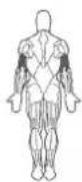
Muscles worked:
Chest muscles (pectoralis major). Also involves front shoulder muscles (anterior deltoid and triceps, located on the back of the upper arm.
Position:
Seated - facing outward
Accessory:
Hand Grips
Pulleys:
Center Cross Bar - wide position
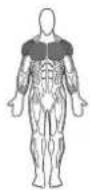
Before you begin:
Remove Leg Extension and adjust seat height. The pulleys should be in the wide position.
Key Points:
- Maintain a 90^ angle between upper arms and torso throughout exercise.
- Limit range of motion so elbows do not travel behind shoulders.
- Keep shoulderblades pinched together and maintain good spinal alignment.
Chest Fly - Shoulder Horizontal Adduction (Elbow Stabilized)
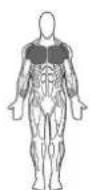
Muscles worked:
Emphasizes chest muscles (pectoralis major). Involves front shoulder muscles (anterior deltoid).
Position:
Seated - facing outward
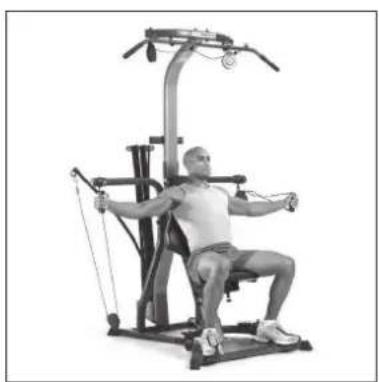
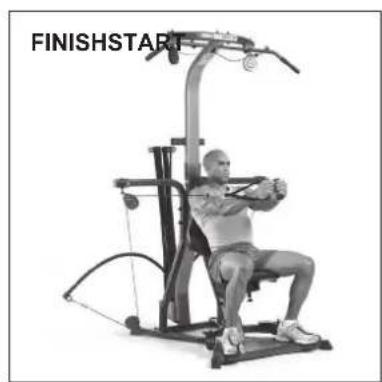
Accessory:
Hand Grips
Pulleys:
Center Cross Bar - wide position
Before you begin:
Remove Leg Extension and adjust seat height. The pulleys should be in the wide position.
Key Points:
- Maintain a 90^ angle between upper arms and torso throughout exercise.
- Limit range of motion so elbows do not travel behind shoulders.
- Keep shoulderblades pinched together and maintain good spinal alignment.
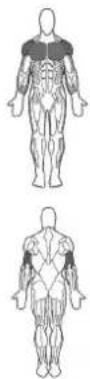
Decline Bench Press - Shoulder Horizontal Adduction (and Elbow Extension)
Muscles worked:
Chest muscles (pectoralis major). Also involves front shoulder muscles (anterior deltoid) and triceps.
Position:
Seated (seat in lowest position) facing outward
Accessory:
Hand Grips
Pulleys:
Center Cross Bar - standard position
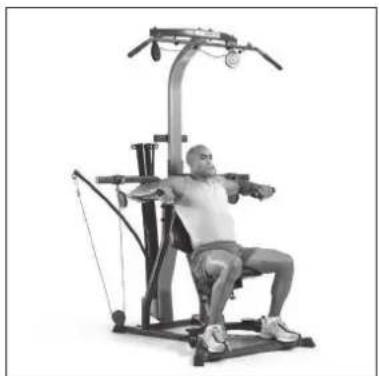
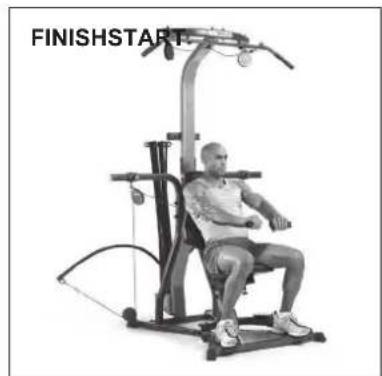
Before you begin:
Remove Leg Extension and adjust seat to lowest setting.
Key Points:
- Maintain 90^ angle between upper arms and torso at the bottom of the motion, and slightly less than 90^ at the top of the motion.
- Limit range of motion so elbows do not travel behind shoulders.
- Keep shoulderblades pinched together and maintain good spinal alignment.
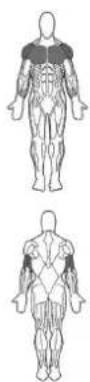
Incline Bench Press - Shoulder Horizontal Adduction (and Elbow Extension)
Muscles worked:
Chest muscles (pectoralis major), especially upper portion. Also involves front shoulder muscles (anterior deltoid) and triceps.
Position:
Seated - facing outward
Accessory:
Hand Grips
Pulleys:
Center Cross Bar - wide position
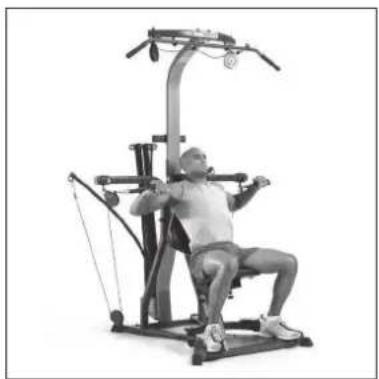
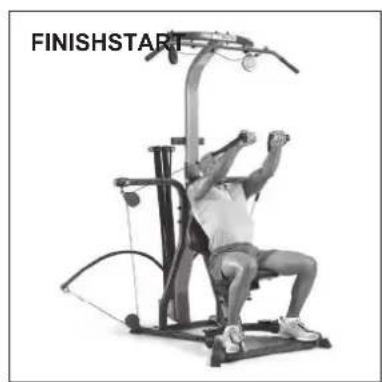
Before you begin:
Remove Leg Extension and adjust seat height.
Key Points:
- Upper arms will be 90^ from sides of torso at the bottom of movement and slightly more than 90^ from the front of torso at the top.
- Limit range of motion so elbows do not travel behind shoulders.
- Keep shoulderblades pinched together and maintain good spinal alignment.
CHEST EXERCISES
Decline Chest Fly - Shoulder Horizontal Adduction (elbow stabilized)
Muscles worked:
Pectoralis Major; Anterior Deltoid
Position:
Seated - facing outward
Accessory:
Hand Grips
Pulleys:
Center Cross Bar - wide position
Leg Extension:
Removed
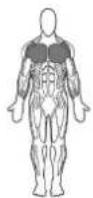
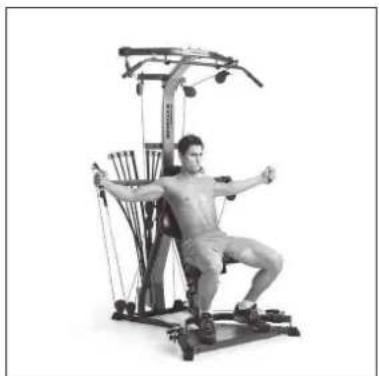
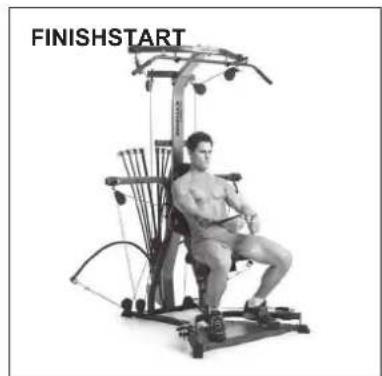
Success Tips
- Maintain a 60 - 90^ angle between upper arms and torso during exercise.
- Keep chest muscles tightened. Limit and control your range of motion.
- Keep knees bent, feet on Platform, headback against Seat Back Pad.
To improve your pectoralis involvement, pinch your shoulderblades together throughout movement.
Incline Chest Fly - Shoulder Horizontal Adduction (elbow stabilized)
Muscles worked:
Pectoralis Major; Anterior Deltoid
Position:
Seated - facing outward
Accessory:
Hand Grips
Pulleys:
Center Cross Bar - wide position
Leg Extension:
Removed
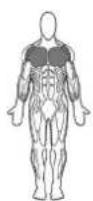
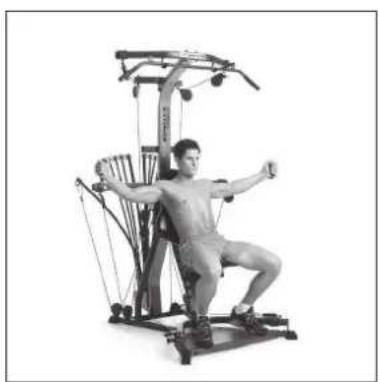
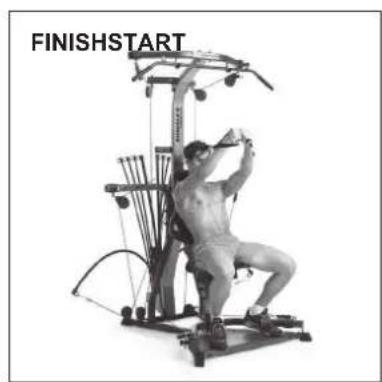
Success Tips
- Maintain a 60 - 90^ angle between upper arms and torso during exercise.
- Keep chest muscles tightened. Limit and control your range of motion.
- Keep knees bent, feet on Platform, headback against Seat Back Pad.
To improve your pectoralis involvement, pinch your shoulderblades together throughout movement.
Reverse Fly - Shoulder Horizontal Abduction (Elbows Stabilized)
Muscles worked:
Back portion of shoulder muscles (rear deltoids, rear portion of middle deltoids).
Position:
Standing - facing machine
Seat:
Removed
Accessory:
Hand Grips
Pulleys:
Center Cross Bar - narrow position
Before You Begin:
Remove Leg Extension. The pulleys should be in the narrow position.
Key Points:
- Maintain a 90^ angle between upper arms and sides of torso throughout exercise.
- Keep shoulderblades pinched together and maintain good spinal alignment.
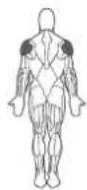
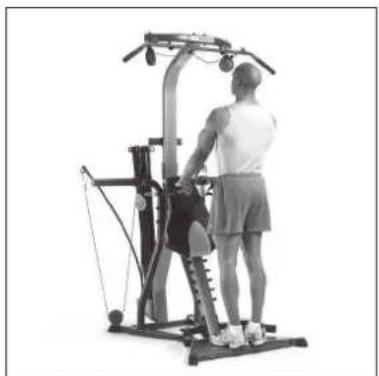
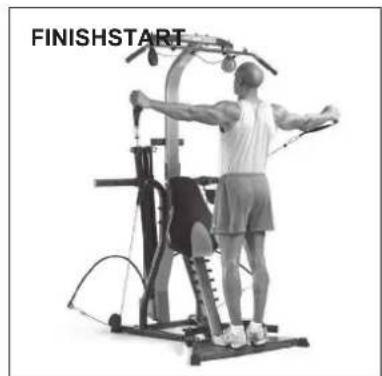
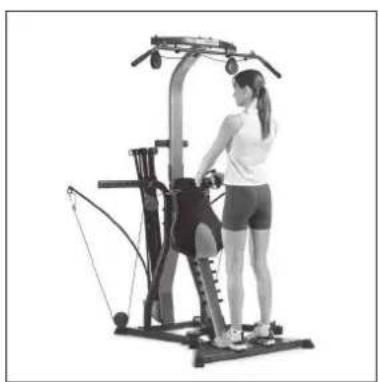
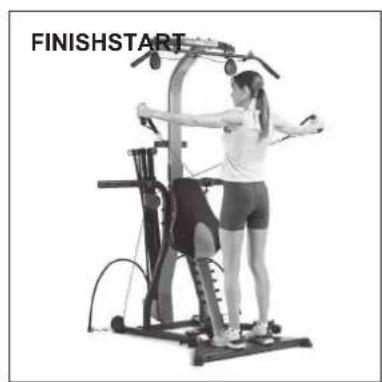
Crossover Reverse Fly - Shoulder Horizontal Abduction (Elbows Stabilized)
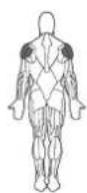
Muscles worked:
Back portion of shoulder muscles (rear deltoids, rear portion of middle deltoids).
Position:
Standing - facing machine
Seat:
Removed
Accessory:
Hand Grips
Pulleys:
Center Cross Bar - narrow position
Before You Begin:
Remove seat and leg extension. The pulleys should be in the narrow position.
Key Points:
- Maintain a 90^ angle between upper arms and sides of torso throughout exercise.
- Keep shoulderblades pinched together and maintain good spinal alignment.
SHOULDER EXERCISES
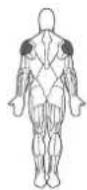
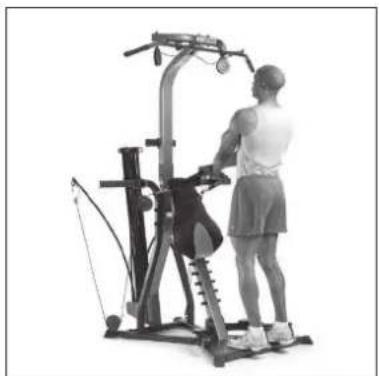
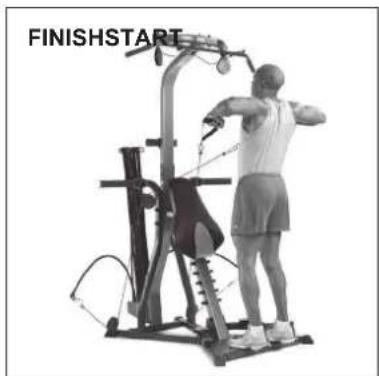
Crossover Rear Deltoid Rows - Elbow Flexion
Muscles worked:
Back portion of shoulder muscles (rear deltoids, rear portion of middle deltoids).
Position:
Standing - facing machine
Accessory:
Hand Grips
Pulleys:
Center Cross Bar - narrow position
Before You Begin:
Remove Leg Extension and seat. Center Cross Bar Pulleys should be in narrow position.
Key Points:
- Maintain a 90^ angle between upper arms and sides of torso.
- Keep shoulderblades pinched together and maintain good spinal alignment.
- To work one arm at a time, place nonworking hand on top of bench for additional stabilization.
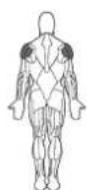
Crossover High Rear Deltoid Rows - Elbow Flexion
Muscles worked:
Back portion of shoulder muscles (rear deltoids, rear portion of middle deltoids).
Position:
Standing - facing machine
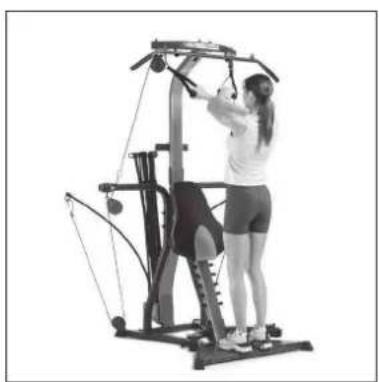
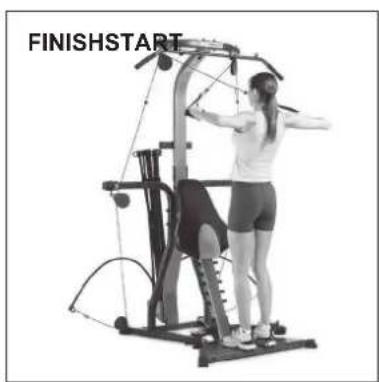
Accessory:
Hand Grips
Pulleys:
Lat Tower
Before You Begin:
Remove Leg Extension and seat.
Key Points:
- Keep shoulderblades pinched together and maintain good spinal alignment.
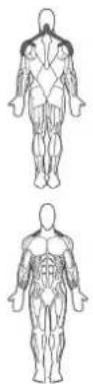
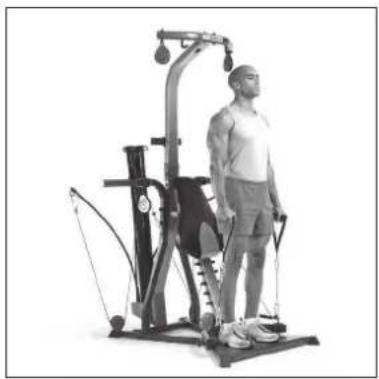
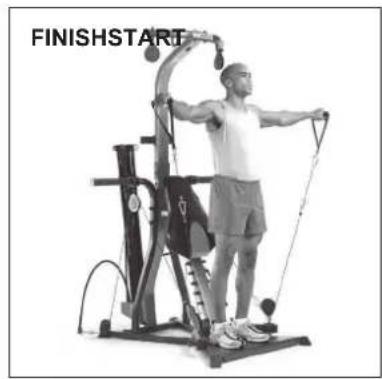
Lateral Shoulder Raise - Shoulder Abduction (Elbows Stabilized)
Muscles worked:
Side shoulder muscles (middle deltoids), top muscle of rotator cuff (supraspinatus) and upper trapezius muscles.
Position:
Standing - facing outward
Accessory:
Hand Grips
Pulleys:
Squat Pulley Frame - use squat straps
Before You Begin:
Remove Seat and Leg Extension
Key Points:
- DO NOT swing arms upward or move trunk.
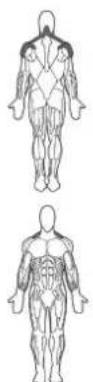
Seated Forearm Lateral Shoulder Raise - Elbows Stabilized
Muscles worked:
Side shoulder muscles (middle deltoids), top muscle of rotator cuff (supraspinatus) and upper trapezius muscles.
Position:
Standing - facing outward
Accessory:
Hand Grips over elbows
Pulleys:
Squat Pulley Frame - narrow position
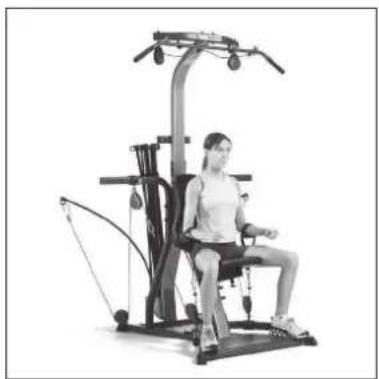
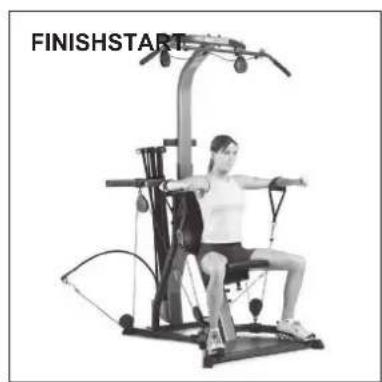
Before You Begin:
Remove Seat and Leg Extension
Key Points:
DO NOT swing arms upward or move trunk.
SHOULDER EXERCISES
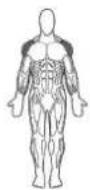
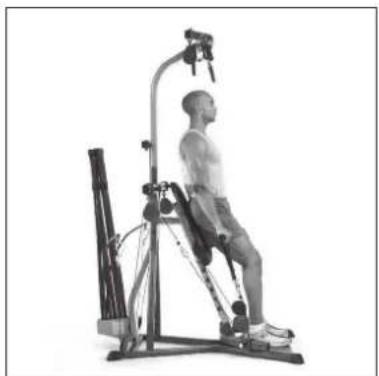
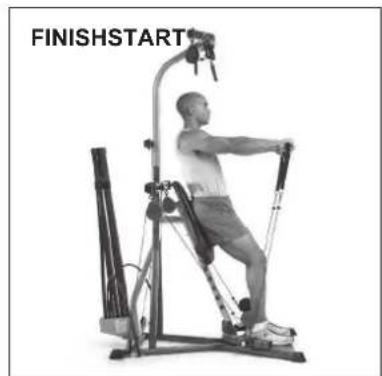
Front Shoulder Raise - Shoulder Flexion (Elbow Stabilized)
Muscles worked:
Front part of shoulder muscles (front deltoids) and front part of middle deltoids.
Position:
Standing - facing outward
Accessory:
Hand Grips
Pulleys:
Squat Pulley Frame
Before You Begin:
Remove Leg Extension and seat. Use platform pulleys.
Key Points:
- Keep chest lifted and abdominals tightened throughout entire motion and maintain good spinal alignment.
- Do not increase arch in lower back while lifting arms.
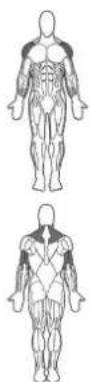
Seated Shoulder Press - Shoulder Adduction (and Elbow Extension)
Muscles worked:
Front portion of shoulder muscles (front deltoids and front part of middle deltoids), upper back muscles (upper trapezius), and triceps.
Position:
Standing - facing outward
Accessory:
Hand Grips
Pulleys:
Center Cross Bar - wide position
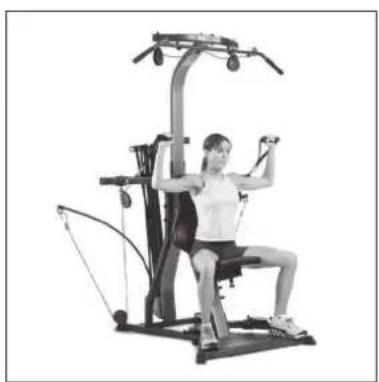
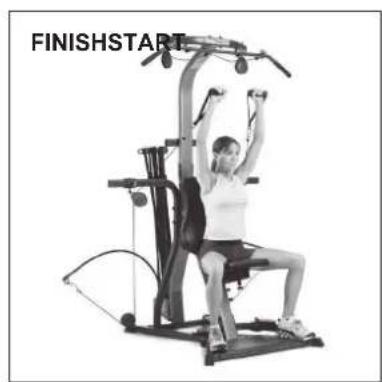
Before You Begin:
Remove Leg Extension and adjust seat height.
Key Points:
- Keep abdominals tight throughout entire motion and maintain good spinal alignment.
- Do not let the arch increase in the lower back while pressing up.
Shoulder Rotator Cuff - Internal Rotation
Muscles worked:
Standing - facing left or right
Accessory:
Hand Grips
Pulleys:
Center Cross Bar -wide position
Before You Begin:
Remove Seat and Leg Extension
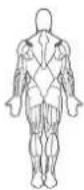
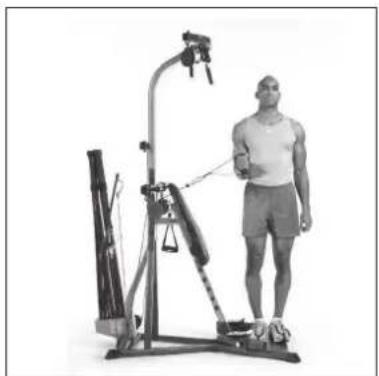
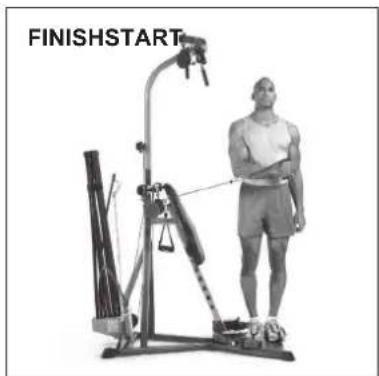
Key Points:
- Motion should be slow and controlled.
- Do not rotate spine to get additional range of motion. Try for pure rotation of shoulder joint. More is not better!
- Use light resistance only. Pick a resistance that you can perform 12-15 perfect reps.
Shoulder Rotator Cuff - External Rotation
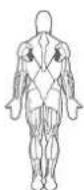
Muscles worked:
Rear portion of rotator cuff (infraspinatus, teres minor muscles).
Position:
Standing - facing left or right
Accessory:
Hand Grips
Pulleys:
Center Cross Bar - wide position
Before You Begin:
Remove Leg Extension and seat.
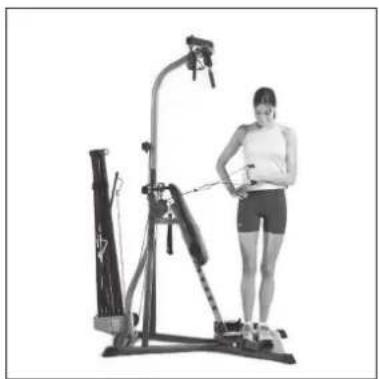
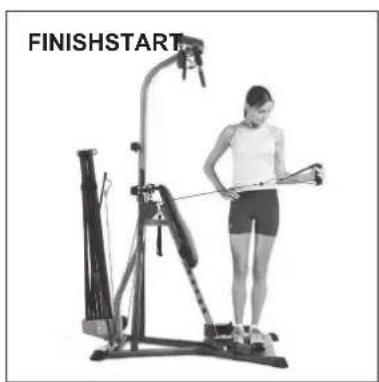
Key Points:
- Motion should be slow and controlled.
- Do not rotate spine to get additional range of motion. Try for pure external rotation of shoulder joint. More is not better!
- Use light resistance only. Pick a resistance that allows you to perform 12-15 reps.
SHOULDER EXERCISES
Shoulder Extension - Elbows Stabilized
Muscles worked:
Front part of shoulder muscles (front deltoids) and front part of middle deltoids.
Position:
Standing - facing outward
Accessory:
Hand Grips
Pulleys:
Squat Pulley Frame
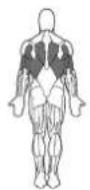
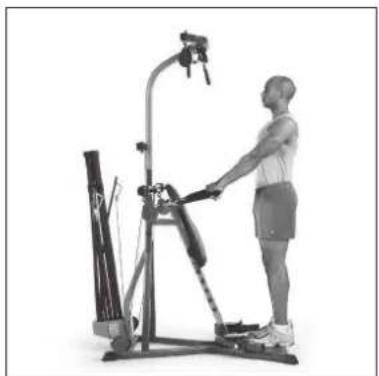
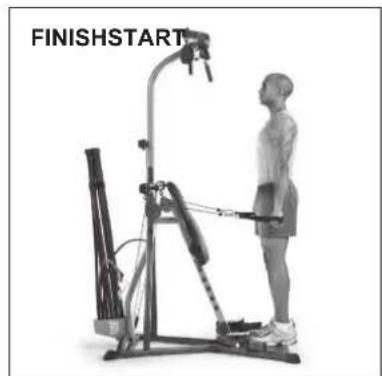
Before You Begin:
Remove Leg Extension and seat. Use platform pulleys.
Key Points:
- Keep chest lifted and abdominals tightened throughout entire motion and maintain good spinal alignment.
- Do not increase arch in lower back while lifting arms.
Shoulder Shrug - Scapular Elevation
Muscles worked:
Upper trapezius and associated smaller muscles of region.
Position:
Standing - facing machine
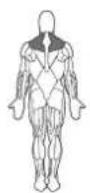
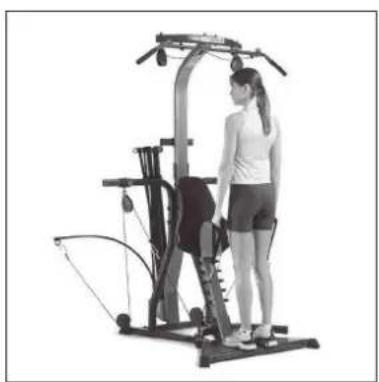
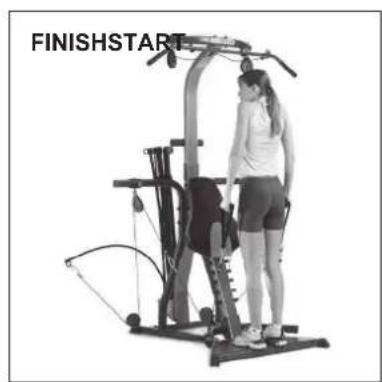
Accessory:
Hand Grips
Pulleys:
Squat Pulley Frame
Before You Begin:
Remove Leg Extension and seat.
Key Points:
- Do not bend neck backward or forward while raising shoulders.
- Do not slouch upon lowering shoulders.
- Keep spine in good alignment through entiremotion.
- Make sure both shoulders raise evenly.
- For variation, bend forward slightly from hips, not spine.
Scapular Protraction - Elbows Stabilized
Muscles worked:
Serratus anterior muscles, the muscles on the side of the rib cage.
Position:
Seated - facing outward
Accessory:
Hand Grips
Pulleys:
Center Cross Bar - narrow position
Before You Begin:
Remove Leg Extension and adjust seat height.
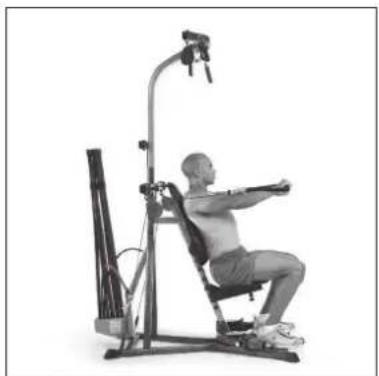
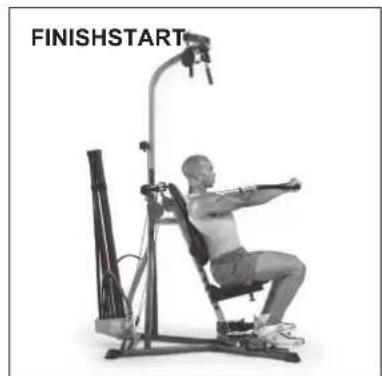
Key Points:
- Maintain a 90^ angle between upper arms and torso throughout the exercise.
- Keep elbows straight.
- Do not slouch forward in the upper spine to further the motion. Maintain a very slight arch in lower back at all times.
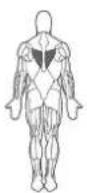
Scapular Depression
Muscles worked:
Develops lower trapezius muscles, which stabilize and move shoulderblades.
Position:
Seated - facing machine
Accessory:
50" Bent Lat Bar
Pulleys:
Lat Tower
Before You Begin:
Remove Leg Extension and adjust seat height.
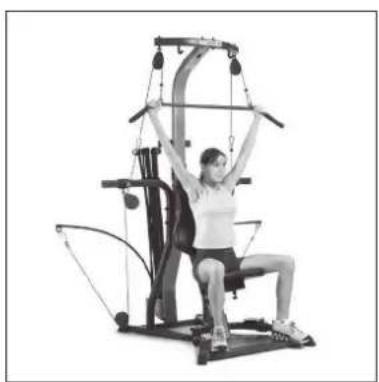
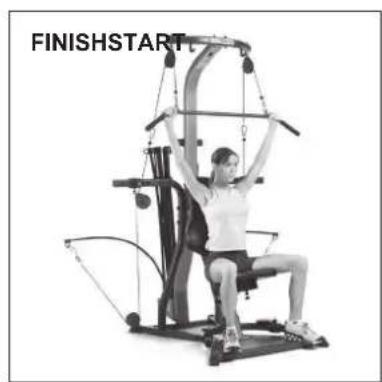
Key Points:
- Do not lose spinal alignment, keep chest lifted.
BACK EXERCISES
Good Morning
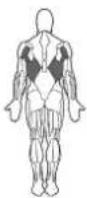
Muscles worked:
Latissimus Dorsi; Teres Major; Rear Deltoids
Position:
Standing - facing outward
Accessory:
Handgrips or optional Squat Bar (Squat Bar shown in photos)
Pulleys:
Squat Pulley Frame

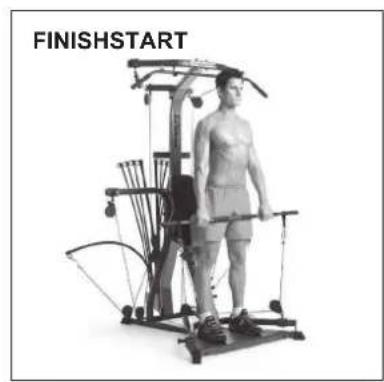
Leg Extension:
Removed
Key Points:
- Keep your chest lifted, spine aligned, abs tight and your back flat with no arch.
- Lift with your legs, not lower back or arms.
- Use a light resistance for this movement.
- Lift your head, keep your knees bent and feet on Standing Platform.
Standing Low Back Extension - with Hip Extension
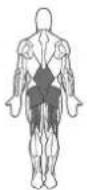
Muscles worked:
Muscles in lower back (erector spinae, deep spinal muscles), lower back muscles, gluteus maximus and hamstrings.
Position:
Standing - facing outward
Accessory:
Hand Grips
Pulleys:
Squat Pulley Frame - standard position
Before You Begin:
Remove Seat and Leg Extension
Key Points:
- Keep chest lifted and a very slight arch in lower back at all times.
- Move from hips only, not waist. Do not increase or decrease the arch in lower back during the movement.
Standing Shoulder Pullover - with Bent Lat Bar (Elbows Stabilized)
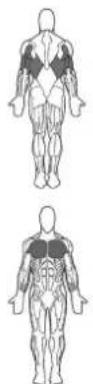
Muscles worked:
Upper back (latissimus dorsi, teres major, rear deltoid muscles). Also involves chest (pectoralis major muscles) and triceps.
Position:
Standing - facing machine
Accessory:
50" Bent Lat Bar
Pulleys:
Lat Tower
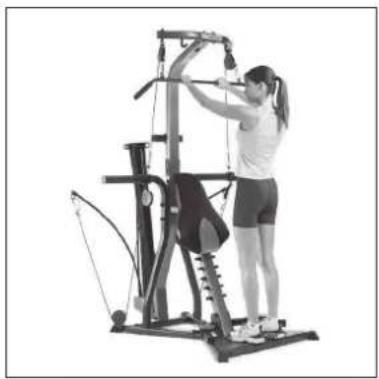
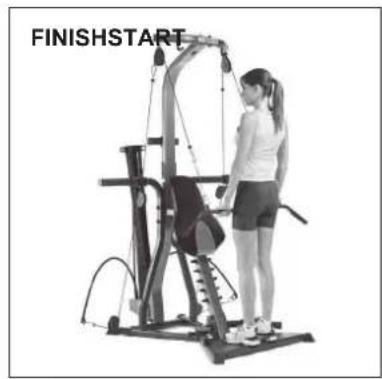
Before You Begin:
Remove Seat and Leg Extension
Key Points:
- Do not lose spinal alignment. Relax neck, keep chest lifted, abs tight and maintain a very slight arch in lower back.
- Keep lats tightened throughout entire motion.
- Release shoulderblades at end of each rep. Initiate new rep by depressing shoulderblades.
Standing Shoulder Pullover - with Hand Grips (Elbows Stabilized)
Muscles worked:
Upper back (latissimus dorsi, teres major, rear deltoid muscles). Also involves chest (pectoralis major muscles) and triceps.
Position:
Standing - facing machine
Accessory:
Hand Grips
Pulleys:
Lat Tower
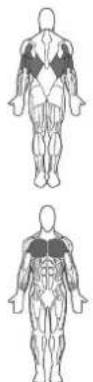
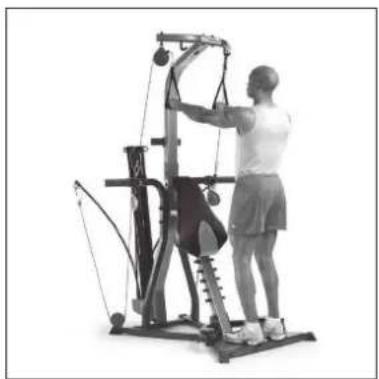
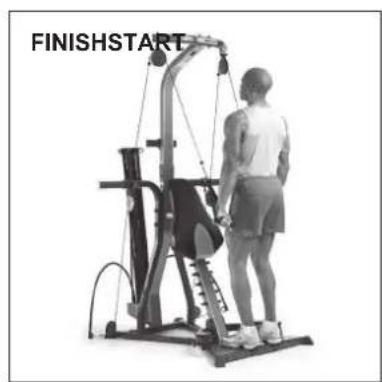
Before You Begin:
Remove Seat and Leg Extension
Key Points:
- Do not lose spinal alignment. Relax neck, keep chest lifted, abs tight and maintain a very slight arch in lower back.
- Keep lats tightened throughout entire motion.
- Release shoulderblades at end of each rep. Initiate new rep by depressing shoulderblades.
BACK EXERCISES
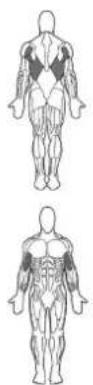
Narrow Pulldowns with Bent Lat Bar - Shoulder Extension (with Elbow Flexion)
Muscles worked:
Latissimus dorsi, teres major and rear deltoid, which make up the large pulling muscles of upper back. Also involves biceps group.
Position:
Seated - facing machine
Accessory:
50" Bent Lat Bar
Pulleys:
Lat Tower
Before You Begin:
Remove Leg Extension
Key Points:
- Do not lose spinal alignment.
- Keep lats tightened throughout entire motion.
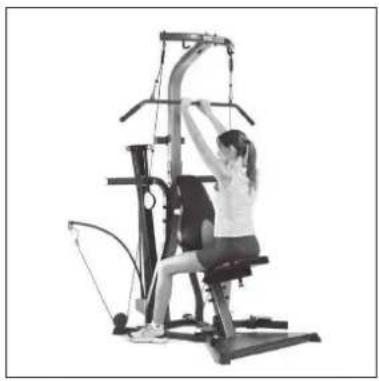
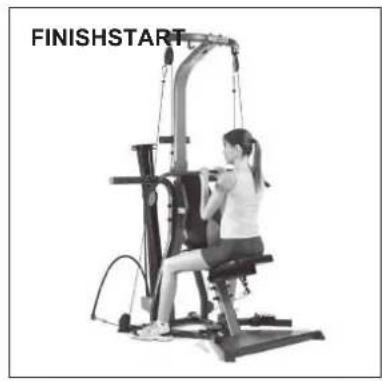
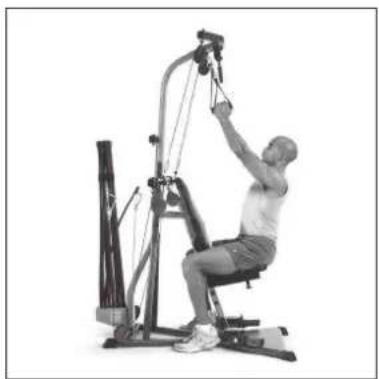
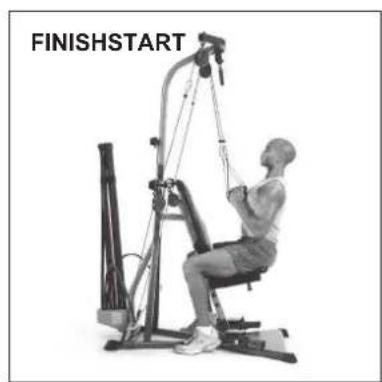
Narrow Pulldowns with Hand Grips - Shoulder Extension (with Elbow Flexion)
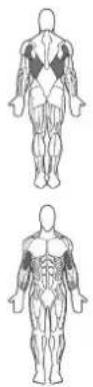
Muscles worked:
Latissimus dorsi, teres major and rear deltoid, which make up the large pulling muscles of upper back. Also involves biceps group.
Position:
Seated - facing machine
Accessory:
Hand Grips
Pulleys:
Lat Tower
Before You Begin:
Remove Leg Extension
Key Points:
- Do not lose spinal alignment.
- Keep lats tightened throughout entire motion.
Bent Over Row
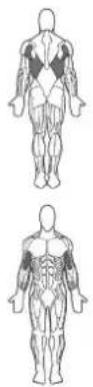
Muscles worked:
Latissimus dorsi, teres major and rear deltoid, which make up the large pulling muscles of upper back. Also involves biceps group.
Position:
Seated - facing machine
Accessory:
Hand Grips
Pulleys:
Squat Pulley Frame
Before You Begin:
Remove Seat and Leg Extension
Key Points:
- Do not bend neck backward or forward while raising bar.
- Do not slouch when lowering hand grips.
- Keep spine in good alignment through entire motion.
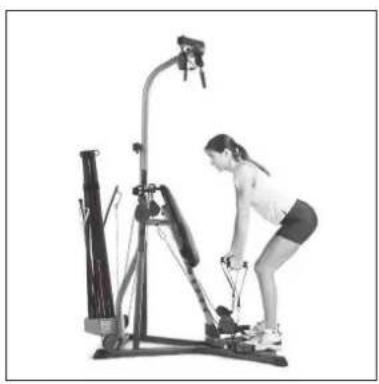
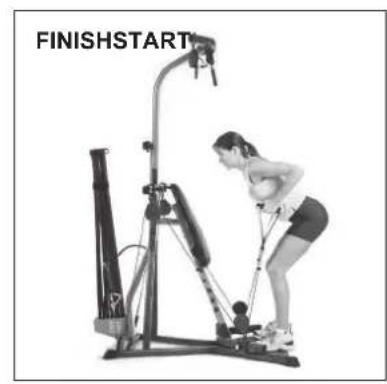
Crossover Bent Over Row
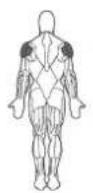
Muscles worked:
Back portion of shoulder muscles (rear deltoids, rear part of middle deltoids).
Position:
Standing - facing machine
Accessory:
Hand Grips
Pulleys:
Squat Pulley Frame
Before You Begin:
Remove Seat and Leg Extension
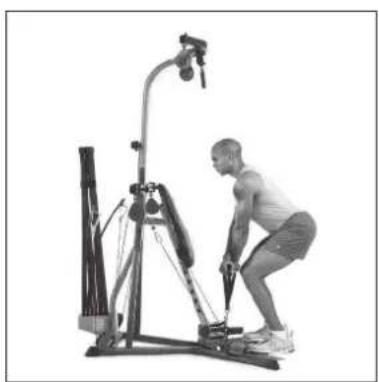
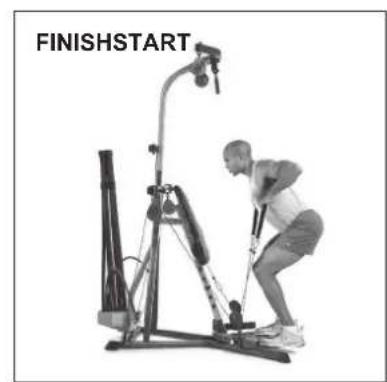
Key Points:
- Do not bend neck backward or forward while raising bar.
- Do not slouch when lowering hand grips.
- Keep spine in good alignment through entire motion.
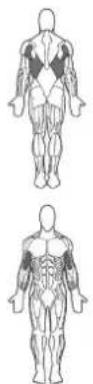
Reverse Grip Pulldown with Lat Bar
Muscles worked:
Latissimus Dorsi; Teres Major; Rear Deltoids; Biceps
Position:
Seated - facing machine
Accessory:
Lat Pulldown Bar
Pulleys:
Lat Cross Bar
Leg Extension:
Removed
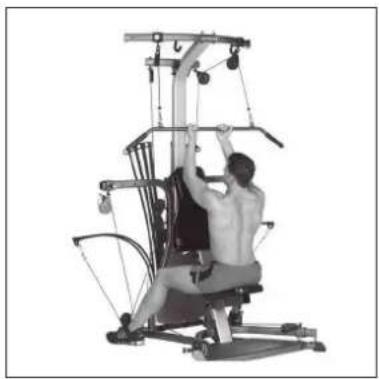
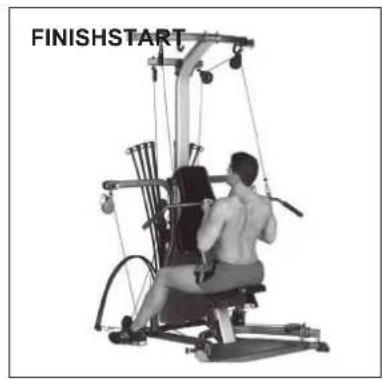
Success Tips
- Lift your chest, keep your knees bent and feet on Standing Platform.
- Do not bend your neck forwards or backwards during motion.
- Keep your spine aligned, abs tight and a slight arch in your lower back. Do not slouch.
Narrow Pulldowns with Hand Grips - Shoulder Extension (with Elbow Flexion)
Muscles worked:
Latissimus dorsi, teres major and rear deltoid. Also involves biceps group.
Position:
Seated - facing machine
Accessory:
Hand Grips
Pulleys:
Lat Tower
Before You Begin:
Remove Leg Extension
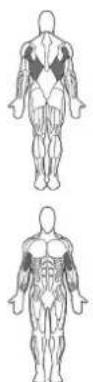
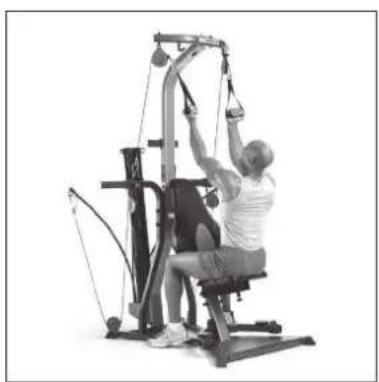
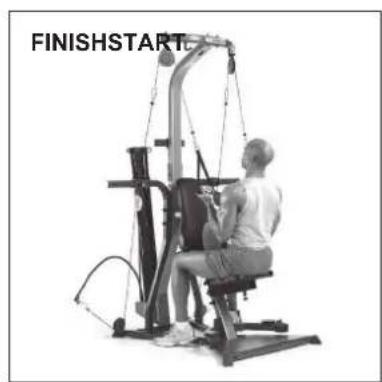
Key Points:
- Do not lose spinal alignment.
- Keep lats tightened throughout entire motion.
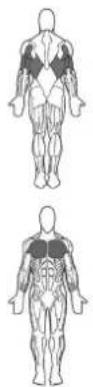
Crossover Wide Pulldowns - Shoulder Extension (with Elbow Flexion)
Muscles worked:
Latissimus dorsi, teres major and rear deltoid. Also involves pectoralis major and triceps.
Position:
Seated - facing machine
Accessory:
Hand Grips
Pulleys:
Lat Tower
Before You Begin:
Remove Leg Extension
Key Points:
- Do not lose spinal alignment.
- Keep lats tightened throughout entire motion.
- Do not lean backward as you pull.
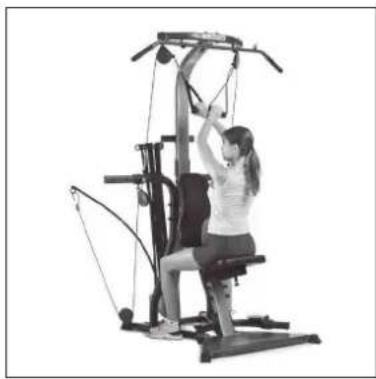
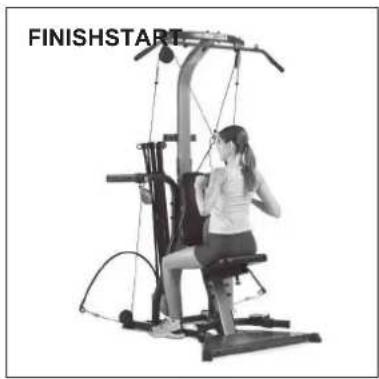
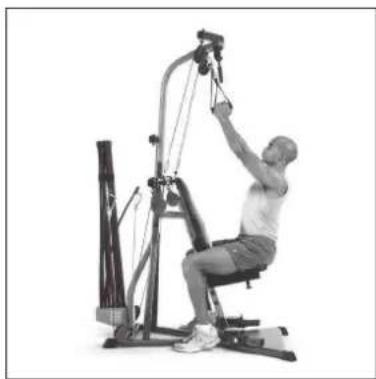
Crossover Narrow Pulldowns - Shoulder Extension (with Elbow Flexion)
Muscles worked:
Latissimus dorsi, teres major and rear deltoid. Also involves biceps group.
Position:
Seated - facing machine
Accessory:
Hand Grips
Pulleys:
Lat Tower
Before You Begin:
Remove Leg Extension
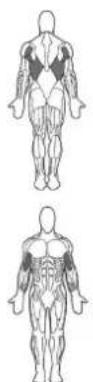
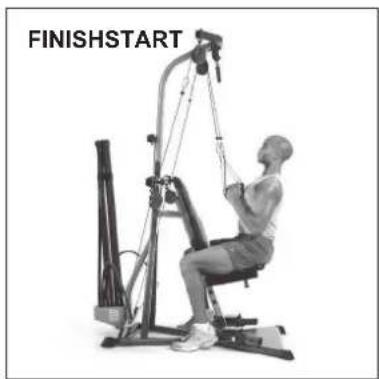
Key Points:
- Do not lose spinal alignment.
- Keep lats tightened throughout entire motion.
BACK EXERCISES
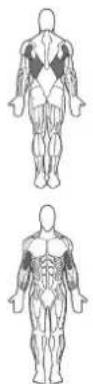
Pulldowns - Shoulder Adduction (with elbow flexion)
Muscles worked:
Latissimus Dorsi; Teres Major; Rear Deltoids; Biceps
Position:
Seated - facing machine
Accessory:
Lat Pulldown Bar
Pulleys:
Lat Cross Bar
Leg Extension:
Removed
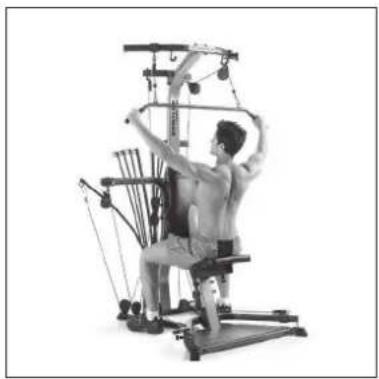
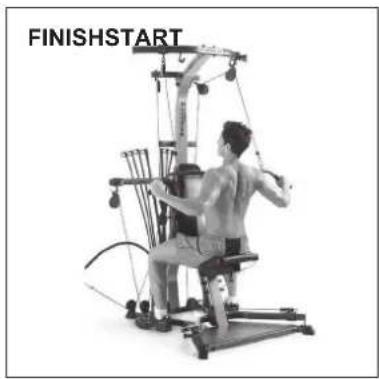
Success Tips
- Lift your chest, keep your knees bent and feet on Standing Platform.
To determine the appropriate grip width for you, hold your arms straight out to your sides at shoulder height. Bend your elbows approximately 90^ . Hands should be no wider apart than your elbows. - Keep your spine aligned, abs tight and a slight arch in your lower back.
Stiff-Arm Pulldown - Shoulder Extension (elbow stabilized)
Muscles worked:
Latissimus Dorsi; Teres Major; Rear Deltoids; Lower Trapezius; Biceps
Position:
Standing - facing machine
Accessory:
Lat Pulldown Bar
Pulleys:
Lat Cross Bar
Leg Extension:
Removed
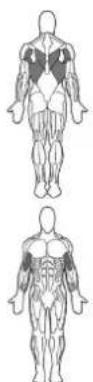
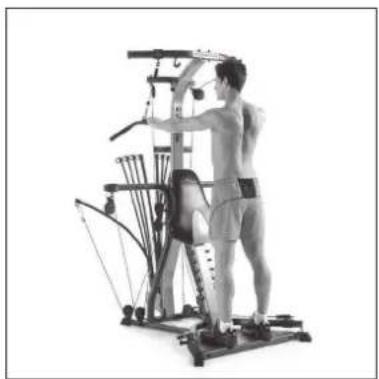
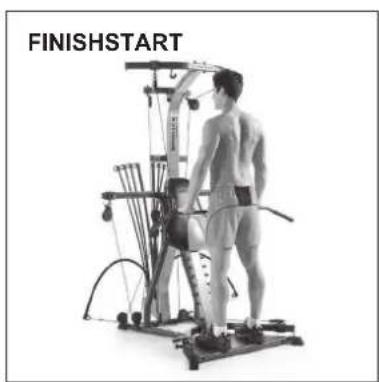
Key Points:
- Keep your lats tightened throughout the entire motion.
- Keep your chest lifted and maintain spinal alignment, keeping a very slight arch in your lower back.
- Release your shoulderblades at the end of each rep. Initiate each new rep by depressing your shoulderblades.
- Keep your elbows nearly straight (do not lock elbows) throughout exercise.
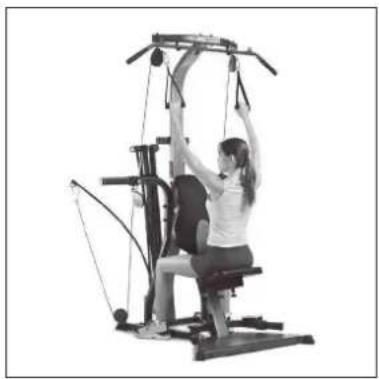
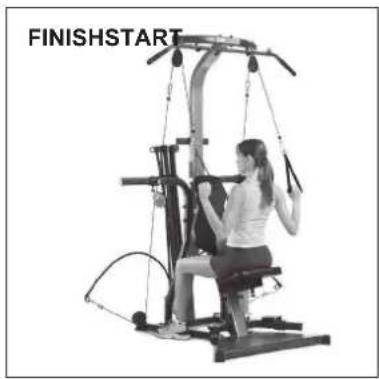
Seated Lat Pulldowns - Shoulder Adduction (with Elbow Flexion)
Muscles worked:
Latissimus dorsi, teres major and rear deltoid. Also involves biceps group.
Position:
Seated - facing machine
Accessory:
Hand Grips
Pulleys:
Lat Tower
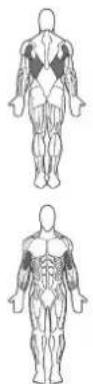
Before You Begin:
Remove Leg Extension
Key Points:
- Maintain good spinal alignment, chest lifted, abs tight and a slight arch in lower back.
- Keep lats tightened throughout entire motion.
- Do not let grips touch chest.
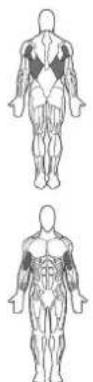
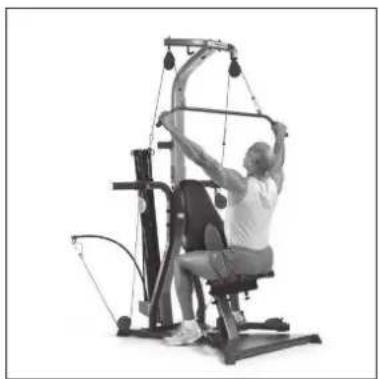
Seated Wide Lat Pulldowns - Shoulder Adduction (with Elbow Flexion)
Muscles worked:
Latissimus dorsi, teres major and rear deltoid. Also involves biceps group.
Position:
Seated - facing machine
Accessory:
50" Bent Lat Bar
Pulleys:
Lat Tower
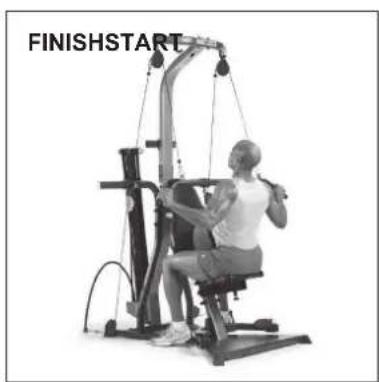
Before You Begin:
Remove Leg Extension
Key Points:
- Do not lose spinal alignment.
- Keep lats tightened throughout entire motion.
- If you can't complete the exercise with hands in the wide position, bring hands closer together.
ARM EXERCISES
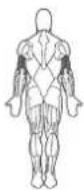
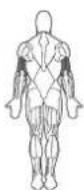
Triceps Pushdown - Elbow Extension
Muscles worked:
Triceps
Position:
Standing - facing machine
Accessory:
Hand Grips
Pulleys:
Lat Tower
Before You Begin:
Remove Seat and Leg Extension
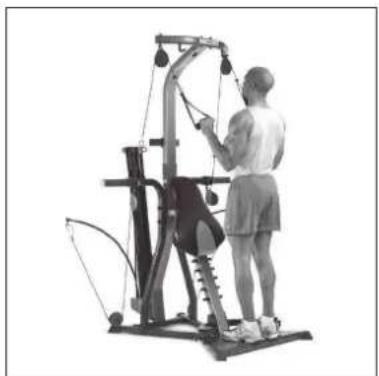
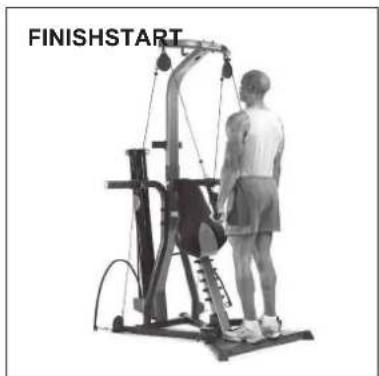
Key Points
- Keep upper arms motionless.
- Keep wrists straight.
- Tighten triceps throughout exercise and control motion on the way up.
- Maintain good posture by keeping chest lifted and abs tight. Maintain a very slight arch in the lower back.
Triceps Hammer Pushdown - Elbow Extension
Muscles worked:
Triceps
Position:
Standing - facing machine
Accessory:
Hand Grips in "Hammer Grip"
Pulleys:
Lat Tower
Before You Begin:
Remove Seat and Leg Extension
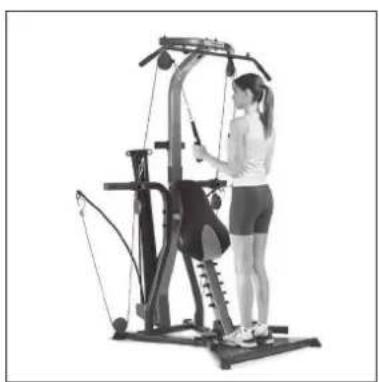
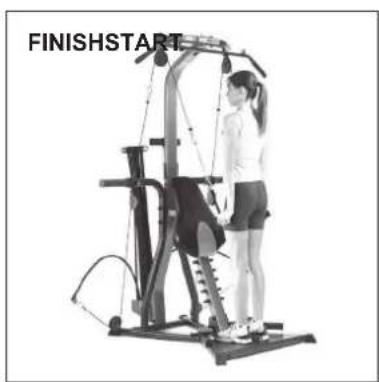
Key Points:
- Keep upper arms motionless.
- Keep wrists straight.
- Tighten triceps throughout exercise and control motion on the way up.
- Maintain good posture by keeping chest lifted and abs tight. Maintain slight arch in lower back.
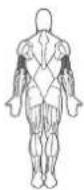
Triceps Pushdown - with Bent Lat Bar (Elbow Extension)
Muscles worked:
Triceps
Position:
Standing - facing machine
Accessory:
50" Bent Lat Bar
Pulleys:
Lat Tower
Before You Begin:
Remove Seat and Leg Extension
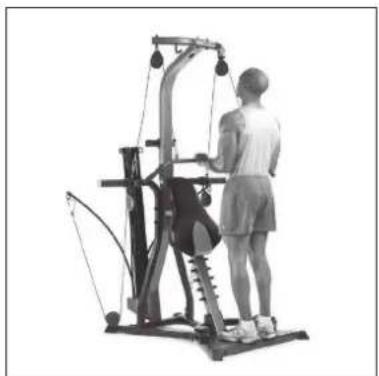
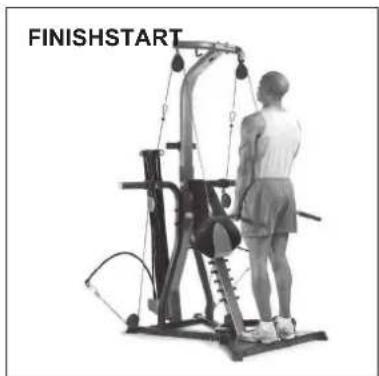
Key Points
- Keep upper arms motionless.
- Keep wrists straight.
- Tighten triceps throughout exercise and control motion on the way up.
- Maintain good posture by keeping chest lifted, abs tight. Maintain a very slight arch in the lower back.
Single Arm Pushdown—Elbow Extension
Muscles worked:
Triceps
Position:
Standing - facing machine
Accessory:
Hand Grips
Pulleys:
Lat Cross Bars
Leg Extension:
Removed
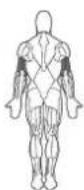
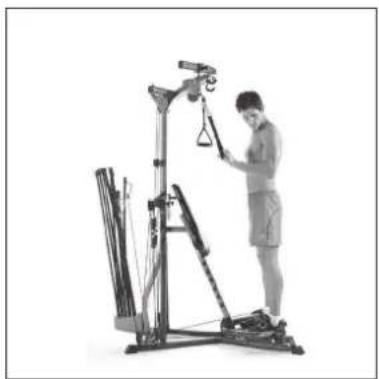
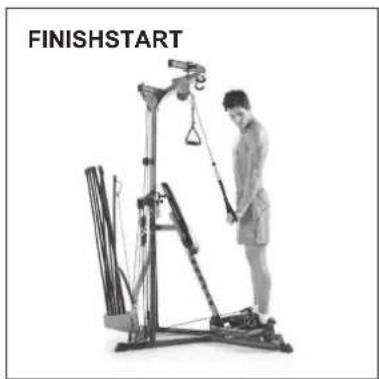
Key Points:
- Keep your upper arms motionless and your wrists straight.
- Keep your chest lifted and maintain spinal alignment, keeping a very slight arch in your lower back.
- Tighten the triceps throughout the exercise, using controlled motion.
- Keep your knees bent and feet on Standing Platform.
ARM EXERCISES
Triceps Extension - Elbow Extension
Muscles worked:
Triceps
Position:
Seated - facing outward
Accessory:
Hand Grips
Pulleys:
Center Cross Bar - narrow position
Before You Begin:
Remove Leg Extension and adjust seat height.
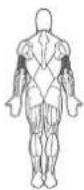
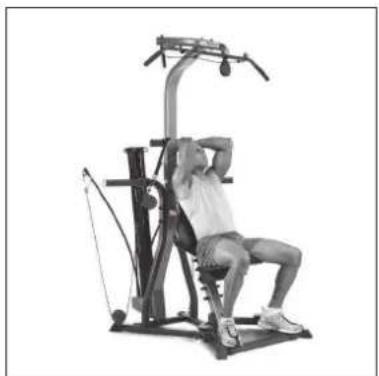
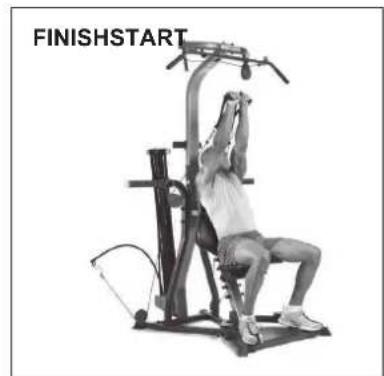
Key Points
- Keep upper arms/shoulders motionless.
- Keep wrists straight.
- Tighten triceps throughout exercise and control the motion on the way down.
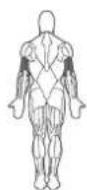
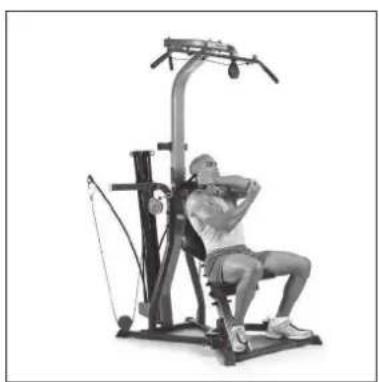
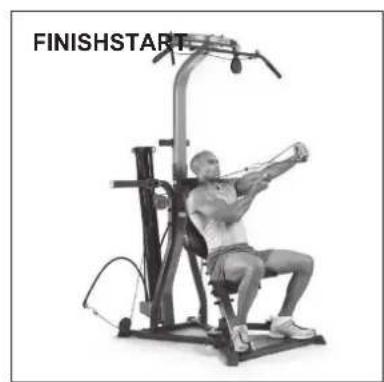
Cross Triceps Extension
Muscles worked:
Triceps
Position:
Seated - facing outward
Accessory:
Hand Grips in "Hammer Grip"
Pulleys:
Center Cross Bar - narrow position
Before You Begin:
Remove Leg Extension
Key Points
- Keep upper arms motionless.
- Keep wrists straight.
- Tighten triceps throughout exercise and control motion on the way down.
- Keep knees bent and feet flat on floor.
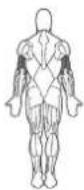
Hammer Triceps Extension - Elbow Extension
Muscles worked:
Triceps
Position:
Seated - facing outward
Accessory:
Hand Grips in "Hammer Grip"
Pulleys:
Center Cross Bar - narrow position
Before You Begin:
Remove Leg Extension and adjust seat height.
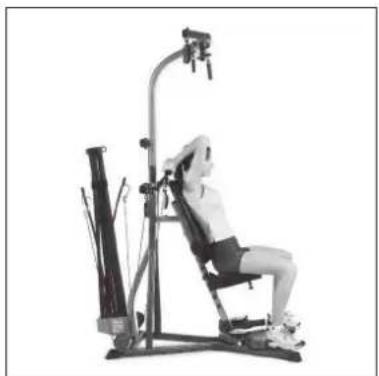
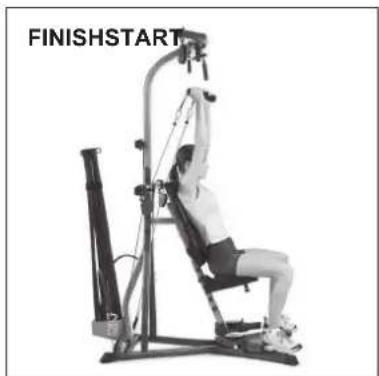
Key Points
- Keep upper arms/shoulders motionless.
- Keep wrists straight.
- Tighten triceps throughout exercise and control the motion on the way down.
"Rope" Pushdown—Elbow Extension
Muscles worked:
Triceps
Position:
Standing - facing machine
Accessory:
Hand Grips in "Hammer Grip"
Pulleys:
Lat Cross Bar
Leg Extension:
Removed
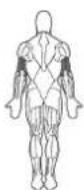
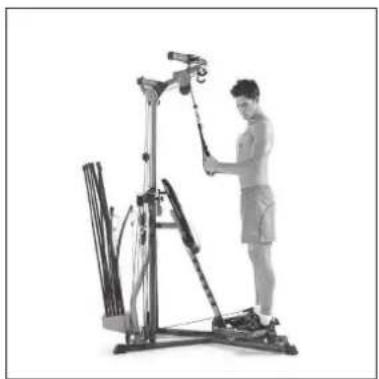
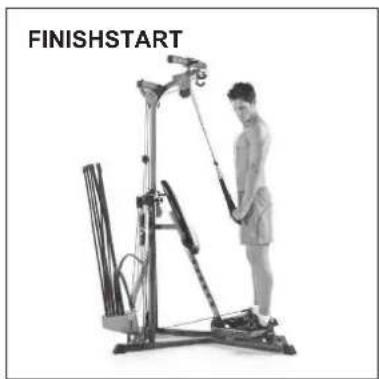
Key Points
- Keep your knees bent and feet on Standing Platform.
- Keep your upper arms motionless and your wrists straight.
- Keep your chest lifted, abs tight and maintain a slight arch in lower back.
- Tighten the triceps throughout the exercise, using controlled motion.
ARM EXERCISES
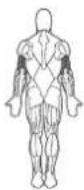
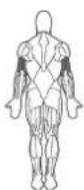
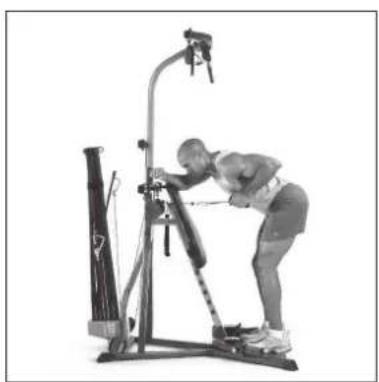
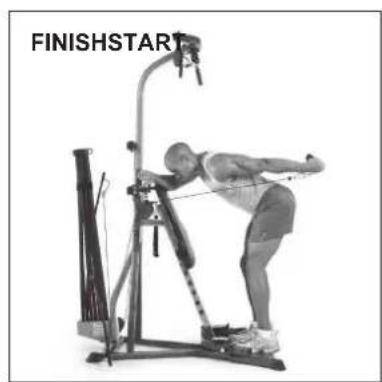
Triceps Kickback
Muscles worked:
Triceps
Position:
Standing - facing machine
Accessory:
Hand Grips
Pulleys:
Center Cross Bar - narrow position
Before You Begin:
Remove Seat and Leg Extension
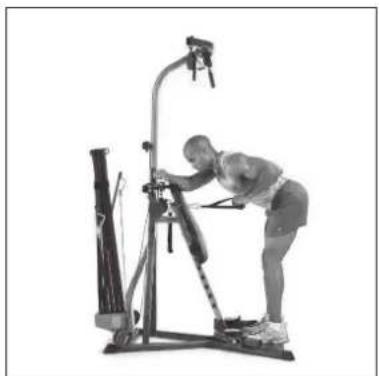
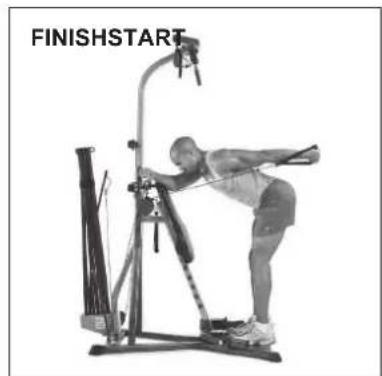
Key Points
- Maintain spinal alignment.
- Keep arm at side and wrist straight throughout entire motion.
- Tighten triceps throughout exercise and control motion.
- Keep palms facing upward.
Hammer Triceps Kickback
Muscles worked:
Triceps
Position:
Standing - facing machine
Accessory:
Hand Grips in "Hammer Grip"
Pulleys:
Center Cross Bar - narrow position
Before You Begin:
Remove Seat and Leg Extension
Key Points
- Maintain spinal alignment.
- Keep arm at side and wrist straight throughout motion.
- Tighten triceps throughout exercise and control motion.
- Maintain Hammer Grip throughout exercise.
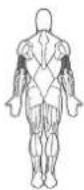
Resisted Dip - Elbow Extension
Muscles worked:
Triceps
Position:
Standing - facing outward
Accessory:
Hand Grips
Pulleys:
Lat Tower
Before You Begin:
Remove Seat and Leg Extension
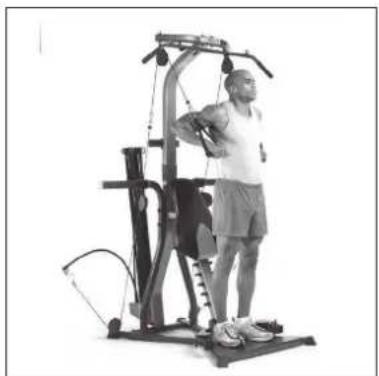
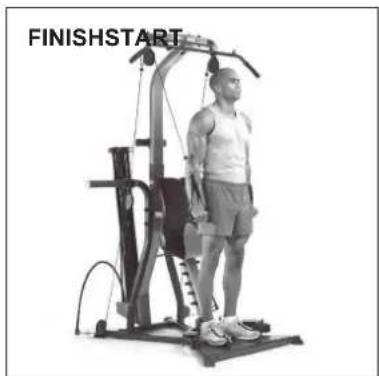
Key Points
- Keep back straight and knees slightly bent.
- Keep the abdominals tight throughout the entire motion and maintain good spinal alignment.
Biceps Curl - Elbow Flexion (in Supination)
Muscles worked:
Triceps
Position:
Standing - facing machine
Accessory:
Hand Grips
Pulleys:
Squat Pulley Frame
Before You Begin:
Remove Seat and Leg Extension
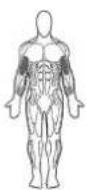
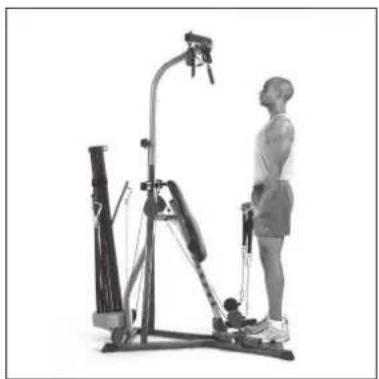
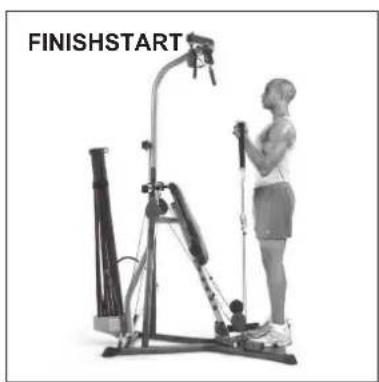
Key Points
- Keep elbows at sides.
- Keep wrists straight.
- Keep trunk muscles tight and maintain a very slight arch in lower back.
ARM EXERCISES
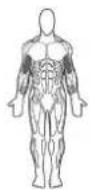
Standing Biceps Curl—Elbow Flexion (in supination)
Muscles worked:
Biceps
Position:
Standing - facing outward
Accessory:
Hand Grips
Pulleys:
Squat Pulley Frame
Leg Extension:
Removed
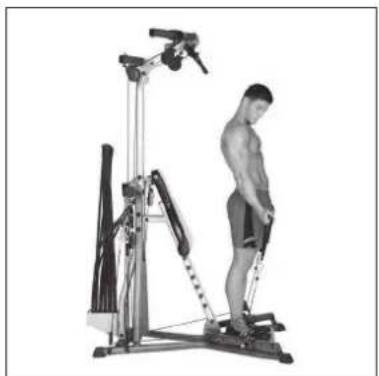
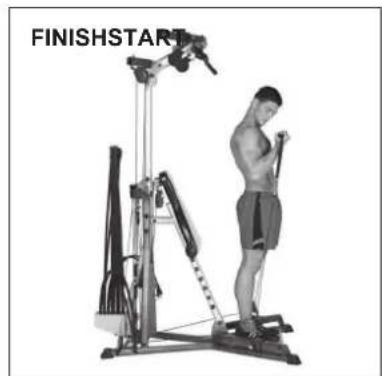
Key Points
- Keep your knees bent and feet on Standing Platform.
- Keep your chest lifted, abs tight and a very slight arch in your lower back.
- Keep your elbows at your sides and your wrists straight.
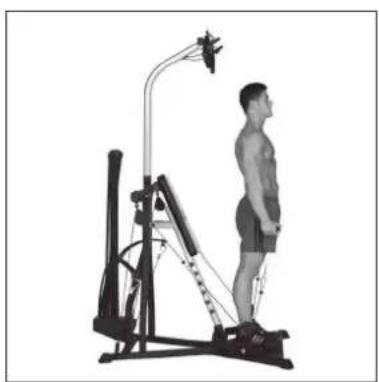
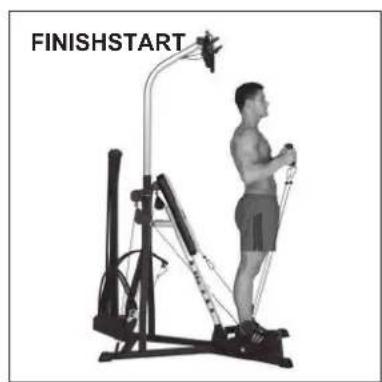
Hammer Biceps Curl—Elbow Flexion (in supination)
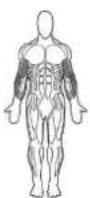
Muscles worked:
Biceps; Brachialis; Brachioradialis
Position:
Standing - facing outward
Accessory:
Hand Grips in "Hammer" Hold (see Page 10)
Pulleys:
Squat Pulley Frame
Leg Extension:
Removed
Key Points
- Keep your knees bent and feet on the Standing Platform
- Keep your chest lifted, shoulders pinched together, and a very slight arch in your lower back.
- Keep your upper arms and shoulders motionless and your wrists straight.
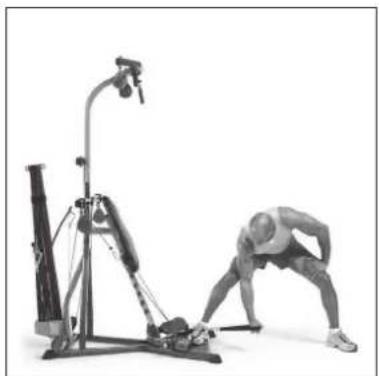
Concentration Biceps Curl - Elbow Flexion (in Supination)
Muscles worked:
Biceps
Position:
Standing - right or left side facing machine
Accessory:
Hand Grips
Pulleys:
Squat Pulley Frame
Before You Begin:
Remove Seat and Leg Extension

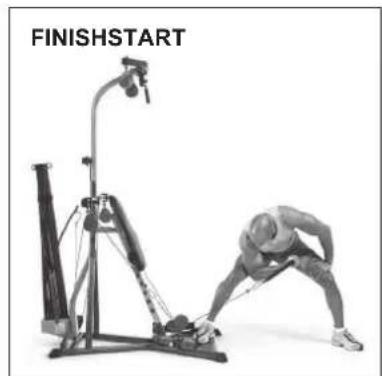
Key Points
- Keep elbow pointing toward floor at all times.
- Keep wrist straight.
- Bend at hips, not at the waist.
- Keep back straight, chest up and maintain a very slight arch in lower back.
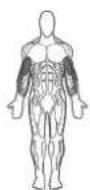
Reverse Curl - Elbow Flexion (in Pronation)
Muscles worked:
Deep arm muscle(brachialis). Also the front forearm muscle (brachioradialis) and biceps.
Position:
Standing - facing machine
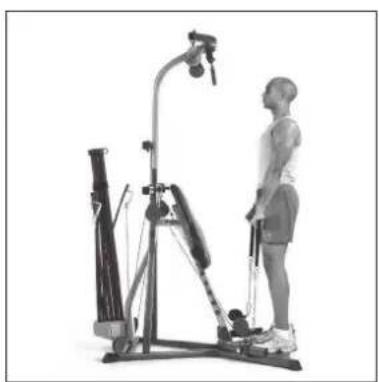
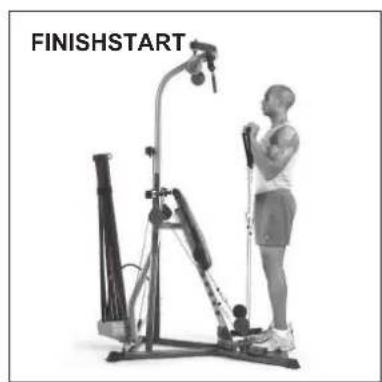
Accessory:
Hand Grips
Pulleys:
Squat Pulley Frame - with squat straps
Before You Begin:
Remove Seat and Leg Extension
Key Points
- Keep elbows at sides.
- Keep wrists straight.
- Keep trunk muscles tight and maintain a very slight arch in lower back.
ARM EXERCISES
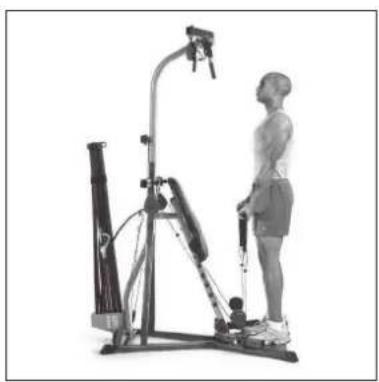
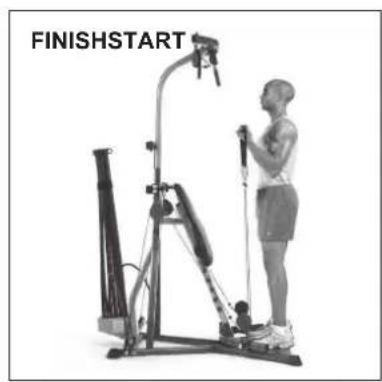
Barbell Biceps Curl - Elbow Extension
Muscles worked:
Biceps
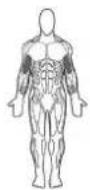
Position:
Standing - facing machine
Accessory:
Hand Grips or optional Squat Bar with squat straps
Pulleys:
Squat Pulley Frame
Before You Begin:
Remove Seat and Leg Extension
Key Points
- Keep elbows at sides.
- Keep wrists straight.
- Keep trunk muscles tight and maintain a very slight arch in lower back.
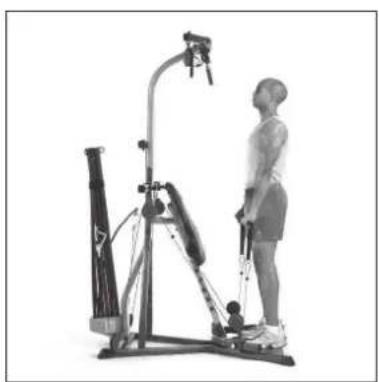
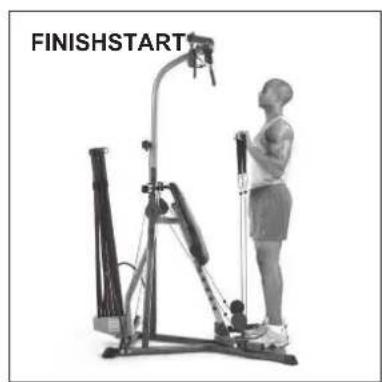
Reverse Barbell Biceps Curl - Elbow Extension
Muscles worked:
Biceps

Position:
Standing - facing machine
Accessory:
Hand Grips or optional Squat Bar with squat straps
Pulleys:
Squat Pulley Frame
Before You Begin:
Remove Seat and Leg Extension
Key Points
- Keep elbows at sides.
- Keep wrists straight.
- Keep trunk muscles tight and maintain a very slight arch in lower back.
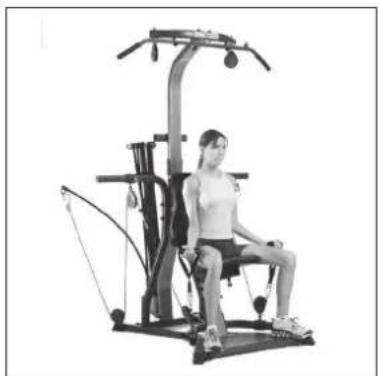
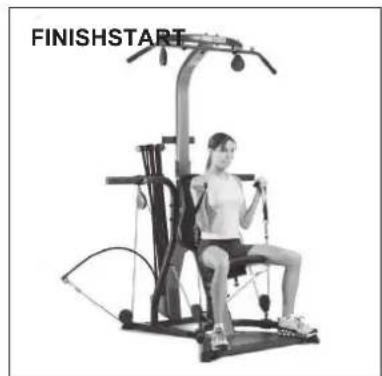
Seated Biceps Curl - Elbow Flexion (in Supination)
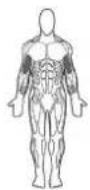
Muscles worked:
Biceps
Position:
Standing - facing outward
Accessory:
Hand Grips
Pulleys:
Squat Pulley Frame
Before You Begin:
Remove Leg Extension
Key Points
- Do not rock upper body while bending elbow.
- Keep wrists straight.
- Keep chest lifted, trunk muscles tight and maintain a very slight arch in lower back.
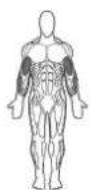
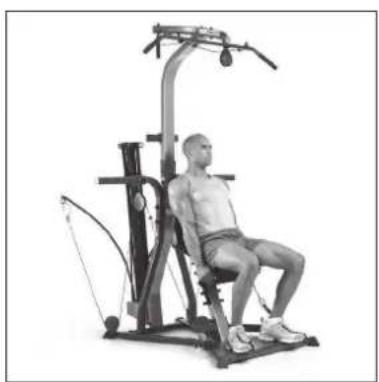
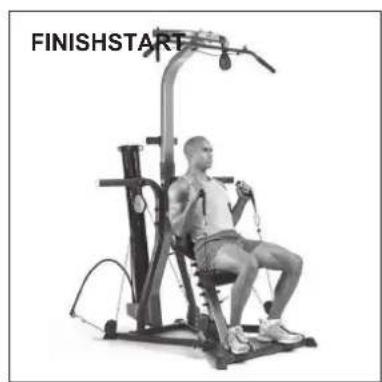
Seated Biceps Hammer Curl - Elbow Flexion
Muscles worked:
Biceps muscles and brachioradialis.
Position:
Seated - facing outward
Accessory:
Hand Grips in "Hammer Grip"
Pulleys:
Squat Pulley Frame
Before You Begin:
Remove Leg Extension
Key Points
- Do not rock upper body while bending elbow.
- Keep wrists straight.
- Keep chest lifted, trunk muscles tight and maintain a very slight arch in lower back.
ARM EXERCISES
Arm Opposition Push-Pull
Muscles worked:
Biceps; Brachialis; Brachioradialis
Position:
Standing - facing outward
Accessory:
Hand Grips
Pulleys:
Lat Cross Bar and Squat Pulley Frame
Leg Extension:
Removed
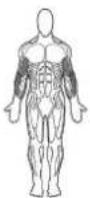
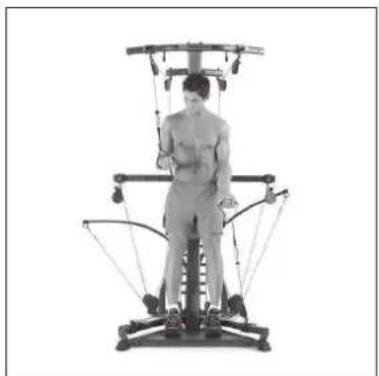
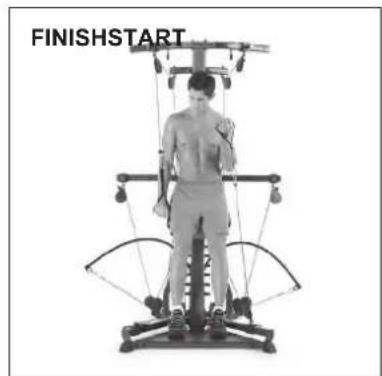
Key Points
- Lift your chest and keep your knees slightly bent and feet on Standing Platform.
- For this exercise, one Hand Grip is attached to a Lat Cable and one Hand Grip is attached to a Squat Cable. Alternate sides to build muscle evenly.
- Keep your upper body motionless, elbows at your sides and your wrists straight.
- Keep your trunk muscles tight and maintain a slight arch in lower back.
Upper Body Opposition Push-Pull
Muscles worked:
Middle Deltoids; Supraspinatus; Trapezius; Biceps; Abs
Position:
Standing - facing outward
Accessory:
Hand Grips
Pulleys:
Lat Cross Bar and Center Cross Bar
Before You Begin:
Remove Seat and Leg Extension
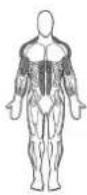
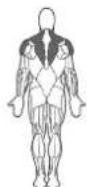
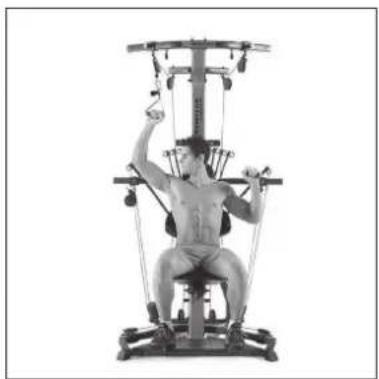
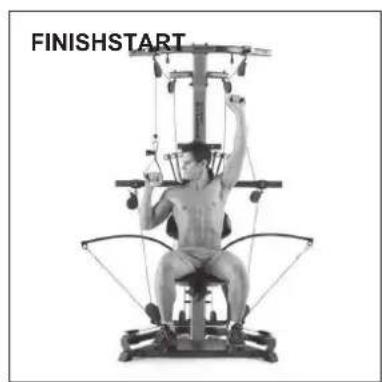
Key Points
- Lift your chest and keep your knees bent and feet on Standing Platform.
- For this exercise, one Hand Grip is attached to a Lat Cable and one Hand Grip is attached to a Rod Cable. Alternate sides to build muscle evenly.
- Keep your upper body motionless, elbows at your sides and your wrists straight.
- Keep your trunk muscles tight and maintain a slight arch in lower back.
Wrist Extension
Muscles worked:
Back and top parts of forearms.
Position:
Standing - facing machine
Accessory:
Hand Grips
Pulleys:
Squat Pulley Frame
Leg Extension:
Remove Seat and Leg Extension
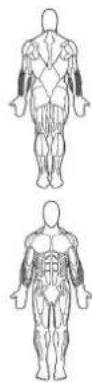
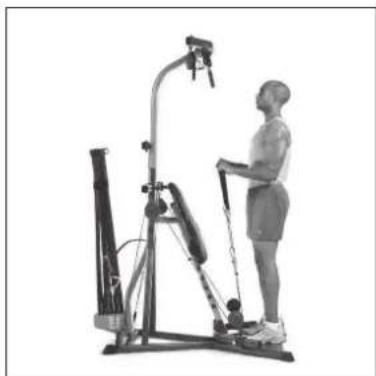
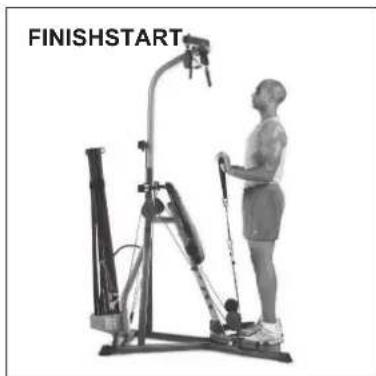
Key Points
- Move slowly and keep tension in back of forearms at all times.
- Perform this exercise one arm at a time to make it easier to focus and isolate the back of forearms, or perform it with both arms simultaneously to save time.
Wrist Curl - with Wrist Flexion
Muscles worked:
Front part of forearms. Also increases the strength of grip and isometrically challenges biceps.
Position:
Standing - facing machine
Accessory:
Hand Grips
Pulleys:
Squat Pulley Frame Removed
Before You Begin:
Remove Seat and Leg Extension
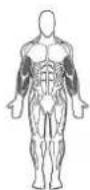
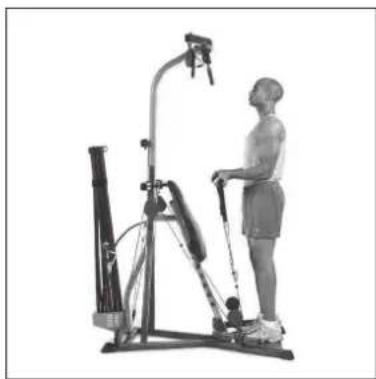
Key Points
- Move slowly and keep tension in front of forearm at all times.
- Do not increase or decrease bend in arms, perform the entire motion at wrist.
- Do not rock body. Keep chest lifted, abs tight and maintain a slight arch in lower back.
ABDOMINAL EXERCISES
Trunk Rotation
Muscles worked:
Most of trunk muscles. Note: rotation is limited in the spine and should be performed with minimal resistance, in proper alignment.
Position:
Seated, facing outward left or right
Accessory:
Hand Grips
Pulleys:
Center Cross Bar - standard position
Before You Begin:
Remove Leg Extension
Key Points

Failure to perform this exercise correctly could result in injury. Use only low weight rods.
- Keep chest lifted and maintain good spinal alignment with a slight arch in lower back.
- Keep hands centered in front of middle of chest and shoulderblades pinched together. Make sure all of motion occurs in torso.
- Move only as far as muscles will take you and eliminate uncontrolled momentum.
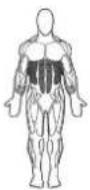
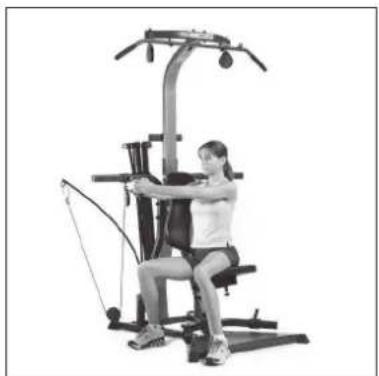
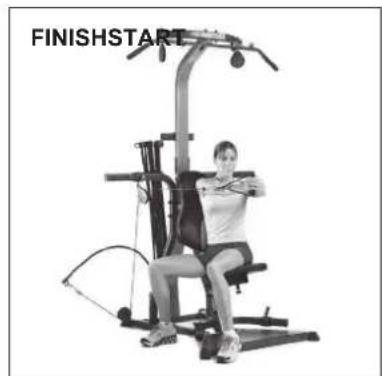
Seated (Resisted) Oblique Abdominal Crunch
Muscles worked:
External obliques on resistance side and internal obliques on opposite side.
Position:
Seated - facing outward
Accessory:
Abdominal Crunch Shoulder Harness
Pulleys:
Abdominal bar
Before You Begin:
Remove Leg Extension
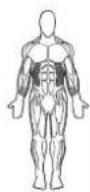
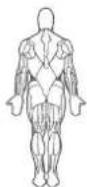
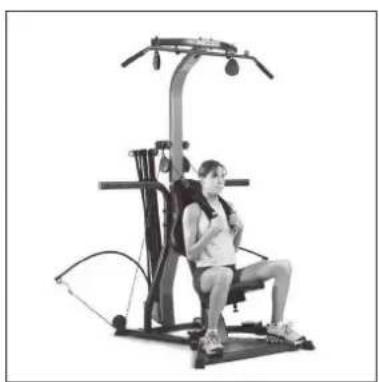
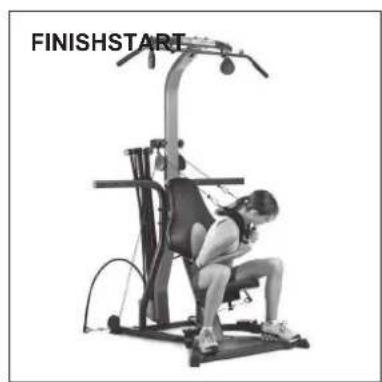
Key Points
- Allow exhalation up and inhalation down, don't exaggerate it.
- Do not lift head/chin. head should follow rib motion, not lead, allowing you to maintain normal neck posture.
- Tighten abs throughout range of motion. Do not let abs relax until set is over.
- MOVING SLOWLY to eliminate momentum is critical.
Seated (Resisted) Abdominal Crunch - Spinal Flexion
Muscles worked:
Abdominal area including upper and lower front abs (rectus abdominus) and side abs (obliques).
Position:
Seated - facing outward
Accessory:
Abdominal Crunch Shoulder Harness
Pulleys:
Abdominal bar
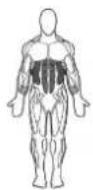
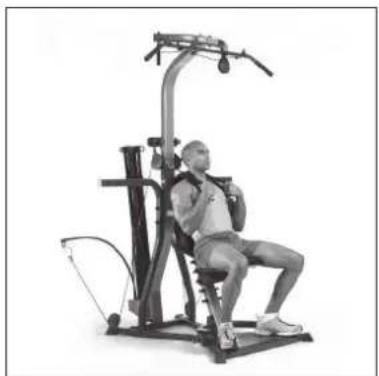
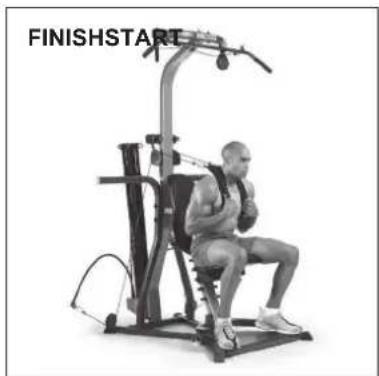
Before You Begin:
Remove Leg Extension
Key Points
- Allow exhalation up and inhalation down, but don't exaggerate it.
- Do not lift head/chin. Your head should follow rib motion, not lead, allowing you to maintain normal neck posture.
- Tighten abs throughout range of motion. Do not let abs relax until set is over.
- MOVING SLOWLY to eliminate momentum is critical.
Leg Extension
Muscles worked:
All muscles on front of upper thigh (quadiceps muscle group).
Position:
Seated - facing outward
Accessory:
Leg Extension
Pulleys:
Squat Pulley Frame
Before You Begin:
Adjust seat height
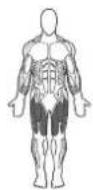
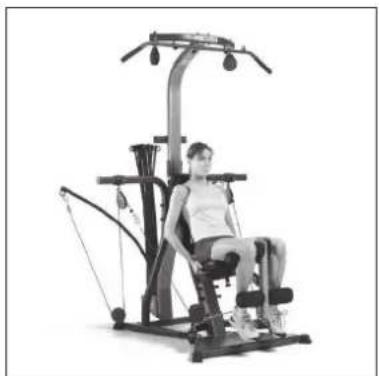
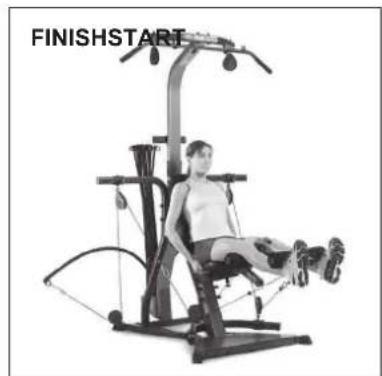
Key Points
- Use slow controlled motion. Do not "kick" into extension.
- Do not let knees rotate out during exercise. Keep kneecaps pointing up and forward.
Squat
Muscles worked:
All muscles of legs and buttocks (gluteus maximus).
Position:
Standing - facing outward
Accessory:
Handgrips or optional Squat Bar with squat straps
Pulleys:
Squat Pulley Frame
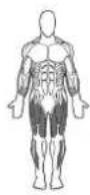
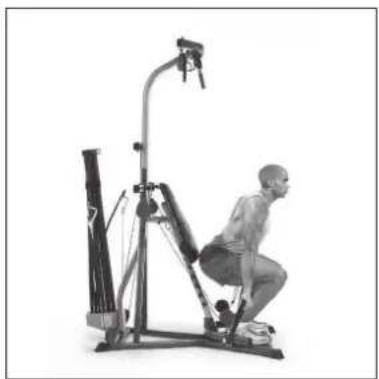
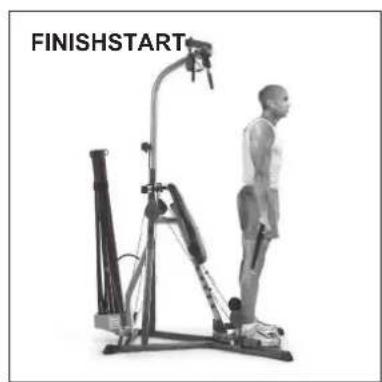
Before You Begin:
Remove Seat and Leg Extension
Key Points
- Make sure you do not bend waist or lower back.
- Keep abs tight throughout entire exercise.
- Keep knees pointed straight out in front of you.
- Never step off platform while under resistance.
Standing Hip Extension - Knee Bent
Muscles worked:
Buttocks area (gluteus maximus).
Position:
Standing - facing machine
Accessory:
Hand Grip on arch
Pulleys:
Squat Pulley Frame
Before You Begin:
Remove Seat and Leg Extension
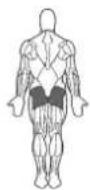
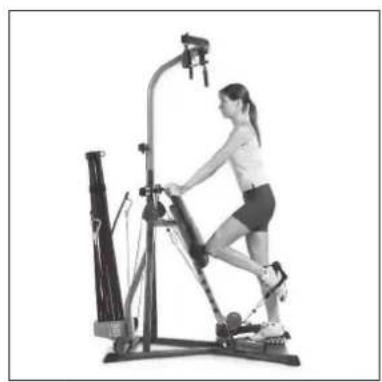
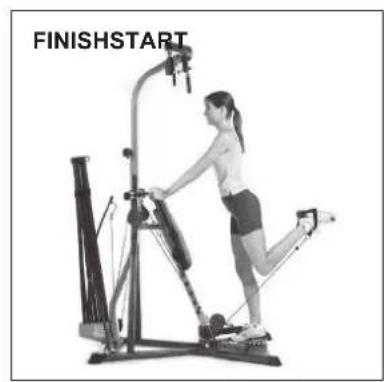
Key Points
- Make sure all motion occurs at hip, NOT waist or lower back.
- Keep abs tight throughout entire exercise.
- Maintain exactly the same bend in the knee of moving leg throughout entire exercise.
Standing Hip Extension - Knee Extended
Muscles worked:
Buttocks area (gluteus maximus).
Position:
Standing - facing machine
Accessory:
Hand Grip on arch
Pulleys:
Squat Pulley Frame
Before You Begin:
Remove Seat and Leg Extension
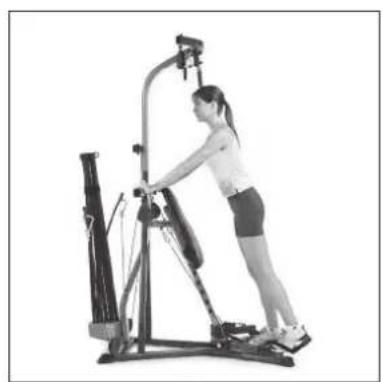

Key Points
- Make sure all motion occurs at hip, NOT waist or lower back.
- Keep abs tight throughout entire exercise.
- Keep leg in same position - slightly away from body's midline through entire exercise.
Leg Kickback - Hip and Knee Extension
Muscles worked:
Buttocks area (gluteus maximus).
Position:
Standing - facing machine
Accessory:
Hand Grip on arch
Pulleys:
Squat Pulley Frame
Before You Begin:
Remove Seat and Leg Extension
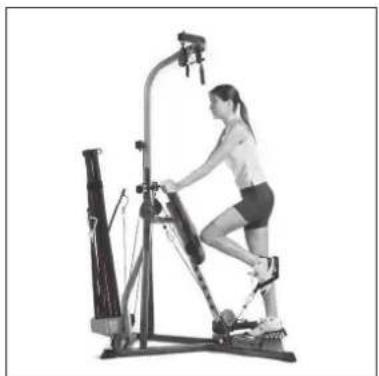
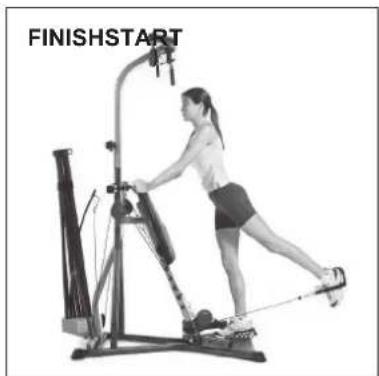
Key Points:
- Do not allow waist, lower back or supportive hip to move.
- Keep abs tight throughout entire exercise.
Hip Flexion - Knee Flexion
Muscles worked:
Muscles on front of hips (iliopsoas, rectus femoris).
Position:
Standing to the left or right of machine facing away
Accessory:
Hand Grip on ankle
Pulleys:
Squat Pulley Frame
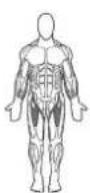
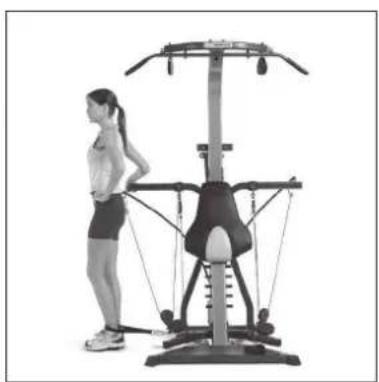
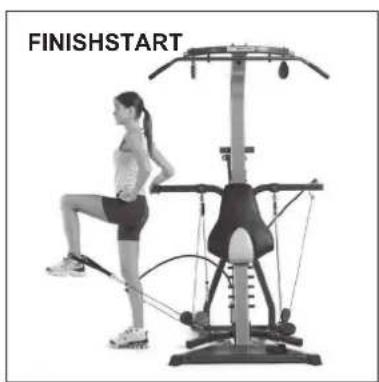
Before You Begin:
Remove Seat and Leg Extension
Key Points:
- Make sure all motion occurs at hip, NOT waist or lower back.
- Keep chest lifted and trunk muscles tight throughout entire exercise.
- Allow lower leg to hang in the direction of cable at all times.
Dead Lift
Muscles worked:
Buttocks area (gluteus maximus).
Position:
Standing - facing outward
Accessory:
Handgrips or optional Squat Bar
Pulleys:
Squat Pulley Frame
Before You Begin:
Remove Seat and Leg Extension
Key Points:
Make sure to keep back flat - do not arch.
- Lift with legs, not your back or arms.
- Keep knees bent and head up.

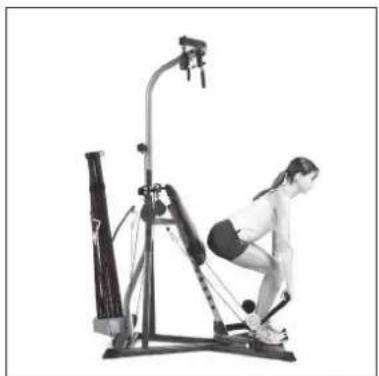
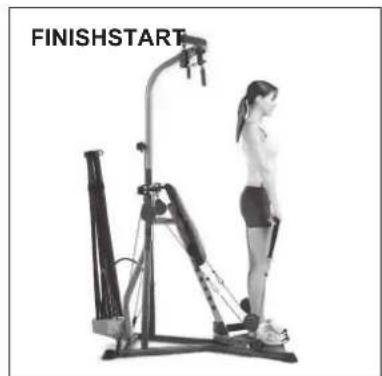
Stiff Leg Dead Lift
Muscles worked:
Buttocks area (gluteus maximus) and hamstrings.
Position:
Standing - facing outward
Accessory:
Handgrips or optional Squat Bar
Pulleys:
Squat Pulley Frame
Before You Begin:
Remove Seat and Leg Extension
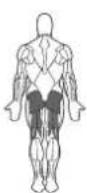
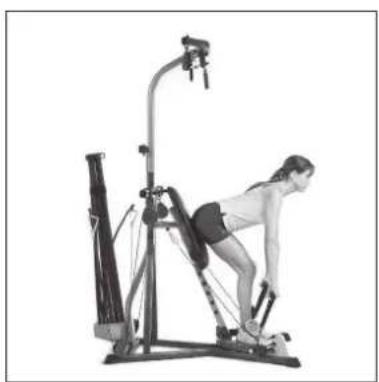
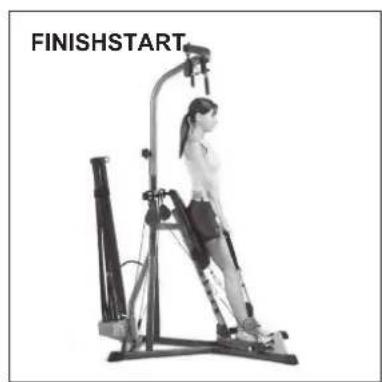
Key Points:
- Make sure to keep your back flat - do not arch.
- Your motion is entirely at the hips NOT the waist.
- Keep knees slightly bent and head up.
- Use light weight.
Standing Hip Adduction
Muscles worked:
Buttocks area (gluteus maximus).
Position:
Standing - facing machine
Accessory:
Hand Grip on arch
Pulleys:
Squat Pulley Frame
Before You Begin:
Remove Seat and Leg Extension
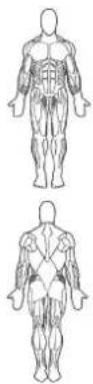
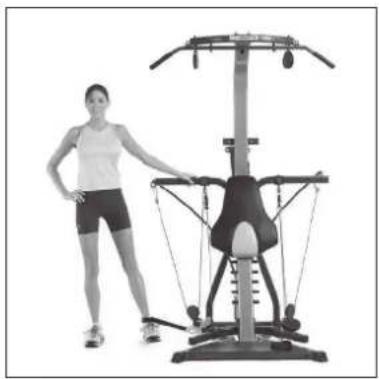
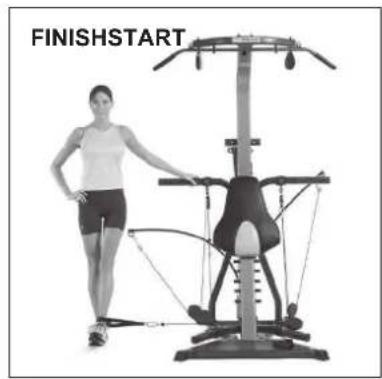
Key Points:
- Do not allow waist, lower back or supportive hip to move.
- Keep abs tight throughout entire exercise.
Standing Hip Adduction
Muscles worked:
Muscles on front of hips (iliopsoas, rectus femoris).
Position:
Standing to the left or right of machine facing away
Accessory:
Hand Grip on ankle
Pulleys:
Squat Pulley Frame
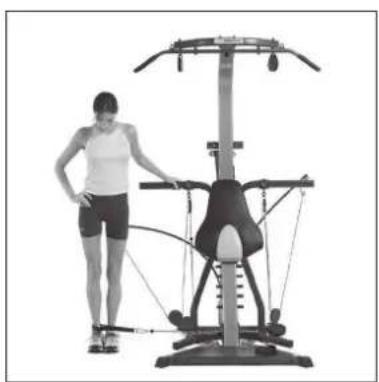
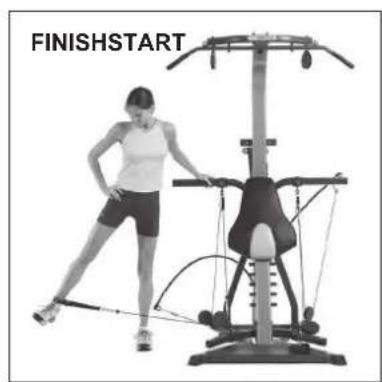
Before You Begin:
Remove Seat and Leg Extension
Key Points:
- Make sure all motion occurs at hip, NOT waist or lower back.
- Keep chest lifted and trunk muscles tight throughout entire exercise.
- Allow lower leg to hang in the direction of cable at all times.
Crossover High Rear Deltoid Rows -Ellenbogenbeugung
Zielmuskulatur:
Bizeps-Curls - Ellenbogenbeugung (in Supination)
Zielmuskulatur:
Trizeps
Position:
Hammer-Bizeps-Curls - Ellenbogenbeugung (in Supination)
Zielmuskulatur:
Bizeps; Brachialis; Brachioradialis
Position:
MODELNAAM: BowFlex Xtreme 2 SE
EXTRA WAARSCHUWING - HOME-GYM / STATION
EXTRA WAARSCHUWING - Power Rod
Arm oppositie Push-Pull
Getrainde spieren:
Biceps; Brachialis; Brachioradialis
Positie:
Staand -narr buiten gericht
Accessoire:
Handgrepen
Katrollen:
Lat dwarstang en katrolframe hurken
Leg-extension:
Verwijderd
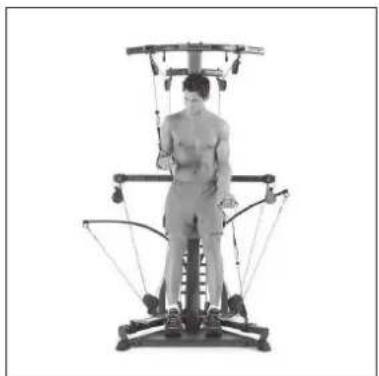
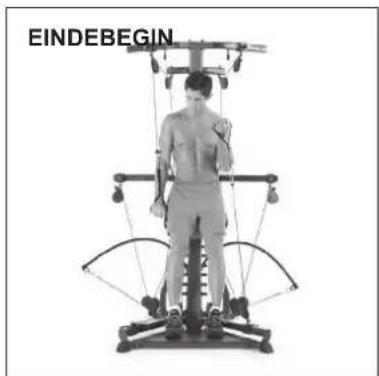
IMPORTANT: LEAVE ALL CABLES COILED AND WRAPPED UNTIL YOUR BOWFLEX XTREMETM 2 SE HOME GYM IS FULLY ASSEMBLED.
DESPIECES
Zone fessier (muscle fessier).
Position :
Zone fessier (muscle fessier).
Position :
Zone fessier (muscle fessier).
Position :
Zone fessier (muscle fessier).
Position :
Zone fessier - (muscle fessier) et tendons.
Position :
| Power Rod® Resistance | 95 kg / 210 lbs. |
| Power Rod® Upgradability | 141 kg / 310 lbs. |
Tool: 3/16" Hex Wrench
18c. Cable and Pulley Routing – Connect Rod Cables through Left (3) Floating and Lat Tower Pulleys
Inspect your machine to ensure that all fasteners are tight and components are properly assembled. Review all warnings affixed to machine.
Be sure to record the serial number in the field provided at the front of the Owner's Manual. Refer to the Safety Warning Labels and Serial Number section of the Owner's Manual.

You may use one rod or several rods in combination, to create your desired resistance level.
El fiscoculturismo requires concentration, dedication, and encouragement to be successful. Entrenate each group of musculos after falling.
Día 1

m = 311

m = 311

M

m = 311 ;

N


C


F

QTS

}

m = 311

F