R200AG - Electric bike BOHLT - Free user manual and instructions
Find the device manual for free R200AG BOHLT in PDF.
User questions about R200AG BOHLT
0 question about this device. Answer the ones you know or ask your own.
Ask a new question about this device
Download the instructions for your Electric bike in PDF format for free! Find your manual R200AG - BOHLT and take your electronic device back in hand. On this page are published all the documents necessary for the use of your device. R200AG by BOHLT.
USER MANUAL R200AG BOHLT
natural_image
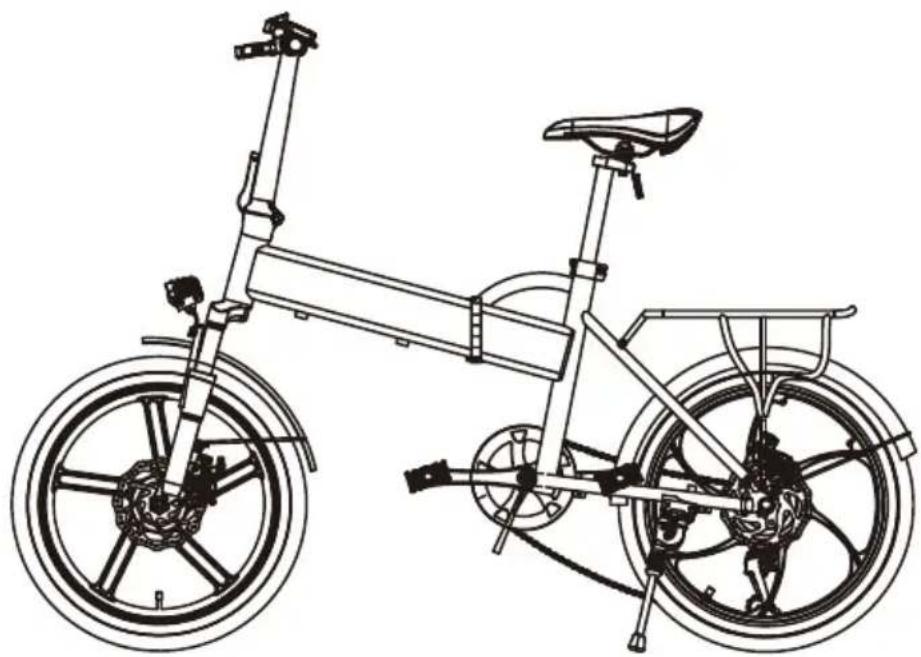
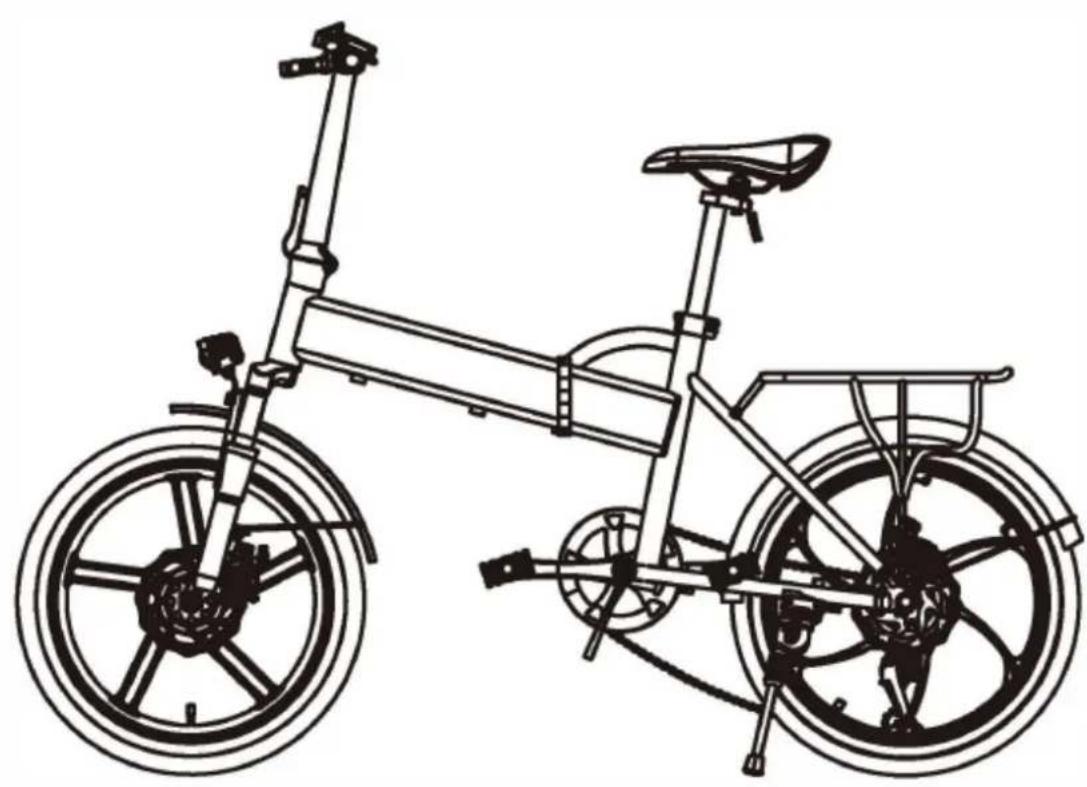
Line drawing of a fully open bicycle with visible wheels and seat (no text or symbols)natural_image
Line drawing of a modern bicycle with extended wings and wheels (no text or symbols)
natural_image
Simple line drawing of a rectangular device connected to a power outlet (no text or symbols)Adapter
Handleiding
natural_image
Technical line drawing of a mechanical assembly with no visible text or symbolsnatural_image
Technical line drawing of a mechanical assembly with gears and linkages (no text or symbols)natural_image
Technical line drawing of a mechanical linkage or support structure with no visible text or symbols3) Vergrendeling op de correcte manier.
natural_image
Technical line drawing of a mechanical assembly with no visible text or symbols4) Vergrendeling op de incorrecte manier
natural_image
Technical line drawing of a mechanical clamp or bracket assembly with an arrow indicating rotational motion (no text or symbols present)natural_image
Line drawing of a hand interacting with a mechanical bracket, showing rotational motion (no text or symbols)natural_image
Technical line drawing of a mechanical joint or bracket (no text or symbols)natural_image
Line drawing of a hand adjusting a mechanical bracket (no text or symbols)natural_image
Line drawing of a mechanical clamp or bracket assembly (no text or symbols)natural_image
Technical line drawing of a bicycle suspension system with directional arrows indicating motion (no text or symbols)natural_image
Technical line drawing of a mechanical device with a rotating arm (no text or symbols)natural_image
Technical line drawing of a mechanical assembly with no visible text or symbolsnatural_image
Technical line drawing of a mechanical assembly with rotating components (no text or symbols)natural_image
Technical line drawing of a mechanical assembly with no visible text or symbolsnatural_image
Technical line drawing of a mechanical assembly with no visible text or symbolsnatural_image
Technical line drawing of a mechanical assembly with no visible text or symbolsnatural_image
Technical line drawing of a mechanical component with a cable and connector (no text or symbols)natural_image
Side profile illustration of a person wearing a helmet and harness (no text or symbols)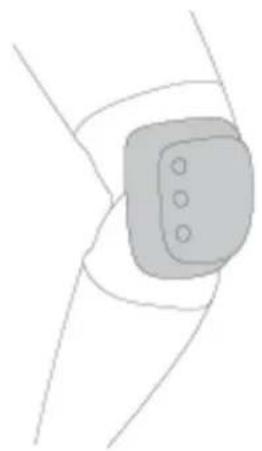
natural_image
Simple line drawing of a wrist joint with a rectangular device and three circular holes (no text or symbols)natural_image
Line drawing of two figures in wheelchairs, one standing and one seated, both wearing helmets (no text or symbols)natural_image
Line drawing of a person riding a bicycle with a helmet and front wheel (no text or symbols)natural_image
Line drawing of a person riding a bicycle with a cross mark indicating no text or symbols on the diagram itselfnatural_image
Line drawing of a person riding a bicycle with a cross mark indicating a step (no text or symbols present)natural_image
Line drawing of a modern folding bicycle with visible wheels and seat (no text or symbols)MANUAL
Read First
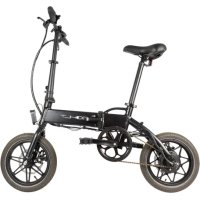
Thank you for choosing The folding electric bike.
Please read this manual carefully before trying this electric bike.
This manual will help you.
Contents
- Product and Accessory 02
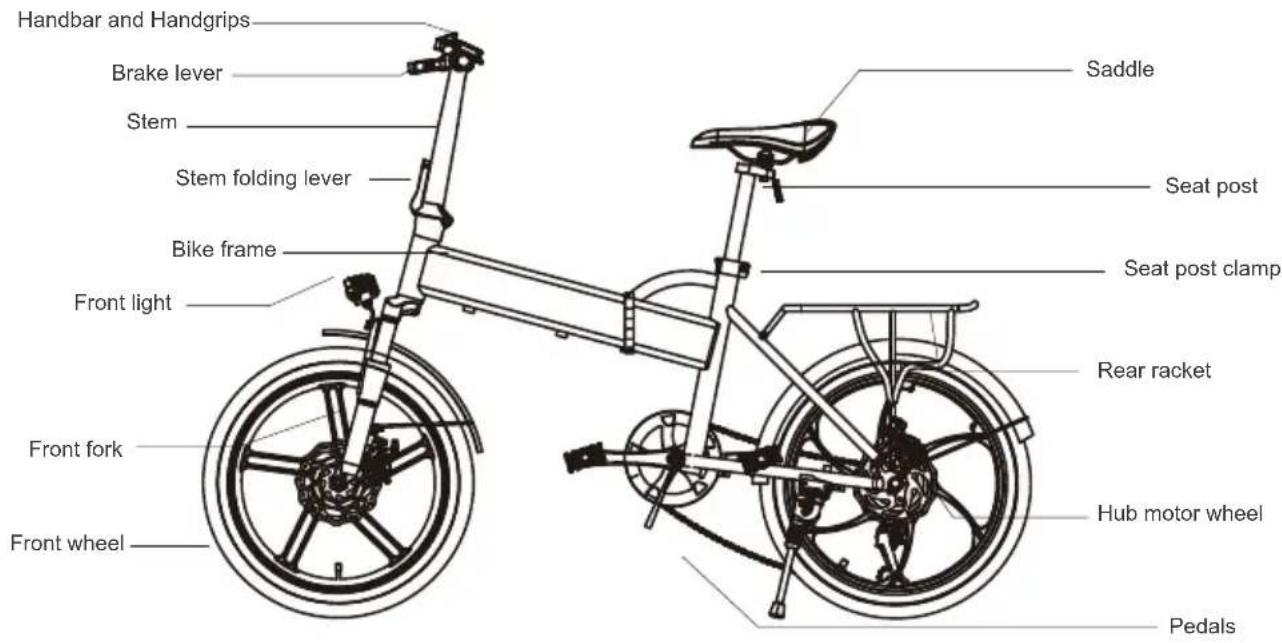
- Main parts instruction 03
- Bike structure and functions 05
- How to charge the bike 11
- Precautions 11
- Folding and carry guide 14
- Warning and Security 15
- Daily maintenance 16
- Parameters 17
- Troubleshooting 18
1. Product and Accessory
natural_image
Line drawing of a fully open bicycle with visible wheels and seat (no text or symbols)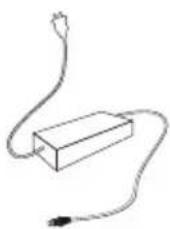
Adaptador
User Manual
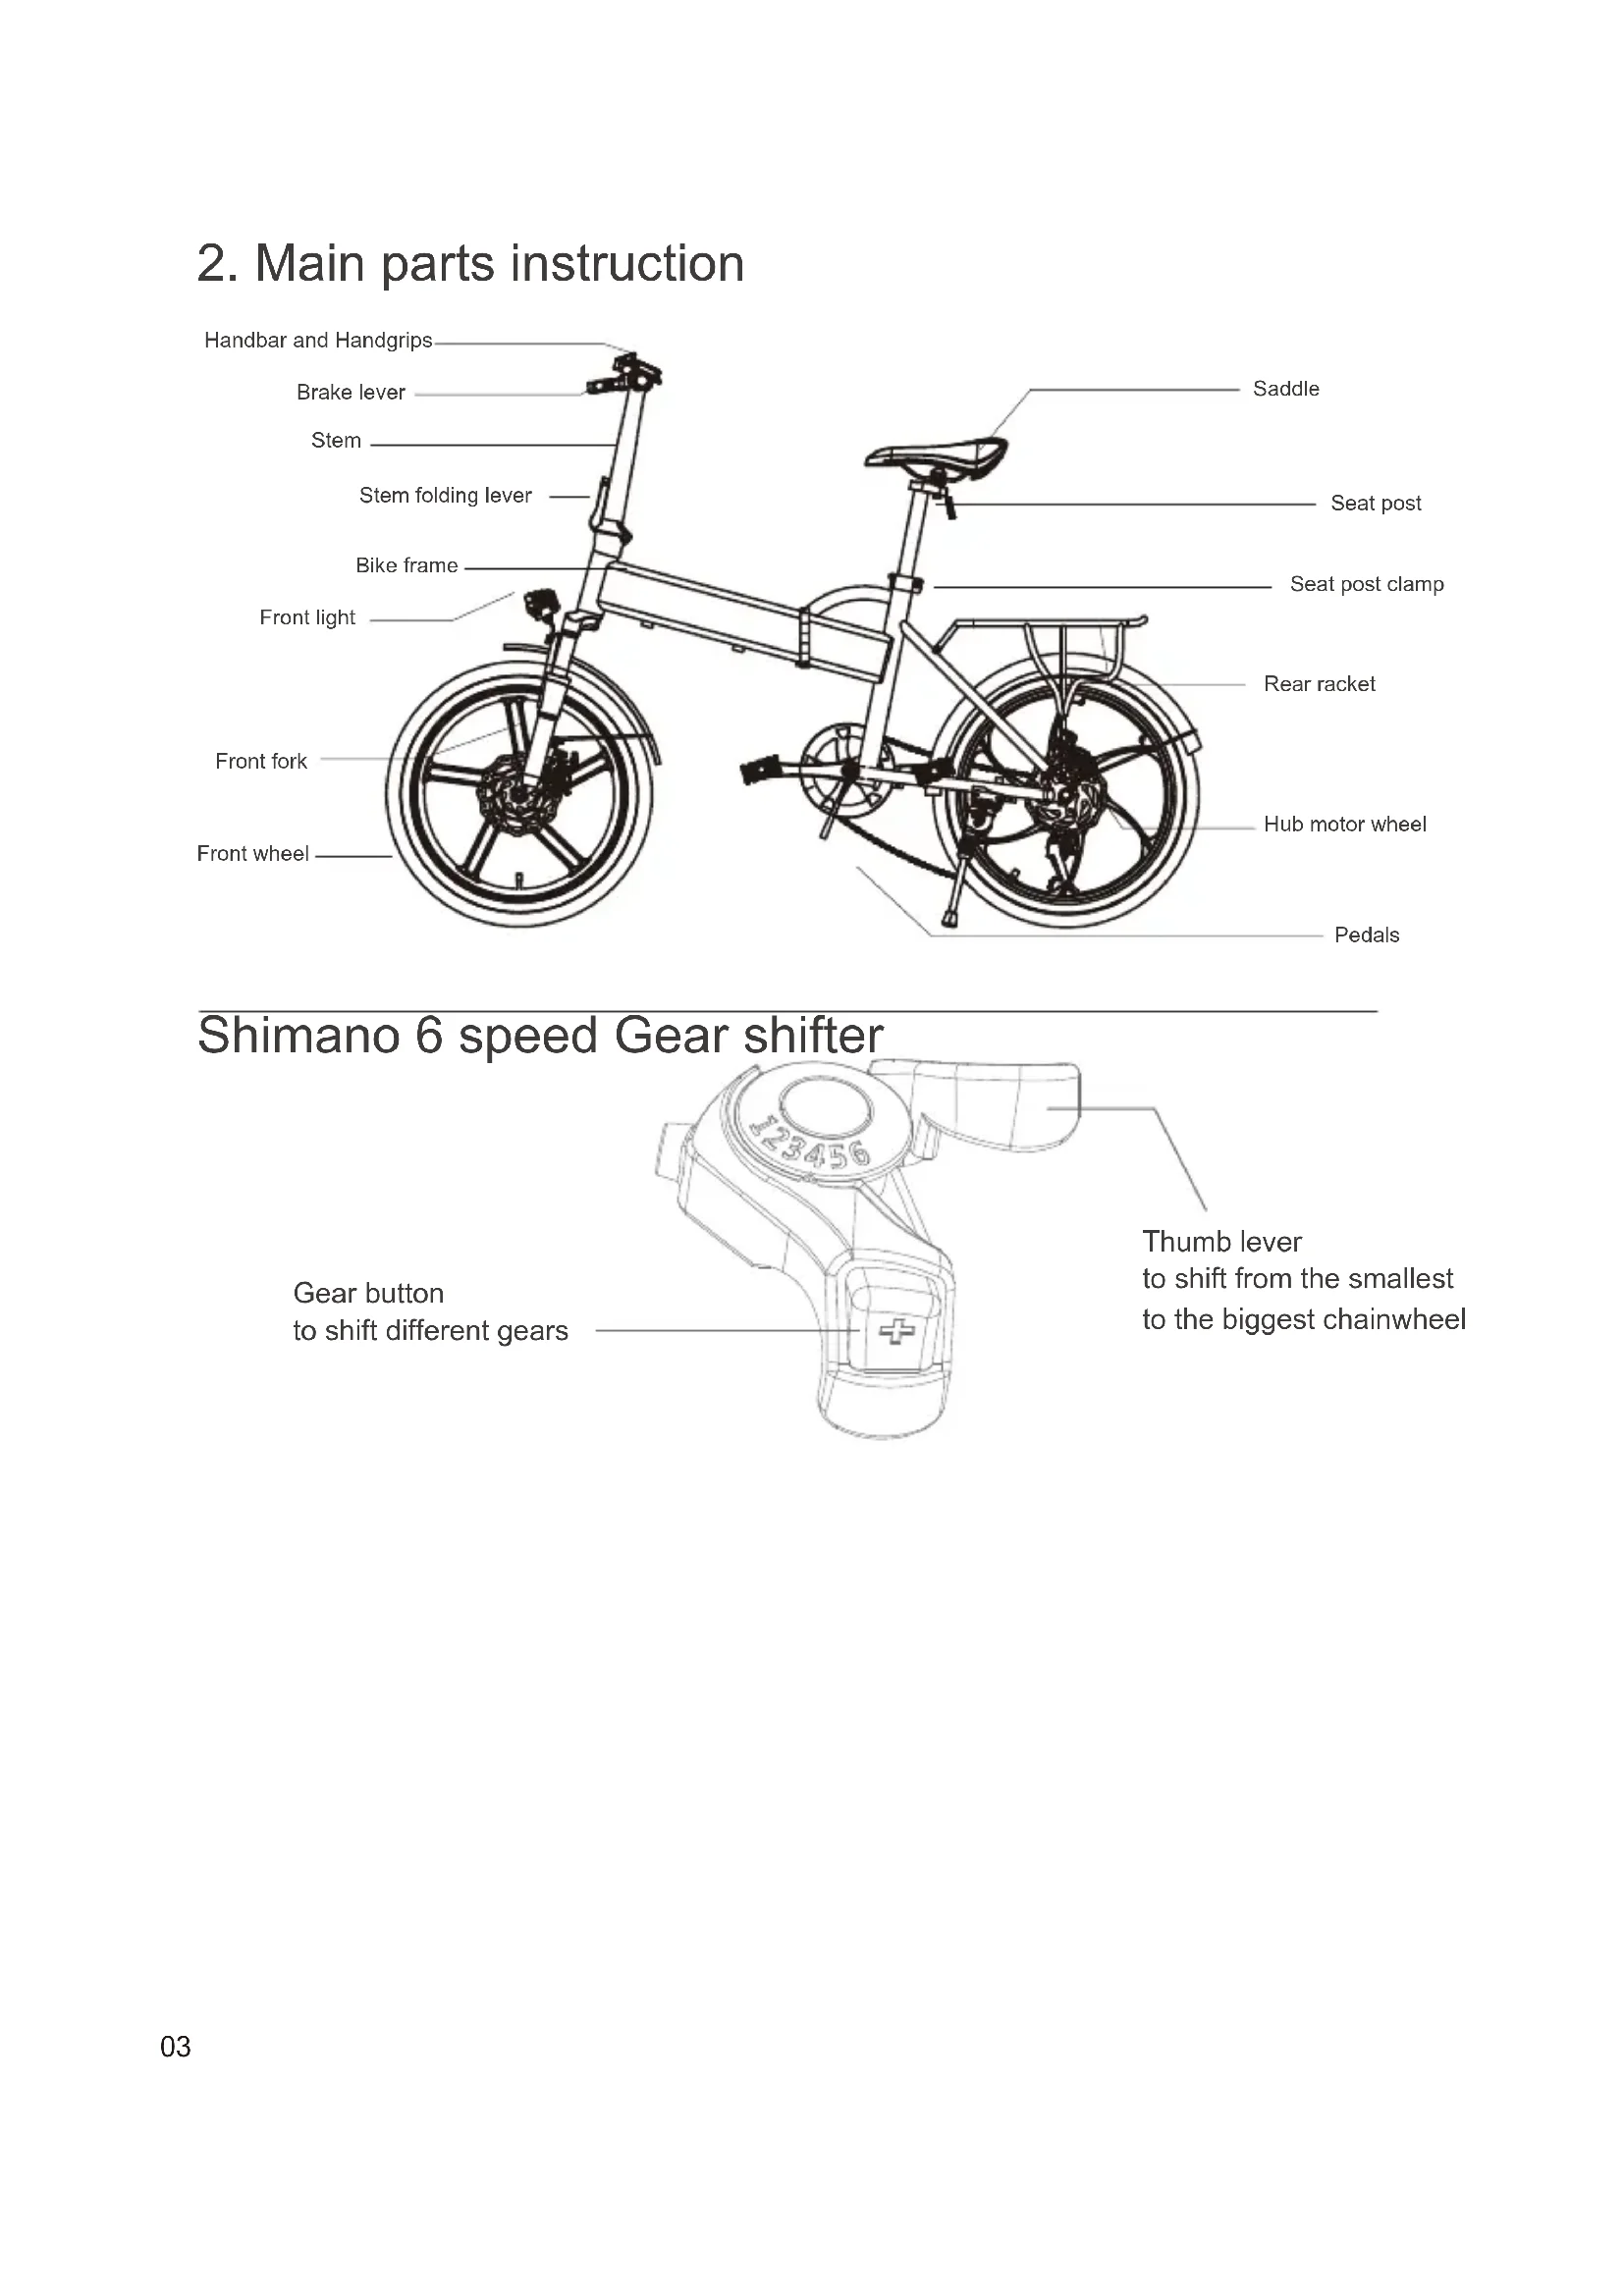
2. Main parts instruction
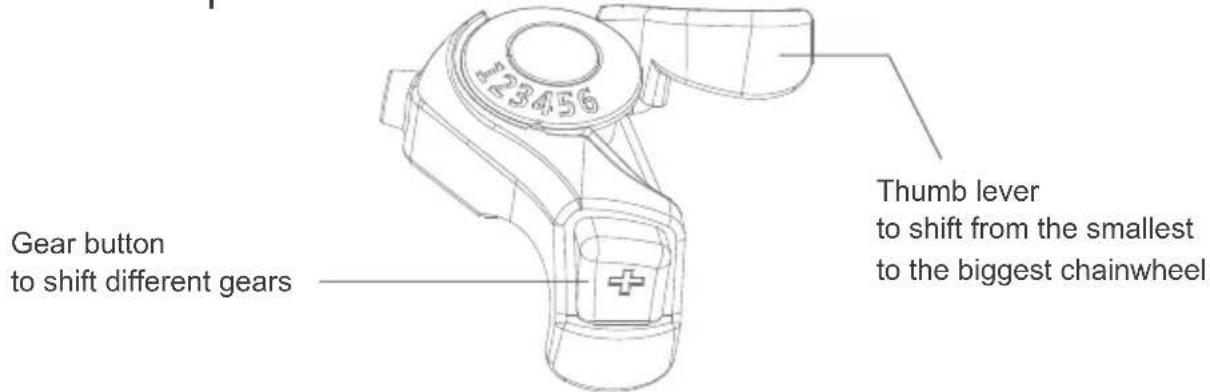
Shimano 6 speed Gear shifter
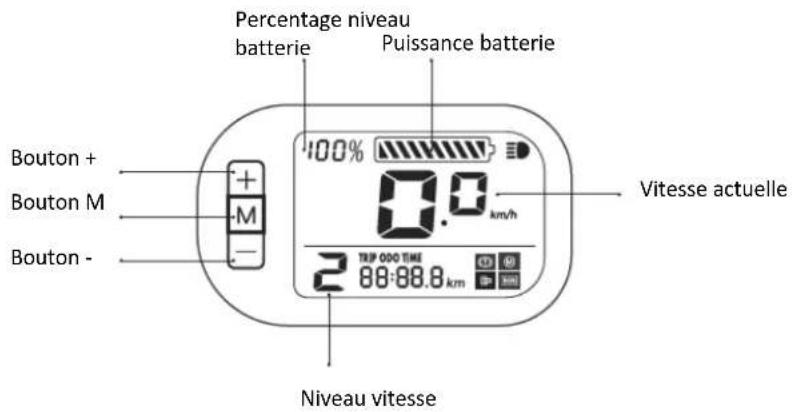
LCD FUNCTION AND USAGE
1.Functional overview
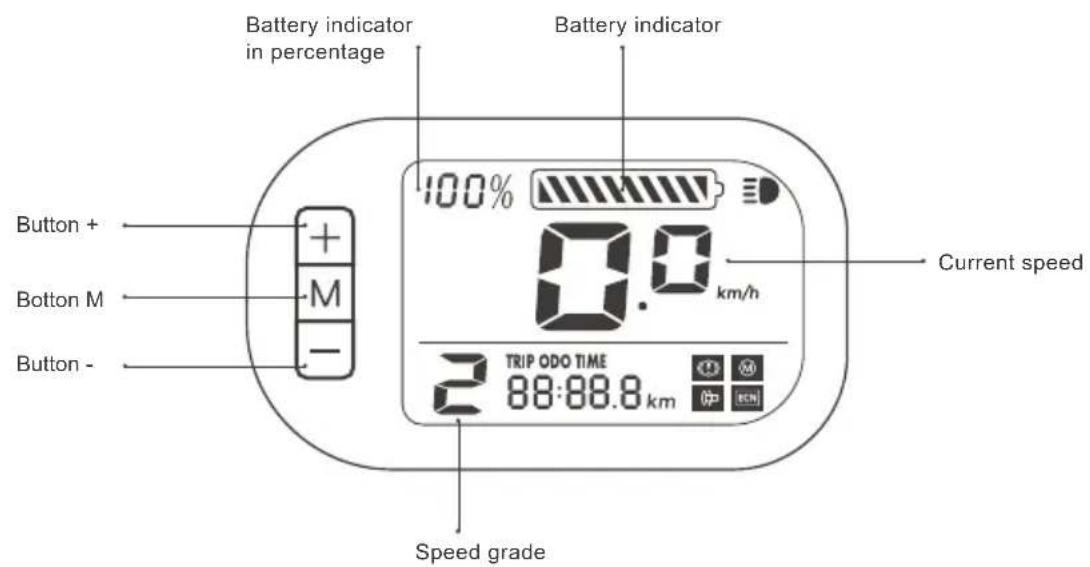
Button instruction:
Button M : Long press 3 seconds to turn on/off power; Short press to shift displaying trip mileage/total mileage/running time
Button + : Long press to turn on/off front light;, Short press to increase speed grade.
Button - : Short press to increase speed grade.
About the gear
Grade 0, pure riding without power support;
Grade 1: low speed, max around 12km/h;
Grade 2: middle speed, max around 18km.h;
3 Grade 3: high speed, max around 25km/h
Icon instruction:
lights up when front light turns on
lights up at braking
Throttle problem indicator
Motor problem indicator
Controller problem indicator
TRIP ODO TIME Shifting display at single trip mileage/total mileage/ riding time 2 while going up slopes.
3. Bike structure and functions
Unfold the bike
natural_image
Technical line drawing of a mechanical assembly with no visible text or symbols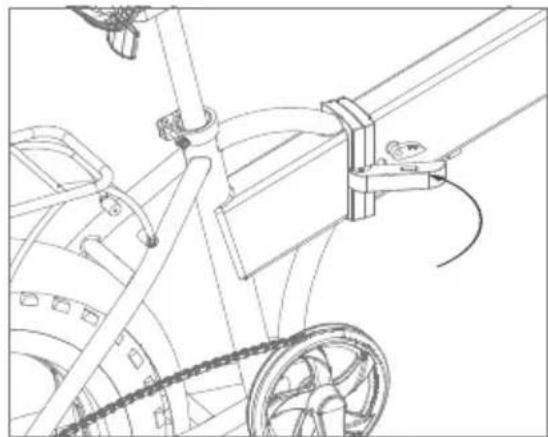
natural_image
Technical line drawing of a mechanical linkage system with pulleys and gears (no text or symbols)- Hold the bike frame and stretch it 2. Close the folding lever and lock it as picture
natural_image
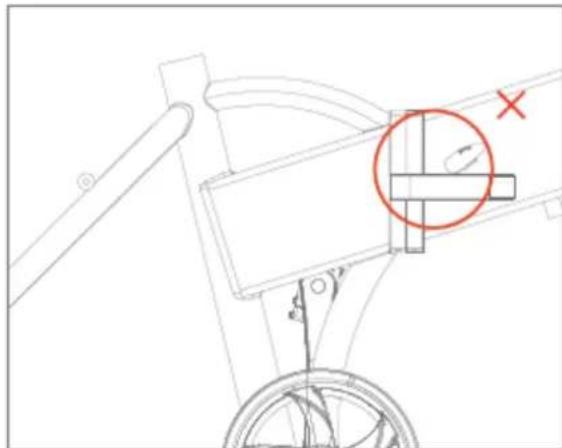
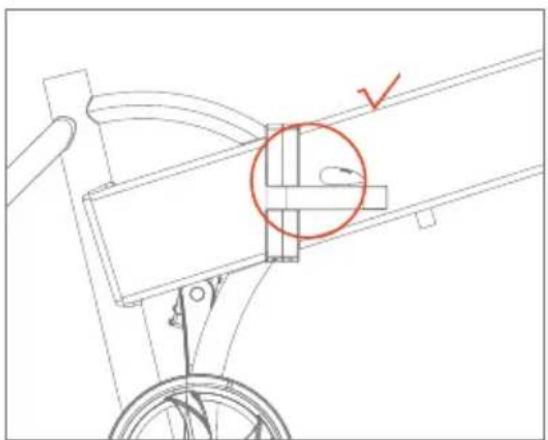
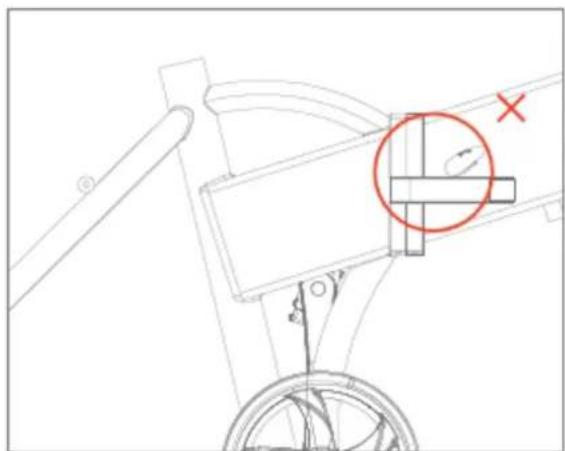
Technical line drawing of a mechanical linkage or support structure with a red circle highlighting a component (no text or symbols present)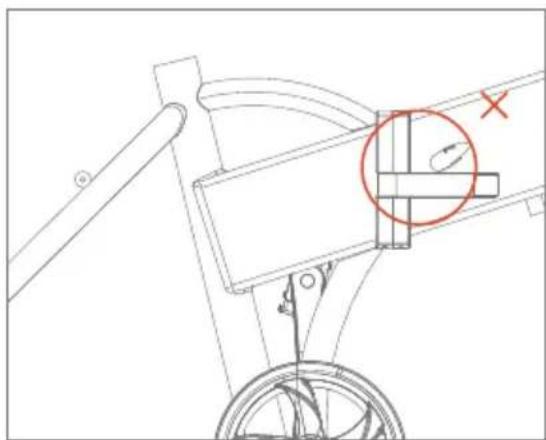
natural_image
Technical line drawing of a mechanical linkage or lever mechanism with no visible text or symbols- Lock well as picture 4. Lock incorrectly as picture
Stretch/Unfold the stem
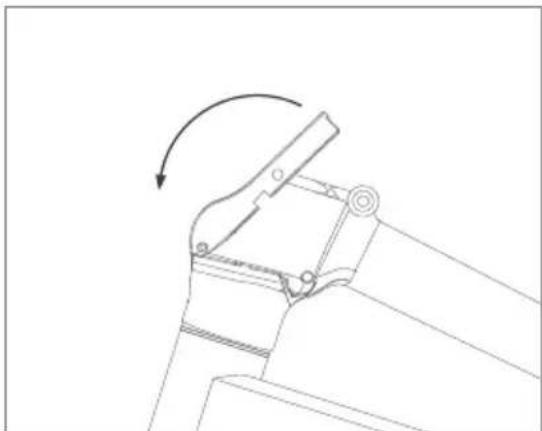
natural_image
Technical line drawing of a mechanical clamp or bracket assembly with an arrow indicating rotational motion (no text or symbols present)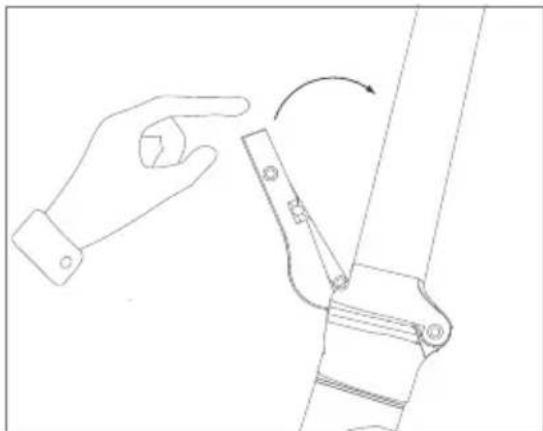
natural_image
Line drawing of a hand interacting with a mechanical lever mechanism (no text or symbols)- Hold the bike frame and straight the stem 2. Lock the stem folder as picture
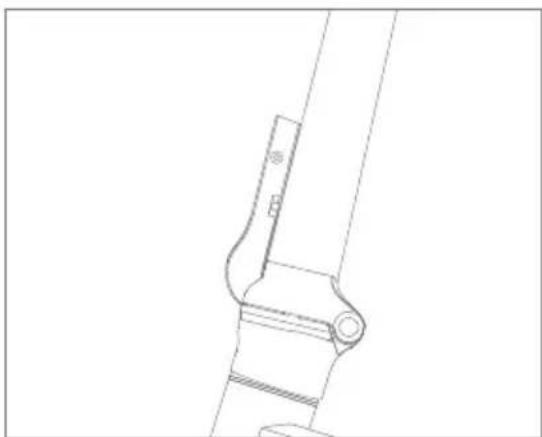
natural_image
Technical line drawing of a mechanical bracket or clamp assembly (no text or symbols)- Shake the stem to make sure the stem locked
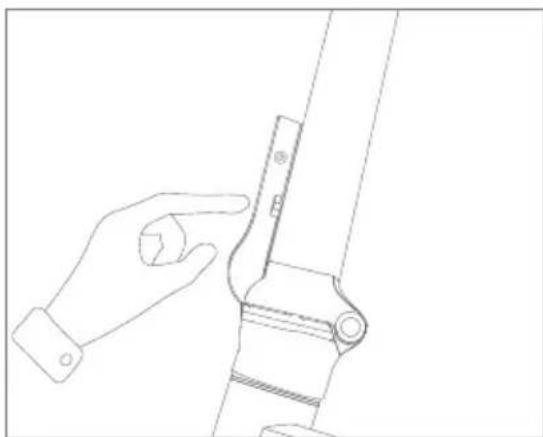
natural_image
Line drawing of a hand adjusting a mechanical bracket (no text or symbols)- Open the stem lock and stem folder as picture
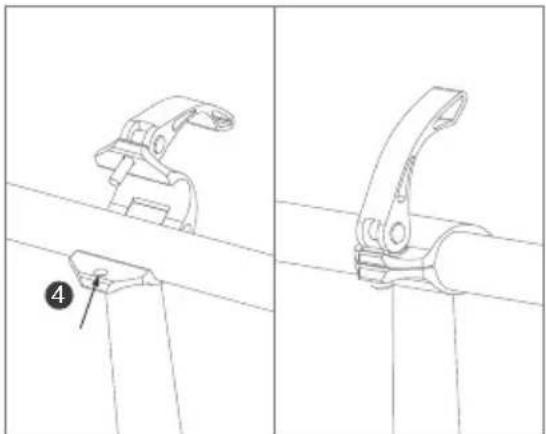
How to assemble the stem folding clamp
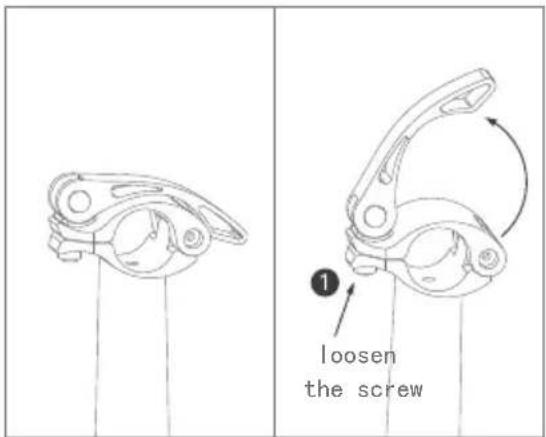
- Open the stem folding clamp as picture and loosen the screw nut ①
natural_image
Technical line drawing of a mechanical clamp or bracket assembly (no text or symbols)- Put handbar into the stem folding clamp, and tighten the screw bolt ③ into ④ as pic
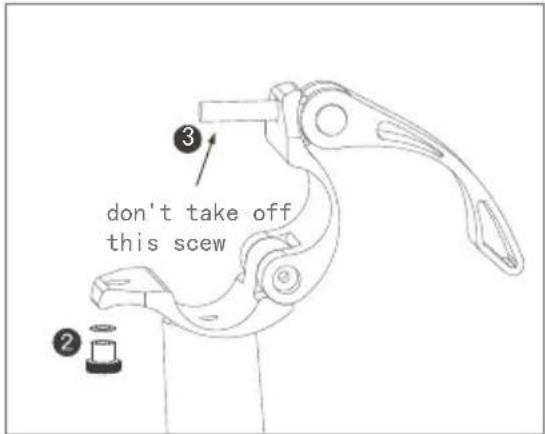
- Put aside of the loosen screw nut and pad ②, pls note: don't take off this screw bolt ③
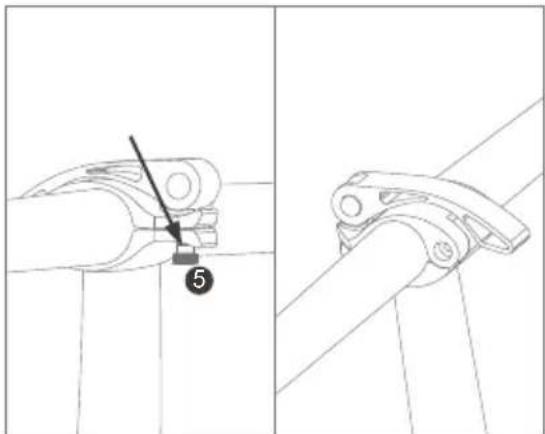
- Tighten the screw nut ⑤ and adjust the handbar and then lock the stem folding clamp
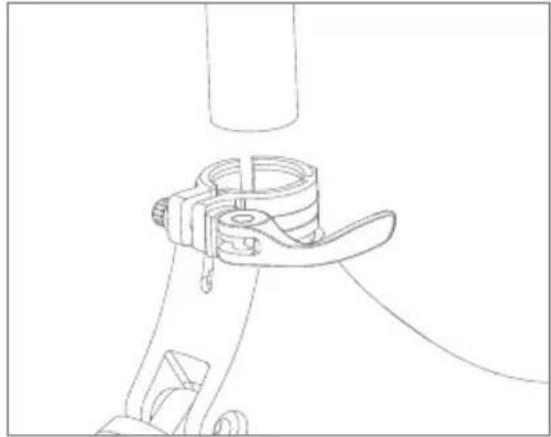
How to assemble the seat post
natural_image
Technical line drawing of a mechanical clamp or bracket assembly (no text or symbols)- Hold the bike and open the seat post clamp as picture
How to assemble the seat post

natural_image
Line drawing of a bicycle seat assembly with directional arrow indicating motion (no text or symbols)- Open the seat post clamp and up/down the saddle as picture
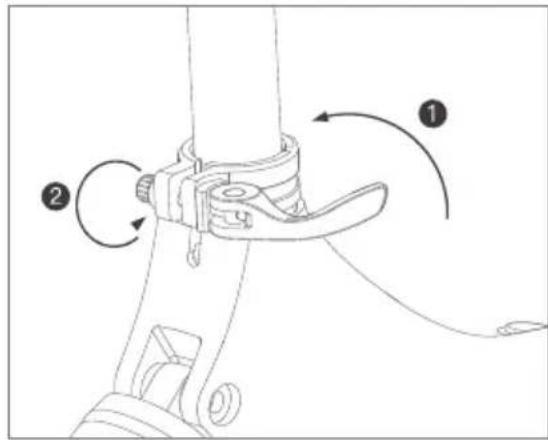
- Plug the seat post and adjust the screw nut ② then close the clamp ① as pic, press down the saddle to check the seat post plugged tightly
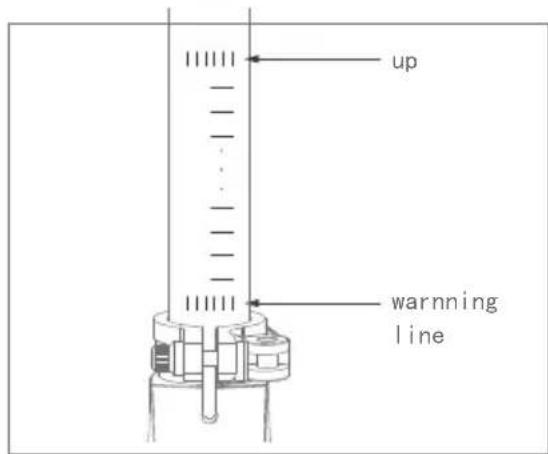
- The saddle cannot exceed the warning line as picture
How to fold/unfold the pedals
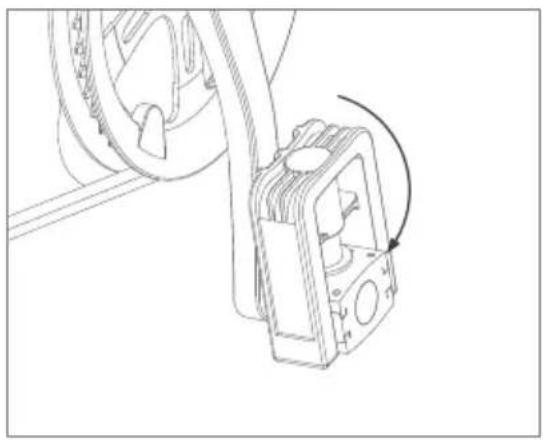
natural_image
Technical line drawing of a mechanical assembly with a rotating component (no text or symbols)- Hold the bike and open down the pedals as picture
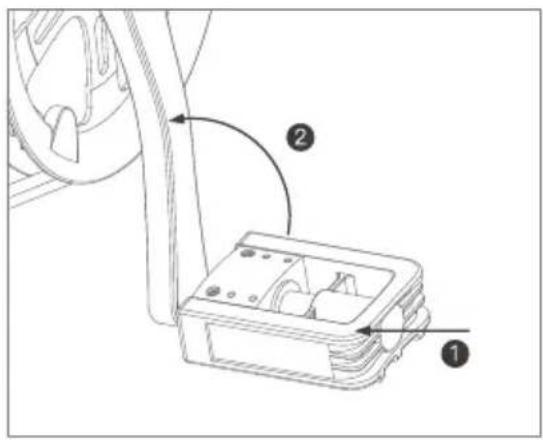
- Hold the bike and push up the pedals as picture
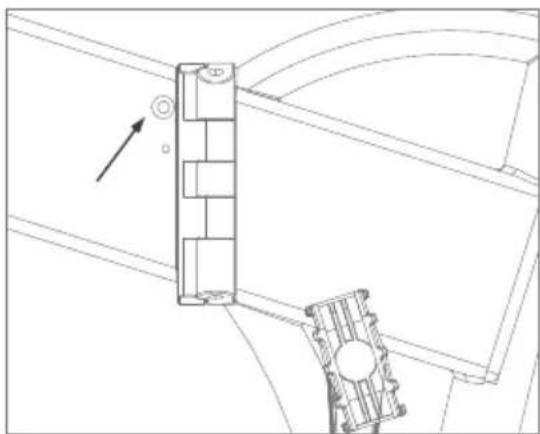
How to check power on status
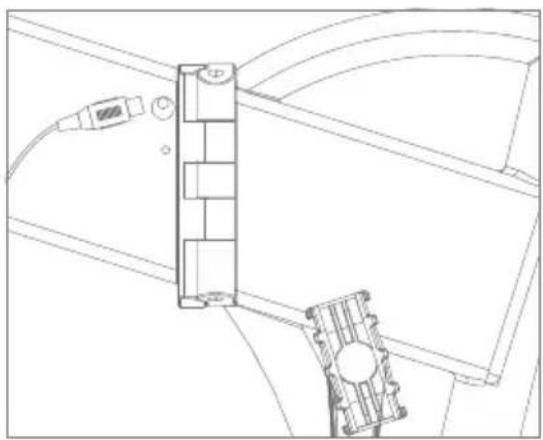
natural_image
Technical line drawing of a mechanical assembly with no visible text or symbols- The charging port is on the left side of bike frame as picture
Long press the button ON/OFF on the meter to power on the bike and check charging is a normal status
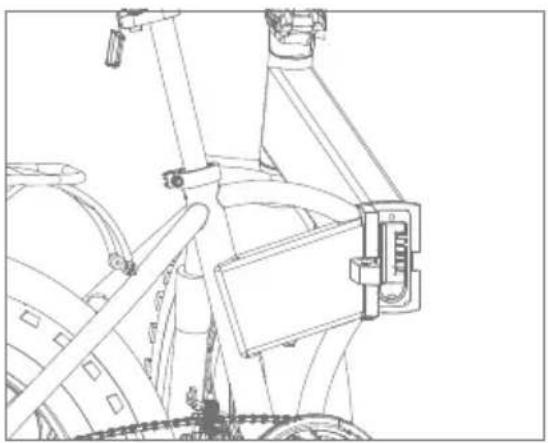
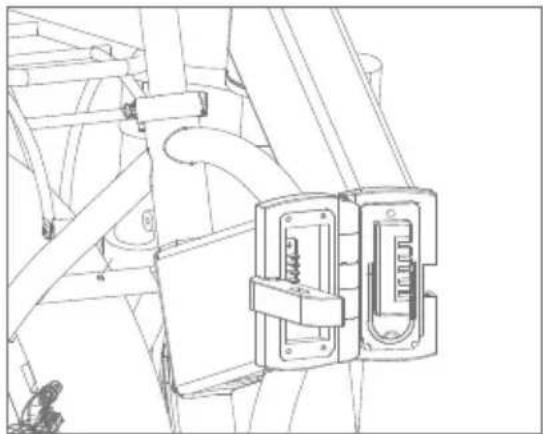
How to remove the battery
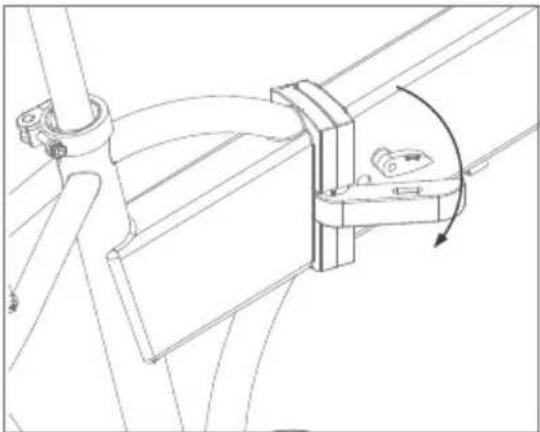
natural_image
Technical line drawing of a mechanical assembly with no visible text or symbols- Power off the bike and unlock the bike frame folding lever
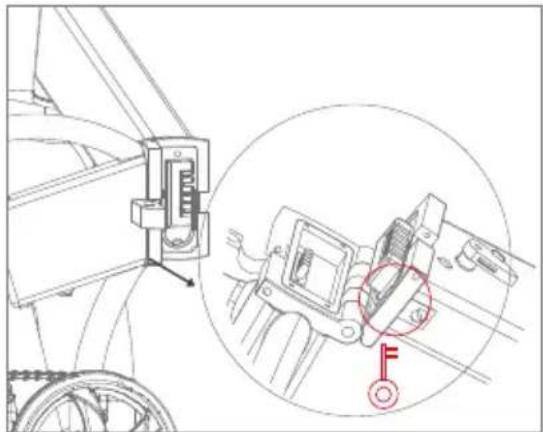
natural_image
Technical line drawing of a mechanical assembly with an inset close-up showing a component detail (no text or symbols)- Fold the bike as pic and take off the battery key (plugged on the bike cables) to open the battery lock, the battery lock is under the bike frame as picture
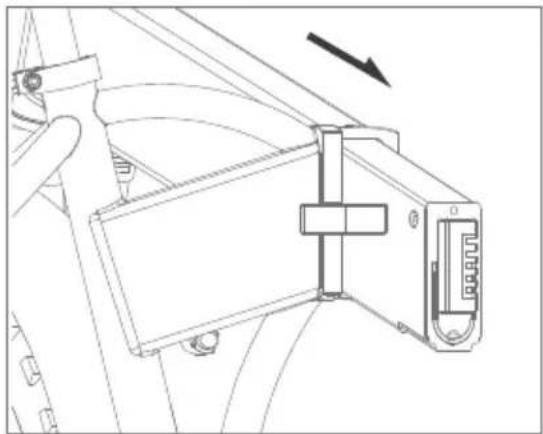
natural_image
Technical line drawing of a mechanical assembly with no visible text or symbols- Take out the battery as picture 2. Slot the battery into the frame as picture and lock it and then take off the key and plug back to the cables
natural_image
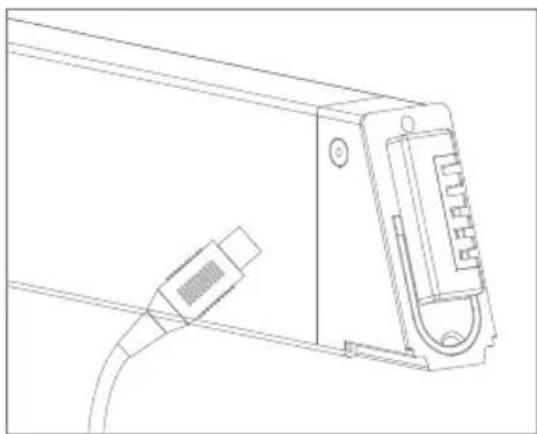
Technical line drawing of a mechanical assembly with no visible text or symbols4. How to charge the bike
natural_image
Technical line drawing of a mechanical assembly with no visible text or symbols- Uncover silicon lid to charge from Charging port of bike frame as picture
natural_image
Line drawing of a device with a connector and cable (no text or symbols)- Take out the battery from the bike frame to charge
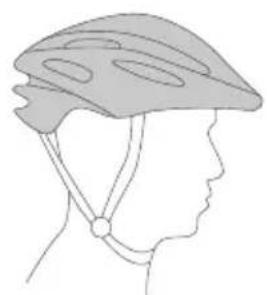
5. Precautions
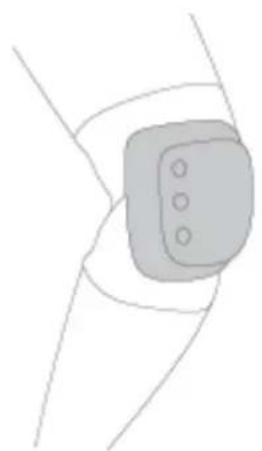
For beginners, helmet, knee-pads, elbow-pads and other protection gears are recommended while riding
natural_image
Side profile illustration of a person wearing a helmet and harness (no text or symbols)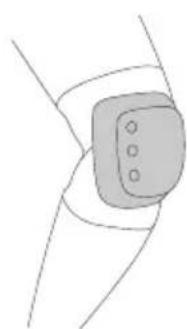
natural_image
Simple line drawing of a wrist joint with a pad and three dots (no text or symbols)- Please do not ride off road, this bike is designed for city cruise, not for MTB and racing etc.
- Please have a full understanding of the local traffic regulations before you hit the road
- In case of accident and injury, make sure your helmet, glove, elbow pads, knee pads and other protection gears are well worn before riding
- Safety check: check your R200 ebike for battery, and bike conditions before riding
- Do not ride on slippery road condition, especially on snowy and watery roads
- Do not ride on slopes over 15^
- If you must ride when it's raining or snowing, keep it at a low speed and a longer distance from the vehicle in front of you for emergency stops
- Kids under age 12 are advised not to ride the R200 ebike
- Avoid sudden acceleration and deceleration, do not lean forwards or backwards while riding, and keep it at a limited speed
- When battery runs low, keep a low constant speed and charge the battery at any chance you have
- If a fall is inevitable, always put your own safety prior to the bike
- In case of any emergencies, keep both of your hands on the handlebar while riding
- Do not store your bike in the trunk of your car in hot weather
- Keep an eye on the surroundings, ride in a controllable condition and avoid any collisions that might occur
- Keep a safe distance while riding along with other people, do not ride neck by neck on the road
- Do not ride in dim environments, be cautious, if necessary, lower you speed or stroll your bike
- Do not ride backwards, and do any actions that might endanger yourself and others while riding
- Do not lend your R200 ebike to those who are not familiar with the manual as you do
- Do not ride while you don't feel well, nor after taking drugs or consuming alcohol
- Don't lift the bicycle from the tire to avoid getting your finger stuck between the tire and the shell
- Accelerate slowly while riding, sudden acceleration may cause out-of-balance and injure yourself
- Check if the brakes are working well before you ride
- The power assist sensor (PAS) will start working when 3/4\~1 cycle is stepped on. Watch the crank when you walk.
- Left brake lever controls Front brake, right brake lever controls rear brake
Battery and charging
- Charging between the temperature range 0^ C- 45^ C and discharging between -20^ C- 60^ C, keep the battery dry
- Keep the battery away from acid, alkaline, watery, flaming, heating and high temperature environment
- Do not misconnect the positive and negative power supply, do not damage, disassemble or short circuit the battery
- Charging the battery with the equipped adaptor and charger, charging time must not exceed
- hours, charging current must not exceed 2A
- If the battery is not to be used in a long time, keep the battery in a dry and cool environment, and charge it for 2 hours every two months
- Charging according to the manual requirements, or else we won't take responsibilities for the damages occurred
- Charging in a dry and cool environment, do not charge in closed or high temperature areas
- Unplug the charger in time when the charging is done, do not plug the charger to power source while not charging
- Plug the battery first, then connect the power source when charging, after charging, disconnect the power source first, then unplug the charger
- If the charger indicator stops working or the charger over heats and causes funny smell, unplug the charger immediately and repair or replace the charger
- Keep the charger away from fluids while using and storage, in case of short circuit, avoid any penetration to the charger
- Try not to carry the charger around with your bike, if you must, make sure it's well protected and store it in your tool box
- Avoid the battery being fully discharged when using
- Do not disassemble or replace any parts of the charger by yourself
-
Do not put the battery in places that may fall to the ground, in case it may cause battery leakage, over heating that could lead to fire or explosion
-
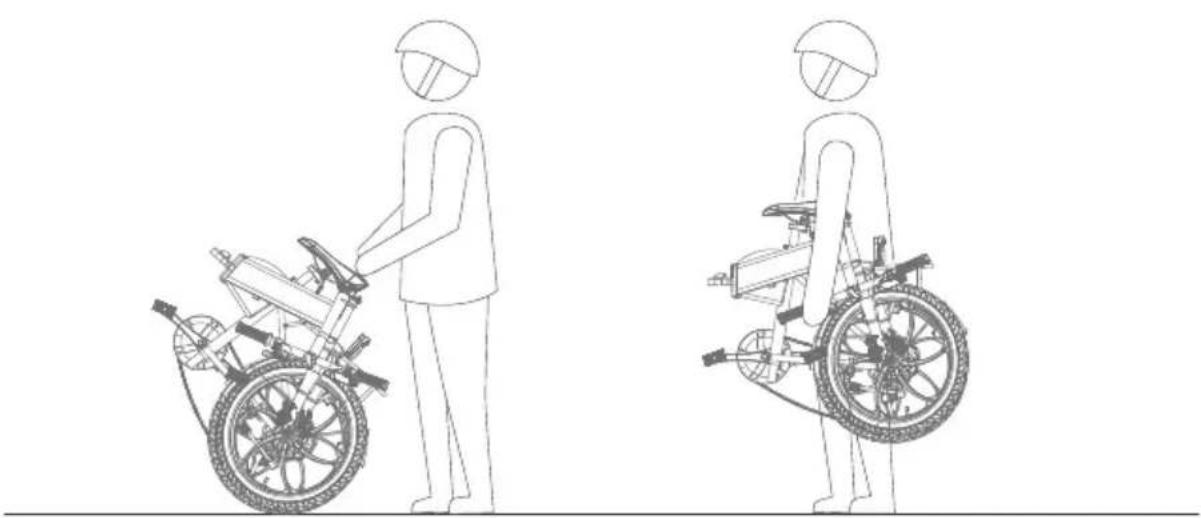
Folding and carry guide
natural_image
Line drawing of a person in a wheelchair using a bicycle, shown from front and side views (no text or symbols)7. Warning and Security
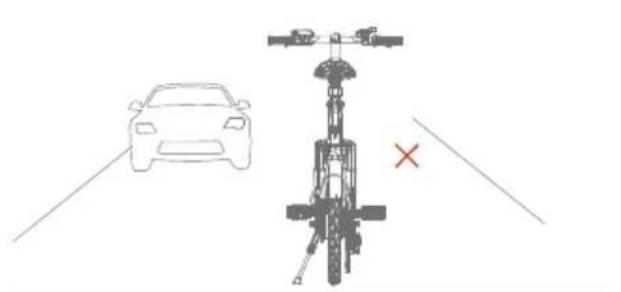
- Please do not ride on the road where is against the transportation regulation
natural_image
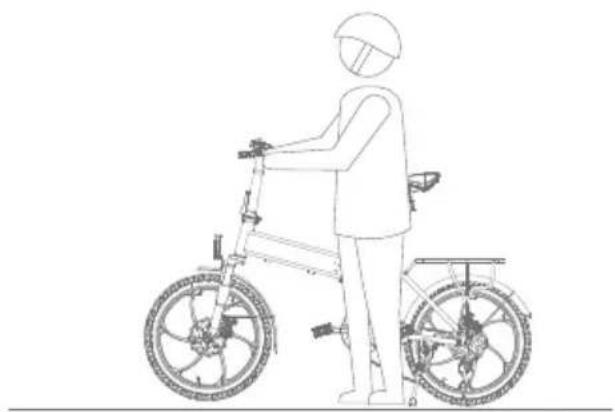
Line drawing of a person riding a bicycle with a helmet and front wheel (no text or symbols)- Please do not throttle the bike at walking condition
natural_image
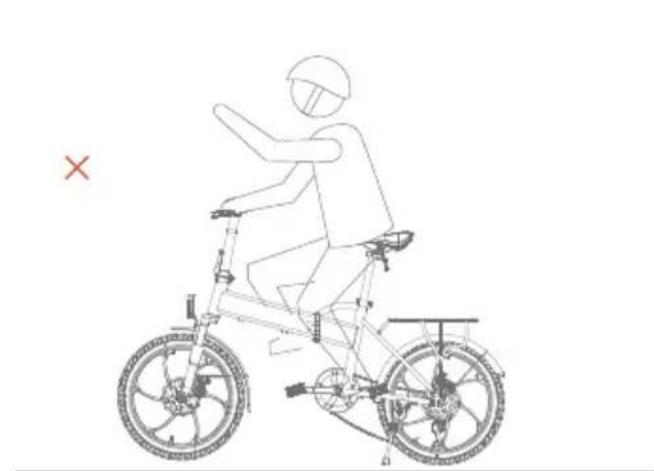
Line drawing of a person riding a bicycle with a cross mark indicating no text or symbols on the diagram itself- Please do not ride the bike with handoff
natural_image
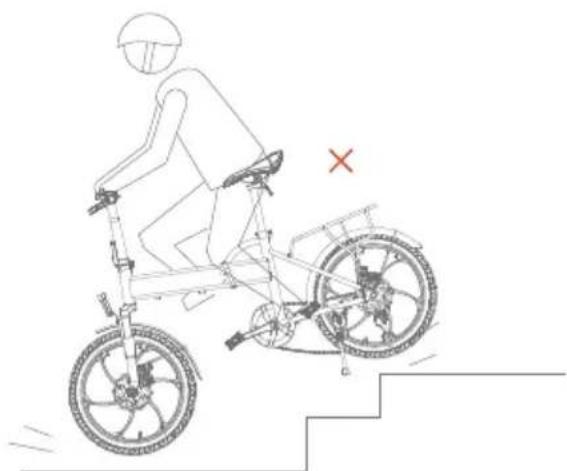
Line drawing of a person riding a bicycle with stairs and a cross mark (no text or symbols)- Please do not ride it on stairs or elevators
8. Daily maintenance
- Please store you bike away from sun exposure and raining areas
- Regularly check the screws and small parts on the bike, and tighten then when needed
- Do not use alcohol, gasoline, paraffin, acetone or other corrosive chemical solvents to clean the bike, they may corrode the bike
- Elastic standard of the chain: the upper and lower chains are ≤10mm; When the chain is loose, the rear wheel nut can be loosened.
The chain can adjust the tensioner to the fastening state of the chain and tighten the rear wheel nut. - If the disc brake is rubbing with the disc brake, adjust the position so that there is no interference friction. If the brake disc is tilted too much or the brake disc is disabled, the brake disc or brake disc need to be replaced.
- Grease the frame folding wrench screws every 3 months and keep the chain covered with anti-rust oil.
- If the shock absorber fails or is damaged, the original shock absorber must be removed and a new one replaced to achieve the best shock absorption effect.
- Do not flush the e-bike with water to avoid accidents caused by internal electronic components and wiring.
| Item | Maintenance purpose |
| Brake | Check the brake function, prevent accidents caused by brake dysfunction |
| Tire | "Check the tires condition and pressure, in case tires bursting or over power consumption during riding" |
| Tire Rim | Check the rim conditions, clean dirt, in case rim breaks or get stuck |
| Shock absorber | "Check the shock absorber condition, clean and lubricant, keep it in good working condition" |
| Throttle | Check throttle condition, in case dysfunction or malfunction |
| Wires | Check if the wires ports are loose or broken |
| Screws | Check the screws in the main parts, in case they get loose or fall off |
| Battery | "heck the appearance and the battery performance, in case of wiring faulty, extend the lifespan of the battery" |
| Charger | Check if the charger cord are impact, input and output plug are reliable |
| Lubrication | Check the if axles and brake lights need lubrication |
| Cleaning | Keep the bike surface in a clean condition |
9. Parameters
| Color options | Black/blue/white |
| Unfolded size | 1560*570*1110mm |
| Folded size | 910*430*700mm |
| Seat height(from ground) | 890-1100mm adjustable |
| Wheelbase | 1045mm |
| Net weight(battery not included) | 22.5kg |
| Brake system | Front and rear disc brake |
| Tire dimension | Φ20*1.95 inch |
| Frame material | Aluminum frame |
| Suspension | Front spring shock absorber |
| Battery installment | Built-in/anti-theft lock/detachable |
| Battery capacity | 36V/7.8Ah |
| Battery Type | Lithium ion battery |
| Battery weight | 1.8kg |
| Charging current | 2A max |
| Charging hour | About 3~5 hours |
| Power consumption | 0.3~0.4Wh per charge |
| Rated input | 100-240V 50/60Hz 2.0A |
| Rated output | 42V 2.0A |
| Battery lifespan | Over 500 times |
| Charging temperature | 0°C -45°C |
10. Troubleshooting
| No power assistance when the bike is powered on | the bike is no powered | 1. Check if the battery is installed correctly.2. Check if battery is low power3. Check the controller connector is connecting on |
| Mileage is not enough | 1. Battery is not fully charged2. Tire pressure is low3. Frequent brakes/starts/overload riding4. Battery is aged or decreasing after long used5. Low temperature,battery attention | 1. Check if the charger is working well2. Check tire pressure before riding3. Ride with good habits4. Replace battery5. Normal phenomenon |
| Battery cannot be charged | 1. Charger is not probably plugged2. Battery temperature too low3. Battery temperature too high | 1. Check if the plug is loose2. Wait until temperature goes back to normal3. Check the wire connection inside |
| Display not working | 1. No power2. Adaptor faulty3. Meter faulty | 1. Check battery connection, voltage and recharge2. Contact with after sales service for replacement |
| The motor doesnot work when powered on | 1. Brake is working2. Displayer M key faulty | 1. Check the brake2. Contact with after sales service to check the displayer |
BOHLT
R200
natural_image
Line drawing of a fully open bicycle with visible wheels and seat (no text or symbols)Guide d'utilisation
Lire ceci en avant
natural_image
Line drawing of a modern bicycle with extended front wheel and rear basket (no text or symbols)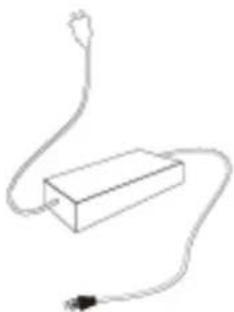
natural_image
Simple line drawing of a rectangular device connected to a power outlet (no text or symbols)Guide d'utilisation
Adaptateur
- Diagramme
FONCTIONS LCD ET APERCU
1. Fonctions
natural_image
Technical line drawing of a mechanical assembly with no visible text or symbolsnatural_image
Technical line drawing of a mechanical linkage system with pulleys and gears (no text or symbols)natural_image
Technical line drawing of a mechanical linkage or support structure with a red circle highlighting a specific component (no text or symbols present)3) Verrouillage correcte.
natural_image
Technical line drawing of a mechanical device with a red circle highlighting a component, no text or symbols present4) Verrouillage incorrecte.
natural_image
Technical line drawing of a mechanical clamp or bracket assembly with an arrow indicating rotational motion (no text or symbols present)natural_image
Line drawing of a hand gripping a mechanical component with an arrow indicating rotation (no text or symbols)natural_image
Technical line drawing of a mechanical joint or bracket (no text or symbols)natural_image
Line drawing of a hand interacting with a mechanical bracket (no text or symbols)natural_image
Line drawing of a mechanical clamp or clamp assembly with no visible text or symbolsnatural_image
Line drawing of a mechanical seat assembly with a vertical arrow indicating motion (no text or symbols)natural_image
Technical line drawing of a mechanical device with a rotating component (no text or symbols)natural_image
Technical line drawing of a mechanical assembly with no visible text or symbolsnatural_image
Technical line drawing of a mechanical assembly with no visible text or symbolsnatural_image
Technical line drawing of a mechanical assembly with a magnified inset showing a key inserted into a component (no text or symbols present)natural_image
Technical line drawing of a mechanical assembly with no visible text or symbolsnatural_image
Technical line drawing of a mechanical assembly with no visible text or symbolsnatural_image
Technical line drawing of a mechanical assembly with no visible text or symbolsnatural_image
Technical line drawing of a mechanical component with a cable and connector (no text or symbols)natural_image
Side profile illustration of a person wearing a bicycle helmet (no text or symbols)