eKick 9 Pro - Scooter BOHLT - Free user manual and instructions
Find the device manual for free eKick 9 Pro BOHLT in PDF.
| Product Type | Foldable electric scooter |
| Brand | BOHLT |
| Model | eKick 9 Pro (BOHLT 9 PRO) |
| Unfolded dimensions (L x W x H) | 1090 x 470 x 1180 mm |
| Folded dimensions (L x W x H) | 1090 x 200 x 440 mm |
| Net weight | 14,6 kg |
| Maximum payload | 120 kg |
| Maximum speed | 20 - 25 km/h |
| Range | 20 - 35 km |
| Maximum slope | 15 - 25° |
| Battery type | Lithium-ion 18650 LG |
| Battery capacity | 36 V / 10,4 Ah |
| Charging time | 4 - 7 hours |
| Motor type | Energy-saving brushless motor |
| Motor rated power | 350 W |
| Wheel size | 8,5 inches |
| Tire type | Inflatable tires |
| Braking system | Rear disc brake, foot brake, automatic motor stop |
| Front light | Integrated LED front light |
| Rear light | Rear brake light |
| USB port | Yes, for charging mobile devices |
| Folding mechanism | Folding lock, three-step folding |
| Display | LCD screen (speed, battery, mode) |
| Maintenance | Check tire pressure before each use, clean with a dry cloth |
| Safety | Mandatory protective gear, check local laws |
Frequently Asked Questions - eKick 9 Pro BOHLT
User questions about eKick 9 Pro BOHLT
0 question about this device. Answer the ones you know or ask your own.
Ask a new question about this device
Download the instructions for your Scooter in PDF format for free! Find your manual eKick 9 Pro - BOHLT and take your electronic device back in hand. On this page are published all the documents necessary for the use of your device. eKick 9 Pro by BOHLT.
USER MANUAL eKick 9 Pro BOHLT
natural_image
Yellow triangular warning sign with black exclamation mark (no text)Please check with local authorities whether or not the use of this product on the public road is allowed.
Warning: Check the tire pressure before using!
natural_image
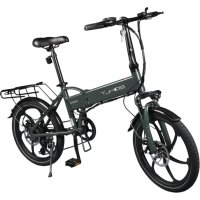
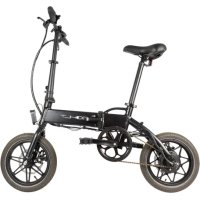
Black electric scooter with yellow and red accents, isolated on white background (no text or symbols)9 PRO
natural_image
Diagram of a hand gripping a vertical pole with an arrow indicating rotation (no text or symbols present)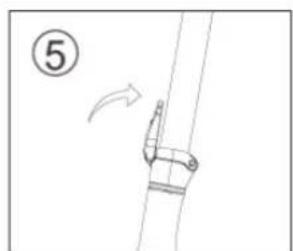
natural_image
Simple line drawing of a rope or cable with a hook and directional arrow, no text or symbols present.flowchart
graph LR
    A["Before State: Initial state with wavy arrow indicating rotational motion"] --> B["Intermediate State: Initial state with two connected components"]
    B --> C["After State: After state with two connected components"]
INKLAPPEN VAN DE STEP NA GEBRUIK
natural_image
Diagram of a mechanical device with rotating arrows indicating motion (no text or symbols)natural_image
Diagram of a mechanical joint or bracket with an arrow indicating motion, no text or symbols present
natural_image
Simple line drawing of a hand holding a pole with an arrow indicating motion (no text or symbols)
natural_image
Line drawing of a hand using a tool to lift a scooter (no text or symbols)natural_image
Line drawing of a multi-wheeled electric scooter with extended suspension components (no text or symbols)Accu en oplader
Please check with local authorities whether or not the use of this product on the public road is allowed.
Warning: Check the tire pressure before using!
natural_image
Black electric scooter with yellow and red accents, isolated on white background (no text or symbols)9 PRO
Please read this manual carefully before using the scooter. Keep this manual for later reference.
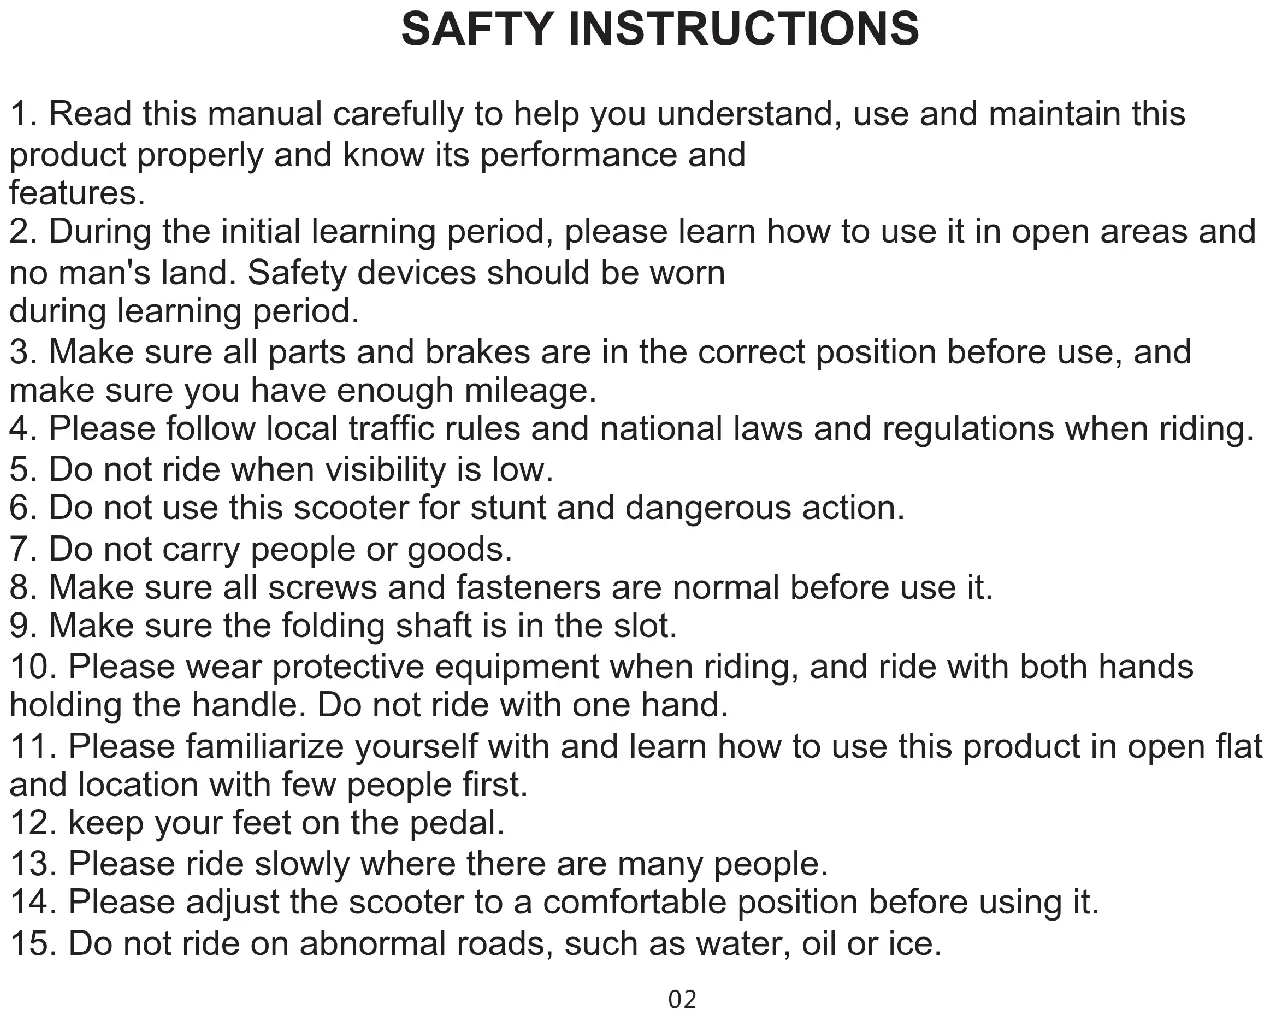
SAFTY INSTRUCTIONS
- Read this manual carefully to help you understand, use and maintain this product properly and know its performance and features.
- During the initial learning period, please learn how to use it in open areas and no man's land. Safety devices should be worn during learning period.
- Make sure all parts and brakes are in the correct position before use, and make sure you have enough mileage.
- Please follow local traffic rules and national laws and regulations when riding.
- Do not ride when visibility is low.
- Do not use this scooter for stunt and dangerous action.
- Do not carry people or goods.
- Make sure all screws and fasteners are normal before use it.
- Make sure the folding shaft is in the slot.
- Please wear protective equipment when riding, and ride with both hands holding the handle. Do not ride with one hand.
- Please familiarize yourself with and learn how to use this product in open flat and location with few people first.
- keep your feet on the pedal.
- Please ride slowly where there are many people.
- Please adjust the scooter to a comfortable position before using it.
-
Do not ride on abnormal roads, such as water, oil or ice.
-
Do not ride on abnormal roads, such as water, oil or ice.
-
DO NOT USE BATTERY UNDER FOLLOWING CIRCUMSTANCES:
-
The product is damaged.
- Abnormal smell and heat is released from the battery.
-
You should stop riding and do not touch with leaking liquid while there is any liquid leakage. The product should be store out of the reach of children.
-
Battery
-
Do not start the motor when charging.
- Battery display roughly shows battery life.
- After the battery is fully charged, the overcharge time should not exceed two hours.
-
When the battery power shows a red light, it is recommended to slow down and stop riding.
-
Charger
- The charging Port of the electric scooter is external. Please insert the charger into the charging port before connecting the power.
- The indicator light of charger is red, charging is normal. When the indicator light turns green, the charging is com
RIDING THE SCOOTER
PROMPT
The center of the body leans back when accelerating.
The center of the body leans forward when slowing down.
BEFORE RIDING
- Choose a flat and open area to try out the scooter first time.
- Assemble the scooter properly according to this manual, and adjust it to a height comfortable to you.
- Wear safety protective devices.
- Make sure all fasteners are fixed well and tight.
RIDING
- Press the button on the right side to turn on the power.
- Put one foot on the foot plate first and then lift the other foot of the ground and push forward with your foot to initially
accelerate the scooter. Then press the throttle lever slowly. - The motor will drive the scooter forward. Make sure you leave your foot off the ground and place it safely on the foot plate.
Increase speed using the throttle.
PACKING
- Release the throttle.
- Move your centre of gravity backward.
- Pull the hand brake a bit. Operating the hand brake will cut out the motor immediately and slow down the vehicle by engaging
the disc brake on the rear wheel. Before you come to a complete halt, balance yourself by putting one foot on the ground. Do
brake carefully and observe conditions.
OPERATION
PREPARE THE SCOOTER FOR USE
- Open the package and take out the scooter. Ensure that the scooter is in order and not damaged.
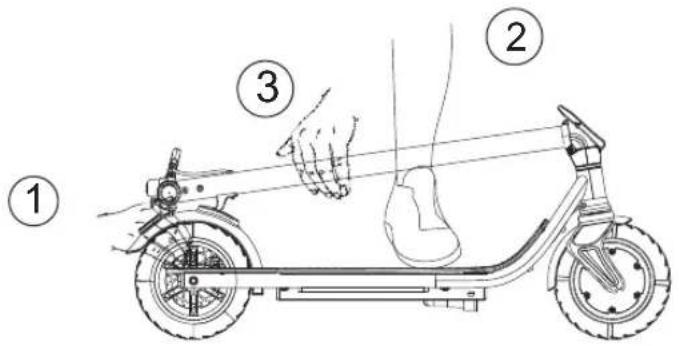
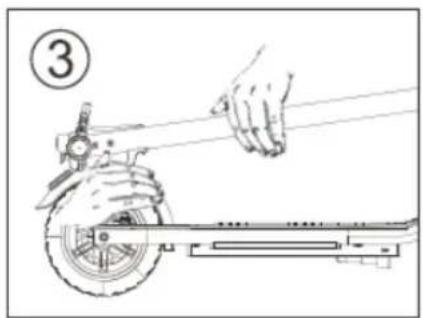
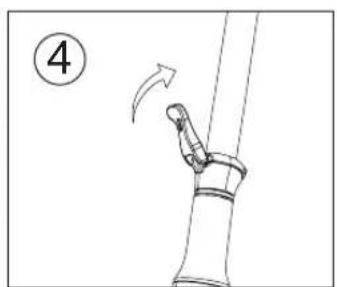
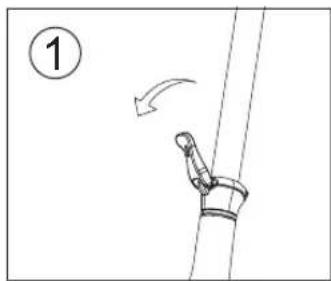
- Open the lower lock. ①press the fender by hand; ②place one foot on the foot plate; ③push the T-bar forward; ④Straighten up the T-bar; ⑤Fasten the fold lock.
natural_image
Diagram of a pipe joint with an arrow indicating motion, no text or symbols present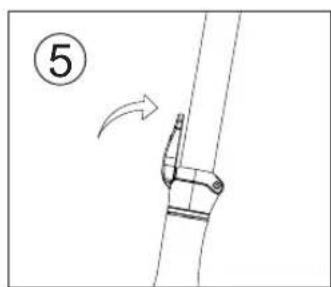
natural_image
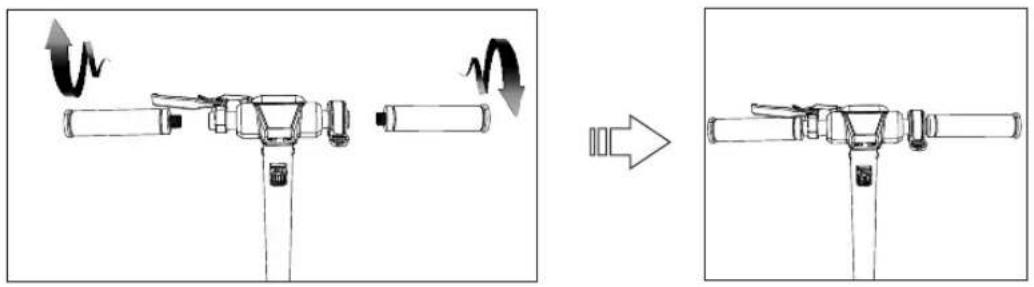
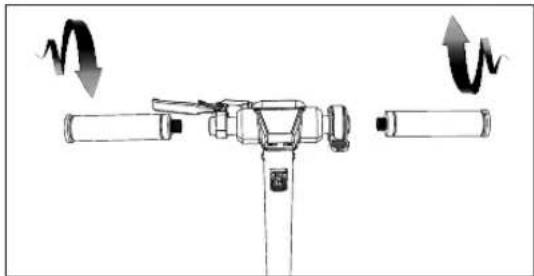
Diagram of a mechanical clamp or bracket with an arrow indicating direction, no text or symbols present- Tighten the two grips according to the screw thread direction, as shown in the picture on the right (check the tightness of the handle grip before riding, and tighten the handle grip if it is loose before riding).
natural_image
Diagram showing a mechanical assembly before and after rotation, with no visible text or symbolsFOLDING UP THE SCOOTER AFTER USE
- Unscrew the grip (This step can be ignored when packing is needed for repair)
natural_image
Diagram of a mechanical device with rotating arms and adjustment knobs (no text or symbols)- 1). Pull up the safety lock, then open it out. 2). Slowly press the riser down by hand, and falls down. 3). At the same time, pressthe rear fender and insert the hook into the card slot. Complete folding.
natural_image
Diagram of a robotic arm joint with motion arrow, no text or symbols present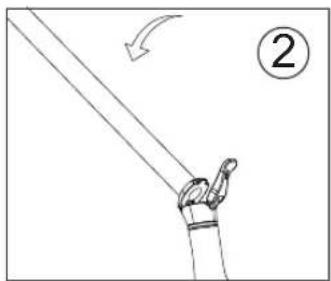
natural_image
Simple line drawing of a hand holding a long rod with an arrow indicating motion (no text or symbols)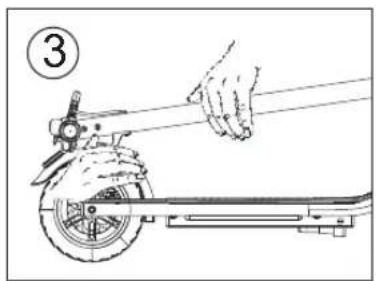
natural_image
Line drawing of a hand using a tool to lift a scooter (no text or symbols)- Fold slowly as shown
natural_image
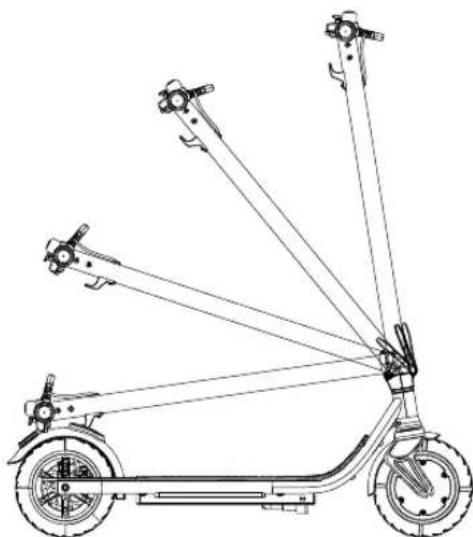
Line drawing of an electric scooter with extended suspension components (no text or symbols)Battery and charger
This scooter is equipped with a special lithium battery and charger, other brands of charger can not be used for charging. In addition, the charger cannot be used to charge other batteries.
The lithium battery
The battery should be charged in time after every use. If it is not used for a long time, please charge it at least once a month. If the battery is not charged for a long time, the battery will enter the self-protection state and cannot be charged. In this case, contact your dealer.
CHARGER
The charger has overcharge protection function, the battery will stop charging automatically after 100% full charge.
Charging operation guide
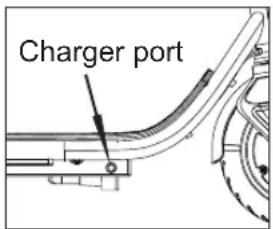
- Firstly, insert the charger into the charging port.
- Then connect the charger to the power supply (AC100-240V).
- After connection, if the indicator light shows red means in charging; If the indicator light shows green means full charged.
Charging port position
PROMPT:
Make sure all connectors are in the correct position when charging. If the fault or damage is caused by the following reasons, even within the warranty period, it is not covered by the warranty:
- Failing to use and maintain according to the user manual.
- Damage caused by dangerous behavior or violation of laws and regulations.
- Refit scooter at will, using non-original parts.
- Riding on irregular roads.
- Used for commercial or rental purposes and not used properly.
- The force majeure.
- Long-term exposure to the outside causes product aging and fault.
TROUBLE SHOOTING
| Problem Possible | Reason | Solution |
| The scooter does not move after startup. | The brake is not fully reset.This cuts off the power. | Reset the brake into position. |
| Scooter moves at low speed, or doesnot move at all. | The battery is low. Recharge the battery. | |
| The motor will start and shut downagain. | The battery is low. | Recharge the battery. |
| Controller is damaged. Change a new controller. | ||
| The battery connection is loose. | Adjust the connectors of battery. | |
| Riding range is too short for a full charge. | The battery life cycle is at its end. | Change a new battery. |
| The battery cannot be charged or it'scharged slowly. | The voltage is not correct. | Do battery maintenance or change the battery. |
| The scooter battery does not charge. | The battery life cycle is at its end. | Change a new battery. |
| The charger does not output anypower. | Change the charger. | |
| The charging port is damaged. | Change the charging port. | |
TECHNICAL DATA
| Specifications | Model | BOHLT EKICK 9 PRO |
| Dimension | L:1090mm W:470mm H:1180mm | |
| Folding size | L:1090mm W:200mm H:440mm | |
| Weight | 14.6KG | |
| Performance | Max load | 120kg |
| Max speed | 20-25KM/H | |
| Climbing | 15-25° | |
| Brake | Disc brake, foot brake, power off brake | |
| Battery | Battery | 18650 Lithium Battery |
| Battery Capacity | 36V/10.4Ah LG | |
| Range | 20-35km | |
| Charging time | 4-7H | |
| Motor | Motor | Brushless energy-saving motor |
| Rated Power | 36V , 350W | |
| Wheel | Wheel size | 8.5" |
| Wheels type | Pneumatic tire |
Guide d'utilisation
BOHLT EKICK 9 PRO

natural_image
Yellow triangular warning sign with black exclamation mark (no text)Please check with local authorities whether or not the use of this product on the public road is allowed.
Warning: Check the tire pressure before using!
natural_image
Black electric scooter with yellow and red accents, isolated on white background (no text or symbols)9 PRO
natural_image
Line drawing of a mechanical joint or bracket with an arrow indicating motion (no text or symbols)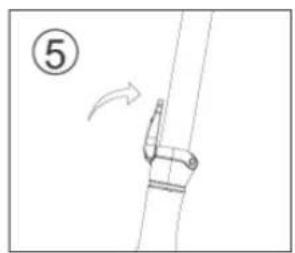
natural_image
Simple line drawing of a mechanical component with an arrow indicating direction (no text or symbols)flowchart
graph LR
    A["Before State"] --> B["Actuator with Rotation Arrow"]
    B --> C["Arrow to Right"]
    C --> D["After State"] --> E["Actuator with Rotation Arrow"]
PLIAGE DE LA TROTTINETTE APRÈS UTILISATION
natural_image
Diagram of a mechanical device with rotating arrows indicating motion (no text or symbols)natural_image
Diagram of a mechanical joint or clamp with an arrow indicating motion, no text or symbols present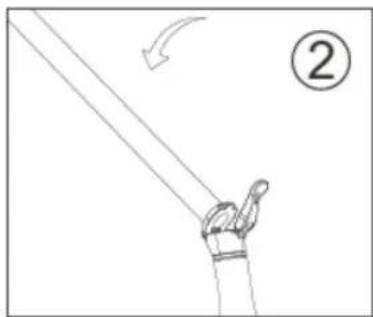
natural_image
Simple line drawing of a hand holding a pole with an arrow indicating motion (no text or symbols)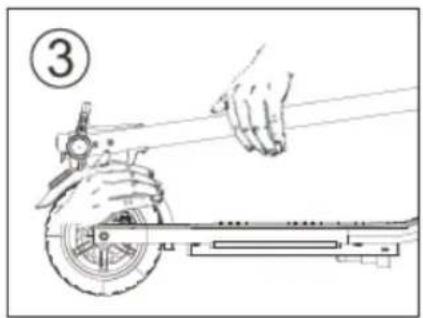
natural_image
Line drawing of a hand using a tool to lift a scooter (no text or symbols)natural_image
Line drawing of a multi-wheeled electric scooter with extended suspension components (no text or symbols)natural_image
Yellow triangular warning sign with black exclamation mark (no text)Please check with local authorities whether or not the use of this product on the public road is allowed.
Warning: Check the tire pressure before using!
natural_image
Black electric scooter with yellow and red accents, isolated on white background (no text or symbols)9 PRO
natural_image
Line drawing of a mechanical joint or bracket with an arrow indicating motion (no text or symbols)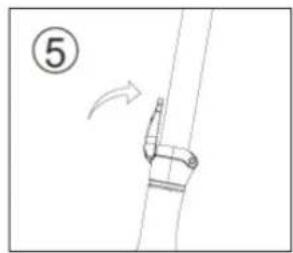
natural_image
Simple line drawing of a mechanical component with an arrow indicating direction (no text or symbols)flowchart
graph TD
    A["Initial Component"] --> B["Assembly"]
    B --> C["Final Assembly"]

    subgraph Before
        direction LR
        A -->|W| B
        B -->|W| C
    end

    subgraph After
        direction LR
        C -->|Arrow| End
natural_image
Diagram of a mechanical device with rotating arrows indicating motion (no text or symbols)natural_image
Simple line drawing of a rope being lifted by a hook, with no text or symbols present.
natural_image
Simple line drawing of a hand holding a pole with an arrow indicating motion (no text or symbols)