
W462AQCE - Camera Lorex - Free user manual and instructions
Find the device manual for free W462AQCE Lorex in PDF.
| Product Type | Indoor Surveillance Camera |
| Brand | Lorex |
| Model | W462AQCE |
| Power Supply | USB power adapter (included), USB cable |
| Connectivity | Wi-Fi, Ethernet port |
| Audio | Built-in microphone and speaker (two-way audio) |
| Night Vision | Automatic mechanical IR cut filter |
| Storage | microSD card slot (not included) |
| LED Indicator | Status: solid green (operating), flashing green (ready), red (error), etc. |
| Mounting | Mounting bracket, mounting tape, anchors and screws (3) |
| Resolution | Not specified in the guide; typically HD |
| Field of View | Not specified; adjustable via pan in the app |
| Control | Lorex Home app (iOS/Android) |
| Safety | Indoor use only; do not disassemble; do not expose to direct sunlight |
| Maintenance and Cleaning | Clean only with a damp cloth; do not use abrasive cleaners |
| Box Contents | Camera, USB power adapter, USB cable, mounting tape, bracket, anchors and screws |
Frequently Asked Questions - W462AQCE Lorex
User questions about W462AQCE Lorex
0 question about this device. Answer the ones you know or ask your own.
Ask a new question about this device
Download the instructions for your Camera in PDF format for free! Find your manual W462AQCE - Lorex and take your electronic device back in hand. On this page are published all the documents necessary for the use of your device. W462AQCE by Lorex.
USER MANUAL W462AQCE Lorex
- Read this guide carefully and keep it for future reference.
- Follow all instructions for safe use and handling of the product.
- Use camera within given temperature, humidity & voltage levels noted in the camera's specifications.
- Do not disassemble the camera.
- Do not point the camera directly at the sun or a source of intense light.
- Periodic cleaning required. Use a damp cloth only. Do not use any harsh, chemical-based cleaners.
Disclaimers
- The camera is rated for indoor use only. Do not mount the camera outdoors.
- This camera includes an Auto Mechanical IR Cut Filter. When the camera changes between Day/Night viewing modes, an audible clicking noise may be heard from the camera. This clicking is normal, and indicates that the camera filter is working.
- Audio recording without consent is illegal in certain jurisdictions. Lorex Corporation assumes no liability for use of its products that does not conform with local laws.
Contents
What's included....1
Camera overview and dimensions....2
Status indicator....3
Step One: Connect to the app....4
Camera placement....5
Step Two: Place or mount the camera....6
Lorex Home app overview....7
What's included
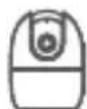
Camera

USB power adapter
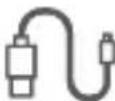
USB power cable
Mounting
tape

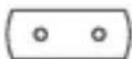
Mounting bracket

Anchors & screws (x3)

ATTENTION: A REGULATED UL / CSA APPROVED power supply is REQUIRED for use with this camera (included). Use of a non-regulated, non-conforming power supply can damage this product and voids the warranty.
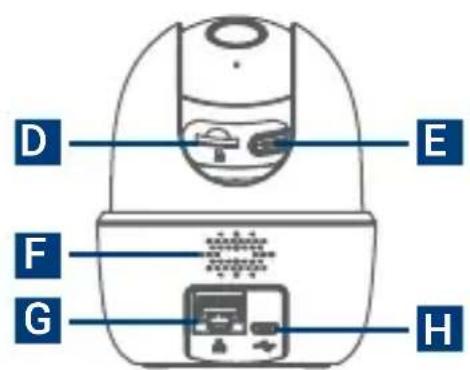
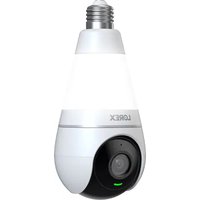
Camera overview
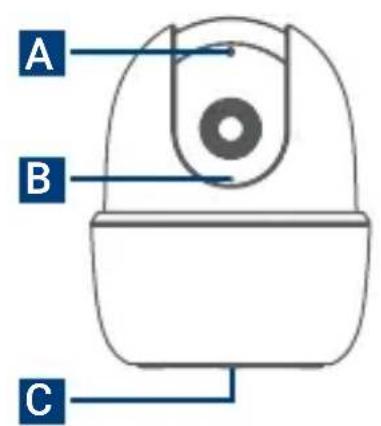
A. Status indicator
B. Microphone
C. Device QR code
D. microSD slot
E. Reset button
F. Speaker
G. Ethernet port
H. Power port
Dimensions
Height: 4.2" (107mm)
Width: 3.4" (86mm)
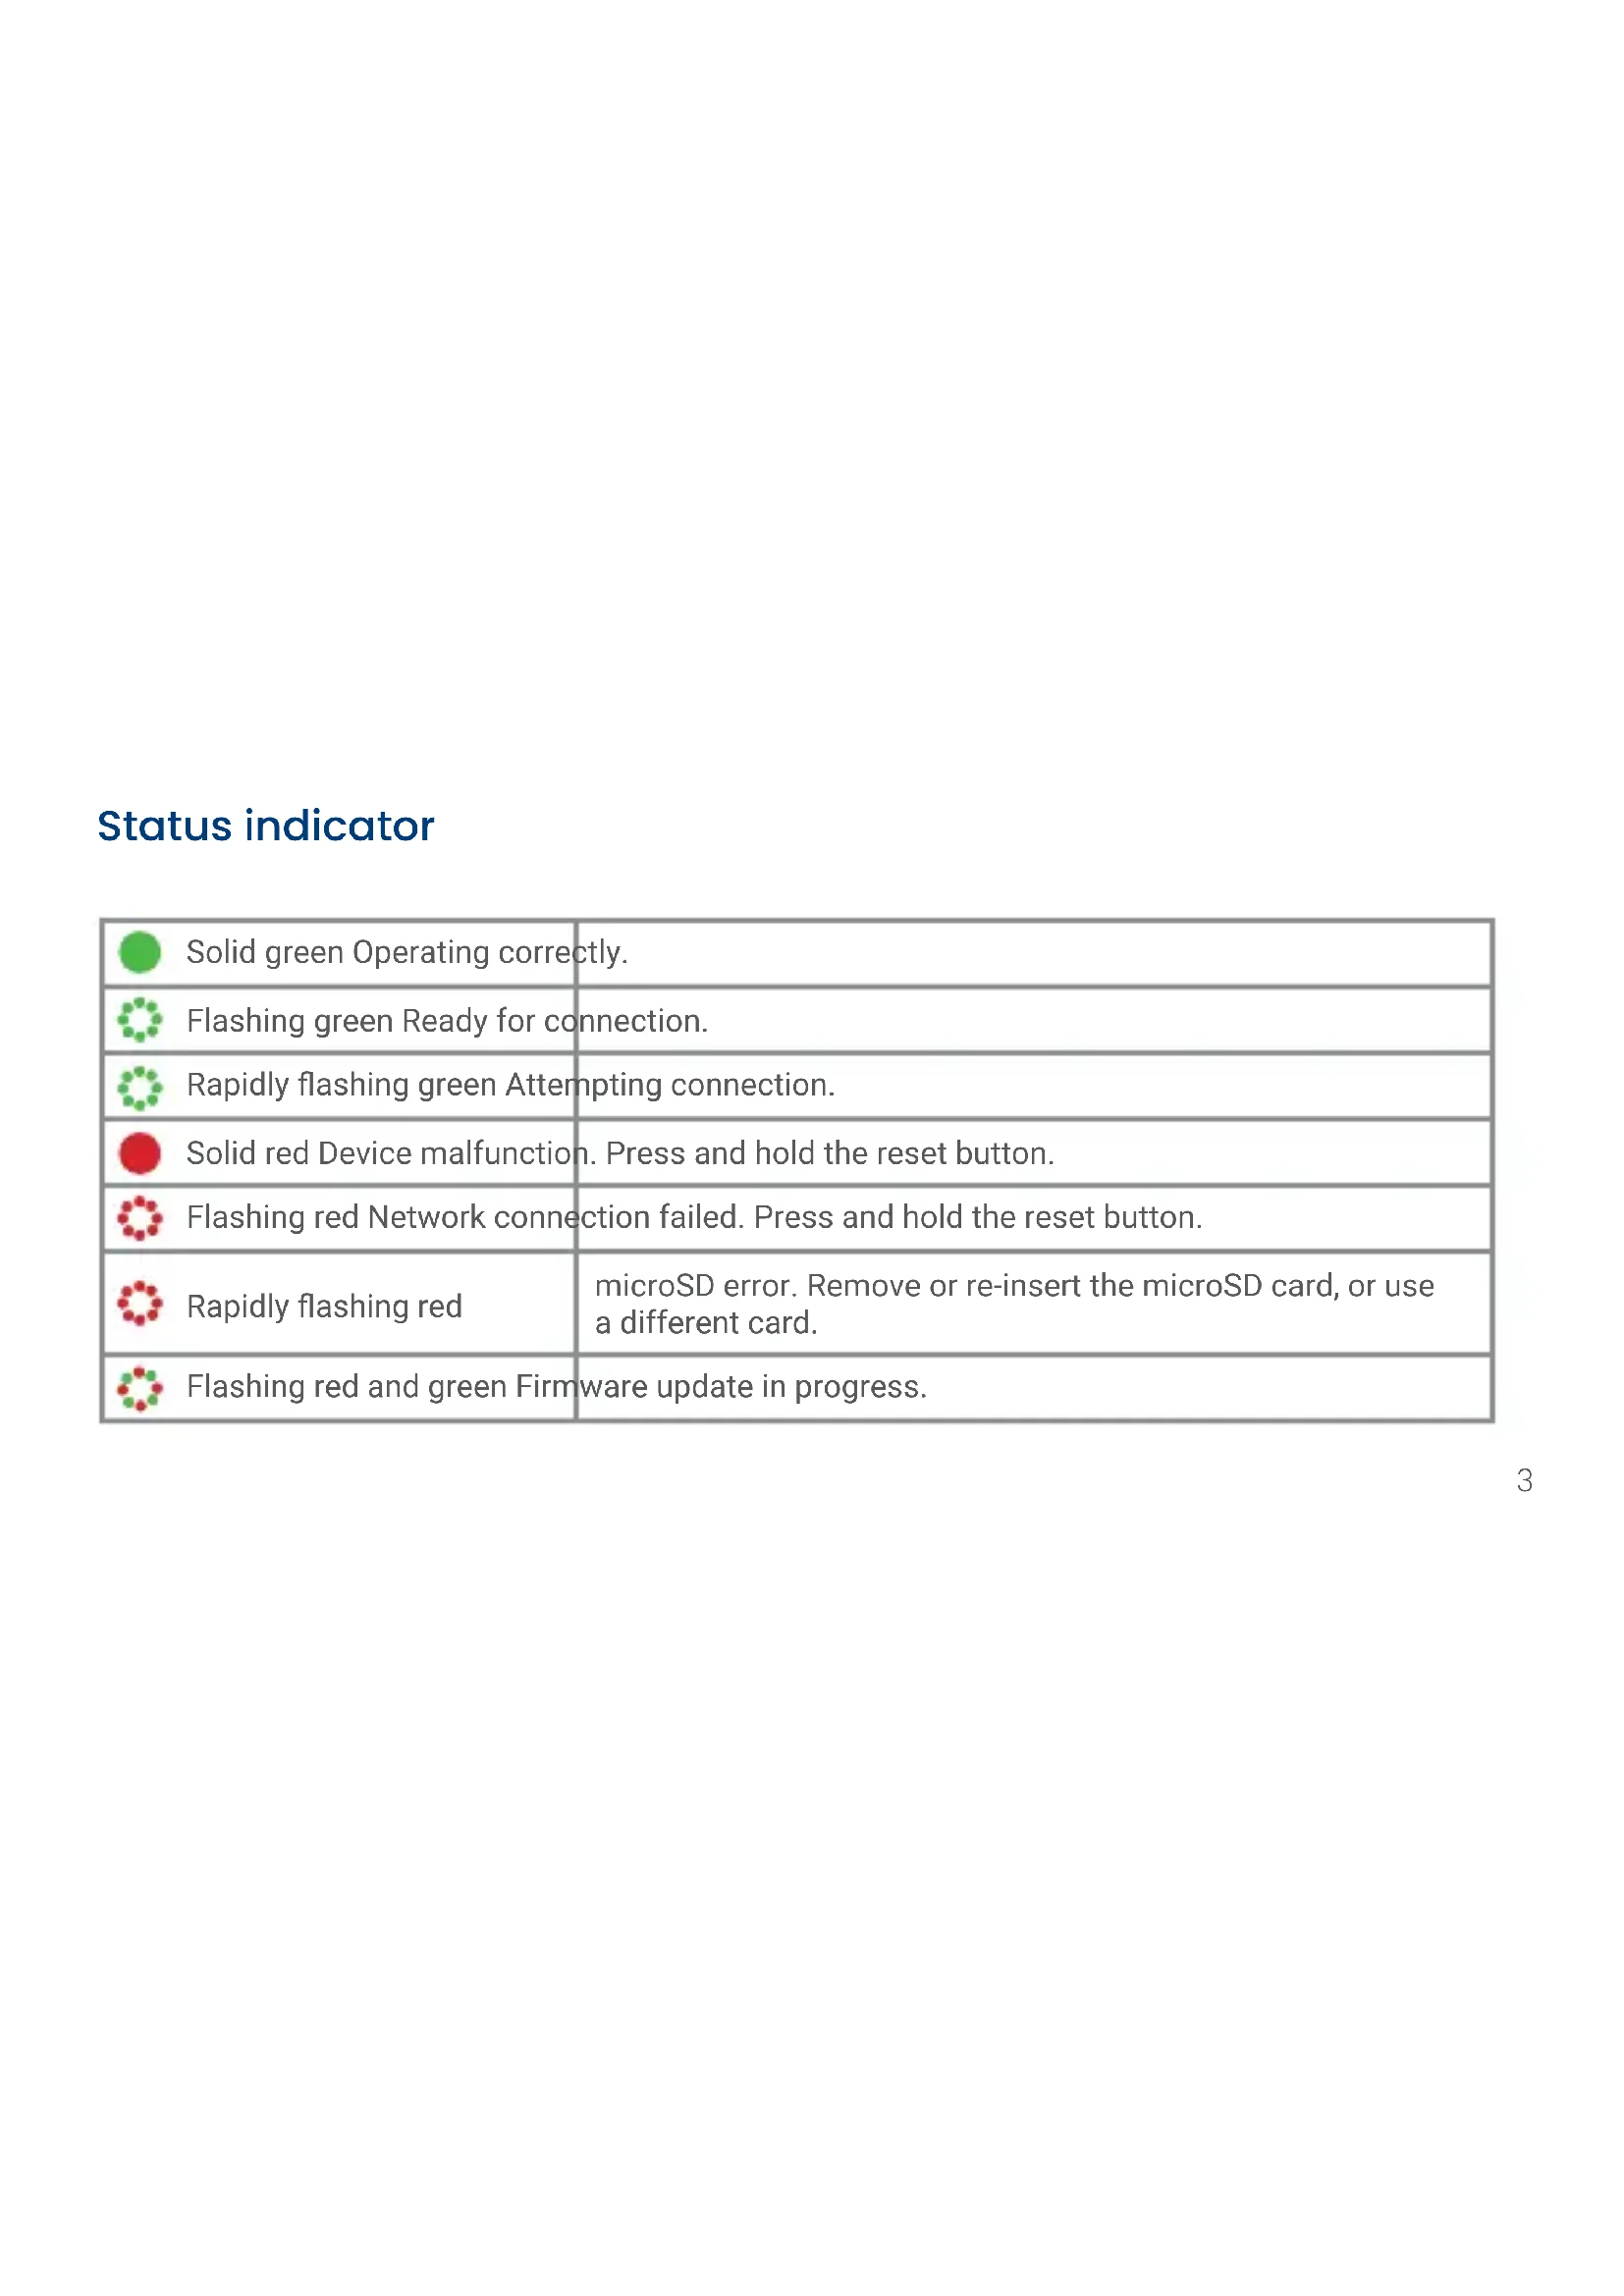
Status indicator
 | Solid green Operating correctly. | |
 | Flashing green Ready for connection. | |
 | Rapidly flashing green Attempting connection. | |
 | Solid red Device malfunction. Press and hold the reset button. | |
 | Flashing red Network connection failed. Press and hold the reset button. | |
 | Rapidly flashing red | microSD error. Remove or re-insert the microSD card, or use a different card. |
 | Flashing red and green Firmware update in progress. |
Step One: Connect to the app
-
Scan the QR code on this page to download the free Lorex Home app from the App Store or Google Play Store.
-
Open the Lorex Home app.
-
Sign in or sign up and create an account.
-
Connect the USB power adapter to the camera and plug into an outlet.
-
Once the status indicator on the camera is flashing green and the startup chime sounds, tap the + icon to add your camera.
-
Scan the device QR code. If your mobile device cannot scan the QR code, tap Manually enter Device ID.
-
Follow the in-app instructions to complete the setup.

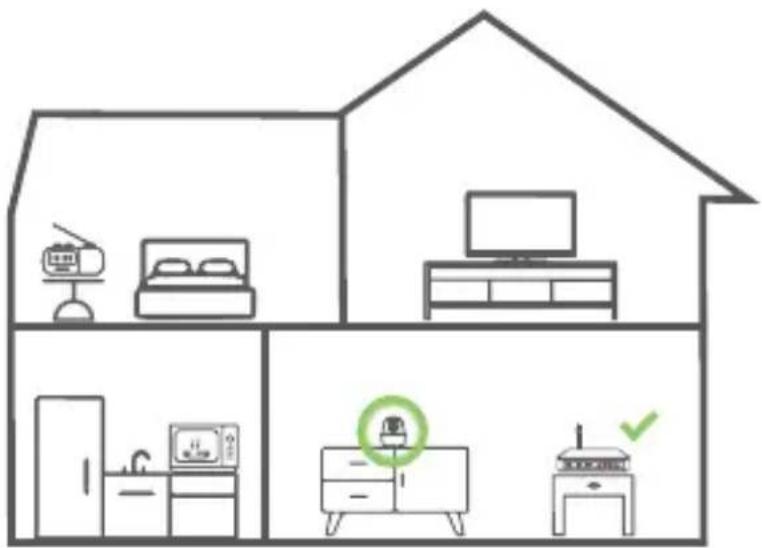
Camera placement
- Place the camera as close to your Wi-Fi router or access point as possible.
- Reduce the number of obstructive materials between the camera and the router or access point. Concrete, brick, metal and wood are the most common materials in your house that can cause poor signal strength.
- Other electronic devices such as microwaves, TVs, cordless phones, and baby monitors can cause signal interference. It is recommended to install the camera as far away from these devices as possible.
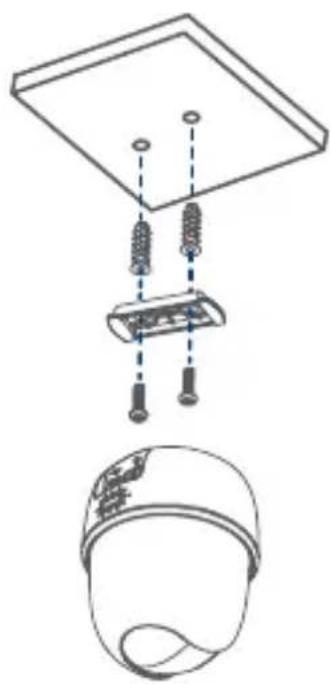
Step Two: Place or mount the camera
You can place the camera on a flat surface or follow the instructions below to mount it to an indoor ceiling.
- Use the mounting template to mark two holes for screws.
- Drill the holes using a ^1/_4 " (6mm) drill bit. If mounting to masonry or drywall, gently tap the anchors into the holes.
- Align the flat side of the mounting plate with the drilled holes.
- Use a Phillips screwdriver and two screws to secure the mounting plate to the mounting surface.
- Twist the camera's base clockwise onto the mounting plate.
- Open the camera's settings on the app and enable Image Rotation to flip the camera image.
natural_image
Technical diagram showing a ceiling-mounted device connected to a battery and a helmet (no text or symbols present)Lorex Home app overview
For a complete overview of controls available in the Lorex Home app, go to lorex.com.
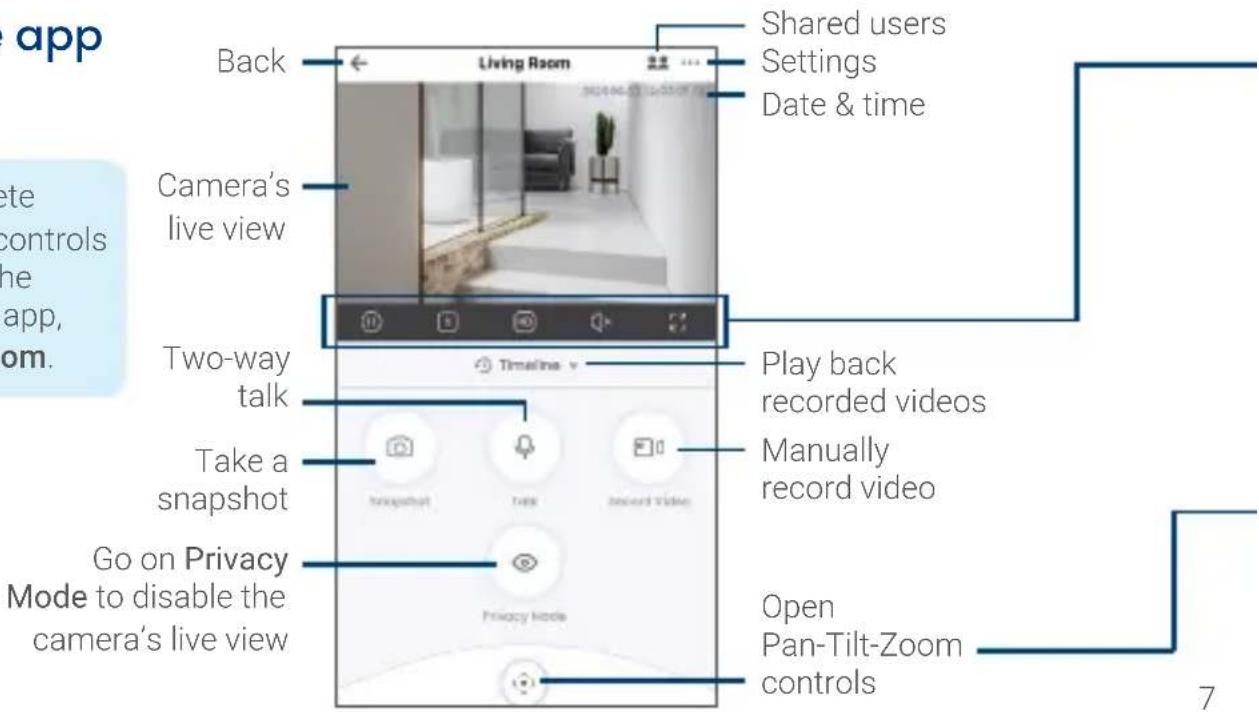

Pause or restart video
modes
Video quality SD or HD
Mute or unmute audio
Full screeningViewing

Tip: Change the video quality to SD (Standard Definition) to conserve bandwidth while watching live video. This will not impact the quality of recorded video.
Tap on the arrows to pan and tilt the camera. Pinch the video screen to zoom in.
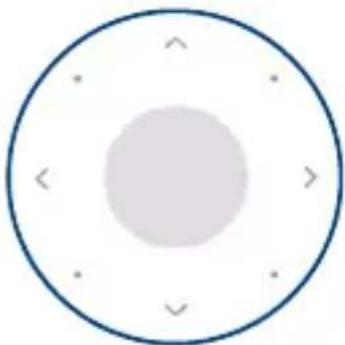
natural_image
Circular diagram with a central shaded circle and surrounding symbols (no text or labels)Copyright © 2021 Lorex Corporation
As our products are subject to continuous improvement, Lorex reserves the right to modify product design, specifications and prices, without notice and without incurring any obligation. E&OE. All rights reserved.

This device complies with part 15 of the FCC Rules. Operation is subject to the following two conditions: (1) This device may not cause harmful interference, and (2) This device must accept any interference received, including interference that may cause undesired operation.
For up-to-date information and support, please visit: help.lorex.com
Please see our full Terms of Service and Limited Hardware Warranty Policy at lorex.com/warranty
W462AQC_QSG_TRILINGUAL_R1
LOREX®
Caméra sans fil HD
Série W462AQC
natural_image
Technical diagram showing a ceiling-mounted device connected to a battery and cable, with no visible text or symbols.natural_image
Circular diagram with a central shaded circle and surrounding arrows (no text or symbols)
Copyright © 2021 Lorex Corporation
Dimensiones
Altura: 4.2 in (107 mm)
Ancho: 3.4 in (86 mm)
natural_image
Technical diagram showing a ceiling-mounted device connected to a battery and cable, with an additional close-up of a helmet (no text or symbols present)natural_image
Circular diagram with a central shaded circle and surrounding symbols (no text or labels)
Copyright © 2021 Lorex Corporation


Brand : Lorex
Model : W462AQCE
Category : Camera