
5304493868 - Dishwasher FRIGIDAIRE - Free user manual and instructions
Find the device manual for free 5304493868 FRIGIDAIRE in PDF.
| Product type | Dishwasher |
| Brand | Frigidaire |
| Model | 5304493868 |
| Dimensions (W x H x D) | 60 x 85 x 60 cm (estimated) |
| Weight | 50 kg (estimated) |
| Power supply | 120 V, 60 Hz, 15 A |
| Water connection | Braided stainless steel hose, 3/8 in. fitting |
| Energy consumption | 1.2 kWh/cycle (estimated) |
| Noise level | 50 dB (estimated) |
| Capacity | 12 place settings (estimated) |
| Programs | Intensive, normal, quick, etc. |
| Functions | Delayed start, half load |
| Safety | Grounding, circuit breaker |
| Installation | Hot water connection, permanent wiring |
| Maintenance | Cleaning filters, checking hoses |
| Included parts | Braided hose, T-fitting, sealing tape |
| Repairability | Parts available, disassembly possible |
| Warranty | 1 year (estimated) |
Frequently Asked Questions - 5304493868 FRIGIDAIRE
User questions about 5304493868 FRIGIDAIRE
0 question about this device. Answer the ones you know or ask your own.
Ask a new question about this device
Download the instructions for your Dishwasher in PDF format for free! Find your manual 5304493868 - FRIGIDAIRE and take your electronic device back in hand. On this page are published all the documents necessary for the use of your device. 5304493868 by FRIGIDAIRE.
USER MANUAL 5304493868 FRIGIDAIRE
Deluxe Dishwasher Install Kit
5304493868
Observe all national and local codes and ordinances for electrical and plumbing connections. Make sure electrical power has been disconnected at fuse box or circuit breaker box. The dishwasher must be connected to a grounded metal, permanent wiring system. The equipment-grounding conductor must be run with the circuit conductors and connected to the appliances equipment grounding terminal or lead. Do not connect the dishwasher to the power supply until the appliance is permanently grounded. Failure to follow this warning could result in death or serious injury.
This power supply has a 3-pronged grounded plug. The cord must be plugged into a compatible 3-pronged grounding wall receptacle, grounded in accordance with all national and local codes and ordinances. If a properly installed wall receptacle is not available, it is the responsibility of the customer to have a properly grounded receptacle installed. The wall receptacle should be within easy reach of this power supply cord. DO NOT USE AN EXTENSION CORD! Such use can result in fire, electrical shock, or other personal injury.
Tools Required

Parts List
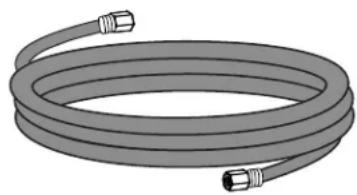
Braided Stainless Steel Hose
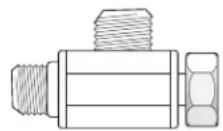
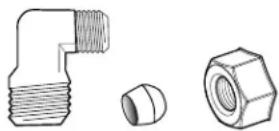
T Connection 3 / 8 Threaded Connection Garden Hose Connection
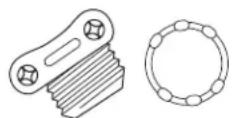
Strain Relief
Installation
1. Waterline Connection

IMPORTANT
- Turn off both hot and cold water supply lines.
- Do not over tighten connections.
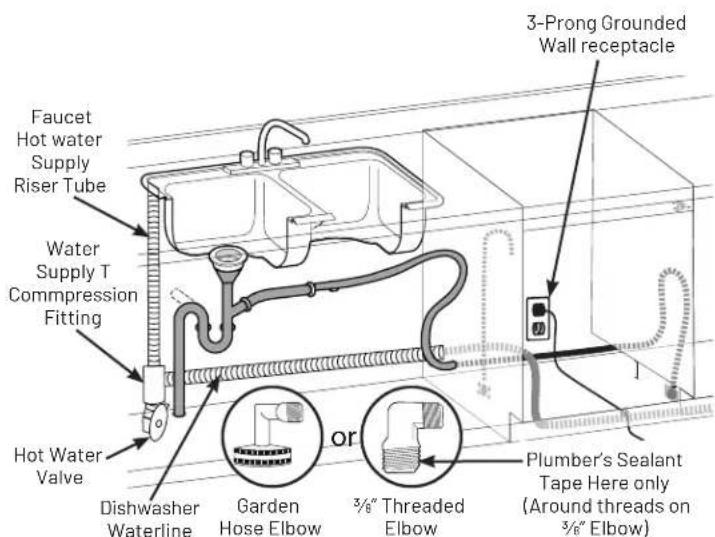
A. Locate the hot and cold water supply lines under the kitchen sink.
B. Disconnect the kitchen faucet hot water riser tube from the shut off valve.
C. Install the water supply T compression tube fitting on the end of the hot water faucet riser tube.
D. Connect the water supply T compression fitting to the hot water shut off valve.
E. Connect the braided stainless steel waterline to the water supply connection.
2. Dishwasher Connection
Determine the type of water fill valve used on your dishwasher:
- If the valve has a 3 / 8 threaded connection, follow steps A through E.
- If the dishwasher has a hose bib connection, follow steps F though J.
- Do not overtighten.
3 18 " Threaded Connection
A. Wrap the threads of the elbow with two turns of sealant tape provided in the kit to ensure a leak-proof connection.
B. Connect and tighten the threaded end of the elbow to the inlet water valve on the dishwasher.
C. Run the braided stainless steel waterline to the underside of the dishwasher.
D. Remove and discard the compression nut and compression ferrule from the elbow installed in step B.
E. Connect the 3/8'' compression nut on the braided stainless steel waterline to the elbow installed in step B above.
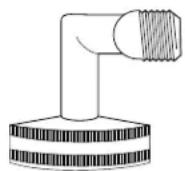
Garden Hose Connection
F. Verify that the hose washer is in the elbow before installing.
G. Connect the garden hose elbow to the dishwasher inlet valve. Do NOT use the sealant tape on the dishwasher inlet valve.
H. Hand tighten the garden hose elbow on the dishwasher inlet valve and add a 1/4 turn.
I. Run the braided stainless steel waterline to the underside of the dishwasher.
J. Connect the 3 / 8 compression nut on the braided stainless steel waterline to the elbow installed in step G above.
3. Check for Leaks
A. Turn on the hot and cold water supply valves under the sink.
B. Carefully inspect for leaks along ALL connections.
C. Tighten connections if leaks are found.
4. Electrical Supply Connections

WARNING
ELECTRICAL SHOCK HAZARD
Do not plug in the power cord until all steps are complete.
A. Make sure electrical power is disconnected at the fuse box or circuit breaker box.
B. Remove access panel at the bottom of the dishwasher.
C. Remove the electrical junction box cover located behind the access panel at the bottom of the dishwasher. The electrical connection wiring for the dishwasher (BLACK and WHITE wires) are located inside this junction box.
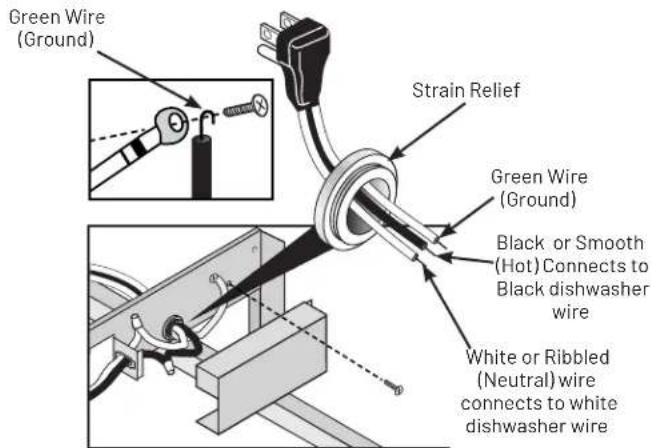
D. Locate the UL listed strain-relief bushing included in the hardware kit. See Figure 1.
E. Remove the lock nut from the strain relief bushing. Push the strain relief bushing into the round opening of the junction box to stabilize the wiring. The lock nut should be installed on the strain relief bushing inside the junction box. See Figure 5.
F. Insert the power cord (wire exposed) into the box through the strain-relief bushing installed in step E.
G. To attach the grounding wire (identified by GREEN insulation or bare wire) on the power cord:
Wrap the grounding wire around the grounding screw and tighten OR,
Connect to ground wire in the junction box.
H. Connect the hot wire (identified by the BLACK or smooth insulation) of the power cord to the black wire on the dishwasher using the wire nut provided.

NOTE
Ensure all wire nuts are tight.
- Connect the neutral wire of the power cord wire (identified by the RIBBED insulation or WHITE insulator color) to the WHITE wire on the dishwasher with the wire nut provided.
J. Tighten the strain-relief bushing screws and lock nut to stabilize the power cord wiring. Check all connections to ensure they are secure. Replace the junction box cover.
K. Restore electrical power at the fuse box or circuit breaker box, then plug the power cord into the outlet.
L. Test for proper operation by running the dishwasher through a fill, wash, and drain cycle. Inspect for leaks again (See step 3).
Deluxe Dishwasher Install Kit
5304493868