
EV675 - Vacuum Cleaner BISSELL - Free user manual and instructions
Find the device manual for free EV675 BISSELL in PDF.

| Product Type | Robot Vacuum |
| Brand | Bissell |
| Model | EV675 |
| Power Supply | Rechargeable battery (removable) |
| Charger Input Voltage | 220-240 V ~ 50/60 Hz |
| Initial Charge Time | 4 to 5 hours |
| Cleaning Modes | Auto, spiral, wall, single room, manual |
| Programming | Yes, via remote control (clock and weekly scheduling) |
| Remote Control | Yes, with AAA batteries (not included) |
| Auto Return to Base | Yes |
| Docking Station | Included, with charging contacts |
| Dustbin Capacity | Approximately 0.5 L (estimated) |
| Filtration | Foam filter + pleated filter (non-washable) |
| Main Brush | Removable brush roller |
| Side Brushes | 2 replaceable side brushes |
| Sensors | Vacuum sensors for obstacle detection |
| Maintenance | Empty dustbin, clean filters and brushes with provided tool, do not wash filters |
| Safety | Do not use on wet surfaces, do not vacuum liquids, do not immerse |
| Warranty | 2-year limited (outside US and Canada) |
| Use | Household use only |
Frequently Asked Questions - EV675 BISSELL
User questions about EV675 BISSELL
0 question about this device. Answer the ones you know or ask your own.
Ask a new question about this device
Download the instructions for your Vacuum Cleaner in PDF format for free! Find your manual EV675 - BISSELL and take your electronic device back in hand. On this page are published all the documents necessary for the use of your device. EV675 by BISSELL.
USER MANUAL EV675 BISSELL
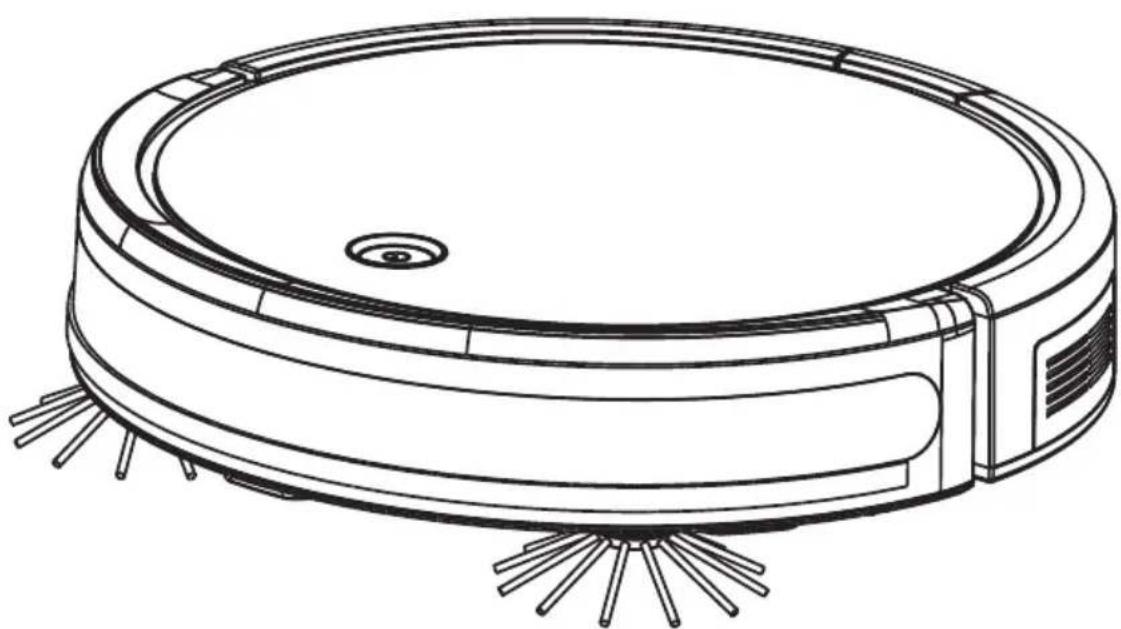
EV675 Robotic Vacuum
2601N
EN USER GUIDE
DE BENUTZERHANDBUCH
ES GUIA DEL USUARIO
FR MANUEL DE L'UTILISATEUR
IT GUIDA PER L'UTENTE

READ ALL INSTRUCTIONS BEFORE USING YOUR APPLIANCE.
When using an electrical appliance, basic precautions should be observed, including the following:
WARNING
TO REDUCE THE RISK OF FIRE, ELECTRIC SHOCK OR INJURY:
This appliance can be used by children aged from 8 years and above and persons with reduced physical, sensory or mental capabilities or lack of experience and knowledge if they have been given supervision or instruction concerning use of the appliance in a safe way and understand the hazards involved. Cleaning and user maintenance shall not be made by children without supervision. Children should be supervised to ensure that they do not play with the appliance.
»Do not immerse in water or liquid.
Keep hair, loose clothing, fingers, and all parts of body away from openings and moving parts of the appliance and its accessories.
If the charger supply cable is damaged, it must be replaced by the manufacturer, its service agent or similarly qualified person in order to avoid a hazard.
Do not incinerate the appliance even if it is severely damaged. The batteries can explode in a fire.
The battery is to be disposed of safely.
This appliance contains batteries that are only replaceable by skilled persons.
Under abusive conditions, liquid may be ejected from the battery; avoid contact. If contact accidentally occurs, flush with water. If liquid contacts eyes, additionally seek medical help. Liquid ejected from the battery may cause irritation or burns.
Recharge only with the charger specified by the manufacturer. A charger that is suitable for one type of battery pack may create a risk of fire when used with another battery pack.
Unplug charger from electrical socket when not in use, before cleaning, maintaining or servicing the appliance, and if your appliance has an accessory tool with a moving brush, before connecting or disconnecting the tool.
This appliance contains batteries that are non-replaceable.
The battery must be removed from the appliance before it is scrapped.
»Do not use with damaged cable or charger. If appliance is not working as it should, has been dropped, damaged, left outdoors, or dropped into water, return it to a service center.
»Do not use to suck up water.
»Do not immerse in water for cleaning.
» Place the cables from other appliances out of the area to be cleaned.
Do not operate the vacuum in a room where an infant or child is sleeping.
Do not operate the vacuum in an area where there are lit candles or fragile objects on the floor to be cleaned.
Do not operate the vacuum in a room that has lit candles on furniture that the vacuum may accidentally hit or bump into.
»Do not allow children to sit on the vacuum.
Turn OFF all controls before unplugging.
» Do not pull or carry charger by cable, use cable as a handle, close door on cable, or pull cable around sharp edges or corners.
»Keep charger cable away from heated surfaces.
»To unplug, grasp the charger plug, not the cable.
»Do not handle charger plug or appliance with wet hands.
Battery pack and charger base output terminals are not to be short-circuited.
»Do not charge the unit outdoors.
The appliance must be disconnected from the supply mains when removing the battery.
»Do not recharge, disassemble, heat above 60°C , or incinerate.
Keep batteries out of reach of children.
»Dispose of used batteries promptly.
Never put batteries in mouth. If swallowed, contact your physician or local poison control.
Prevent unintentional starting. Ensure the switch is in the OFF-position before picking up or carrying the appliance. Carrying the appliance with your finger on the switch or energising appliance that have the switch on invites accidents.
»Do not use appliance that is damaged or modified. Damaged or modified batteries may exhibit unpredictable behavior resulting in fire, explosion or risk of injury.
Do not expose appliance to fire or excessive temperature. Exposure to fire or temperature above 130°C may cause explosion.
Follow all charging instructions and do not charge the appliance outside of the temperature range specified in the instructions. Charging improperly or at temperatures outside of the specified range may damage the battery and increase the risk of fire.
Have servicing performed by a qualified repair person using only identical replacement parts. This will ensure that the safety of the product is maintained.
» Do not modify or attempt to repair the appliance except as indicated in the instructions for use and care.
Plastic film can be dangerous. To avoid danger of suffocation, keep away from children.
»Use only as described in this user guide.
»Use only manufacturer's recommended attachments.
» If appliance is not working as it should, has been dropped, damaged, left outdoors, or dropped into water; do not attempt to operate it and have it repaired at an authorised service center.
»Do not put any object into openings.
» Do not use with any opening blocked; keep free of dust, lint, hair, and anything that may reduce air flow.
»Use extra care when cleaning on stairs.
Do not use to pick up flammable or combustible liquids, such as petroleum, or use in areas where they may be present.
» Do not pick up toxic material (chlorine bleach, ammonia, drain cleaner, etc.).
» Do not use appliance in an enclosed space filled with vapours given off by oil-based paint, paint thinner, some moth-proofing substances, flammable dust, or other explosive or toxic vapours.
» Do not pick up hard or sharp objects such as glass, nails, screws, coins, etc.
» Do not pick up anything that is burning or smoking, such as cigarettes, matches or hot ashes.
»Do not use without filters in place.
»Do not use outdoors or on wet surfaces.
SAVE THESE INSTRUCTIONS
ORIGINAL INSTRUCTIONS. FOR OPERATION ON A 220-240 VOLT A.C. 50-60 HZ POWER SUPPLY ONLY.
THIS MODEL IS FOR HOUSEHOLD USE ONLY.
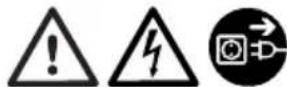
| SYMBOL | EXPLANATION |
| ! | Caution. |
| Read operator's manual. | |
| For indoor use only. | |
| Do not use on wet surfaces. | |
| Protection against moving parts. | |
| Risk of automatic start-up. |
| SYMBOL | EXPLANATION |
| Always turn unit off prior to charging. | |
| Detachable power supply unit. | |
| Class II equipment. | |
| This symbol means to recycle. Do not mix batteries with general household waste. Recycle used batteries at your nearest recycling center. | |
| This symbol on the product and/or accompanying documents means that used electrical and electronic products should not be mixed with general household waste. For proper treatment, recovery and recycling, please take this product to designated collection points. Please contact your local authority for further details of your nearest designated collection point. |
Safety Instructions. 2
Product View. 4
Setup 4-5
Operations 6
Maintenance. 7-8
Troubleshooting 8-9
Guarantee 10
Package Contents
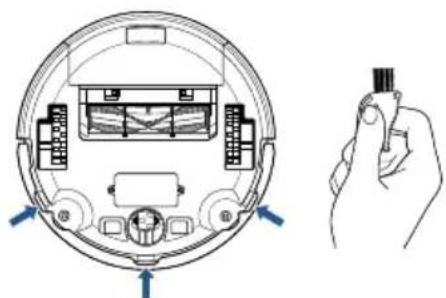
Product View
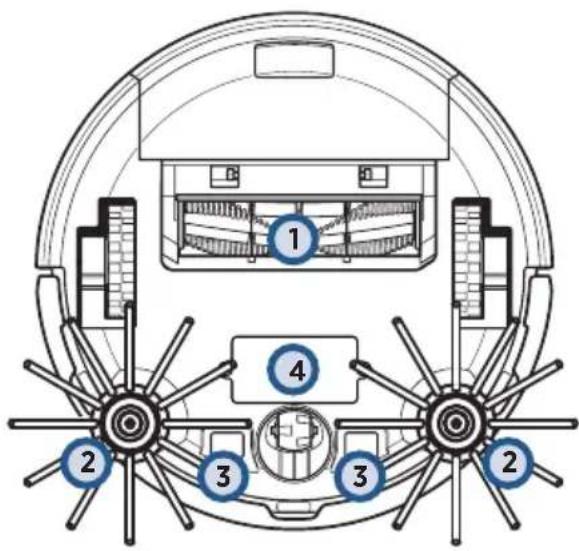
- Brush Roll
- Cliff Sensors
- Contact Points (for automatic charging)
- Removable Battery
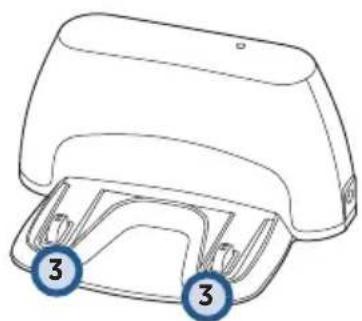
Setting Up Your Robot
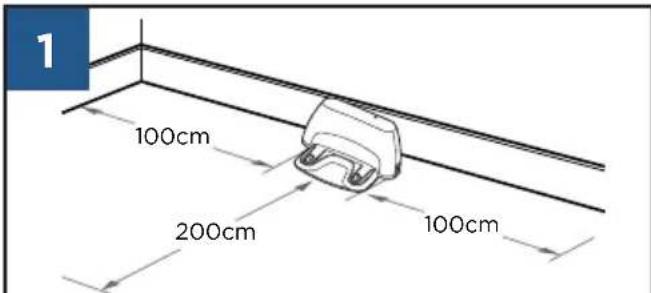
Place the Docking Station away from obstructions.
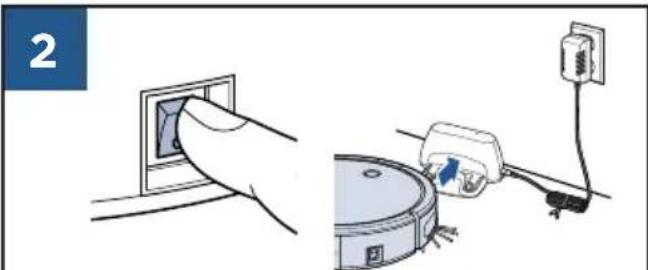
Turn power ON and put on the Docking Station. The first charge will take 4-5 hours.
Setting Up the Remote Control
Pair the Remote to the Robot
NOTE: Be sure to install batteries in the remote.
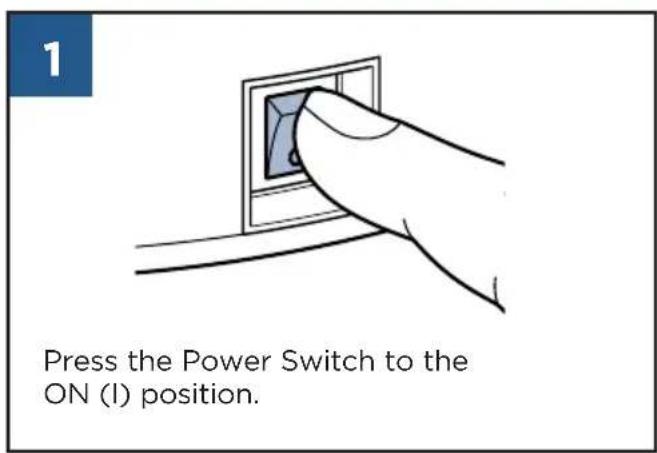
1
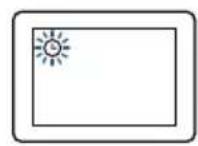
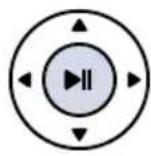
While the Power Switch on the side of the robot is OFF (0), press and hold the Play Button on the remote for 5 seconds until the clock icon on the display flashes.
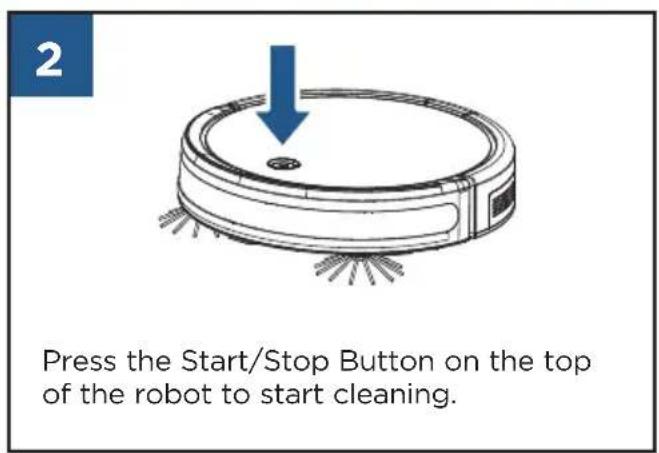
2
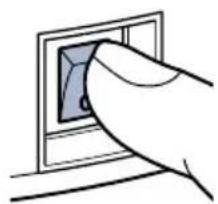
Continue to hold the Play Button and turn the robot ON (I).
NOTE: The robot will beep three times to indicate that it has successfully paired.
Set the Clock
1
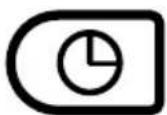
Set the time by pressing the Clock Button on the Remote Control and holding until the icon flashes on the Remote Control display.
2
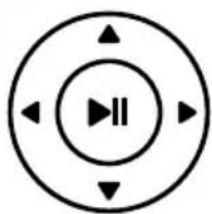
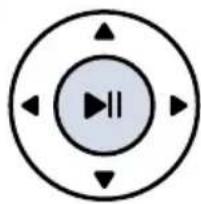
Use the directional arrows to set the hour and minute.
3

Press the Clock Button again to save the time setting.
NOTE: The robot will beep once to confirm the time has been saved.
Schedule Cleaning Sessions
NOTE: Be sure the clock is set to the correct time before scheduling cleaning sessions.
1
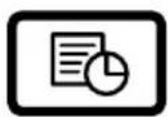
Press the Schedule Button on the Remote Control. The icon will begin to flash on the Remote Control display.
2
Use the directional arrows to set the hour and minute for your robot to start cleaning.
3

Press the Schedule Button again to save the schedule setting.
NOTE: The robot will beep once to confirm the schedule has been saved.
NOTE: To cancel a scheduled cleaning session, press and hold the Schedule Button on the remote.
Getting Ready to Clean
With Remote Control
NOTE: Be sure the Power Switch on the Robot is set to the ON position.
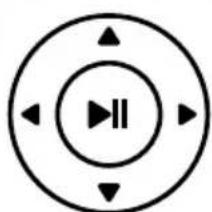
You can change the cleaning pattern of the robot by pressing one of the following buttons:
| II | Auto Mode Robot will drive in a straight path until it encounters an obstacle and change direction. |
| Spiral Mode Best for concentrated cleaning. | |
| Wall Mode Best for cleaning along walls and edges. | |
| Single Room Mode Best for cleaning a single room. It's recommended that you close any doors to contain the robot. | |
| Manual Mode Best for directing the robot to a particular area. | |
| Return to Dock Press to return the robot to the Docking Station. |
Without Remote Control

Maintenance

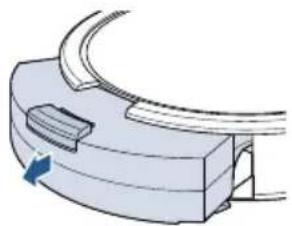
1
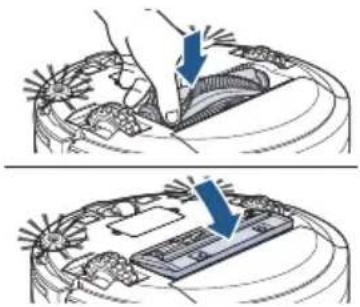
Press the button on top of the Dust Bin and pull to remove.
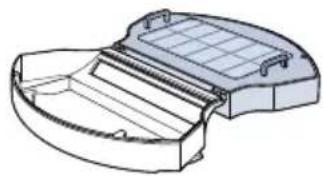
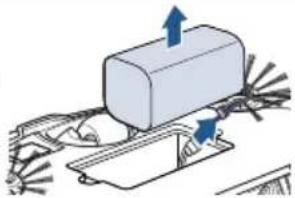
2
Open filter door by pulling both sides apart. Empty the debris from the Dust Bin.
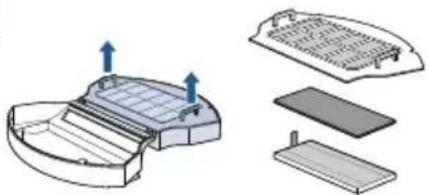
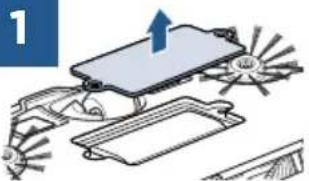
3
Remove the filter cover, followed by the Foam and Pleated Filters.
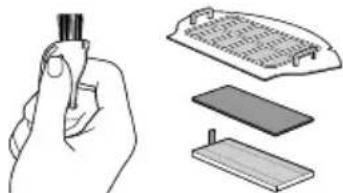
4
Use the Cleaning Tool to brush the filter cover and filters. Do not wash the filters.
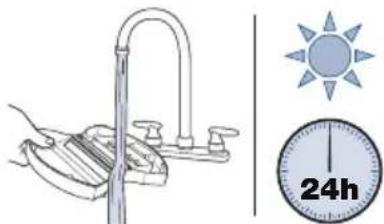
5
Rinse Dust Bin. Allow to dry for 24H.
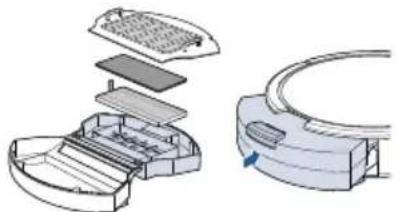
6
Reinstall the filters and filter cover, close and push back into the unit.
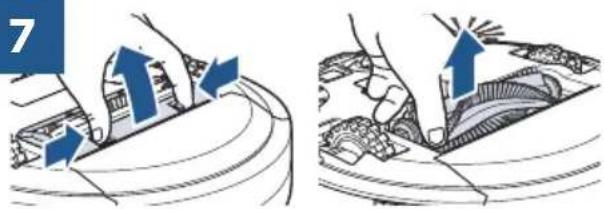
7
Pinch the tabs on the Brush Guard inward and pull to remove. Lift to remove the Brush Roll.
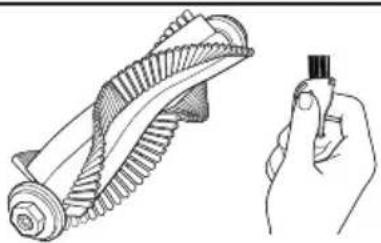
8
Clean the Brush Roll with the Cleaning Tool.
9
Replace the Brush Roll and Brush Guard.
10
Use the Cleaning Tool to brush dust off sensors.
Replacing the Battery
Turn the Power Switch to the OFF position. Use a Phillips-head screwdriver to remove the two screws and battery cover. Remove the battery and disconnect.


Connect the new battery and install into battery compartment. Use a Phillipshead screwdriver to replace the battery cover.
Replacing the Edge Cleaning Brushes
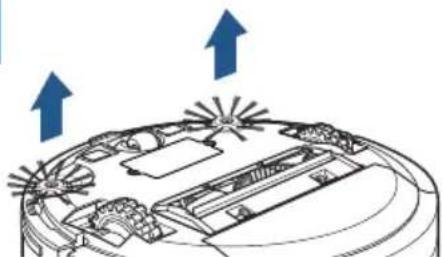
1
Use a Phillips-head screwdriver to remove the screw. Pull up on the base of the brush.
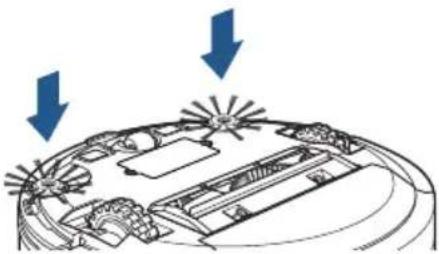
2
Push the brush directly onto the holder. Replace the screws with a Phillips-head screwdriver.
Troubleshooting
| Problem Possible causes Remedies | ||
| Remote Control doesn't work properly | Power Switch on the robot is turned OFF (0). Turn ON (1) the Power Switch located on the side of the robot. | |
| The batteries need replacing. Replace with 2 AAA batteries. | ||
| The Remote Control is too far from the robot. Ensure the Remote Control is within 10 feet of the robot. | ||
| The Remote Control is not paired with the robot. | Turn the robot OFF. Hold down the Start Button on the remote. Once the clock flashes on the display, continue to hold the Start Button and turn ON the robot. The robot will beep three times once successfully paired. | |
| Low or no suction | The Dust Bin is full. Empty the Dust Bin. | |
| One or both filters are missing or clogged. Check to see if the filters are in place and clean as needed. | ||
| Robot won't start | The battery is not installed properly. | Please refer to the "Replacing the Battery" section on page 10. |
| Battery power is low. Charge the robot's battery using the Docking Station. | ||
| Doesn't return to Docking Station after cleaning | Cleaning interrupted by error. | Please refer to the "Status Light and Error Notifications" section of this guide. |
| Robot is too far away from the Docking Station. | Limit or control the range of the robot by closing off rooms, or by using the manual cleaning arrows on the remote control. | |
Status Light and Error Notifications
| Status Light Color Status | |
| Breathing Blue Charging | |
| Power Light Off Robot fully charged | |
| Solid Blue Cleaning | |
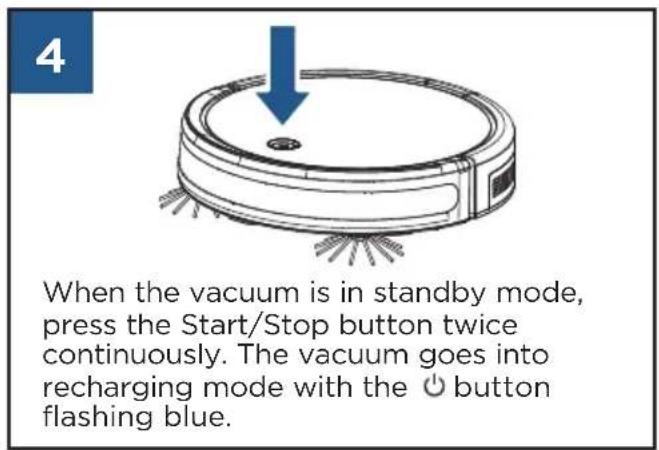
| Flashing Blue Returning to Docking Station | |
| Flashing Red Error: Check Cliff Sensors, Battery Power Low, Robot is Trapped | |
| Solid Red | Error: Check Wheels, Edge Cleaning Brushes, Brush Roll, and Bumper |
| Status Light Color | Error Notification Possible | Cause Remedies | |
| Flashing Red | One beep | Cliff Sensors are dirty. | Clean the Cliff Sensors with a dry cloth. |
| Flashing Red | Two beeps | Low power. | Charge the robot battery. |
| Flashing Red | Three beeps | Robot is trapped. | Turn OFF the robot and move to a new location. |
| Flashing Red | Four beeps | Low suction. | Empty the Dust Bin and remove hair and debris from suction inlet and filters. |
| Solid Red | One beep | Wheels are stuck. | Turn OFF the robot and remove hair and debris from wheels. |
| Solid Red | Two beeps | Edge Cleaning Brushes are stuck. | Turn OFF the robot and remove hair and debris from Edge Cleaning Brushes. |
| Solid Red | Three beeps | Brush Roll is stuck. | Turn OFF the robot and remove hair and debris from Brush Roll. |
| Solid Red | Four beeps | Bumper is stuck. | Turn OFF the robot and tap the Bumper several times to release any debris that may have accumulated. |
Consumer Guarantee
This guarantee only applies outside of the USA and Canada. It is provided by BISSELL International Trading Company B.V. ("BISSELL").
This guarantee is provided by BISSELL. It gives you specific rights. It is offered as an additional benefit to your rights under law. You also have other rights under law which may vary from country to country. You can find out about your legal rights and remedies by contacting your local consumer advice service. Nothing in this guarantee will replace or lessen any of your legal rights or remedies. If you need additional instruction regarding this guarantee or have questions regarding what it may cover, please contact BISSELL Consumer Care or contact your local distributor.
This guarantee is given to the original purchaser of the product from new and is not transferable. You must be able to evidence the date of purchase in order to claim under this guarantee.
It may be necessary to obtain some of your personal information, such as a mailing address, to fulfill terms of this guarantee. Any personal data will be handled pursuant to BISSELL's Privacy Policy, which can be found at www.BISSELL.eu.
Limited 2 Year Guarantee (from the date of purchase by original purchaser)
Subject to the *EXCEPTIONS AND EXCLUSIONS identified below, BISSELL will repair or replace (with new, refurbished, lightly used, or remanufactured components or products), at BISSELL's option, free of charge, any defective or malfunctioning part or product.
BISSELL recommends that the original packaging and evidence of the date of purchase be kept for the duration of the guarantee period in case the need arises within the period to claim on the guarantee. Keeping the original packaging will assist with any necessary re-packaging and transportation but is not a condition of the guarantee.
If your product is replaced by BISSELL under this guarantee, the new item will benefit from the remainder of the term of this guarantee (calculated from the date of the original purchase). The period of this guarantee shall not be extended whether or not your product is repaired or replaced.
*EXCEPTIONS AND EXCLUSIONS FROM THE TERMS OF THE GUARANTEE
This guarantee applies to products used for personal domestic use and not commercial or hire purposes. Consumable components such as filters, belts and mop pads, which must be replaced or serviced by the user from time to time, are not covered by this guarantee.
This guarantee does not apply to any defect arising from fair wear and tear. Damage or malfunction caused by the user or any third party whether as a result of accident, negligence, abuse, neglect, or any other use not in accordance with the user guide is not covered by this guarantee.
An unauthorised repair (or attempted repair) may void this guarantee whether or not damage has been caused by that repair/atempt.
Removing or tampering with the Product Rating Label on the product or rendering it illegible will void this guarantee.
SAVE AS SET OUT BELOW BISSELL AND ITS DISTRIBUTORS ARE NOT LIABLE FOR ANY LOSS OR DAMAGE THAT IS NOT FORESEEABLE OR FOR INCIDENTAL OR CONSEQUENTIAL DAMAGES OF ANY NATURE ASSOCIATED WITH THE USE OF THIS PRODUCT INCLUDING WITHOUT LIMITATION LOSS OF PROFIT, LOSS OF BUSINESS, BUSINESS INTERRUsION, LOSS OF OPPORTUNITY, DISTRESS, INCONVENIENCE, OR DISAPPOINTMENT. SAVE AS SET OUT BELOW BISSELL'S LIABILITY WILL NOT EXCEED THE PURCHASE PRICE OF THE PRODUCT.
BISSELL does not exclude or limit in any way its liability for (a) death or personal injury caused by our negligence or the negligence of our employees, agents or subcontractors; (b) fraud or fraudulent misrepresentation; (c) or for any other matter which cannot be excluded or limited under law.
Consumer Care
If your BISSELL® product should require service or to claim under our limited guarantee, please contact us as follows:
Website:
global.BISSELL.com
Visit the BISSELL website: global.BISSELL.com
When contacting BISSELL, have model number of cleaner available.
Please record your Model Number:
Please record your Purchase Date:
NOTE: Please keep your original sales receipt. It provides proof of the date of purchase in the event of a guarantee claim. See guarantee for details.
| Color de la luz de estado | Avisos de fallo Possible Cause Remedies | |
| Rojo parpadeante | Un pitido Cliff Sensors are dirty. Clean the Cliff Sensors with a dry cloth. | |
| Rojo parpadeante | Dos pitidos Low power. Charge the robot battery. | |
| Rojo parpadeante | Tres pitidos Robot is trapped. Turn OFF the robot and move to a new location. | |
| Rojo parpadeante | Cuatro pitidos | Low suction. |
| Roja fija | Un pitido | Wheels are stuck. |
| Roja fija | Dos pitidos | Edge Cleaning Brushes are stuck. |
| Roja fija | Tres pitidos | Brush Roll is stuck. |
| Roja fija | Cuatro pitidos | Bumper is stuck. |
Maintenance. 34 - 35
Dépannage. 36
Garantie. 37
*EXCEPTIONS ET EXCLUSIONS DES CONDITIONS DE LA GARANTIE
- EV675 Robotic Vacuum
- READ ALL INSTRUCTIONS BEFORE USING YOUR APPLIANCE.
- WARNING
- TO REDUCE THE RISK OF FIRE, ELECTRIC SHOCK OR INJURY:
- SAVE THESE INSTRUCTIONS
- ORIGINAL INSTRUCTIONS. FOR OPERATION ON A 220-240 VOLT A.C. 50-60 HZ POWER SUPPLY ONLY.
- Package Contents
- Product View
- Setting Up Your Robot
- Setting Up the Remote Control
- Pair the Remote to the Robot
- Set the Clock
- Schedule Cleaning Sessions
- Getting Ready to Clean
- With Remote Control
- Without Remote Control
- Maintenance
- Replacing the Battery
- Replacing the Edge Cleaning Brushes
- Troubleshooting
- Status Light and Error Notifications
- Consumer Guarantee
- Limited 2 Year Guarantee (from the date of purchase by original purchaser)
- *EXCEPTIONS AND EXCLUSIONS FROM THE TERMS OF THE GUARANTEE
- Consumer Care
- Website:
- Visit the BISSELL website: global.BISSELL.com
- *EXCEPTIONS ET EXCLUSIONS DES CONDITIONS DE LA GARANTIE
Brand : BISSELL
Model : EV675
Category : Vacuum Cleaner