MOBILE 9000 BTU - Air Conditioning SILVERCREST - Free user manual and instructions
Find the device manual for free MOBILE 9000 BTU SILVERCREST in PDF.


| Product type | Portable air conditioner |
| Dimensions (W x H x D) | 33.5 × 68 × 28.5 cm |
| Weight | 23.5 kg |
| Power supply | 220‑240 V~, 50 Hz |
| Power consumption | 1000 W |
| Cooling capacity | 9000 BTU (2.6 kW) |
| Refrigerant | R290, 160 g |
| Noise level | 65 dB(A) |
| Air flow | 320 m³/h |
| Operating modes | Cooling, dehumidification, fan |
| Temperature range | 16 °C to 31 °C |
| Timer | 24 h (automatic on/off) |
| Protection class | I (air conditioner) / III (remote control) |
| Air filter | Washable, clean every 2 weeks |
| Power cord length | Approx. 1.75 m |
| Maximum room volume | 80 m³ |
| Minimum room area | 7.7 m² |
| Warranty | 3 years |
| Package contents | Air conditioner, remote control, hot air hose, fittings, window seal, plugs, batteries |
Frequently Asked Questions - MOBILE 9000 BTU SILVERCREST
User questions about MOBILE 9000 BTU SILVERCREST
0 question about this device. Answer the ones you know or ask your own.
Ask a new question about this device
Download the instructions for your Air Conditioning in PDF format for free! Find your manual MOBILE 9000 BTU - SILVERCREST and take your electronic device back in hand. On this page are published all the documents necessary for the use of your device. MOBILE 9000 BTU by SILVERCREST.
USER MANUAL MOBILE 9000 BTU SILVERCREST
natural_image
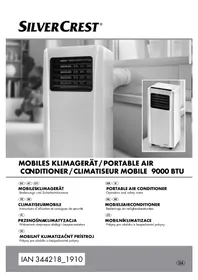
Exterior view of a modern air conditioner unit with a coiled tube, shown in black and white (no visible text or symbols)MOBILES KLIMAGERÄT / PORTABLE AIR CONDITIONER / CLIMATISEUR MOBILE 9000 BTU
DE AT CH
MOBILESKLIMAGERÄT
Operation and safety notes
NL BE
MOBIELEAIRCONDITIONER
Before reading, unfold both pages containing illustrations and familiarise yourself with all functions of the device.
FR BE
Wassertanks: ca. 0,51
Abmessungen
(B x H x T): ca. 33,5 x 68 x
28,5 cm
Lieferumfang
Intended use....Page 29
Parts description ......Page 30
Technical data Page 30
Scope of delivery ......Page 31
Safety notes......Page 32
Safety instructions for batteries/rechargeable batteries......Page 37
Before first use......Page 38
Checking the product and delivery contents......Page 38
Setting up the product......Page 38
Dismantling the product Page 39
Inserting / replacing batteries in the remote control......Page 39
Initial use......Page 39
Using cooling mode......Page 40
Using dehumidification mode......Page 40
Using fan mode......Page 41
Using the timer function......Page 41
Adjusting the air flow Page 42
Draining the water tank Page 42
Using continuous water drainage....Page 42
Troubleshooting......Page 43
Cleaning and care ......Page 44
Cleaning the air filter......Page 44
Storage......Page 45
Disposal Page 45
Warranty and service......Page 46
Warranty......Page 46
Service address Page 46
| List of pictograms used | |||
 | Read the instructions! |  | 24 hour timer function |
 | |||
 | |||
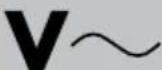 | Volts(alternating voltage) | 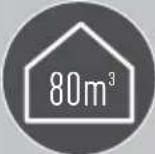 | Suitable for roomsup to 80 m3 |
| -GW6K] | Hertz (frequency) | 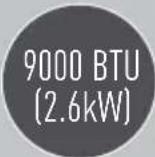 | Cooling capacity:9000 BTU (2.6 kW) |
 | Observe the warningsand safety notes! | 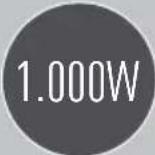 | Power rating: 1000 W |
 | Danger to life andrisk of accidents forinfants and children! |  | Noise level: 65 dB(A) |
 | Cools |  | Cable length:approx. 1.75 m |
 | Dehumidifies |  | Fans |
 | 2 fan speeds | 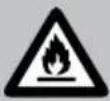 | ATTENTION, FIRE HAZARD: The device is filled with R290 propane gas. For repair work, always follow the manufacturer's instructions exclusively. |
 | Temperature adjustable from 16 to 31 °C |  | Protection class III |
 | 3-year warranty | 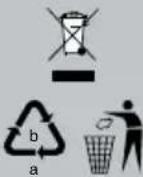 | Dispose of the packaging and device in an environmentally friendly manner! |
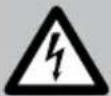 | Avoid the risk of fatal injury from electric shock | ||
Portable air conditioner 9000 BTU
- Introduction

Congratulations on the purchase of your new
product. You have chosen a high-quality product. The instructions for use are a part of this product. They contain important information concerning safety, use and disposal. Before using the product, please familiarise
yourself with all the instructions for use and safety notes. Only use the product as described and for the specified purposes. When passing this product on to others, please be sure to include all documentation.
Intendeduse
This product is a mobile air conditioner designed exclusively for circulating, dehumidifying, and regulating the temperature of air in dry interiors. Any use other than that described or any
product modification is prohibited and will result in damage. The manufacturer assumes no liability for damages due to improper use. This product is not intended for commercial use.
- Partsdescription
1 Control panel
2 Ventilation slots
3 Front air outlet (HIGH/LOW)
4 Castors
5 Side air inlet
6 Air filter
7 Back air outlet
8 Drain plug
9 Back air inlet
10 Mains cable with mains plug
11 Remote control
12 Window feed-through
13 Hot air outlet hose
14 Hose connection (window)
15 Hose connection (air conditioner)
16 Fixing plug
17 Water tank indicator (W.F)
18 Fan speed indicator
19 Timer indicator
20 Display
21 Modeindicator
22 TIMER button
23 SPEED button
24 MODE button
25 Signal receiver
(COOL/DEHUM/FAN)
26 ▽TEMP- button
27 ATEMP+ button
28 POWER button
29 2 batteries
30 Battery compartment cover
●Technicaldata
Model: AC-5439
Supply voltage:
220-240V\~,
50 Hz
Power consumption: 1000W
Protection class: I (air conditioner)
III/ (remote

control)
Energy
efficiency class: A
Cooling capacity: 9000 BTU
Air flow rate: 320 m^3/h
Refrigerant: R290
Quantity of
refrigerant: 160g
Minimum room
size (floor space): 7.7 m^2
Maximum
room volume: 80 m ^4
Noise level: 65 dB
Battery (remote
control):
2 x AAA 1.5 V
(LRO3)
Weight: 23.5 kg
Protectiontype:IP20
(indoor use)
Permissible operating
pressure
Discharge: 2.6 MPa
Suction: 1.0 MPa
Maximum
permissible
pressure
Discharge: 3.2 MPa
Suction: 1.0 MPa
Length of the
mains cable: approx. 1.8 m
Length of the hot
air outlet hose: approx. 1.5 m
Water tank
capacity: approx. 0.5 L
Dimensions
(W x H x D): approx. 33.5 x
68 × 28.5 cm
- Scope of delivery
1 Mobile air conditioner
1 Remote control
2 Window feed-throughs
1 Hot air outlet hose
1 Hose connection (window)
1 Hose connection (air conditioner)
2 Fixing plugs
2 1.5 V batteries (type LRO3 (AAA))
1 Set of operating and safety instructions
Specific information on the model(s) which this information relates to:
| Designation | Symbol | Value | Unit |
| Nominal power in cooling mode | P_rated in cooling mode | 2.6 | kW |
| Nominal power in heating mode | P_rated in heating mode | N/A | kW |
| Nominal power consumption in cooling mode | P_EER | 1.0 | kW |
| Nominal power consumption in heating mode | P_COP | N/A | kW |
| Designation Symbol Value | Unit | ||
| Nominal energy efficiency ratio in cooling mode | EERd 2.6 - | ||
| Nominal coefficient of performance in heating mode | COPd N/A - | ||
| Power consumption in operating state “temperature controller off” | P_TO | N/A W | |
| Power consumption in standby mode | P_SB | 0.5 W | |
| Power consumption of single-channel/dual-channel room air conditioners (separate specifications for cooling and heating mode) | Dual-channel: Q_DD | Dual-channel:N/A | Dual-channel:kWh/a |
| Single-channel: Q_SD | Single-channel:1.0 | Single-channel:kWh/h | |
| Sound power level L | WA | 65 dB(A) | |
| Global warming potential GWP 3 | kg CO_2 eq. | ||
| Contact address for further information | Tristar Europe B.V.Jules Verneweg 875015 BH TilburgTHE NETHERLANDS | ||

Safety notes
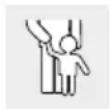
WARNING!
DANGER TO LIFE
AND RISK OF ACCIDENTS
FOR INFANTS AND CHIL-
DREN! This product may be
used by children aged 8 years and up, as well as by persons with reduced physical, sensory or mental capacities, or those lacking experience and knowledge, as long as they are supervised or instructed in the safe use of
the product and they understand the associated risks. Do not allow children to play with the product. Never allow children to clean or maintain this product unsupervised.
Do not leave the product or packaging material lying unattended. Plastic films or bags, or plastic parts etc. can turn into dangerous toys for children.
- Do not leave the product unattended during operation.
WARNING!
RISK OF ELECTRIC SHOCK!
A faulty electrical installation or a mains voltage which is too high may lead to an electrical shock.
- Only connect the product if the mains voltage of the socket corresponds with the specifications on the rating plate.
- Only connect the product to an easily accessible socket, so that the product can quickly be disconnected from the mains in the event of a fault.
- Do not use the product if it is visibly damaged or the mains cable 10 or mains plug is defective.
If the mains cable 10 for the product is damaged it must be replaced by the manufacturer, its service agent or a similarly
qualified person, in order to avoid hazards.
Do not open the housing; repairs must be carried out by a professional. Contact a specialist workshop for this purpose. Unauthorised repairs, incorrect connection or improper use will void all warranty and liability claims.
- When repairing the product, only use parts which meet the original specifications. This product contains electrical and mechanical parts which are vital to prevent safety hazards.
- Do not use the product with an external timer switch or a separate remote control system.
■ Never immerse the product, the mains cable 10 or the mains plug in water or other liquids.
■ Never touch the mains plug with wet hands.
■ Never pull on the mains cable 10 to unplug the mains plug from the socket. Always take hold of the mains plug to do so.
■ Never use the mains cable 10 as a carrying handle.
- Keep the product, the mains plug and the mains cable 10 away from open fire and hot surfaces.
■ Make sure that the mains cable 10 does not become a tripping hazard.
Do not kink the mains cab €0 or run it over sharp edges.
■ Only use the product indoors. Never use the product in wet rooms or in rain.
■ Never use the product near a fireplace.
■ Never use the product in areas where oil or water could be splashed.
■ Never keep the product where it may fall into a bath or washbasin.
■ Never reach for an electrical appliance which has fallen into water. In this event, immediately unplug the mains plug 10 from the power socket.
■ Ensure that children do not insert objects into the product.
If you are not using the product, you are cleaning it or if it malfunctions, always switch off the product and unplug the mains plug 10 from the mains socket.
All sockets must comply with the safety regulations of the respective country.
WARNING!
FIRE HAZARD!
■ Parts of the product become hot during operation and can cause fires if not handled properly.
■ Never cover the product. This could cause a fire.
ATTENTION! FIRE HAZARD!
The device is filled with R290 propane gas. For repair work, always follow the manufacturer's instructions exclusively.
WARNING!
RISK OF INJURY!
- Improper use of the product can lead to injury.
- Do not touch the hot parts of the product with bare fingers during operation. Also instruct other users of the hazards!
Please note that some of the product's parts may still be hot even after it has been switched off.
Do not insert hands, fingers or objects into the air inlets 5, 9 or air outlets 3, 7. Make children in particular aware of this hazard.
■ Always transport and store the product upright, never at an angle.
■ Switch off the product and unplug the mains plug 10 from the socket before moving the product.
- Do not use the product in rooms where flammable gases may be present.
- Keep long hair away from the product. It could get sucked into the air inlets 5, 9.
- Avoid using spray cans near the product.
- Operate and store the product in a room with a floor space of at least 7.7 m ^2 .
WARNING!
DANGER DUE TO REFRIGERANT!
The product contains 160 g of refrigerant gas R290, which is highly flammable and can cause damage to health and the environment if not handled properly.
Note that refrigerants can be odourless.
- Avoid contact with the refrigerant and never damage the refrigerant circuit.
■ Only store the product in rooms without continuously operating ignition sources (e.g. open flames, active gas appliances, active electric heaters, etc.).
- Operate the product only in sufficiently ventilated rooms with a floor space of at least 7.7 m ^2 .
The area in which the product is located must be designed in such a way that any refrigerant gas that may escape cannot accumulate.
■ Store the product in such a way as to avoid mechanical damage.
■ Repairs and maintenance work on the refrigerant circuit may only be carried out by specialist personnel certified for this purpose.
■ The refrigerant may only be charged or drained by certified personnel. - Maintenance work and repairs may only be carried out in accordance with the manufacturer's recommendations.
■ Local gas regulations must be observed.
■ Ventilation openings must always be freely permeable and must not be blocked.
■ The product may not be drilled or burnt.
■ Dispose of the product according to the local regulations of your place of residence.

ATTENTION! RISK OF DAMAGE!
■ Improper use of the product may result in damage to the product.
- Set up the product on an easily accessible, level, dry, heat-resistant and sufficiently stable surface. Do not set up the product on the edge of the work surface.
The product is on castors. Make sure that it always stands on a flat surface and cannot roll away.
■ To prevent a heat build-up, do not place the product directly against a wall or under wall cabinets or similar.
■ Never place the lamp on or near hot surfaces (hobs, etc.).
■ Do not allow the mains cable 10 to come into contact with hot parts.
■ Never expose the product to high temperatures (radiators, etc.) or to the weather (rain, etc.).
■ Never fill the product with liquid.
When cleaning, never immerse the product in water and never use a steam cleaner. Otherwise the product may be damaged.
Discontinue using the product if the product's plastic parts are cracked or deformed. Always replace damaged parts with genuine spare parts.
■ Always transport and store the product upright and avoid it tipping.
■ Always place the product at a minimum distance of 30 cm from walls, curtains, furniture and other obstacles on all sides.
■ Operate the product in rooms with a maximum volume of 80 m^3 .
- Do not use objects other than those permitted by the manufacturer to speed up the defrosting process.
■ Any person working on the refrigerant circuit must hold a qualification certificate from an industry accredited body which demonstrates their competence in the safe handling of refrigerants using a method known to the industry.
Service work should only be carried out in accordance with the manufacturer's instructions. If the maintenance and repair work requires the assistance of additional people, the person trained in handling flammable refrigerants should constantly supervise the work.

Safety instructions for batteries/rechargeable batteries
■ DANGER TO LIFE! Keep the
batteries/rechargeable batteries out of the reach of children. Seek immediate medical attention if swallowed!
- Ingestion may cause burns, perforation of soft tissue and death.
Severe burns may occur within 2 hours of swallowing batteries.
EXPLOSION HAZARD!

Never recharge disposable batteries. Do not short-circuit and / or open batteries or rechargeable batteries. This could cause batteries to overheat, catch fire or explode.
■ Never throw batteries/rechargeable batteries into fire or water.
- Do not exert mechanical loads on batteries/rechargeable batteries.
Risk of battery / rechargeable battery leakage
- Avoid extreme conditions and temperatures which may affect the batteries/rechargeable batteries, e.g. on radiators/in direct sunlight.
If batteries/rechargeable batteries have leaked, prevent contact
between skin, eyes and mucous membranes and the chemicals! Flush the affected areas immediately with clean water and seek medical attention!

WEAR PROTECTIVE
GLOVES! Exhausted or
damaged batteries/rechargeable batteries can cause chemical burns upon contact with the skin. Therefore wear suitable protective gloves in this case.
In the event of a battery leak, immediately remove the batteries/rechargeable batteries from the product to prevent damage.
Only use the same type of batteries/rechargeable batteries. Do not mix old and new batteries/rechargeable batteries!
■ Remove the batteries/rechargeable batteries if the product will not be used for an extended period.
Risk of product damage
■ Only use the specified battery / rechargeable battery type!
- Insert the batteries/rechargeable batteries according to the polarity marking (+) and (-) on the battery/rechargeable battery and the product.
- Clean the contacts on the battery/rechargeable battery and in the battery compartment with a dry, lint-free cloth or cotton bud before inserting the batteries!
■ Remove drained batteries / rechargeable batteries from the product immediately.
- Before first use
- Checking the product and delivery contents
ATTENTION! RISK OF DAMAGE! Opening the packaging carelessly with a sharp knife or other sharp objects could quickly damage the product.
■ Be very careful when opening the packaging.
□ Remove the product from the packaging.
☐ Check that the delivery contents are complete (see fig. A and K).
☐ Check to see if the product or the individual parts are visibly damaged. If this is the case, do not use the product. Contact the manufacturer via the service address given in the chapter "Service address".
- Setting up the product
- Set up the product on an easily accessible, level, dry, heat-resistant and stable surface to minimise vibration and noise. The product is fitted with castors 4.
- Do not roll the product over objects and, if necessary, protect fragile floor coverings from damage.
Note: The product must be located near a properly installed grounded power socket.
■ Make sure that the air inlets 5/9 and the air outlets 3/7 are always free of obstructions.
- Keep a minimum distance of 30 cm between the product and any obstacles.
Note: The window feed-through 12 is designed for horizontal and vertical sliding windows to allow the exhaust air of the product to escape outside.
☐ Screw the hose connection (window) 14 and the hose connection (air conditioner) 15 each to one end of the hot air outlet hose 13 (see fig. D). To do this, pull the ends of the hot air outlet hose 13 apart.
☐ Push the hose connection (air conditioner) 15 into the rail
provided on the back air outlet 7 (see fig. E).
Place the window feed-through 12 with the side indicated by the arrow in Figure G facing outwards towards the window opening. Adjust the length of the window feed-through 12 so that it corresponds to the width or height of the window (see fig. F). To do this, insert the two parts of the window feed-through 12 into each other. The window feed-through 12 can be adjusted as required between 67.5 cm and 123 cm.
☐ Fix the movable part of the window feed-through 12 using a fixing plug 16 (see fig. G).
☐ Close the window so that it directly contacts the window feed-through 12 and fixes it in place.
☐ Insert the hose connector (window) 14 into the round opening of the window feed-through 12 so that it locks firmly into place (see fig. H).
• Dismantling the product
☐ To disassemble the product, repeat the process in the reverse order.
Note: Drain the water tank as described in the chapter "Draining the water tank".
- Inserting / replacing batteries in the remote control
Open the battery compartment cover 30 on the back of the remote control 11 (see fig. K).
☐ Remove any used batteries from the battery compartment.
☐ Insert 2 AAA (LR03) type batteries 29 into the battery compartment. Make sure that the polarity (+ or -) is correct as indicated in the battery compartment.
☐ Reattach the battery compartment cover 30 to the battery compartment.
- Initial use
Note: The product has 3 operating modes: cooling mode, dehumidification mode and fan mode.
Unless otherwise described, you can select all the settings listed below using both the control panel 1 and the remote control 11 (see fig. B or C). Each time a button is pressed, an acoustic signal sounds as confirmation.
Note: The blank button on the remote control has no function.
☐ Set up the product as described in the chapter "Setting up the product".
☐Pl ug the mains plug 10 into a pro-
perly installed grounded power
socket. Do not use extension
leads or multi-plugs.
☐ Point the remote control 11 in the direction of the signal receiver 25 and make sure that there are no obstacles between the two components.
Note: You can control the direction of the air flow by moving the lever on the ventilation slots 2.
• Using cooling mode
□PressthePOWER button ⏻ 28 to switch on the product. The product switches on and the display 20 shows the pre-set / last set temperature.
□PresstheMODE button 24 repeatedly until the mode indicator 21 shows COOL. The product is now in cooling mode.
☐ Now set the desired temperature using the TEMP- button Ⓥ 26 / TEMP+ button Ⓐ 27 (temperature range: 16 °C–31 °C). The set temperature flashes on the
display 20 and is saved after approx. 5 seconds.
□PushtheSPEED button 23 to adjust the fan speed. The fan speed indicator 18 shows the selected speed (HIGH or LOW).
☐ To turn off the product, press the POWER button ⏻ 28.
●Usingdehumidification mode
Note: You can remove the hot air outlet hose 13 from the product when operating in dehumidification mode.
☐ For instructions on how to drain the integrated water tank, see the chapter "Draining the water tank" or "Using continuous water drainage".
□PressthePOWER button 28 to switch on the product.
□PresstheMODE button 24 repeatedly until the mode indicator 21 shows DEHUM. The product is now in dehumidification mode.
Note: The temperature is automatically set to approx. 2 °C below the currently measured room temperature and shown on the display 20.
The temperature cannot be set manually in this mode.
The fan speed is automatically set to LOW and indicated by the fan speed indicator 18. The fan speed cannot be set manually in this mode.
☐ To turn off the product, press the POWER button ⏻ 28.
• Using fan mode
Note: You can remove the hot air outlet hose 13 from the product when operating in fan mode.
□PressthePOWER button 28 to switch on the product.
□PresstheMODE button 24 repeatedly until the mode indicator 21 shows FAN. The product is now in fan mode. The temperature is automatically set to 25 °C and shown on the display 20. The temperature cannot be set manually in this mode.
■PushtheSPEED button 23 to adjust the fan speed. The fan speed indicator 18 shows the selected speed (HIGH or LOW).
- Using the timer function Automatic switch-on
□PushtheTIMER button 22 when the product is off. The display 20 flashes and the timer indicator 19 lights up.
□UsetheTEMP- button 26/TEMP+ button 27 to set the timer (1-24 hours). The set time flashes on the display 20.
□PushtheTIMER button 22
again to confirm the set time.
If the time is not confirmed and no further entry is made, the timer will be cancelled after about 10 seconds.
☐ If necessary, select an operating mode using the MODE button 24. This is indicated by the mode indicator 21 (COOL, DEHUM or FAN). The timer will start counting down the remaining time and the product will turn on automatically when the time is up.
☐ To cancel the timer function, press the TIMER button ⏻ 22 once.
Automatic switch-off (sleep timer)
□PushtheTIMER button 22 when the product is on.
□UsetheTEMP- button 26/TEMP+ button 27 to set the timer (1 - 24 hours). The set time flashes on the display 20.
□PushtheTIMER button 22 again to confirm the set time. If the time is not confirmed and no further entry is made, the timer
will be cancelled after about 10 seconds. The timer will start counting down the remaining time and the product will turn off automatically when the time is up.
☐ To cancel the timer function, press the TIMER button ⏻ 22 once.
- Adjusting the air flow
☐ You can adjust the air flow manually by moving the ventilation slots 2 on the front air outlet 3 up or down.
- Draining the water tank The integrated water tank fills with water in the following situations:
-A t low room temperature and high humidity, the product may not be able to evaporate the moisture quickly enough. If this is the case, water collects in the water tank.
- If the product is in dehumidification mode, it draws moisture from the air in the room. Consequently, water accumulates in the water tank. When the water tank is full, the water tank indicator (W.F) 17 lights up and the error code "E2" is shown on the display 20. The product stops operating.
Proceed as follows to drain the water tank:
☐ Switch off the product and remove the mains plug 10 from the socket.
☐ Pull the hose connector 15 off the back air outlet 7 and remove the hot air outlet hose 13 from the product.
☐ Take the product to a place where water can drain properly.
☐ Pull the drain plug 8 (as well as the inner plug beneath it) out of the opening and allow the water to drain (see fig. I).
☐ Insert both drain plugs 8 back into the opening properly. Once the product has been connected to the power supply and the hot air outlet hose 13 has been reattached, it can resume operation.
●Usingcontinuous water drainage
If the product is mainly being used in dehumidification mode, it is possible to drain the water continuously and thus empty the water tank automatically.
☐ Switch off the product and remove the mains plug 10 from the socket.
☐ Pull the drain plug 8 (as well as the inner plug beneath it) out
of the opening and allow the water to drain (see fig. 1).
☐ Connect a suitable drainage hose (not included) to the opening.
☐ Place the open end of the drain hose in a suitable collecting vessel or drain.
■ Make sure that the drain hose leads to the drain as directly as possible and without kinks or knots. This way, the water collected during the dehumidification process is automatically fed into the drain.
Some errors are caused by minor malfunctions and can sometimes be corrected by the user. If you are still unable to remedy the problem, contact customer service. Do not repair the product yourself under any circumstances.
- Troubleshooting
| Problem Possible cause Solution | ||
| The product won't start. | The water tank is full. Empty | the water tank. |
| The room temperature is lower than the set temperature (cooling mode). | Adjust the temperature setting. | |
| The product is not cooling sufficiently. | Doors and windows are not closed properly. | Close doors and windows. |
| There are heat sources in the room. | Remove all heat sources if possible. | |
| The hot air outlet hose 13 is not connected or blocked. | Connect the hot air outlet hose 13 or clean it. | |
| The temperature setting is too high. | Adjust the temperature setting. | |
| The air inlets 5, 9 are blocked. | Clean the air inlets 5, 9. | |
| The product is very loud. | The product is standing on uneven ground. | Place the product on as level and flat a surface as possible. |
| Error code E0 The room temperature sensor is defective. | Contact customer service. | |
| Error code E2 The water tank is full. Empty the water tank. | ||
- Cleaning and care
WARNING!
RISK OF ELECTRIC SHOCK!
Improper handling of the product may result in electric shock.
■ Always switch the product off and unplug the mains plug 10 from the socket before cleaning the product.
ATTENTION! RISK OF SHORT CIRCUIT! Water or other liquids inside the housing may cause a short circuit.
■ Never immerse the product in water or other liquids.
- Do not allow water or other liquids to enter the housing.
ATTENTION! RISK OF DAMAGE! Improper use of the product may result in damage to the product.
- Do not use aggressive cleaning agents, brushes with metal or nylon bristles, or sharp or metal
objects such as knives, hard spatulas, etc. These can damage the surfaces.
□ Clean the housing and the remote control 11 with a soft, dry cloth.
- Cleaning the air filter
□ Clean the air filter 6 every 2 weeks or when it is visibly dirty.
☐ Unplug the mains plug 10 before cleaning.
Drain the water tank completely (see chapter "Draining the water tank").
☐ Wipe the product with a slightly damp cloth. Then allow all parts to dry completely.
☐ Remove the air filter 6 from the housing (see fig. J).
☐ Clean it with lukewarm water (max. 40 °C) and some neutral detergent and let it air dry completely (without direct sunlight).
☐ Put the air filter ☐ back in the housing.
Storage
Note: All parts must be completely dry prior to storage.
■ Always store the product in a dry location.
- Do not expose the product to direct sunlight.
■ Store the product out of reach of children.
Drain the water tank as described in the chapter "Draining the water tank".
●Disposal
The packaging is made entirely of recyclable materials, which you may dispose of at local recycling facilities.
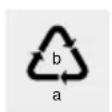
Observe the marking of the packaging materials for waste separation, which are marked with abbreviations (a) and numbers (b) with following meaning: 1–7: plastics / 20–22: paper and fibre-board / 80–98: composite materials.

The product and packaging materials are recyclable, dispose of it separately for better
waste treatment. The Triman logo is valid in France only.

Contact your local refuse disposal authority for more details of how to dispose of your worn-out product.
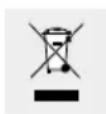
To help protect the environment, please dispose of the product properly when it has reached the end of its useful life and not in the household waste. Information on collection points and their opening hours can be obtained from your local authority.
Faulty or used batteries / rechargeable batteries must be recycled in accordance with Directive 2006/66/EC and its amendments. Please return the batteries/rechargeable batteries and/or the product to the available collection points.
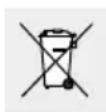
Environmental damage through incorrect disposal of the batteries / rechargeable batteries!
Batteries/rechargeable batteries may not be disposed of with the usual domestic waste. They may contain
toxic heavy metals and are subject to hazardous waste treatment rules and regulations. The chemical symbols for heavy metals are as follows: Cd = cadmium, Hg = mercury, Pb = lead. That is why you should dispose of used batteries/rechargeable batteries at a local collection point.
The device contains refrigerant. Refrigerant must be professionally disposed of as hazardous waste at an approved collection point.
● Warranty and service
Warranty
The product has been manufactured to strict quality guidelines and meticulously examined before delivery. In the event of product defects you have legal rights against the retailer of this product. Your legal rights are not limited in any way by our warranty detailed below.
The warranty for this product is 3 years from the date of purchase. Should this product show any fault in materials or manufacture within 3 years from the date of purchase, we will repair or replace it – at our choice – free of charge to you.
The warranty period begins on the date of purchase. Please keep the original sales receipt in a safe location. This document is required as your proof of purchase. This warranty becomes void if the product has been damaged, or used or maintained improperly.
The warranty applies to defects in material or manufacture. This warranty does not cover product parts subject to normal wear, thus possibly considered consumables (e.g. batteries) or for damage to fragile parts, e.g. switches, rechargeable batteries or glass parts.
• Service address
Please have your receipt and the item number (IAN 344218_1910) ready as your proof of purchase when enquiring about your product.

WAARSCHUWING! BRANDGEVAAR!
Gooi batterijen / accu's nooit in vuur of water.
NOSIĆ Z RĘKAWICE OCHRONNE! Wylane
NOSIT OCHRANNÉ RUKAVICE! Vyteklé
NOSTE OCHRANNÉ RUKAVICE! Vytečené
- MOBILES KLIMAGERÄT / PORTABLE AIR CONDITIONER / CLIMATISEUR MOBILE 9000 BTU
- MOBILESKLIMAGERÄT
- MOBIELEAIRCONDITIONER
- FR BE
- Lieferumfang
- Safety notes......Page 32
- Before first use......Page 38
- Initial use......Page 39
- Troubleshooting......Page 43
- Cleaning and care ......Page 44
- Storage......Page 45
- Disposal Page 45
- Warranty and service......Page 46
- Portable air conditioner 9000 BTU
- - Introduction
- Intendeduse
- - Partsdescription
- (COOL/DEHUM/FAN)
- ●Technicaldata
- Permissible operating
- pressure
- Maximum
- permissible
- - Scope of delivery
- Safety notes
- WARNING!
- DANGER TO LIFE
- AND RISK OF ACCIDENTS
- FOR INFANTS AND CHIL-
- DREN! This product may be
- RISK OF ELECTRIC SHOCK!
- FIRE HAZARD!
- ATTENTION! FIRE HAZARD!
- RISK OF INJURY!
- DANGER DUE TO REFRIGERANT!
- ATTENTION! RISK OF DAMAGE!
- Safety instructions for batteries/rechargeable batteries
- Risk of battery / rechargeable battery leakage
- WEAR PROTECTIVE
- GLOVES! Exhausted or
- Risk of product damage
- - Before first use
- - Checking the product and delivery contents
- - Setting up the product
- • Dismantling the product
- - Inserting / replacing batteries in the remote control
- - Initial use
- Note: The blank button on the remote control has no function.
- • Using cooling mode
- ●Usingdehumidification mode
- • Using fan mode
- - Using the timer function Automatic switch-on
- Automatic switch-off (sleep timer)
- - Adjusting the air flow
- - Draining the water tank The integrated water tank fills with water in the following situations:
- Proceed as follows to drain the water tank:
- ●Usingcontinuous water drainage
- - Troubleshooting
- - Cleaning and care
- Storage
- ●Disposal
- ● Warranty and service
- Warranty
- • Service address
- WAARSCHUWING! BRANDGEVAAR!
- NOSIĆ Z RĘKAWICE OCHRONNE! Wylane
- NOSIT OCHRANNÉ RUKAVICE! Vyteklé
- NOSTE OCHRANNÉ RUKAVICE! Vytečené
Brand : SILVERCREST
Model : MOBILE 9000 BTU
Category : Air Conditioning