
MXGR2165 - Croque monsieur clip Mx Onda - Free user manual and instructions
Find the device manual for free MXGR2165 Mx Onda in PDF.
| Product type | Panini press / Sandwich maker |
| Brand | Mx Onda |
| Model | MXGR2165 |
| Dimensions (L x W x H) | 235 x 240 x 100 mm |
| Weight | 2.13 kg |
| Power supply | 220-240 V ~ 50/60 Hz |
| Power | 750 W |
| Cable length | Approx. 80 cm |
| Functions | Sandwiches, waffles, grill |
| Removable plates | 3 sets of plates: sandwiches, waffles, grill |
| Non-stick coating | Yes, on all plates |
| Indicator lights | Power light (on when operating) and temperature light (turns off when at temperature) |
| Thermostat | Yes, automatic temperature control |
| Cool-touch handle | Yes |
| Safety | Automatic shut-off not specified; do not immerse, do not use outdoors, keep out of reach of children |
| Care and cleaning | Plates hand washable (not dishwasher); housing cleaned with a damp cloth; do not use metallic scouring pads |
| Usage | Household use only |
| Included accessories | 3 sets of plates (sandwiches, waffles, grill) |
| Warranty | Standard manufacturer (not specified) |
| Customer service | MX Onda, S.A.; tel. +34 902 551 501; email mxsat@mxonda.es |
Frequently Asked Questions - MXGR2165 Mx Onda
User questions about MXGR2165 Mx Onda
0 question about this device. Answer the ones you know or ask your own.
Ask a new question about this device
Download the instructions for your Croque monsieur clip in PDF format for free! Find your manual MXGR2165 - Mx Onda and take your electronic device back in hand. On this page are published all the documents necessary for the use of your device. MXGR2165 by Mx Onda.
USER MANUAL MXGR2165 Mx Onda
natural_image
Exterior view of a black and white food grater with a side panel and control buttons (no text or symbols visible)CE
ANTES DE SU USO LEA ATENTAMENTE ESTE MANUAL
ATENCIÓN
natural_image
Two black plastic tray containers with internal triangular patterns and labeled parts (8 and 7), no text or symbols present.USO COMO SANDWICHERA
natural_image
Diagram of a device with two arrows pointing to internal components (no text or symbols)Fig.1
MANUAL DE INSTRUÇÕES
Mx Onda
SANDUICHEIRA, GRELHA E MÁQUINA DE WAFFLE ELÉTRICA
MODELO: MX-GR2165

natural_image
Exterior view of a black and white electric grill grater with a handle and control buttons (no text or symbols visible)CE
ANTES DE UTILIZAR LEIA ESTE MANUAL CUIDADOSAMENTE
ATENÇÃO
natural_image
Two black plastic tray containers with internal patterns, labeled ⑧ and ⑦ (no text or symbols on the compartments)natural_image
Diagram of a device with two arrows pointing to internal components (no text or symbols)Fig.1
MANUEL D'INSTRUCTIONS
Mx Onda
MACHINE À SANDWICH, GRILL ET GAUFRIER ÉLECTRIQUE
MODÈLE: MX-GR2165
natural_image
Exterior view of a black and white Xiaomi Onda grater appliance (no text or symbols visible on body)CE
AVANT D'UTILISER CE MANUEL DE LIRE ATTENTIVEMENT
ATTENTION
natural_image
Two black plastic tray containers with internal triangular patterns, labeled with numbers 7 and 8 (no text or symbols on the shapes themselves)UTILISER COMME MACHINE À SANDWICH
natural_image
Diagram of a device with two arrows pointing to internal components (no text or symbols)Fig.1
natural_image
Exterior view of a black and white electric grill (no text or symbols visible on the appliance body)CE
PRIMA DI UTILIZZARE IL MANUALE DI LEGGERE ATTENTAMENTE
ATTENZIONE
natural_image
Diagram of a device with two arrows pointing to internal components (no text or symbols)Fig.1
natural_image
Exterior view of a black and white electric grill (no text or symbols visible on the appliance body)CE
natural_image
Diagram of a device with an open lid and internal compartments, showing directional arrows (no text or symbols)Fig.1
natural_image
Exterior view of a black and white Xiaomi Onda grater appliance (no text or symbols visible on body)CE
BEFORE USE READ THIS MANUAL CAREFULLY
ATTENTION!
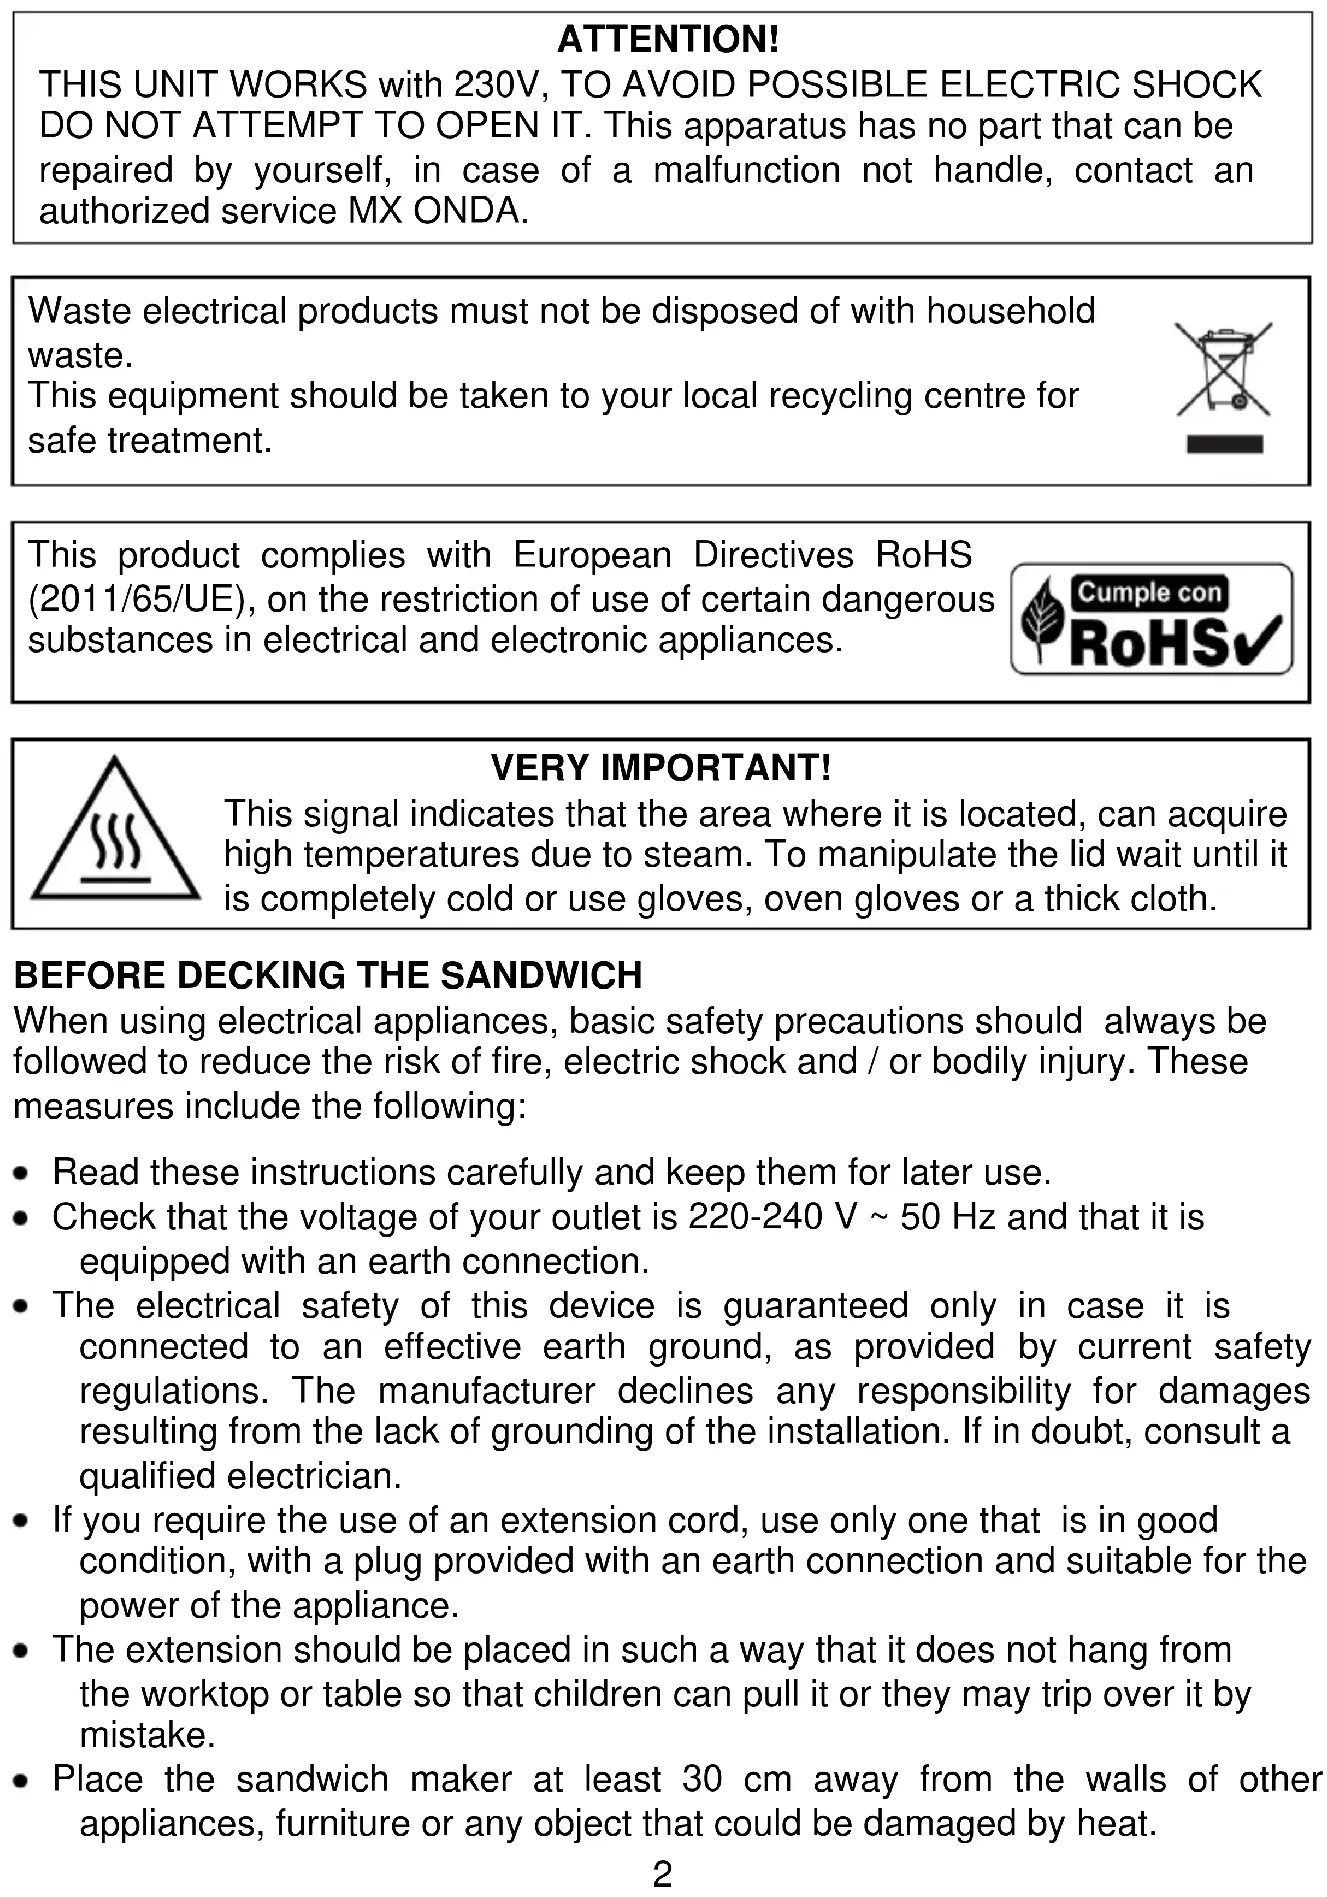
THIS UNIT WORKS with 230V, TO AVOID POSSIBLE ELECTRIC SHOCK DO NOT ATTEMPT TO OPEN IT. This apparatus has no part that can be repaired by yourself, in case of a malfunction not handle, contact an authorized service MX ONDA.
Waste electrical products must not be disposed of with household waste.
This equipment should be taken to your local recycling centre for safe treatment.
This product complies with European Directives RoHS (2011/65/UE), on the restriction of use of certain dangerous substances in electrical and electronic appliances.

VERY IMPORTANT!
This signal indicates that the area where it is located, can acquire high temperatures due to steam. To manipulate the lid wait until it is completely cold or use gloves, oven gloves or a thick cloth.
BEFORE DECKING THE SANDWICH
When using electrical appliances, basic safety precautions should always be followed to reduce the risk of fire, electric shock and / or bodily injury. These measures include the following:
- Read these instructions carefully and keep them for later use.
- Check that the voltage of your outlet is 220-240 V \~ 50 Hz and that it is equipped with an earth connection.
- The electrical safety of this device is guaranteed only in case it is connected to an effective earth ground, as provided by current safety regulations. The manufacturer declines any responsibility for damages resulting from the lack of grounding of the installation. If in doubt, consult a qualified electrician.
- If you require the use of an extension cord, use only one that is in good condition, with a plug provided with an earth connection and suitable for the power of the appliance.
- The extension should be placed in such a way that it does not hang from the worktop or table so that children can pull it or they may trip over it by mistake.
-
Place the sandwich maker at least 30 cm away from the walls of other appliances, furniture or any object that could be damaged by heat.
-
To protect against the risk of electric shock and personal injury, do not put the cord, plug or sandwich maker in water or any other liquid.
- After removing the packaging, check that the appliance is not damaged. If in doubt, do not use it; Contact the technical assistance staff.
- Packaging materials such as plastic bags, polystyrene foam, etc., should not be left within the reach of children, as they are a potential source of danger.
- Before using this appliance for the first time, clean the sandwich maker with a slightly damp cloth, DO NOT use metal scouring pads or abrasive liquid cleaners. Dry all parts carefully.
- The manufacturer declines any responsibility for damages resulting from improper, incorrect or reckless use of the device.
SECURITY MEASURES
- This product is not a toy, children should not play with this device. The cleaning and maintenance to be performed by the user can not be done by children, unless they are over 8 years old and are supervised by an adult.
- This device can not be used by children (under 8 years old) or people with reduced physical, sensory or mental abilities or without experience and knowledge, unless they have received appropriate instructions on the use of the device and are supervised by an adult or responsible person.
- This device is designed only for domestic, non-professional use. MX ONDA will not accept any liability and the guarantee will be invalid in case of improper use or failure to comply with the instructions.
- The sandwich maker incorporates a short length of power cord, to reduce the risk of bodily injury that can occur when entangled in or tripping over long cables.
- Failure to comply with these warnings and safety instructions could result in burns or serious injury.
- This appliance works at high temperatures, so during handling do NOT touch hot surfaces. Hold it by the handles. If necessary, use gloves or oven mitts.
- While the sandwich maker is connected or still hot, do not neglect its vigilance and keep it out of reach of children.
- Always place the sandwich maker on a dry, stable and level surface, do not use it outdoors.
- To disconnect the appliance from the mains, gently pull the plug from the socket. Never do it by pulling the cable.
- Make sure that the cable does not hang over the edge of the table, countertop or counter, or that it touches hot surfaces.
-
Unplug the sandwich maker and allow it to cool before moving it or cleaning it.
-
When in operation, a fire may occur if the sandwich maker comes into contact or is near flammable material or items such as curtains, net curtains, etc.
- The use of accessories not recommended by the appliance manufacturer may cause fire, electric shock or bodily injury.
- Disconnect the sandwich maker, whenever you are not using it or when there is a power failure, or "jump" a fuse or automatic and before proceeding with the maintenance cleaning itself.
- Do not place the sandwich maker on or near gas burners, hot plates, or hot ovens.
- In case of failure, anomalies, if the sandwich maker has fallen, the plug or other parts have deteriorated, or the cable is damaged, do not plug in the appliance and do not try to repair it on your own. Contact the nearest MX ONDA Official Technical Service.
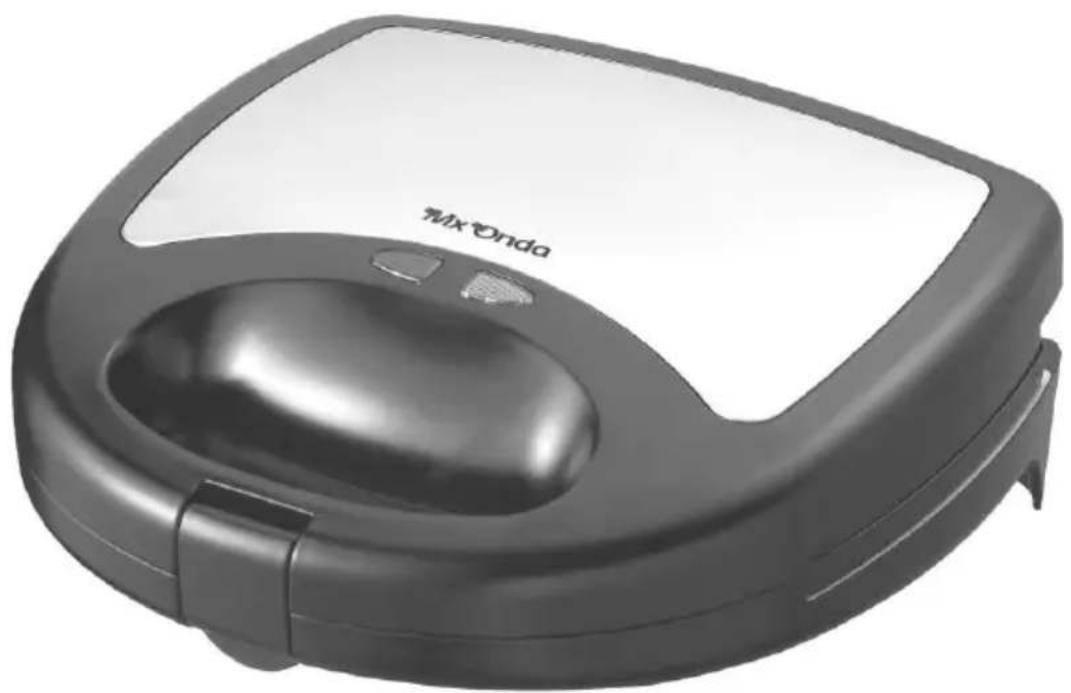
BEFORE USING THE SANDWICH MAKER FOR THE FIRST TIME
- Place the sandwich maker on a firm, dry and level surface.
- Open the top cover using the clip 3.
- Place any of the plates (7, 8 or 9) correctly in their position. To do this insert the tabs of the plate into the holes of the sandwich maker and then press the plate until you hear a "click", indicating that it is perfectly fitted. Repeat this operation with the other plate.
- Close the upper cover, fixing it to the lower cover by means of the closing clip 3.
- Plug the plug of the mains cable of the sandwich maker into the mains and the power indicator 1 as well as the temperature indicator 2 will light up, wait a few minutes until the temperature indicator 2 goes out.
- Unplug the sandwich maker and wait for it to cool completely.
- Open the closing clip 3, lift the upper cover and remove the plates using buttons 5 and 6.
- Wash all three sets of plates with hot water, some dishwashing liquid and a sponge. Do not use metal scouring pads or abrasive liquid cleaners and DO NOT insert the plates in the dishwasher, then dry them with a cloth.
- Clean all surfaces with a slightly damp cloth, DO NOT use metal scouring pads or abrasive liquid cleaners. Thoroughly dry all surfaces.
Note:
The first few times you use the appliance it is possible that it gives off some smoke or a slight odor, this is caused by the lubrication of the different internal elements. It is normal and does not mean a malfunction.
CONTROLS AND ELEMENTS
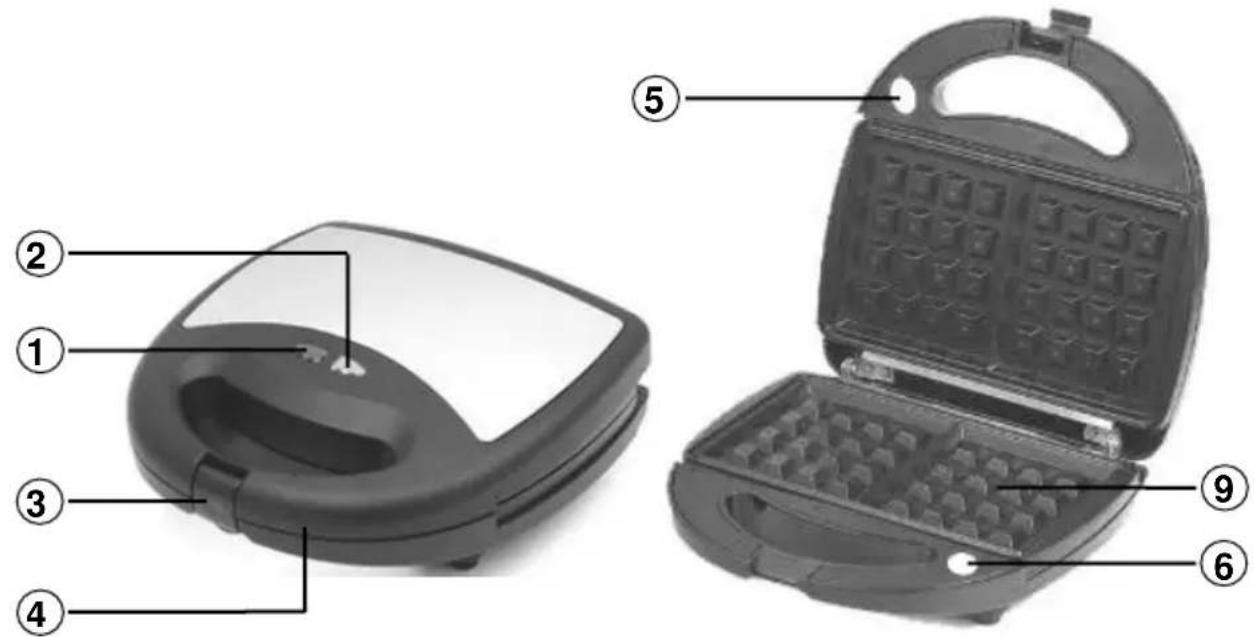
- Power indicator
- Temperature indicator
- Closing clip
- Handle
- Top plate extraction button
- Bottom plate extraction button
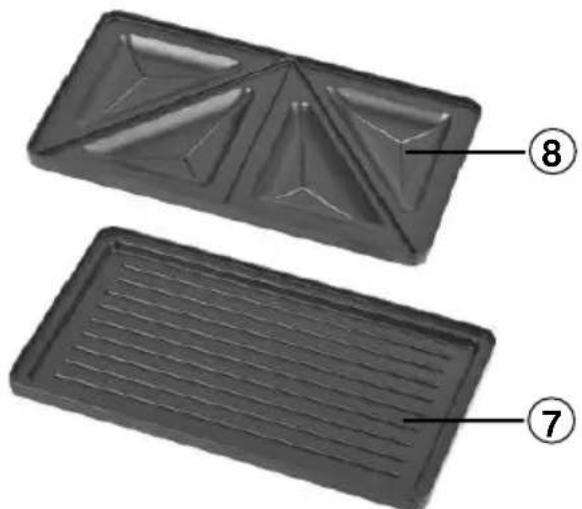
- Grill plates
- Plates for sandwiches
- Waffle plates
natural_image
Two black plastic tray containers with internal patterns, labeled 7 and 8 (no text or symbols on the shapes themselves)USE AS A SANDWICH MAKER
To use this appliance as a sandwich maker, proceed as follows:
- Check that the appliance is disconnected from the mains and that both the sandwich maker and the plates are completely cold.
- Insert the sandwiches plates 8 correctly, as indicated in the previous section.
- Lightly spread the two plates with a little butter or margarine. This will prevent the sandwiches from sticking to the plates.
- Close the upper cover, fixing it to the lower cover by means of the closing clip 3.
-
Plug the plug of the network cable of the sandwich maker into the mains, the power indicator 1 will light up. The appliance will begin to heat up.
-
Allow the unit to preheat for a few minutes, once the maximum temperature has been reached the automatic thermostat will act and the temperature indicator 2 will turn off.
Note:
During use it is normal for the light indicator 2 to turn on and off, this means that the plates have reached the maximum temperature and that the thermostat is controlling the temperature correctly.
- Open the clip 3 and lift the upper lid of the sandwich maker, holding it by the handle 4. Be careful not to touch the metal surface of the upper lid of the sandwich maker, as it is hot.
- Place the sandwiches on the bottom plate. Fully lower the upper cover, by the handle 4 and joining the two covers with the closing clip 3.
- Wait a few minutes until the sandwiches are made to your liking. The cooking time will depend on the type of bread, the filling used, etc.
- Open the closing clip 3 and lift the top cover. Remove sandwiches using wooden or plastic tongs. Do not use metal tongs or tongs, it could damage the surface of the plates.
- If you are going to use the sandwich maker again, repeat steps 8 through 10 described above.
- After using the unit, disconnect the plug from the socket and close the top cover. Do not move the appliance and allow it to cool completely.
- Once the sandwich maker is completely cold, proceed as indicated in the "Cleaning the unit" section.
USE AS WAFLE MAKER
If you want to use this appliance to make waffles, the operation is similar to that indicated in the section "Use as a sandwich maker". Proceed as follows:
- Pre-prepare dough to make the waffles.
- Insert the waffle plates correctly 9. Spread the two plates lightly with a little oil or butter.
- Then carefully place the dough on the waffle plate, without exceeding the capacity of the waffle plate.
- Cook for a few minutes or until the waffles are golden brown. Remove the waffles with wooden or plastic tongs.
- Once you have the waffle outside the sandwich maker, you can serve it alone or add chocolate, whipped cream, ice cream balls, syrups, etc.
USE AS A GRILL
If you want to use this appliance as a grill, the operation is similar to that indicated in the section "Use as a sandwich maker". Proceed as follows:
- Insert grill plates correctly 7.
- Pour a few drops of oil on the surface of the bottom plate.
- If you are cooking any food that contains any amount of fat, or that has been previously marinated, it will not be necessary to grease the surface of the plate.
- Cooking times may vary depending on the type of food, size, thickness, etc.
- The food should be at room temperature. If you are going to cook frozen foods, you must first defrost them.
- When the food is made to your liking, remove it. Add salt, pepper or accompany it with some sauce.
TIPS FOR USE
- Remember that the plates are coated with a non-stick surface and that you should always use wooden or plastic utensils.
• Always preheat the plates before each use.
• Always clean the plates after using the sandwich maker. - If you never use margarine or butter, spread the plates from time to time with vegetable olive oil, this will prevent sandwiches or food from sticking together and help you to perform the cleaning of the plates more effectively.
CLEANING THE UNIT
- Unplug the sandwich maker from the mains socket and wait until it is completely cold before cleaning it.
- Once the plates are cold, remove them from the sandwich maker. Press button 6 and remove the bottom plate. Press button 5 and remove the top plate.
Attention: Do not submerge the sandwich maker in water or other liquid, and do not put it in the dishwasher either.
- Clean all surfaces with a slightly damp cloth, DO NOT use metal scouring pads or abrasive liquid cleaners. Thoroughly dry all surfaces.
-
Clean the plates with hot water, some dishwashing liquid and a sponge, then rinse and let dry.
DO NOT use metal scouring pads or abrasive liquid cleaners and do not insert the plates in the dishwasher. -
If some drops of fat or some other type fall on the inside of the sandwich maker (Fig.1), clean it with a slightly damp cloth, DO NOT use metal scouring pads or abrasive liquid cleaners. Be careful not to damage the resistors. Dry all the inside thoroughly.
- Store the plates so that the surface of the plates does not rub with metallic elements so that they do not suffer scratches.
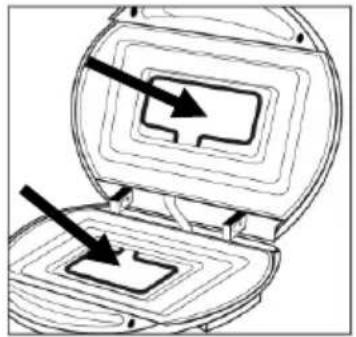
natural_image
Diagram of a device with two arrows pointing to internal components (no text or symbols)Fig.1
TECHNICAL SPECIFICATIONS
Operating voltage 220 - 240 V \~ 50/60 Hz Power consumption 750 W Cable length 80 cm approx. Dimensions 235 x 240 x 100 mm (l, a, h) Weight 2.13 Kg
Specifications subject to change without notice.
This product complies with the European Directives 2004/108/EC (EMC – Electromagnetic Compatibility) and the 2006/95/EC (LVD – Low Voltage Directive) relative to Low Tension Security.
"MX, MX ONDA" and its logos are trademarks of MX ONDA, S.A.
Telephone of information and Technical Service: +34 902 551 501
MX ONDA, S.A.
Isla de Java, 37
28034 - MADRID (SPAIN)

natural_image
Icon of a person reading a book inside a circle (no text or symbols)Manual de instrucciones Instruction manual Manual de instruções Benutzerhandbuch Manuel utilisateur Manuale di istruzioni

E-MAIL: mxsat@mxonda.es
http://www.mxonda.es
- ATENCIÓN
- USO COMO SANDWICHERA
- MANUAL DE INSTRUÇÕES
- Mx Onda
- SANDUICHEIRA, GRELHA E MÁQUINA DE WAFFLE ELÉTRICA
- ATENÇÃO
- MANUEL D'INSTRUCTIONS
- MACHINE À SANDWICH, GRILL ET GAUFRIER ÉLECTRIQUE
- ATTENTION
- UTILISER COMME MACHINE À SANDWICH
- ATTENZIONE
- ATTENTION!
- VERY IMPORTANT!
- BEFORE DECKING THE SANDWICH
- SECURITY MEASURES
- BEFORE USING THE SANDWICH MAKER FOR THE FIRST TIME
- Note:
- CONTROLS AND ELEMENTS
- USE AS A SANDWICH MAKER
- USE AS WAFLE MAKER
- USE AS A GRILL
- TIPS FOR USE
- CLEANING THE UNIT
- TECHNICAL SPECIFICATIONS
Brand : Mx Onda
Model : MXGR2165
Category : Croque monsieur clip