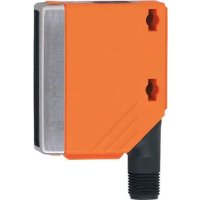
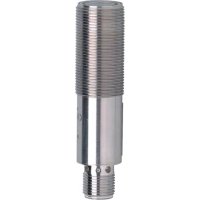
O5D150 - Laser pointer IFM - Free user manual and instructions
Find the device manual for free O5D150 IFM in PDF.


User questions about O5D150 IFM
0 question about this device. Answer the ones you know or ask your own.
Ask a new question about this device
Download the instructions for your Laser pointer in PDF format for free! Find your manual O5D150 - IFM and take your electronic device back in hand. On this page are published all the documents necessary for the use of your device. O5D150 by IFM.
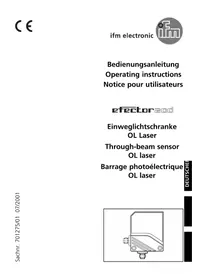
USER MANUAL O5D150 IFM
CE
Operating instructions Optical distance sensor
O5D15x
GB

Contents
1 Preliminary note....3
1.1 Symbols used .... 3
2 Safety instructions ....3
3 Functions and features .... 4
3.1 Applications .... 4
4 Installation....5
4.1 Installation conditions ....5
5 Operating and display elements .... 5
6 Electrical connection....6
7 Settings....7
7.1 The sensor is to switch when the object is detected....7
8 IO-Link 7
8.1 General information....7
8.2 Device-specific information....7
8.3 Parameter setting tools....7
9 Operation....8
9.1 Electronic lock....8
9.2 Fault indications....8
10 Maintenance, repair and disposal....9
1 Preliminary note
1.1 Symbols used
▶ Instructions
▷ Reaction, result
[...] Designation of keys, buttons or indications
→ Cross-reference

Important note
Non-compliance may result in malfunction or interference.
2 Safety instructions
- The device described is a subcomponent for integration into a system.
- The manufacturer of the system is responsible for the safety of the system.
- The system manufacturer undertakes to perform a risk assessment and to create a documentation in accordance with legal and normative requirements to be provided to the operator and user of the system. This documentation must contain all necessary information and safety instructions for the operator, the user and, if applicable, for any service personnel authorised by the manufacturer of the system.
- Read this document before setting up the product and keep it during the entire service life.
- The product must be suitable for the corresponding applications and environmental conditions without any restrictions.
- Only use the product for its intended purpose (→ Functions and features).
- If the operating instructions or the technical data are not adhered to, personal injury and/or damage to property may occur.
- The manufacturer assumes no liability or warranty for any consequences caused by tampering with the product or incorrect use by the operator.
- Installation, electrical connection, set-up, operation and maintenance of the unit must be carried out by qualified personnel authorised by the machine operator.
- Protect units and cables against damage.
According to cULus
Caution - Use of controls or adjustments or procedures other than those specified herein may result in hazardous radiation exposure.

Visible laser light; CLASS 1 LASER PRODUCT.
EN/IEC 60825-1 : 2007 and EN/IEC 60825-1 : 2014
Complies with 21 CFR 1040.10 except for conformance with IEC 60825-1
Ed. 3., as described in Laser Notice No. 56, dated May 8, 2019.
Position of the product label
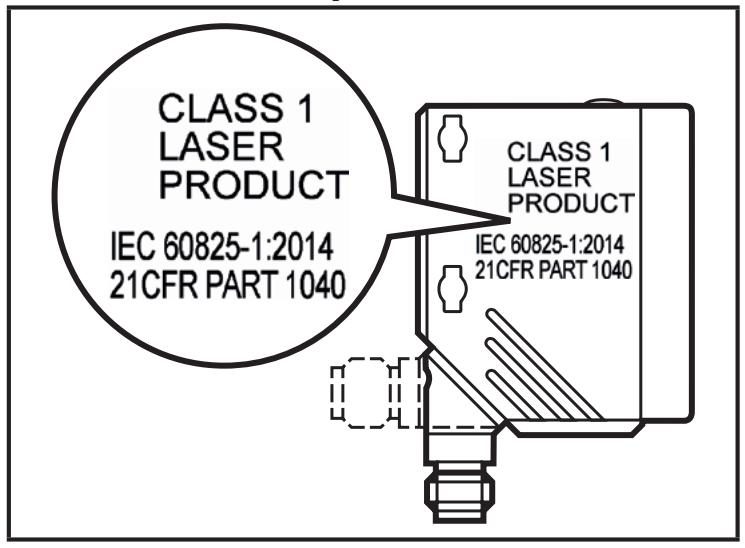
Warning sign

3 Functions and features
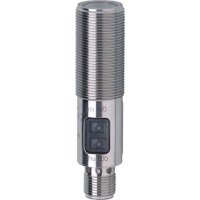
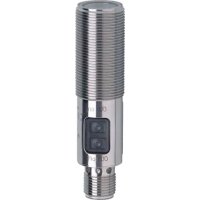
The unit is used as an optical distance sensor.
3.1 Applications
• The optical distance sensor measures distances between 0.03 and 2 m.
- It has a background suppression of up to 20 m.
• The switching outputs are complementary.

The distance between the sensor and the background must be limited to max. 20 m by the customer. Otherwise measured values can be ambiguous → 4.1 Installation conditions.
4 Installation
4.1 Installation conditions
▶ Install the unit so that the object to be detected is within a measuring range of 0.03...2 m.
Any object between the set switch point and a distance of 20 m from the sensor is suppressed.

Reflecting surfaces in the direct beam path of the sensor – also in the range > 20 m – are to be avoided by the customer. Otherwise the measured values can be ambiguous.
5 Operating and display elements
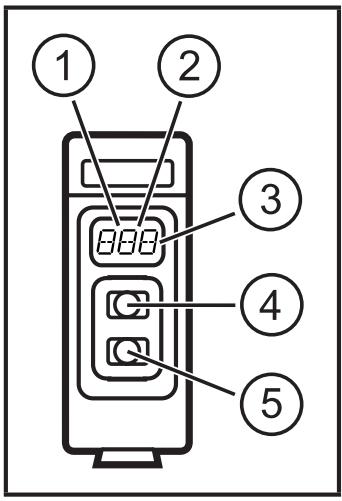
1: LED green: operation
2: LED yellow: switching status
3: 3-digit alphanumeric display
4: Range +
5: Range -
6 Electrical connection

The unit must be connected by a qualified electrician.
▶ The national and international regulations for the installation of electrical equipment must be adhered to.
▶ Ensure voltage supply to EN 50178.
▶ Disconnect power.
▶ Connect the unit as follows:
DC PNP


4: OUT1 = normally open / IO-Link
2: OUT2 = normally closed
DC NPN

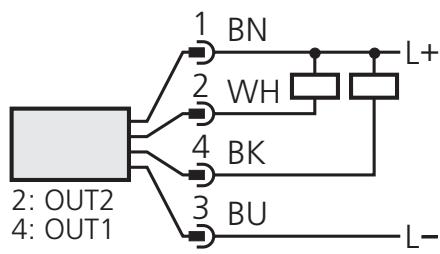
4: OUT1 = normally open / IO-Link
2: OUT2 = normally closed
Core colours of ifm sockets:
1 = BN (brown), 2 = WH (white), 3 = BU (blue), 4 = BK (black)
7 Settings
7.1 The sensor is to switch when the object is detected
▶ Position the object.


▶ Press [+] to increase the range.
▷ The set distance value is shown flashing in the display.
▷ The yellow LED lights when the object is detected.




▶ Press [-] to decrease the distance value.
▷ The set distance value is shown flashing in the display.
▷ During operation, the currently detected distance value is shown in the display.
8 IO-Link
8.1 General information
This unit has an IO-Link communication interface which requires an IO-Link-capable module (IO-Link master) for operation.
The IO-Link interface enables direct access to the sensor values and parameters and provides the possibility to set the parameters of the unit during operation. In addition communication is possible via a point-to-point connection with a USB adapter cable.
You will find more detailed information about IO-Link at www.ifm.com.
8.2 Device-specific information
You will find the IODDs necessary for the configuration of the IO-Link device and detailed information about sensor values, diagnostic information and parameters in the overview table at www.ifm.com.
8.3 Parameter setting tools
You will find all necessary information about the required IO-Link hardware and software at www.ifm.com.
9 Operation
▶ Check whether the unit operates correctly.
▷ The LED lights when the switching output is switched.
▷ The detected distance value is shown in the display.
9.1 Electronic lock
The unit can be locked electronically to prevent unauthorised setting. On delivery the unit is not locked.
Locking
▶ Make sure that the unit is in the normal operating mode.
▶ Keep [+] + [-] pressed until [Loc] is displayed.
▷ The unit is locked.
Unlocking
▶ Keep [+] + [-] pressed until [uLo] is displayed.
▷ The unit is unlocked.
9.2 Fault indications
| Display | Possible cause | Switching output | |
| [Hno] | [Hnc] | ||
| [++] | Too much light, e.g. reflective surfaces | ON | OFF |
| [--] | Not enough light, no object | OFF | ON |
| [nEA] | Object to be measured outside the measuring range < 30 mm | ON | OFF |
| [FAr] | Object to be measured outside the measuring range > 2500 mm | OFF | ON |
| [ERP] | Plausibility (e.g. object too fast) | unchanged | unchanged |
| [SC] | Short circuit at the switching output | ||
10 Maintenance, repair and disposal
▶ Keep the front pane of the sensor free from soiling.
▶ For cleaning do not use any solvents or cleaning agents which could damage the plastic material.
▶ Do not open the module housing. There are no user-serviceable components inside.
- 1 PRELIMINARY NOTE
- 1.1 SYMBOLS USED
- 2 SAFETY INSTRUCTIONS
- 3 FUNCTIONS AND FEATURES
- 3.1 APPLICATIONS
- 4 INSTALLATION
- 4.1 INSTALLATION CONDITIONS
- 5 OPERATING AND DISPLAY ELEMENTS
- 6 ELECTRICAL CONNECTION
- 7 SETTINGS
- 7.1 THE SENSOR IS TO SWITCH WHEN THE OBJECT IS DETECTED
- 8 IO-LINK
- 8.1 GENERAL INFORMATION
- 8.2 DEVICE-SPECIFIC INFORMATION
- 8.3 PARAMETER SETTING TOOLS
- 9 OPERATION
- 9.1 ELECTRONIC LOCK
- 9.2 FAULT INDICATIONS
- 10 MAINTENANCE, REPAIR AND DISPOSAL
Brand : IFM
Model : O5D150
Category : Laser pointer