
PetHairEraser 1941N - Broom BISSELL - Free user manual and instructions
Find the device manual for free PetHairEraser 1941N BISSELL in PDF.
| Product Type | Stick vacuum without bag |
| Brand | Bissell |
| Model | PetHairEraser 1941N |
| Color | Red and black |
| Power Supply | 220-240 V ~ 50/60 Hz |
| Power | 700 W (estimated) |
| Weight | 4.5 kg (approx.) |
| Dust Bin Capacity | 0.5 L (estimated) |
| Filtration Type | Pre-motor foam and fabric filter, pleated post-motor filter |
| Motorized Brush | Yes, with PowerBrush switch |
| Included Accessories | Flexible crevice tool, crevice tool with LED, Pet TurboEraser tool, hard floor tool, two-tool holder |
| Noise Level | 75 dB (estimated) |
| Dimensions (L x W x H) | 30 x 25 x 110 cm (approx.) |
| Cord Length | 8 m (approx.) |
| Usage | Household |
| Warranty | 5 years limited |
| Maintenance | Wash pre-motor filters, replace post-motor filter, clean cyclone separator, replace brush and belt |
| Safety | Double insulation, motor thermal protection, automatic brush stop in upright position |
| Spare Parts | Available at www.BISSELL.com |
Frequently Asked Questions - PetHairEraser 1941N BISSELL
User questions about PetHairEraser 1941N BISSELL
0 question about this device. Answer the ones you know or ask your own.
Ask a new question about this device
Download the instructions for your Broom in PDF format for free! Find your manual PetHairEraser 1941N - BISSELL and take your electronic device back in hand. On this page are published all the documents necessary for the use of your device. PetHairEraser 1941N by BISSELL.
USER MANUAL PetHairEraser 1941N BISSELL
ENGINEERED FOR HOMES WITH PETS
QUICK START/USER GUIDE 1941 Series

More of a video person? Look for this icon and go online for an instructional how-to video at
www.BISSELL.com
READ ALL INSTRUCTIONS BEFORE USING YOUR UPRIGHT VACUUM.
Unplug from electrical socket when not in use and before cleaning, maintaining or servicing the appliance.
When using an electrical appliance, basic precautions should be observed, including the following:

WARNING
TO REDUCE THE RISK OF FIRE, ELECTRIC SHOCK, OR INJURY:
This appliance can be used by children aged from 8 years and above and persons with reduced physical, sensory or mental capabilities or lack of experience and knowledge if they have been given supervision or instruction concerning use of the appliance in a safe way and understand the hazards involved. Children shall not play with the appliance. Cleaning and user maintenance shall not be made by children without supervision.
Children should be supervised to ensure that they do not play with the appliance.
If the supply cable is damaged it must be replaced by the manufacturer, its service agent, or similarly qualified person in order to avoid a hazard.
Keep hair, loose clothing, fingers, and all parts of body away from openings and moving parts of the appliance and its accessories.
Do not leave apoliance when plugged in.
Unplug from electrical socket when not in use and before servicing.
Do not allow to be used as a toy.
» Use only as described in this user guide.
» Use only manufacturer's recommended attachments.
Do not use with damaged cable or plug.
Do not immerse in water or liquid.
If appliance is not working as it should, has been dropped, damaged, left outdoors, or dropped into water; do not attempt to operate it and return it to a service center.
Do not pull or carry by cable, use cable as a handle, close door on cable, or pull cable around sharp edges or corners.
Do not run appliance over cable.
» Keep cable away from heated surfaces.
Do not unplug by pulling on cable.
To unplug, grasp the plug, not the cable.
Do not handle plug or appliance with wet hands.
Do not put any object into openings.
Do not use with any opening blocked; keep free of dust, lint, hair, and anything that may reduce air flow.
Turn off all controls before unplugging.
» Use extra care when cleaning on stairs.
Do not use to pick up flammable or combustible liquids, such as petroleum, or use in areas where they may be present.
Do not pick up toxic material (chlorine bleach, ammonia, drain cleaner, etc.)
Do not use appliance in an enclosed space filled with vapours given off by oil base paint, paint thinner, some mothproofing substances, flammable dust, or other explosive or toxic vapours.
Do not pick up hard or sharp objects such as glass, nails, screws, coins, etc.
» Use only on dry, indoor surfaces.
Keep appliance on a level surface.
Do not pick up anything that is burning or smoking, such as cigarettes, matches, or hot ashes.
Do not use without dust bag and/or filters in place.
Do not use outdoors or on wet surfaces
This appliance is provided with double insulation. Use only identical replacement parts.
Do not leave machine running in the same spot without handle fully upright.
Unplug before connecting or disconnecting the TurboBrush Tool or Pet TurboEraser Tool.
If your appliance is fitted with a nonrewireable BS 1363 plug it must not be used unless a 13 amp (ASTA approved to BS 1362) fuse is fitted in the carrier contained in the plug. (Spares may be obtained from your BISSELL supplier). If for any reason the plug is cut off, it must be disposed of, as it is an electric shock hazard should it be inserted into a mains socket.
LED LIGHTED CREVICE TOOL WARNING
READ OPERATOR'S MANUAL

- Caution: Risk of fire and burns. Do not recharge, disassemble, heat above 60^ (140^) or incinerate. Keep batteries out of reach of children and in original package until ready to use. Dispose of used batteries promptly.
- Never put batteries in mouth. If swallowed, contact your physician or local poison control.
- Replace Battery With CR1632 Only. USE OF ANOTHER BATTERY MAY PRESENT A RISK OF FIRE OR EXPLOSION. CR1632 cells may be purchased anywhere batteries are sold.
SAVE THESE INSTRUCTIONS
FOR OPERATION ON A 220-240 VOLT A.C. 50-60 HZ POWER SUPPLY ONLY.
This model is for household use only.

WARNING
Plastic film can be dangerous. To avoid danger of suffocation, keep away from children.
» Do not plug in your vacuum cleaner UNTIL you are familiar with all instructions and operating procedures.
To reduce the risk of electrical shock, turn power switch off and disconnect plug from electrical outlet BEFORE performing maintenance or troubleshooting checks.
Quick Start Guide
REFER TO COMPLETE USER GUIDE FOR FULL INSTRUCTIONS, PRODUCT VIEW, AND IMPORTANT SAFETY NOTICES.
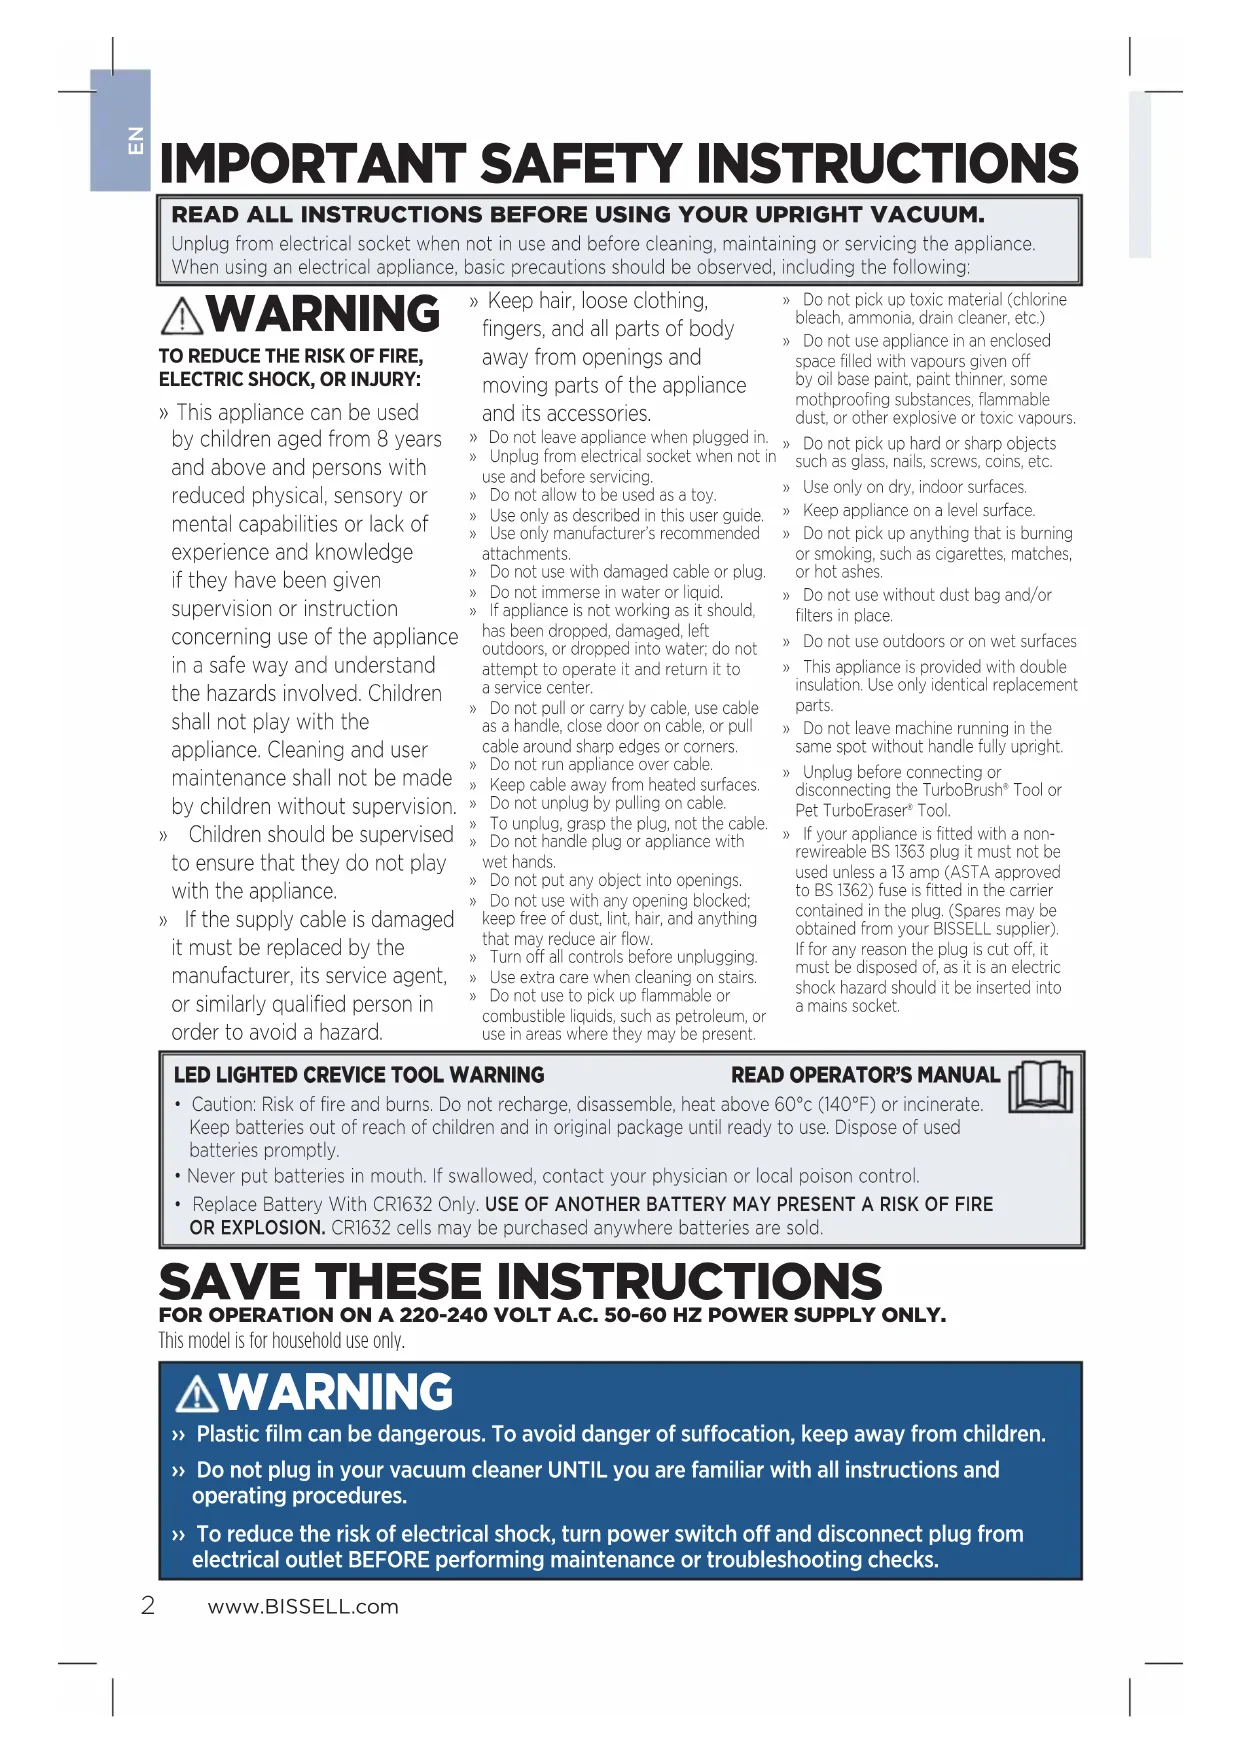
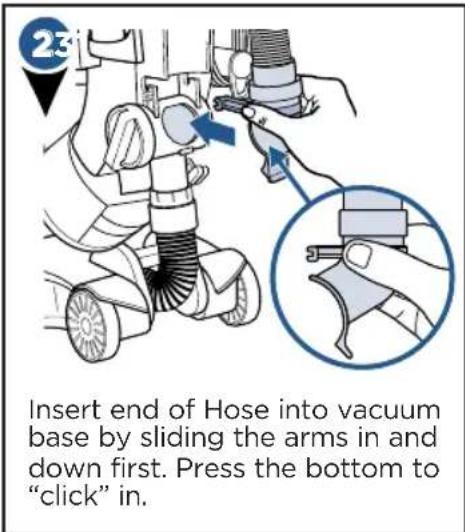
Assembly

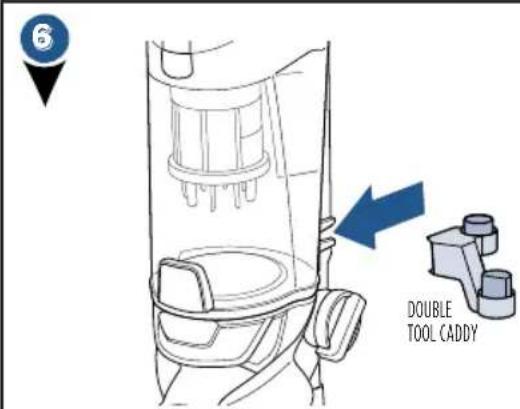
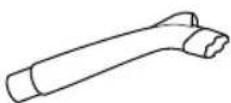
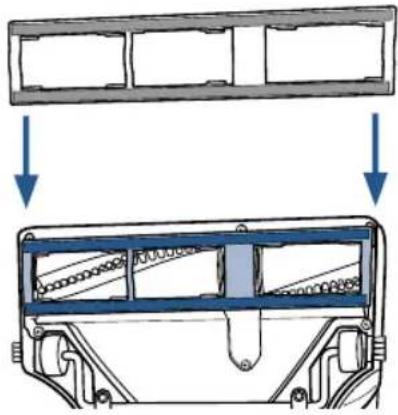
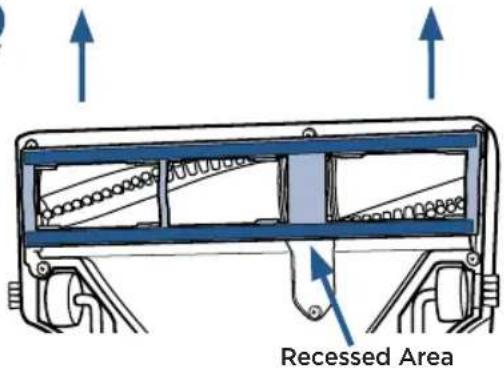
Store both the Flexible Crevice Tool and the Pet TurboEraser Tool. Push hard on the double tool caddy to slide it on the base of the vacuum.
Thanks for buying a BISSELL vacuum!
We love to clean and we're excited to share one of our new innovative products with you. We want to make sure your vacuum works as well in five years as it does today, so this guide has tips on using (pages 6-10), maintaining (pages 11-14), and if there is a problem, troubleshooting (page 15).
What's in the Box?
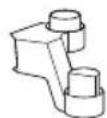
Double Tool Caddy
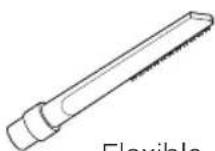
Flexible Crevice Tool
Clip-on Hard Floor Tool
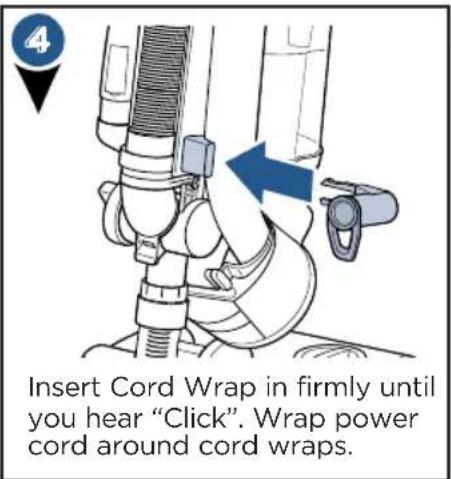
Lower Cord Wrap
LED Lighted Crevice Tools select models)
Pet TurboEraser Tool
NOTE: Standard accessories may vary by model. To identify what should be included with your purchase, please refer to the "Carton Contents" list located on the carton top flap.
Vacuum Base
Safety Instructions. 2
Quick Start / Assembly 3
Product View. 5
Operations 6-10
Maintenance & Care . . . . . . 11-14
Troubleshooting 15
Warranty 16
Service 16
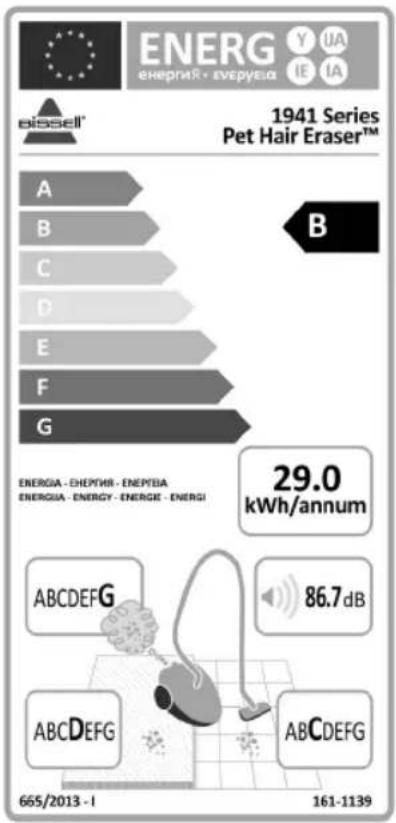
Based on 3rd party testing of the lowest performing unit from internal testing of a 3 unit sample in accordance with EU regulations 666/2013 and 665/2013.
Product View
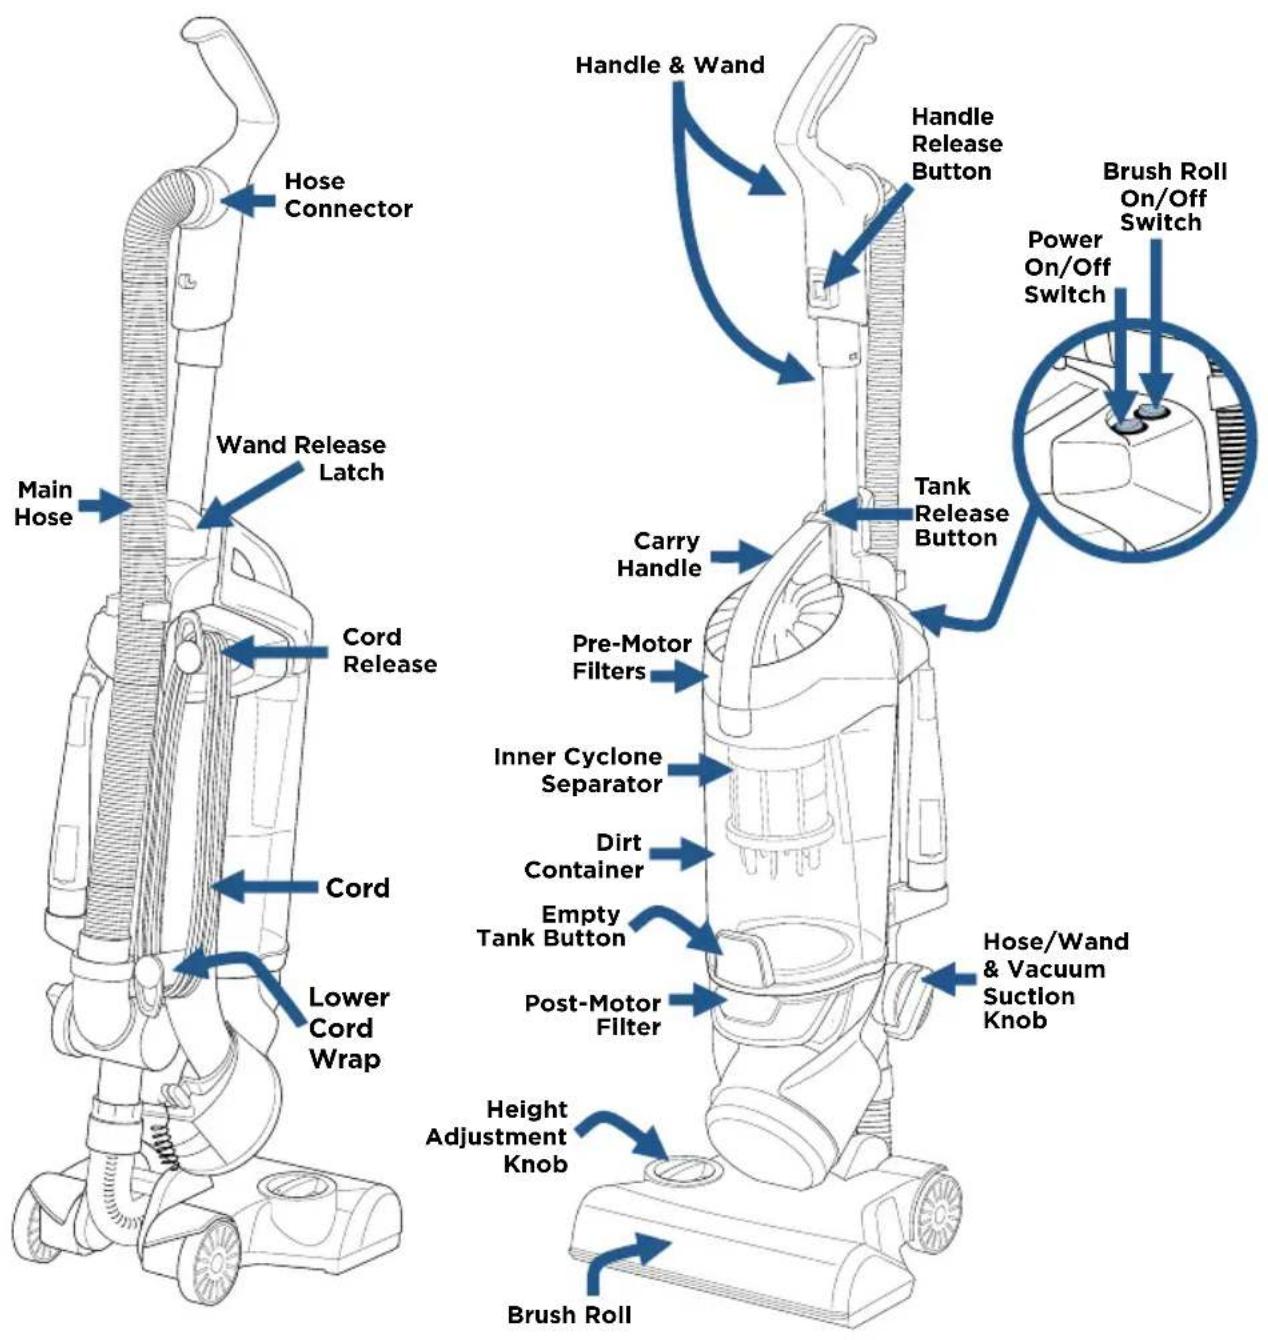
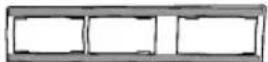
Tool Caddy Options
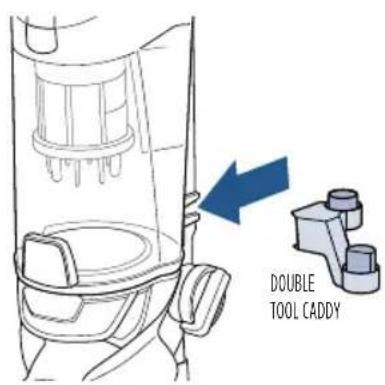
Store both the Flexible Crevice Tool and the Pet TurboEraser Tool. Push hard on the double tool caddy to slide it on the base of the vacuum.
Getting Started
WARNING
Do not plug in your vacuum until you are familiar with all instructions and operating procedures.
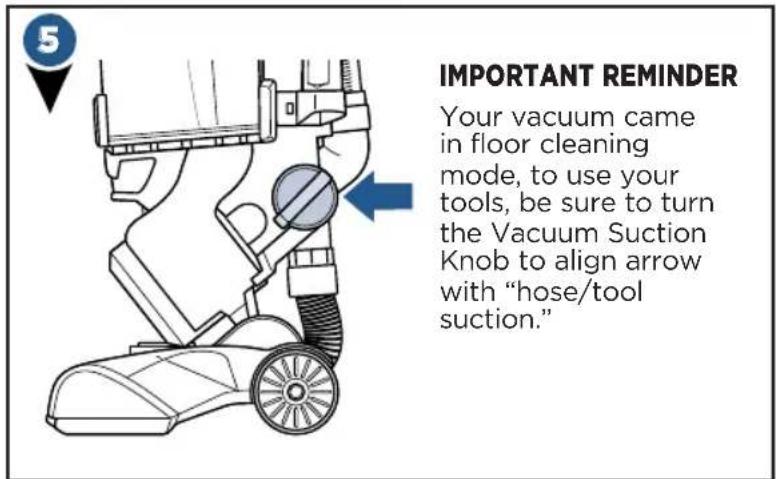
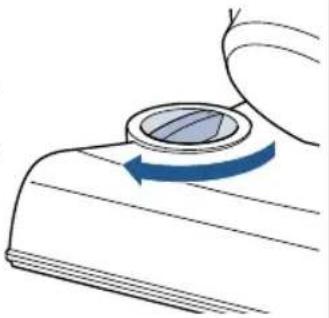
NOTE: Be sure the green suction knob on side of vacuum is turned to "Floor Suction" before use.
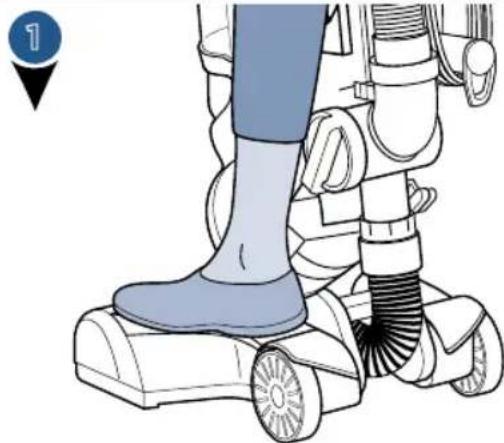
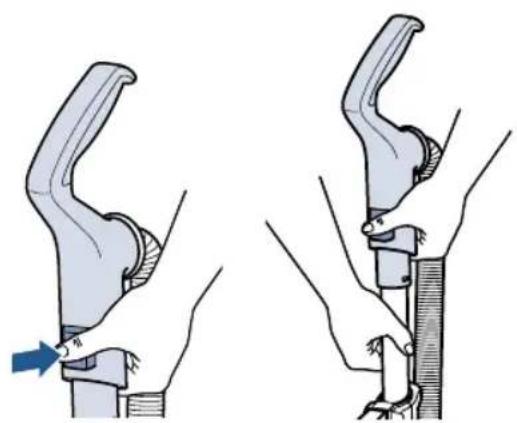
Step gently on base and pull back on handle to recline.
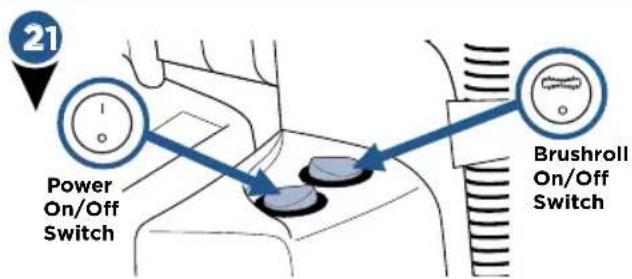
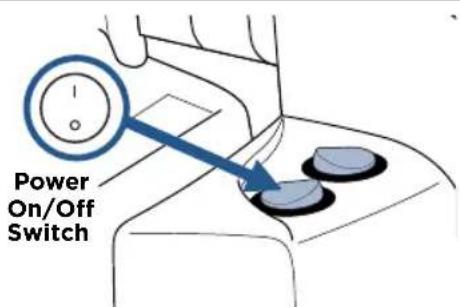
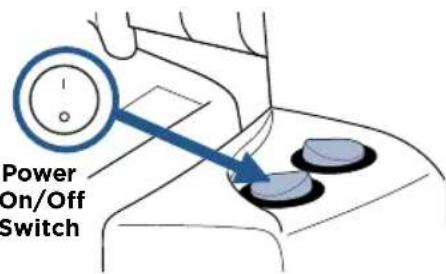
Turn vacuum on by pressing Power Switch on (I - ON and O - OFF). Press Brush roll switch to run the PowerBrush for carpet cleaning (brush roll is on when light on switch is illuminated).
NOTE: The brush roll will automatically shut off when vacuum is locked in upright position, recline to reactivate.
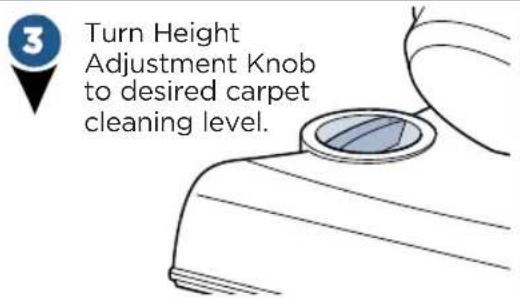
NOTE: For optimal carpet cleaning performance, adjust to the lowest practical setting. If your vacuum is difficult to push, adjust to the next higher setting.
NOTE: In the unlikely event that hair wrapped around your brush roll, run vacuum back and forth on clean carpet several times. This will help release any wrapped hair.
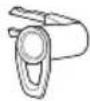
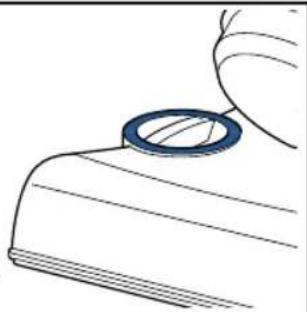
Attach Hard Floor Tool

Install the clip-on hard floor tool for optimal cleaning on hard floors.

To remove the tool, place two fingers in the recess on the foot and lift up on the clip-on hard floor tool.
Brush Roll Safety Light


If red light illuminates around height adjustment knob, you have tripped your brush roll motor safety feature.

Put vacuum in upright position and turn it off.

It may have tripped because of use on premium soft carpet. Turn Height Adjustment Knob to the "high carpet" setting. Also check if debris is clogged in brush roll. Clear debris if necessary.

Turn vacuum back on and try again.
NOTE: Turn off the brush roll when vacuuming hard or delicate surfaces that may be caught by the rotating brush. This could include hard wood, tiled floors, small area rugs or frieze carpets that have long delicate fibers or threads.
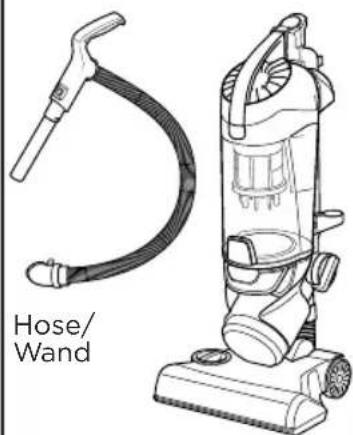
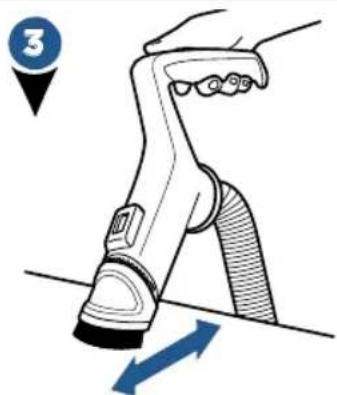
Above Floor Cleaning: Handle


To use tools and the hose/wand; turn the green knob aligning arrow with "hose/tool suction."

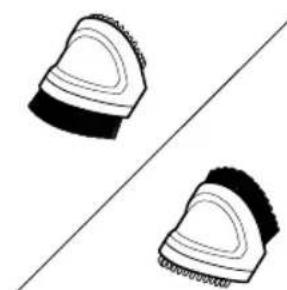
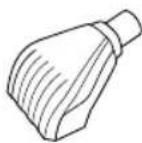
2-in-1 Pet Brush has white soft bristles for those gentle uses and rubber knobs for embedded pet hair.
Use the collar with the white soft bristles side for delicate surfaces.

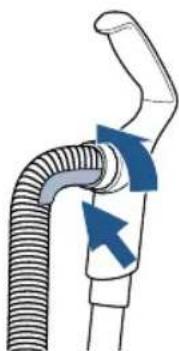
Un-click the collar and flip around to use the rubber fingers for removing pet hair from your furniture. Listen for 2 "clicks" when reattaching.
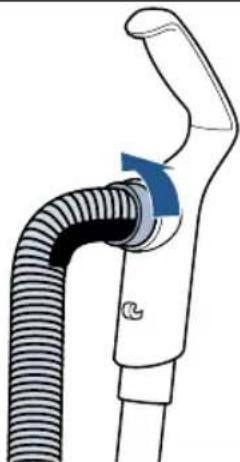
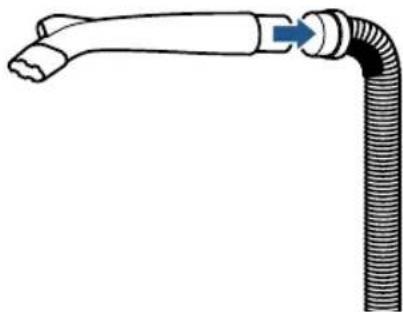
Once done using Handle, slide back on to Wand until it "clicks."
Be sure to turn the green knob back to "Floor Suction" mode after using tools.
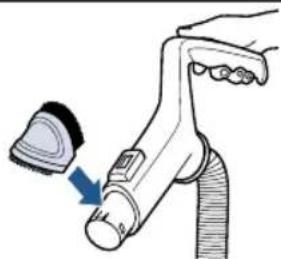
Above Floor Cleaning: Wand


Attach desired tool to end of wand.
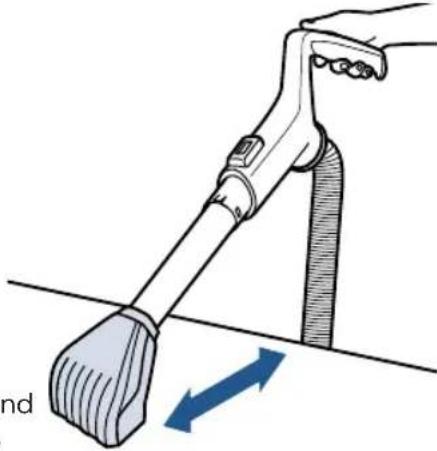
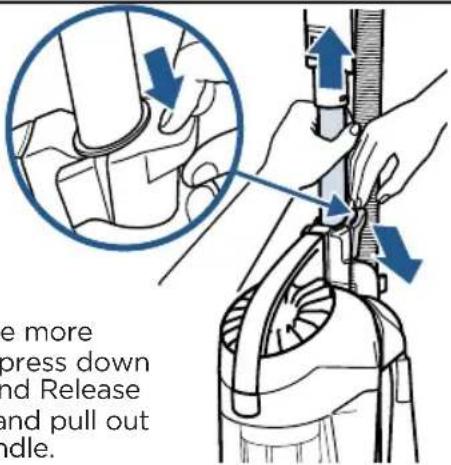
To have more reach, press down on Wand Release Latch and pull out the handle.
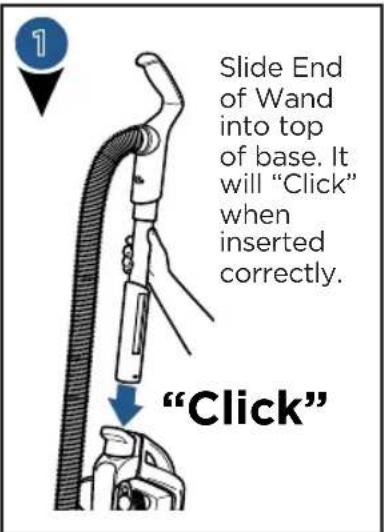
Above Floor Cleaning: Hose


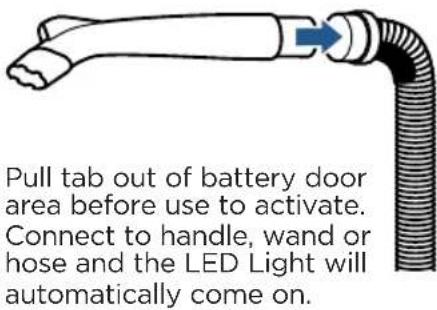
NOTE: The Pet TurboEraser® Tool and LED Lighted Crevice Tool each fit any of the above floor cleaning modes; Handle, Wand, or Hose!
NOTE: Be sure to always remember to turn the green knob back to "Floor Suction" mode after using tools.
LED Lighted Crevice Tool


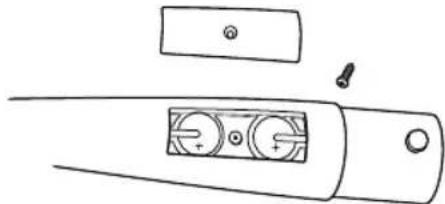
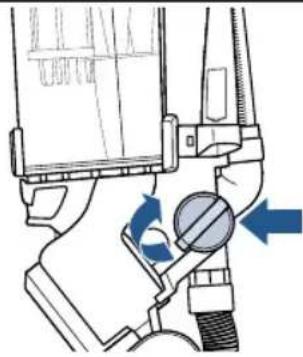
To replace LED battery, unscrew the small screw with a Phillips head screw driver. Pull cover off to reveal two batteries (CR1632 3V). Slide and pull out each battery and replace with new. Be sure the "+" sign on battery is facing out.
Dispose of used battery promptly. Keep away from children. Do not disassemble and do not dispose of in fire.
NOTE: When the small tab on the connection point of Crevice tool comes into contact with the handle, wand, or hose; that triggers the LED light to come on. When using with the Wand, be sure it does not pop through the opening at the end of the Wand.
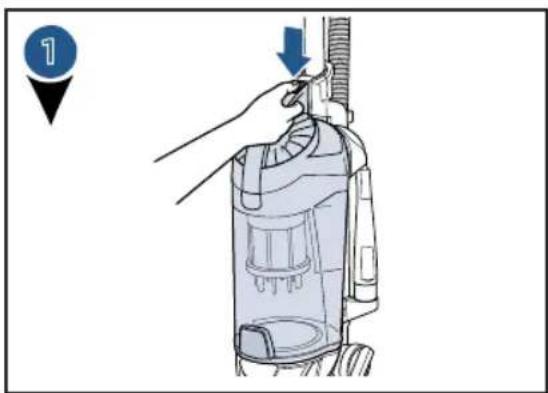
Vacuum Motor Protection
An internal thermal protector has been designed into your vacuum to protect it from overheating. When the thermal protector activates, the main vacuum motor will stop operating. If this happens, proceed as follows.

Turn vacuum OFF and unplug from electrical outlet.

Check for the source of overheating problem (full dirt cup, dirty filters or, a clog) and fix by following the maintenance instructions.

When the motor cools for approximately 30 minutes, the thermal protector automatically resets and cleaning may continue. If the vacuum will not turn on or the thermal protector continues to activate, your vacuum may need servicing. Call BISSELL Consumer Care.
NOTE: The thermal protector controls the main vacuum motor only, not the brush motor. If the thermal protector activates, the brush will continue to operate normally; however, there will be no suction.
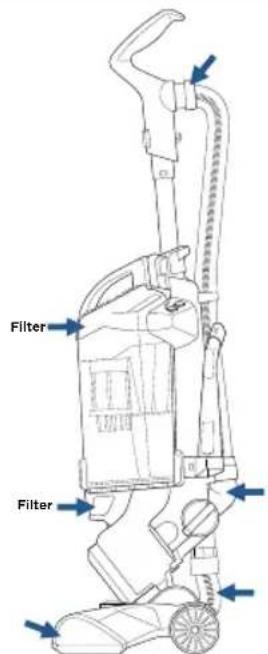
Possible areas that could clog.
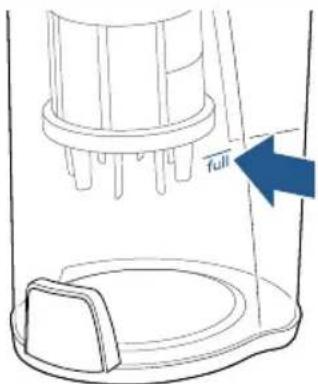
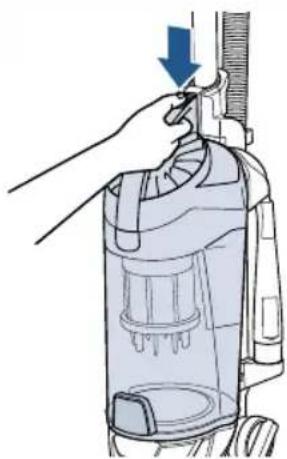
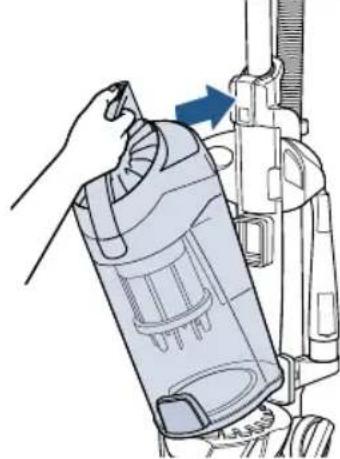
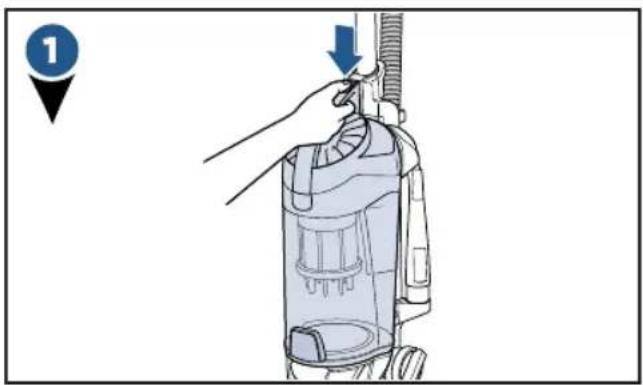
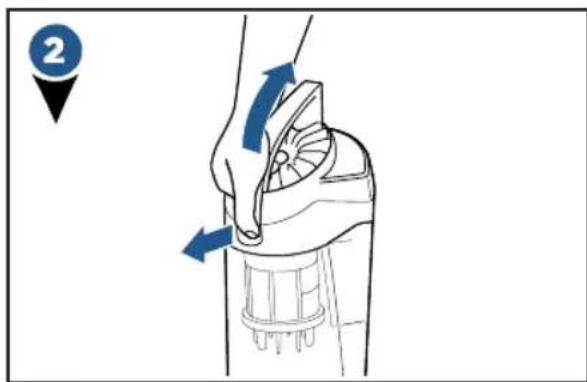
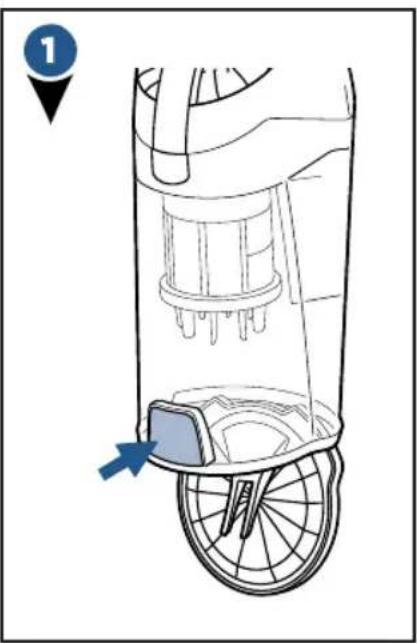
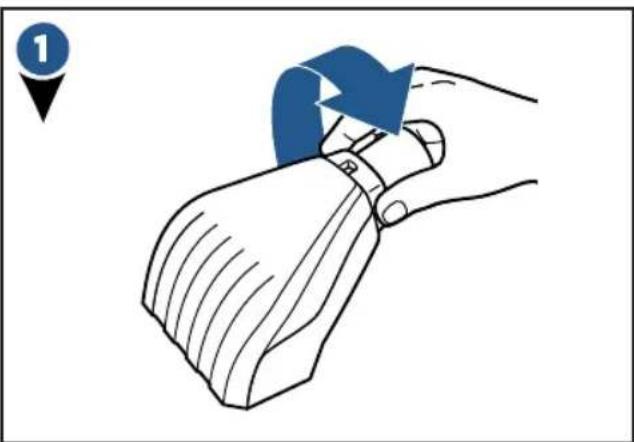
Remove/Empty Dirt Tank
WARNING
To reduce the risk of electrical shock, turn power switch off and disconnect polarized plug from electrical outlet before performing maintenance or troubleshooting checks.


WARNING
Do not operate vacuum with damp or wet filters. Allow components to dry before reassembling the Dirt Container.
WARNING
Before using your vacuum, make sure that the dirt container is in locked position and that all filters, both pre- and post-motor filters, are in place. DO NOT operate your vacuum without these filters.
Parts & Supplies
For Parts and Supplies, go to www.BISSELL.com and enter your model number in the search field.
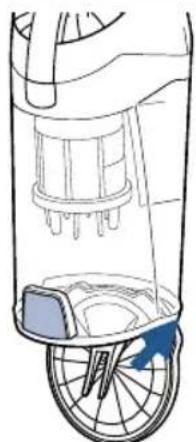
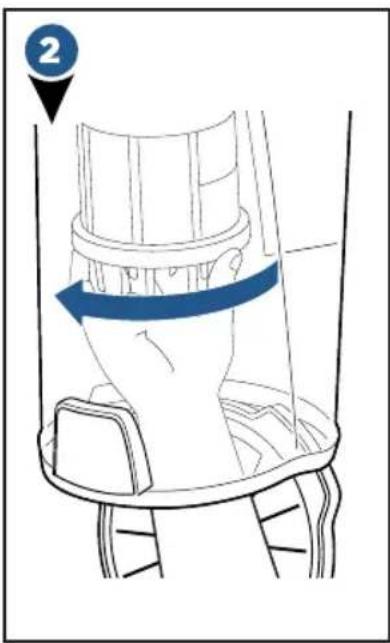
Clean & Replace Pre-Motor Filters

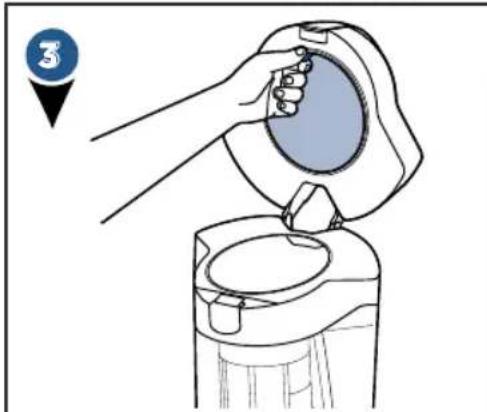


Both the Pre-Motor Mesh and Foam filters are washable.
Clean with mild detergent, rinse and squeeze all excess water. Allow filters to dry completely before reinserting.
Place dry pre-motor filters back in the top of dirt container placing the thick foam filter last.
Clean & Replace Post-Motor Filter

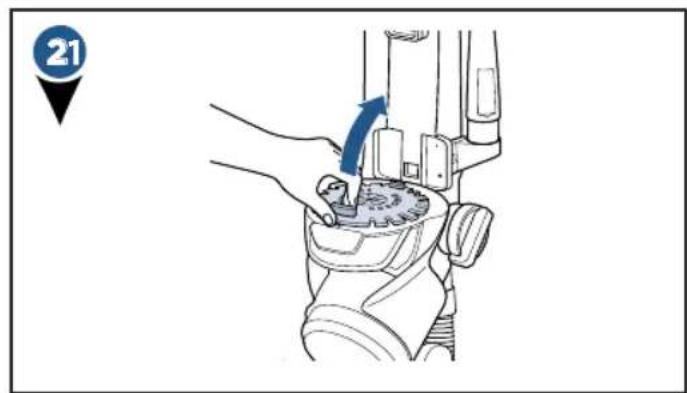
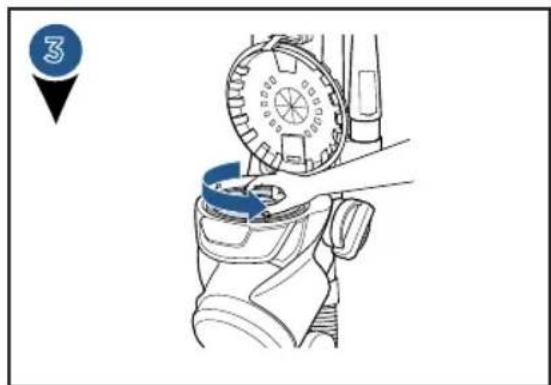
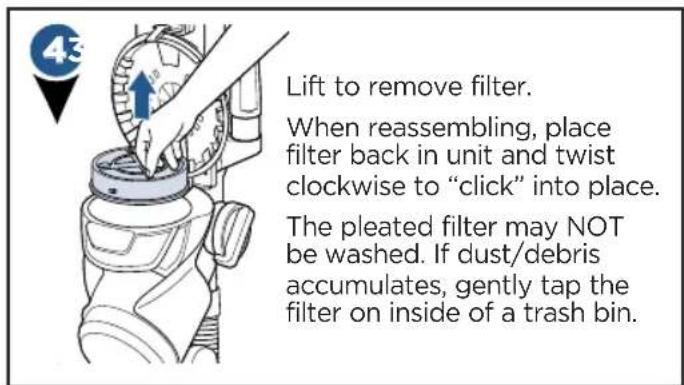
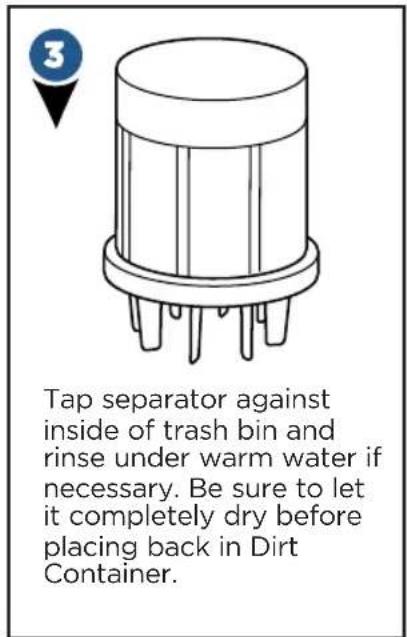
Clean Inner Cyclone Separator
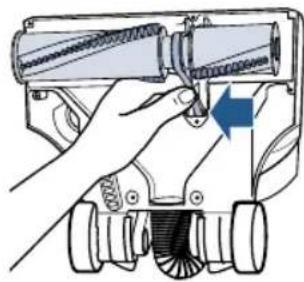
Maintain the Pet TurboEraser® Tool
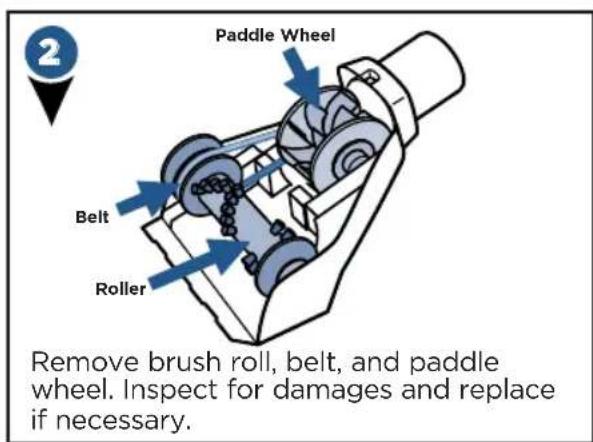
Replace the Brush & Belt

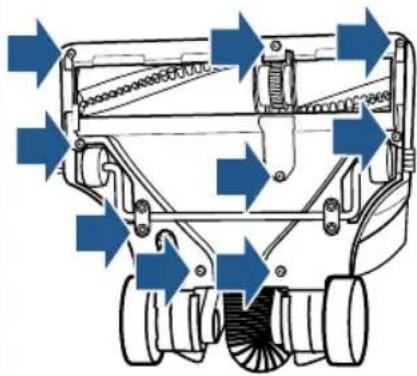
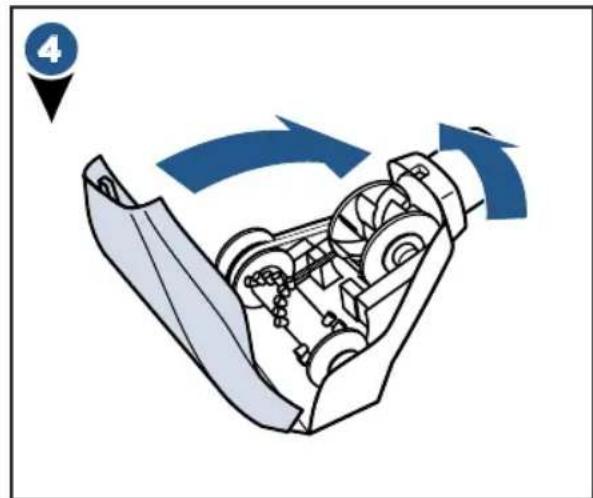
Unplug vacuum, turn over and unscrew 9 Silver Phillips head screws to remove bottom cover.

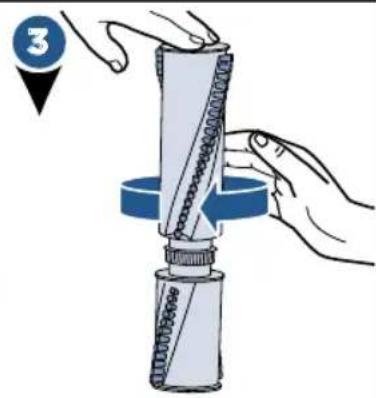
Pull roller straight out and slide belt off motor gear. Replace roller and/or belt.
-
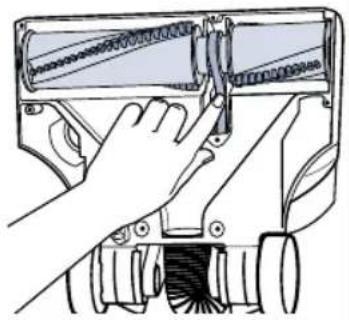
Inspect brush roll by placing it on its end and spin. The brush roll should spin freely, multiple times by one flick. If it doesn't, replace brush roll.
-
Inspect belt, replace if it appears damaged.

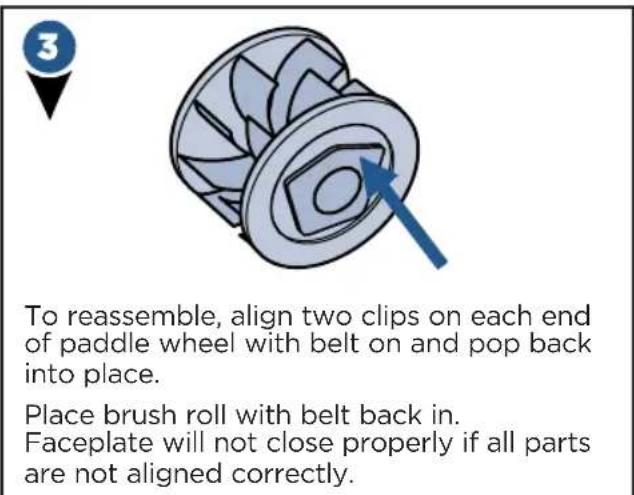
- Place belt back on brush roll.
- Pinch belt around brush roll & hook back around the silver motor gear.
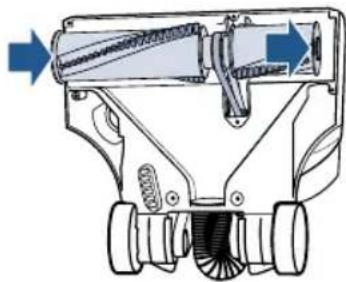
- Rotate brush roll into place and line up end caps.
- Re-attach bottom cover with 9 screws.
NOTE: If an object becomes lodged in foot and brush shuts off, turn vacuum off and unplug from electrical outlet. Remove obstruction and brush will automatically reset when vacuum is plugged and turned back on.
Parts & Supplies
For Parts and Supplies, go to www.BISSELL.com and enter
your model number in the search field.
Troubleshooting
WARNING
To reduce the risk of electric shock, turn power switch off and disconnect plug from electrical outlet before performing maintenance or troubleshooting checks.
| Problem Possible causes Remedies | ||
| Brush roll doesn't rotate | Brush roll switch is turned off Make | sure Brush Roll switch is ON |
| Vacuum is locked in upright position | Recline vacuum and switch ON the Brush Roll | |
| Vacuuming on Premium Soft Carpet | Turn Height Adjustment Knob to “high carpet” and turn vacuum off and back on | |
| Brush roll safety feature triggered (blue changes to red light illuminating around height adjustment knob) | Unplug, check for debris, and remove the debris | |
| Brush roll has lodged debris or other entanglements, keeping the brush from rotating | Unplug, check for debris, and remove the debris | |
| Vacuum won't pick up dirt | Vacuum Suction Knob is in “hose/tool suction” mode | Turn knob aligning arrow with “Floor Suction” |
| Filters are dirty Remove and rinse | pre-motor filter; allow enough time for it to dry properly before reinserting Remove post-motor filter and knock it against a trash can to remove debris; it should be replaced every 3-6 months depending on level of use | |
| There is a clog in the vacuum Remove debris and any other entanglements that may be restricting the brush rolls rotation | ||
| Dirt Container is not seated correctly | Press the Empty Button to release the Dirt Container and reseat properly | |
| There is a crack or hole in the Main Hose | If there is a crack or hole, order a new Main Hose from the BISSELL website | |
| Main Hose is not connected Locate the Main Hose and reconnect by pushing the hose connection to secure the latch | ||
| There is a clog in the hose or wand | Check inside of hose for clogs by disconnecting from handle; disassemble wand and check for clogs | |
| Hair wrapped around brush roll Run vacuum back and forth on clean carpet several times to release wrapped hair | ||
| Dirt is escaping from the vacuum | Dirt Container is full Empty the Dirt Container | |
| Filters are missing Check to see if all of the Pre-Motor and Post-Motor filters are in place | ||
| Hose won't pick up dirt | Vacuum Suction Knob is in “Floor Suction” mode | Turn knob aligning arrow with “hose/tool suction” |
Please do not return this product to the store.
Other maintenance or service not included in the manual should be performed by an authorized service representative. For any questions or concerns, BISSELL is happy to be of service.
Consumer Guarantee
This Guarantee only applies outside of the USA and Canada. It is provided by BISSELL International Trading Company BV ("BISSELL").
This Guarantee is provided by BISSELL. It gives you specific rights. It is offered as an additional benefit to your rights under law. You also have other rights under law which may vary from country to country. You can find out about your legal rights and remedies by contacting your local consumer advice service. Nothing in this Guarantee will replace or lessen any of your legal rights or remedies. If you need additional instruction regarding this Guarantee or have questions regarding what it may cover, please contact BISSELL Consumer Care or contact your local distributor.
This Guarantee is given to the original purchaser of the product from new and is not transferable. You must be able to evidence the date of purchase in order to claim under this Guarantee.
Limited 5 Year Guarantee from the date of purchase by original purchaser
Subject to the *EXCEPTIONS AND EXCLUSIONS identified below, BISSELL will repair or replace (with new or remanufactured components or products), at BISSELL's option, free of charge, any defective or malfunctioning part or product.
BISSELL recommends that the original packaging and evidence of the date of purchase be kept for the duration of the Guarantee period in case the need arises within the period to claim on the Guarantee. Keeping the original packaging will assist with any necessary re-packaging and transportation but is not a condition of the Guarantee.
If for your product is replaced by BISSELL under this Guarantee, the new item will benefit from the remainder of the term of this Guarantee (calculated from the date of the original purchase). The period of this Guarantee shall not be extended whether or not your product is repaired or replaced.
*EXCEPTIONS AND EXCLUSIONS FROM THE TERMS OF THE GUARANTEE
This Guarantee applies to products used for personal domestic use and not commercial or hire purposes. Consumable components such as filters, belts and mop pads, which must be replaced or serviced by the user from time to time, are not covered by this Guarantee.
This Guarantee does not apply to any defect arising from fair wear and tear. Damage or malfunction caused by the user or any third party whether as a result of accident, negligence, abuse, neglect, or any other use not in accordance with the User Guide is not covered by this Guarantee.
An unauthorised repair (or attempted repair) may void this Guarantee whether or not damage has been caused by that repair/atempt.
Removing or tampering with the Product Rating Label on the product or rendering it illegible will void this Guarantee.
SAVE AS SET OUT BELOW BISSELL AND ITS DISTRIBUTORS ARE NOT LIABLE FOR ANY LOSS OR DAMAGE THAT IS NOT FORESEEABLE OR FOR INCIDENTAL OR CONSEQUENTIAL DAMAGES OF ANY NATURE ASSOCIATED WITH THE USE OF THIS PRODUCT INCLUDING WITHOUT LIMITATION LOSS OF PROFIT, LOSS OF BUSINESS, BUSINESS INTERUCTION, LOSS OF OPPORTUNITY, DISTRESS, INCONVENIENCE OR DISAPPOINTMENT. SAVE AS SET OUT BELOW BISSELL'S LIABILITY WILL NOT EXCEED THE PURCHASE PRICE OF THE PRODUCT.
BISSELL DOES NOT EXCLUDE OR LIMIT IN ANY WAY ITS LIABILITY FOR (A) DEATH OR PERSONAL INJURY CAUSED BY OUR NEGLIGENCE OR THE NEGLIGENCE OF OUR EMPLOYEES, AGENTS OR SUBCONTRACTORS; (B) FRAUD OR FRAUDULENT MISREPRESENTATION; (C) OR FOR ANY OTHER MATTER WHICH CANNOT BE EXCLUDING OR LIMITED UNDER LAW.
Consumer Care
If your BISSELL product should require service or to claim under our limited guarantee, please contact us as follows:
Website:
www.BISSELL.com
Email:
UKSupport@bissell.com
Telephone:
0344-888-6644
Write:
BISSELL Homecare (Overseas) Inc.
Ground Floor
226 Berwick Avenue
Slough, Berkshire, SL1 4QT
United Kingdom
Spares are available for purchase.
To purchase visit www.4bissell.co.uk
Visit the BISSELL website: www.BISSELL.com
When contacting BISSELL, have model number of cleaner available.
Please record your Model Number: Please record your Purchase Date:
NOTE: Please keep your original sales receipt. It provides proof of the date of purchase in the event of a Guarantee claim. See Guarantee for details.

©2017 BISSELL Homecare, Inc.
Grand Rapids, Michigan
All rights reserved. Printed in China
Part Number 161-2477orar 04/17 RevA
Visit our website at: www.BISSELL.com
Bissell® PETHAIR ERASER®
ENTWICKELT FÜR HAUSHALTE MIT HAUSTIEREN
Slough, Berkshire, SL1 4QT
Slough, Berkshire, SL1 4QT
Reino Unido
*EXCEPTIONS ET EXCLUSIONS DES CONDITIONS DE LA GARANTIE
Slough, Berkshire, SL1 4QT
Royaume-Uni
Slough, Berkshire, SL1 4QT
Regno Unito