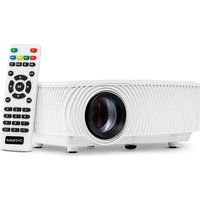
Multipic 2.5 - Projector Overmax - Free user manual and instructions
Find the device manual for free Multipic 2.5 Overmax in PDF.

| Product type | LED projector |
| Brand | Overmax |
| Model | Multipic 2.5 |
| Power supply | Mains (power cable included) |
| Display ratio | 16:9 (default) |
| Keystone correction | Vertical only (manual slider) |
| Focus adjustment | Manual (knob on side) |
| Video sources | HDMI, AV, USB, built-in media player |
| Audio output | 3.5 mm (headphone jack) |
| Remote control | Included (battery not supplied) |
| Supported video formats | MP4, MKV, MOV, WMV, RMVB, RM, AVI, FLV, TRP, VOB, 3GP, DIVX, TP, TS, MPG, M2TS, F4V, DAT |
| Supported audio formats | MP3, AAC, FLAC, WAV, WMA, M4A |
| Supported image formats | BMP, JPG, PNG, JPEG |
| Supported text formats | TXT |
| Projection distance (16:9) | 50" at 1.55 m, 70" at 2.17 m, 100" at 3.10 m, 120" at 3.72 m |
| Indicators | Red (standby), Blue (on) |
| Lens cleaning | Eyeglass cloth or soft cloth |
| Housing cleaning | Damp cloth (unplug before cleaning) |
| Ventilation | Air vents to be cleaned with a soft brush |
| Safety | Do not look into the lens during operation; do not cover; do not use on soft surfaces; turn off after 6 hours of continuous operation; indoor use only |
| Compliance | European directives (CE), WEEE (separate collection) |
Frequently Asked Questions - Multipic 2.5 Overmax
User questions about Multipic 2.5 Overmax
0 question about this device. Answer the ones you know or ask your own.
Ask a new question about this device
Download the instructions for your Projector in PDF format for free! Find your manual Multipic 2.5 - Overmax and take your electronic device back in hand. On this page are published all the documents necessary for the use of your device. Multipic 2.5 by Overmax.
USER MANUAL Multipic 2.5 Overmax
Color Temperature Medium
Noise Reduction Middle
6
7
Wprowadzenie
PL
Drogi Kliencie!
Thank you for placing trust in us and choosing Overmax.
Thanks to the use of high-quality materials and modern solutions, we provide you with a product perfect for everyday use. We are convinced that the product will satisfy your requirements as it has been manufactured with utmost care. Before you use the product, please read this operating manual carefully.
Should you have any remarks or questions concerning the product, please do not hesitate to contact us:
Before you start using the projector, please read and then follow guidelines presented in this operating manual. Wrong use of the device may lead to electric shock and raise fire risk. When using and maintaining the projector, please adhere to the instructions below.
Note:
How to install
To assure better quality of image, use the projector in rooms with drawn curtains or in dark rooms.
- Be careful while using the projector. Dropping or failure may lead to damage to parts or may cause the picture to be blurred and improperly displayed.
- Keep the device away from inflammable items.
How to switch on
- Be careful when using the power cable, do not excessively bend the cable; damage to power cable may lead to electric shock or fire.
How to clean
- Before you start cleaning the device, unplug the power cable.
-
Clean the housing with a wet cloth on a regular basis.
To clean the projector lens, use a glasses tissue or soft fabric to avoid scratching. -
Regularly clean air holes and projector loudspeakers with a soft brush, otherwise ventilation may get blocked.
High temperature
- When the projector is on, make sure air holes of the device are not covered. This is why you should not place it on soft surfaces or cover with materials.
- Do not look into the lens while it is operating.
EN
Additional information
- Do not place any liquids or heavy items on the projector.
- Do not disassemble the projector on your own.
- Do not keep the projector in humid and wet places - electric shock risk.
It is advisable to turn the projector off after 6 hours of continuous operation.
The product is intended for indoor use only.
To assure stability of heat dissipation, before you activate the projector, please adjust its height in the lower part with the use of a base adjustment knob.
C∈
The product complies with requirements of EU directives.
Pursuant to the Directive 2012/19/EU, this product is subject to selective collection. The product must not be disposed of along with domestic waste as it may pose a threat to the environment and human health. The worn-out product must be handed over to the electrics and electronics recycling center.
Description of projector parts (fig. 1)
- Direction keys
- Exit key
- OK key
- On/off switch
- Power indicator
-
Image sharpness knob
-
Image shape adjustment knob
- Audio output 3.5mm
- AV input
- USB port
- HDMI port
EN
Remote control (fig. 2)
-
On/off key
-
Rotate screen
-
Display proportions select key
-
Select source
-
Direction keys
-
Confirm
-
Homepage
-
Return key
-
Menu
-
Volume up
-
Volume down
-
Mute
-
Settings
How to install
Standard settings
See the table below to adjust the size of picture and projector distance.
| Ratio 16:9 | |
| Picture size (inches) Distance (m) | |
| 50 1.55 | |
| 70 2.17 | |
| 100 3.10 | |
| 120 3.72 | |
- When installing, place the projector on a stable surface or suspend under ceiling. Do not cover or block air holes.
If the distance between the projector and screen is lower than the minimum or is too large, the picture may be blurred.
How to use the device
Switching on and off
- When the projector is connected to the source of power, it switches into standby mode. The control light glows in red.
- To switch the projector or or off, press the on/off key at the top of the housing or press on/off key on the remote control. The projector is ready for operation when the control light turns blue.
Sharpness adjustment (fig. 3 and 4)
- Place the projector in a way that the lens is perpendicular to the wall or screen the image is to be displayed on.
To correct sharpness of the image, rotate the sharpness knob on the top panel (1) until the picture gets clear. - If the image is not displayed perpendicularly, it will be distorted.
Picture shape adjustment
Distorted picture in the shape of trapezoid can be corrected with the use of a picture shape adjustment knob (2).
X - wrong shape
√- correct shape
Note! The projector features a vertical trapezoid correction only. There is no horizontal correction. Make sure the projector is positioned on a horizontal surface in relation to the picture.
Menu settings (fig. 5)
When you press the left/right key on the remote control or projector, the submenu will displayed in the main interface, select the desired mode and press OK to confirm.
Options to choose:
- PICTURE: picture mode, contrast, brightness, color, tint, sharpness, color temperature, noise reduction.
- SOUND: volume mode, bass.
OTHER OPTIONS: language, ratio, projection mode, restore factory settings, update software, version.
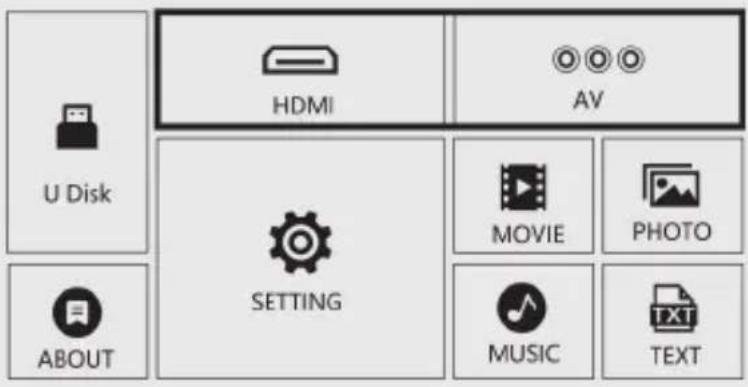
Select source (fig. 6)
Step 1: Switch the projector on. Main interface will be displayed.
Step 2: Select a source from the list displayed, e.g. HDMI or AV, and confirm with „OK” key.
Note! When there is no signal, press source key on the remote control to choose homepage or other source.
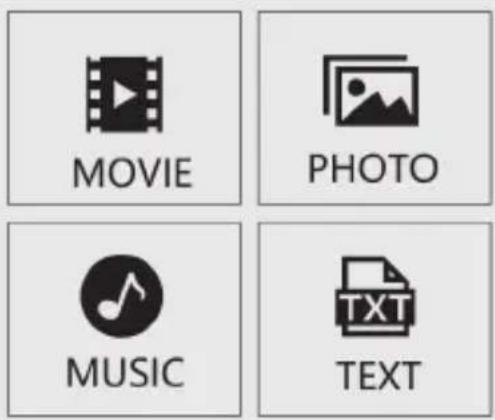
Multimedia support (fig. 7)
Step 1: Connect a USB cable to projector.
Step 2: Select file to be played in the main interface.
EN
Supported formats
Video formats: MP4/MKV/MOV/WMV/RMVB/RM/AVI/FLV/TRP/VOB/3GP/
DIVX/TP/TS/MPG/M2TS/F4V/DAT
Audio formats: MP3/AAC/FLAC/WAV/WMA/M4A
Image formats: BMP/JPG/PNG/JPEG
File formats: TXT
Note: this device does not support sound coded in Dolby due to copyrights protection.
The pictures are for reference only. The real design of the product may differ from the pictures presented.
Einführung
Menuinstallingen (afb.5)
CtanhapTHi HanaWtyBaHHa
YbIMKHeHH Ta BmMKHeHH
HanaHTyBaHHMeHIO (pnc. 5)
MylbTmMeiHa NiTpumka (pnc.7)
Kpok 1:Пдклочь USB-ka6eьdo npoeKTopa.
Kpok 2: Bn6epitb faI IJI BIDTBOpEHHa OCHOBHOMy iHTepfeci.
Пдтумванi Формати
UK
ΦopMaTn BiJeO:
MP4/MKV/MOV/WMV/RMVB/RM/AVI/FLV/TRP/VOB/3GP/DIVX/TP/TS/MPG/M2TS/F4V/DAT
Φopmatu ayidio: MP3/AAC/FLAC/WAV/WMA/M4A