
Total PA Ultra - Loudspeaker ION - Free user manual and instructions
Find the device manual for free Total PA Ultra ION in PDF.
| Product type | Portable amplified speaker |
| Power supply | 110-240 V AC (selectable via fuse holder), IEC cable included |
| Main functions | Bluetooth, USB, SD, FM radio, microphone with echo, multicolor LED lighting, digital equalizer |
| Inputs | Microphone (XLR and 6.35 mm), auxiliary 3.5 mm, XLR line, RCA |
| Outputs | Mix XLR for daisy-chaining speakers |
| Equalization | Bass and treble ±12 dB; EQ presets for USB/SD/Bluetooth sources (Bass, Pop, Rock, Jazz, Classical, Country, OFF) |
| Lighting | 4 modes: Auto 1, Auto 2, Beat Sync, Off |
| Remote control | Included, CR2032 lithium battery |
| Supported audio formats | APE, FLAC, MP3, WAV 16-bit, WMA |
| Box contents | Total PA Ultra speaker, microphone with cable, 6 m XLR cable, telescopic stand, remote control, IEC power cable, quick start guide, safety instructions |
| Safety | Do not expose to weather or water; read the safety instructions booklet |
| Care and cleaning | Clean with a soft dry cloth; remove the protective film from the display for optimal viewing |
| Spare parts and repairability | Replaceable fuse (appropriate rating indicated under the power input); replaceable CR2032 remote battery |
| General information | Brand: ION, Model: Total PA Ultra, Category: Speaker |
Frequently Asked Questions - Total PA Ultra ION
User questions about Total PA Ultra ION
0 question about this device. Answer the ones you know or ask your own.
Ask a new question about this device
Download the instructions for your Loudspeaker in PDF format for free! Find your manual Total PA Ultra - ION and take your electronic device back in hand. On this page are published all the documents necessary for the use of your device. Total PA Ultra by ION.
USER MANUAL Total PA Ultra ION
Quickstart Guide English (3–9)
- Make sure all items listed in the Box Contents are included in the box. Look in the box under the foam sheet for the speaker stand rubber feet, speaker stand mounting knob, power cable, and microphone.
- Read the safety instruction booklet before using the product.
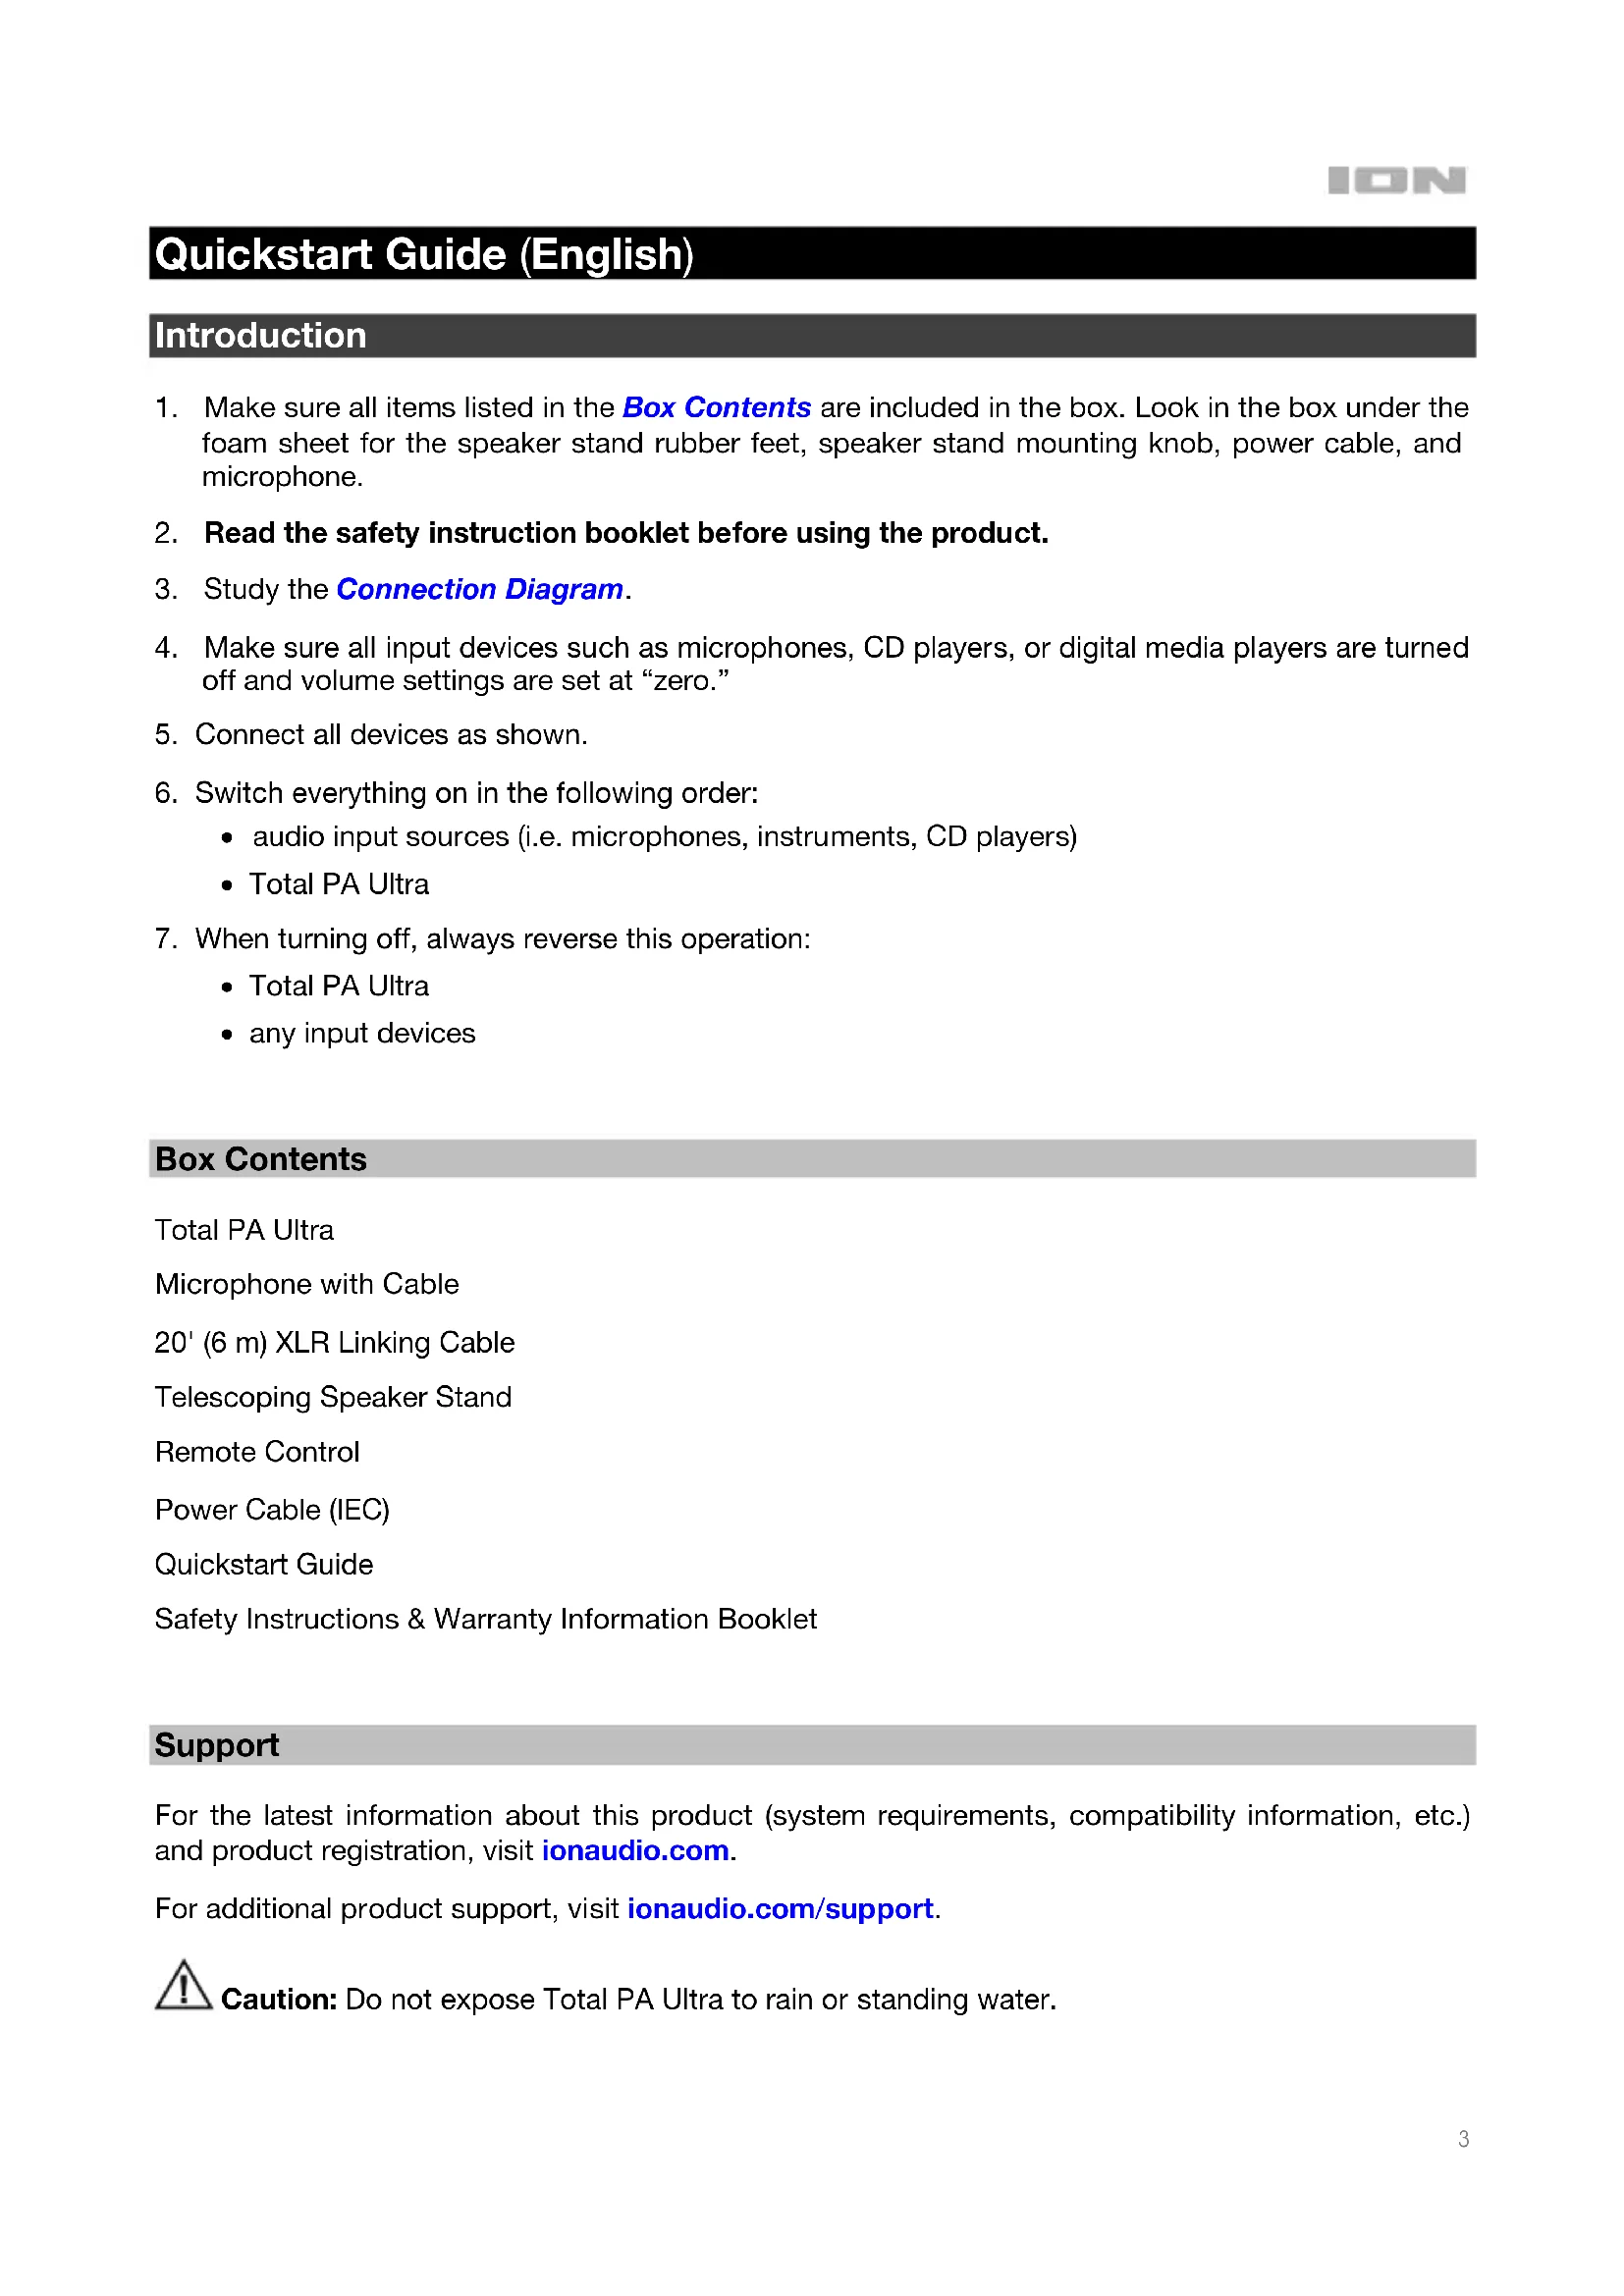
- Study the Connection Diagram.
- Make sure all input devices such as microphones, CD players, or digital media players are turned off and volume settings are set at "zero."
- Connect all devices as shown.
- Switch everything on in the following order:
• audio input sources (i.e. microphones, instruments, CD players)
- Total PA Ultra
-
When turning off, always reverse this operation:
-
Total PA Ultra
- any input devices
Box Contents
Total PA Ultra
Microphone with Cable
20' (6 m) XLR Linking Cable
Telescoping Speaker Stand
Remote Control
Power Cable (IEC)
Quickstart Guide
Safety Instructions & Warranty Information Booklet
Support
For the latest information about this product (system requirements, compatibility information, etc.) and product registration, visit ionaudio.com.
For additional product support, visit ionaudio.com/support.

Caution: Do not expose Total PA Ultra to rain or standing water.
Quick Setup
Connection Diagram
Items not listed under Introduction > Box Contents are sold separately.
flowchart
graph TD
    A["ICON"] --> B["SD Card"]
    A --> C["Microphones"]
    A --> D["Tablet"]
    A --> E["Smartphone"]
    A --> F["Power"]
    G["USB drive"] --> A
    H["Power"] --> A
    style A fill:#f9f,stroke:#333
    style B fill:#ccf,stroke:#333
    style C fill:#cfc,stroke:#333
    style D fill:#fcc,stroke:#333
    style E fill:#cff,stroke:#333
    style F fill:#ffc,stroke:#333
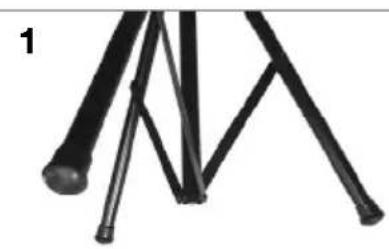
Speaker Stand Installation
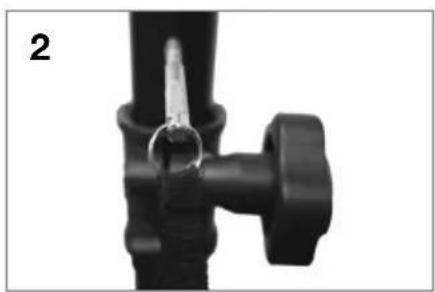
- Fully extend the speaker stand tripod legs on a flat, stable surface. Look in the box contents under the foam sheet for the rubber feet and speaker stand mounting knob.
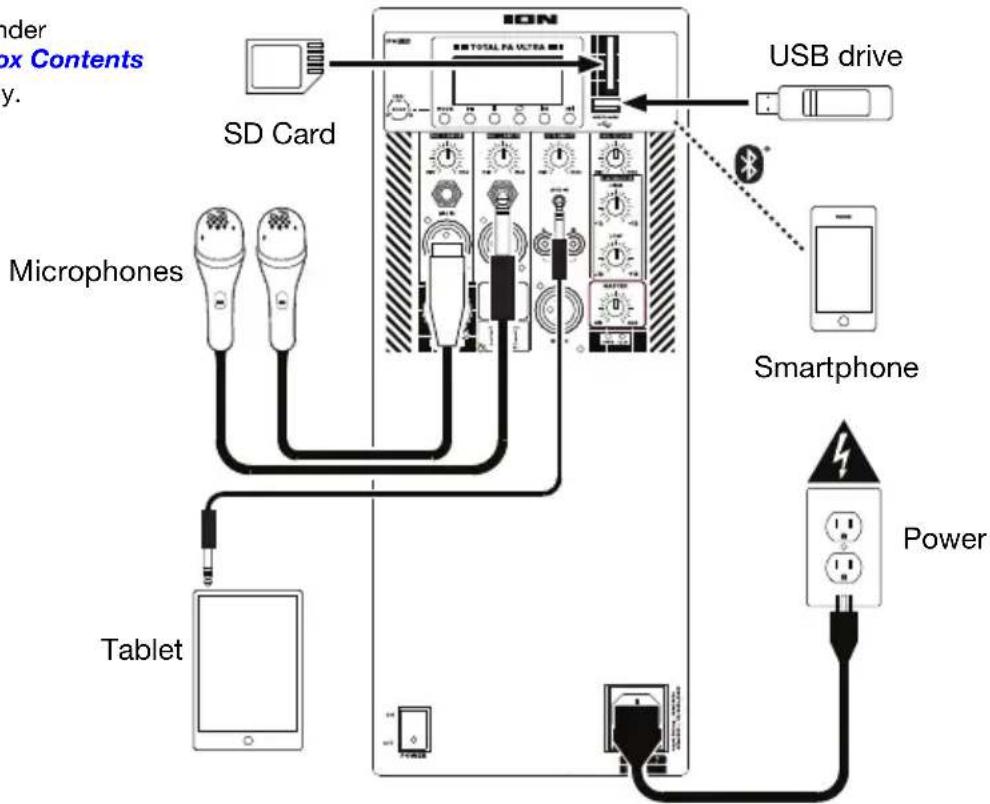
- Raise the mounting pole up to the appropriate height needed and tighten the side adjustment knob.
- Insert the pin into the bottom pin-hole so the mounting pole stays at your set height.
- On Total PA Ultra, adjust the bottom knob counter-clockwise so the screw is not blocking the opening.
- Line up the Total PA Ultra mounting hole with the speaker stand pole and place on the pole.
- Tighten the mounting knob clockwise on Total PA Ultra.

natural_image
Close-up of black metal rods with triangular tips, no text or symbols visible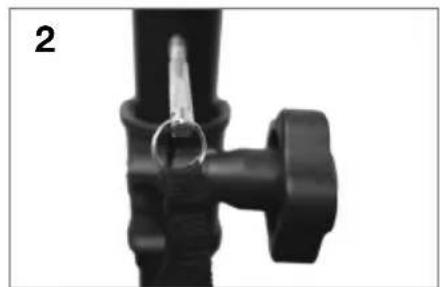
natural_image
Close-up of a black mechanical component with a metallic clip and handle (no visible text or symbols)
natural_image
Close-up of a black mechanical component with a metallic clip attached, labeled '3' in the top-left corner (no other text or symbols visible)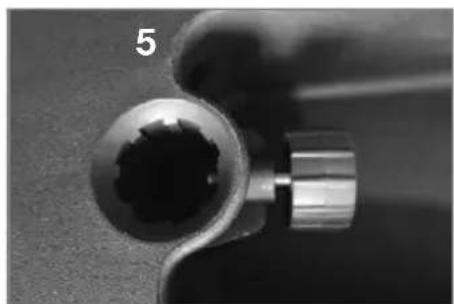
natural_image
Close-up of a mechanical tool or bracket with a circular head and metallic shaft (no visible text or symbols)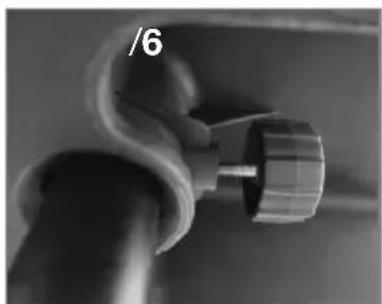
natural_image
Close-up of a mechanical knob or knob component with a curved handle and a numbered label '6' (no readable text or symbols beyond the number)Features
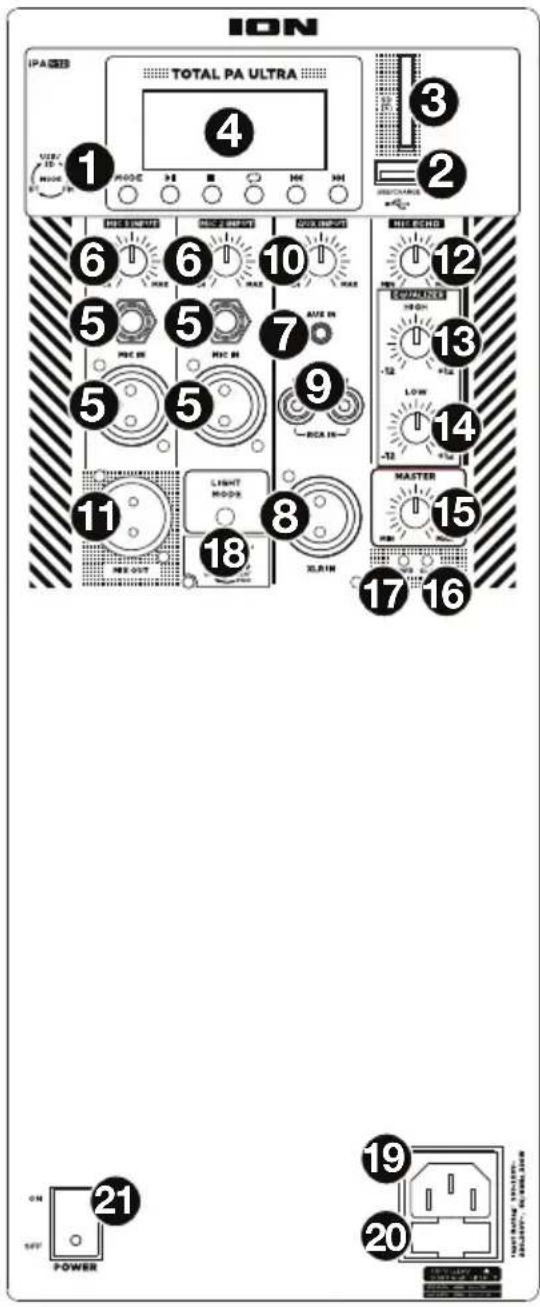
Rear Panel
- Media Panel: Controls for the USB, SD, FM radio (if applicable), and Bluetooth sources. The Media Panel Mode source symbol will illuminate when that source is playing.
Note: A USB drive or SD card must contain playable files in order for it to appear properly in the media panel's display. You can play APE, FLAC, MP3, 16-bit WAV, and WMA files.
-
USB Port: Connect your USB flash drive here to play music. You can also use this port for charging a USB device.
-
SD Card Slot: Insert your SD card here to play music.
-
Display: Displays the media panel modes for USB, SD, FM radio (if applicable), and Bluetooth.
Note: The display comes with a plastic protector on it. Remove this for optimal viewing.
-
Mic Inputs (1/4"/6.35 mm & XLR): Connect a dynamic microphone to the 1/4" (6.35 mm) or XLR inputs. Control the volume of the inputs using the Mic Input Volume knobs.
-
Mic Input Volume: Turn this knob to adjust the input volume of the Mic Input.
-
Aux Input (1/8"/3.5 mm): Connect a CD player, digital media player, or other audio source to this 1/8" (3.5 mm) stereo auxiliary input. Control the volume using the Aux Input Volume knob.
-
XLR Input (XLR): Connect a line-level mixer or musical instrument to this XLR line-level input. Control the volume using the Aux Input Volume knob. Use this line-level input when linking together two Total PA Ultra units.
-
RCA Inputs: Connect a CD player, digital media player, mixer, or other media source to these inputs. Control the volume using the Aux Input Volume knob.
-
Aux Input Volume: Turn this knob to adjust the input volume of the Aux Input, XLR Input, and RCA Inputs.
-
Mix Out (XLR): Connect this XLR output to another active (powered) speaker. The level of the output is controlled by the Mic Input Volume, Aux Input Volume, and Master Volume.
-
Mic Echo: Use this knob to add or remove an echo effect to the Mic Inputs.
-
High EQ: Increases or decreases the high (treble) frequencies for Mic Input, Line Input, and Media Panel sources at a range between -12 dB to +12 dB.
-
Low EQ: Increases or decreases the low (bass) frequencies for Mic Input, Line Input, and Media Panel sources at a range between -12 dB to +12 dB.
-
Master Volume: Turn this knob to adjust the overall output volume of the loudspeaker.
-
Clip LED: This LED will flash red if the signal from the inputs or media panel source is clipping. If this happens, decrease the setting of the Mic Input Volume knob, Aux Input Volume knob, or Master Volume knob.
- Power LED: Indicates whether Total PA Ultra is powered on or off.
-
Light Mode Button: Press this button to toggle between four modes for the lights on the front panel:
-
Auto 1: The lights steadily cycle through different colors. As they cycle, the light ring will be the same color as the glowing woofer. While operating in this mode, press and hold the Light Mode button to freeze the lights on their current color. Press and hold again to unfreeze. Auto 1 is the default mode when Total PA Ultra is powered on.
- Auto 2: The lights steadily cycle through different colors. As they cycle, the light ring will be a different color than the glowing woofer. While operating in this mode, press and hold the Light Mode button to freeze the lights on their current color.
- Beat Sync: The light ring flashes and changes colors according to the tempo of the music playing on the speaker. The glowing woofer will steadily cycle through different colors.
-
Off: The lights turn off.
-
Power Cable Input (IEC): Insert the included power cable here to power the unit.
-
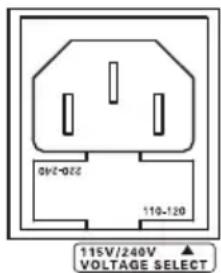
Fuse: The orientation of the fuse holder determines the current voltage setting of Total PA Ultra. The current setting is shown above the white triangle ( ): 110–120 V or 220–240 V. If you use Total PA Ultra in a region with a different voltage, change the voltage setting by removing the fuse holder, inverting it, and reinserting it.
If the unit's fuse is broken, remove the fuse holder and replace the broken fuse with one with the same rating (printed on the fuse holder). Using a fuse with an incorrect rating can damage the unit and/or fuse.
- Power Switch: Turns Total PA Ultra on or off.
Media Panel
Media Panel Functions:
MODE Mode: Switches modes from USB, SD, FM radio (if applicable), or Bluetooth.
Note: A USB drive or SD card must contain playable files in order for it to appear properly in the media panel's display. You can play APE, FLAC, MP3, 16-bit WAV, and WMA files.

Play/Pause: Play/pause the USB, SD, or Bluetooth source. Press and hold Play/Pause for 2 seconds to begin the preset auto-store function (if applicable). This jumps to the lowest station (87.5) and then travels through the bandwidth to auto-store the strongest stations as presets.

Repeat: Repeat all of the tracks (ALL), repeat all of the tracks in the folder (FOLd), repeat the current playing USB or SD track (OnE), or shuffle the track order (rAn).

Previous: Plays the previous USB, SD, or Bluetooth track. When listening to the FM radio (if applicable), press the button once to skip back through the FM stations and hold the button down to seek back through the channel presets.

Next: Plays the next USB, SD, or Bluetooth track. When listening to the FM radio (if applicable), press the button once to tune the radio down one preset and hold the button down to seek forward through the channel presets.
Note: In some apps, pressing the Previous (I◄◄) or Next (►►I) buttons may go to another playlist or music genre.
Media Panel Remote
Note: Aim the remote straight at the front of the speaker woofer. Room lighting and battery life can affect the operating range of the remote control.
Note: To use the remote control for the first time, first pull out the tab attached to the battery compartment. To change the remote battery, follow the diagram located on the back of the remote. Use a 3 V DC CR2032 lithium button cell battery for replacement.
- Stop: Stops the media panel source from playing.
- Mode: Selects the media panel source: USB, SD, FM radio (if applicable), or Bluetooth.
Note: A USB drive or SD card must contain playable files in order for it to appear properly in the media panel's display. You can play APE, FLAC, MP3, 16-bit WAV, and WMA files.
- Mute: Silences the music playback on media panel sources.
- Prev ( I◄◄): Goes to the previous USB or SD card track. When listening to Bluetooth sources, pressing Prev in some apps may go to another playlist or music genre. When listening to the FM radio (if applicable), press the Prev button once to skip back through the FM stations and hold the button down to seek back through the channel presets.
- Next (▶▶I): Advances to the next USB or SD card track. When listening to Bluetooth sources, pressing Next in some apps may go to another playlist or music genre. When listening to the FM radio (if applicable), press the Next button once to tune the radio down one preset and hold the button down to seek forward through the channel presets.
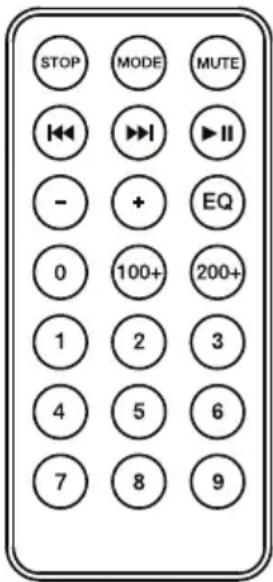
- Play/Pause (▶II): Plays or pauses the USB, SD, or Bluetooth media panel source. Press and hold Play/Pause for 2 seconds to begin the preset auto-store function (if applicable). This jumps to the lowest station (87.5) and then travels through the FM band to auto-store the strongest stations as presets.
Note: Files are played from the USB or SD source first by alphabetical order of what is on the root level, then alphabetical by folder, and then alphabetical by the track name.
- Vol -: Decreases the media panel source volume.
• Vol +: Increases the media panel source volume.
Note: The remote volume only affects the media panel source and works together with the physical media panel volume knob on the unit's rear panel.
- EQ: Selects one of the following digital EQ presets to use with a media panel source: Bass (BAS), Pop (POP), Rock (rOC), Jazz (JA2), Classical (CLA), Country (COU), No EQ (OFF, factory default setting).
Note: The digital EQ only works for Bluetooth, USB flash drive, and SD card sources.
• 100+: Jumps ahead by 100 tracks.
• 200+: Jumps ahead by 200 tracks.
- Number Keys: Provides channel selection for FM radio stations (if applicable), and track selection for USB and SD card sources.
Operation
Pairing a Bluetooth Device
- Turn on your Bluetooth device.
- Power on Total PA Ultra.
- Use the Mode button to select Bluetooth mode, which appears as "bt" in the display. Total PA Ultra will automatically go into pairing mode to search for Bluetooth devices. You will know you are in pairing mode when the Bluetooth icon is flashing. In addition, automatic voice prompts from the speaker will alert you of the device's status: Bluetooth Pairing, Bluetooth Connected, or Bluetooth Disconnected. *
- Navigate to your Bluetooth device's setup screen, find Total PA Ultra, and connect. The Bluetooth icon will remain solidly lit.
Note: Users should consider updating their device's OS if experiencing trouble with pairing or playing music. - To disconnect pairing, turn off Bluetooth on your device or select Forget this device from your device.
* If you would like to disable (or enable) the voice prompts, press and hold the Play/Pause button on the Media Panel.
Note: Bluetooth must be selected as the audio source in order to disable (or enable) the voice prompts.
Pairing a Bluetooth Device Using NFC
NFC (near-field communication) allows data exchange from devices, such as pairing, by gently bumping them together. Check in your device's manual to see if this feature is supported.
To use NFC to pair with Total PA Ultra:
- In order to use NFC, your device must be turned on and unlocked.
- Enter your device's Settings menu and check that NFC is turned On (one-time step).
- Power on Total PA Ultra.
- Touch and briefly hold your device to the NFC logo located on Total PA Ultra's rear panel.
- Follow the pairing instructions that appear on your phone. If a passcode is required, enter "0000".
- To unpair, gently bump your device against the NFC logo.
Connecting Two Speakers
To link two Total PA Ultra speakers:
- Plug an XLR cable into the Mix Output located on the rear panel of one Total PA Ultra.
- Plug the other end of the XLR cable into the XLR Input of another Total PA Ultra.
- Power on both speakers. Use the Aux Input Volume on the second speaker to adjust the input signal level.
Troubleshooting
If the sound is distorted: Try lowering the volume control of your sound source or musical instrument. Also, try to reduce the overall volume of Total PA Ultra.
If there is too much bass: Try adjusting the tone or EQ control from Total PA Ultra or your sound source to lower the bass level. This will allow you to play the music louder before clipping (distortion) occurs.
If there is a high-pitched whistling noise when using a microphone: This is probably feedback. Point the microphone away from the speaker.
If you can't hear the microphone over the music volume: Turn down the music volume from your source.
When I press Previous (◀◀) or Next (▶▶), it doesn't increment to the next FM station: Short presses of the button will jump to presets. Hold the button down to seek to the next station. (If applicable)
If the radio station channel is flashing: The unit is currently muted. Unmute to stop the flashing and resume playback.
The USB track number (Example: 001) is flashing slowly: The USB drive music playback is muted. Unmute to stop the flashing and resume playback.
The LCD shows "NONE": The unit is in USB/SD mode, but there is no USB drive attached or no SD card inserted. If a USB drive or SD card is already properly inserted, make sure it contains playable files (APE, FLAC, MP3, 16-bit WAV, and WMA files).
If the Bluetooth logo is flashing rapidly: The unit is currently in pairing mode.
If the Bluetooth logo is flashing slowly: A device is paired, but the music is muted. Unmute to stop the flashing and resume playback.
If you cannot connect your audio device to Total PA Ultra via Bluetooth:
- Have your audio device (e.g., smartphone or tablet) and Total PA Ultra as close together as possible while trying to connect. Make sure both the audio device and Total PA Ultra are unobstructed by walls, furniture, etc.
- Reset the Bluetooth connection on Total PA Ultra to disconnect Total PA Ultra from any other audio device and restart the search process. If this does not work right away, power off Total PA Ultra and then power it back on. See Pairing a Bluetooth Device for more information.
- Reset the Bluetooth connection on your audio device by turning Bluetooth off and back on. You can find this under the Bluetooth menu in the Settings for your phone or other audio device.
If this does not work, and you have connected to Total PA Ultra before, find Total PA Ultra in the list of available or previously connected devices in your audio device's Bluetooth menu, tap the "gear" or "i" icon located next to it and then select Unpair or Forget. Turn Total PA Ultra off and back on and try pairing again once it reappears in your available devices list.
Note: If Total PA Ultra has been paired to another audio device recently that is still within range, you may need to repeat this process with that audio device to fully disconnect.
natural_image
Close-up of black metal rods with connecting rods, no text or symbols visible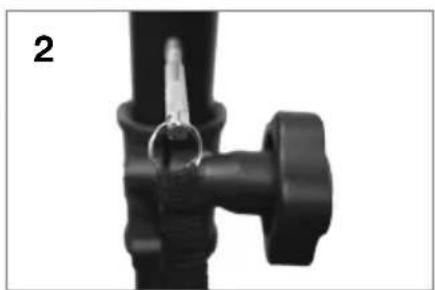
natural_image
Close-up of a black mechanical valve or fitting with a handle and lever (no visible text or symbols)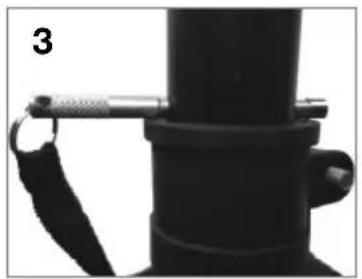
natural_image
Close-up of a black mechanical component with a strap and handle, no visible text or symbols
natural_image
Close-up of a mechanical component with a central spherical feature and a metallic end (no visible text or symbols)
natural_image
Close-up of a mechanical component with a curved pipe fitting and a knob (no visible text or symbols)Características
Panel trasero
natural_image
Close-up of black metal rods with triangular tips, no text or symbols visible
natural_image
Close-up of a black mechanical valve or fitting with a metallic clip, no visible text or symbols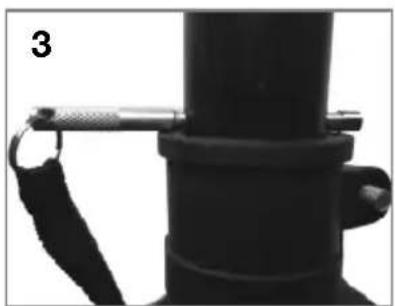
natural_image
Close-up of a black mechanical component with a metallic clip attached, labeled '3' in the corner (no text or symbols on the object itself)
natural_image
Close-up of a metallic tool handle with a circular head and cylindrical shaft (no text or symbols visible)
natural_image
Close-up of a mechanical component with a curved handle and cylindrical end (no visible text or symbols)Caractéristiques
Panneau arrière
natural_image
Close-up of three black metal rods with twisted ends, no text or symbols visible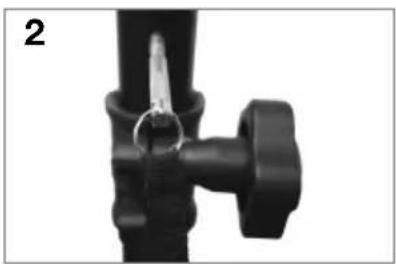
natural_image
Close-up of a black mechanical valve or fitting with a handle and lever (no visible text or symbols)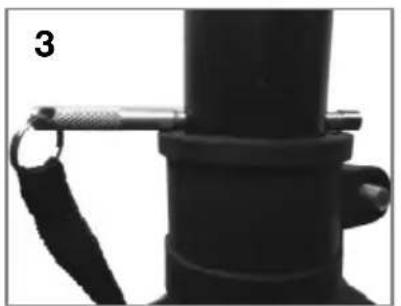
natural_image
Close-up of a black mechanical component with a strap and handle, no visible text or symbols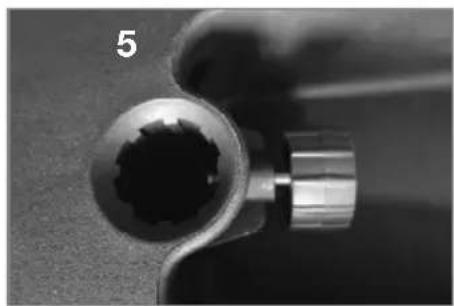
natural_image
Close-up of a metallic tool tip with a textured central component, labeled '5' in the corner (no other text or symbols visible)
natural_image
Close-up of a mechanical component with a curved handle and a knob, no visible text or symbolsCaratteristiche
Pannello posteriore
natural_image
Close-up of a black mechanical component with a metallic clip attached, labeled '3' in the corner (no text or symbols on the object itself)
natural_image
Close-up of a mechanical tool or component with a central circular feature and a metallic handle (no visible text or symbols)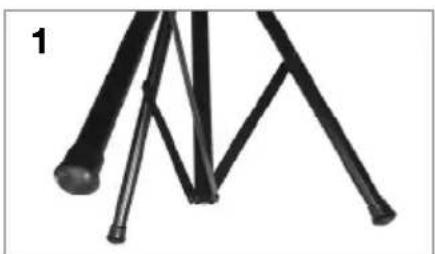
natural_image
Close-up of a black mechanical valve or fitting with a metallic clip and handle (no text or symbols visible)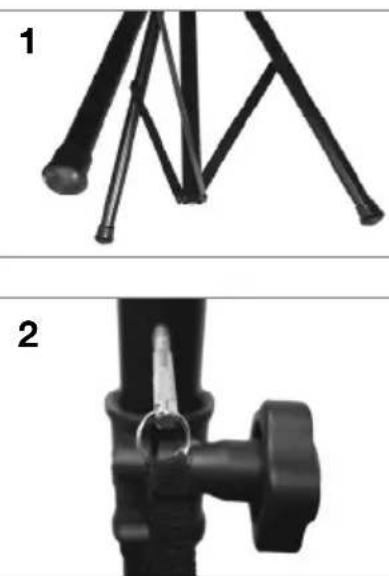

natural_image
Close-up of a kitchen handle with a knob and lever (no visible text or symbols)Funktionen
Rückseite
natural_image
Close-up of a mechanical device with a metallic lever and attached strap (no visible text or symbols)
natural_image
Close-up of a metallic mechanical component with a circular opening, no visible text or symbols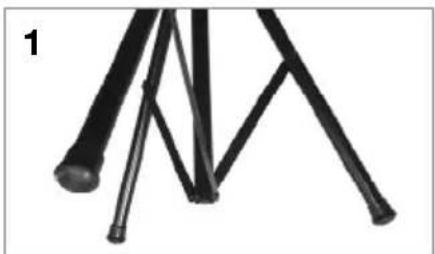
natural_image
Close-up of black metal rods with triangular tips, no text or symbols visible
natural_image
Close-up of a black mechanical valve or fitting with a metallic clip, no visible text or symbols
natural_image
Close-up of black metal rods with connecting rods, no text or symbols visible
natural_image
Close-up of a black mechanical component with a metallic clip and handle (no visible text or symbols)
natural_image
Close-up of a mechanical knob or knob with a curved handle and a cylindrical knob, no visible text or symbols.Kenmerken
Achterpaneel
Technical Specifications
| Output Power | 500 W (Peak) |
| Max SPL (@ 1 m) | 116 dB peak, 110 dB continuous C-weighted, free space |
| Low Frequency | 15” (381 mm) woofer, 2” (51 mm) voice coil |
| High Frequency | 1” (25 mm)-exit ferrite compression driver, 1” (25 mm) voice coil |
| Crossover | 2.6 kHz |
| Frequency Response | 55 Hz - 20 kHz (±3 dB) |
| Frequency Range | 45 Hz - 22 kHz (@ -10 dB) |
| Horn Coverage | 80/100° H x 60° V, nominal (@ -6 dB) |
| Input | Gain Range: -∞ to +10 dB (microphone/line)Max Input Level: +10 dBuImpedance: 22 kΩ |
| External Controls | Channel volume, master volume, power on/off with LED, clip limiter with LED, echo, 2-band equalizer, mode, play/pause, repeat, previous track, next track, light mode |
| Connectors | (3) XLR inputs (2 dynamic microphone/line, 1 line)(2) 1/4” (6.35 mm) TRS inputs(1) 1/8” (3.5 mm) TRS input(1) stereo RCA input pair(1) XLR mix output(1) SD card slot(1) USB port (host)(1) IEC power connection |
| Light Type | RGB LED |
| Bluetooth* | Profile: A2DP, AVRCPVersion: 4.2Range: Up to 100 feet / 30.5 meters * |
| USB/SD Card | Audio: Music playback from USB drive or SD cardSupported File System: FAT32Supported File Types: APE, FLAC, MP3, WAV, WMAMaximum File Size: ≤ 16 GBMaximum USB Drive / SD Card Capacity: ≤ 16 GB |
| Protection Features | Over-excursion, thermal, short-circuit protection |
| Power | Speaker: 100 VAC, 110–120 VAC, or 220–240 VAC; 50/60 HzFuse: ~100–120 V: 5 A, 300 W; or ~220–240 V: 2.5 A, 300 W (EU version)Remote Control: 3 VDC CR2032 lithium button cell battery |
| Cabinet | Trapezoidal with floor monitor capability; injection-molded polypropylene with perforated steel grilleTransport: 1 telecoping handle, 3 handles, 2 wheelsMounting: Integrated pole socket (36 mm diameter) |
| Dimensions (height x width x depth) | 27.6" x 17.8" x 14.6"700 x 452 x 372 mm |
| Weight (speaker only) | 40.1 lbs.18.2 kg |
Specifications are subject to change without notice.
* Bluetooth range is affected by walls, obstructions, and movement. For optimal performance, place the product in the center of the room so it is unobstructed by walls, furniture, etc.
FCC ID: 2AB3E-IPA91
This device complies with Part 15 of the FCC rules. Operation is subject to the following two conditions: (1) this device may not cause harmful interference, and (2) this device must accept any interference received, including interference that may cause undesired operation. Shielded cables must be used with this unit to ensure compliance with the Class B FCC limits.
Trademarks & Licenses
ION Audio is a trademark of ION Audio, LLC, registered in the U.S. and other countries.
The Bluetooth word mark and logos are owned by the Bluetooth SIG, Inc. and any use of such marks by ION Audio is under license.
SD is a registered trademark of SD-3C, LLC.
All other product or company names are trademarks or registered trademarks of their respective owners.
ionaudio.com
- Box Contents
- Support
- Quick Setup
- Connection Diagram
- Speaker Stand Installation
- Features
- Rear Panel
- Media Panel
- Media Panel Functions:
- Media Panel Remote
- Operation
- Pairing a Bluetooth Device
- Pairing a Bluetooth Device Using NFC
- To use NFC to pair with Total PA Ultra:
- Connecting Two Speakers
- Troubleshooting
- If you cannot connect your audio device to Total PA Ultra via Bluetooth:
- Características
- Panel trasero
- Caractéristiques
- Panneau arrière
- Caratteristiche
- Pannello posteriore
- Funktionen
- Rückseite
- Kenmerken
- Achterpaneel
- FCC ID: 2AB3E-IPA91
- Trademarks & Licenses
- ionaudio.com
Brand : ION
Model : Total PA Ultra
Category : Loudspeaker