
Robot 600 Plus - Blender TAURUS - Free user manual and instructions
Find the device manual for free Robot 600 Plus TAURUS in PDF.


| Product Type | Multifunction blender with accessories |
| Brand | Taurus |
| Model | Robot 600 Plus |
| Main Functions | Blend, chop, whip, emulsify, beat |
| Speed | Electronic speed adjustment (multiple steps) |
| Turbo Function | Yes, for maximum power |
| Included Accessories | Whisk, jug, measuring cup (chopper and emulsifier mixer depending on model) |
| Jug Material | Glass (estimated) |
| Parts Cleaning | Dishwasher (gentle cycle) or soapy water |
| Motor Body Maintenance | Damp cloth, do not immerse |
| Safety | Sharp blades, handling precautions, stop and unplug before cleaning |
| Power Supply | Mains 220-240 V ~ 50/60 Hz (estimated) |
| Warranty | Manufacturer's warranty (details in manual) |
| Usage | Domestic use only |
| Recycling | WEEE compliant, do not dispose of with household waste |
Frequently Asked Questions - Robot 600 Plus TAURUS
User questions about Robot 600 Plus TAURUS
0 question about this device. Answer the ones you know or ask your own.
Ask a new question about this device
Download the instructions for your Blender in PDF format for free! Find your manual Robot 600 Plus - TAURUS and take your electronic device back in hand. On this page are published all the documents necessary for the use of your device. Robot 600 Plus by TAURUS.
USER MANUAL Robot 600 Plus TAURUS
natural_image
Line drawing of a handheld electric shaver with a control panel (no text or symbols)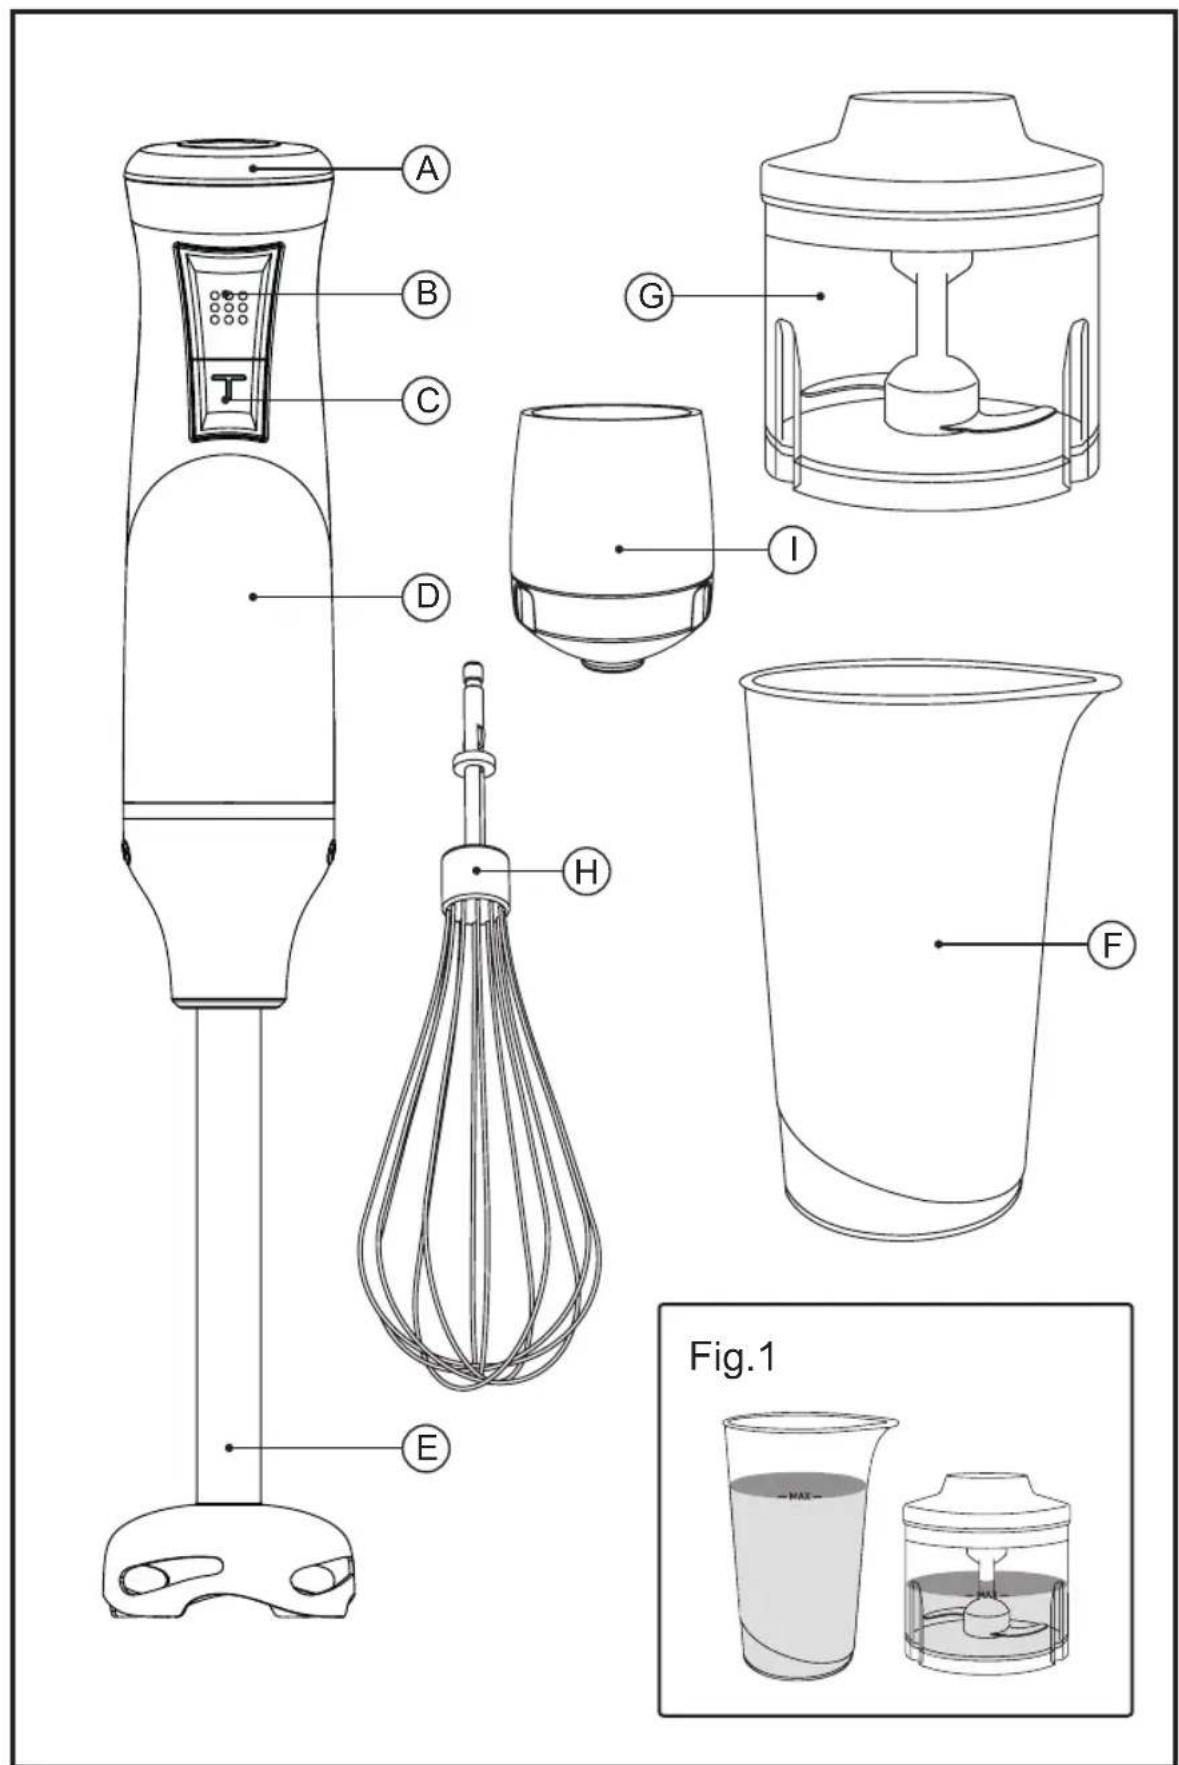
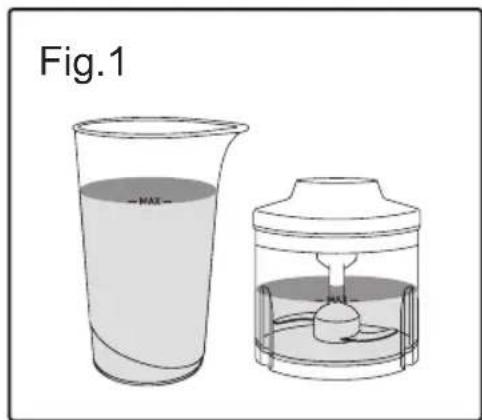
Fig.2
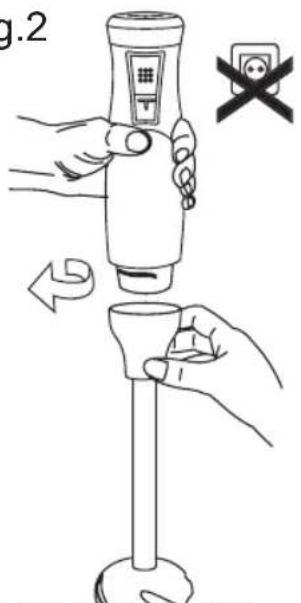
Fig.2.1 Fig.2.3 Fig.2.2
natural_image
Line drawing of a hand using a digital pipette to test liquid in a beaker (no text or symbols)
Fig.3
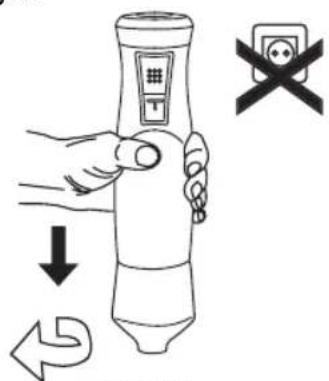
Fig.3.1
natural_image
Line drawing of a hand holding a digital thermometer with a downward arrow indicating compression (no text or symbols)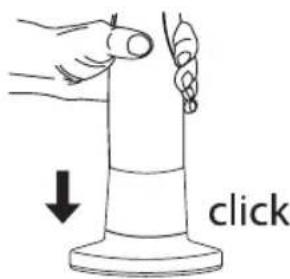
Fig.3.2
Fig.3.3
natural_image
Three-step illustration showing hands pouring liquid into a jar, then adding granular material into a container (no text or symbols)Fig.3
Fig.3.4
natural_image
Line drawing of a hand holding a blender with a control panel (no text or symbols)Fig.3.5
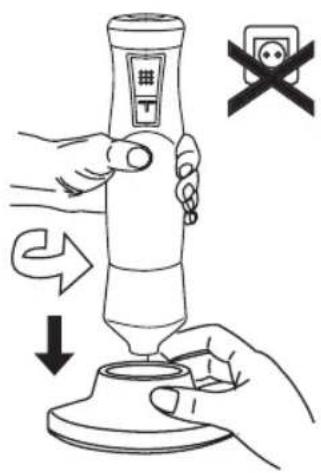
Fig.4
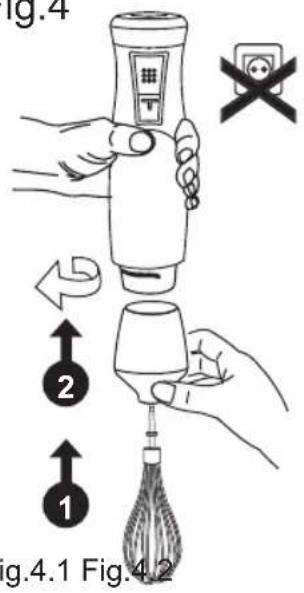
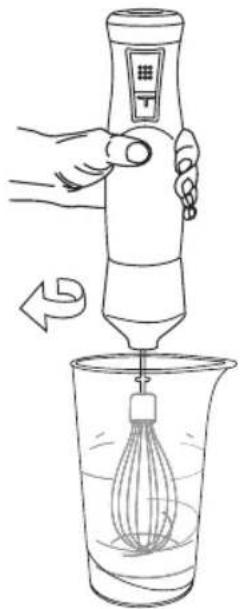

Fig.4.1 Fig.
Fig.5
natural_image
Simple line drawing of a mechanical component with three vertical supports and a central handle (no text or symbols)Español
Batidora de varilla
Robot 600 Inox
Robot 600 Plus Inox
Many thanks for choosing to purchase a TAURUS brand product.
Thanks to its technology, design and operation and the fact that it exceeds the strictest quality standards, a fully satisfactory use and long product life can be assured.
SAFETY HINTS AND WARNINGS
- Read these instructions carefully before switching on the appliance and keep them for future reference. Failure to follow and observe these instructions may result in an accident. Failure to follow and observe these instructions could lead to an accident.
- Clean all the parts of the product that will be in contact with food, as indicated in the cleaning section, before use.
- This appliance must not be used by children. Keep the appliance and its cable out of reach of children.
- This appliance can be used by people unused to its handling, disabled people if they have been given supervision or instruction concerning use of the appliance in a safe way and understand the hazards involved.
- This appliance is not a toy. Children should be supervised to ensure that they do not play with the appliance.
- The blades are sharp and there is a risk of being cut. Proceed with caution and avoid direct contact with their edges.
- Be especially careful when handling the blades during operations of assembly and dismantling, emptying the goblet and cleaning.
- Disconnect the appliance and unplug the mains if you leave it unattended and before changing the accessories or nearby moving parts, assembling, dismantling or cleaning.
- Be careful when pouring hot liquids into the food processor or blender, as they could be expelled back out due to a sudden release of steam.
- If the mains connection is damaged, it must be replaced. Take the appliance to an authorised Technical Assistance Service In order to prevent any danger, do not attempt to dismantle or repair it yourself.
- Be careful if hot liquid is poured into the food processor or blender as it can be ejected out of the appliance due to a sudden steaming.
- Ensure that the voltage indicated on the nameplate matches the mains voltage before plugging in the appliance.
- Connect the appliance to a base with an earth socket withstanding a minimum of 10 amperes.
- The appliance's plug must fit into the mains socket properly. Do not modify the plug. No usar adaptadores de clavija.
- Keep the working area clean and well lit. Cluttered and dark areas invite accidents.
- Keep children and bystanders away when using this appliance.
- Do not use the appliance if the cable or plug is damaged.
- If any of the appliance casings breaks, immediately disconnect the appliance from the mains to prevent the possibility of an electric shock.
- Do not use the appliance if it has fallen on the floor, if there are visible signs of damage or if it has a leak.
- Do not use the appliance with damp hands or feet, or when barefooted.
- Do not force the electrical wire. Never use the power cord to lift up, carry or unplug the appliance.
- Do not wrap the cable around the appliance.
- Check the state of the power cord. Damaged or tangled cables increase the risk of electric shock.
- The power cord must be regularly examined for signs of damage and if damaged, the appliance must not be used.
- Do not touch the plug with wet hands.
- Take the necessary measures to avoid starting the appliance involuntarily.
- Before using the appliance ensure that the tool is properly fixed in place.
- Do not touch any of the appliance's moving parts while it is operating.
- Be careful after switching the appliance off, as the blade/s continue rotating as a result of their mechanical inertia.
USE AND CARE
- Fully unroll the appliance's power cable before each use.
- Do not use the appliance if its accessories are not properly fitted.
- Do not use the appliance if the accessories attached to it are defective. Replace them immediately.
- Do not use the appliance if the on/off switch does not work.
-
Respect the MAX level indicator (Fig. 1)
-
Do not add a volume of hot liquid greater than half of the total capacity of the goblet, and whenever there are hot liquids inside the goblet ensure that only the slowest speed is used.
- This appliance is for household use only, not professional or industrial use.
- This appliance should be stored out of reach of children and/or those with reduced physical, sensorial or mental abilities or who are unfamiliar with its use
- Keep the appliance in good condition. Check that the moving parts are not misaligned or locked and make sure there are no broken parts or anomalies that may prevent the appliance from operating correctly.
- Use the appliance, its accessories and tools in accordance with these instructions. Take working conditions and job to be carried out into consideration. Using the appliance for anything other than its intended use can create hazards.
- Never leave the appliance connected and unattended if is not in use. This saves energy and prolongs the life of the appliance.
- Do not use the appliance for longer than 1 minute at a time, or to complete cycles lasting more than 1 minutes. In the latter case always ensure rest periods of at least 1 minute between cycles. Never keep the appliance working for longer than the required time.
- The annexed illustrative table shows a number of recipes, including the amount of food to be processed, the recommended time to prepare each recipe, as well as the maximum operation time of the device under each of these load conditions.
- Do not use the appliance on any part of the body of a person or animal.
- Do not use the appliance with frozen goods, ice or those containing bones.
SERVICE
- Any misuse or failure to follow the instructions for use renders the guarantee and the manufacturer's liability null and void.
DESCRIPTION
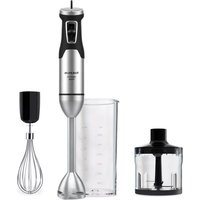
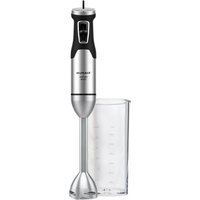
A Speed regulator
B Button
C Turbo
D Driving motor
E Blender leg
F Measuring cup
G Chopper (*)
H Whisk (*)
I Adapter fitting (*)
(*) Only available in the model Robot 600 Plus Inox
If the model of your appliance does not have the accessories described above, they can also be bought separately from the Technical Assistance Service.
INSTRUCTIONS FOR USE
BEFORE USE:
- Make sure that all the product's packaging has been removed.
- Before using the product for the first time, clean the parts that will come into contact with food in the manner described in the cleaning section.
- Prepare the appliance according to the function you wish to use.
USE:
- Unroll the cable completely before plugging it in.
- Connect the appliance to the mains.
- Turn the appliance on using the on/off switch.
- Select the desired speed.
- Work with the food you want to process.
ELECTRONIC SPEED CONTROL:
- The speed of the appliance can be regulated simply by using the speed regulator control (A). This function is very useful, as it makes it possible to adapt the speed of the appliance to the type of work that needs to be done.
TURBO FUNCTION:
- The appliance has a Turbo function. By activating the Turbo function all the power of the motor becomes available, thus obtaining a finer finish in the final texture of the product.
ONCE YOU HAVE FINISHED USING THE APPLIANCE:
- Stop the appliance by releasing the pressure on the on/off button.
- Unplug the appliance to the mains.
- Clean the appliance
ACCESSORIES:
STICK BLENDER ACCESSORY (FIG.2):
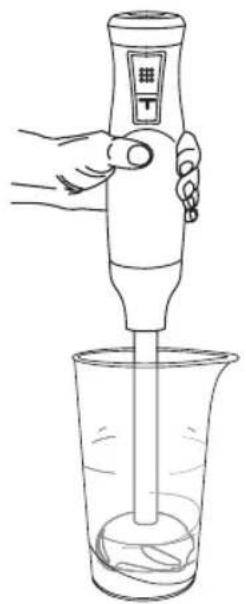
- This accessory is used to make sauces, soups, mayonnaise, milkshakes, baby food...
- Attach the stick blender to the motor body by turning it in the direction indicated by the arrow (Fig. 2.1).
- Pour the foodstuffs into the sieve and operate it by pressing the start button (Fig. 2.2).
- Detach the stick blender by turning it in the opposite direction to the arrow and remove it for later cleaning (Fig. 2.3).
CHOPPING ACCESSORY (FIG. 3):
- This accessory is used to chop vegetables, nuts, meat...
- Fit the adapter fitting to the motor unit by turning it in the direction of the arrow. (Fig. 3.1)
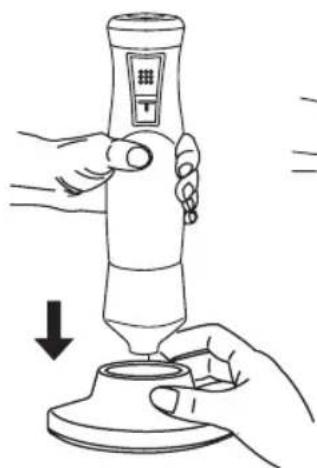
- Fit the unit to the lid until hear the click. (Fig. 3.2)
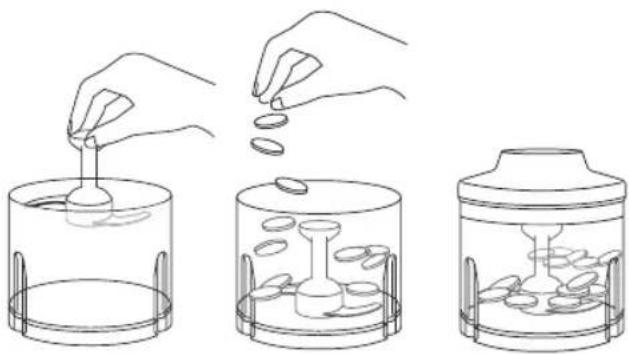
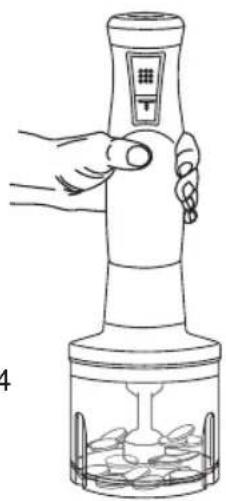
- Put the food to be prepared in the chopping container and attach the lid firmly. (Fig. 3.3)
- Start the appliance. Warning: do not start the appliance if the entire unit is not properly seated and fitted. (Fig. 3.4)
- Stop the appliance when the food reaches the desired texture.
- Detach the unit from the lid and release the adapter fitting. (Fig. 3.5)
WHISK ACCESSORY (FIG.4):
- This accessory is used to whip cream, beat egg whites...
- Insert the whisk into the adapter fitting (Fig.4.1). Fit the adapter fitting to the motor unit by turning it in the direction of the arrow (Fig. 4.1).
- Place the food in a wide container and turn on the device. For optimum results, move the whisk clockwise.
- Remove the whisk accessory and release the adapter fitting (Fig. 4.2).
- Note 1: Do not work at high speeds with this accessory attached, as this would cause defects in the whisk (spinning its wires).
- Note 2: To free the whisk (H) from the adapter fitting (I), pull the ring on the whisk.
CLEANING
- Disconnect the appliance from the mains and let it cool before undertaking any cleaning task.
- Clean the equipment using a damp cloth with a few drops of washing-up liquid and then dry.
- Do not use solvents, or products with an acid or base pH such as bleach, or abrasive products, for cleaning the appliance.
- Do not submerge the appliance in water or any other liquid, or place it under a running tap.
- During the cleaning process, take special care with the blades, as they are very sharp.
- It is advisable to clean the appliance regularly and remove any food remains.
- If the appliance is not in good condition of clean-
liness, its surface may degrade and inexorably affect the duration of the appliance's useful life and could become unsafe to use.
- The appliance is suitable for cleaning in hot soapy water or in a dishwasher (using a soft cleaning program):
- Whisk
- Measuring cup
- Mincer
- Liquidiser attachment
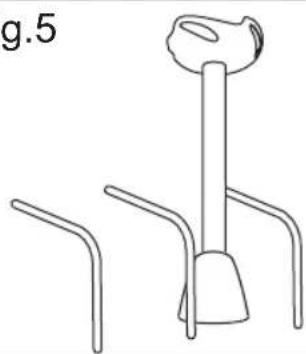
- The draining/drying position for washable parts in dishwashers or after washing by hand in a sink must allow for water to drain easily (Fig. 5).
- Next dry all the parts before fitting them together and storing.
ANOMALIES AND REPAIR
Take the appliance to an authorised technical support service if problems arise. Do not try to dismantle or repair without assistance, as this may be dangerous.
For EU product versions and/or in the case that it is requested in your country:
ECOLOGY AND RECYCLABILITY OF THE PRODUCT
The materials of which the packaging of this appliance consists are included in a collection, classification and recycling system. Should you wish to dispose of them, use the appropriate public containers for each type of material.
The product does not contain concentrations of substances that could be considered harmful to the environment.
This symbol means that in case you wish to dispose of the product once its working life has ended, take it to an authorised waste agent for the selective collection of waste electrical and electronic equipment (WEEE)
This appliance complies with Directive 2014/35/EC on Low Voltage, with Directive 2014/30/EU on Electromagnetic Compatibility, with Directive 2011/65/EU on restrictions on the use of certain dangerous substances in electrical and electronic appliances and with Directive 2009/125/EC on the ecological design requirements applicable to products related to energy.
FOOD PREPARATION
| Recipe | Recommended accessory | Quantity | Method Speed Time | ||
| Mayonnaise |  | 250 ml | Add 1 egg, salt, some drops of vinegar or lemon to the receptacle. Fill with oil up to the level indicated and switch on, do not move or agitate until the oil has been bound. | 10 35s | |
| Fruit milkshakes |  | ---- Add | the fruit and mix with blender until smooth. 15 ---- | ||
| Béchamel sauce |  | 600 ml | Melt 30g of butter in a saucepan over a low heat, add 100g of lour and 30g of fried onion (beforehand chop using the mincer attach-ment) and gradually add 500ml of milk. | 10 15 s | |
| Whipped cream | 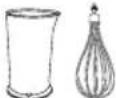 | 250 ml | Place cold cream (0 to 5°C) into a cold recep-tacle and beat with blender, making vertical movements. Be careful not to overbeat as the cream will turn to butter. | 1-5 2 min | |
| Whipped egg whites | 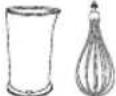 | 3 whites | Add the whites to a receptacle and whip with blender, making vertical movements. | 5 2-4 min | |
| Mashed pota-toes |  | 400 g | Potatoes can be blended while still in the saucepan. | 20 30 s | |
| Baby food |  | 300 g | Cut up 100g of apples, 100g of banana, 50g of biscuits and place into a receptacle. Add orange juice and blend. | 20 25 s | |
| Grated bread |  | 50 g | Cut up stale bread and place into goblet. Blend until desired consistency is achieved. | 20 1,5 min | |
| Grated cheese |  | 100 g | Cut into 1cm cubes and blend until desired consistency is achieved. | 20 30-50 s | |
| Minced boiled egg |  | 2 eggs | Cut into four pieces and blend until desired consistency is achieved. | 20 10 s | |
| Minced meat (raw or cooked) |  | 150 g Before blending, cut into 1cm cubes. 20 30 s | |||
| Carrot |  | 200 g | Peel, dice and blend until desired consistency is achieved. | 20 30 s | |
| Nuts |  | 200 g | Remove shell and blend until desired consistency is achieved. | 20 30 s | |
| Chopped Spa-nish Serrano ham | 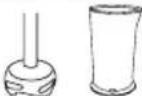 | 35 g | Previously chop into 1 cm chunks Mince until the desired texture is obtained | 20 3 s |
Français
Mixeur batteur
Robot 600 Inox
Robot 600 Plus Inox
Cher Client,
HACKZUBEHÖR (FIG. 3)
ELEKTRISCHE SNELHEIDSCONTROLE:
GARDE- ACCESSOIRE (AFB.4):
ACCESORIU PENTRU TOCAT (FIG. 3)
1 membership àXTZAL (*)

- Español
- Batidora de varilla
- SAFETY HINTS AND WARNINGS
- USE AND CARE
- SERVICE
- DESCRIPTION
- INSTRUCTIONS FOR USE
- BEFORE USE:
- USE:
- ELECTRONIC SPEED CONTROL:
- TURBO FUNCTION:
- ONCE YOU HAVE FINISHED USING THE APPLIANCE:
- ACCESSORIES:
- STICK BLENDER ACCESSORY (FIG.2):
- CHOPPING ACCESSORY (FIG. 3):
- WHISK ACCESSORY (FIG.4):
- CLEANING
- ANOMALIES AND REPAIR
- ECOLOGY AND RECYCLABILITY OF THE PRODUCT
- Français
- Mixeur batteur
- Cher Client,
- HACKZUBEHÖR (FIG. 3)
- ELEKTRISCHE SNELHEIDSCONTROLE:
- GARDE- ACCESSOIRE (AFB.4):
- ACCESORIU PENTRU TOCAT (FIG. 3)
Brand : TAURUS
Model : Robot 600 Plus
Category : Blender