
RL115A - Loudspeaker SAMSON - Free user manual and instructions
Find the device manual for free RL115A SAMSON in PDF.

| Product Type | RL Series Bi-Amplified Powered Speaker |
| Brand and Model | Samson RL115A |
| Dimensions (W x D x H) | 386 mm x 356 mm x 631.5 mm (15.2 x 14 x 24.9 inches) |
| Weight | 14.8 kg (32.6 lb) |
| Output Power | 800 W peak (700 W LF + 100 W HF) / 400 W RMS (350 W LF + 50 W HF) |
| Frequency Response | 50 Hz - 20 kHz |
| Max SPL (at 1 m) | 122 dB |
| Woofer | 15" (381 mm) woofer with 2" (50.8 mm) voice coil |
| Tweeter | 1" (25.4 mm) neodymium driver with 1" (25.4 mm) voice coil |
| Coverage Angle | 90° H x 60° V |
| Crossover Frequency | 2.5 kHz, 12 dB/octave slope |
| Inputs | 1 x XLR/TRS combo (balanced), 1 x XPD wireless USB port |
| Output | 1 x balanced XLR (Mix Out for daisy chaining) |
| Built-in EQ | Contour switch (boost at 100 Hz and 12 kHz) |
| Electronic Protection | Thermal, overload, optical analog limiter, compressor |
| Power Supply | IEC 3-pin connector, 250 VAC, 20 A |
| Power Consumption | 420 W |
| Fuse | 110-120 V: T4A 250V; 220-240 V: T2A 250V |
| Enclosure Material | Impact-resistant polypropylene |
| Grille | Premium quality perforated steel |
| Mounting | 35 mm (1 3/8") pole socket with locking bolt; use as 45° tilted monitor |
| Handles | Two on the sides, one on the top |
| Care and Cleaning | Clean with a dry cloth only. Do not expose to water or moisture. |
| Safety | Do not open the enclosure. Refer servicing to qualified personnel. Use only recommended accessories. |
| General Information | Ideal for live music, DJ, conferences, sound reinforcement. Compatible with Samson XPD wireless receiver (sold separately). |
Frequently Asked Questions - RL115A SAMSON
User questions about RL115A SAMSON
0 question about this device. Answer the ones you know or ask your own.
Ask a new question about this device
Download the instructions for your Loudspeaker in PDF format for free! Find your manual RL115A - SAMSON and take your electronic device back in hand. On this page are published all the documents necessary for the use of your device. RL115A by SAMSON.
USER MANUAL RL115A SAMSON
natural_image
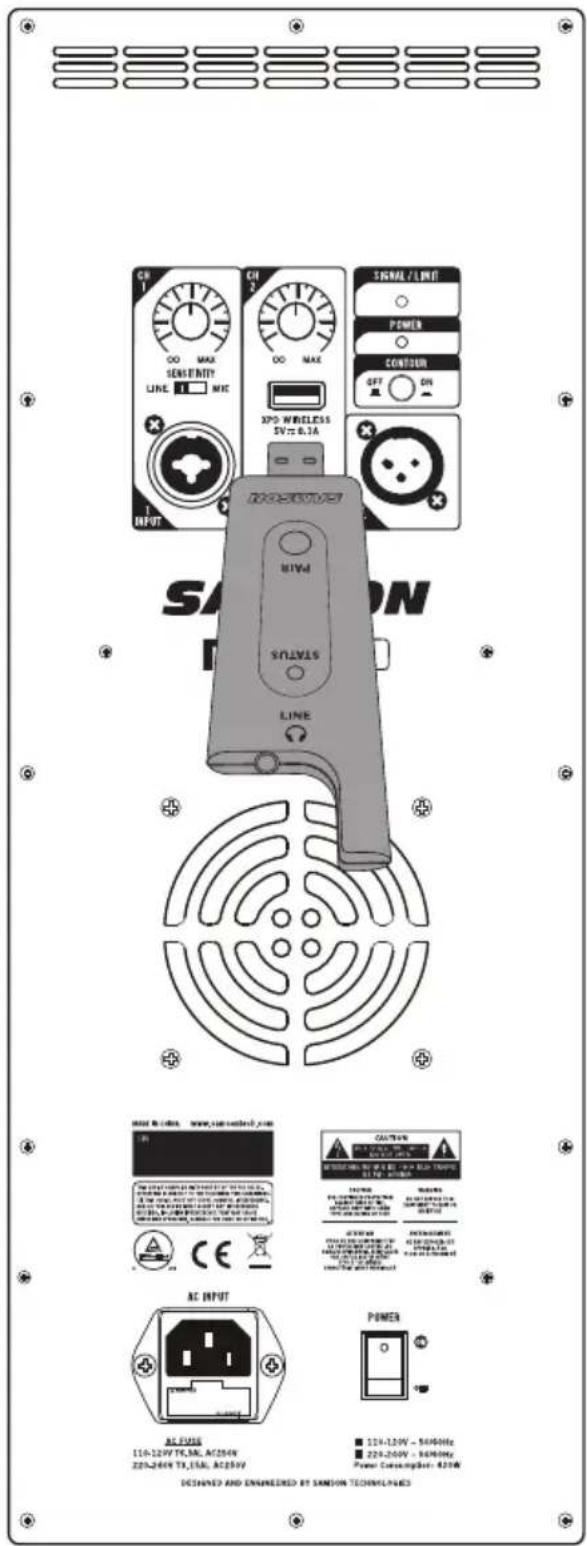
Top-down line drawing of a device casing with dotted pattern and 'SAMSON' logo on front panel (no text or symbols beyond branding)Owner's Manual
Important Safety Information

AVIS RISQUE DE CHOC ÉLECTRONIQUE - NE PAS OUVRIR
CAUTION: TO REDUCE THE RISK OF ELECTRIC SHOCK, DO NOT REMOVE COVER (OR BACK). NO USER-SERVICEABLE PARTS INSIDE. REFER SERVICING TO QUALIFIED SERVICE PERSONNEL.
This lightning flash with arrowhead symbol within an equilateral triangle is intended to alert the user to the presence of non-insulated “dangerous voltage” within the product’s enclosure that may be of sufficient magnitude to constitute a risk of electric shock.

The exclamation point within an equilateral triangle is intended to alert the user to the presence of important operating and maintenance instructions in the literature accompanying the appliance.
If you want to dispose this product, do not mix it with general household waste. There is a separate collection system for used electronic products in accordance with legislation that requires proper treatment, recovery and recycling.
Private household in the 28 member states of the EU, in Switzerland and Norway may return their used electronic products free of charge to designated collection facilities or to a retailer (if you purchase a similar new one).
For Countries not mentioned above, please contact your local authorities for a correct method of disposal.
By doing so you will ensure that your disposed product undergoes the necessary treatment, recovery and recycling and thus prevent potential negative effects on the environment and human health.
Copyright 2019, Samson Technologies Corp. v3
Samson Technologies Corp.
278-B Duffy Ave
Hicksville, New York 11801
Phone: 1-800-3-SAMSON (1-800-372-6766)
www.samsontech.com
Important Safety Information
- Read these instructions.
- Keep these instructions.
- Heed all warnings.
- Follow all instructions.
- This apparatus shall not be exposed to dripping or splashing liquid and no object filled with liquid, such as a vase, should be placed on the apparatus.
- Clean only with a dry cloth.
- Do not block any of the ventilation openings. Install in accordance with the manufacturer's instructions.
- Do not install near any heat sources such as radiators, heat registers, stoves, or other apparatuses (including amplifiers) that produce heat.
- Only use attachments/accessories specified by the manufacturer.
- Unplug this apparatus during lightning storms or when not in use for long periods of time.
- Do not override the intended purpose of the polarized or grounding-type plug. A polarized plug has two blades, with one wider than the other. A grounding-type plug has two blades and a third grounding prong. The wide blade, or third prong, is provided for your safety. If the provided plug does not fit your outlet, consult an electrician to replace the obsolete outlet.
- Protect the power cord from being walked on or pinched, particularly at the prongs, convenience receptacles, the point where they exit from the apparatus.
-
Use only with the cart stand, tripod bracket, or table specified by the manufacture, or sold with the apparatus. When a cart is used, utilize caution when moving the cart/apparatus combination to avoid injury from tip-over.
-
Refer all servicing to qualified service personnel. Servicing is required if the apparatus has been damaged in any way, such as power-supply cord or plug breakage, damage due to liquid or objects falling onto the apparatus, exposure to rain or moisture, or if the apparatus does not operate normally, or has been dropped.
- POWER ON/OFF SWITCH: For products with a power switch, the power switch DOES NOT break the connection from the mains.
- MAINS DISCONNECT: The plug should remain readily operable. For rack-mount or installation where plug is not accessible, an all-pole mains switch with a contact separation of at least 3 mm in each pole shall be incorporated into the electrical installation of the rack or building.
- FOR UNITS EQUIPPED WITH EXTERNALLY ACCESSIBLE FUSE RECEPTACLE: Replace fuse with same type and rating only.
- MULTIPLE-INPUT VOLTAGE: This equipment may require the use of a different line cord, attachment plug, or both, depending on the available power source at installation. Connect this equipment only to the power source indicated on the equipment rear panel. To reduce the risk of fire or electric shock, refer servicing to qualified service personnel or equivalent.

Important Safety Information
FCC Notice
- This device complies with Part 15 of the FCC Rules. Operation is subject to the following two conditions:
(1) This device may not cause harmful interference.
(2) This device must accept any interference received, including interference that may cause undesired operation.
- Changes or modifications not expressly approved by the party responsible for compliance could void the user's authority to operate the equipment.
FCC Statement
This equipment has been tested and found to comply with the limits for a Class B digital device, pursuant to Part 15 of the FCC Rules. These limits are designed to provide reasonable protection against harmful interference in a residential installation.
This equipment generates uses and can radiate radio frequency energy and, if not installed and used in accordance with the instructions, may cause harmful interference to radio communications. However, there is no guarantee that interference will not occur in a particular installation. If this equipment does cause harmful interference to radio or television reception, which can be determined by turning the equipment off and on, the user is encouraged to try to correct the interference by one or more of the following measures:
- Reorient or relocate the receiving antenna.
- Increase the separation between the equipment and receiver.
- Connect the equipment into an outlet on a circuit different from that to which the receiver is connected.
- Consult the dealer or an experienced radio/TV technician for help.
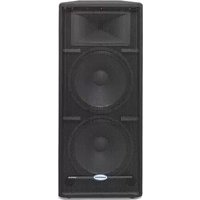
Introduction
Thank you for purchasing the Samson RL Loudspeaker. The RL112A and RL115A are lightweight and powerful speaker systems featuring 800 watts of bi-amped, Class D power. The RL112A and RL115A, respectively feature 12" and 15" heavy-duty, long-excursion woofers, as well as a 1" neodymium high frequency driver mounted in 90° x 60° wide-dispersion horns. The speaker cabinets provide both XLR and 1/4" inputs that handle microphone or line level inputs. The RL Loudspeakers also include a USB Wireless port for connecting Samson XPD Series wireless microphone systems. The XLR Mix Output allows you to "daisy-chain" multiple RL cabinets together to create larger sound reinforcement systems.
Each cabinet's trapezoidal shape allows it to be configured for either front-of-house use, or for operation as a wedge-style monitor. In addition, the compact cabinets can easily be stacked using the built-in bumpers, or can be stand-mounted using the integral 1 3/8" pole-mount receptacles.
The RL Loudspeaker system's durable enclosure is made of high-impact polypropylene with a scuff-resistant textured finish, and include a heavy-grade steel grill, offering excellent protection against wear and tear for truly portable audio. The RL Loudspeakers are ideal for live music, DJ, lecture, and installed sound applications, or anywhere serious power and superior sound quality are desired.
In these pages, you'll find a detailed description of the features of your RL Loudspeaker, as well as step-by-step instructions for its setup and use. If your loudspeaker was purchased in the United States, you'll also find a registration card enclosed—don't forget to follow the instructions so that you can receive online technical support and so that we can send you updated information about this and other Samson products in the future. Also, be sure to check out our website www.samsontech.com for complete information about our full product line.
We recommend you keep the following records for reference, as well as a copy of your sales receipt:
Serial number: ____
Date of purchase: ____
If you have any questions or comments regarding the RL Loudspeaker or any other products from Samson, do no hesitate to contact us at support@samsontech.com.
With proper care and maintenance, your RL Loudspeaker will operate trouble-free for many years. Should your RL Loudspeaker ever require servicing, a Return Authorization (RA) number must be obtained before shipping your unit to Samson. Without this number, the unit will not be accepted. Please visit www.samsontech.com/ra for an RA number prior to shipping your unit. Please retain the original packing materials and, if possible, return the unit in its original carton. If your RL Loudspeaker was purchased outside of the United States, contact your local distributor for warranty details and service information.
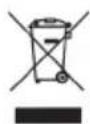
Quick Start
natural_image
Diagram showing two devices connected via a cable to an internal network device (no text or labels present)The following steps will help you get started using your RL112A/RL115A Loudspeakers with a mixer.
- Turn the RL Loudspeaker and Mixer Power switch to the OFF positions.
- Turn the VOLUME control on the rear panel of the RL Loudspeaker down, fully counterclockwise.
- If you are using your RL Loudspeaker(s) for live performance, set the Contour switch in the OFF (out) position. If you are using your RL Loudspeaker(s) for music playback, set the CONTOUR switch to the ON (in) position.
- Following the manufacturer's instruction, connect the audio sources to your mixer.
- Connect either a XLR or 1/4" cable from the output of your mixer to the INPUT 1 jack on the RL112A/RL115A rear panel. Set the SENSITIVITY switch to the LINE position.
- Connect the supplied power cable to the IEC socket on the back of the loudspeaker. Plug the power cable into an AC outlet.
Note: Always make sure that the AC outlet is configured with the correct voltage as indicated on the rear panel of the RL Loudspeaker. - Switch the RL Loudspeaker's Power switch to the ON position.
- Run an audio signal from your mixer and check that you are getting a good level using the mixers output meter.
- Slowly raise the RL Loudspeaker's VOLUME control until you have reached the desired level.
- If the volume from the speakers gets really loud, or you see the Limit indicator blinking frequently, turn down the VOLUME control on the RL112A/RL115A a little until the Peak indicator does not light, or only lights occasionally with signal peaks.
Note: Before plugging in and turning on, remember the “last on, first off” rule of powered audio gear - When powering up your system, be sure that all the wires are connected, first turn on your mixer and any other outboard gear, then turn on your RL Loudspeakers. When powering down, turn off your RL Loudspeakers off first and then your mixer and outboard gear.
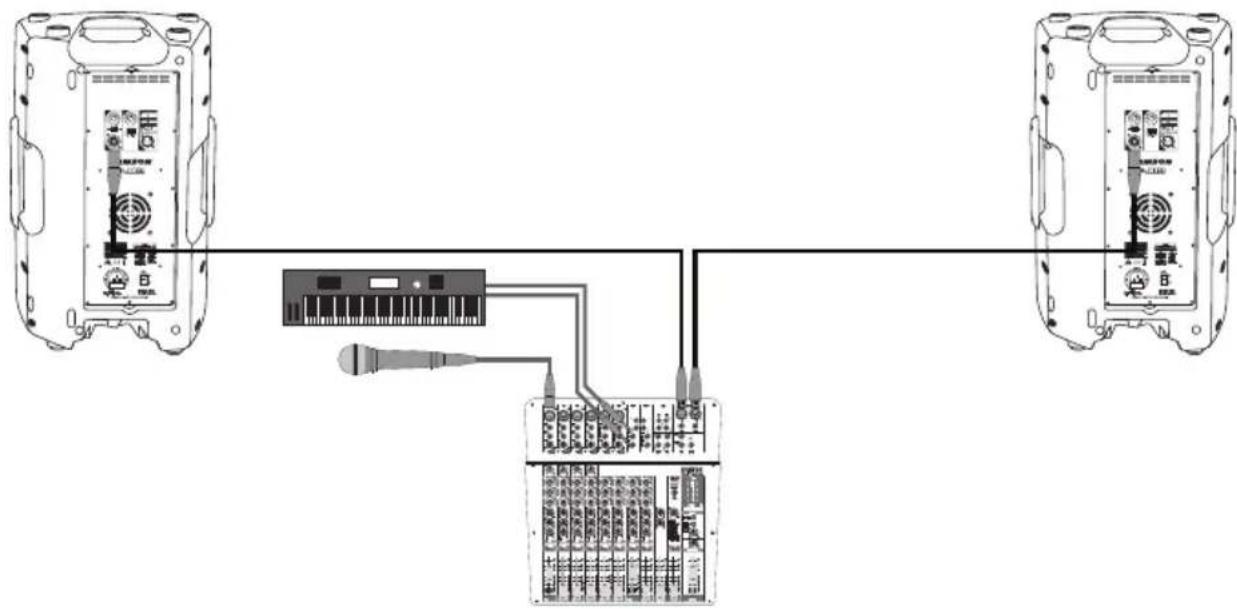
Connecting a Wired Microphone
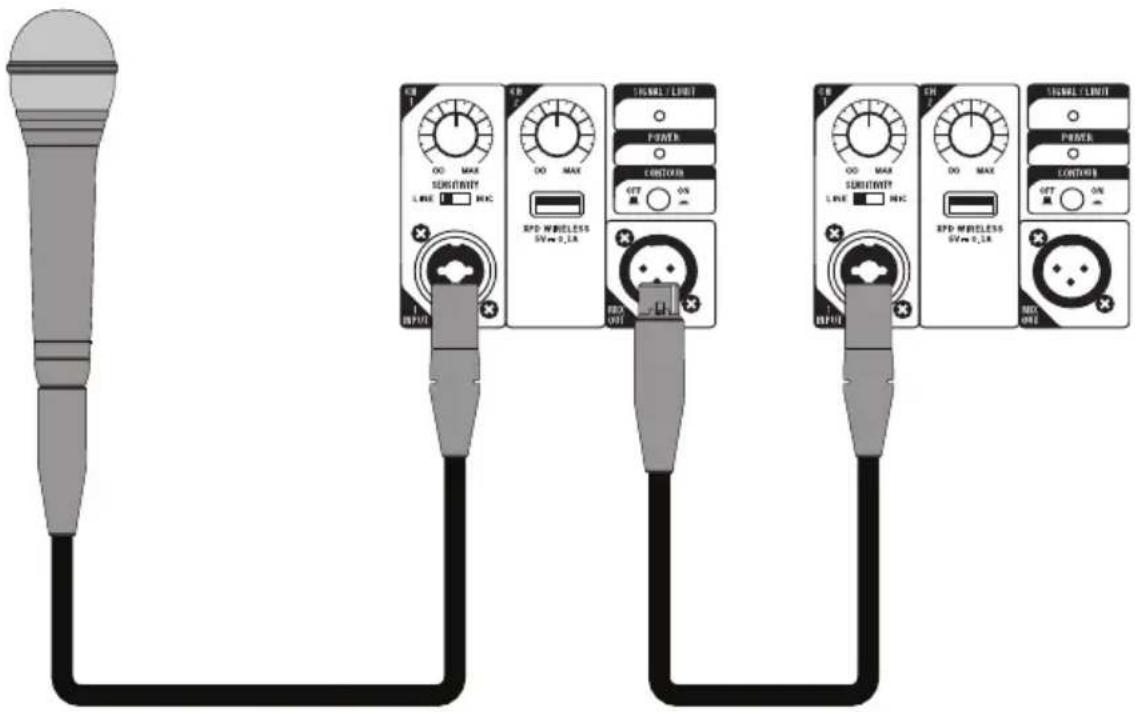
Follow these steps to connect a microphone level signal to your RL Loudspeaker and daisy-chain the signal to a second RL Loudspeaker:
- Set the both RL Loudspeaker's POWER switch to the OFF position.
- Turn the VOLUME control fully down (counterclockwise).
- Connect the power cables for each cabinet to an AC socket.
- Connect a standard XLR cable from the main RL Loudspeaker's MIX OUT to the second RL Loudspeaker's INPUT 1 XLR input.
- On the second RL Loudspeaker, set the SENSITIVITY switch to the LINE position.
- Using a standard XLR cable, plug a dynamic microphone into the RL Loudspeaker's XLR INPUT.
- Set the SENSITIVITY switch to the MIC position.
- Switch the Power switch to the ON position.
- While speaking or singing into the microphone, slowly raise the VOLUME control until you have reached the desired level.
- For larger sound reinforcement you can run several monitors using the Link Output to daisy-chain one RL Loudspeaker to another. Set the input Sensitivity on the additional cabinets to the LINE level position.
Connecting XPD Wireless Microphone (sold separately)
- Plug the Samson XPD USB receiver into the XPD Wireless USB jack on the rear panel of the RL Loudspeaker.
- Turn the CH2 Volume knob on the RL Loudspeaker completely counterclockwise.
- Place a fresh set of AA (LR6) batteries in the transmitter battery holder, taking care to observe the polarity markings, then replace the cover.
- Turn on the power to the transmitter by pressing and holding Power switch; the indicator light on the transmitter and receiver will light amber.
- Speak or sing into the mic at a normal performance level and raise the CH2 Volume control until the desired level is reached.
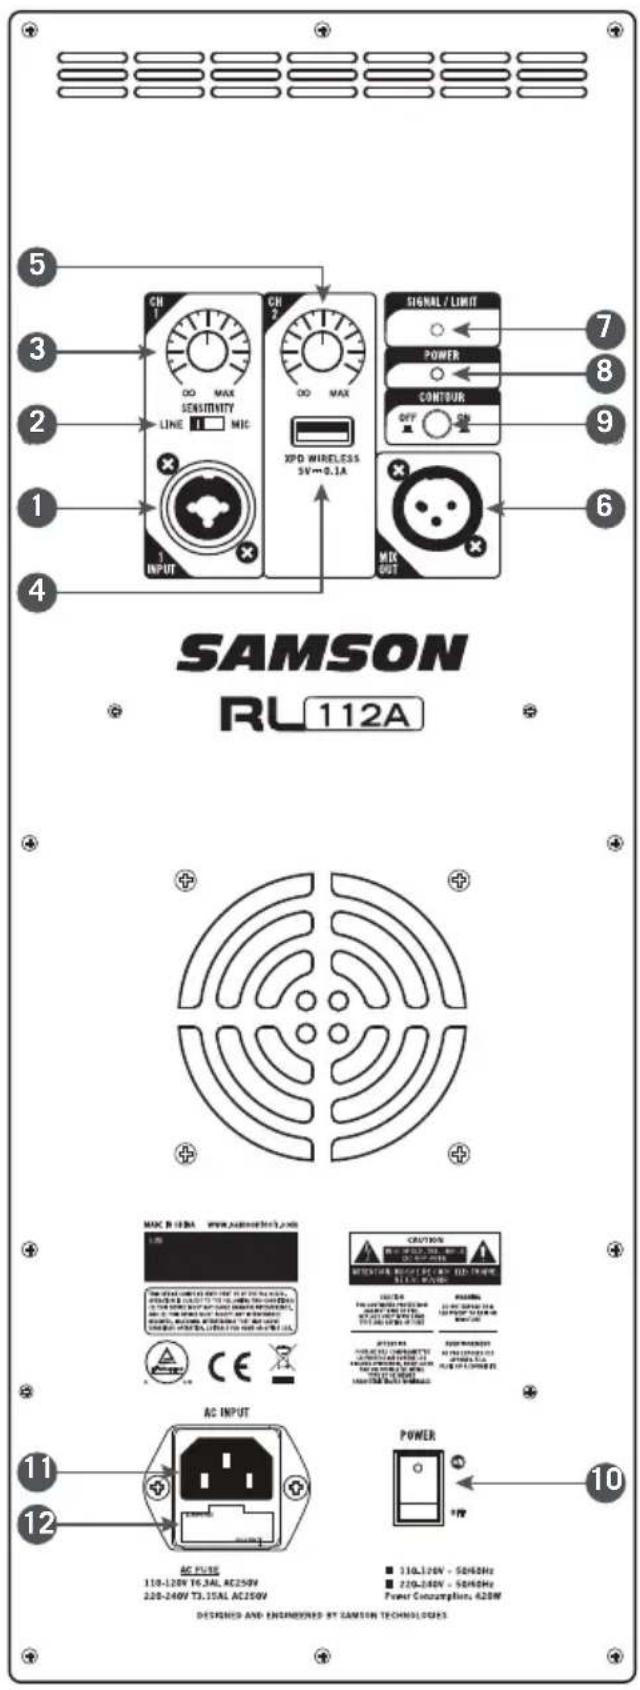
Rear Panel Layout
- XLR & 1/4" Combo Input - Use this XLR - 1/4" input for balanced microphone or line level device.
- SENSITIVITY Switch (Mic/Line) - Matches the channel sensitivity to the input audio source signal.
- Volume Control (CH 1) - This Volume knob adjusts the level of the Channel 1 input.
- XPD WIRELESS Input - Connect a Samson XPD digital wireless USB receiver to this input. The USB connector supplies 5V 200mA at of power to charge a small portable USB device like an MP3 player or smartphone.
- Volume Control (CH 2) - Controls the level of the XPD USB wireless input.
- MIX OUT - Male XLR connector used to link multiple RL Loudspeaker cabinets.
- SIGNAL / LIMIT Indicator - This indicator lights green when signal is present. It will light red when the amp is near the clipping point and the limiter is engaged.
- POWER Indicator - This LED lights GREEN when amp is active.
- CONTOUR Switch - This switch enables an equalization curve that is ideal for music playback.
- POWER Switch - Switches on the RL Loudspeaker's main power.
- AC Power Inlet - Connect the supplied standard IEC AC power cable here.
- Fuse Holder - The fuse holder comes from the factory with the appropriately rated fuse for your model. If you need to change this fuse for any reason, replace it with one that has the same exact rating.
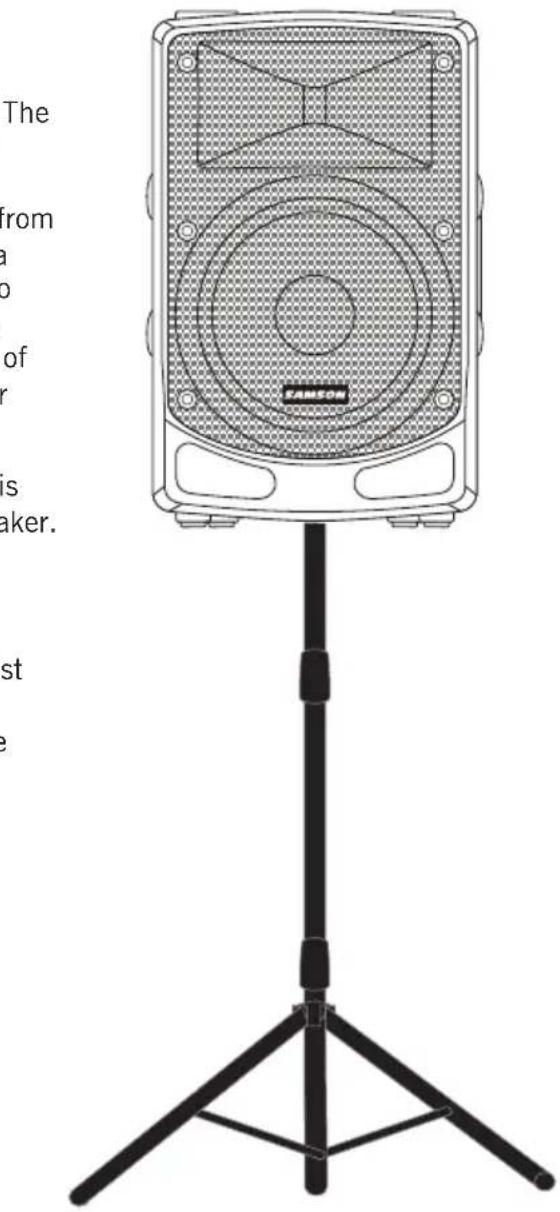
Positioning the RL112A/RL115A
Speaker Placement
Whenever possible, it is a good idea to raise the speakers above the heads of the listening audience. The RL Loudspeaker enclosures include standard 1-3/8" (35mm) pole mount receptacles with locking bolts, which are compatible with standard speaker stands from a variety of manufacturers. In a smaller setting like a school cafeteria, library, or a mall kiosk, you can also use the RL Loudspeaker loudspeaker in the tilt back monitor positions, which will improve the projection of the speakers and may eliminate the need for speaker stands.
When using a speaker pole mount, be sure the pole is capable of supporting the weight of the RL Loudspeaker.
Speaker stands should only be placed on flat, level surfaces.
Note: It is recommended to have another person assist when mounting the RL Loudspeaker speaker onto a speaker stand, or when adjusting the stand while the speaker is mounted on the stand.
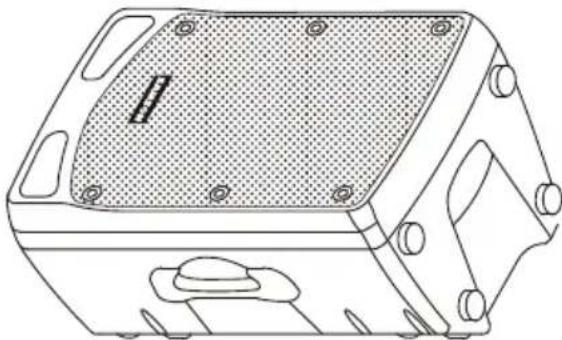
Floor Monitor
The RL112A/RL115A may be used as floor stage monitors by placing the speaker on its angled side.
When placed on its side, the RL Loudspeaker is tilted at a 45^ angle, providing optimal coverage for the performer.
natural_image
Technical line drawing of a mechanical housing component with mounting holes and internal mesh structure (no text or symbols)Specifications
| RL112A RL115A | ||
| Output Power | 800 Watts Peak (700 LF + 100 HF) | |
| 400 Watts RMS (350 LF + 50 HF) | ||
| Max. SPL (1M) 120dB 122dB | ||
| Frequency Response 58Hz - 20kHz 50Hz - 20kHz | ||
| Low Frequency | 12" (305mm) Woofer2" (50.8mm) Voice Coil | 15" (381mm) Woofer2" (50.8mm) Voice Coil |
| High Frequency | 1" (25.4mm) Neodymium Driver1" (25.4mm) Voice Coil | |
| Crossover | Frequency: 2.5kHzType: 12dB/Oct | |
| Horn Coverage 90°H x 60°V | ||
| Inputs Balanced XLR-1/4" Combo, USB XPD Wireless | ||
| Output Balanced XLR Line Output | ||
| Contour Equalization | 100Hz & 12kHz Boost | |
| Electronic Protection | Thermal, Overload, Analog (Optical) Limiter, Compressor | |
| AC Connector | 3-pin IEC 250 VAC, 20 A male | |
| Power Consumption | 420 W | |
| Fuse | 110V-120V T4A AC250V; 220V-240V T2A AC250V | |
| Enclosure | Polypropylene | |
| Grille | Full metal perforated | |
| Handles | Two side, one top | |
| Monitor Angle | 45° | |
| Mounting Method | 1-38" (35mm) Pole Mount Receptacle | |
| Dimensions(LxWxH) | 15" x 12.9" x 23.9"380mm x 327mm x 606.5mm | 15.2" x 14" x 24.9"386mm x 356mm x 631.5mm |
| Weight | 30.8lb / 14kg | 32.6lb / 14.8kg |
At Samson, we are continually improving our products, therefore specifications and images are subject to change without notice.
natural_image
Diagram showing two devices connected via a cable to an internal network device (no text or labels present)natural_image
Diagram showing two devices connected via a cable to an internal network device (no text or labels present)natural_image
Line drawing of a speaker on a tripod stand (no text or symbols)Bodenmonitor
natural_image
Technical line drawing of a mechanical housing component with mounting holes and internal mesh structure (no text or symbols)Technische Daten
natural_image
Diagram showing two devices connected via a cable to a central network interface (no text or symbols present)Monitor de piso
natural_image
Diagram showing two devices connected via a cable to an internal network device (no text or labels present)natural_image
Line drawing of a speaker on a tripod stand (no text or symbols)natural_image
Technical line drawing of a mechanical housing component with mounting holes and internal mesh structure (no text or symbols)Specifiche
Having Trouble with your RL Loudspeaker? We can help!

CONTACT OUR SUPPORT TEAM: support@samsontech.com Our experts can help you resolve any issues.
Follow us:


@samson @samsontech @samson_technologies

- Important Safety Information
- FCC Notice
- FCC Statement
- Introduction
- Quick Start
- Connecting a Wired Microphone
- Connecting XPD Wireless Microphone (sold separately)
- Rear Panel Layout
- Positioning the RL112A/RL115A
- Speaker Placement
- Floor Monitor
- Bodenmonitor
- Technische Daten
- Monitor de piso
- Having Trouble with your RL Loudspeaker? We can help!
Brand : SAMSON
Model : RL115A
Category : Loudspeaker