
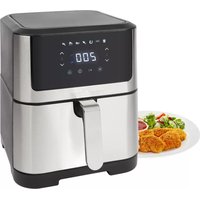
PCFR 1200 H - Deep fryer PROFICOOK - Free user manual and instructions
Find the device manual for free PCFR 1200 H PROFICOOK in PDF.
| Product type | Air fryer |
| Brand | ProfiCook |
| Model | PCFR 1200 H |
| Net weight | 6.8 kg |
| Power supply | 220-240 V~, 50/60 Hz |
| Power consumption | 1500 W |
| Protection class | I |
| Basket capacity | Approximately 12 L (estimate) |
| Temperature range | 80-200 °C (drying: 40-80 °C) |
| Timer | 1-90 min (drying: 1-24 h) |
| Automatic programs | 8 (fries, pizza, bread, meat, fish, drying, poultry, cakes) |
| Special functions | Rotisserie, interior lighting, reheating, standby mode |
| Included accessories | Basket with lid, extraction tool, rotisserie, fixing clips and discs, 8 skewers, cooking/drip tray, 2 sliding racks |
| Housing material | Plastic and metal |
| Control type | Touch buttons with display |
| Safety | Door switch, automatic shut-off, hot surface indicator |
| Cleaning | Hand-washable accessories; wipe housing with a damp cloth |
| Maintenance | Do not immerse, no abrasive cleaners |
| Repairability | Contact an authorized technician; power cord replaceable by manufacturer |
| Warranty | 2 years (according to legislation) |
Frequently Asked Questions - PCFR 1200 H PROFICOOK
User questions about PCFR 1200 H PROFICOOK
0 question about this device. Answer the ones you know or ask your own.
Ask a new question about this device
Download the instructions for your Deep fryer in PDF format for free! Find your manual PCFR 1200 H - PROFICOOK and take your electronic device back in hand. On this page are published all the documents necessary for the use of your device. PCFR 1200 H by PROFICOOK.
USER MANUAL PCFR 1200 H PROFICOOK
- Estos se consideraran valores guía. El tiempo y la temperaturaSEOSEOSEOSEOSEOSEOSEOSEOSEOSEOSEOSEOSEOSEOSEOSEOSEOSEOSEOSEOSEOSEOSEOSEOSEOSEOSEOSEOSEOSEOSEOSEOSEOSEOSEOSEOSEOSEOSEOSEOSEOSEOSEOSEOSEOSEOSEOSEOSEOSEOSEOSEOSEOSEOSEOSEOSEOSEOSEOSEOSEOSEOSEOSEOSEOSEOSEOSEOSEOSEOSEOSEOSEOSEOSEOSEOSEOSEOSEOSEOSEOSEOSEOSEOSEOSEOSEOSEOSEOSEOSEOSEOSEOSEOSEOSEOSEOSEOSEOSEO SEOEYO OMOOEOO OMOOEOO OMOOEOO OMOOEOO OMOOEOO OMOOEOO OMOOEOO OMOOEOO OMOOEOO OMOOEOO OMOOEOO OMOOEOO OMOOEOO OMOOEOO OMOOEOO OMOOEOO OMOOEOO OMOOEOO OMOOEOO OMOOEOO OMOOEOOO OMOOEOOO OMOOEOOO OMOOEOOO OMOOEOOO OMOOEOOO OMOOEOOO OMOOEOOO OMOOEOOO OMOOEOOO OMOOEOOO OMOOEOOO OMOOEOOO OMOOEOOO OMOOEOOO OMOOEOOO OMOOEOOO OMOOEOOO OMOOEOOO OMOOEOOO OMOOEOoo OMOOEOoo OMOOEOoo OMOOEOoo OMOOEOoo OMOOEOoo OMOOEOoo OMOOEOoo OMOOEOoo OMOOEOoo OMOOEOoo OMOOEOoo OMOOEOoo OMOOEOoo OMOOEOoo OMOOEOoo OMOOEOoo OMOOEOoo OMOOEOoo OMOOEOoo OMOOEOooo OMOOEOoo OMOOEOoo OMOOEOoo OMOOEOoo OMOOEOoo OMOOEOoo OMOOEOoo OMOOEOoo OMOOEOoo OMOOEOoo OMOOEOoo OMOOEOoo OMOOEOoo OMOOEOoo OMOOEOoo OMOOEOoo OMOOEOoo OMOOEOoo OMOOEOoo OMOOEO oo
- Sin embargo, puedaCambiar la temperatura y el tiempo predeterminados de lasmericanas.
- Si desea seleccionar/othersprogramatras iniciar unopulse primo el boton
Thank you for choosing our product. We hope you will enjoy using the appliance.
Symbols in these Instruction Manual
Important information for your safety is specially marked. It is essential to comply with these instructions in order to avoid accidents and prevent damage to the appliance:

WARNING:
This warns you of dangers to your health and indicates possible injury risks.

CAUTION:
This refers to possible hazards to the appliance or other objects.

NOTE:
This highlights tips and information.
Contents
Overview of the Components. 3
Control Panel. 4
General Notes 46
Special Safety Precautions for this Appliance. 47
Unpacking the Appliance 48
Scope of Delivery 48
Overview of the Components. 48
Notes for Use 48
Location 48
Connected Wattage 48
Electric Connection 49
Standby (Standby Mode) 49
Switching the Appliance On/Off 49
Before Initial Use 49
Useful Hints for Use 49
Function Buttons 49
Auto Functions 49
Change of Temperature and Time 50
Turn On the Lighting 50
Warm Up Food 50
Add Rotisserie 50
Preparation 50
Use with the Frying Basket. 50
Use with the Rotisserie and the Fixing Clips 50
Use with the Rotisserie, Fixing Discs and Spits 50
Use with the Baking Tray and the Slide-in Grids. 51
Using the Appliance 51
Pause Operation 51
End of Operation 51
Cleaning 51
Accessories 51
Housing 51
Storage 52
Troubleshooting 52
Technical Data. 52
Disposal 52
Meaning of the "Dustbin" Symbol 52
General Notes
Read the operating instructions carefully before putting the appliance into operation and keep the instructions including the warranty, the receipt and, if possible, the box with the internal packing. If you give this appliance to other people, please also pass on the operating instructions.
- The appliance is designed exclusively for private use and for the envisaged purpose. This appliance is not fit for commercial use.
- Do not use it outdoors. Keep it away from sources of heat, direct sunlight, humidity (never dip it into any liquid) and sharp edges. Do not use the appliance with wet hands. If the appliance is humid or wet, unplug it immediately.
- When cleaning or putting it away, switch off the appliance and always pull out the plug from the socket (pull the plug itself, not the lead) if the appliance is not being used and remove the attached accessories.
- Do not operate the appliance without supervision. If you leave the room you should always turn the appliance off. Remove the plug from the socket.
- The appliance and the mains lead have to be checked regularly for signs of damage. If damage is found the appliance must not be used.
- Use only original spare parts.
- In order to ensure your children's safety, please keep all packaging (plastic bags, boxes, polystyrene etc.) out of their reach.

WARNING:
Do not allow small children to play with the plastic foil.
There is a danger of suffocation!
Special Safety Precautions for this Appliance
You will find the following symbol with warning character on the appliance:
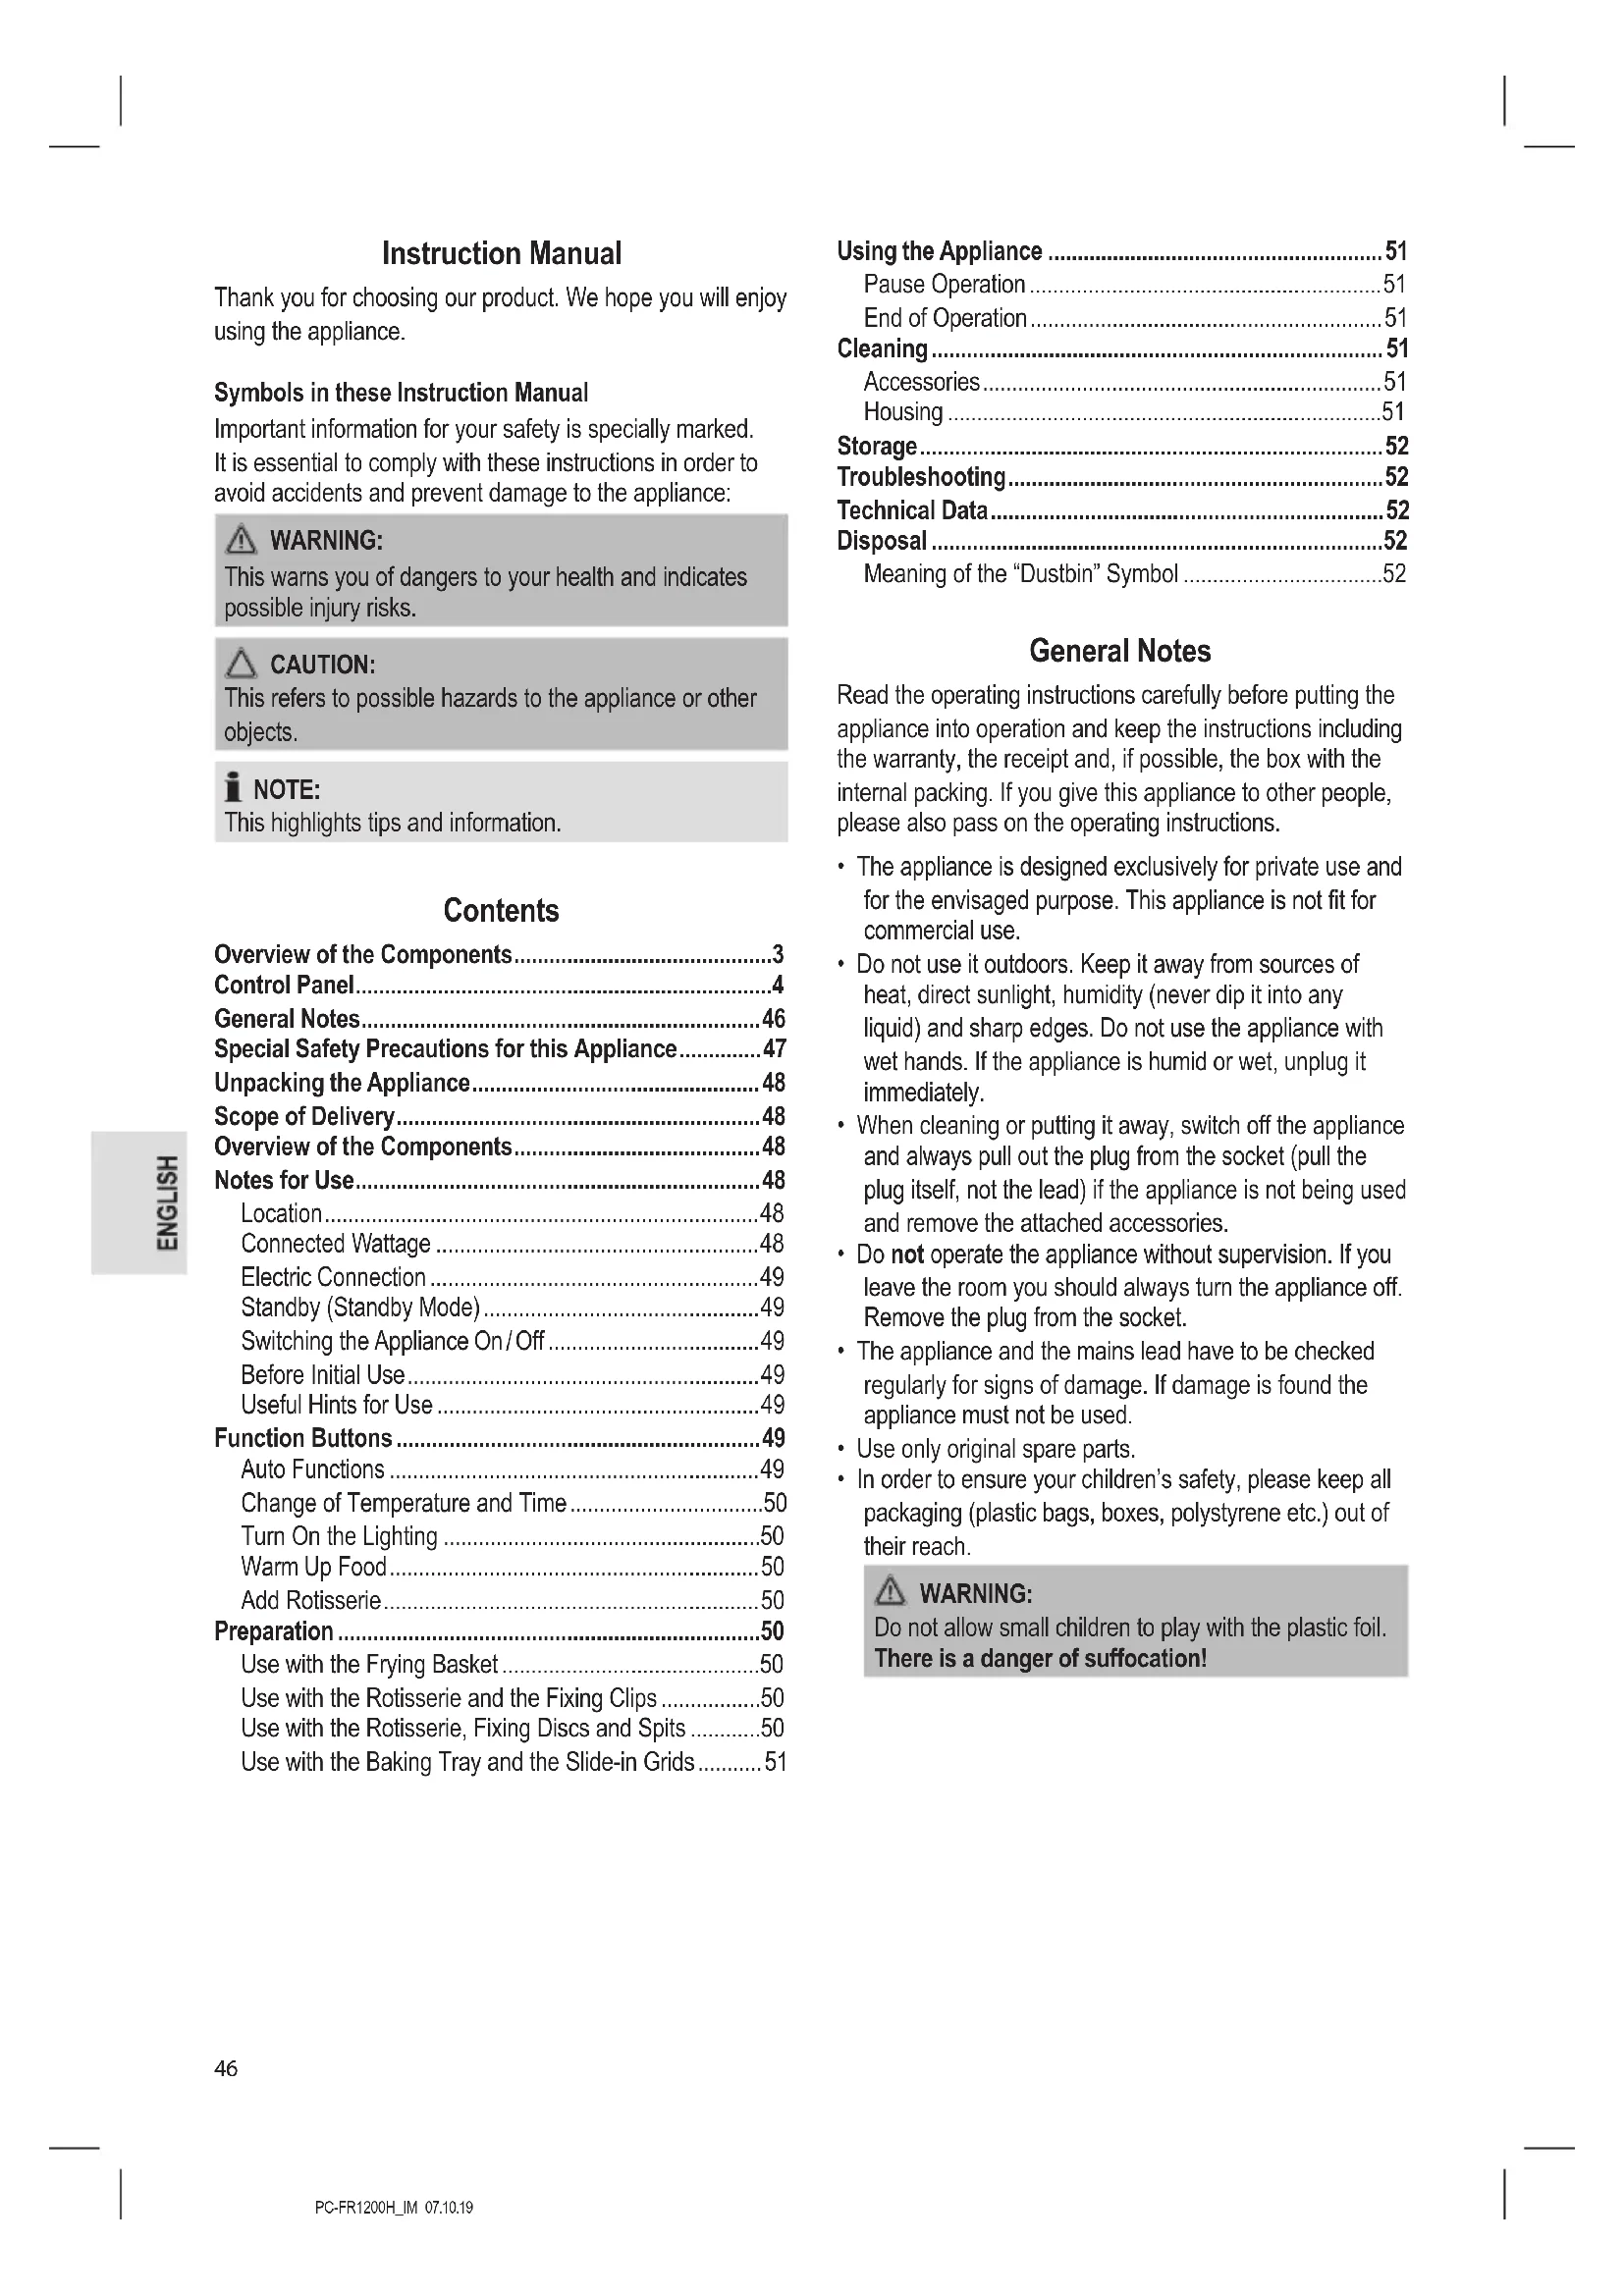
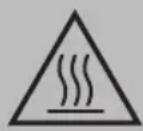
WARNING: Hot surface!
Danger of burns!
During operation and afterwards, the temperature of the accessible surfaces will be very high.
- Therefore, only touch the appliance at the door handle as well as the control panel. If necessary, use oven gloves.
-
During operation, hot steam may escape from the air outlet opening. Keep a sufficient distance.
-
Do not cover the air inlet opening and air outlet opening, in order to ensure sufficient air circulation.
- Keep sufficient distance (15 cm) to highly flammable objects such as furniture, curtains, etc.!
- Due to rising heat and vapours do not place the appliance under wall cupboards.
- Do not operate the appliance with an external timer or separate remote control system.
- Do not tamper with the safety switch.
- This appliance can be used by children aged from 8 years and above and persons with reduced physical, sensory or mental capabilities or lack of experience and knowledge if they have been given supervision or instruction concerning use of the appliance in a safe way and understand the hazards involved.
Children shall not play with the appliance. -
Cleaning and user maintenance shall not be made by children unless they are older 8 years and supervised.
-
Keep the appliance and its cord out of reach of children less than 8 years.
- Do not repair the appliance by yourself. Always contact an authorized technician. If the supply cord is damaged, it must be replaced by the manufacturer, its service agent or similarly qualified persons in order to avoid a hazard.
CAUTION:
This appliance is not intended to be immersed in water during cleaning. Please observe the instructions that we have included for you in the chapter "Cleaning".
Unpacking the Appliance
- Remove the appliance from its packaging.
- Remove all packaging materials like foils, filling materials, cable holders, and carton packaging.
- Check the scope of deliveries for completeness.
- If there are missing parts or obvious damage, do not use the appliance. Return it to your retailer immediately.
Scope of Delivery
1× Hot air fryer
1 × Frying basket with lid
1×Removal tool
2 × Fixing discs for spits
1× Rotisserie
2 × Fixing discs for spits
8 × Spits
1 × Baking tray / Grease drip tray
2 × Slide-in grid
Overview of the Components
Picture A, Page 3
1 Air inlet opening
2 Display
3 Air outlet opening
4 Housing
5 Door
6 Door handle
7 Release
8 Guide rail
9 Mount for the rotisserie / frying basket
10 Control panel
11 Frying basket
11a Lid
12 Removal tool
13 Fixing clips
14 Rotisserie
15 Fixing discs for spits
16 Spits
17 Baking tray / Grease drip tray
18 Slide-in grid
Picture B, Page 4: Symbols on the Control Panel
19 Buttons for program selection
20 and buttons for the time setting (
21 button (Switching the appliance on / off)
22 button (Add rotisserie)
23 Button (Warm up food)
24 button (Turn on the lighting)
25 and buttons for the temperature setting ( )
Notes for Use
Location
- Set the appliance onto a non-slip, level, and heat-resistant surface.
- Take care that the appliance and the mains cable never are placed onto hot surfaces or near heat sources (e.g. range, hob).
Connected Wattage
The total power consumption of this appliance can be up to 1500 W. With this connected load a separate supply line protected by a 16 A household circuit breaker is recommended.
CAUTION: Overload!
- If you use extension leads, these should have a cable cross-section of at least 1.5mm^2

CAUTION: Overload!
- Do not use any multiple sockets, as this appliance is too powerful.
Electric Connection
- Before inserting the power plug into the outlet, check that the mains voltage to be used matches that of the appliance. You can find the required information on the nameplate.
- Connect the appliance to a properly installed earthed socket. You will hear a beep sound and all symbols light up briefly. The button lights red.
Standby (Standby Mode)

NOTE:
The appliance is in standby, if the button lights red.
When faced with the following situations, the appliance will switch into standby:
- When the power plug is inserted.
- If no button is pressed for approx. 60 seconds.
- When the time has elapsed.
- When you press and hold the button for approx. 3 seconds.
You exit the standby mode by pressing the button. All symbols light up and the button flashes red.
Switching the Appliance On/Off
Turn the appliance on and off by using the button.

NOTE:
Operation is only possible when the door is closed.
Before Initial Use
- There is a protective layer on the heating element. To remove this, operate the appliance for about 10 minutes without any contents.

WARNING:
Allow the appliance to cool down before you clean it!
- Disconnect the mains plug from the wall socket.
- Wipe the inside of the appliance and clean the accessories before using the appliance.
Useful Hints for Use
- A safety switch prevents the use of the appliance when the door is not closed. The lighting of the control panel goes out.
- Do not overfill the basket. Always make sure the food has enough space in the basket to get the best results.
- In order to achieve crispy results, you can baste the food with a little oil.
-
Do not prepare the appliance for high-fat foods (e. g. sausages).
-
All foods can be prepared in the appliance, which are also suitable for the oven.
- Frozen meals or liquid foods such as soups can be prepared in appropriate containers.
- Note that the dough expands during baking of cakes, bread or similar. Nothing must come into contact with the heating element.
- Pour water on homemade potato products after cutting at least 30 minutes to reduce the potato starch. Then dry the potato pieces with paper.
- The cooking time depends on several factors: Size, condition, quantity of food and set temperature. For standard values, see "Function Buttons" Auto functions".
- If you do not preheat the hot air fryer, add 3 minutes to the cooking time.
- Fry steaks / larger quantities of meat in a pan previously before leaving to cook in the hot air fryer. Time and temperature are dependent on the desired degree of doneness.
Function Buttons

NOTE:
- The buttons on the appliance are touch keys. Gently touch the buttons with a finger to execute the function. Whenever a button is pressed, it will be confirmed by a beep sound.
If you keep the or buttons pressed, fast mode will start.
Auto Functions
Select your desired automatic program on the control panel. The set program can be identified by the flashing of the respective button.
| Button | Mode | Pre-set temperature in °C | Pre-set time in min. |
| French fries | 200 15 | ||
| Pizza 175 25 | |||
| Bread 165 15 | |||
| Meat | 180 15 | ||
| Fish | 175 30 | ||
| Drying | 40 120 | ||
| Poultry | 190 30 | ||
| Cakes | 160 30 |
NOTE:
- These shall be considered as guide values. Depending on the size and weight, the time and temperature may be longer and higher or shorter and lower.
- You may, however, change the pre-set temperature and time of the auto functions.
If you would like to select another program after starting a program, first press the button.
Change of Temperature and Time
The end buttons are available twice each on the appliance.
Use the or - buttons above and below the 1 symbol to set the temperature. (In all programs - except Drying - 80^ to 200^ , Drying: 40^ to 80^ )
Use the or buttons above and below the symbol to set the cooking time. (In all programs - except Drying - 1 to 90 minutes, Drying: 1 to 24 hours)
NOTE:
The display shows alternately the remaining running time and the set temperature.
Turn On the Lighting
Use the button to switch the lighting in the interior of the appliance on and off. After approx. 2 minutes, the lighting switches off automatically. In addition, the lights go on when the door is opened.
Lighting on = button flashes Lighting off = button lights continuously
Warm Up Food
Use the button to warm up food. The button flashes once you have presses it. The preset temperature is 115^ and the time 6 minutes.
Add Rotisserie
Use the button to switch the rotisserie on and off. You need this one for the rotisserie as well as the frying basket.
Rotisserie on = button flashes Rotisserie off = button lights continuously
Preparation
Use with the Frying Basket
- Open the door.
- Slide the grease drip tray onto the bottom of the hot air deep fryer.
-
Hold the frying basket by the black plastic surfaces. Open the lid of the frying basket by turning it in the direction of The symbol must be exactly above the detent. Remove the lid.
-
Fill the basket with the desired food.
- Close the lid. Place the lid in such a way that the symbol is above the detent. Tighten the lid in the direction of
- Lift the frying basket with the removal tool onto the guide rails. Hold the release button (7) in the direction of the arrow and slide the basket toward the end of the rail. Unhand the release. The frying basket must snap into place.
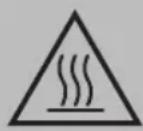
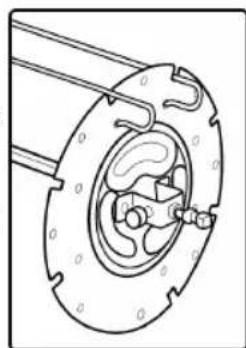
Use with the Rotisserie and the Fixing Clips
i
NOTE:
Do not select a roast which is too large. The food being grilled must be far enough away from the internal walls and the heating elements and must not touch them.
- Open the door.
- Slide the grease drip tray onto the bottom of the hot air deep fryer.
- Rub edible oil on to the revolving spit and spit forks.
- Poultry has to be dressed before grilling. To do so, tie the wings and the legs closely to the body using kitchen yarn.
- Place the dressed poultry or the piece of roast meat carefully on to the revolving spit. Push the spit forks on to the revolving spit and use them to fix the roast meat in place. Tighten the fixing clips by means of the screws.
- Lift the ready-made rotisserie with the removal tool onto the guide rails. Hold the release button (7) in the direction of the arrow and slide the basket toward the end of the rail. Unhand the release. The rotisserie must snap into place.
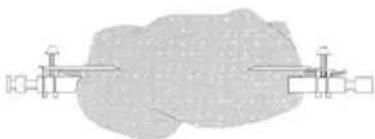
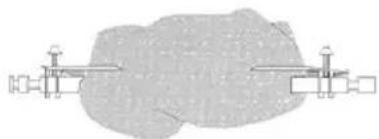
Use with the Rotisserie, Fixing Discs and Spits
- Open the door.
- Slide the grease drip tray onto the bottom of the hot air deep fryer.
- Stuff the spits at will.
-
Slide the fixing discs onto the rotisserie. Pay attention to the inscription L (left) and R (right) on the inside of the discs as well as to the recesses for the screws on the rotisserie spit. Tighten the fixing discs with the screws.
-
Insert the stuffed spits into the fixing discs. Refer to the adjacent figure. Place the spit with the curved side in a notch of a fixing disc. Insert the end of the spit into the opposite hole of the other fixing disc. Hook the curved side of the spit into the hole under the notch.
- Lift the ready-made rotisserie with the removal tool onto the
guide rails. Hold the release button (7) in the direction of the arrow and slide the basket toward the end of the rail. Unhand the release. The rotisserie must snap into place.
Use with the Baking Tray and the Slide-in Grids
- Open the door.
- Slide the baking tray and / or the slide-in grids into the slide rails.
Using the Appliance
- Close the door.
- Press the button to exit standby mode. You will see the preset setting 200^ and 15 minutes.
- Select an automatic program and, if necessary, change the cooking time and the temperature with the br buttons.
- If you use the frying basket or the rotisserie, additionally press the button to add the rotisserie.
- Press the button to start the cooking process.
Pause Operation
- Press the button to pause the operation. The button is flashing. Press the button again to resume the operation. The button is continuously lit again.
However, the operation will be interrupted when you open the door. Close the door to resume operation.

NOTE:
The appliance will start from the spot it has been paused.
End of Operation

NOTE:
When the cooking time has elapsed, the fan continues to run to cool down the appliance. Flashes in the display. After approx. 20 seconds, 3 beeps will sound and OFF disappears on the display. The appliance is again in standby mode.

WARNING: Danger of burns!
Hot steam can escape!
- Use oven gloves!
- Open the door.
- If you have used the frying basket or the rotisserie spit, remove it with the removal tool. To do this, unlock the frying basket or the rotisserie spit using the unlocking mechanism (7) and remove it. If you have used the baking sheet or the slide-in grids, pull them out.
- Place the accessories only on heat-resistant surface!
- Close the door.
Cleaning

WARNING:
- Always turn the appliance off before cleaning it and remove the mains plug. Wait until the appliance has cooled down.
- Do not immerse the appliance in water! Doing so may result in an electric shock or fire.

CAUTION:
- Do not use any wire brush or other abrasive objects.
- Do not use any acidic or abrasive detergents.
Accessories
The accessories can be cleaned in a warm rinse bath.
Housing
Clean the appliance inside and outside with a slightly moist, not a wet cloth.
Storage
- Clean the appliance as described. Let the accessories dry completely.
We recommend that you store the appliance in its original packaging when it is not to be used for a longer period.
- Always store the appliance at a well ventilated and dry place outside the reach of children.
Troubleshooting
If a problem occurs, it is often only a small thing. Before you contact our service, please note the following information:
| Problem Possible Cause | Remedy | |
| The appliance is not working. | The appliance has no power supply. | Check the socket with another appliance. |
| Plug in the mains plug correctly. | ||
| Check the main circuit breaker. | ||
| The door is not closed properly. Close | the door until it audibly snaps into place. | |
| The appliance is defective. Contact our service or a repair centre. | ||
| The lighting in the interior does not light up anymore. | The lighting is defect. | |
| The food is not cooked to the end. | The basket is too full. Reduce the amount of food. Smaller quantities are cooked evenly. | |
| The temperature is set too low. Set a higher temperature. | ||
| The cooking time is set too low. Set a longer period of time. | ||
| The food is not crisp. Foods are used, which is only suitable for a conventional fryer. | Use oven-ready food or sprinkle it with a little oil. | |
| Smoke comes out of the appliance. | You are preparing very fatty foods. Fat splashes inside the appliance may cause the emission of fumes. Provide adequate ventilation. | |
| On the baking sheet / fat drip tray are still fat residues from previous use. | Clean the baking sheet / fat drip tray after each use as described in the chapter "Cleaning". | |
Technical Data
Model: PC-FR 1200 H
Power supply: 220-240V\~,50/60Hz
Power consumption: 1500 W
Protection class:
Net weight: approx. 6.8kg
The right to make technical and design modifications in the course of continuous product development remains reserved.
This appliance has been tested according to all relevant current CE guidelines, such as electromagnetic compatibility and low voltage directives, and has been constructed in accordance with the latest regulations.
Disposal
Meaning of the "Dustbin" Symbol
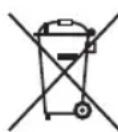
Protect our environment: do not dispose of electrical equipment in the domestic waste.
Please return any electrical equipment that you will no longer use to the collection points provided for their disposal.
This helps avoid the potential effects of incorrect disposal on the environment and human health.
This will contribute to the recycling and other forms of re-utilisation of electrical and electronic equipment.
Information concerning where the equipment can be disposed of can be obtained from your local authority.
Instrukcja obslugi
CTC Clatronic Sp. z o.o
Ul. Brzeska 1
45-960 Opole
Usuwanie
Jaet COBtI INHOpMaIIO.
CoapedkaHne
O63op detae np6opa. 3
He nO3BOJnTe DeTm mIpaTb c NOnIaTnIeHOBOI nIeKo. Onacnoctb yduyba!
CneuNbHbIe yka3aHnNo 6e3oNaChOCTn IJy 3TOrO np6opa
Ha n3delen imeToTc sJeDyUoIne npEdupeKdaUOJIe CmBOJ:
POnCBtKa BkHNoyeHa = KhonKa
IoDCBtKaOTKnHcHa = KhoNka noCToHHo rOpHT
PazorpeB 6JIOda
NcnoB3yIe KhoNky To6bI pa3oRpeTb 6nIO. Iocne HaxKaTHa KHOJa MmHET OAnH pa3. PpeBaPteJIbHo 3aDaHHa TeMnepaTypa paBHa 115 ^ C a Bpemr -6 MNHT.
IobabneHnBepTeJI
IcnoB3yTe KhoNky Tn BKnIOUeHn I OTKIOUeHn Beptena. OHa npImeHReTcKa KdJIa BepTeNa, TaK n DnjarOpOHyoKp3uHbI.
BepTeN BkInOueH = KhoIIka Muraet
BepTeN OTKJIIOUeH = KHOIIKa TOTOrHHO rOpNT
Iodrotobka
IcnoJb3ObaHHe c JkaOpuHOK KOp3nHO
- OtkpoTe Ibepu.
- 3aDbHbTe IOTOK c6opa Jnpa, pa3MeCTNB erO HaДHe BO3dUHoiФpNTKOpHNcbl.
3.ДерхиTeжарOHyIOKop3HNY3aЧepHbIeПлacTMac-COBbie NOBepxHocTN.OTKpoIte KpbIshkyжapOHHoKop3HbI,NOBepHyBeeBHaPpAbeHnCmBoJ DOnJIeHpacONaratbcraTOHNoHaDФнKCaTopOM.CHMnTe KpbIshKy. - 3anonHnTe KOp3nHy Heo6xOuMbIM npOdykTaM.
- 3akpoIte KpbIky.PacnoOnKnte KpbIky TaKIM O6pa3OM, YTObI CnMBOJ HaxOINcHnD qNKcatOpom.3aTHeNITe KpbIky B HanpaBHeHH
6.Понимпе Карочую кориHy cnomoшью 3axBaTaNCTAHOBnTE Ha HaprabJIOxN. YdepxnBaIte KhoNkyOTkpBITn(7)ВНарвлЕнИСТpeJKNu 3aDbHbTeKOP3Hnydo KOHua HaprabJIOxN. OTnyCTIne KhoNkyOTkpBITn.ЖapouHЯКориHa DoJnxHa BCTaTb Ha MeCTO CO UeJHKOM.
IcnoJb3OBAHne CBepTeIOM n 3aXmamn dna KpenJIeHHN

ПРМЕЧАЙ:
He 6epitte cinnkOM 6oJIbIe Kcckm Mca. Iopka-pnBaemble npOyKtbl DOJXHbI 6blTb pa3MeueHbHaIOCTaTOHOM paccToHHN OT BHYTeHHNX CTEHOK HArpeBaTeIbHbIX 3JeMeHTOB Neu. B JIObOM cIyae OH He DoJIKhbl IN KCaTaBcR.
- OtkpoTe DBepu.
2.3aBnHbTe IOTOK c6opa Jknpa,pa3MeCTNB ero Ha DHe BO3dUHHO pHTOPHNbI.
3.CmaKbTeBepTeNΦHKcTopbIpaTnteHbIMMacnOM. - Tnuy Heo6xOIMO NOIROTOBt DnI NOJkapNBHa Ha rPnE. 3TOrO pNIBXKITE KpbIbIK N HOKKN K TyuKe npN NOMOu KxOHHOH HHTN.
- Octopokho HacaHte NpIroTOBneHHyo PtNy Hn HauNIOROBaHHb KycOK Mca Ha BepTe. HaJeHbTe fKcCATOpbl 3aXmITE npix NMOU NpOJkapBaembl Kycok. KpeKko 3aTaNHTe BuNTbHa fNKcatopax.
6.ПОДИМЛТЕ NOДROTOВЕнь ВERTEN C NOMOULTI 3axBaTaNCTAHOBITE Ha HApPABLIOUx. YdePKNBaiTe KHOJIky OTKpbITnA (7) B HApPABLIEHn CTpeJIkn N3aDbNtBe KOp3NHy DO KOHcA HApPABLIOUx. OTnyCTIte KHOJky OTKpbITnA. BePTEN DoJnxEh BCTaTb Ha MecTO CO UeJIyKOM.
IcnoB3ObaHne C BepTeNoM,ΦKcnpyUuMMN DnCKaMn N uamnpaMn
- OtkpoTe DBepuy.
2.3aBnHbTe IOTOK c6opa knpa,pa3MeCTNB ero Ha DHe BO3dyHoi pPHTOPHui bI. - Hanxbs He ha wamnpbI npOyktbI NO CBOemy ycmOTpeHIO.
- HadeHbTe Ha BepTeJ fKcnpyUoJe DnCK. O6paTInTe BHMaHHe Ha HApNCu L (CneBa) n R (Cnpaba) Ha BHy- TpeHHe Yactn DCKOB, a TaKke Ha yIpyBHeHnA dJa BnHTOB Ha WAMNype BepTea. 3aTaNHe Tef KcnpyUoJe DnCKn C NOMOsbIO BNTOB.
5.BCTaBtse ammypbI c HAHn3aHHbIMn npOdyKTAMN BΦHKCnpyUOuNE DnCKn.CM. COeDnH pUCyHok. IOMecTte N3OrHytBk KOHeu, WAMnpa B nPope3b BΦKcnpyUoE MnCKe. BCTaBtTe dpyroK OHeu WAMnpa B nPOTNBONOxHoe OTBepCTne BTOPORoΦHKCnyUeO DnCKa. BBeDnTE N3OrHytBk KOHeu, WAMnpa B OTBepCTne NOI npope3bIO
6.ПОДHIMNITE NOIROTOBHeHbI BepTe N C NOMOuBIO 3axBaTaNCTAHOBnTE Ha HAnpABJIIOUx.N YdePknBAitKe KHOJky OTKpbITn7 (7) B HAnpABJIeHm n CTpeIKNn 3aDbINbTe KOp3nHy Do KOHua HAnpABJIIOUxN. OTnyCtnte KHOJky OTKpbITnA.BepTe DOnJkeH BcTaTbHa MeCTO CO UeJIyKOM.
IcnoJIb3OBAHnE C npOTNBHEm N BblBnXhBIMnpewETkAMN
- OtkpoTe DBepuy.
- BdBnHbTe npOTnBEh n / mnn BblBnKHbIe peuETkn no HappaBIAHOUIM.
IcnoJb3ObaHne yctpoNCTBa
- 3aKpOte DBepey.
- HaxMnte Ha KhoNky TO6bI BbIITn 3peXIMa OxuHaH. IoBNTc npEdbapnteHbHO 3aHaHHa HactpoiKa 200°C n 15 MHyT.
- Bb6epuTe aBtOMaTnueckyIO nporpamMy n npHne0xOДIMOCTN N3MeHNTe BpEMr npIroTOBJIeHnN TEmpeatypy C NOMOuBIO KHOIOK .
- Pn nCnoB3oBaHnn KApOHH KOp3HbI Nn BepTeNa TaKke HaxMMte Ha KHONkY To6bI DoabNt BepTeJ.
- Haxmte Ha KhoNky To6bHaayaTb npoucc npuroTOBHeHn.
Mmnylbchb pexnm
HaKMTe KONky nocTaHOBKn pa6Otbl. Miraet KhoNka HaxMnte KOnKy epe pa3, YTObI npoDoXnTb pa6Oty. ChOba NoCToHH OropIT KOnKa
- PnOtKpbBaHmN DBeepbI onepaun6ydet npepBaHa. 3aKpoTe DBepu, YTO6bI BO306HOBnTb pa60Ty.
I PIMMEUAHNIA:
Pa6ota npnbopa npoJnKITc c MOMeHTa npnoCTaHOBKN.
Koheu pa60bI

ПИМЕЧАНО:
Korda Bpem npirotoBneHnIcTeeT,BeHTnIaTOp npoDIOJNt pa6oTaB,yTO6bI OCTyUInTB np6Op. Otraet Ha dncnnee. PnpMePno yepe3 20 cekynpa3dactc3 3BykoBbix CnHaHa nOHe3HET c DnCnPe. Pnp6Op CHOBA nepeKnUoyaeTcB pexm OkndaHn.

IPENyIPEXDEHNE:Onachoctb oxora!
- Moxtet bixodntb ropny nap!
-
UcnoJIb3yIte npxBAtKn!
-
OtkpoTe DBepuy.
- EcIn nCnOlb3oBaIacb JapOchHa KOp3HHa HIN
Wamnp BepTeNa, ydaNITe INC NOMOuBIO 3axBATA.
Tn 3TOO OCB6OJNTe JApOCHyO KOp3HHy INn WAMNP
BepTeNa, nCNoJIb3yMexAHm3Ma36IOKIpOBKn (7), n
YdaNITe npHaNDNeXHOCTb.
EcIn nCnOlb3oBaIc npOTNBHe HIN BblBnXHbIe peweTKn, INBLeKNITE INX. - Klaadte npHaedexKHOCTn TOnbko Ha JaponpoHyIO NOBepxHOCTb!
- 3akpoTe DBepy.
UncTka

ПЕДУПЕЖДЕНЕ:
- Перацстков Всерда Вьклочаite пибор И Вьимаite ceTeBOI wTekepньі разьем. ПоождITE, noka пибор OCTbIHET.
He norpykaite npnbop B Body! Nocne 3toro Bo3nkaet pck Bo3ropania nn ydapa 3neKtpnueckm TOKOM.

BHIMAHNE:
He npimEnHnTe npBOIOUHbIe UeTkn NIn npEIMtbi c a6pa3uBbIM nOKpbItMeM.
He npimemHnTe CnIbHbIe IIN a6pa3nBbIe MoOuIe cpeDCTBa.
PpnaadJeekHoctn
Iotpe6JraMaMoouHocTb: 1500BaTT
Klacc 3aunrbl:
Bec HeTTO: npu6n.6,8 Kr
CoxpaHeNo npaBo Na TexHnueckne I KOHCTpyKuOnHHbIe N3MeHeHnB pAMkax npoDoJIkaUoSeIcR pa3pa60TKn npOdykTa.
3To n3dJIe npoJIO BCE Heo6xOIMbIe I aKtYaIbHbIe npOBepKn, npEINcAHbIe DnpeKTHBOI CE, K npM. Ha 3JIeKTPOMaHTHyIO COBmecTUMocTb I COOTBeTCTBne Tpe60BaHnM K H3KOBoTbTHOI TEXHKe, OHO bIIO TAKKE cKOHCTpyuPObaHO INOCTpoeHO C yYeTOM NocJeDHX Tpe60BaHnI NO TEXHKe Be3OpAChOCTN.
YTNIN3aun
3HaueHne cHMBOJa KOp3HnHa
3aunTa OkpykaHoueI cpebl: He DonyckaTeCryTIN3aunr 3JeKtpnpi6pOBv BmEcTe C 6blTOBbIMN OTXoJam.
Yttnn3auny yCTapeBwe TeXHnKn HEnCnpabHBbIX 3NeKTPoPnp6OpOB pOn3BODITcB RopOdCKNX npEeMHbIX NyHKtax.
He donyckaIte HnnpaBnIbHO yTINI3aIMN OTO HAHOCT BpeD OKpykaIOUe CpeE N OKa3bIBaET HeRaTINBHOE BO3DeIcTBNe Ha 3IDOpOBBe IIOJe.
Oka3bIaBaiTe codeeCTBne nporpaMMe yTuIN3aUNn dpyrIM fopmam nepepa60TKn 3NeKtpoHHoN n3NeKtpuYeckoI TEXHKn.
HOpMaIuO O NyHKTx yTIN3aUN 6bITOBoTExNKn MOXHO NOJyUHTB B MECTbIX OPraHAX Blactn.
A
PC-FR 1200 H
60/50~240-220
1500
1.
6,8.
jaiuui jyglil qg 3 aauuaa g aaii 1jaj 1 jaiu b
.
g jia aill CE 1j g jgl
g 1 g 1 g 1 g 1 g 1 g 1 g 1 g
. do x. w#ll
jglj jolal
aalalalalalalalalalalalalal
-
1000000000000000000000000000000000000000000000000000
-
wJgIaJIbIeIgIcJIO JgJyI, gJyJI bIgJIgJIgJIgJIgJIgJIgJIgJIgJIgJIgJIgJIgJIgJIgJIgJIgJIgJIgJIgJIgJIgJIgJIgJIgJIgJIgJIgJIgJIgJIgJIgJIgJIgJIgJIgJIgJIgJIgJIgJIgJIgJIgJIgJIgJIgJIgJIgJIgJIgJIg
olalwai aal alu aal y 1aui u ayyil
(7)(a)()
j1u 1gai jai jai uui
a.

ouoluluiuieiueeaiuoiyjiaoyoo
.
JgLio 1000000000000000000000000000000000000000000
Jably
L
1b
Jabababaae bajj jolll no jolll aalld o
.
100xu!g a#
J 1 J 1 J 1 J 1 J 1 J 1 J 1 J 1 J 1 J 1 J 1 J 1 J 1 J 1 J 1 J 1 J 1 J 1 J 1 J 1 J 1 J 1 J 1 J 1 J 1 J 1 J 1 J 1 J 1 J 1 J 1 J 1 J 1 J 1
jll = 0lgab1 Jzdi
zbl oolg jll = 0lgab1
piaWOWoJao gai
aloo yll jy Llae jlae jlae jlae jlae g 1
.
slo ploab lny de leo wro . alw . Jg Bj
.
.
.
.
.
.
.
.
.
.
.
.
.
.
.
.
.
.
.
.
.
.
.
.
.
.
.
.
.
.
.
.
.
.
.
.
.
.
.
.
.
.
.
.
.
.
.
.
.
.
.
.
.
.
.
.
.
.
.
.
.
.
.
.
.
.
.
.
.
.
.
.
.
.
.
.
.
.
.
.
.
.
.
.
.
.
.
.
.
.
.
.
.
.
.
.
.
.
.
.
.
.
.
.
.
.
.
.
.
.
.
.
.
.
.
.
.
.
.
.
.
.
.
.
.
.
.
.
.
.
.
.
.
.
.
- 30
30
30
30
30
30
30
30
30
30
30
30
30
30
30
30
30
30
30
30
30
30
30
30
30
30
30
30
30
30
30
30
30
30
28
28
28
28
28
28
28
28
28
28
28
28
28
28
28
28
28
28
28
28
28
28
28
28
28
28
28
28
28
28
28
28
28
28
p50011jjj
1 1
aLalal
gi gll gali jdi 15g 1000000000000000000000000000000000000000000000000000
156 = 1
.0jol pglao g jzio g zw b w ds jzlal . 1 jolw 1g a l y 1 g jlal 1 g y 1 d o 1 . (jall g fll Jta) oJlal no u jally
alogb1olgbyauijy
110 111.111500 jia jia jia aaii jia jia jia jia jia jia jia jia jia jia jia jia jia jia jia jia jia jia jia jia jia jia jia jia jia jia jia jia jia jia jia jia jia jia jia jia jia jia jia jia jia jia jia jia jia jia jia jia jia jia j
ab = 30
JgUy jj 151.1u2wSg g jq
j 1 j 1 j 1 j 1 j 1 j 1 j 1 j 1 j 1 j 1 j 1 j 1 j 1 j 1 j 1 j 1 j 1 j 1 j 1 j 1 j 1 j 1 j 1 j 1 j 1 j 1 j 1 j 1 j 1 j 1 j 1 j 1 j 1 j 1
aillll llae Jlds Iue
60 gai jil da jia all pa Jla
.3gll saiil
j j 10
J5 1000000000000000000000000000000000000000000000000000
山
yll plauw yjglal Jus / jus
ab = 10
i
Lalao jolj sloie baj jgl Joo
gj11 pluuswulj
jiaai jiaai aaiy jiaai naie daaigaa
1026
:
1aabbs j3 s, jlgdo
aai jao yjll jj
jglal plaol jla caleo1 2h b0g Jlwl no jlgall c
j4 = 2j1 CD
- 心 S S 10,9
a. g. SJI a.g. sJI
- | x,y| = 1 .
- j!0d59:j0d59,
1
P
jLwJgalyaasllyao 1
a#
a11y110x1
125x
日 _ 公 1
x2
x8
jgwl gaoa aioo/ jaoi1ai 1
aJjia 0laao X2
(ωy)
s oolnolie d aole o jbi
3 aaaa, A ojjall
1g411g20 2x3 1
2
c0g 3
14
U5
6
7
- a gill 8
Jai aIw/olgai Jol9
SsJ1 a0g1 10
Jalal 11
11a
aJyJ 12
c 13
14
swll 15
16


- Symbols in these Instruction Manual
- WARNING:
- CAUTION:
- NOTE:
- Contents
- General Notes
- Special Safety Precautions for this Appliance
- WARNING: Hot surface!
- Danger of burns!
- Unpacking the Appliance
- Scope of Delivery
- Overview of the Components
- Picture A, Page 3
- Picture B, Page 4: Symbols on the Control Panel
- Notes for Use
- Location
- Connected Wattage
- CAUTION: Overload!
- Electric Connection
- Standby (Standby Mode)
- Switching the Appliance On/Off
- Before Initial Use
- Useful Hints for Use
- Function Buttons
- Auto Functions
- Change of Temperature and Time
- Turn On the Lighting
- Warm Up Food
- Add Rotisserie
- Preparation
- Use with the Frying Basket
- Use with the Rotisserie and the Fixing Clips
- i
- Use with the Rotisserie, Fixing Discs and Spits
- Use with the Baking Tray and the Slide-in Grids
- Using the Appliance
- Pause Operation
- End of Operation
- WARNING: Danger of burns!
- Cleaning
- Accessories
- Housing
- Storage
- Troubleshooting
- Technical Data
- Disposal
- Meaning of the "Dustbin" Symbol
- Instrukcja obslugi
- Usuwanie
- CoapedkaHne
- CneuNbHbIe yka3aHnNo 6e3oNaChOCTn IJy 3TOrO np6opa
- PazorpeB 6JIOda
- IobabneHnBepTeJI
- Iodrotobka
- IcnoJb3ObaHHe c JkaOpuHOK KOp3nHO
- IcnoJb3OBAHne CBepTeIOM n 3aXmamn dna KpenJIeHHN
- ПРМЕЧАЙ:
- IcnoB3ObaHne C BepTeNoM,ΦKcnpyUuMMN DnCKaMn N uamnpaMn
- IcnoJIb3OBAHnE C npOTNBHEm N BblBnXhBIMnpewETkAMN
- IcnoJb3ObaHne yctpoNCTBa
- Mmnylbchb pexnm
- I PIMMEUAHNIA:
- Koheu pa60bI
- ПИМЕЧАНО:
- IPENyIPEXDEHNE:Onachoctb oxora!
- UncTka
- ПЕДУПЕЖДЕНЕ:
- BHIMAHNE:
- PpnaadJeekHoctn
- YTNIN3aun
- 3HaueHne cHMBOJa KOp3HnHa
- A
- jglj jolal
- a.
- 100xu!g a#
- piaWOWoJao gai
- p50011jjj
- aLalal
- j4 = 2j1 CD
- P
Brand : PROFICOOK
Model : PCFR 1200 H
Category : Deep fryer