1912 - Heating Reer - Free user manual and instructions
Find the device manual for free 1912 Reer in PDF.
User questions about 1912 Reer
0 question about this device. Answer the ones you know or ask your own.
Ask a new question about this device
Download the instructions for your Heating in PDF format for free! Find your manual 1912 - Reer and take your electronic device back in hand. On this page are published all the documents necessary for the use of your device. 1912 by Reer.
USER MANUAL 1912 Reer
natural_image
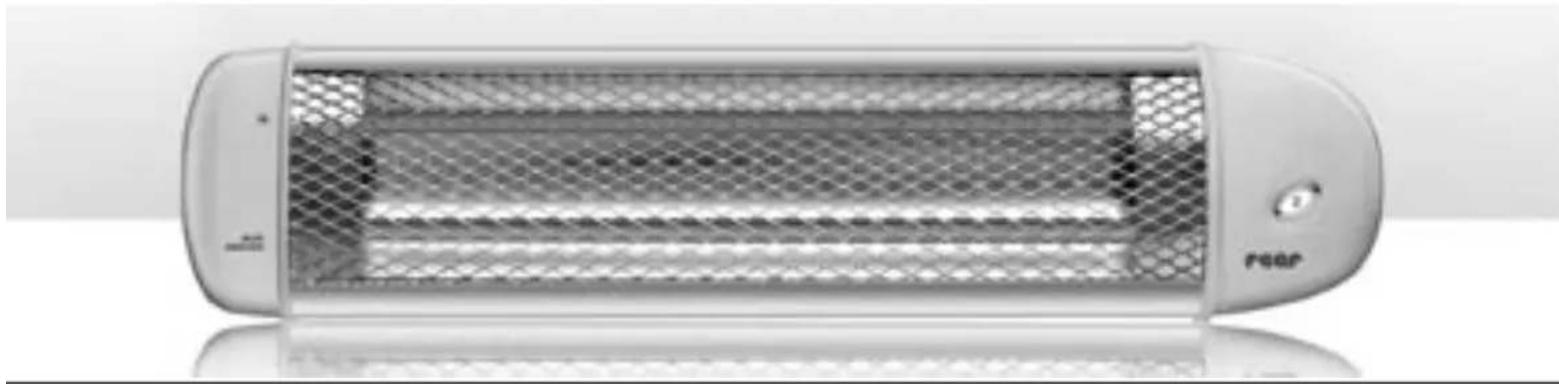
Exterior view of a modern electric heater with mesh grille and 'rear' label (no additional text or symbols)WICHTIG:
natural_image
Two mechanical clamps with screws mounted on a textured surface, labeled Abb.2 (no text or symbols on the clamps themselves)
text_image
Abb.4 Abb.4 Abb.3 bnatural_image
Front view of a portable flat-screen heater with mesh grille and control knob (no visible text or symbols)Important :
Please read user manual carefully and keep it for further reference.
Tips and instructions under: www.wickeltisch-heizstrahler.de
CE
230-50Hz
300/600W
Our changing unit radiant heater provides comforting direct heat in the area of changing units. It is also suitable for quick heating of bathrooms, hobby rooms, hallways, sheltered patios and balconies though.
Important remarks :
- Please read the user manual carefully before putting it in use.
- If the radiant heater is used above a changing unit the device is never to be used without supervision.
- The maximum irradiating duration must not exceed 15 minutes.
- Avoid additional warmth such as sunrays or other irradiating sources as the body temperature of your baby can consequently go up very high.
- Young infants with increased temperatures are not allowed to be irradiated. Danger of body overheating exists.
- Do not cover the radiant heater! Danger of fire exists.
- Do not touch the protecting grid during operation.
- Do not use this heater with a programmer, timer or any other device that switches the heater on automatically, since a fire risk exists if the heater is covered or positioned incorrectly.
Warning: it can still be hot after switching off.
The irradiation distance of 100 cm between child and changing unit radiant heater must be kept.
Assembly:
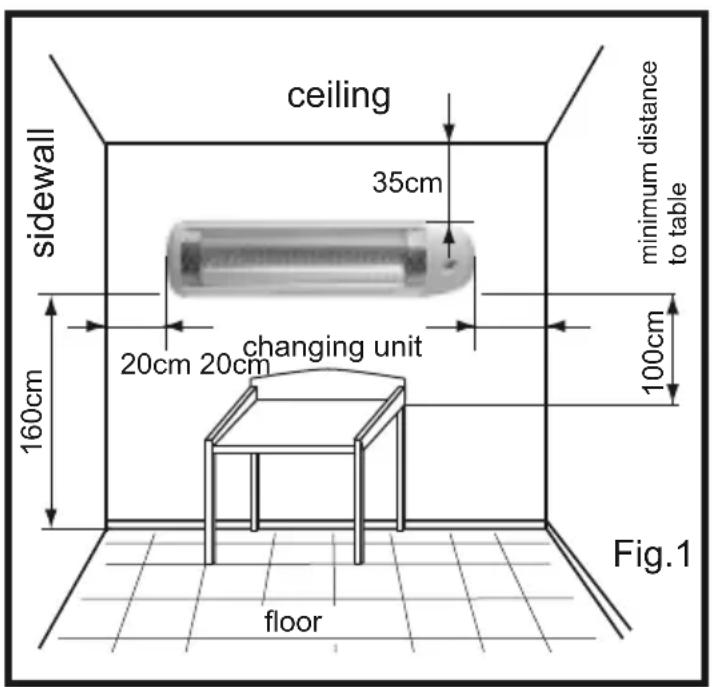
- The radiant heater is only allowed to be assembled at a permanent place on the wall and in horizontal position. It is not allowed to be attached to the ceiling as shown in Fig. 1 must be obeyed.
- The minimum distance so walls, ceilings and floors as shown in Fig. 1 must be obeyed.
- Keep a minimum distance of 65 cm to infl ammable materials such as textiles, wood etc. Danger of fire exists!
- The radiant heater is not allowed to be fixed underneath a socket.
text_image
ceiling 35cm sidewall 160cm changing unit 20cm 20cm 100cm minimum distance to table floor Fig.1Typ:1912
The heater has a build-in automatic cut off function, i.e. the heater cuts off automatically after 10 minutes.
In the event of a power failure or with defective fuses, automatic shutdown will automatically be started for additional 10 minutes if the switch is in ON position. After use or expiration of the turn-off time, please make sure the switch is in OFF/0 position.
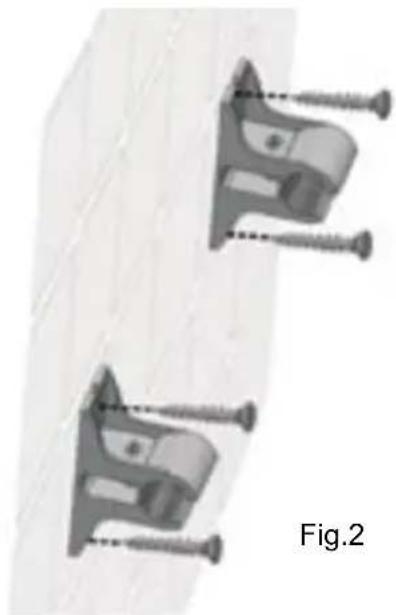
a) Mark dowel positions of the variable wall holders under consideration of the minimum clearances (Fig.1, page 2). Insert dowels and tighten. (Please mind the positions of the locating screw. They are to be used for the upper holes) (Fig.2). The minimum clearance between the wall holders is 12cm , the maximum clearance is 40cm . Thus, it is possible to drill into the gaps between the tiles.
natural_image
Two mechanical clamps with screws mounted on a textured surface, labeled Fig.2 (no text or symbols on the clamps themselves)
text_image
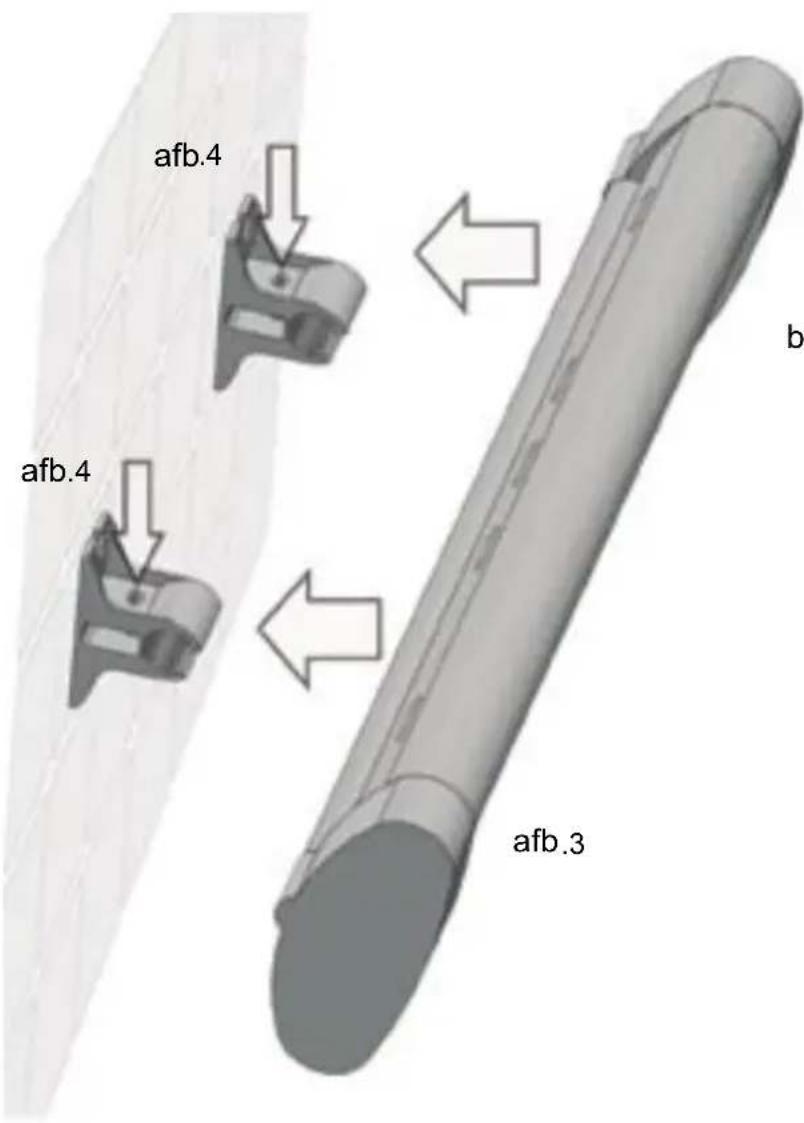
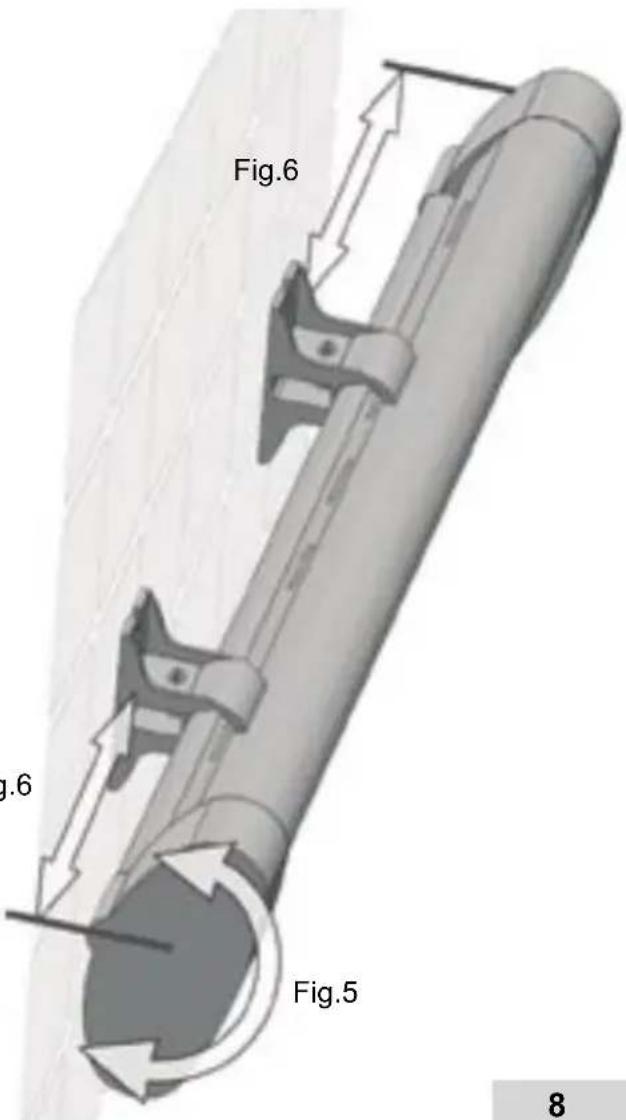
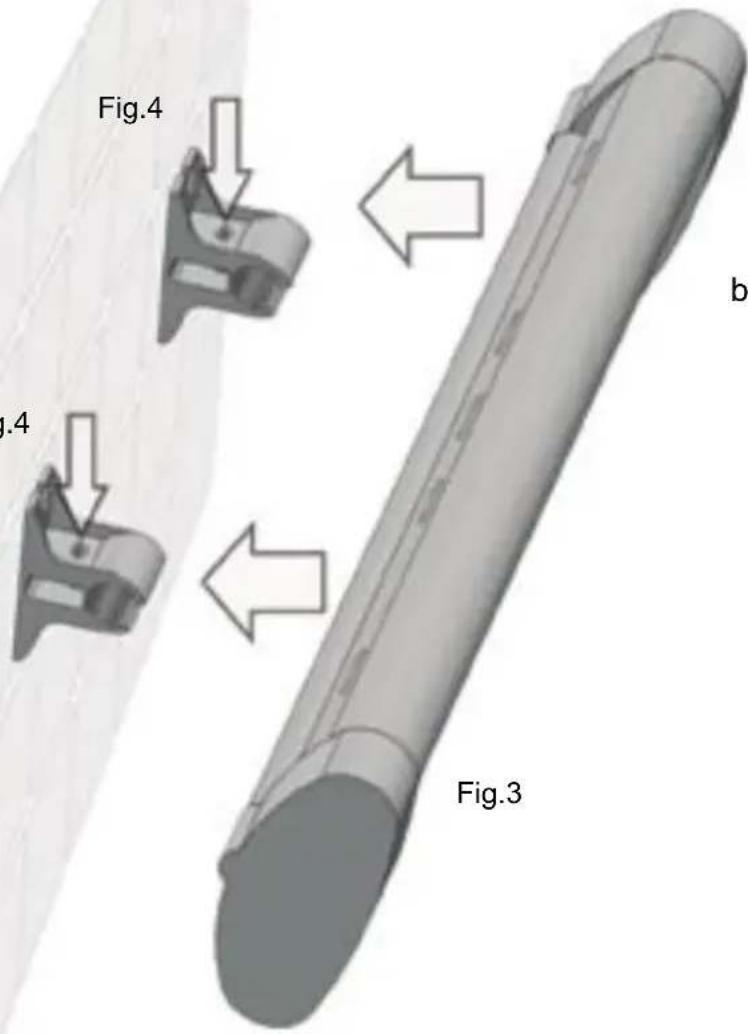
Fig.4 Fig.4 Fig.3 bb) Put the radiant heater onto the wall holder (Fig.3). The device is provided with a variable angle adjustment (Fig.5). Simply place the device into the position desired and tighten by means of the two locating screws (Fig.4).

The locating screws (Fig. 4) must be tightly screwed in to ensure that the device does not fall out of the holders.
The device must be centrically positioned towards the holders (i.e. same distance on the left and on the right) (Fig.6).
Fig.6
text_image
Fig.6 Fig.6 Fig.5 8STARTING UP:
Switch setting: 0 OFF
1 300W The red LED glows (Typ 1912)
2 600W The red LED glows (Typ 1912)
Caution:
You should start up the device before the first use with a good ventilation of the room of approx. 10 minutes. During the first start-up the device could cause odor accumulation. DO NOT TOUCH the radiant heater during and shortly after use! (HEAT RADIATION)
Plug the heater into the socket-the heater is now ready for use
Caution: Do not place the power cord over the radiant heater!
- The local electrical regulations (EVU) must be complied with when installing the heater in bathrooms and shower rooms. The heater must be positioned so that the pull switch cannot be directly touched from the bathtub or shower.
- Device must not be installed above bathtub!
The device should not be used by children or people having physical, sensory or mental limitations. People having insufficient experience and/or knowledge should be supervised and instructed in order to guarantee the secure use of the device.
-Children playing with the device
Cleaning:
Before cleaning is begun, please ensure that the device is switched off and cooled down (draw the plug).
Clean the surface with a dry or damp cloth.
The reflector and heating bar can only be cleaned by an expert.
Repair:
The device may only be repaired by an expert.
Technical details :
Mains voltage : 230 V
Power : 300/600 W
Type of assembly: power plug in socket or fixed connection
Protection class: 1
Irradiating angle : 90°
Infrared radiation and temperature distribution proofed according to the standard for medical products (IEC601-2-21)
Guarantee
This device has been produced with intact material and the utmost care. Therefore Reer grants a guarantee period of 2 years after date of purchase against defective materials and workmanship. In the unlikely event that you are confronted with such a defect, you should complete the yellow warranty card and contact your dealer.
Warranty cannot be granted if:
- the device is used improperly and not for its intended purpose
- the device is connected to wrong mains voltage
- unauthorised repairs are made
- the warranty card is improperly completed.
(Do not forget to attach your sales slip.)
reer GmbH, Muehlstr. 41, 71229 Leonberg, Germany, www.reer.de
Type: 1911 / Type: 1912
Date of purchase:
Stamp and signature of dealer:
TYP: 1911 / 1912
reer
Manuel
natural_image
Exterior view of a white rectangular heater with mesh grille and 'PEEP' branding (no additional text or symbols)Important :
natural_image
Mechanical component with screws and a bracket (no visible text or symbols)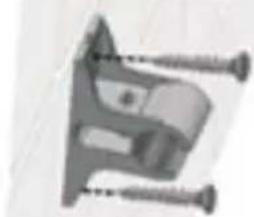
natural_image
Mechanical component with screws and mounting bracket (no visible text or symbols)Fig.2
Fig.4
text_image
Fig.4 Fig.3 b 1.4 1.4text_image
Fig.6 Fig.6 Fig.5 13MISE EN SERVICE :
natural_image
Exterior view of a rectangular electronic device with mesh grille and control panel (no visible text or symbols)Importante:
natural_image
Two mechanical clamps with screws mounted on a textured surface, labeled 'm' and 'immagine.2' (no text or symbols on the clamps themselves)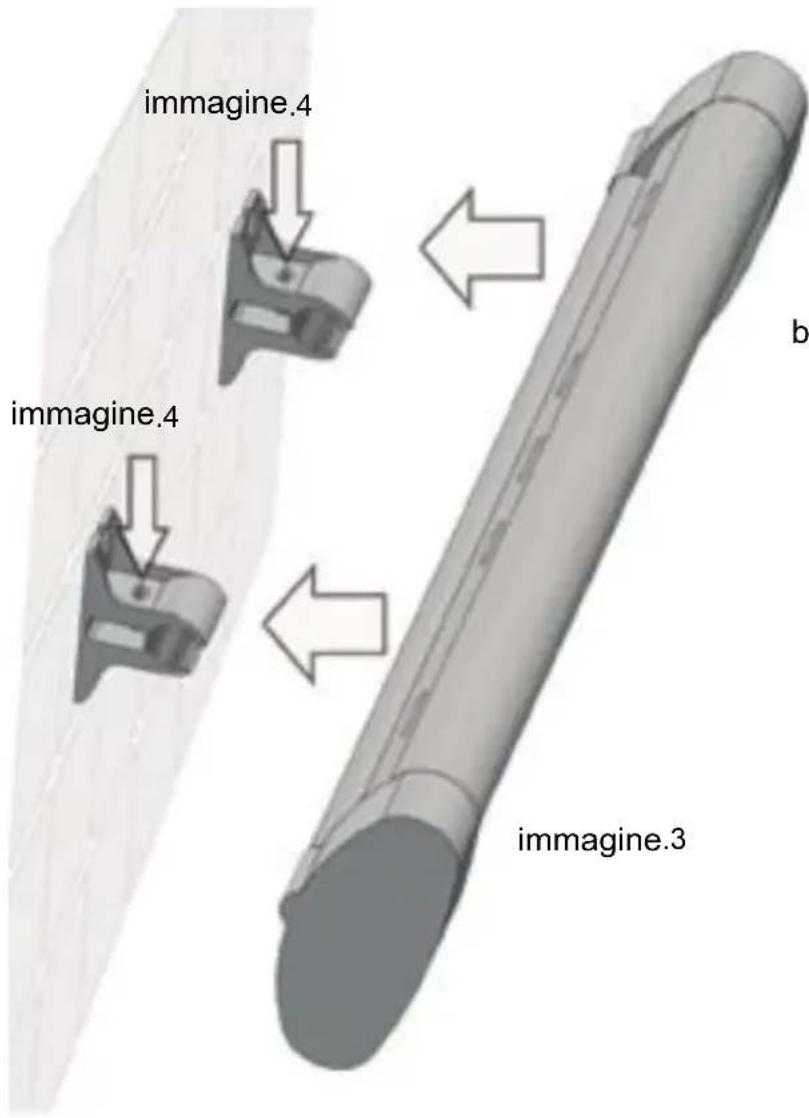
natural_image
Front view of a portable electric heater with mesh grille and control panel (no visible text or symbols)Importante:
natural_image
Two identical mechanical clamps with screws, labeled 'fi g.2' below (no text or symbols on the clamps themselves)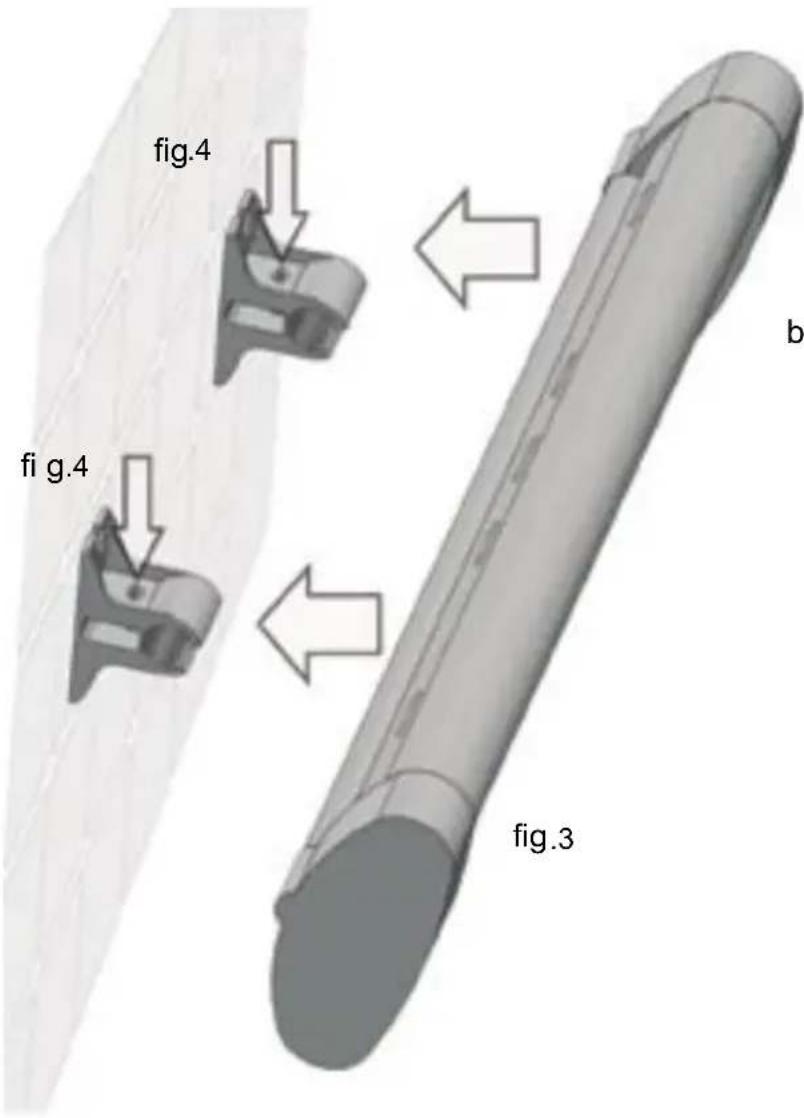
text_image
fig.4 fi g.4 b fig.3natural_image
Front view of a white portable heater with mesh grille and 'PGAP' logo (no text or symbols on body)Belangrijk :
natural_image
Two identical mechanical clamps with screws mounted on a textured surface, labeled 'afb.2' below (no text or symbols on the clamps themselves)