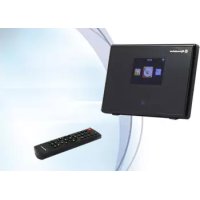
IRX16BT - Radio ROADSTAR - Free user manual and instructions
Find the device manual for free IRX16BT ROADSTAR in PDF.


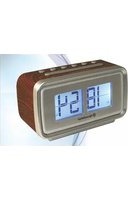
| Product type | Internet radio with alarm, Bluetooth and media player |
| Power supply | AC 230 V ~ 50 Hz, DC 5 V / 1 A power adapter |
| Wireless network | Wi-Fi IEEE 802.11b/g/n, security WEP/WPA/WPA2 |
| Bluetooth | Built-in, maximum radiated power 2.5 mW (4 dBm) |
| Audio output | 3.5 mm jack (external speaker) |
| Headphone output | 3.5 mm jack |
| Main functions | Internet radio, Bluetooth, DLNA, UPnP, alarms (2 programmable + nap), timer, standby, equalizer |
| Display | Letters and numbers, adjustable backlight (energy-saving mode or permanent) |
| Languages | French, English, German, Spanish, Italian, Dutch, etc. |
| Cleaning | Dry cloth only |
| Safety | Use exclusively the supplied adapter; do not open the casing; avoid humidity and heat sources |
| Repairability | No user-serviceable parts; contact a qualified technician |
| Package contents | IRX16BT radio, power adapter, user manual |
| Dimensions | Not specified |
| Weight | Not specified |
Frequently Asked Questions - IRX16BT ROADSTAR
User questions about IRX16BT ROADSTAR
0 question about this device. Answer the ones you know or ask your own.
Ask a new question about this device
Download the instructions for your Radio in PDF format for free! Find your manual IRX16BT - ROADSTAR and take your electronic device back in hand. On this page are published all the documents necessary for the use of your device. IRX16BT by ROADSTAR.
USER MANUAL IRX16BT ROADSTAR
Please ensure the following is ready:
- You have a broadband internet connection;
- A wireless (Wi-Fi) broadband router is connected to the internet. The radio supports Wireless B, G and N connection (Wireless N router can also be used with the setting on B or G);
- You know the Wired Equivalent Privacy (WEP) or Wi-Fi Protected Access (WPA) data encryption code / password. You need to key in the correct code when the radio is connected to the wireless router for network connection. If you do not know the code/password, please contact the person /technician who set up the router/network for you.
PRECAUTIONS
- The radio should not be used in a high temperature / high humidity environment over prolonged periods of time as this may damage the unit.
- Keep the radio away from liquids as it may get damaged. Please switch off the radio immediately if water or liquids is spilled into the radio. Consult with the shop you bought this radio for any question.
- Avoid using or storing the unit in dusty or sandy environment
- Do not open and repair the radio by yourself.
- Use only the AC / DC Adaptor supplied with the radio. Connecting a power supply with a different rating will cause permanent damage to the radio and may be hazardous.
- Clean only with dry cloth.
SWITCHING ON THE RADIO (FIRST SETTING)
- Plug the connector pin of the AC / DC adaptor into the DC jack of the unit (5).
- Connect the other end of the adaptor to the wall socket.
Caution: Use only the adaptor supplied. Connecting an adaptor with different rating will cause permanent damage to the radio and may be hazardous.
- Connect your external powered speaker to Audio-Out jack on the radio (3).
- Switch the radio on using the Power on / off switch (6).
The display will light up and show "WELCOME".
- Select the language with up/down cursors (12/13).
The radio will ask if you want to "Check Network" when power on. - Radio will ask if you want to "Configure Network"
If you chose to configure network now, please follow next steps, otherwise you can configure it later. - The radio will check for networks.
- Select your network with up/down cursors (12/13).
-
Insert the password:
-
Press repeatedly letters and numbers (9) or up/down cursors (12/13) to enter a character.
- Move to next or previous character with left/right cursors (14/15).
- Confirm with "OK" (16).
CONNECTING TO THE WI-FI NETWORK
- Enter the Configuration menu.
- Enter the Network menu.
- Select Wireless Network Configuration.
- Select your network with up/down cursors (12/13).
-
Insert the password:
-
Press repeatedly letters and numbers (9) or up/down cursors (12/13) to enter a character.
- Move to next or previous character with left/right cursors (14/15).
- Confirm with "OK" (16).
INTERNET RADIO
Choose 'Internet Radio' from the menu, you can see different functions as below:
My Favorite: List of favorite stations which have been assigned to the presets.
Radio Station / Music: To select desired radio station by Genre or Location.
- Local Radio: Quick access to the radio station located in your area. Remark: You can set other region as local radio.
History: Shows the radio stations that you have listened in the past.
Service:
- Search Radio Stations: You can search your desired radio station.
- Add new Radio Station: If you cannot find the desired station from the Radio Station list and you have the URL address, you can input the link here and add to your favorite list.
To start listen the worldwide radio stations, select "Radio Station/Music"
SET PRESETS
- While you are playing the favorite station, press and hold (around 3 sec.) the favorite button (11) until a screen with "Add to My Favorite" appear.
- Select the position where you want to save the station with up/down cursors (12/13).
- Confirm with "OK" (16).
EDIT PRESET
You can edit your Favorite list with the following options:
- Press the favorite button (11) to enter the Preset station list.
- Choose the radio station that you want to edit.
- Press right cursor (15) to enter to the edit menu.
-
Choose the desired action from the following:
-
Delete - To delete the selected station
- Shift up/down - To shift the selected station on the list.
-
Rename - To rename the selected station
-
Confirm with "OK" (16).
RECALL PRESET
- Press Favorite Button (11) to recall the favorite list.
- Select desired station with up/down cursors (12/13).
- Confirm with "OK" (16).
BLUETOOTH OPERATION
- Switch the mode to Bluetooth on the Radio with left / right cursors (14/15).
- Connect your Bluetooth portable device to the ID Bluetooth tagged "I-RX16BT";
- You can now transfer the music to the "I-RX16BT".
Note: Music control (play, pause, etc) must be done from your ext. device.
VOLUME CONTROL (FOR HEADPHONES ONLY)
To adjust the volume for the external powered speaker, please use the volume control on the powered speaker unit.
The buttons on the remote control (19/20) are to adjust the volume for earphone only.
DLNA
The Internet radio can play music stream from DLNA compatible device, provided that the Internet radio and other DLNA devices are under the same Wi-Fi network.
The radio will appear as "AirMusic" when you try to search it on other devices. If you want to change other name from AirMusic, go to Configuration and DLNA setup to make the change.
MEDIA CENTER
UPNP (UNIVERSAL PLUG AND PLAY)
You can stream music from the Networked device which supports UPnP function to the radio to play.
For instance, most of the latest computer supports UPnP, and you can stream music from Windows Media Player application on the computer and listen on your radio.
Remark: Please make sure your computer is on the same Wi-Fi network as the radio.
The latest Windows Media Player may be downloaded from Microsoft's website and install by following the instructions detailed in its installation wizard.
Once installed, Windows Media Player will create a library from all the media files available to it on your PC.
WINDOWS XP / WINDOWS MEDIA 11
- To add new media files to the library, select 'File > Add to Library...> Advanced Options', Click 'Add' and choose the files you wish to add and click 'OK'.
-
Now you need to connect your Internet radio to Windows Media Player 11 and configure it to allow the radio to access your media library. In order to this, you will need to do the following:
-
On the radio, go to the main menu and select
. - It will scan for all available UPnP servers. Note, this may take a few seconds for the radio to complete its scan and before the scan has completed, the radio will display '[Empty]'. The radio will continue to display '[Empty]' if no UPnP servers are found.
- After a successful scan. Select your UPnP server, by rotating the dial if there is more than one UPnP server, and then press
SELECT.
- Your PC will now prompt you that a device has attempted to connect to your UPnP server. In order to allow the radio to have access to the media files, you will need to click the 'Library' tab from Windows Media Player 11 and select the
item to open the 'Media Sharing' window. - From the 'Media Sharing' windows, the radio will be listed as an unknown device. Click on the unknown device listed, then click the 'Allow' button and then click 'OK'.
WINDOWS 7 / WINDOWS MEDIA PLAYER 12
- If you are using WMP 12, simply go to
and choose to retrieve the music files you would like to add to library. - Windows 7 or above requires the PC to be set as Home network and also with the Homegroup enabled to allow devices to access/ play the media files on your Windows Media Player. Please find the steps below:
a. Go to "Control Panel" and select "Network and Internet".
b. Choose "Homegroup".
c. Select "Network location".
d. Choose "home Network".
e. Select "Create a Homegroup".
f. Launch the Windows Media Player, select "Stream" and choose
"Automatically allow devices to play my media" from the drop down list.
You can now enjoy the music streaming from windows media player.
MUSIC STREAMING VIA UPNP
- On the main menu, select "Media Centre" and choose "UPnP". It may take a few seconds for the radio to complete the scan for available UPnP servers. If no UPnP servers are found, it will show "Empty List".
- After a successful scan is done, select your UPnP server.
The radio will show the media categories available from the UPnP server, e.g. 'Music', 'Playlists' etc.
- Choose the media files that you wish to play.
INFORMATION CENTER
WEATHER INFORMATION
To view the weather forecast all over the world and choose the desired region to display on Standby. To activate this feature, choose the desired region then press right cursor (15), choose "add to standby display" and confirm with "OK" (16). "Current Date & Time" and "Current Weather" will display every 10 seconds alternately in standby mode. You can press left / right cursors (14/15) to display the previous / next day weather forecast.
Remark: Weather may have deviation to the actual, it is for reference only.
To get the information of Stock Market all over the world.
Remark: Info may have deviation to the actual, is for reference only.
SYSTEM INFORMATION
To view the information of the radio such as the Version of the software, etc.
CONFIGURATION
TIME DISPLAY: Set the Standby clock mode as Clock Radio or Internet Radio
MANAGE MY MEDIAU: You can create a favorite station list by operating on PC.
- On your computer, go to http://www.mediatyou.net/web/index.php, this is the radio portal used on your radio. Register as member by selecting "Join now".
- Log In to the portal
- From the menu on the left side of the portal select "Device"
-
On the Radio adaptor
-
Go to "information Center".
- Select "System Information".
-
Select "Wireless Info" and note the MAC Address.
-
On your PC write the name of your device and write the MAC Address into the "Serial Number" space.
- Confirm by clicking "Add".
-
Now you can organize your own favorite stations or add any new station which is currently not found on the station list. After the work is done, follow the steps below to sync the changes to the radio:
-
On your Internet Radio Adaptor go to "Configuration"
- Select "Manage my MediaU"
- Choose "Enable" and confirm with "OK" (16) (if this option was already "Enabled", "Disable" and then "Enable" it again).
Then you will see "Manage My mediaU" appear on the main menu.
NETWORK:
- Wireless Network Configuration: To Scan for wireless network and list out.
- Wireless Network (WPS PBC): To Use WPS function. You can set the wireless without enter any password for Wi-Fi protected if your router has this function.
- Manual Configuration: To Set the DHCP on or off, and enter the SSID as you known, or delete the connected Wi-Fi.
- Check Network when Power On: Enable / disable "Check Net. when Power On".
DATE & TIME:
- Set Date and Time: To choose between "Auto Detect" or "Manual Setup" the Currently Date & Time.
- Time Format setting: To choose Time format setting (12hours / 24hours).
- Date Format setting: To chose date format setting.
ALARM CLOCK:
- Alarm 1 / 2: To select your favorite Alarm settings (2 available alarms).
- NAP Alarm: To set a short time alarm. You can select the time from 5 minutes up to 120 minutes. No Snooze function available for the NAP alarm.
Remark: The NAP Alarm is with beeping sound only.
- Alarm Volume: To set the alarm sound level with left / right cursors (14/15)
When the Alarm comes on, press any key except "Power" button, to enter the "Snoopze" mode or press "Power" button (7) to cancel the alarm sounds again 5 minutes later.
Remark: You can select any internet radio station as Alarm tone from the favorite station. If internet station doesn't work in 1 minute, it will auto set into beeping
sound.
TIMER: Use up/down and left/right cursors (12/13 and 14/15) to adjust the time then confirm with "OK" (16) and the timer will start.
- To pause the timer, press "OK", to resume it, press "OK" again.
- To cancel the timer, press and hold "OK" button until "00:00" appears, then press "OK" to exit.
LANGUAGE: Choose between 17 available languages available.
DIMMER: To adjust the backlight of the LCD with below settings:
- Power Saving: Set a down level when there is no operation after 15 seconds.
- Turn on: The backlight will not dim down even there is no operation. You can adjust the backlight leve you want.
DISPLAY: To choose the display mode between "color" or "monochrome".
POWER MANAGEMENT: To set the auto-standby time if there is no internet signal received in order to save power. The default setting is 30 minutes (the radio will go into Standby after 30 minutes when the radio does not receive any internet signal).
SLEEP TIMER: To set the timer to put the radio on standby after certain time elapsed, from 15 minutes to 180 minutes with the step of every 15 minute.
You can also set this timer by pressing repeatedly the "Sleep Timer" button (18) from the remote control (you will see the sleep timer on the top right corner of the display).
BUFFER: To select your preferred buffering time.
WEATHER: To set the display of weather forecast on the standby mode and the temperature units. You can select Weather Display On/Off and Location.
Temperature units are Celsius (^) and Fehrenheit (^)
LOCAL RADIO SETUP:
The radio will detect your local area stations automatically and under "Internet radio" you will find all the "Local Radio".
If you would like to change the Local area stations to other countries, you can choose "Manual setup" to make the change.
PLAYBACK SETUP: To set the playback mode as Off, Repeat one / all and Shuffle.
DLNA SETUP: When the radio is connected by other DLNA devices, the default name is "AirMusic". You can change it as you desire.
Please note: The DLNA feature is compatible and works with corresponding third party Android APPs. Apple devices are not supported.
EQUALIZER: Equalizer function (for headphones listening only).
RESUME WHEN POWER ON: To set to ON or OFF of "Resume When Power On".
SOFTWARE UPDATE: Upgrade information will pop up on the display when there is upgrade available on the server.
RESET TO DEFAULT: To set all the settings back to default settings.
Please note: all the Station presets, Settings and configuration will be lost after you have performed the "Factory Reset".
TECHNICAL SPECIFICATIONS
Power
Power Voltage: AC 230V ~ 50Hz.
Power Input: DC 5 V = 1A.
General
Wireless Network: IEEE802.11b/g/n.
Security Protocol: WEP / WPA / WPA2.
Audio Sockets: 3.5mm jack audio out;
3.5mm jack headphones out.
BT Maximum radiated Power: 2.5mW (4 dBm).
Specifications and design are subject to possible modifications without notice due to improvement.
WARNING

The exclamation point within the triangle is a warning sign alerting the user of important instructions accompanying the product.
The lightening flash with arrowhead symbol within the triangle is a warning sign alerting the user of "dangerous voltage" inside the unit.
To reduce the risk of electric shock, do not remove the cover. No user serviceable parts inside the unit. Refer all servicing to qualified personnel.
This unit operates on 230V 50Hz . If the unit is not used for a long period of time, remove the plug from the AC mains.

Ensure all connections are properly made before operating the unit.

This unit must not be exposed to moisture or rain.

This unit should be positioned so that it is properly ventilated. Avoid placing it, for example, close to curtains, on the carpet or in a built-in installation such as a bookcase.
Do not expose this unit to direct sunlight or heat radiating sources.
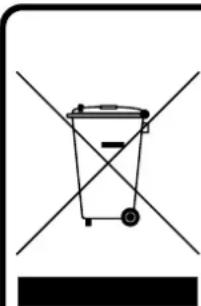
CORRECT DISPOSAL OF THIS PRODUCT (Waste Electrical & Electronic Equipment)
This marking shown on the product or its literature, indicates that it should not be disposed with other household wastes at the end of its working life. To prevent possible harm to the environment or human health from uncontrolled waste disposal, please separate this from other types of wastes and recycle it responsibly to promote the sustainable reuse of material resources. Household users should contact the retailer where they purchased this product, or their local government office, for details of where and how they can take this item for environmentally safe recycling. Business users should contact their supplier and check the terms and conditions of the purchase contract. This product should not be mixed with other commercial wastes for disposal.
9
Deutsch
ORT DER BEDIENELEMENTE
- LCD ANZEIGE
- INFRAROTSENSOR
- 3.5 mm Jack AUDIO AUSGANG
- 3.5 mm Jack KOPFHÖRER AUSGANG
- DC BUCHSE (5V)
- POWER EIN / AUS
FERNBEDIENUNG
- POWER EIN/AUS
-
STUMMSCHALTUNG
-
TASTE LIEBLINGSSENDER/GEBEN SIE BUCHSTABEN UND ZIFFERN EIN
-
"0"——0,'DEL'
• “1”——‘1’->‘@’->‘(raum)→’! ‘-’>“->#’->‘$’->‘%’->‘&’->‘-’(‘-’) ‘-’*’-’+’-’, ‘-’-’-’-’-’/ - >':-'>';-'>'<'->='->'>->'?'-'>['-']1'->1'-->1-->1-->1-->1'-->1'
- “2”——2,A,B,C,a,b,c
- "3"——3,D,E,F,d,e,f
- "4"——4,G,H,I,g,h,i
- "5" —— 5, J, K, L, j, k, l
- “6”——6,M,N,O,m,n,o
- "7"——7,P,Q,R,S,p,q,r,s
-
"8"——8,T,U,V,t,u,v
9W,X,Y,Z,w,x,y,z -
HELLIGKEITSREGLER (HELLIGKEIT DER ANZEIGE)
- FAVORITENTASTE
- CURSOR NACH OBEN
- CURSOR NACH UNTEN
- CURSOR LINKS/ZURUCK
- CURSOR NACH RECHTS
- OK (BESTÄTIGUNGSTASTE)
- ALARM-TASTE
- SLEEP-TIMER
- LAUTSTÄRKE + (NUR FÜR KOPFHÖRER)
- LAUTSTARKE - (NUR FÜR KOPFHÖRER)
- HAUPTMENÜ
- MODUS
- EQUALIZER (NUR FÜR KOPFHÖRER)
- VORHERIGER SONG/VORHERIGER RADIOSENDER
- NACHSTER SONG/NACHSTER RADIOSENDER
- PLAY/PAUSE
BEVOR SIE BEGINNEN
LA CONNEXION AU RÉSEAU WI-FI
CONNECTION AD UNA RETE WI-FI
UPNP (UNIVERSAL "PLUG AND PLAY")
VOORZORGSGMAATREGELEN
Hereby, Roadstar Management SA declares that the radio equipment type I-RX16BT is in compliance with Directive 2014/53/EU.
The full text of the EU declaration of conformity is available at the following internet address:
http://roadstar.com/images/ce/l-RX16BT.pdf
or by scanning the following QR Code.
http://roadstar.com/images/ce/l-RX16BT.pdf
http://roadstar.com/images/ce/l-RX16BT.pdf
http://roadstar.com/images/ce/l-RX16BT.pdf
http://roadstar.com/images/ce/l-RX16BT.pdf
http://roadstar.com/images/ce/l-RX16BT.pdf

- PRECAUTIONS
- SWITCHING ON THE RADIO (FIRST SETTING)
- CONNECTING TO THE WI-FI NETWORK
- INTERNET RADIO
- SET PRESETS
- EDIT PRESET
- RECALL PRESET
- BLUETOOTH OPERATION
- VOLUME CONTROL (FOR HEADPHONES ONLY)
- DLNA
- MEDIA CENTER
- UPNP (UNIVERSAL PLUG AND PLAY)
- WINDOWS XP / WINDOWS MEDIA 11
- SELECT.
- WINDOWS 7 / WINDOWS MEDIA PLAYER 12
- MUSIC STREAMING VIA UPNP
- INFORMATION CENTER
- WEATHER INFORMATION
- SYSTEM INFORMATION
- CONFIGURATION
- NETWORK:
- DATE & TIME:
- ALARM CLOCK:
- LOCAL RADIO SETUP:
- TECHNICAL SPECIFICATIONS
- Power
- General
- WARNING
- CORRECT DISPOSAL OF THIS PRODUCT (Waste Electrical & Electronic Equipment)
- 9
- Deutsch
- ORT DER BEDIENELEMENTE
- FERNBEDIENUNG
- BEVOR SIE BEGINNEN
- LA CONNEXION AU RÉSEAU WI-FI
- CONNECTION AD UNA RETE WI-FI
- UPNP (UNIVERSAL "PLUG AND PLAY")
- VOORZORGSGMAATREGELEN
Brand : ROADSTAR
Model : IRX16BT
Category : Radio