
AI2302 - Cooker ASPES - Free user manual and instructions
Find the device manual for free AI2302 ASPES in PDF.

| Product type | Built-in induction hob |
| Brand | Aspes |
| Model | AI2302 |
| Cooking type | Induction |
| Number of burners | 2 |
| Dimensions (W x D x H) | 290 x 520 x 62 mm |
| Cutout dimensions (A x B) | 260 x 490 mm |
| Power supply voltage | 220-240 V ~ 50/60 Hz |
| Total installed power | 2990 W |
| Cooking zone diameter | Zone 1: 160 mm, Zone 2: 180 mm |
| Energy consumption (EC) | 189.7 Wh/kg |
| Main functions | Boost, Timer (99 min), Keep warm, Auto shut-off, Child lock, Pause |
| Residual heat indicator | Yes (display 'H') |
| Cleaning | Ceramic glass: specific cleaner, scraper for stubborn residues |
| Safety | Auto shut-off, child lock, overheat protection, pan detection |
| Error codes | E1 (board), E2/E3 (voltage), E4-E6 (thermistor), E7 (overheat), E8/E9 (IGBT sensor), E0 (IGBT), EE (display) |
| Net weight | Approximately 6 kg |
| Warranty | Refer to the seller |
Frequently Asked Questions - AI2302 ASPES
User questions about AI2302 ASPES
0 question about this device. Answer the ones you know or ask your own.
Ask a new question about this device
Download the instructions for your Cooker in PDF format for free! Find your manual AI2302 - ASPES and take your electronic device back in hand. On this page are published all the documents necessary for the use of your device. AI2302 by ASPES.
USER MANUAL AI2302 ASPES
ATENCIÓN:
INSTALACIÓN
natural_image
Simple line drawing of a rectangular object with a coiled cable attached, no text or symbols present.natural_image
Three identical cooking pots with crossed X marks, no text or symbols presentnatural_image
Four identical cooking pots with crossed-out X marks, no text or symbols presentnatural_image
Two identical icons showing a cooking pot with crossed arrows and a lid with double-headed arrows, no text or symbols present.

natural_image
Diagram showing various electrical or mechanical components with no visible text or symbolsnatural_image
Symbol of a trash bin crossed with two crossed lines, no text or numbers presentATENÇÃO:
INSTALAÇÃO
natural_image
Simple line drawing of a rectangular block with a coiled cable attached, no text or symbols present.AI2302


natural_image
Three identical cooking pots with crossed-out X marks, no text or symbols presentnatural_image
Four identical cooking pots with crossed X marks, no text or symbols presentnatural_image
Two icons: a crossed-out pot and a cooking pot with directional arrows, no text or symbols present.
natural_image
Symbol of a trash bin crossed with two crossed lines and a solid black rectangle below (no text or labels)Operation / Installation Manual
. aspes
Built-in Induction Hob
MODEL: AIFZ2601S AI3602 AI2302
INDEX
SAFETYWARNINGS......4
INSTALLATION......12
GUIDETOTHEAPPLIANCE......20
CAREANDCLEANING....38
QUSTIONSANDQUICKCHECK......40
ERRORCODE......42
TECHNICALSPECIFICATION......43
WASTEMANAGEMENT......49
Congratulations on the purchase of your new hob. Wewould liketo thank you for purchasing a product from our wider range of domestic appliances. Were recommend that you spend sometime to read this Instruction/Installation Manual in order to fully understand how to install correctly and operate it. For installation, pleaseread the installation section. Read all the safety instructions carefully before use and keep this Instruction/Installation Manual for further reference. If you transfer the appliance to third party, also hand over this instruction manual.
The figures in this instruction manual may differ in some details from the currentdesignofyourappliance.Neverthelessfollowtheinstructionsin suchacase.
② Any modifications, which do not influence the functions of the appliance. shall remain reserved by the manufacturer. Pleased dispose of the packing with respect to your current local and municipal regulations.
③ The appliance you have purchased may be an enhanced version of the unit thismanualwasprintedfor.Nevertheless,thefunctionsandoperating conditionsareidentical.Thismanualisthereforeststillvalid.Technical modificationsaswellasmisprintsshallremainreserved.
1.SAFETYWARNINGS
Pleasereadthisusermanualthoroughlybeforeattemptingtousethisappliance forthefirsttime. Thismanualcontainsimportantinformationonsafe installation,useandcareoftheappliance.Keeptheseinstructionsforreference andpassthemontofutureuser.
Allinformationincludedinthosepagesservefortheprotectionoftheoperator. Ifyouignorethesafetyinformationandsafetyinstructions,youwillendanger yourhealthandlife.
Storethismanualinasafeplacesoyoucanuseitwheneveritisneeded. Strictlyobservetheinstructionstoavoiddamagetopersonsandproperty.
MAKESURETHATTHISMANUALISAVAILABLE TOANYONEUSINGTHEAPPLIANCEANDMAKE SURETHATITHASBEENREADAND UNDERSTOODPRIORTOUSINGTHEAPPLIANCE.
Installation
ElectricalShockHazard
- Thetechnicaldataofyourenergysupplymustmeetthedataontherating label.Disconnecttheappliancefromthemainselectricitysupplybefore carryingoutanyworkormaintenanceonit.
- Donotconnecttheappliancetothemainsiftheapplianceitselforthepower cordortheplugarevisiblydamaged.
- Allmodificationstotheelectricalmainstoenabletheinstallationofthe appliancemustbeperformedbyaqualifiedprofessional.
-
Connectiontoagoodearthwiringsystemisessentialandmandatory.A check-upofexistingandnewly-madeconnectionsmustbedonebyan authorizedprofessional.
-
Alterationstothedomesticwiringsystemmustonlybemadebyaqualified electrician.Donotmodifytheenergysupply.Theconnectionmustbecarried outinaccordancewiththecurrentlocalandlegalregulations.
- Theroomtheapplianceisinstalledinmustbedryandwell-ventilated. When theapplianceisinstalled,aneasyaccesstoallcontrolelementsisrequired.
- Donotinstalltheapplianceneartocurtainsorupholsteredfurniture.RISK OFFIRE!
- Failuretofollowthisadvicemayresultinelectricalshockordeath.
CutHazard
•Takecare-paneledgesaresharp.
- Failuretousecautioncouldresultininjuryorcuts.
Important safety instructions
- Readtheseinstructionscarefullybeforeinstallingorusingthisappliance.
- Whileunpacking, the packaging materials (polythene bags, polystyrene pieces, etc.) should be kept away from children and pets. RISKOFINJURY!
CHOKINGHAZARD!
- When you unpack the appliance, you should be token of the position of its components in case you have to expand and transport at a later point of time.
- Nocombustiblematerialorproductsshouldbeplacedonthisapplianceatany time.
• The appliance must be transported and installed by least twopersons. - Plessemakethisinformationavailabletothepersonresponsibleforinstalling theapplianceasitcouldreduceyourinstallationcosts.
- Inordertoavoidahazard, this appliancemustbeinstalledaccordingtothese instructionsforinstallation.
- This appliance is to be properly installed and earthed only by asuitably qualified person.
-
Thisapplianceshouldbeconnectedtoacircuitwhichincorporatesan isolatingswitchprovidingfulldisconnectionfromthepowersupply.
-
Theveneeringofcabinetshastobefixedwithaheat-resistantglue, thatis abletowithstandatemperatureof100 °C.
- Adjacentfurnitureorhousingandallmaterialsusedforinstallationmustbe abletoresistatemperatureofmin.85 °C abovetheambienttemperatureof theroomtheapplianceisinstalledinduringoperation.
- Donotinstalltheapplianceinroomsoratareaswhichcontainflammable substancesaspetrol,gasorpaint.Thiswarningalsoreferstothevapourthese substancesrelease.
- Cooker-hoodsshouldbeinstalledaccordingtotheirmanufacturers' instructions.
- Thesafetydistancebetweenthehobandawall/cupboardaboveshouldbeat least450mm.
- Thesafetydistancebetweenthehobandanextractorhoodaboveshouldbeat least650mm.
- Householdequipmentandconnectionleadsmustnottouchthehobasthe insulationmaterialisusuallynoheat-resistant.
- Onlyusehobguardsdesignedbythemanufacturerofthecookingappliance orindicatedbythemanufactureroftheapplianceintheinstructionsforuseas suitableorhobguardsincorporatedintheappliance.Theuseofinappropriate guardscancauseaccidents.
- Failuretoinstalltheappliancecorrectlycouldinvalidateanywarrantyor liabilityclaims.
Operationandmaintenance ElectricalShockHazard
- Nevertouchthepowerplug, thepowerswitchorotherelectricalcomponents withwetordamphands. RISKOFELECTRICSHOCK!
- Operatetheappliancewith220\~240VAC/50-60Hzonly.
- Donotcookonabrokenorcrackedhob.Ifthehobsurfaceisbreakorcrack, switchtheapplianceoffimmediatelyatthemainspowersupply(wallswitch) andcontactaqualifiedtechnician.
- Switchthehoboffatthewallbeforecleaningormaintenance.
- Failuretofollowthisadvicemayresultinelectricalshockordeath.
HealthHazard
- This appliance complies with the electromagnetic safety standards. Your pacemaker must be designed in compliance with the corresponding regulations so it will not cause any interferences between the pacemaker and the appliance. Consult the manufacturer of your pacemaker or your doctor to decide whether it meets the forced requirements for any incompatibilities do exist.
HotSurfaceHazard
- Duringuse, accessible part of this appliance will become hot enough to cause burns.
- Donotletyourbody,clothingoranyitemotherthansuitablecookware contacttheceramicglassuntilthesurfaceiscool.
- Metallicobjectssuchasknives, forks, spoonsandpanlidsshouldnotbe placedonthehobsurfacesincetheycangethot
•Theaccessiblepartsoftheappliancebecomehotduringoperation, sokeep childrenaway.Touchingtheappliancewhileitisoperatingcancauseserious burns. - Handlesofsaucepansmaybehottotouch.Checksaucepanhandlesdonot overhangothercookingzonesthatareon.Keephandlesoutofreachof children.
- The appliance will become hot while operating and will retain and demitheate even ifithas stopped operating.
- Failuretofollowthisadvicecouldresultinburnsandscalds.
CutHazard
- Therazor-sharpbladeofahobscraperisexposedwhenthesafetycoveris retracted. Use with extremecareandalwaysstoresafelyandoutofreach of children.
- Failuretousecautioncouldresultininjuryorcuts.
Important safety instructions
- Storethismanualinasafeplacesoyoucanuseitwheneveritisneeded. Strictlyobservetheinstructionstoavoiddamagetopersonsandproperty.
- Onlyusecookwarewhichissuitabletobeusedonceramicglass;otherwise youwilldamagetheappliance.
- Donotswitchonthehobbeforeyouhaveputacookwareonit.
- Donotoperatetheapplianceunlessallcomponentsareinstalledproperly.
- Thehobshouldbecleanateverytime.Soiledcookingzonesdonottransfer theheatcorrectly.
- Protectthehobagainstcorrosion.
- Nevertrytorepairtheapplianceyourself.Repairscarriedoutby unauthorizedpersonscancauseseriousdamage.Iftheappliancedoesnot operateproperly,pleasecontacttheshopyoupurchasedthe applianceat.Originalsparepartsshouldbeusedonly.
- Whenyoumovetheappliance, holditatitsbaseandliftitcarefully. Keep the appliance in an upright position.
- Neverleavetheapplianceunattendedwheninuse.Boilovercausessmoking andgreasyspilloversthatmayignite.NEVERtrytoextinguishafirewith water,butswitchofftheapplianceandthencoverflamee.g.withalidorafire blanket.
- Neveruseyourapplianceasaworkorstoragesurface.
- Neverleaveanyobjectsorutensilsontheappliance.
- Neveruseyourapplianceforwarmingorheatingtheroom.
- Afteruse, alwaysturnoff the cooking zones and the hobas described in this manual (i.e. by using the touch controls).
- Donotallowchildrentoplaywiththeapplianceorsit,stand,orclimbonit.
- Donotstoreitemsofinteresttochildrenincabinetsabovetheappliance.
Childrenclimbingonthehobcouldbeseriouslyinjured.
- The cooking process hastobesupervised. A short term cooking process has to be supervised continuously.
- Alwayssupervisechildrenwhentheyareneartheappliance.
- Onlyallowchildrentousetheappliancewithoutsupervision,whenadequate instructionshavebeengivenbeforesothatthechildisabletousetheappliance inasafewayandunderstandstherisksofimproperuse.
- Donotleavechildrenaloneorunattendedintheareawheretheapplianceis inuse.
- Childrenorpersonswithadisabilitywhichlimitstheirabilitytousethe applianceshouldhavearesponsibleandcompetentpersontoinstructtheminitsuse.Theinstructorshouldbesatisfiedthattheycanusetheappliance withoutdangertothemselvesortheirsurroundings.
- Donotrepairorreplaceanypartoftheapplianceunlessspecifically recommendedinthemanual. Allotherservicingsshouldbedonebyaqualified technician.
- Donotallowanybodywhoisnotfamiliarwiththisinstructionmanualto operatetheappliance. Thesteamwillcauseseriousdamagetothelectric componentsoftheappliance.RISKOFELECTRICALSHOCK!
- Donotuseasteamcleanertocleanyourhob.
- Donotplaceordropheavyobjectsonyourhob.
- Donotstandonyourhob.
- Donotusepanswithjaggededgesordragpansacrosstheglasssurfaceas thiscanscratchtheglass.
- Donotusescourersoranyotherharshabrasivecleaningagentstocleanyour hob, asthesecanscratchthesurfaceanddamagetheceramicglass.
- If the supply cord is damaged, it must bere placed by the manufacturer or an authorized afters a less service or a qualified professional only, its service agent or similarly qualified persons in order to avoid a hazard. The appliance is intended for private use only.
- This appliance is intended to be used in domestic household environment only! Commercial use of any kind is not covered under the manufacturer's warranty!
•The appliance is intended for indoor-use only.
- The appliance is not intended to be operated for commercial purposes and in public transport.
- WARNING: The appliance and its accessible parts become hot during use. Careshould be takento avoid touching heating elements. Children less than 8 year so fages shall be kept away unless continuously supervised.
- This appliance can be used by children aged from 8 years and above and persons with reduced physical, sensory or mental capabilities or lack of experience and knowledge if they have been given supervision or instruction concerning use of the appliance in as a few way and understand the hazards involved.
- Children shall not play with the appliance. Cleaning and user maintenance shall not be made by children without supervision.
- WARNING: Unattended cooking on ahob with fator oil can be dangerous and may result in fire. NEVER try to extinguish a fire with water, but switch off the appliance and then cover flamee. g. with alidor a fire blanket.
- WARNING:Dangeroffire:donotstoreitemsonthecookingsurfaces.
- WARNING: If the surface is cracked, switch off the appliance to avoid the possibility of electric shock, for hobsurfaces of glass-ceramicorsimilar material which protect live parts
- Asteamcleanerisnottobeused.
- The appliance is not intended to be operated by means of an external timer or separateremote-controlsystem.
- The air vent so the appliance or its built-in structure (if the appliance is suitable for being built-in) must be completely open, unblocked and free of any kind of dirt.
- Incaseofaneventcausedbyatechnicalmalfunction,disconnectthe appliance from the mains. Report the malfunction to your service centre so it canberepaired.
- Donotuseadapters, multiplesocketsandextensioncordsforconnectingthe appliancetothemains.
- Donotcarryoutanymodificationstoyourappliance.
- Switchoffsoiledcookingzones.
- Switchoffthecompletehobifanydamageormalfunctionoccurs.
- Afteruse, alwaysswitchoffthecookingzonesasdescribedinthismanual (i.e. byusingthetouchcontrols). Donotrelyontheautodetectionfeaturetoswitch offthecookingzoneswhenyouremovethe cookware.
- Theratingplatemustnotberemovedormadeillegible,otherwisealltermsof thewarrantybecomeinvalid!
SAVETHESEINSTRUCTIONS
☆ Themanufactureranddistributorarenotresponsible foranydamageorinjuryintheeventoffailuretocomply withtheseinstructions.
Unpackingandpositioning
- Unpacktheappliancecarefully.
- The appliance may be equipped with the transport-protection. Be very careful and donotuse any aggressive or abrasive detergent storemoveresidual so the transport protection.
- Check that the appliance and the power cord are not damaged.
- Connecttheappliancetoadedicatedsocketonly.
- Donotinstalltheapplianceinaplacewhereitmaycomeincontactwithwaterorrain;otherwisetheinsulationoftheelectricalsystemwillbedamaged.
- Connecttheappliancetothemainsproperly.
Selectionofinstallationequipment
- Besurethethicknessoftheworksurfaceisatleast30mm.Pleaseselect heat-resistantworksurfacematerialtoavoidlargerdeformationcausedbythe heatradiationfromthehob.
- Forthepurposeofinstallationanduse,aminimumof50mmspaceshallbe preservedaroundthehole.
- Thesafetydistancebetweenthehobandawallcupboardaboveshouldbeat least450mm.
- Thesafetydistancebetweenthehobandanextractorhoodaboveshouldbeat least650mm.
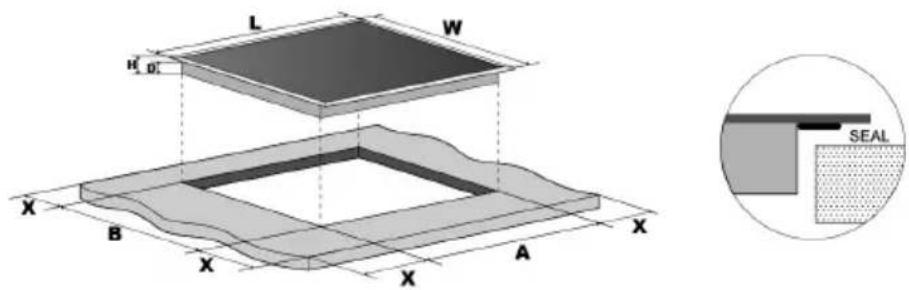
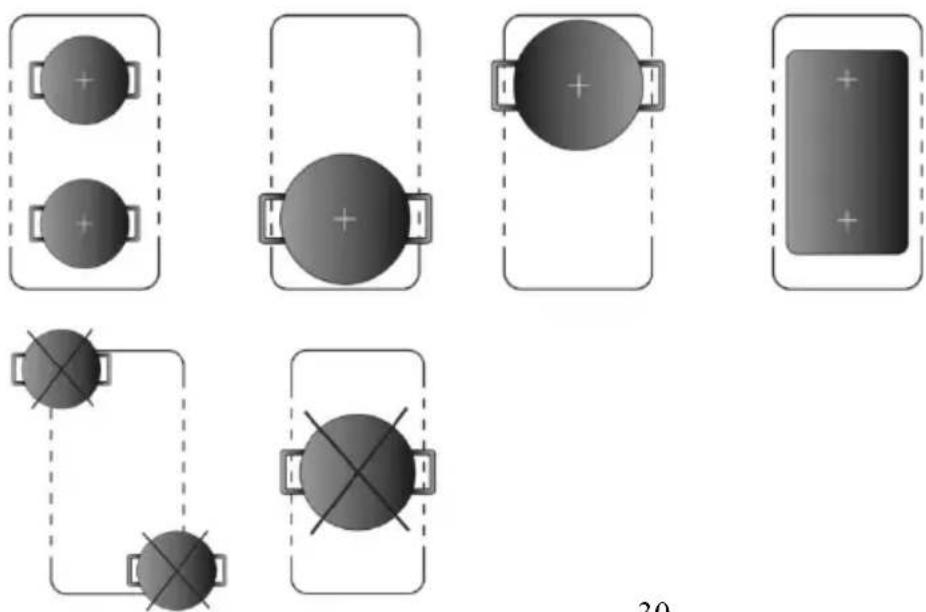
- Cutouttheworksurfaceaccordingtothesizesshowninthedrawing.
| Models | L(mm) | W(mm) | H(mm) | D(mm) | A(mm) | B(mm) | X(mm) |
| AIFZ2601S | 590 | 520 | 62 | 58 | 560 | 490 | 50 mini |
| AI3602 | 590 | 520 | 62 | 58 | 560 | 490 | 50 mini. |
| AI2302 | 290 | 520 | 62 | 58 | 260 | 490 | 50 mini. |
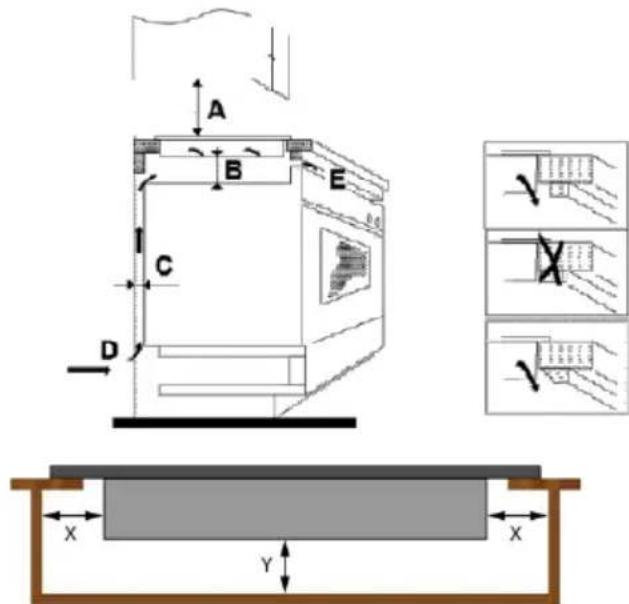
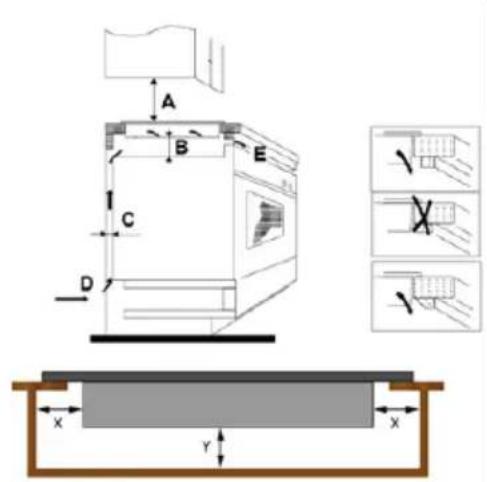
ATTENTION:
① Underanycircumstances, makesurethehobiswellventilated and the air
② inletandoutletarenotblocked.Ensurethehobisinggoodworkstate.As shownbelow:
③ Note: Thesafetydistancebetweenthehobandthecupboardaboveshould beatleast760mm.
| A(mm)760 | |
| B(mm)50minimum | |
| C(mm)30minimum | |
| DAirintake | |
| EAirexit5mm |
| X(mm)100minimum | |
| Y(mm)30minimum |
4 WeightandDimensionsareapproximate.Becausewecontinuallystriveto improveourproducts,wemaychangespecificationsanddesignswithout priornotice.
Beforeyouinstallthehob,makesurethat
① theworksurfaceissquareandlevel, andnostructuralmembersinterfere withspacerequirements.
② theworksurfaceismadeofaheat-resistantmaterial.
③ ifthehobisinstalledaboveanoven,theovenhasabuilt-incoolingfan.
④ the installation will comply with all clearance requirements and applicable standardsandregulations.
⑤ a suitable isolating switch providing full disconnection from the mains powersupplyisincorporatedinthepermanentwiring,mountedand positionedtocomplywiththelocalwiringrulesandregulations.
⑥ The isolating switch must be of an approved type and provide a 3 mm air gapcontactseparationinallpoles(orinallactive[phase]conductorsif thelocalwiringrulesallowforthisvariationoftherequirements).The isolatingswitchwillbeeasilyaccessibletothecustomerwiththehob installed.
⑦ you consult local building authorities and by-laws if in doubt regarding installation.
⑧ you use heat-resistant and easy-to-clean finishes (such as ceramic tiles) for the wallsurface surrounding the hob.
⑨ Thepowercablemustnotcomeintocontactwithcabinetdoorsor drawers.
⑩ Theappliancemustbesuppliedwithanadequateflowoffreshairfrom
outsidethe
cabinettothebaseofthehob.
Beforelocatingthefixingbrackets
Theunitshouldbeplacedonastable,smoothsurface(usethepackaging).Do notapplyforceontothecontrolsprotrudingfromthehob.
Stretch out and stick the supplied tape [02] along the underside edge of the hob, ensuretheendsoverlap.Trimoffanyexcesstapeanddisposeofit.
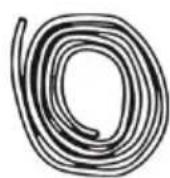
[02]

natural_image
Simple line drawing of a rectangular object with a coiled cable attached, no text or symbols present.locatingthefixingbrackets
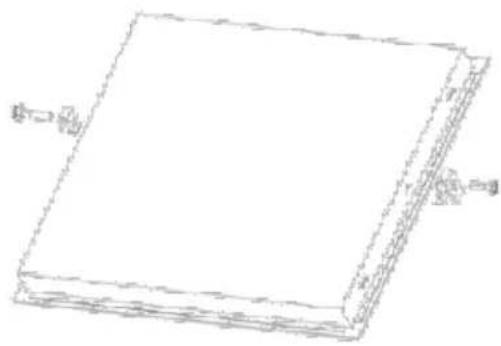
Fixthehobbracketsbyscrewtw obracketsonthebottomofhob(seepicture).
natural_image
Simple line drawing of a rectangular sheet or panel with two small protrusions on top (no text or symbols)
Theninstallthehobintothecutoutoftheworktop.Applygentledownwards pressureontothehobtopushitintotheworktop.
Whenyouhaveinstalledthehob,makesurethat
① thepowersupplycableisnotaccessiblethroughcupboarddoorsor drawers.
② there is adequate flow of air from outside the cabinetry to the base of the hob.
3 ifthehobisinstalledaboveadrawerorcupboardspace,athermal protectionbarrierisinstalledbelowthebaseofthehob.
④ theisolatingswitchiseasilyaccessiblebythecustomer.
Cautions
The hobmustbe installed by qualified personnel or technicians. We have professionals at your service. Plesenever conduct the operation by yourself.
② Thehobshallnotbemountedtocoolingequipment,dishwashersand rotarydryers.
③ The hob shall be installed such that better heat radiation can be ensured to enhance its reliability.
④ The wall and induced heating zone above the work surface shall withstand heat.
5 Toavoidanydamage,thesandwichlayerandadhesivemustberesistant toheat.
⑥ Asteamcleanerisnottobeused.
⑦ Thisobcanbeconnectedonlytoasupplywithsystemimpedanceno morethan0.427ohm.Incasenecessary,pleaseconsultyoursupply authorityforsystemimpedanceinformation.
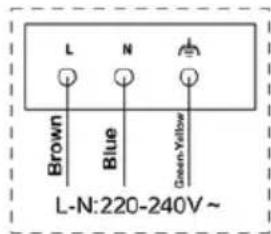
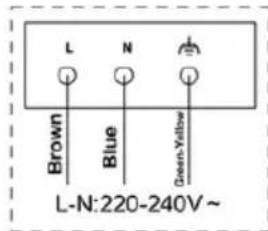
Connectingthehobtothemainspowersupply
If this appliance comes with a fitted 13 amp plug-top and can be plugged directly into as suitable no less than 13 amp socket.
Thepowersupplyshouldbeconnectedincompliancewiththerelevant standard,orasingle-polecircuitbreaker. Themethodofconnectionisshown asthediagram.(Ifthehobhasaplug,thereisnoneedtorefertothewiring diagram.)
AI3602AIFZ2601SAI2302

Thisobmustbeconnectedtothemainspowersupplyonlybyasuitably qualified person, who is familiar with and adheres to the local requirements and supplementaryregulationsofyourelectricitysupplier.Donotcarryoutthe
installationyourself.RISKOFELECTRICSHOCK.Beforeconnectingthe hobtothemainspowersupply,checkthat:
① Thedomesticwiringsystemissuitableforthepowerdrawnbythehob.
② The voltage correspond to the value given in the rating plate
③ The power supply cable sections can withstand the load specified on the ratingplate.
Toconnectthehobtothemainspowersupply, donotuseadapters, reducers, or branchingdevices, astheycancauseoverheatingandfire.
The powersupplycable must not touch any hot parts and must be positioned so that its temperature will not exceed 75^ C at any point.
Checkwithanelectricianwhetherthedomesticwiringsystemissuitable withoutalterations.Anyalterationsmustonlybemadebyaqualified electrician.

-
If the cable is damaged or needs replacing, this should be done by an after-sale technician using the propertools, so a avoid any accidents.
-
If the appliance is being connected directly to them, an omnipolar circuit breaker must be installed with a minimum gap of 3 mm between the contacts.
-
The installermustensure that the correct electrical connection has been made and that it complies with safety regulations.
-
Thecablemustnotbebentorcompressed.
-
The cable must be checked regularly and only replaced by a proper qualified person.
-
Your household powers supply must meet the power consumption of the appliance.
-
Whenthesocketisnotaccessiblefortheuserorafixedelectricalconnection oftheapplianceisrequired,anall-poledisconnectingdevicemustbe incorporatedduringinstallation.Disconnectingdevicesareswitcheswitha contactopeningdistanceofatleast3mm.TheseincludeLS-switches,fuses andprotectors(EN30335).Readtheinformationonthenameplateandthe connectiondiagrambeforeconnectingtheappliancetothemains.The electricitysupplymustbeperformedviaa16Aautomaticcut-out.Ifin
doubt,alwayscontactthelocalbuildingauthoritiesandconsulttherelevant legalprovisions.
3. GUIDETOTHEAPPLIANCE
AIFZ2601S
AI3602

Note: The illustration is a reference image, your device may differ
| Model#AIFZ2601S | AI3602 | AI2302 | |
| Powerofzone-11800 | /2200W1800/2200W1400/1600W | ||
| Powerofzone-21400 | /1600W1400/1600W1800/2200W | ||
| Powerofzone-31800 | /2200W2500/3000W | ||
| Powerofzone-41400 | /1600W// |
CONTROLPANEL
AIFZ2601S
AI3602
AI2302
Note: The illustration is a reference image, your device may differ
ControlPanelKeys
| KEY#FUNCTIONS | TIONSKEY#FUNCTIONS | ||
| Key 1. | ON/OFF | Key 6. | Timer |
| Key2.MINUS | SKey7.Boost | ||
| Key3.PLUS | Key9.Slidertouch | ||
| Key4.Zoneselection | Key11.Keepwarm | ||
| Key 5. | Child lock | Key 16. | Pause/Child lock |
BeforeusingyourNewHob
- Readthisguide, takingspecialnoteofthe‘SafetyWarnings’ section.
- Removeanyprotectivefilmthatmaystillbeonyourhob.
•Cleantheglass-ceramic
UsingtheTouchControls
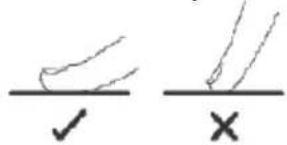
•Thecontrolsrespondtotouch,soyoudon'tneedtoapplyanypressure.
- Usetheballofyourfinger,notitstip(seefigurebelow).
- Youwillhearabeepeachtimeatouchisregistered.
- Makesurethecontrolpanelisalwaysclean,dry,andthatthereisnoobject (e.g.,autensiloracloth)coveringthem.Evenathinfilmofwatermay makethecontrolsdifficulttooperate.
ChoosingtherightCookware
- Useglass-ceramicsuitablecookwareonly.
- Thebaseofcookwaremusthaveaminimumdiameterrelevanttothe diameterofthecookingzoneyouusethecookwareon.
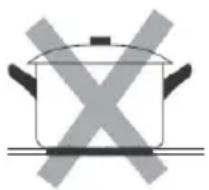
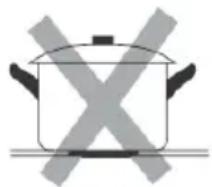
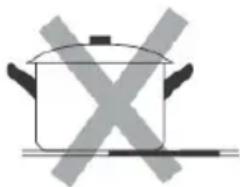
Donotusecookwarewithjaggededgesoracurvedbase.
natural_image
Simple line drawing of a cooking pot with crossed-out X marks (no text or symbols)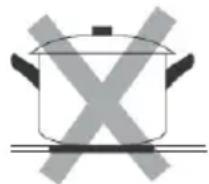
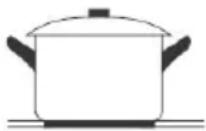
Make sure that the base of your pan is smooth, sits flat against the glass, and is the samesizeasthecookingzone.Alwayscentreyourpanonthecooking zone.
natural_image
Simple line drawing of a cooking pot with crossed-out X symbol (no text or labels)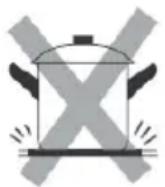
natural_image
Simple line drawing of a cooking pot with crossed-out X symbol (no text or labels)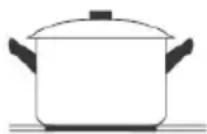
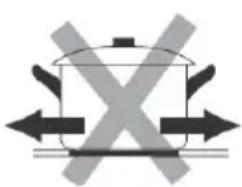
Alwaysliftpansoffthehob-donotslide,ortheymayscratchtheglass.
natural_image
Pure diagram of a cooking pot with crossed arrows indicating direction (no text or symbols)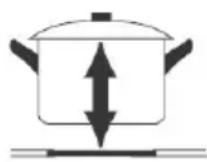
ForInductionhob

- Onlyferromagneticcookwaresaresuitableforinductioncooking.Lookfor theinductionsymbolonthepackagingoronthebottomofthepan.
- You can check whether your cookware is suitable by carrying out a magnet test. Move a magnet towards the base of the pan. If it is attracted, the pan is suitable for induction.
- Ifyoudonothaveamagnet:
- Putsomewaterinthepanyouwanttocheck.
2.Followthestepsunder'Tostartcooking'. - If does not flash in the display and the water is heating, the pan is suitable.
- Cookwaremadebythefollowingmaterialsisnotsuitable:purestainlesssteel, aluminumorcopperwithoutamagneticbase,glass,wood,porcelain, ceramic,andearthenware.
- Usepanswhichiswideenoughtocompletelycoverthecookingarea.Ifitis slightlywidertheenergywillbeusedatitsmaximumefficiency.Cookware diametersmallerthanbelowtablewillnotbesupportedbyinductionhob.
| Sizeofburner(mm) | Theminimumpot(diameter/mm) |
| 160120 | |
| 180140 | |
| 210160 | |
| 280220 |
While using unsuitable cookware the cooking zonedoes no the atup. The display goes off automatically after 1 minute even if you haven not placed suitable cookware on the cooking zone
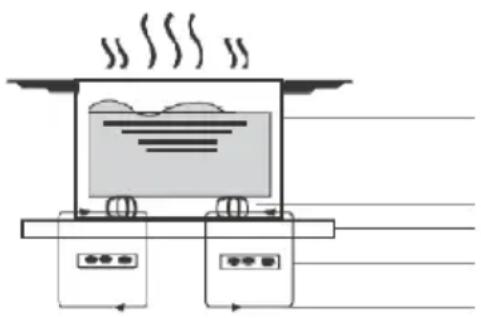
AWordonInductionCooking
Induction cooking is a safe, advanced and efficient cooking technology. It works by electromagnetic vibrations generating heat directly in the pan, rather than indirectly through heating the glass surface. The glass becomes hot only because the pane eventually warmsitup.
natural_image
Simple line drawing of a steaming appliance with steam rising, no text or symbols presentiron pot
magnetic circuit ceramic glass plate induction coil
UsingyourHobwithtouchcontrolpanel
Switchingthehobonandoff
Switchthehobonandoffbyusingthemainswitch.
-
TouchtheON/OFFkey(1).Alltheindicatorsshow“-”.TheHobisin standbymode.
-
Placeasuitablepanonthecookingzonethatyouwishtouse.
- Makesurethebottomofthepanandthesurfaceoftheglassarecleanand dry.
-
Selectzonebytouchcorrespondingzoneselectionkey(4),anindicatornext tothekeywillflash.
-
SelectpowerlevelbytouchingtheMINUS(2)orPLUSkey(3). Thepower canbechangedduringcookingasrequired.
*Fortheslidercontrolmodel,adjustheatsettingbytouchingtheslidercontrol. Thepowercanbechangedduringcookingasrequired.
- If you don't choose a heat setting within 1 minute, the hob will automatically switch off. You will need to start again from step 1.
- While cooking, the power level can be changed at any time.
Whenyouhavefinishedcooking
-
Selectingtheburnerthatyouwishtoswitchchoffbypassingthezone selectionkey(4).
-
TurnthecookingzoneoffbytouchingMINUSkey(2)untilpowerlevel reduceto"0".
-
Toturnthewholehoboff, touchtheON/OFFkey(1).
-
Youcanusetheresidualheatforsavingenergywhenstartinganewcooking procedureonacookingzonewhichisstillwarm/hot.
*Fortheslidercontrolmodel,turnthecookingzoneoffbytouchingtheslider to“I”untilpowerlevelreduceto”0”.
natural_image
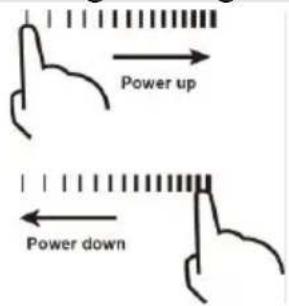
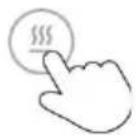
Simple line drawing of a hand pointing upward with vertical bars above (no text or symbols)Residual Heat Warning(Bewareofhotsurfaces)
Whenthehobhasbeenoperatingforsometime,therewillbesomeresidual heat. The power indicator will appear “H” or red light twinkling to warn you to keepawayfromit.
Itwilldisappearwhenthesurfacehascooleddowntoasafetemperature.Itcan alsobeusedasanenergysavingfunctionifyouwanttoheatfurtherpans,use thecookingzonethatisstillhot.
UsingBoostfunction
Toactivatetheboostfunction
- Select the zonewith boost function (with word "Boost").
- TouchBOOSTkey(7) and power level indications shows "P".
CancelBoostfunction
- SelectthezoneunderBOOSTmode.
- Touching the MINUS key (2) to cancel the Boost function, an level you want to set.
*Fortheslidercontrolmodel,touchingtheslidercontroltocanceltheBoost function.
NOTE: boostfunctioncanonlylastfor5minutes,afterthatthezonewillgoto level9automatically.
ChildLockFunction
YoucanuseChildlockfunctiontopreventunintendeduse(forexample childrenaccidentallyturningthecookingzoneson).
Tolockthecontrols
TouchtheChildlockkey(5)untiltheindicatorshow“Lo”.
Tounlockthecontrols
- Makesurethehobisturnedon.
- TouchandholdtheChildlockkey(5)forawhile.
- Youcannowstartusingyourhob.

WhenthehobisinChildlockmode, allthecontrolsaredisableexceptthe mainswitchkey, youcanalwaysturnthehoboffwiththemainswitchinan emergency, butyoushallunlockthehobfirstinthenextoperation.
Pause/Childlockfunction(OnlyforAI3602)
Key(16) combinesthepause and childlock function.
YoucanusePausefunctiontostopallheatingbutstillkeepallthesettingyou set,incaseyourhaveanyinterruptionwhencooking. Youcanrevertallsetting backeasilywiththisfunction.
YoucanalsouseChildlockfunctiontopreventunintendeduse(forexample childrenaccidentallyturningthecookingzoneson).
TousePausefunction
TouchthePause/Childlockfunctionkey(16),alltheheatingzonesstop working,alltheindicatorsshow“||||”.
CancelPausefunction
TouchingthePause/Childlockfunctionkey(16)again,alltheheatingzones willreverttoitsoriginalsetting.
NOTE: The function is available when none or multiheating zones are working.
NOTE: If you don't cancel the stop Pause modewith in 1 hour, the induction hob will automatically switch off.
Tolockthecontrols
TouchthePause/Childlockfunctionkey(16)untiltheindicatorshow“Lo”.
Tounlockthecontrols
- Makesurethehobisturnedon.
- TouchandholdthePause/Childlockfunctionkey(16)forawhile.
- Youcannowstartusingyourhob.

WhenthehobisinChildlockmode, allthecontrolsaredisableexceptthe mainswitchkey, youcanalwaysturnthehoboffwiththemainswitchinan emergency, butyoushallunlockthehobfirstinthenextoperation.
AutoShutdown
Safetyfeatureofthehobisautoshutdown. Thisoccurswheneveryouforgetto switchoffacookingzone. Thedefaultshutdowntimesareshowninthetable below:
| Power l | e | v | e | l | 1 | 2 | 3 | 4 | 5 |
| Defaultworkingtimer(hour) | 8 | 8 | 8 | 4 | 4 | 4 | 2 | 2 | 2 |
6 7 8 9
UsingtheTimer
Youcanusethetimerintwodifferentways:
- Youcanuseitasaminuteminder. In this case, the timer will not turn any cooking zone off when the set time is up.
- Youcanuseitasacutofftimertoturnoneormorecookingzonesoffwhen thesettimeisup.
- Youcansetthetimerupto99minutes.
UsingtheTimerasaMinuteMinder
- Makesurethehobisturnedon, and none cooking zone is in selecting mode.
Note: you can usetheminuteminder before or after cooking zonesetting finished.
- Touchtimerkey(6), "05" will show in the timer display. Then number to represent units digit will flash.
- Set the desired minutes by touching the MINUSkey(2) or PLUSkey(3).
*Fortheslidercontrolmodel,setthedesiredminutesbytouchingtheslider control.

- Touchtimerkeyagain,thennumbertorepresenttensdigitwillflash.
- setthedesireddozensofminutesbytouchingMINUSkey(2)orPLUSkey (3).
*Fortheslidercontrolmodel,setthedesireddozensofminutesbytouchingthe slidercontrol.
- Whenthetimeisset, it will begin to count down immediately. Th display will show the remaining time.
- Asignalsoundwillbeepsfor10secondsandthetimerindicatorshows “”whenthesettingtimefinished.
Settingthetimertoturnoneormorecookingzonesoff Ifthetimerissetononezone:
-
Selecting the heating zone key (4) that you want to settimer.
-
Touchtimerkey(6), the digits "05" will show in the timer display and the "5" flashes.
- Setthedesiredtimeinthecontrolpanel.
- Whenthetimeisset, it will begin to count down immediately. Th display will show the remaining time.
NOTE: Thereddotnexttopowerlevelindicator(eg.)willilluminate indicating that the zone is intimer mode.
- Whencookingtimerexpires, the corresponding cookingzonewillbeswitch offautomatically.
NOTE: Other cooking zones will keep operating if they are returned on previously.
Ifthetimerissetonmorethanonezone:
- Whenyousetthetimeforseveralcookingzonessimultaneously, decimal dotsoftherelevantcookingzonesareon. Theminutedisplayshowsthe remainingtime. Thedotofthecorrespondingzoneflashes.
- Oncethecountdowntimerexpires, thecorrespondingzonewillswitchoff. Thenitwillshowtheremainingactivatedtimerandthedotofcorrespondingzonewillflash.
- To check the remaining times on a particular zone, touch the zone(4) and the corresponding timer will be shown in the timer indicator.
Cancelthetimer
- Selectthezonethatyouwanttocancelthetimer.
- Touchthetimerkey(6), the indicator will flash.
- Setthetimerto "00", thetimeriscancelled.
Keepwarmfunction
Thewarmingfunctionisusedtokeepcookedfoodwarm.Hencethisfunction canalsobeusedasmeltingorsimmerfunction.
Toenterkeepwarmmode
- Selecting the heating zone key (4) that you want to set keep warm.
- Pressthekey(11)tostartthekeepwarmfunction,

- Waitforawhile, theindicatorshow”, thezoneisworkingunderkeep warmmode.
Toexitkeepwarmmode
Selectingtheheatingzonekey(4)thatyouwanttocancel,thenpressthekey (11)tocancelthekeepwarmfunction.
BridgeZone
If your induction hobhas Bridgezone function, the are acan be used as a single bigger zone, to have better cooking experience on some special cook ware like griddle etc.
- Bridgeareaismadeoftwoindependentinductorsthatcanbecontrolled separately. Whenworkingasbridgezone,acookwareismovedfromone zonetotheotherwithintheareakeepingthesamepowerlevelofthezone wherethecookwareoriginallyplaced,andthepartthatisnotcoveredby cookwareisautomaticallyswitchedoff.
IMPORTANT: Make sure to place the cookwares centered on the single cookingzone. The ideal recipe is an oval or rectangular saucepan, or a saucepan. Below is thereference:
TouseBridgezonefunction
- ToactivateBridgearea, pressfrontleftzonekey(4) and rearleftzonekey(4) simultaneously until the zone indicator show “ = ” and power level.
- Setthepowerlevel, and the area is working under bridgemode.
TocancelBridgezonefunction
- Toucheitherzonekey(4), setthepowertouseindependently. ThenBridge zonefunctioniscancelled.
COOKINGGUIDELINES

Take care when frying a the oil and fat heat up very quickly, particularly if you're using Power Boost. At extremely high temperaturesoilandfatwillig-nitespontaneouslyandthispresentsaserious firerisk.

NEVER trytoextinguishafirewithwater,butswitchoffthe applianceandthencoverflamee.g.withalidorafireblanket.
CookingTips
- When food comesto the boil, reducethe powersetting.
- Usingalidwillreducecookingtimesandsaveenergybyretainingtheheat.
- Minimisetheamountofliquidorfattoreducecookingtimes.
- Startcookingonahighpowerandreduceitwhenthefoodhasbeenwell heated.
SIMMERING/COOKINGOFRICE
- Simmeringiscookingwithatemperatureofapprox.850C.Atthis temperaturesmallbubblesascendtothesurfaceofthecookingliquid. Simmeringisaperfectwaytocookdelicioussoupsandstewsastheflavoursof thefoodunfoldcompletelywithoutbeingover-heated.Youshouldalsocook egg-basedsaucesandsaucesthickenedwithflourinthisway.
- Some cooking procedures, including the cooking of fricewith the absorption-method (= the water is consumed completely), require a setting abovethelowest power level, so the food is cooked within there recommended cooking time.
STEAKS
- Takethemeatoutofthefridgeandletitrestatroomtemperatureforapprox.
20minutes. - Heatupapanwithaheavybase.
- Rubbothsidesofthesteakwithoil. Drizzleasmallamountofoilintothe hotpanandplacethesteakintothepan.
- Turnthemeatjustoncewhilecooking.Theexactcookingtimedepends fromthesizeofyoursteakandyourindividualpreferences(medium, medium rareetc.).Sothecookingtimeofeachsidemayvaryfrom2to8minutes.Press thesteaktocheckthecookingresult-afirmsteakiswelldone.
5.Leavethesteakonawarmplateforafewminutes;soitwillbecometender.
ASIAN-STYLECOOKING
- Chooseawokwithaflatbaseorabigpan.
- Prepare all ingredients and the cooking utensils you need. Asian-style cookingshouldworkfast.Ifyouwanttocookabigamountoffood,you shoulddividethefoodintoseveralportions.
- Preheatthewok/panbriefly and addtwotablespoonsofoil.
- Cookthemeatfirst.Putitasideandkeepitwarm.
- Now cook the vegetable. When the vegetable is shot but still crisp, reduce the power level. Add themeat and, if desired, as auce.
- Sautéthecompletefoodcarefullysoallcomponentsarehot.
- Serveimmediately
Powerlevels
| POWERLEVEL:SUITABILITY(EXAMPLES): | |
| Level1-2 | •Delicatewarmingofsmallamounts offood.•Meltingofchocolate,butteretc.•Foodwhichburnsquickly.•Gentlesimmering.•Slowwarming. |
| Level3-4 | •Reheating.•Fastsimmering.•Rice. |
| Level5-6•Pancakes. | |
| Level7-8 | •Sautéing.•Pasta. |
| Level9 | •Asian-style.•Frying.•Reachingoftheboilingpointofsoup/water. |
Savingofenergy
• Usepropercookwareforcooking.
- Cookwarewiththick, flatbasescansaveupto 1/3 of electricenergy.
Remembertocoveryourcookwareifpossible;otherwiseyouwillusefour timesasmuchenergy!
- Matchthesizeofthecookwaretothesurfaceoftheheatingplate.A cookwareshouldneverbesmallerthanaheatingplate.
- Ensure that the heating plates and the cookware are clean.
- Soilspreventheat-transfer.Repeatedlyburnt-onspillagescanoftenbe removedbyproducts,whichwilldamagetheenvironment,only.
- Donotuncoverthecookwaretoooften(awatchedpot-contentwillneverboil!).
- Youcanusetheresidualheatforsavingenergywhenstartinganewcooking procedureonacookingzonewhichisstillwarm/hot.
4. CAREANDCLEANING
- Cleanthehobafteruse.
- Cleantheglass-ceramicwithacommerciallyavailabledetergentfor glass-ceramic.Useaspecialspongeandwarmwater.
- Removeresidualsontheglass-ceramicwithasoftcloth.
- Donotscrubtheglass-ceramic.
- Removeresidualswithasilicon-madescraper,whichissuitablefor glass-ceramic.Suchscrapersarecommercialavailable.
| What?How? | |
| Dirtystuffonglass (fingerprints,marks, residualstainsor non-sugaryspillovers ontheglass). | 1.Switchoffthepowerofthehob.2.Applyahobcleanerforglassceramicwhilethe glassisstillwarm(butnohot!)3. Rinse and wipe dry with a clean cloth or paper towel.4.Switchthepowertothehobbackon. |
| Boilovers, melts, and hot sugary spills on theglass | Removetheseimmediatelywithafishslice, palette knife or razor blade scraper suitable for ceramic glass hobs, but beware of hot cooking zone surfaces which arestillhot.1.Switchthepowertothehoboffatthewall.2. Hold the blade or utensil at a 30° angle and scrape thesoilingorspilltoacoolareaofthehob.3. Clean the soiling or spill up with a dish cloth or papertowel.4. Proceed as described in steps 2 - 4 in the previous section. |
| Spilloversonthe touchcontrols | 1.Switchoffthepowerofthehob.2.Removethespillovers3. Wipe the touch control area with a clean damp sponge or cloth, then wipe the area completely dry withapapertowel.4.Switchthepowertothehobbackon. |
IMPORTANT!
- Whenthehobisswitchedoff,therewillbeno‘hotsurface’indicationbutthe cookingzonemaystillbehot!Takeextremecare!Disconnecttheappliance fromthemainsbeforemaintenance(fuseboxofyourhouseholdpower supply)!
- Do not use a steam cleaner. Risk of electric shock! The steam can damage the electriccomponentsoftheappliance.
- Heavy-dutyscourers, somenylonscourersandharsh/abrasivecleaningagents mayscratchtheglass. Alwaysreadthelabeltocheckifyourcleanerorscourer issuitable.
- Never leave cleaning residue on the hob: the glass may become stained.
- Removestainsleftbymeltsandsugaryfoodorspilloversassoonaspossible. Iflefttocolontheglass,theymaybedifficulttoremoveorevenpermanently damagetheglasssurface.
•Cuthazard:whenthesafetycoverisretracted,thebladeinascraperis razor-sharp. Use with extreme care and always store safely and out of reach of children.
•Thehobmaybeepandturnitselfoff,andthetouchcontrolsmaynotfunction whilethereisliquidonthem.Makesureyouwipethetouchcontrolareadry beforeturningthehobbackon.
5. QUESTIONSANDQUICKCHECK
EMERGENCYMEASURES:
- Switchofftheentireappliance.
- Disconnect the appliance from themains (fusebox of your household power supply).
- Contact the shop you purchased the appliance at.
➢ Checktheschedulebelowbeforeyoucontacttheshopyoupurchasedthe applianceat.
| ProblemPossiblecausesandWhattodo | |
| Thehobcannotbe turnedon. | Nopower.1.Checktheconnectiontothepowersupply andmakesureitisswitchedon.2.Checkwhetherthereis apoweroutageinyourhomeorarea.3.Checkthe householdfusebox.4.Ifyou’vecheckedeverythingand theproblempersists,callaqualifiedtechnician. |
| Thetouchcontrols areunresponsive. | ThecontrolpanelislockedbyChildlockfunction.Unlockthecontrols.Seesection‘Usingyourhob’for instructions. |
| Thetouchcontrols aredifficultto operate. | Theremaybeaslightfilmofwateroverthecontrolsoryoumaybeusingthetipofyourfingerwhentouchingthe controls.Makesurethetouchcontrolareaisdryandusetheballof yourfingerwhentouchingthecontrols. |
| Theglassisbeing scratched. | Rough-edgedcookware.Unsuitable,abrasivescoureror cleaningproductsbeingused.Usecookwarewithflatandsmoothbases.See‘Choosing therightcookware’.See‘Careandcleaning’. |
| Somepansmake cracklingor clickingnoises. | Thismaybecausedbythematerialofyourcookware (layersofdifferentmetalsvibratingdifferently). Thisisnormalforcookwareanddoesnotindicateafault. |
| Theinductionhob makesalow hummingnoiseat somecertainpower setting. | Thisiscausedbythetechnologyofinductioncooking. Thisisnormal,butthenoisemayquietdownordisappear completelywhenyouchangethepowerlevelsetting. |
| Fannoiscoming fromtheinduction hob. | Acoolingfanisbuiltinyourinductionhobwhichprevent theelectronicsfromoverheating.Itmaycontinuetorun evenafteryou’veturnedtheinductionhoboff.Thisis normalandneedsnoaction.Donotswitchthepowerto theinductionhoboffatthewallwhilethefanisrunning. |
| Pansdonot becomehotand appearsinthe display. | Theinductionhobcannotdetectthepan.Checkthepan basesize,ifitistoosmallforthecookingzoneornot properlycentered.Usecookwaresuitableforinduction cooking.Seesection‘Choosingtherightcookware’. Centrethepanandmakesurethatitsbasematchesthe sizeofthecookingzone. |
| Theinductionhob orazoneturnitself offunexpectedly.A tonesoundsand errorcodeis displayed. | Technicalfault.Pleasenotedowntheerrorcode(typicallyalternatingwith oneortwodigitsinthecookingtimerdisplay)..switchthe powertotheinductionhoboffatthewall,andcontacta qualifiedtechnician. |
If the appliances shows a malfunction not noted on the schedule above or if you have checked all items on the aboves schedule but the problem still exists, please contact the shop you purchase the appliance at.
6.ERRORCODE
Ifanabnormalitycomesup, the hobwillentertheprotective state automatically and display corresponding protective codes:
ErrorCodeforInductionhob
| ProblemPossiblecausesWhattodo | |
| E1Signallost(PCB failure) | Pleasecontactaftersalesservice. |
| E2/E3Abnormalhigh/Low inputvoltage | Stopcookingandwaituntilinput voltagebacktonormal.Ifnotplease contactservicecenter. |
| E4/E5/E6Thermistorfailure.Pleasecontactservicecentertorepair. | |
| E7Abnormalhigh temperature(dry burning) | Cutoffpower,waitfor30minand switchon.Ifstillnotworking,pleasecontact service. |
| E8/E9FailureofIGBT sensor | Pleasecontactservicecentertorepair. |
| E0IGBTOverheatCheckifthefanisstillw orking.Ifnot pleasecontactservicecentertorepair. | |
| EEDisplayPCBfailure.Pleasecontactservicecenter. | |
The above are the judgment and inspection of common failures.
ATTENTION! To avoid danger, please do not disassemble the unit by yourself!
7.TECHNICALSPECIFICATION
| CookingHob | AIFZ2601S | |||||
| Typeofhob | Electric | |||||
| CookingZones | 4Zones | |||||
| SupplyVoltage | 220-240V~50-60Hz | |||||
| InstalledElectricPower | 7360W | |||||
| Forcircularcookingzonesorarea:diameterofusefulsurfaceareaperelectricheatedcookingzone,roundedtothenearest5mm | 1601 | 801801 | 60N/A | mm | ||
| Energyconsumptionpercookingzoneorareacalculatedperkg(ECelectric cooking) | 185.5 | 192.517 | 5.3207 | 3N/A | Wh/kg | |
| Energyconsumptionofthehob,calculatedperkg(ECelectrichob) | 190.2 | Wh/kg | ||||
| CookingHob | AI3602 | |||||
| Typeofhob | Electric | |||||
| CookingZones | 3Zones | |||||
| SupplyVoltage | 220-240V~50-60Hz | |||||
| InstalledElectricPower | 6680W | |||||
| Forcircularcookingzonesorarea:diameterofusefulsurfaceareaperelectricheatedcookingzone,roundedtothenearest5mm | 1601 | 80280N | AN/A | Cm | ||
| Energyconsumptionpercookingzoneorareacalculatedperkg(ECelectric cooking) | 185.5 | 192.519 | 4.4N/AN/A | Wh/kg | ||
| Energyconsumptionofthehob,calculatedperkg(ECelectrichob) | 190.8 | Wh/kg | ||||
| CookingHob | AI2302 | |||||
| Typeofhob | Electric | |||||
| CookingZones | 2Zones | |||||
| SupplyVoltage | 220-240V~50-60Hz | |||||
| InstalledElectricPower | 2990W | |||||
| Forcircularcookingzonesorarea:diameterofusefulsurfaceareaperelectricheatedcookingzone,roundedtothenearest5mm | 1601 | 80N/AN | N/AN/A | Cm | ||
| Energyconsumptionpercookingzoneorareacalculatedperkg(ECelectric cooking) | 186.3 | 193.1N | AN/AN | N/A | Wh/kg | |
| Energyconsumptionofthehob,calculatedperkg(ECelectrichob) | 189.7 | Wh/kg | ||||
8. WASTEMANAGEMENT

natural_image
Symbol of a trash bin crossed out by two diagonal lines (no text or labels)
DISPOSAL: Donot disposethisproduct asunsorted municipalwaste. Collectionofsuch wasteseparatelyfor specialtreatmentis necessary. Donot removethesymbol fromtheappliance.
This appliance is labeled in compliance with European directive 2002/96/EC for Waste Electrical and Electronic Equipment (WEEE). By ensuring that this appliance is disposed of correctly, you will help prevent any possible damage to the environment and to human health, which might otherwise be caused if it was disposed of in the wrong way.
Thesymbolontheproductindicatesthatitmaynotbe treatedasnormalhouseholdwaste.Itshouldbetakentoa collectionpointfortherecyclingofelectricaland electronicgoods.
- Oldandunusedappliancesmustbesendfordisposal totheresponsiblerecyclingcentre.Neverexposito openflames.
- Before you dispose of an old appliance, render it inoperative. Unplug the appliance and cutoff the entire power cord. Dispose of the power cord and the plugin immediately.
- Disposeofanypaperandcardboardintothe correspondingcontainers.
Thisappliancerequiresspecialistwastedisposal. For furtherinformationregardingthetreatment, recover and recycling of this product please contact your local council, your household wasted disposalservice, or the shop where you purchased it.
Formoredetailedinformationabouttreatment,recovery andrecyclingofthisproduct,pleasecontactyourlocal cityoffice,yourhouseholdwastedisposalserviceorthe shopwhereyoupurchasedtheproduct.
www.aspes.es
ATTENZIONE :
INSTALLAZIONE
natural_image
Simple line drawing of a rectangular block with a coiled cable attached, no text or symbols present.AI2302

natural_image
Three identical cooking pots with crossed X marks, no text or symbols presentnatural_image
Four identical cooking pots with crossed-out X marks, no text or symbols presentnatural_image
Two pictograms of cooking pots with directional arrows indicating movement (no text or symbols)
natural_image
Symbol of a trash bin crossed with two crossed lines and a solid black rectangle below (no text or labels)ATTENTION :
- Weight and Dimensions are approximate. Because we continually strive to improve our products, we may change specifications and designs without prior notice.
| X (mm) | Y (mm) |
| 100 minimum | 30 minimum |
INSTALLATION
natural_image
Simple line drawing of a rectangular block with a coiled cable attached, no text or symbols present.AI2302

natural_image
Three identical cooking pots with crossed-out X marks, no text or symbols presentnatural_image
Four identical cooking pots with crossed X marks, shown in sequence (no text or symbols)natural_image
Two icons: a crossed-out pot and a cooking pot with directional arrows, no text or symbols present.