GBM 87.1 - Lawn mower Güde - Free user manual and instructions
Find the device manual for free GBM 87.1 Güde in PDF.

User questions about GBM 87.1 Güde
0 question about this device. Answer the ones you know or ask your own.
Ask a new question about this device
Download the instructions for your Lawn mower in PDF format for free! Find your manual GBM 87.1 - Güde and take your electronic device back in hand. On this page are published all the documents necessary for the use of your device. GBM 87.1 by Güde.
USER MANUAL GBM 87.1 Güde
Translation of the original instructions
FR
Notice originale
IT
ENGLISH Please read the instructions carefully before starting the machine.
English Technical Data / Device description / Safety Warnings / Specified Conditions of Use / Emergency procedure / Symbols / Maintenance / Disposal / Guarantee / Service 24
text_image
Product packaging image showing a red manual lawn tool with text indicating quantity above 20 kg
natural_image
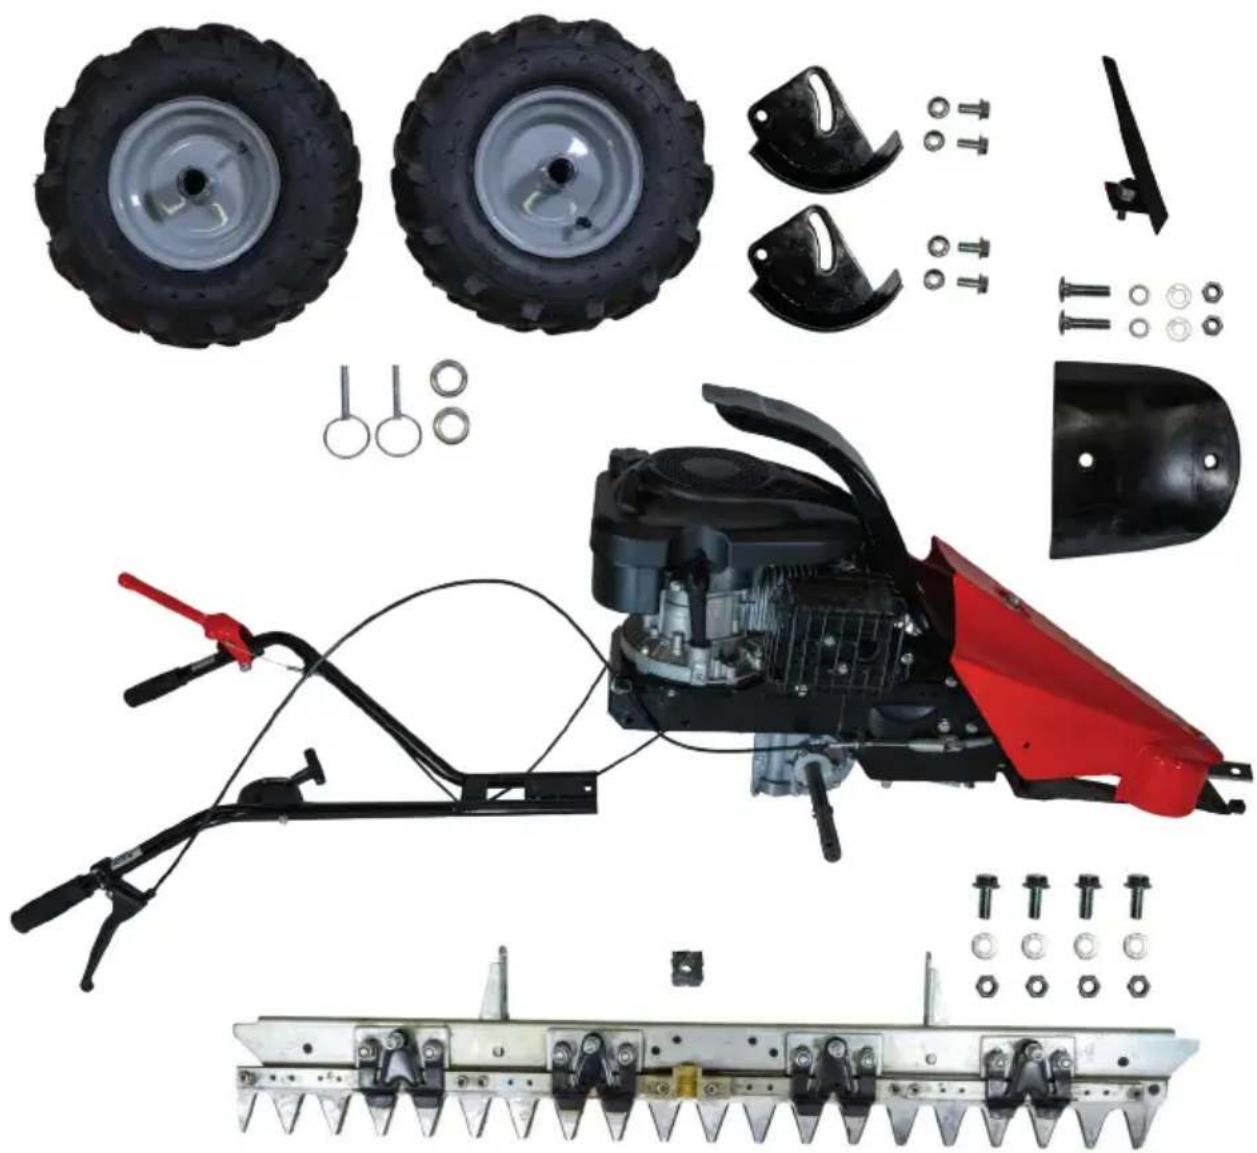
Exploded view of a red and black tiller machine showing components like tires, blades, and tools (no text or symbols)Montage
EN Assembly FR Assemblage IT Montaggio ES Montaje NL Montage CZ Montáž SK Montáž PL Montaž HU Szerelés
2-4

Inbetriebnahme
EN starting-up the device FR Mise en service IT Messa in funzione ES Puesta en marcha NL Toestel in gebruik nemen CZ Uvedení do provozu SK Uvedenie do prevádzky PL Uruchamianie urządzenia HU A készülék üzembe helyezése ____
5-9

Betrieb
EN Operation FR Fonctionnement IT Esercizio ES Operação NL Gebruik CZ Provoz SK Prevádzka PL Operacja HU Üzemeltetés.
10-13

Wartung
EN Maintenance FR Entretien IT Manutenzione ES Mantenimiento NL Onderhoud CZ Údržba SK Údrzba PL Konserwacja HU Karbantartás
14-17
natural_image
Illustration of a red and black manual push tool next to a cardboard box, with an upward arrow indicating motion (no text or symbols)


natural_image
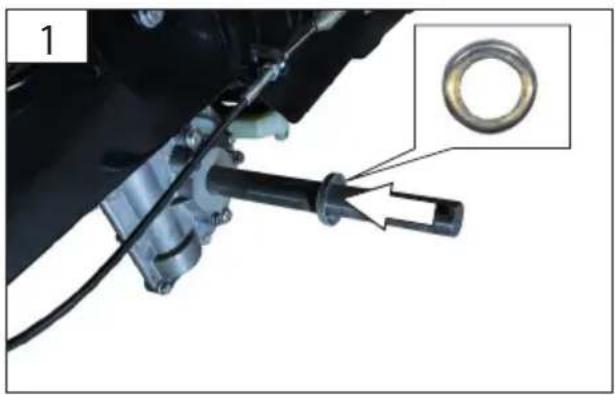
Mechanical assembly diagram showing a shaft and housing with a magnified inset of a ring component (no text or symbols)
natural_image
Mechanical assembly diagram showing two large tires mounted on a central shaft, with an inset close-up of two tires (no text or symbols visible)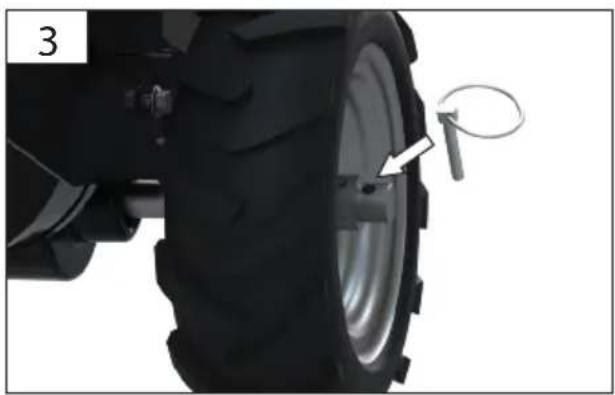
natural_image
Close-up of a tractor wheel with a mounted sensor or clamp, showing no text or symbols on the vehicle itself.
text_image
4 1 2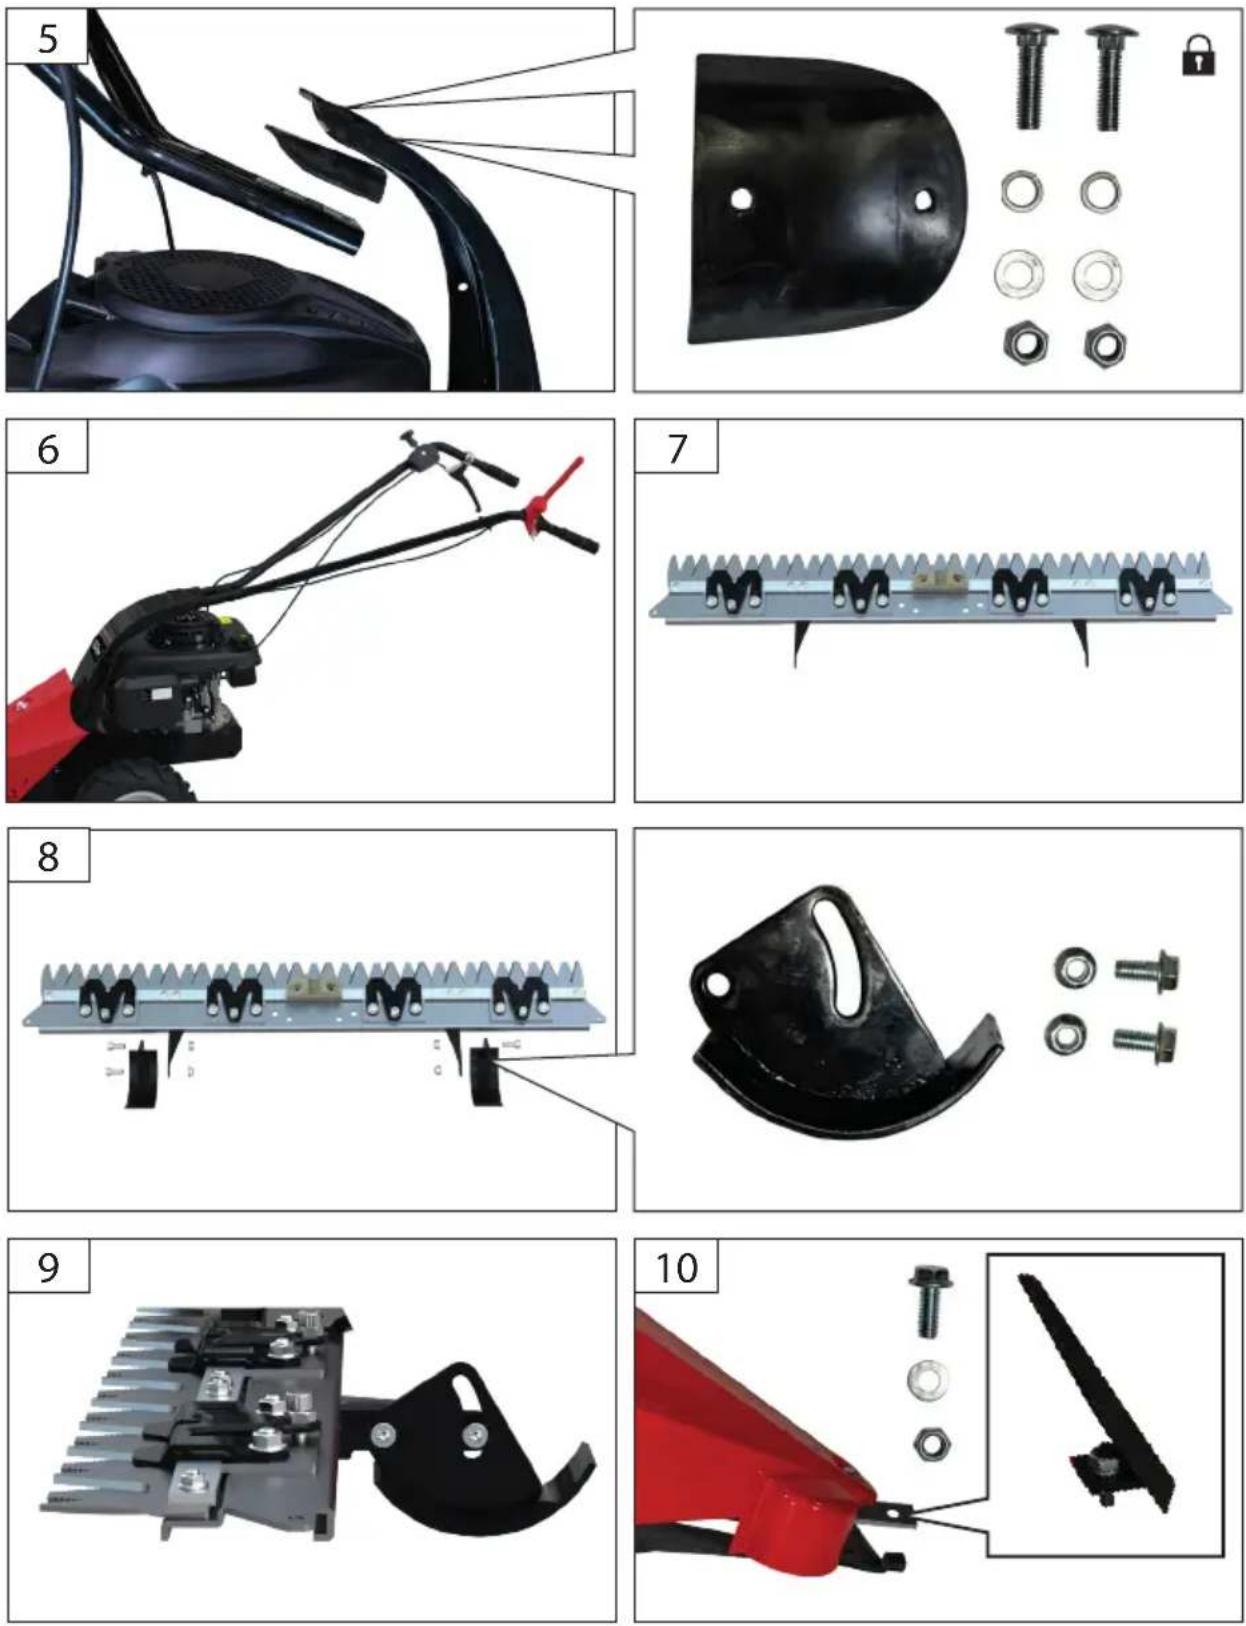
natural_image
Close-up of a red aircraft component with a black blade and a small inset showing a circular hole (no text or symbols visible)
natural_image
Industrial machine with mechanical components and a close-up inset showing a red component (no visible text or symbols)
natural_image
Close-up of a red vehicle's wheel assembly with bolt holes and a magnified inset showing four bolts (no text or symbols)
natural_image
Close-up of a car battery panel with bolts and a red cover, no visible text or symbols
natural_image
Red and black tracked agricultural machine with a green checkmark indicating inspection or status (no text or symbols on the machine itself)
15W 40
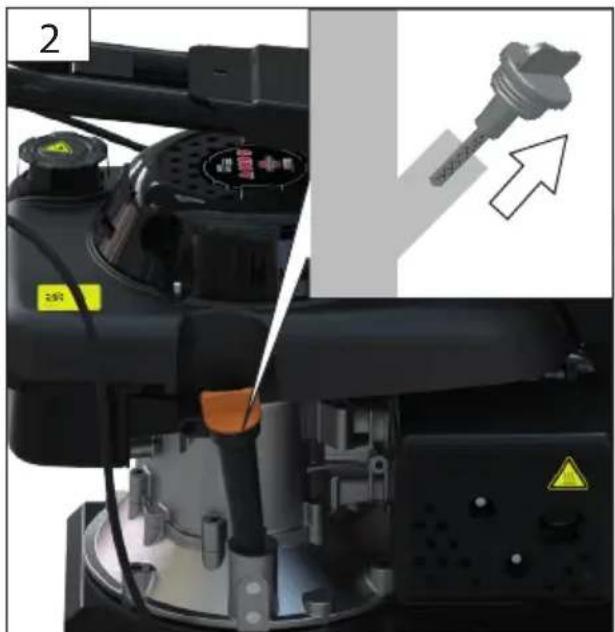
EN Before initial start-up, it is essential to fill the engine with engine oil. Check the oil level before each start-up.
natural_image
Illustration of a red lawn mower with a green checkmark indicating inspection or completion (no text or symbols present)2
natural_image
Close-up of a mechanical device with a highlighted screw and warning labels, showing internal components and a close-up view (no readable text or symbols)


natural_image
Illustration of a hand holding a small object with a pipette inserted, no text or symbols present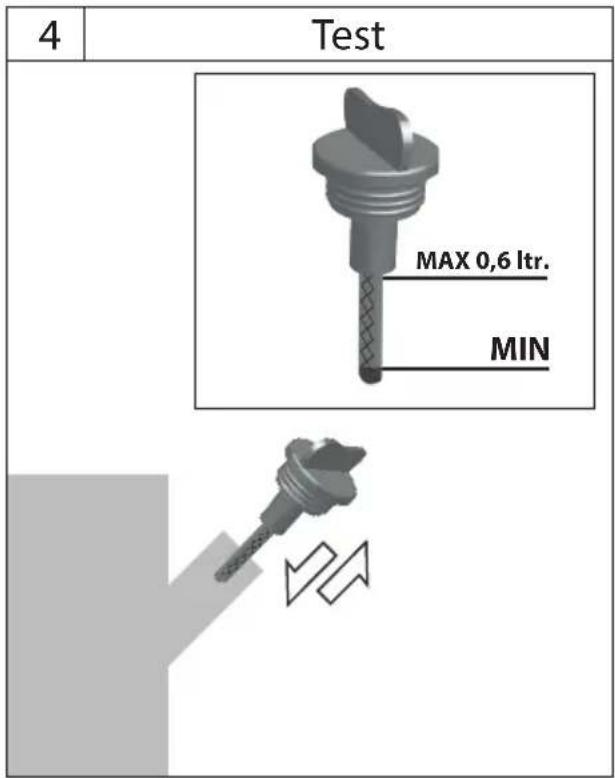
text_image
4 Test MAX 0,6 ltr. MIN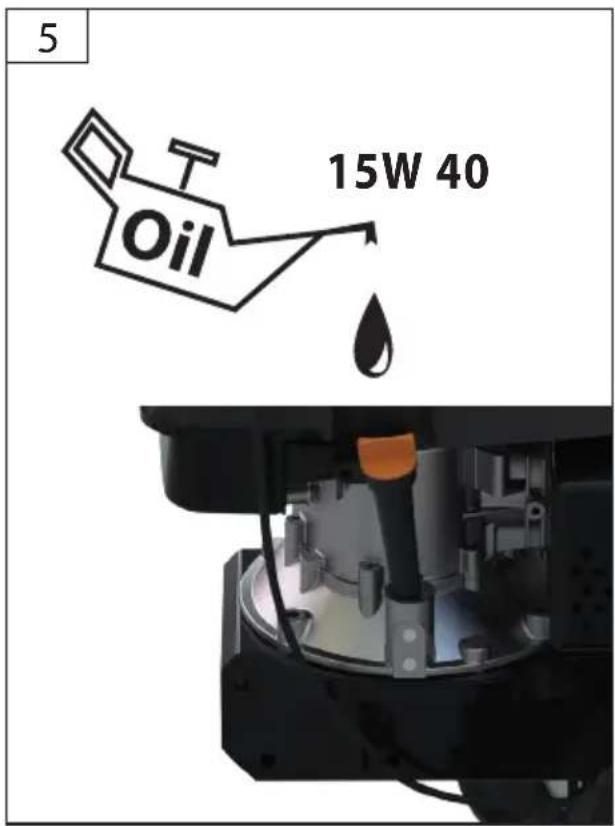
text_image
5 Oil 15W 40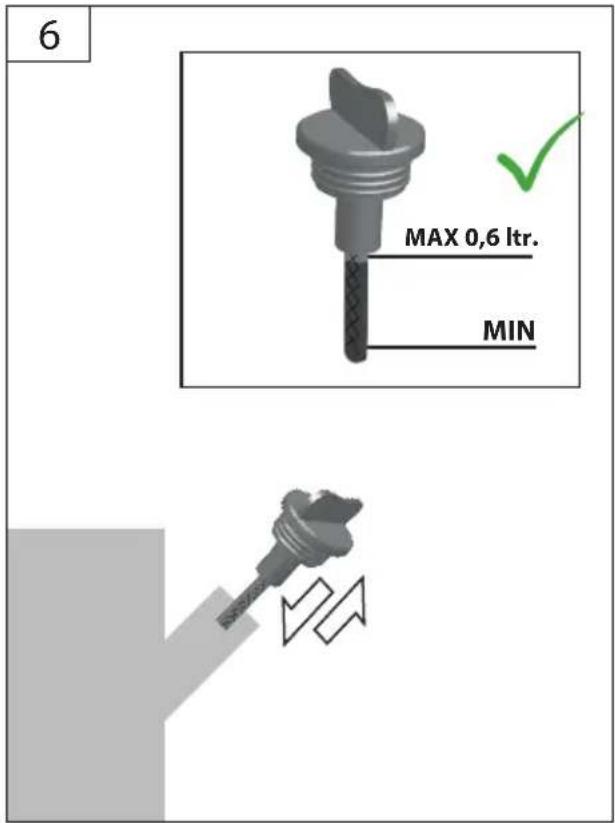
text_image
6 MAX 0,6 ltr. MIN
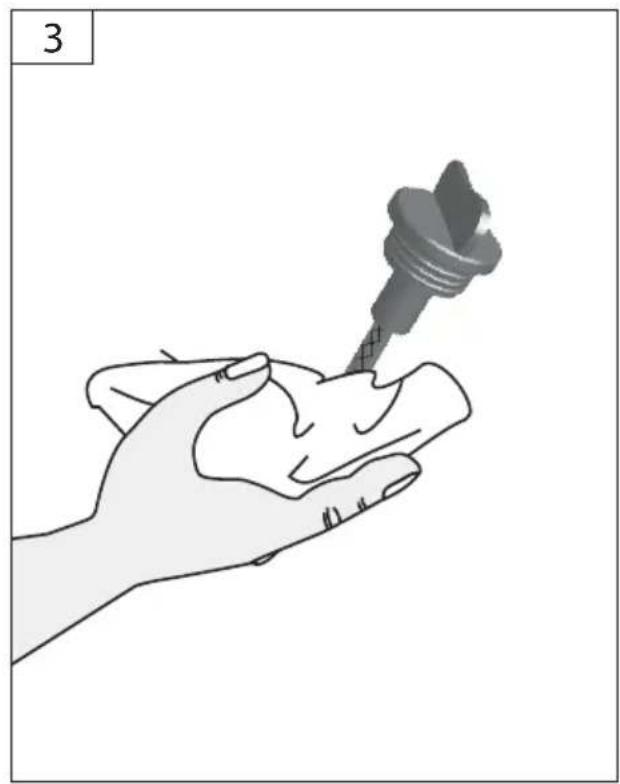
EN To ensure quality, every piece of equipment is subject to a test operation and filled with motor oil. Oil is drained before transport; however, there can be some motor oil remains on the dip stick. Please check carefully the oil level and add motor oil again. → 7±8
natural_image
Simple line drawing of a square device with a handle and label (no text or symbols)
text_image
1 °C °C OK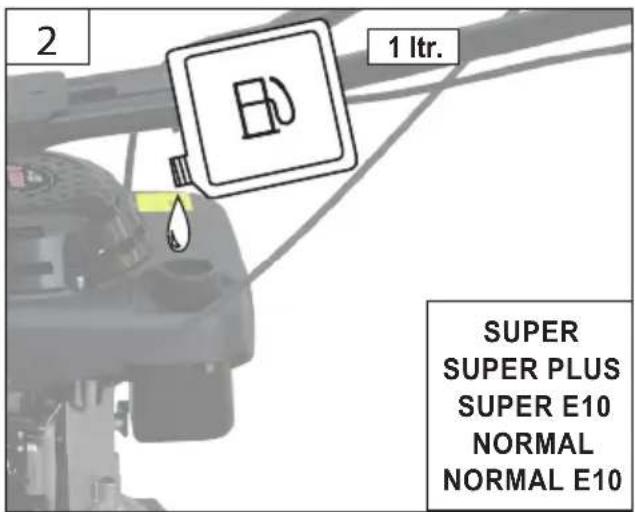
text_image
2 1 ltr. SUPER SUPER PLUS SUPER E10 NORMAL NORMAL E10
natural_image
Close-up of a mechanical device with a lock and safety tag, no visible text or symbols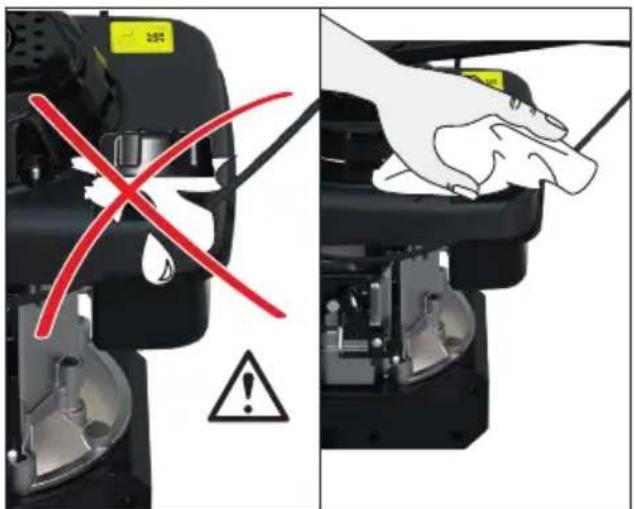
text_image
Diagram showing a robot's control panel with red X mark and warning symbol, alongside its mechanical assembly.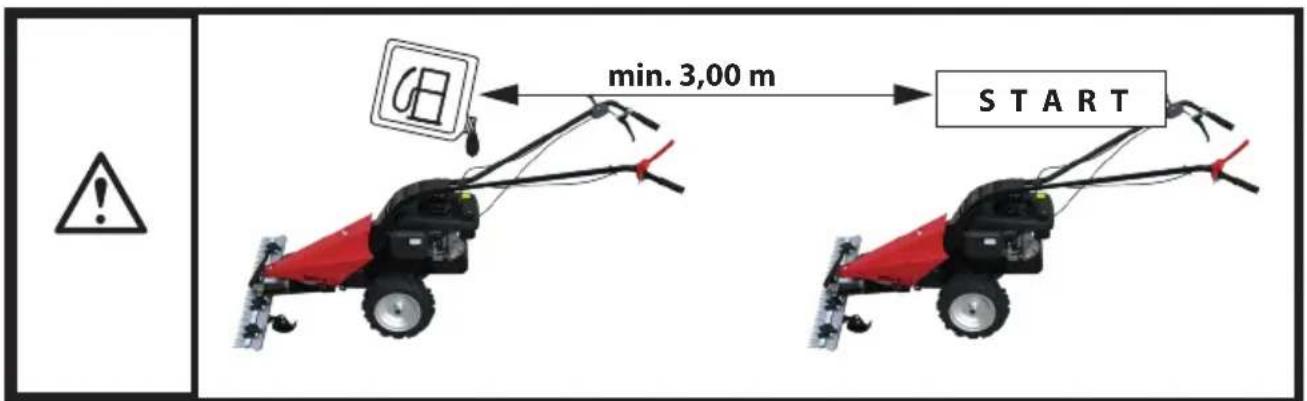
text_image
min. 3,00 m START


natural_image
Red agricultural robot with four large tires mounted on a platform, emitting oil drop (no text or symbols visible)
natural_image
Mechanical assembly diagram showing a lock mechanism with curved arrows indicating motion (no text or symbols)
natural_image
Mechanical assembly diagram showing gear and mounting components with motion arrows (no text or symbols)
natural_image
Close-up of a red agricultural machine with metal blades and a green crop field inset (no text or symbols visible)
natural_image
Close-up of a red agricultural machine with mechanical components and a small inset image of green grass (no text or symbols visible)


flowchart
graph TD
    A["Warning Symbol"] --> B["X/Y Mark"]
    B --> C["OK"]
    C --> D["5"]
    D --> E["✓"]
    E --> F["START"]
text_image
1 ▲
natural_image
Red GBM 87.1 tractor with visible tracks and levers (no text or symbols on the vehicle itself)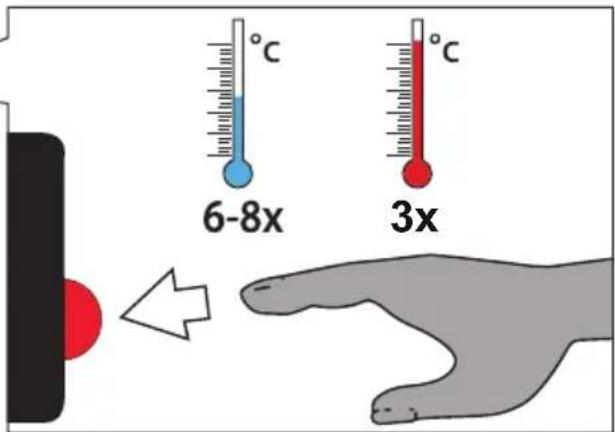
text_image
6-8x 3x
natural_image
Red and black tracked agricultural sprayer machine (no visible text or symbols)
natural_image
Close-up of a black bicycle handle with a small inset image showing a rabbit silhouette (no text or symbols)
natural_image
Close-up of a robotic arm with attached sensors and wiring, no visible text or symbols
text_image
STOPP


natural_image
Close-up of a red GBM 87.1 tractor with visible tire and wheel assembly, showing side profile and wheel motion (no text or symbols)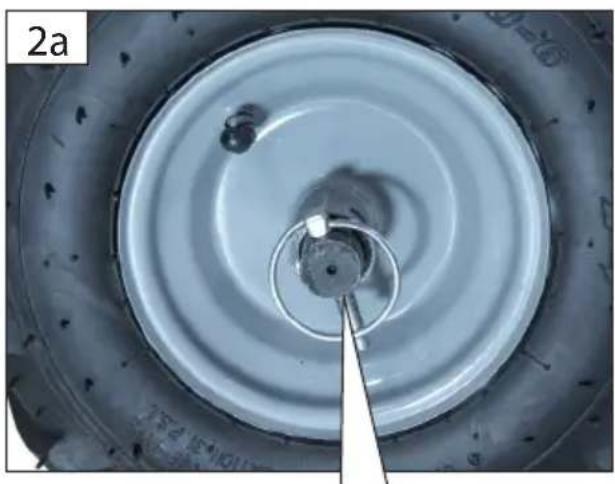
natural_image
Close-up of a mechanical component with concentric rings and a metal rod inserted, labeled '2a' in the corner (no readable text or symbols on the main subject)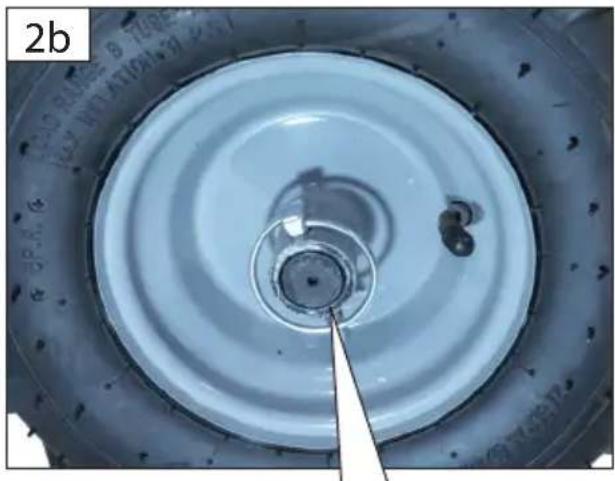
natural_image
Close-up of a mechanical component with concentric rings and a pointed tip, no visible text or symbols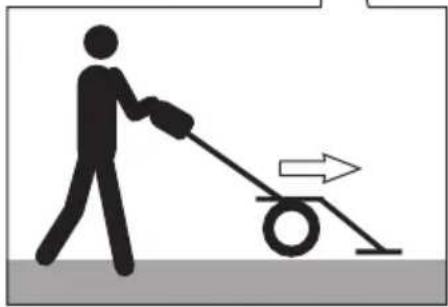
natural_image
Silhouette of a person pushing a pull-up cart with an arrow indicating direction (no text or symbols)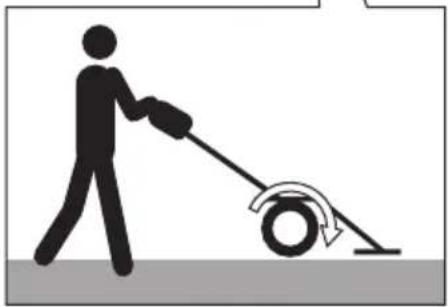
natural_image
Silhouette of a person pushing a roll with a tire, no text or symbols present


natural_image
Close-up of a hand adjusting a bicycle handle, no visible text or symbols
natural_image
Close-up of a black electric scooter handle and front-mounted device (no visible text or symbols)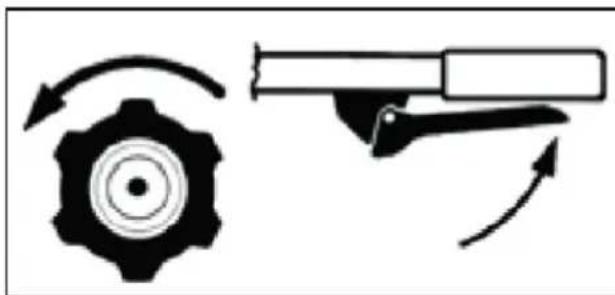
natural_image
Diagram showing a gear and a tool with rotational arrows, no text or symbols present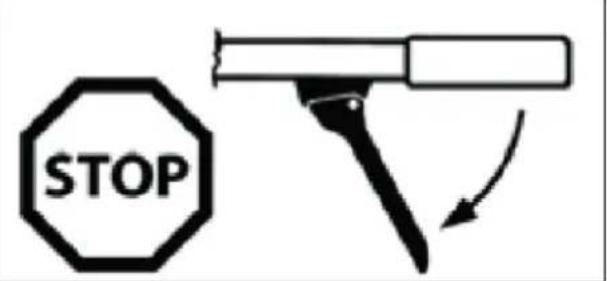
text_image
STOP
natural_image
Mechanical lever mechanism with red-handled lever and black handle, no text or symbols visible
text_image
2 PRESS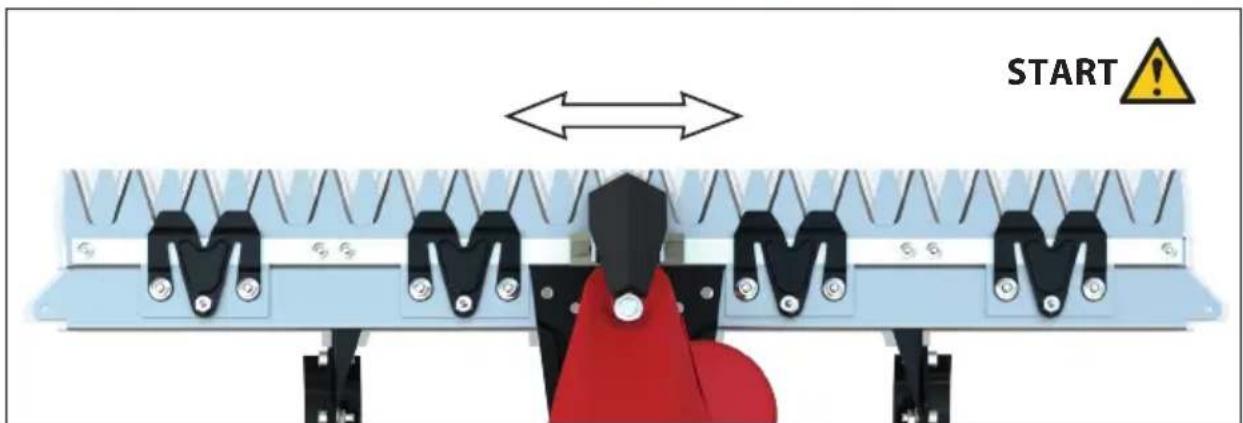
text_image
START


text_image
max. 25°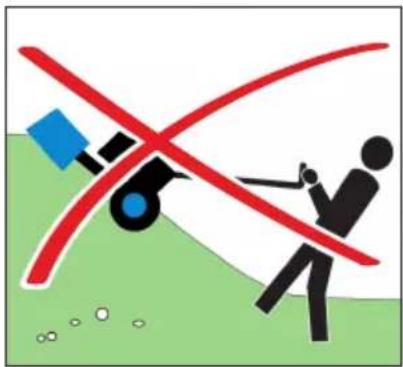
natural_image
Illustration of a person using a tool to cut a red cross over a green field, with no text or symbols present.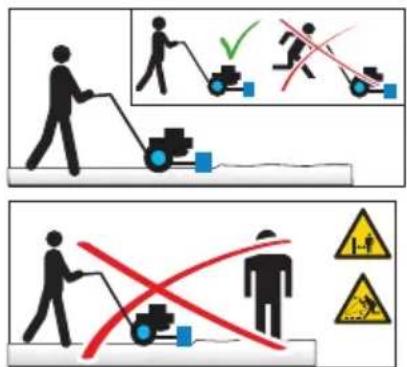
text_image
Safety warning illustration showing two scenarios: one with a person pushing a lawn pump, the other with a person using a plow and another with a person crossed over a machine.
text_image
1 RELEASE
natural_image
Close-up of a bicycle handle with red-handled lever and black cable, no visible text or symbols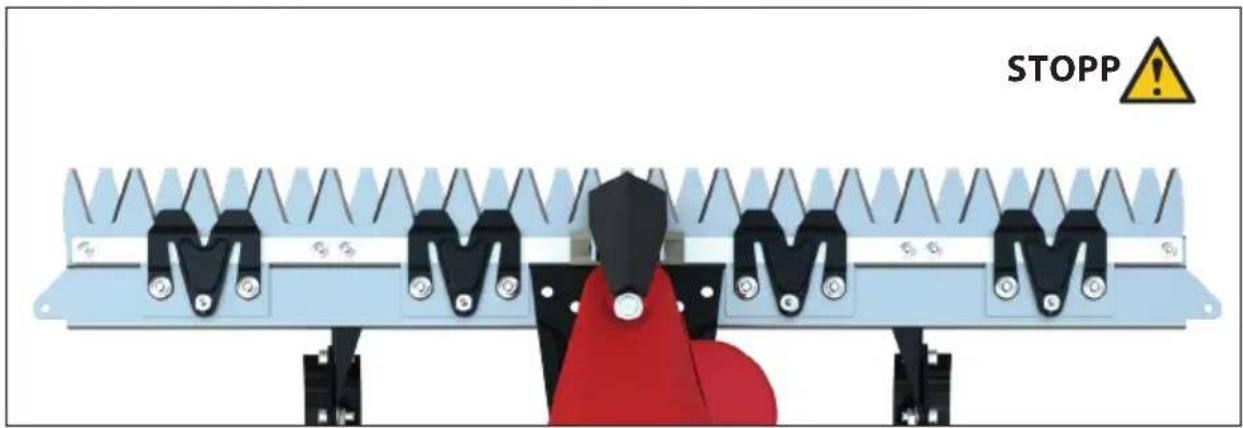
text_image
STOPP!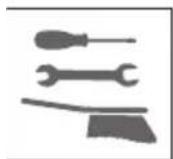


natural_image
Close-up of a red and black agricultural machine with visible wheel and mechanical components (no text or symbols)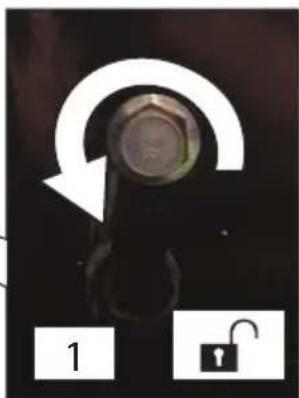
natural_image
Close-up of a mechanical knob with a curved arrow indicating rotation, and a lock icon labeled '1' (no text or symbols on the knob itself)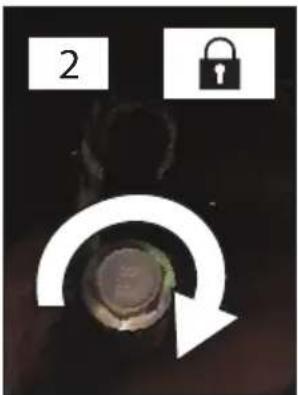
natural_image
Close-up of a mechanical component with a curved arrow indicating rotation, accompanied by a padlock icon (no text or symbols)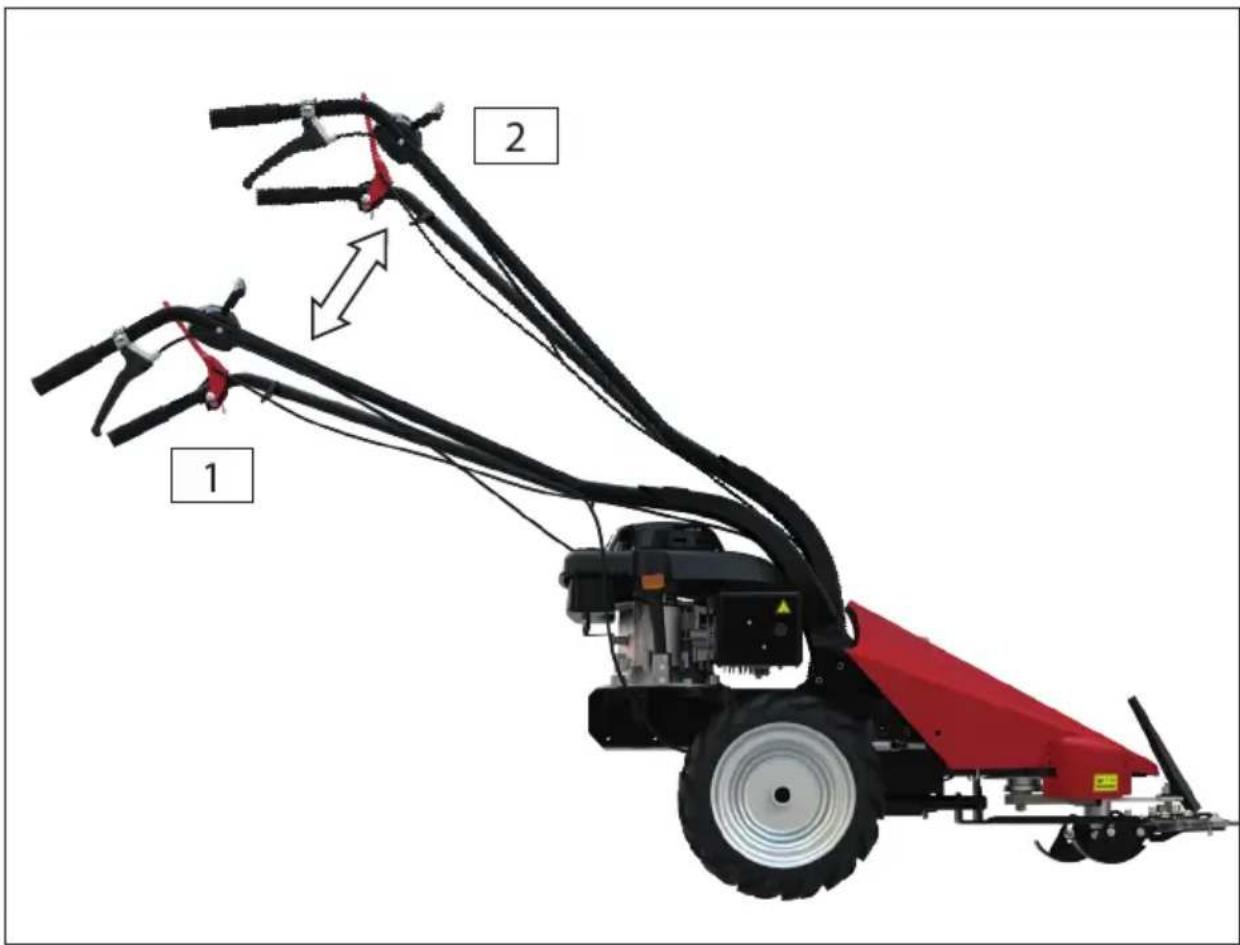
natural_image
Red agricultural sprayer machine with two articulated arms labeled 1 and 2, showing blade structure and motion arrows (no text or symbols on the machinery itself)


text_image
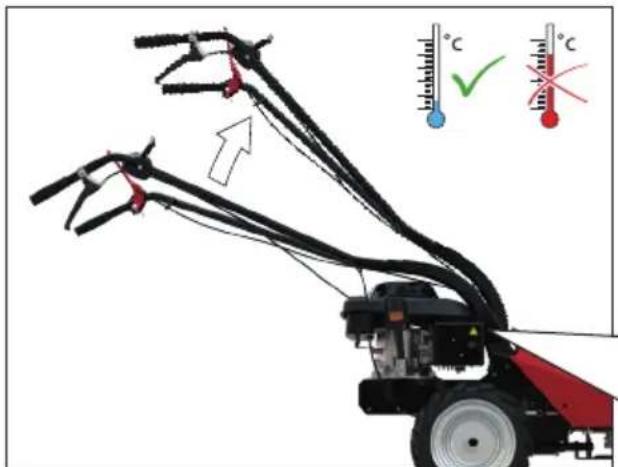
Temperature °C ✓ °C °C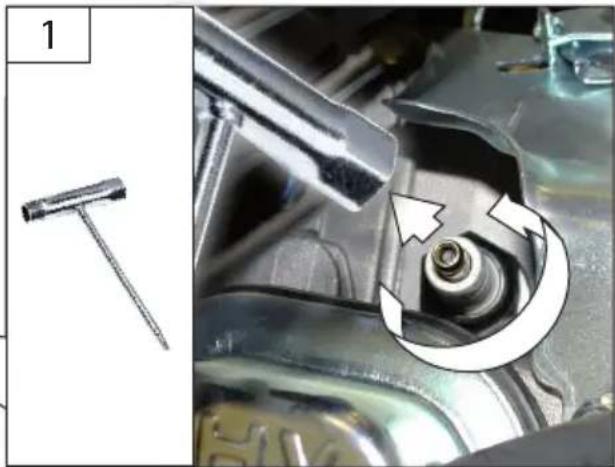
natural_image
Close-up of a mechanical component with a tool and a circular arrow indicating a turning point (no text or symbols present)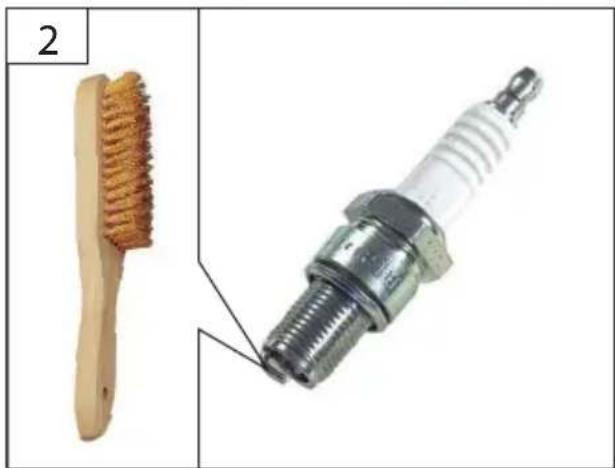
natural_image
Two mechanical components: a wooden brush and a spark plug, shown side by side with no visible text or symbols.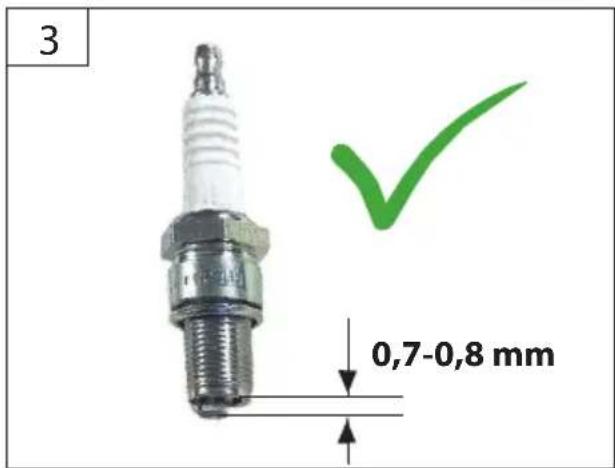
text_image
3 0,7-0,8 mm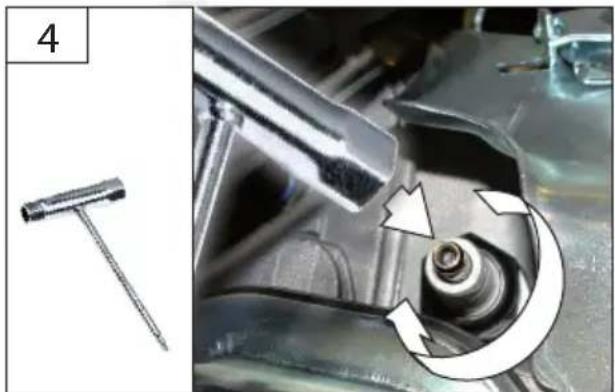
natural_image
Mechanical assembly diagram showing a tool inserted into a component with a rotating shaft and arrow indicating rotation (no text or symbols)


natural_image
Close-up of a red and black lawn mower with visible blade and wheel (no text or symbols)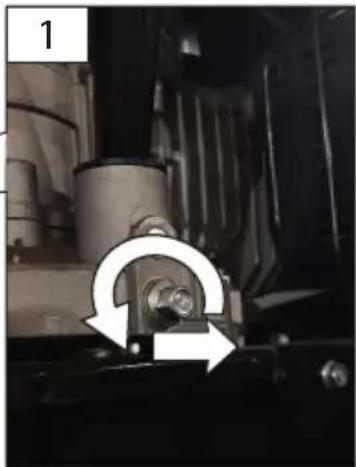
natural_image
Close-up of a mechanical assembly with a circular arrow indicating rotation or adjustment (no visible text or symbols)
natural_image
Close-up of a mechanical assembly with a central component and a circular base, no visible text or symbols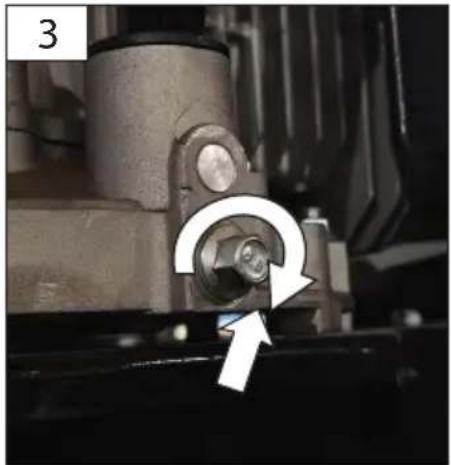
natural_image
Close-up of a mechanical component with a circular arrow pointing to a specific part (no visible text or symbols)4
GB Check the oil level/add oil!
natural_image
Red agricultural sprayer machine with visible blade and wheel, no text or symbols present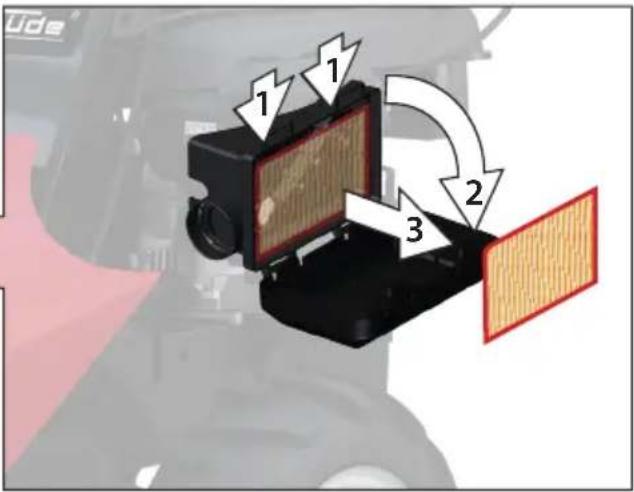
text_image
1 1 2 32a

natural_image
Illustration of a hand cleaning a surface with water droplets (no text or symbols)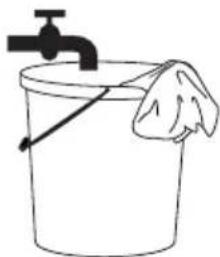
natural_image
Simple line drawing of a bucket with a faucet and a cloth, no text or symbols present
natural_image
Simple line drawing of a sun and a rectangular block (no text or symbols)2b

natural_image
3D rendering of a black mechanical component with red highlighted surfaces and a white arrow pointing to a textured surface (no text or symbols)4

natural_image
Close-up of a mechanical device with red and black components, no visible text or symbolsTechnische Daten
Read and understand the operating instructions before using the appliance. Do it
yourself with the controls and the proper use of the device.
Abide by all the safety measures stated in the service manual. Act responsibly toward third parties.
In case of any doubts about connection and operation refer please to our customer center

Danger of injury!
Please note the operation instructions of attachments
In spite of compliance with all relevant design regulations, dangers may still present themselves when the machine is operated, e.g. work piece parts being thrown off, parts of damaged tools being thrown off, noise emissions, dust emissions.
Specified Conditions Of Use
The device is designed for use on meadows, slopes and for mowing orchards.
Respecting technical data and safety precautions.

Use the appliance only outside, never use it onfined and bad ventilated areas.
Do not use this product in any other way as stated for normal use. Not observing general regulations in force and instructions from this manual does not make the manufacturer liable for damages..
Residual risks
Safety instructions

Danger of injury!
Never put parts of your body and clothes near rotating parts.

Warning, hot surfaces
Some parts of the appliance get too hot when the appliance is operated. Do not touch any hot parts, e.g. engine and muffler.
Read carefully the operating and maintenance instructions. Familiarise thoroughly with the controls and proper use of the appliance. You need to know how the appliance works and how controls can immediately be switched off.
Never let children work with the appliance. Never let adults work with the appliance unless they have been properly trained.
Keep all persons, especially small children, and pets out of reach of the place of your work.
Being careful prevents slipping or falling, especially when reversing.
Check the ground on which the appliance is going to be used and remove any items that might be caught or thrown off by the appliance.
Wear gloves, protective glasses, closefitting winter clothes and solid shoes with a rough sole when working and providing maintenance.

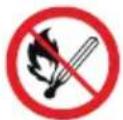
Fuel is highly flammable.
Keep the fuel in suitable containers only.
The appliance may only be refuelled outdoors and not near open fire or burning cigarettes.
Refuel before starting the appliance. If the engine is running or still hot, it must not be refuelled or the tank cover opened.
Make sure the fuel does not overflow. If the fuel overflows, the engine must not be started. Remove any dirt from the appliance and prevent any attempt at ignition until fuel fumes have evaporated.
Do not adjust the appliance when the engine is running (except for settings directly recommended by the manufacturer).
Snow should be removed only after adjusting the machine to the outdoor temperature.
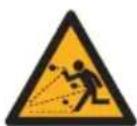
There is a risk of items being thrown off at eyes when working with power appliances.
Protective glasses or a shield should always be used when operating, adjusting or repairing the appliance.
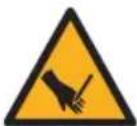
Do not put your hands and legs near the rotating parts. Keep a safe distance from the eject hole.
Be extremely careful when running over or removing snow off brash entrances, footpaths and paths. Be prepared for unexpected risks or moving vehicles.
When you hit a foreign item, switch the engine off, disconnect the cable from the spark plug and check thoroughly the machine for any damage and remove it if necessary – the machine can be put into operation again and worked with now.
If the appliance starts abnormally vibrating, switch the engine off and search for the cause immediately. Generally, vibrations are a warning against operating failure.
Switch the engine off every time you stop operating the appliance, clean the working screw/rotor can/eject tube and when executing repairs, adjusting and inspecting the appliance.
When cleaning, repairing and checking the appliance, make sure that the working screw/rotor and all moving parts are stopped.
Never use the appliance inside rooms; to be used outdoors only.
Do not overload the appliance.
Never use the appliance at a high travelling speed on a slippery surface. Be careful when reversing.
Disconnect the working screw/rotor drive when the machine is to be transported or when not being used.
Use only extensions and accessories approved by the machine manufacturer (e.g. wheel weights, counterweight, cabins, etc.).
The machine must only be used when appropriate visibility or good lighting is provided. Stand fast on the ground and hold the handle tight by hands at all times. Walk, never run.
Do not allow anybody to stand on the appliance.
Switch the engine off and unplug it if you are not working with the appliance or when leaving the appliance or adjusting, maintaining or repairing it.
The appliance should only be used when in a perfect state. Carry out a visual inspection before switching the appliance on. Check especially the safety equipment, electrical control elements, power lines and screw couplings for any damage and if they are tightened appropriately. Replace any damaged parts before the appliance is put into operation if necessary.
Put the appliance out of operation and store it in a closed room only after the engine has cooled down.
The engine must necessarily be filled with engine oil before being put into operation for the first time.
Check the oil level whenever the appliance is to be put into operation. Add engine oil if necessary.
Never store the appliance with petrol in the tank inside a building where petrol fumes may potentially get in touch with open fire or sparks.
When the appliance is not going to be used for a long time, store it with an empty tank.
Do not change the controlled engine setting and do not rev the engine up.
Requirements for operating staff
The operating staff must carefully read the Operating Instructions before using the appliance.
Qualification
Apart from the detailed instructions by a professional, no special qualification is necessary for appliance using. Minimum age
The product has been designed to be used by persons over 16 years of age.
If the product is to be used by children below the age of 8 or persons with reduced physical, sensory or mental skills or with a lack of experience and knowledge, they must be supervised or instructed in the safe use of the appliance and understand the resulting risks. Children must not play with the appliance. Cleaning and user maintenance must not be performed by children without supervision.
Training
Using the appliance only requires corresponding training by a professional or the Operating Instructions. No special training is necessary.
The operator is responsible for accidents or risks to third parties.
Emergency procedure
Conduct a first-aid procedure adequate to the injury and summon qualified medical attendance as quickly as possible. Protect the injured person from further harm and calm them down. For the sake of eventual accident, in accordance with DIN 13164, a workplace has to be fitted with a first-aid kit. It is essential to replace any used material in the first-aid kit immediately after it has been used.
If you seek help, state the following pieces of information
- Accident site
- Accident type
- Number of injured persons
- Injury type(s)
Maintenance

Switch the engine off and remove the socket plug before any work on the engine. Wait until all rotating parts have stopped the appliance has cooled down.
Keep the appliance, especially the tank and engine, clean at all times.
Apply environment-friendly oil to all moving parts.
Refer all servicing to qualified service personnel.
Use only original accessories and original spare parts.
Only a regularly maintained and treated appliance can serve as a satisfactory aid. Insufficient maintenance and care can lead to unforeseen accidents and injuries.
If necessary, a list of spare parts can be found at www.guede.com.

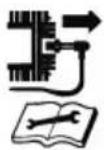
Read the Operating Instructions

Wear ear protectors!

Solid shoes to be worn!

Wear protective gloves!

Caution!

Caution - hot surface!

Warning against dangerous voltage

Warning of flammables

Risk of explosion

Machine parts only touch when they are stopped completely.

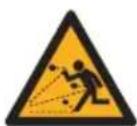
Warning against thrown-off items

Toxic exhaust fumes and oil vapors can cause poisoning.

manual note

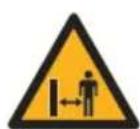
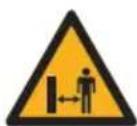
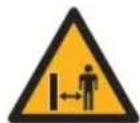
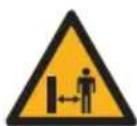
Keep distance of persons Observe to keep out of dangerous zone

Caution must always be refueled with the engine off

Not to be used in enclosed spaces

Respect for loose parts (people, animals, houses, cars)
Symbols

strong


Prohibited smoking and open fire using.

Switch the engine off and remove the socket plug before any work on the engine.

gas lever

Oil level

Protect against humidity

This side up
Guarantee
Warranty period of 12 months applies to commercial use and 24 months applies to private use and commences on the day of purchase of the device.
The guarantee solely covers inadequacies caused by material defect or manufacturing defect. Original payment voucher with the sales date needs to be submitted for any claim in the guarantee period.
The guarantee does not cover any unauthorised use such as appliance overloading, use of violence, damage as a result of any unauthorised interference or caused by foreign items. Failing to follow the operating and assembly instructions and common wear are also not included in the guarantee.
Service
Do you have any technical questions? Any claim? Do you need any spare parts or operating instructions? We will quickly help you and without needles bureaucracy at our web pages at www.guede.com in the Servicing part. Please help us be able to help you. In order to
identify your device in case of claim we need the serial No., product No. and year of production. All this data can be found on the type label. Please enter it here for future reference
Serial No.
Art. No
Year of production
Important information for the customer
Please be sure to know that returning the product in or after the warranty period must be made in the original packaging.
Inspection and maintenance plan
| Regular servicing period Before | any start-up | After 1 month | After 3 months | After 6 months | After 12 months | At the end of the season | |
| 20 Hours of operation | 50 Hours of operation | 100 Hours of operation | 300 Hours of operation | ||||
| Engine oil (15W 40) max. 0,6 l | Inspection | √ | |||||
| Change | √ | √ | √ | ||||
| Spark plug Inspection cleaning | √ | ||||||
| √ | |||||||
| Air filter Inspection | √ | ||||||
| √ | |||||||
| √ | |||||||
| Check the petrol level | √ | ||||||
| Safety device check | √ | ||||||
| Drain the petrol tank | √ | ||||||
| Check the screwed connec-tion | √ | ||||||
| Check the cables | √ | ||||||
| Clean the machine thoroughly. Spray the skids and plough with oil | After every take out of service | √ | |||||
Provide appropriate servicing upon the earlier of the following in the given month or after the specified hours of operation have expired.
Failure removal
| Failures | causes | removal |
| Engine not starting | Fuel tap closed Open the fuel tap | |
| contaminated fuel fuel tank change | ||
| Petrol tank empty Add petrol | ||
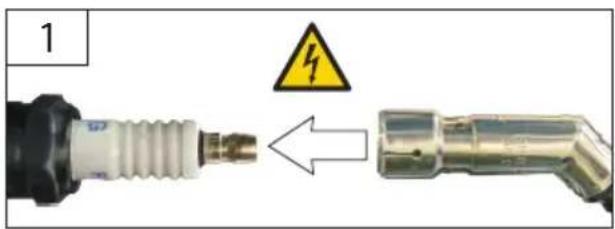
| Spark plug dirty from oil or defective | Clean or replace the spark plug →15 | |
| Wrong gas lever position Correct the settings | ||
| low power | Dirty air filter Clean or replace the air filter →17 | |
| Unsteady running, strong vibrations | Components and screwed connection loosened | Stop the engine and retighten screw check /; damaged parts replaced |
Données techniques
Translation of the EC-Declaration of Conformity
We, hereby declare the conception and construction of the below mentioned appliances correspond - at the type of construction being launched - to appropriate basic safety and hygienic requirements of EC Directives.
In case of any change to the appliance not discussed with us the Declaration expires.
Notified Body Name: No: Adress:
Type Ex. Cert.-No.:
97/68/EC_&2016/1628/EU
Emission No.: e9*2016/1628*2016/1628SYA1/P*0077*01(V5)
2000/14/EC_2005/88/EC