SC07M25M9WD - Vacuum Cleaner SAMSUNG - Free user manual and instructions
Find the device manual for free SC07M25M9WD SAMSUNG in PDF.

User questions about SC07M25M9WD SAMSUNG
0 question about this device. Answer the ones you know or ask your own.
Ask a new question about this device
Download the instructions for your Vacuum Cleaner in PDF format for free! Find your manual SC07M25M9WD - SAMSUNG and take your electronic device back in hand. On this page are published all the documents necessary for the use of your device. SC07M25M9WD by SAMSUNG.
USER MANUAL SC07M25M9WD SAMSUNG
- Before operating this unit, please read the instructions carefully.
- For indoor use only.
natural_image
Black-and-white photo of a modern lounge chair with leather backrest and matching metallic arms, featuring headphones placed on the backrest (no text or symbols visible)SAMSUNG
PREPARATION
Safety information 3
Important safety instructions 4
INSTALLATION
Name of the parts 10
Accessories 11
OPERATIONS
Using the vacuum cleaner 12
Using the body 12
Using the handle 12
Using the brushes 13
MAINTENANCE
Cleaning and maintaining 14
When to empty the dust bag 14
Cleaning the inlet filter 14
Cleaning the dust bag 14
Cleaning the outlet filter 15
Cleaning the cyclone filter 15
Cleaning the brush 16
Cleaning the pipe 16
Cleaning the hose 16
Storing the vacuum cleaner 16
APPENDICES
Notes and cautions 17
In use 17
Cleaning and maintenance 17
Troubleshooting 18
Product information 19
Safety information
- Before operating the appliance, please read this manual thoroughly and retain it for your reference.
- Because these following operating instructions cover various models, the characteristics of your vacuum cleaner may differ slightly from those described in this manual.
Caution/Warning symbols used
WARNING
Indicates that a danger of death or serious injury exists.
CAUTION
Indicates that a risk of personal injury or material damage exists.
Other symbols used
NOTE
Indicates that the following text contains additional important information.
- For information on Samsung's environmental commitments and product specific regulatory obligations e.g. REACH (WEEE, Batteries) visit: samsung.com/uk/aboutsamsung/samsungelectronics/corporatecitizenship/data_corner.html
Important safety instructions
When using an electrical appliance, basic precautions should be observed, including the following:

WARNING
This vacuum cleaner is designed for household use only.
Use the vacuum cleaner only for its intended use as described in these instructions.
Always install the filters in the correct position as shown in this manual.
Failure to meet these requirements could cause damage to the internal parts and void your warranty.
Please contact the manufacturer or service agent for a replacement.
General
- Read all instructions carefully. Before switching on, make sure that the voltage of your electricity supply is the same as that indicated on the rating plate on the bottom of the cleaner.
- This appliance can be used by children aged from 8 years and above and persons with reduced physical, sensory or mental capabilities or lack of experience and knowledge if they have been given supervision or instruction concerning use of the appliance in a safe way and understand the hazards involved. Children shall not play with the appliance. Cleaning and user maintenance shall not be made by children without supervision.
- Children should be supervised to ensure that they do not play with the appliance. Do not allow the vacuum cleaner to run unattended at any time.
Power related
- Switch the vacuum cleaner off on the body of the machine before unplugging from the electrical outlet. Disconnect the plug from the electrical outlet before emptying the dust bag. To avoid damage, please remove the plug by grasping the plug itself, not by pulling on the cord.
- The plug must be removed from the socket outlet before cleaning or maintaining the appliance.
- Slide to the Min. position before inserting a plug into the electrical outlet
- The use of an extension cord is not recommended.
-
Please prevent any risk of electric shock or fire.
-
Do not damage the power cord.
- Do not pull the power cord too hard or touch the power plug with wet hands.
- Do not use a power source other than the national rated voltage and also do not use a multi-outlet to supply power to number of devices at the same time.
- Do not leave the power cord carelessly on the floor.
- Do not use a damaged power plug, power cord or loose power outlet.
- Turn off the power before connecting or disconnecting the power plug to the power outlet and make sure your fingers don't come in contact with the pins of the power plug.
- Do not disassemble or modify the vacuum cleaner. When power cord is damaged, contact the manufacturer or service agent to get it replaced by certified repairman.
- Clean dust or any foreign matters on the pin and contact part of the power plug.
- Unplug the cleaner when not in use. Turn off the power switch before unplugging.
- If the supply cord is damaged, it must be replaced by the manufacturer or its service agent or a similarly qualified person in order to avoid a hazard.
In use
- Don't carry the vacuum cleaner by holding the hose. Use the handle on the vacuum cleaner set for lifting or carrying vacuum cleaner.
- Unplug the cleaner when not in use. Turn off the power switch before unplugging.
- Do not use outdoors, or on wet rugs or surfaces.
- Do not use the vacuum cleaner when rug or floor is wet.
- Do not use this product outdoors since it's designed for household use only.
- There is a risk of malfunction or damage.
* Outdoor cleaning : Stone, Cement
* A billiard room : Powder of a chalk
* An aseptic room of a hospital
- Do not use the vacuum cleaner to suction up liquids(such as water), blades, pins or embers.
- There is a risk of malfunction or damage.
- Be sure children do not touch the vacuum cleaner when you use it.
- The children may get burned if the body is overheated.
- Do not mount or make any physical impacts on the body.
- It may result in injury or damage.
- Do not use the vacuum cleaner to pick up matches, live ashes or cigarette butts. Keep the vacuum cleaner away from stoves and other heat sources. Heat can deform and discolour the plastic parts of the unit.
- Avoid picking up hard, sharp objects with the vacuum cleaner as they may damage the cleaner parts.
- Do not block the suction or the exhaust port.
- Do not use the vacuum cleaner without a dust bag and filters in place.
- Do not use worn, deformed or damaged filters and insert filter properly without gap between filter and cover filter.
- It can be a reason of penetration of dust and debris into motor.
- If your vacuum cleaner is not operating correctly, switch off the power supply and consult an authorized service agent.
- If there's any gas leak or when using combustible sprays such as a dust remover, do not touch the power outlet and open the windows to ventilate the room.
- There is a risk of explosion or fire.
- Do not use this vacuum cleaner to clean building waste and debris, toner of laser printer. Regularly keep the filters in clean conditions to prevent of collecting fine dust in them.
- Dry carpet cleaners or fresheners, powders and fine dust such as flour should be only vacuumed in very small amounts.
- Use extra care when cleaning on stairs.
- Do not use to suction up water.
- Do not immerse in water for cleaning.
- The hose should be checked regularly and must not be used if damaged.
- Hold plug when rewinding onto cord reel. Do not allow plug to whip when rewinding.
Cleaning and maintenance
- Do not lift or carry the vacuum cleaner putting a brush in the groove for storage. - Use a dry cloth or towel to clean the body and make sure to unplug the vacuum cleaner before cleaning. Do not spray water directly or use volatile materials (such as benzen, thinner or alcohol) or combustible sprays (such as a dust remover) for cleaning.
- If water or other liquid gets into the product and causes malfunction, turn off the vacuum cleaner, unplug the power plug and then consult a service agent.
- Do not use alkaline or industrial detergents, air fresheners or (acetic) acids to clean the washable parts of the vacuum cleaner. (Refer to the following table.)
- It may cause damage, deformation or discoloration of the plastic parts.
| Available detergent Neutral | al detergent Kitchen cleaner | |
| Unavailable detergent Alk | aline detergent Bleach, Mold cleaner, etc. | |
| Acid detergent Paraffin oil, Emulsifier, etc. | ||
| Industrial detergent NV-I, | PB-I, Opti, Alcohol, Acetone, Benzene, Thinner, etc. | |
| Air freshener Air freshener(Spray) | ||
| Oil Animal or vegetable oil | ||
| Etc. Edible acetic acid, Vinegar, Glacial acetic acid, etc. |
- Do not stand on the hose assembly. Do not put weight on the hose.
CAUTION
In use
- Do not use the pipe for anything other than its intended purpose.
- It may result in injury or damage.
- When you lift up the body cover of the product while using the vacuum cleaner, safety device will be activated and there might be changes in operating noise.
- Operating noise may change when you hold the body cover of the product while using the vacuum cleaner, but the circular tube on bottom of the dust bag prevents dust from spilling out.
- Do not pull the power cord fully and hold the power cord with one hand when rewinding it.
- If you try to pull it fully, power cord can be damaged and if you don't hold the power cord while rewinding, it may lose control and cause injury or damage to people or objects around it.
- If any abnormal sounds, smells or smoke come from the vacuum cleaner, immediately unplug the power plug and contact a service agent.
- There is a risk of fire or electric shock.
- Do not use the vacuum cleaner in any places near heating appliances (such as stove), combustible spray or flammable materials.
- It may cause fire or deformation of the product.
- Empty the dust bag before it is full in order to maintain the best efficiency.
Cleaning and maintenance
- Unplug the vacuum cleaner if you do not use it for a long time. - It may cause electric shock or fire.
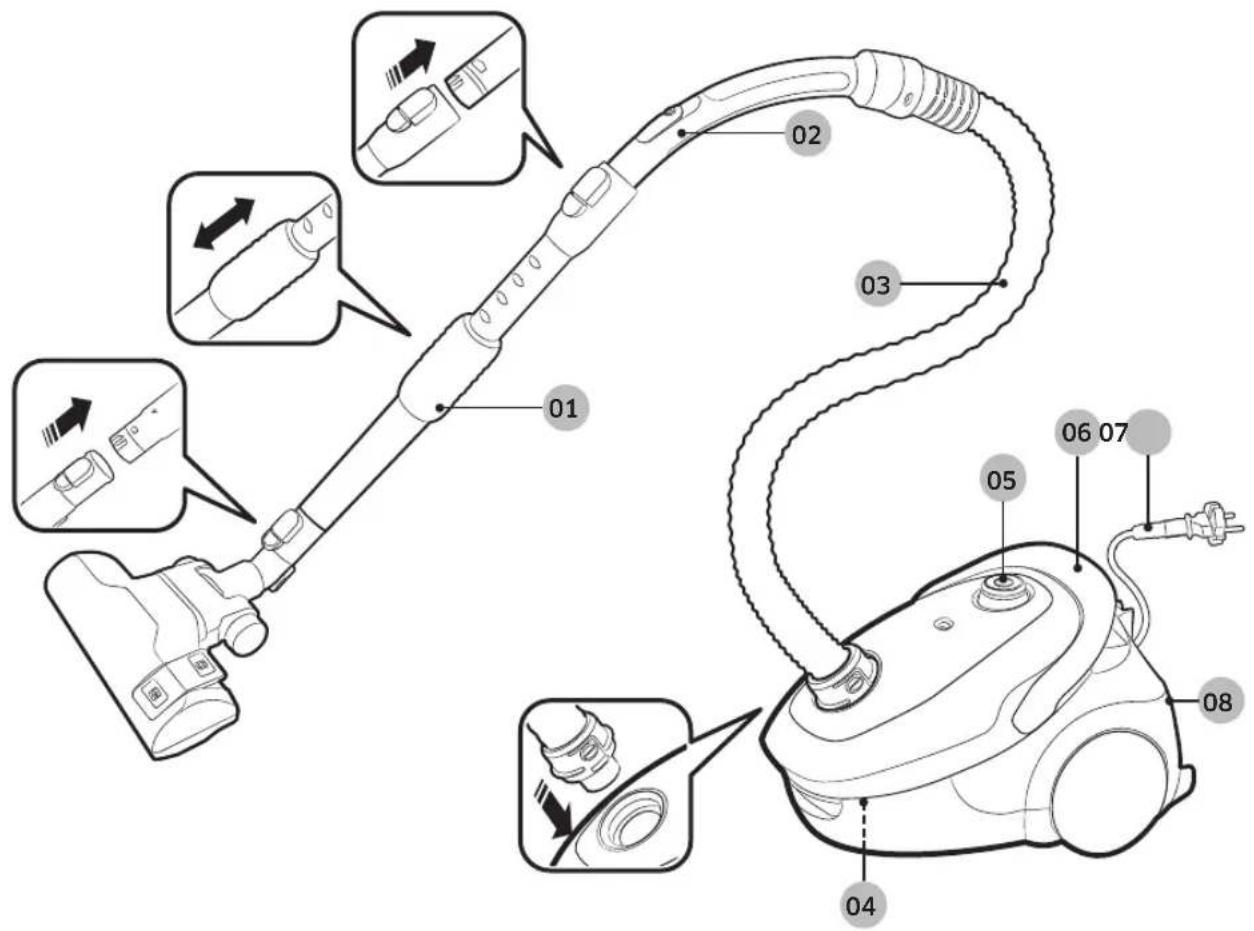
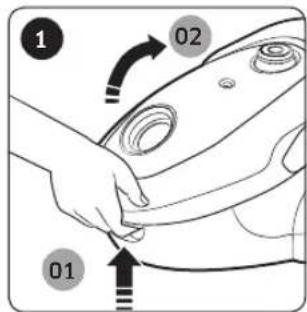
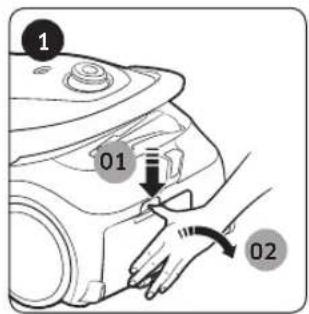
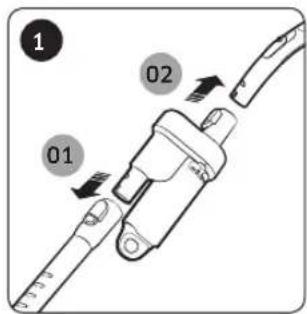
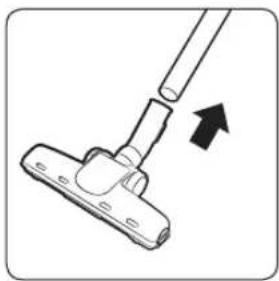
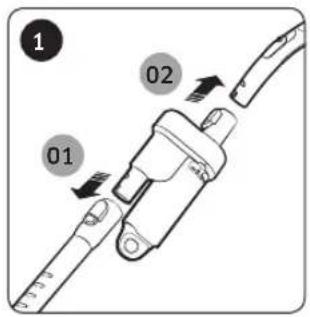
Name of the parts
Product design may differ depending on the models.
text_image
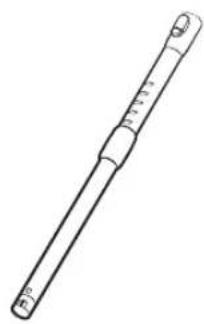
Diagram of a vacuum cleaner with labeled parts, showing exploded and assembled views with numbered labels.01 Pipe
02 Handle
03 Hose
04 Dust bag
05 Power button
06 Cord rewind button / Carry handle
07 Power cord
08 Outlet filter
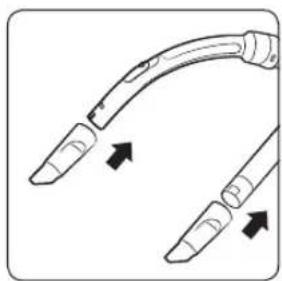
Accessories
Accessories may differ depending on the models.
natural_image
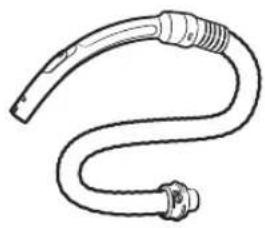
Line drawing of a flexible hose with a bulbous end cap (no text or symbols)Hose Pipe Pipe

natural_image
Line drawing of a cylindrical object with a flanged end and central shaft (no text or symbols)
natural_image
Simple line drawing of a cylindrical object with a protruding handle (no text or symbols)
natural_image
Line drawing of a handheld vacuum cleaner device (no text or symbols)
natural_image
Line drawing of a handheld device with a handle and control knob (no text or symbols)
natural_image
Line drawing of a mechanical clamp or bracket component (no text or symbols)2-step brush 2-step brush Pet Brush
natural_image
Line drawing of a vacuum cleaner (no text or symbols)
natural_image
Line drawing of a mechanical clamp or connector (no text or symbols)
Porch brush EzClean Cyclone 2-in-1 accessory

Anit-Tangle tool/Mini Pet Care Tool

User manual
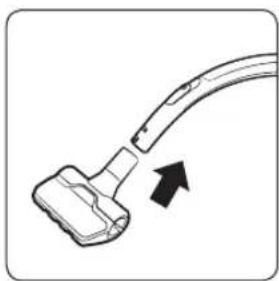
Using the vacuum cleaner
Suction control may differ depending on the models.
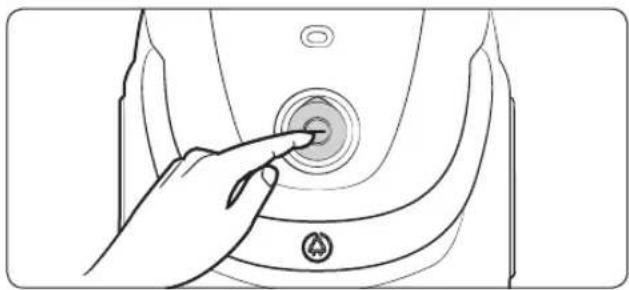
Using the body
Power cord
natural_image
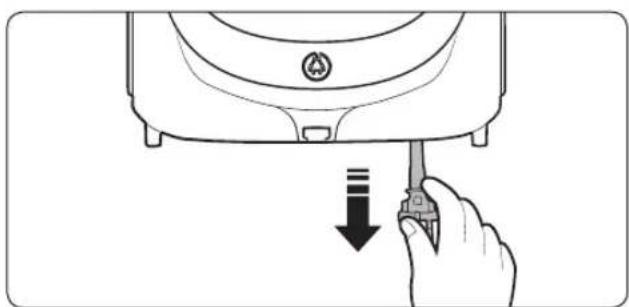
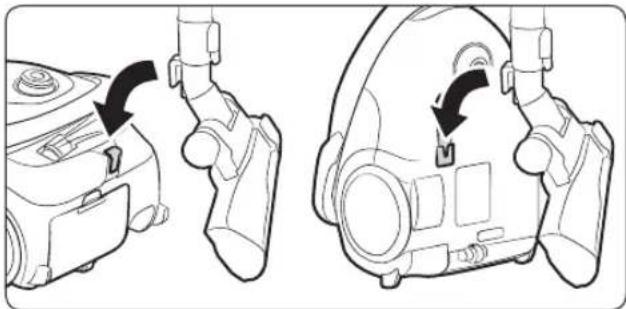
Line drawing of a hand using a screwdriver to press down a device component (no text or symbols)
text_image
Diagram showing hands installing a device with a bell icon and directional arrows indicating process stepsOn/Off

natural_image
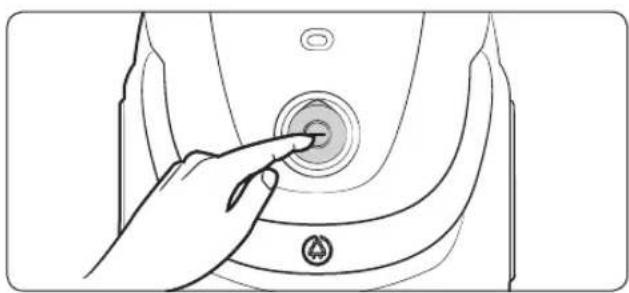
Line drawing of a hand pressing a circular button on a device casing (no text or symbols)Suction
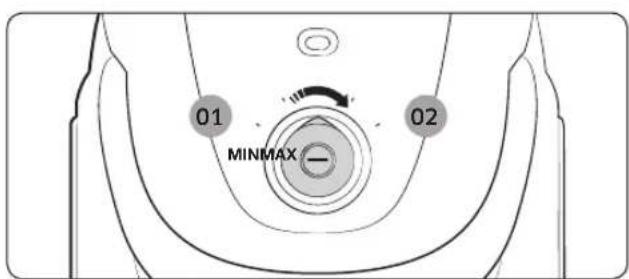
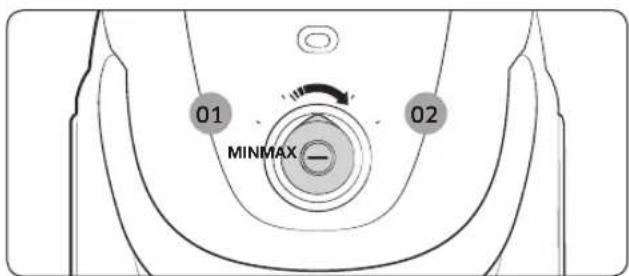
text_image
01 MINIMAX 0201 Low power
02 High power
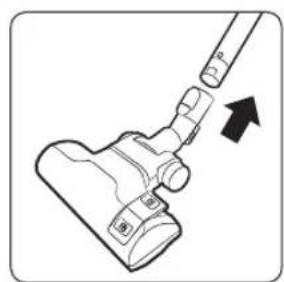
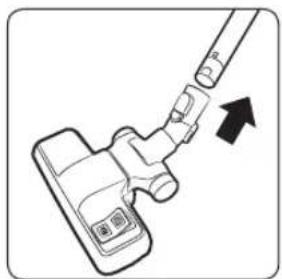
Using the handle
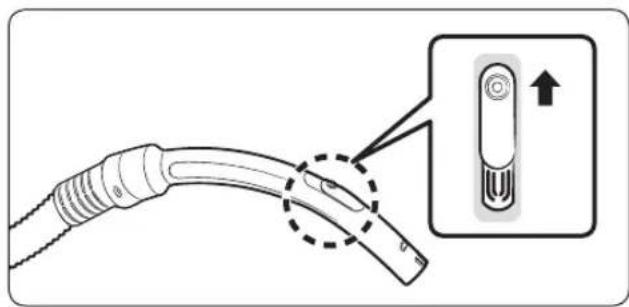
natural_image
Diagram of a cable connector with an inset showing a plug inserted into it (no text or symbols present)NOTE
• To vacuum fabrics, push the cover downward to reduce suction.
- The handle does not control the power of the product.
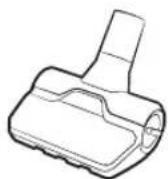
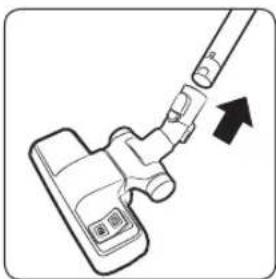
Using the brushes
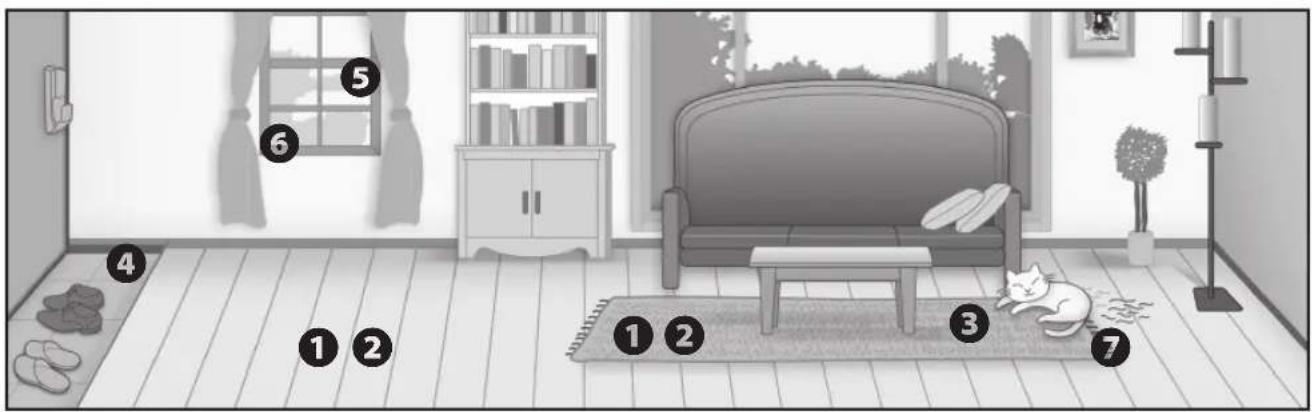
text_image
Illustration of a cozy room with numbered furniture and a cat sleeping on the rug, labeled 1 through 7.Where to use the brushes
natural_image
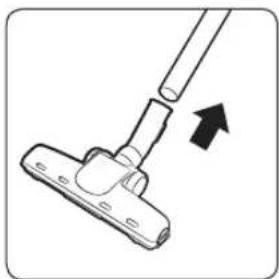
Line drawing of a hand holding a vacuum cleaner with an arrow indicating motion (no text or symbols)① 2-step brush
* Floor
Carpet
natural_image
Diagram of a vacuum cleaner with a handle and valve, showing mechanical components and an arrow indicating motion (no text or symbols)② 2-step brush

natural_image
Simple line drawing of a mechanical clamp or bracket with an arrow indicating direction (no text or symbols)③ Pet brush
natural_image
Simple line drawing of a mop handle with an arrow indicating direction (no text or symbols)4 Porch brush

natural_image
Diagram of two curved medical or surgical instruments with arrows indicating motion direction (no text or symbols)⑤ Dusting brush

natural_image
Diagram of two medical or surgical instruments with arrows indicating movement or force direction (no text or symbols)⑥ Crevice tool

natural_image
Diagram of a cable connector with an arrow indicating direction (no text or symbols)⑦ Anit-Tangle tool/Mini Pet Care Tool
Cleaning and maintaining
You must unplug the vacuum cleaner before cleaning it.
When to empty the dust bag
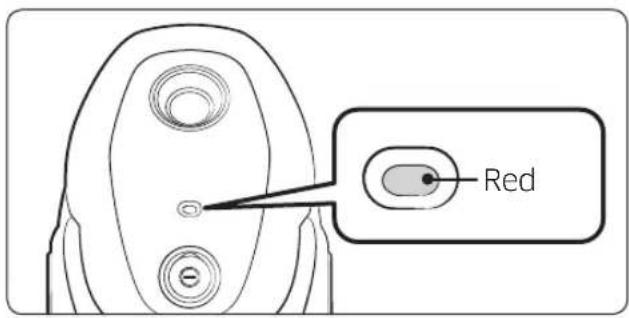
text_image
RedCleaning the inlet filter

text_image
1 02 01
natural_image
Diagram of a hand pressing down on the engine compartment, showing mechanical components and a directional arrow (no text or symbols)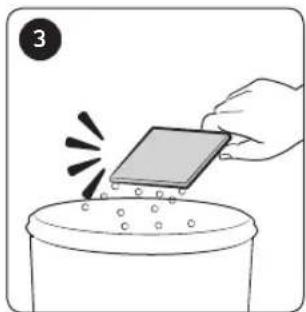
natural_image
Illustration of a hand placing a small electronic component into a container with heat lines (no text or symbols)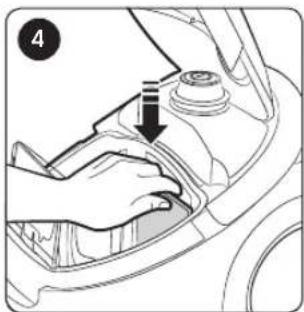
natural_image
Illustration of hands using a tool to adjust or install a component on a car hood (no text or symbols visible)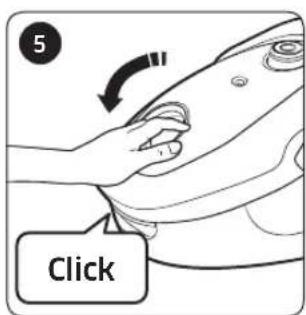
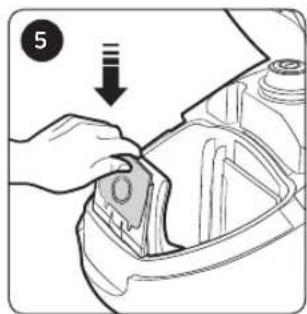
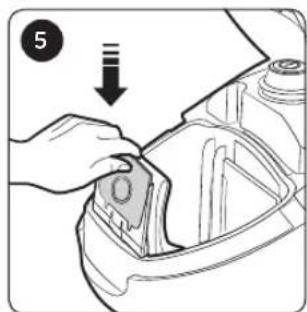
text_image
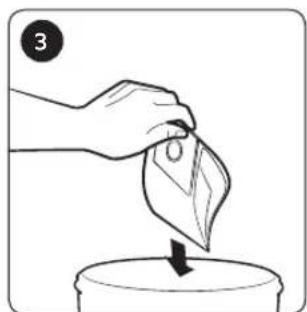
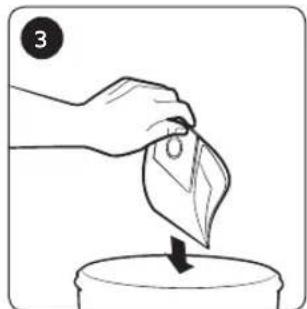
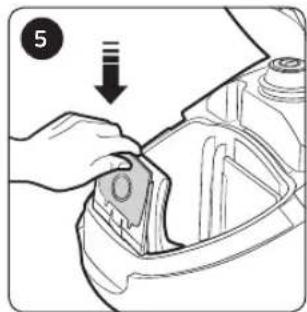
5 ClickCleaning the dust bag
Clean or replace the dust bag if there is a lot of dust in the bag.
text_image
1 02 01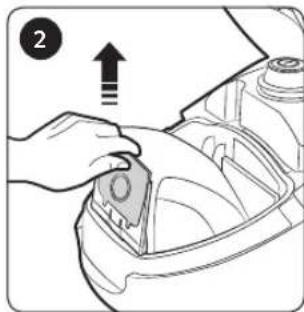
natural_image
Illustration of a hand placing a small object into a mechanical component (no text or symbols visible)
natural_image
Illustration of two sailboats collecting particles from a container (no text or symbols)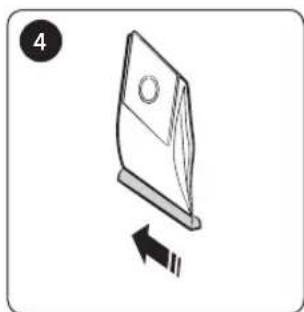
natural_image
Simple line drawing of a folded paper or plastic sheet with an arrow indicating downward motion (no text or symbols)Cloth Bag
natural_image
Illustration of a hand pouring liquid into a container with an arrow indicating flow (no text or symbols)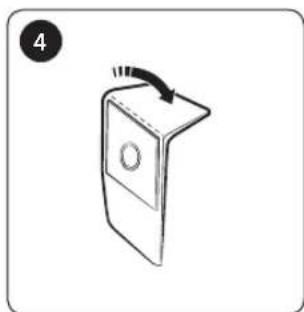
natural_image
Simple line drawing of a door handle with a circular opening and a curved arrow indicating rotation (no text or symbols)Paper bag
natural_image
Illustration of a hand using a tool to adjust or install a mechanical component (no text or symbols visible)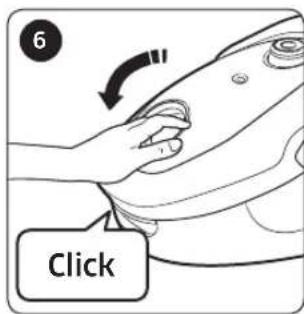
text_image
6 ClickCleaning the outlet filter
text_image
1 01 02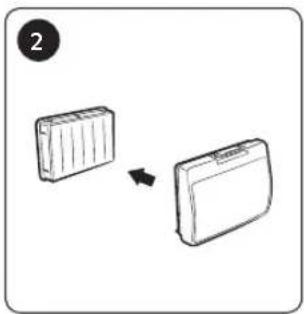
natural_image
Diagram showing two rectangular objects with internal compartments and an arrow indicating transformation (no text or symbols)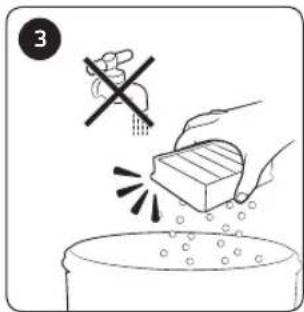
text_image
3
natural_image
Diagram showing two rectangular objects with internal ribbeds transforming into a larger closed case (no text or symbols)
natural_image
Line drawing of a mechanical component with a knob and directional arrow (no text or symbols)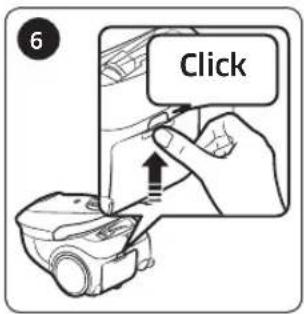
text_image
6 ClickCleaning the cyclone filter
text_image
1 01 02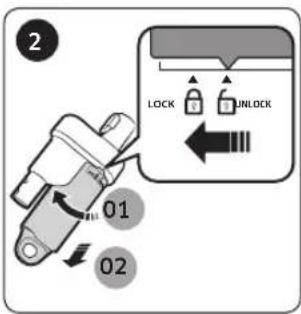
text_image
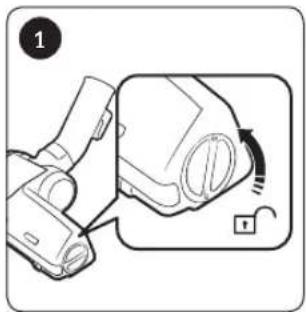
2 01 02 LOCK UNLOCK
text_image
3
natural_image
Illustration of hands performing a manual tool manipulation or repair operation (no text or symbols visible)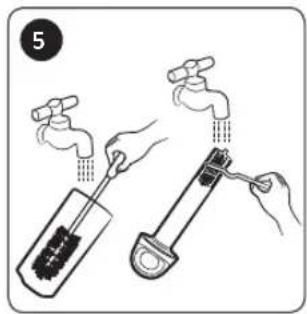
text_image
5
natural_image
Illustration of a sun shining on a brick wall next to a tool and a measuring cup, no text or symbols present.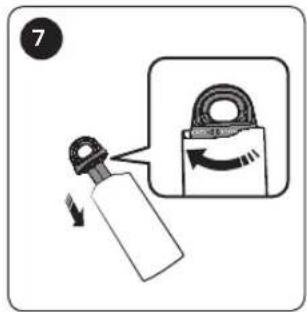
text_image
7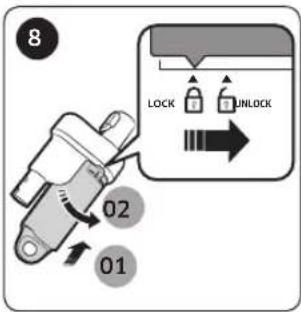
text_image
8 02 01 LOCK UNLOCKCleaning the brush
natural_image
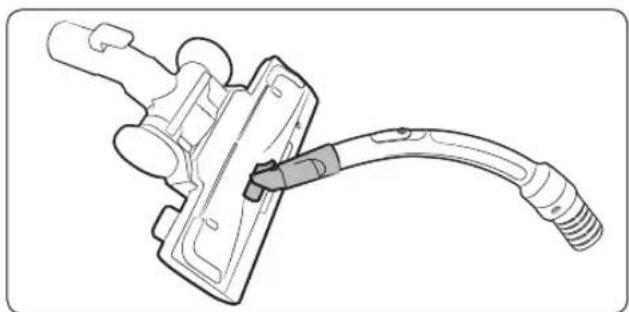
Technical line drawing of a mechanical connector or clamp assembly (no text or symbols)2-step brush
* Cleaning method for the [2-step brush], [Anit-Tangle tool/Mini Pet Care Tool] and [Porch brush] is the same.
text_image
1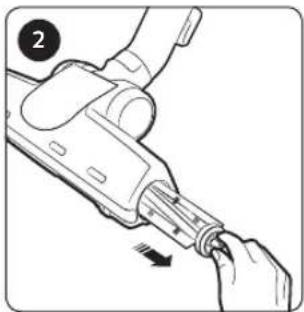
natural_image
Illustration of a hand holding a tool with a circular arrow indicating direction (no text or symbols)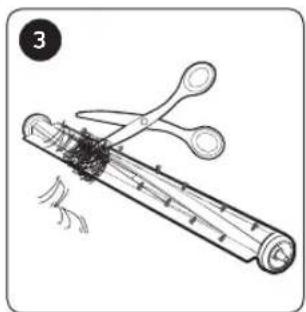
natural_image
Illustration of a pair of scissors cutting a cylindrical object with motion lines (no text or symbols)
text_image
4Pet brush
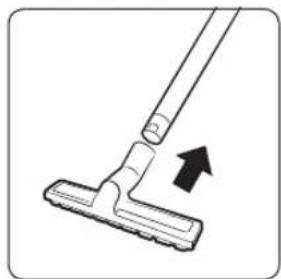
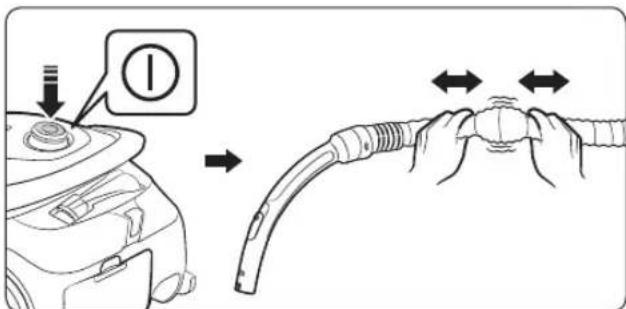
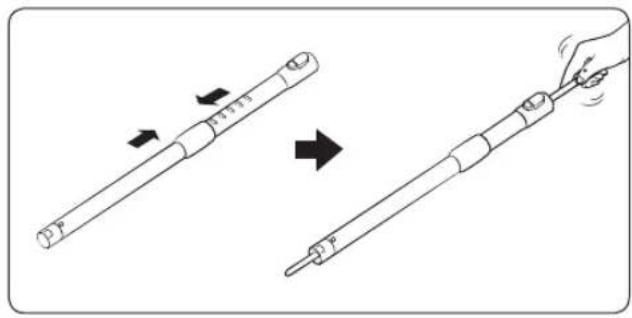
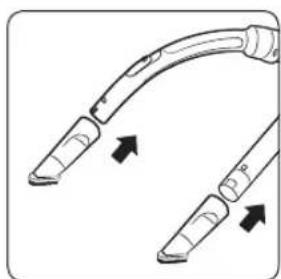
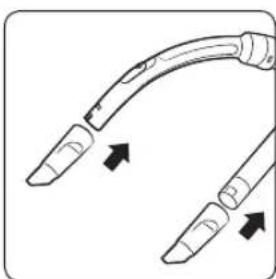
Cleaning the pipe

natural_image
Diagram showing two mechanical components with arrows indicating motion, one being rotated and the other being tilted (no text or symbols)Cleaning the hose
text_image
Diagram illustrating a mechanical assembly process with labeled parts and directional arrows indicating movement or alignment.Storing the vacuum cleaner
natural_image
Technical line drawing of a mechanical component with two views showing internal components and directional arrows (no text or symbols)In use

NOTE
- Product features may vary according to model.
- When you use the dusting brush or crevice tool, you may feel vibration from the vacuum cleaner.
- The operating noise may change once the safety device is activated to prevent the dust bag from getting detached.
- The circular tube on bottom of the dust bag prevents dust from spilling out.

CAUTION
- When removing the power plug from the electrical outlet, grasp the plug, not the cord.
- Make sure you don't open the body cover by pressing the button under the cover when carrying the vacuum cleaner.
- For storage of the product, park the floor nozzle in the small groove on the bottom of the body.
Cleaning and maintenance

NOTE
- Do not wash the outlet filter with water.
- To maintain the best performance of the outlet filter, replace it once a year.
- To prevent floors from scratches, inspect condition of the brush and replace it if it is worn down.
- Replacement filters are available at your local Samsung service agent.
- Hold the power cord and then press the Cord rewind button since you can get injured if the power cord may lose control while rewinding it.
- If the power cord is not rewinding well, press the Cord rewind button again after pulling the power cord about 2 \~ 3 m.
- When suction power is noticeably reduced continuously, please clean the inlet filter by referring to the "Cleaning the inlet filter" section.

CAUTION
- When suction is noticeably reduced continuously or vacuum cleaner abnormally overheats, please clean the outlet filter.
- Suction may reduce noticeably due to wrong reassembling of the inlet filter.
- Please contact a nearest service agent if you cannot remove foreign matters from the hose.
- Store the vacuum cleaner in the shade to prevent deformation or discoloration.
| Symptom Checklist | |
| Motor does not start. • Check the cable, the power plug and outlet. | |
| Suction force is gradually decreasing. | • Check if there is any blockage, and remove it if required.• Please check the filters, and if required, clean as illustrated in this manual.- If filters are out of condition, replace them with new ones. |
| Cord does not rewind fully. | • Pull the power cord out 2 - 3 m and press the Cord rewind button. |
| Body overheating | • Check the filters, and clean as illustrated in this manual if required. |
| Static electricity discharge. | • Reduce suction.• This may also occur when air in the room is very dry. Ventilate the room so that air humidity becomes normal. |
| During using, stop the unit. | • This vacuum cleaner has a special thermostat that protects the motor in case of its overheating. If the vacuum cleaner suddenly shuts off, turn off the switch and unplug the vacuum cleaner. Check the vacuum cleaner for possible source of overheating such as a full dust bag, a blocked hose, pipe, or clogged filter. If these conditions are found, fix them and wait at least 30 minutes before attempting to use the vacuum cleaner. |
- This Vacuum cleaner is approved the following.
- Electromagnetic Compatibility Directive : 2004/108/EEC
- Low Voltage Directive : 2006/95/EC
[English]
According to Commission Regulation (EU) No 666/2013
| A | Supplier Samsung Electronics Co., Ltd. | |
| B | Model SC07M25F0WP SC07M25M9WD | |
| C | Annual Energy Consumption (kWh/yr) | 28.0 |
| D | Sound Power Level (dBA) | 79 |
| E | Rated Input Power (W) | 700 |
| F | Type General purpose vacuum cleaner | |
1 Indicative annual energy consumption (kWh per year), based on 50 cleaning tasks. Actual annual energy consumption will depend on how the appliance is used.
2 Measurements for power consumption and performance are based on methods in EN 60312 - 1 and EN 60704.
If you have any questions or comments relating to Samsung products, please contact the SAMSUNG customer care center.
| Country Customer Care Center Web Site | ||
| SWITZERLAND | 0800 726 78 64(0800-SAMSUNG) | www.samsung.com/ch/support (German)www.samsung.com/ch_fr/support (French) |
| AUSTRIA | 0800 72 67 864(0800-SAMSUNG) | www.samsung.com/at/support |
This product is RoHS compliant
Staubsauger
Benutzerhandbuch
Serien SC07M25****
text_image
Diagram of a vacuum cleaner with labeled parts, showing exploded and assembled views with numbered labels.natural_image
Line drawing of a flexible hose with a bulbous end cap (no text or symbols)Schlauch Rohr Rohr
natural_image
Line drawing of a cylindrical object with a flanged end and central shaft (no text or symbols)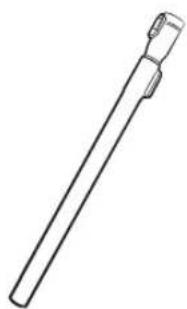
natural_image
Simple line drawing of a cylindrical object with a protruding handle (no text or symbols)
natural_image
Line drawing of a handheld vacuum cleaner device (no text or symbols)
natural_image
Line drawing of a handheld device with ports and a button (no text or symbols)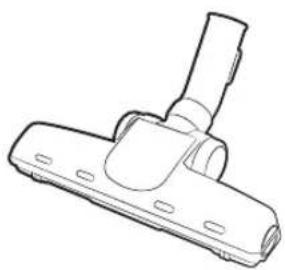
natural_image
Technical line drawing of a mechanical component with a handle and mounting flange (no text or symbols)natural_image
Line drawing of a vacuum cleaner (no text or symbols)
natural_image
Line drawing of a mechanical clamp or lever device (no text or symbols)
Verandabürste EzClean Cyclone 2-in-1-Saugaufsätze
natural_image
Line drawing of a hand using a screwdriver to press down a device component (no text or symbols)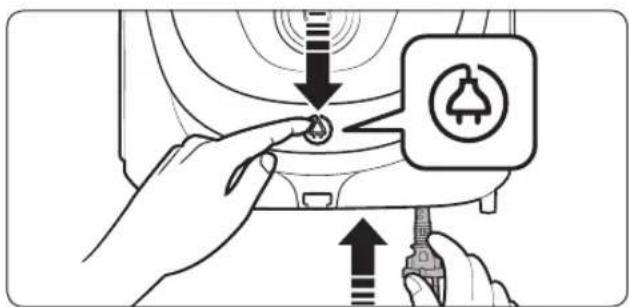
text_image
Diagram showing hands installing a device with a warning symbol and directional arrows indicating process stepsNetztaste
natural_image
Line drawing of a hand pressing a circular button on a device casing (no text or symbols)Saugleistung

text_image
01 MINIMAX 02natural_image
Diagram of a cable with a connector and an inset showing a plug (no text or symbols)HINWEIS
text_image
Illustration of a cozy room with numbered furniture and a cat on the rug, labeled 1 through 7.natural_image
Line drawing of a vacuum cleaner with an arrow indicating force direction (no text or symbols)natural_image
Diagram of a vacuum cleaner with a handle and lever mechanism, showing no text or symbols② Zweistufenbürste
natural_image
Diagram of a mop handle with an arrow indicating direction (no text or symbols)③ Haustierbürste

natural_image
Simple line drawing of a mop handle with an arrow indicating direction (no text or symbols)4 Verandabürste

natural_image
Diagram of a medical or surgical tool with two curved arms and directional arrows indicating movement (no text or symbols)⑤ Staubbürste
natural_image
Diagram of two medical or surgical instruments with arrows indicating movement or force direction (no text or symbols)⑥ Flachdüse
natural_image
Diagram of a cable connector with an arrow indicating direction (no text or symbols)natural_image
Diagram of a hand pressing down on the hood of a car, showing mechanical components and a directional arrow (no text or symbols)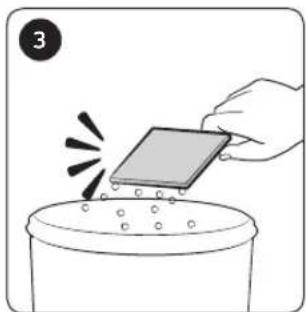
natural_image
Illustration of a hand placing a small electronic component into a container with liquid, no text or symbols present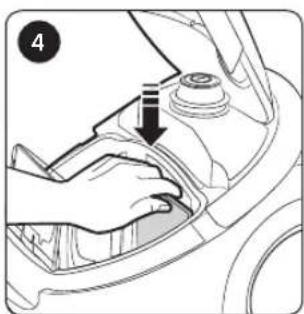
natural_image
Illustration of hands installing or adjusting a component on a car hood (no text or symbols visible)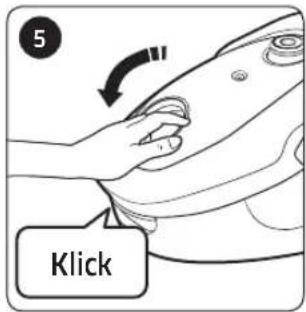
text_image
5 Klicknatural_image
Illustration of two sailboats on a boat with arrows indicating flow direction (no text or symbols)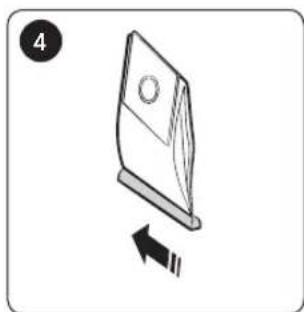
natural_image
Simple line drawing of a folded paper or plastic sheet with an arrow indicating direction (no text or symbols)natural_image
Illustration of a hand pouring leaf into a container with an arrow (no text or symbols)
natural_image
Simple line drawing of a door handle with a circular opening and a curved arrow indicating rotation (no text or symbols)Einwegstaubbeutel
natural_image
Illustration of a hand using a tool to adjust or install a mechanical component (no text or symbols visible)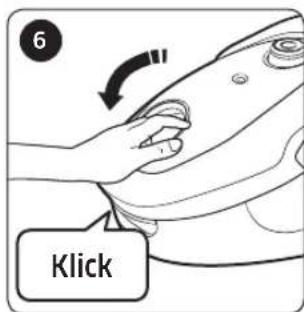
text_image
6 Klicknatural_image
Diagram showing two rectangular objects with internal compartments, one moving right and the other inside, labeled with number 2 (no text or symbols on objects)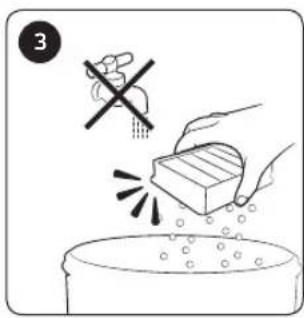
text_image
3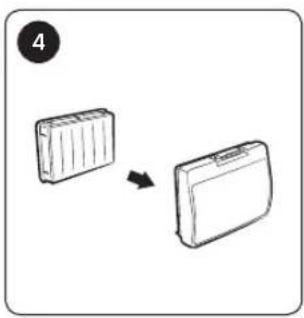
natural_image
Illustration of two rectangular objects with internal compartments, one moving right (no text or symbols)
natural_image
Line drawing of a mechanical component with a knob and directional arrow (no text or symbols)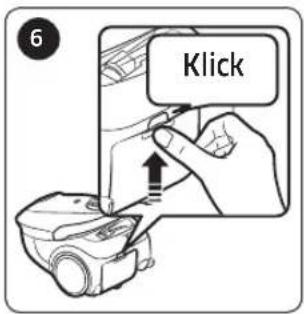
text_image
KlickReinigen des Zyklonfilters
text_image
1 01 02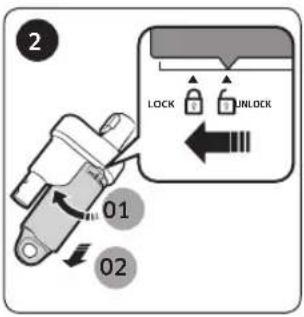
text_image
2 01 02 LOCK UNLOCK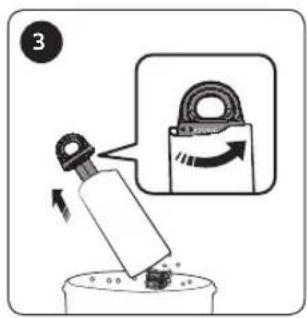
text_image
3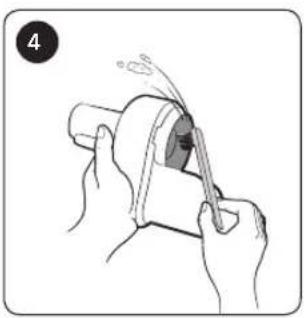
natural_image
Illustration of hands using a tool to interact with a mechanical component (no text or symbols visible)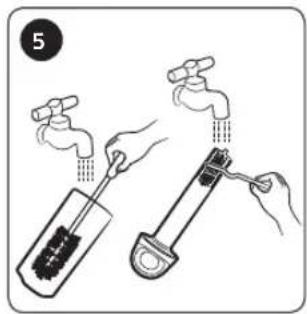
text_image
5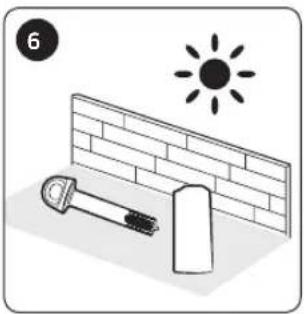
natural_image
Illustration of a sun shining on a brick wall next to a tool and spray bottle (no text or symbols)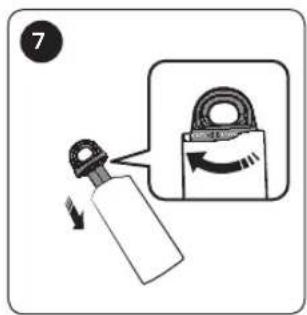
text_image
7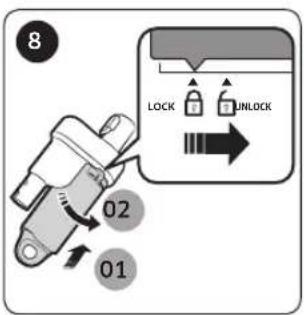
text_image
8 02 01 LOCK UNLOCKReinigen der Bürste

natural_image
Technical line drawing of a mechanical clamp or connector assembly (no text or symbols)Zweistufenbürste
text_image
Diagram showing a device being inserted into a device with a close-up view of the component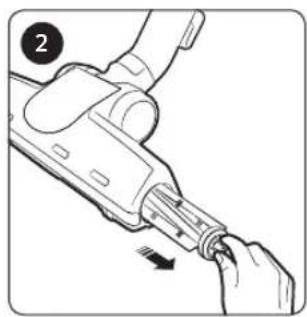
natural_image
Illustration of a hand holding a mechanical device with a cable or connector (no text or symbols visible)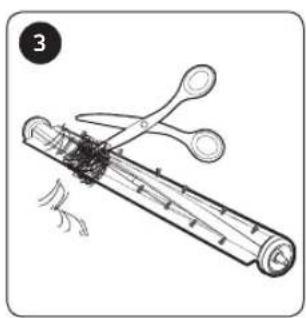
natural_image
Illustration of a pair of scissors cutting a cylindrical object with motion lines (no text or symbols)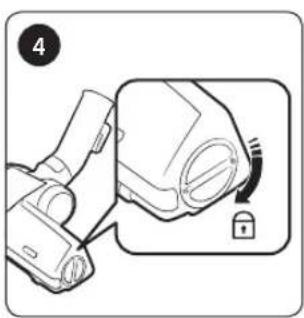
text_image
4Haustierbürste
Reinigen des Rohrs
text_image
Diagram illustrating the stepwise change of a mechanical component with arrows indicating direction and rotation.text_image
Diagram illustrating a hand holding a cable with directional arrows indicating movement or force, alongside a device component with a numbered label.natural_image
Technical line drawing of a mechanical component with two views showing assembly or assembly steps (no text or symbols present)Im Betrieb
HINWEIS
natural_image
Black-and-white photo of a modern lounge chair with white leather backrest and metallic armrests, placed near a bookshelf and mirror (no text or symbols visible)SAMSUNG
PRÉPARATION
text_image
Diagram of a vacuum cleaner with labeled parts, showing exploded and assembled views with numbered labels.natural_image
Line drawing of a flexible hose with a bulbous end cap (no text or symbols)Flexible Tuyau Tuyau

natural_image
Line drawing of a cylindrical object with a flanged end and central shaft (no text or symbols)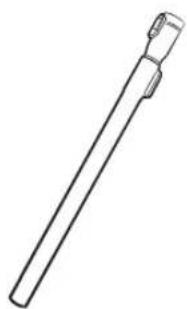
natural_image
Simple line drawing of a cylindrical object with a protruding handle (no text or symbols)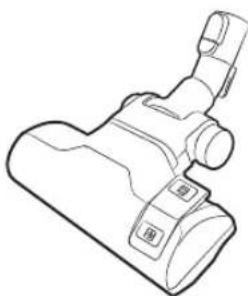
natural_image
Line drawing of a handheld vacuum cleaner device (no text or symbols)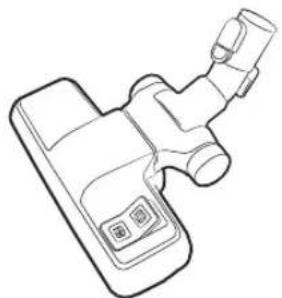
natural_image
Line drawing of a handheld device with ports and a handle (no text or symbols)
natural_image
Line drawing of a mechanical clamp or bracket component (no text or symbols)natural_image
Line drawing of a mechanical component with a T-shaped handle and flanged ends (no text or symbols)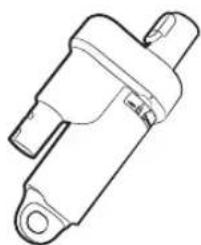
natural_image
Line drawing of a mechanical device with no visible text or symbols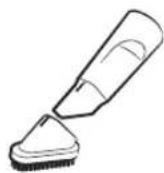
natural_image
Line drawing of a hand using a screwdriver to press down a device component (no text or symbols)
text_image
Diagram showing hands installing a device with a warning symbol and directional arrows indicating process stepsMarche/Arrêt
natural_image
Line drawing of a hand pressing a circular button on a device casing (no text or symbols)Aspiration

text_image
01 MINIMAX 02natural_image
Diagram of a cable with a connector and an inset showing a plug inserted (no text or symbols present)REMARQUE
text_image
Illustration of a cozy room with numbered furniture and a cat sleeping on the rug, labeled 1 through 7.natural_image
Line drawing of a vacuum cleaner with an arrow indicating force direction (no text or symbols)①Brosse 2 positions
natural_image
Diagram of a vacuum cleaner with a handle and lever mechanism, showing no text or symbols② Brosse 2 positions
natural_image
Simple line drawing of a mechanical clamp or bracket with an arrow indicating direction (no text or symbols)natural_image
Simple line drawing of a mop handle with an arrow indicating direction (no text or symbols)natural_image
Diagram of two curved medical or surgical instruments with arrows indicating motion direction (no text or symbols)natural_image
Diagram of a medical or surgical tool with curved and flanged ends, showing directional arrows (no text or symbols)⑥ Suceur plat

natural_image
Diagram of a cable connector with an arrow indicating direction (no text or symbols)natural_image
Diagram of a hand pressing down on a car hood with a valve, showing mechanical components (no text or symbols)
natural_image
Illustration of a hand holding a small electronic device above a container with droplets (no text or symbols)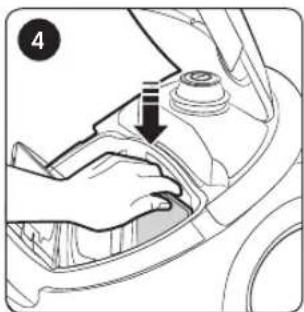
natural_image
Diagram of hands installing or adjusting a mechanical component on a car hood (no text or symbols visible)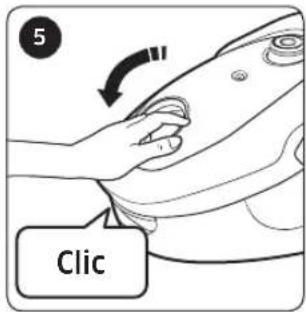
text_image
5 Clicnatural_image
Illustration of a hand placing a small object into a container with an upward arrow (no text or symbols)
natural_image
Illustration of two sailboats collecting particles from a container (no text or symbols)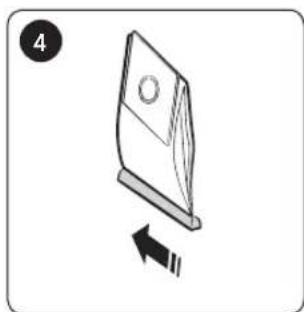
natural_image
Simple line drawing of a folded paper or plastic sheet with an arrow indicating downward motion (no text or symbols)Sac en tissu
natural_image
Illustration of a hand pouring liquid into a container with an arrow indicating flow (no text or symbols)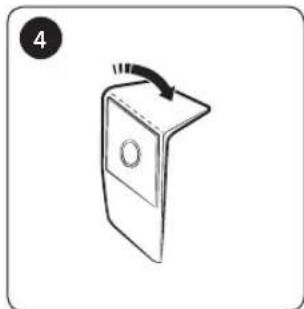
natural_image
Simple line drawing of a door handle with a circular opening and arrow indicating rotation (no text or symbols)Sac en papier
natural_image
Illustration of a hand using a tool to adjust or install a mechanical component (no text or symbols visible)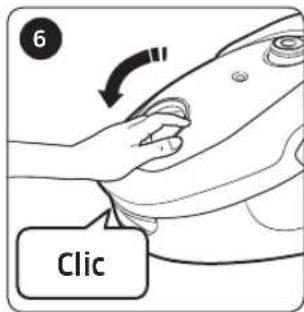
text_image
6 Clicnatural_image
Diagram showing two rectangular objects with internal compartments, one moving right (no text or symbols)
text_image
3
natural_image
Diagram showing two rectangular objects with internal compartments, one moving right and the other inside, labeled with number 4 (no text or symbols on objects)
natural_image
Line drawing of a mechanical component with a knob and directional arrow (no text or symbols)
text_image
6 Clicnatural_image
Illustration of hands performing a medical procedure on a device (no text or symbols visible)
text_image
5
natural_image
Illustration of a sun shining on a brick wall next to a measuring tool and a gauze (no text or symbols)
text_image
7
text_image
8 02 01 LOCK UNLOCKnatural_image
Technical line drawing of a mechanical component with a coiled cable or connector (no text or symbols)Brosse 2 positions
text_image
Diagram showing a device being inserted into a housing with a close-up view of the component.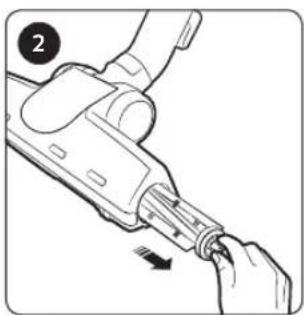
natural_image
Diagram of a hand holding a tool with a circular label (no text or symbols present)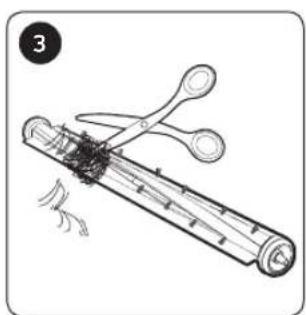
natural_image
Illustration of a pair of scissors cutting a cylindrical object with a base, no text or symbols present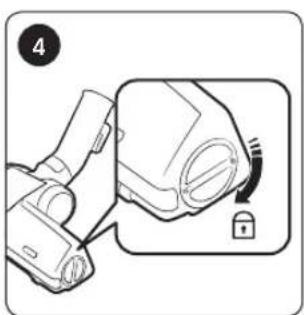
text_image
4text_image
Diagram illustrating the process of adding a pen to a cylindrical device, showing step-by-step assembly and change.text_image
Diagram illustrating a mechanical assembly process with labeled parts and directional arrows indicating movement or alignment.natural_image
Technical line drawing of a mechanical component with two views showing internal components and directional arrows (no text or symbols)text_image
Diagram of a vacuum cleaner with labeled parts, showing exploded and assembled views with numbered labels.natural_image
Line drawing of a flexible hose with a bulbous end cap (no text or symbols)
natural_image
Line drawing of a cylindrical mechanical device with a central shaft and end cap (no text or symbols)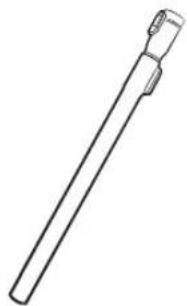
natural_image
Simple line drawing of a cylindrical mechanical component with a protruding end (no text or symbols)Tubo flessibile Tubo rigido Tubo rigido

natural_image
Line drawing of a handheld vacuum cleaner device (no text or symbols)
natural_image
Line drawing of a handheld device with a handle and control knob (no text or symbols)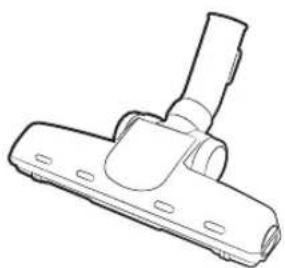
natural_image
Line drawing of a mechanical clamp or bracket component (no text or symbols)natural_image
Line drawing of a vacuum cleaner (no text or symbols)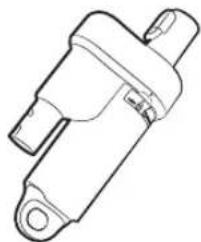
natural_image
Line drawing of a mechanical clamp or connector (no text or symbols)
Spazzola veranda Ciclone EzClean Accessorio 2 in 1


natural_image
Line drawing of a hand using a screwdriver to press down a device component (no text or symbols)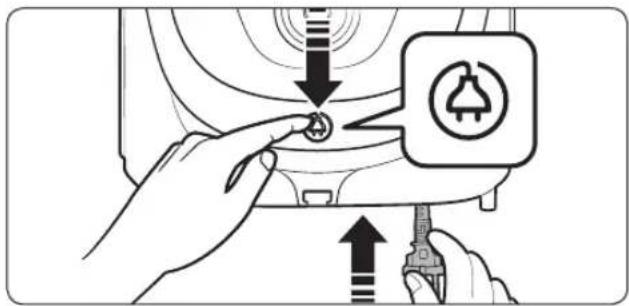
text_image
Diagram showing hands installing a button on a device with a warning symbol and directional arrowsnatural_image
Line drawing of a hand pressing a circular button on a device casing (no text or symbols)Aspirazione
text_image
01 MINMAX 02natural_image
Diagram of a cable connector with an inset showing a plug inserted into a socket (no text or symbols present)NOTA
text_image
Illustration of a cozy room with numbered furniture and a cat sleeping on the rug, labeled 1 through 7.natural_image
Diagram of a vacuum cleaner with a handle and lever, showing mechanical components and an arrow indicating motion (no text or symbols)① Spazzola 2-step
* Pavimento
Tappeti/Moquette

natural_image
Diagram of a vacuum cleaner with a handle and lever mechanism, showing no text or symbols② Spazzola 2-step

natural_image
Diagram of a mechanical clamp or bracket with an arrow indicating direction (no text or symbols present)natural_image
Simple line drawing of a mop handle with an arrow indicating direction (no text or symbols)④ Spazzola veranda
natural_image
Diagram of two medical or surgical instruments with curved ends and directional arrows indicating movement (no text or symbols)⑤ Spazzola polvere
natural_image
Diagram of two medical or surgical tools with curved and flanged ends, no text or symbols presentnatural_image
Diagram of a medical device with a curved cable and arrow indicating direction (no text or symbols)⑦Strumento anti groviglio/ Strumento Mini Pet Care
natural_image
Illustration of a hand inserting a component into a car's hood, showing mechanical parts and a directional arrow (no text or symbols)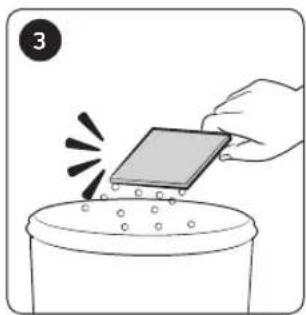
natural_image
Illustration of a hand placing a rectangular object onto a container with granular contents (no text or symbols)
natural_image
Illustration of a hand inserting a component into a car hood, showing a valve and handle (no text or symbols)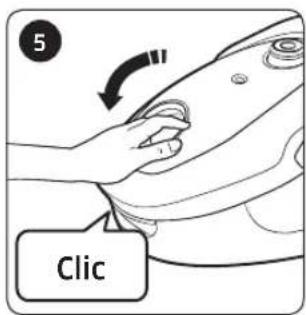
text_image
5 Clicnatural_image
Illustration of two sailboats on a boat with a pile of paper underneath (no text or symbols)
natural_image
Simple line drawing of a folded paper or plastic sheet with an arrow indicating downward motion (no text or symbols)natural_image
Illustration of a hand pouring leaf into a container with an arrow (no text or symbols)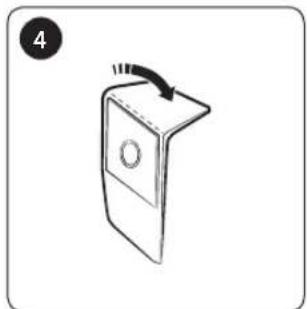
natural_image
Simple line drawing of a door handle with a circular opening and a curved arrow indicating rotation (no text or symbols)Sacchetto in carta

natural_image
Illustration of a hand using a tool to adjust or install a mechanical component (no text or symbols visible)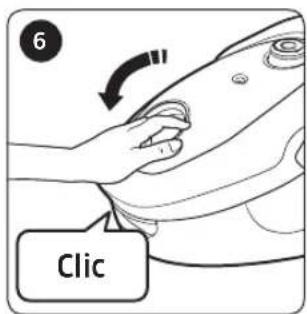
text_image
6 Clicnatural_image
Diagram showing two rectangular objects with internal compartments and an arrow indicating transformation (no text or symbols)natural_image
Diagram showing two rectangular objects with internal ribbeds transforming into a larger closed case (no text or symbols)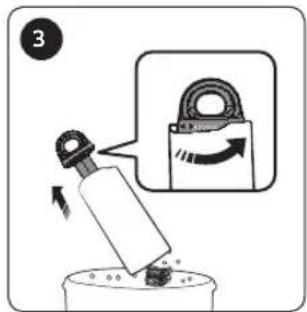
text_image
3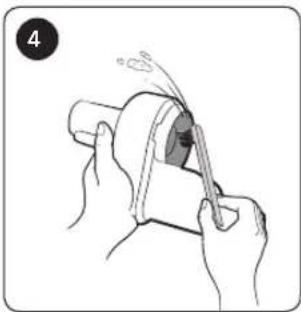
natural_image
Illustration of hands performing a manual tool on a cylindrical object (no text or symbols visible)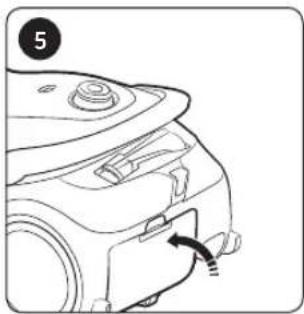
natural_image
Line drawing of a mechanical component with a knob and directional arrow (no text or symbols)
text_image
6 Clic
text_image
5
natural_image
Illustration of a sun shining on a brick wall next to a tool and a measuring cup, no text or symbols present.
text_image
7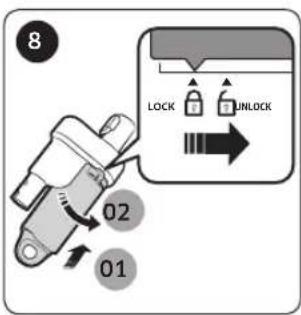
text_image
8 02 01 LOCK UNLOCKnatural_image
Technical line drawing of a mechanical device with attached cable (no text or symbols)Spazzola 2-step
text_image
Diagram showing a device being adjusted for a lock, with labeled parts and directional arrows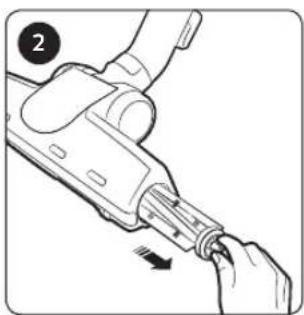
natural_image
Illustration of a hand holding a tool with a circular indicator (no text or symbols)
natural_image
Illustration of a pair of scissors cutting a cylindrical object with motion lines (no text or symbols)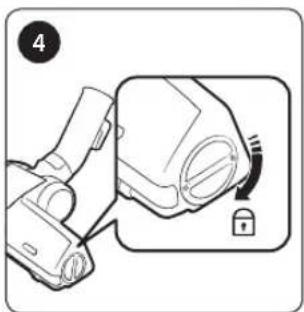
text_image
4text_image
Diagram illustrating the stepwise change of a mechanical component with arrows indicating direction and rotation.text_image
Diagram illustrating a cable or connector being inserted into a device, with directional arrows indicating movement.natural_image
Technical line drawing of a mechanical component with two views showing assembly or assembly steps (no text or symbols present)Utilizzo